engine INFINITI QX4 2001 Factory Service Manual
[x] Cancel search | Manufacturer: INFINITI, Model Year: 2001, Model line: QX4, Model: INFINITI QX4 2001Pages: 2395, PDF Size: 43.2 MB
Page 5 of 2395

Attachment No.14
TID CID
P0420 01H 01H Max. X -
P0420 02H 81H Min. X -
P0430 03H 02H Max. X -
P0430 04H 82H Min. X -
P0440 05H 03H Max. X -
P1440
★1 05H 03H Max. X -
EVAP control system purge flow monitoring P1447 06H 83H Min. X mV
EVAP control system (Very small leak) P1441
★2 07H 03H Max. X -
P0133 09H 04H Max. X ms
P0131 0AH 84H Min. X mV
P0130 0BH 04H Max. X mV
P0132 0CH 04H Max. X mV
P0134 0DH 04H Max. X s
P0153 11H 05H Max. X ms
P0151 12H 85H Min. X mV
P0150 13H 05H Max. X mV
P0152 14H 05H Max. X mV
P0154 15H 05H Max. X s
P0139 19H 86H Min. X mV/500ms
P0137 1AH 86H Min. X mV
P0140 1BH 06H Max. X mV
P0138 1CH 06H Max. X mV
P0159 21H 87H Min. X mV/500ms
P0157 22H 87H Min. X mV
P0160 23H 07H Max. X mV
P0158 24H 07H Max. X mV
P0135 29H 08H Max. X mV
P0135 2AH 88H Min. X mV
P0155 2BH 09H Max. X mV
P0155 2CH 89H Min. X mV
P0141 2DH 0AH Max. X mV
P0141 2EH 8AH Min. X mV
P0161 2FH 0BH Max. X mV
P0161 30H 8BH Min. X mV
TEST VALUE AND TEST LIMIT (GST ONLY — NOT APPLICABLE TO CONSULT-II)
The following is the information specified in Mode 6 of SAE J1979.
The test value is a parameter used to determine whether a system/circuit diagnostic test is “OK” or “NG” while
being monitored by the ECM during self-diagnosis. The test limit is a reference value which is specified as the
maximum or minimum value and is compared with the test value being monitored.
Items for which these data (test value and test limit) are displayed are the same as SRT code items.
These data (test value and test limit) are specified by Test ID (TID) and Component ID (CID) and can be dis-
played on the GST screen.
: Applicable ・: Not applicable
SRT item Self-diagnostic test item DTCTest value
(GST display)Te s t limit Application Unit
CATALYSTThree way catalyst function (Bank 1)
Three way catalyst function (Bank 2)
EVAP SYSTEMEVAP control system (Small leak)
HO2SHeated oxygen sensor 1(Bank 1)
Heated oxygen sensor 1(Bank 2)
Heated oxygen sensor 2(Bank 1)
Heated oxygen sensor 2(Bank 2)
HO2S HTRHeated oxygen sensor 1 heater(Bank 1)
Heated oxygen sensor 2 heater(Bank 2)
Heated oxygen sensor 2 heater(Bank 1)
Heated oxygen sensor 2 heater(Bank 2)
★<021103d60225025802430245025002540200024d024f02440245024c0253020002240212021202000236022702130213022502000245024e02470249024e0245020c0200023702240212021202000236022702130213022502000245024e02470249024e02
45020c02000232021502100200023602310213021502240225> engine, JR50 VQ35DE engine 2001★<021203d60225025802430245025002540200024d024f02440245024c02530200022102130213020002360231021302100224022502000245024e02470249024e0245020c02000223022102130213020002360231021302100224022502000245024e024702
49024e024502000212021002100211022d0239020e>
Page 6 of 2395
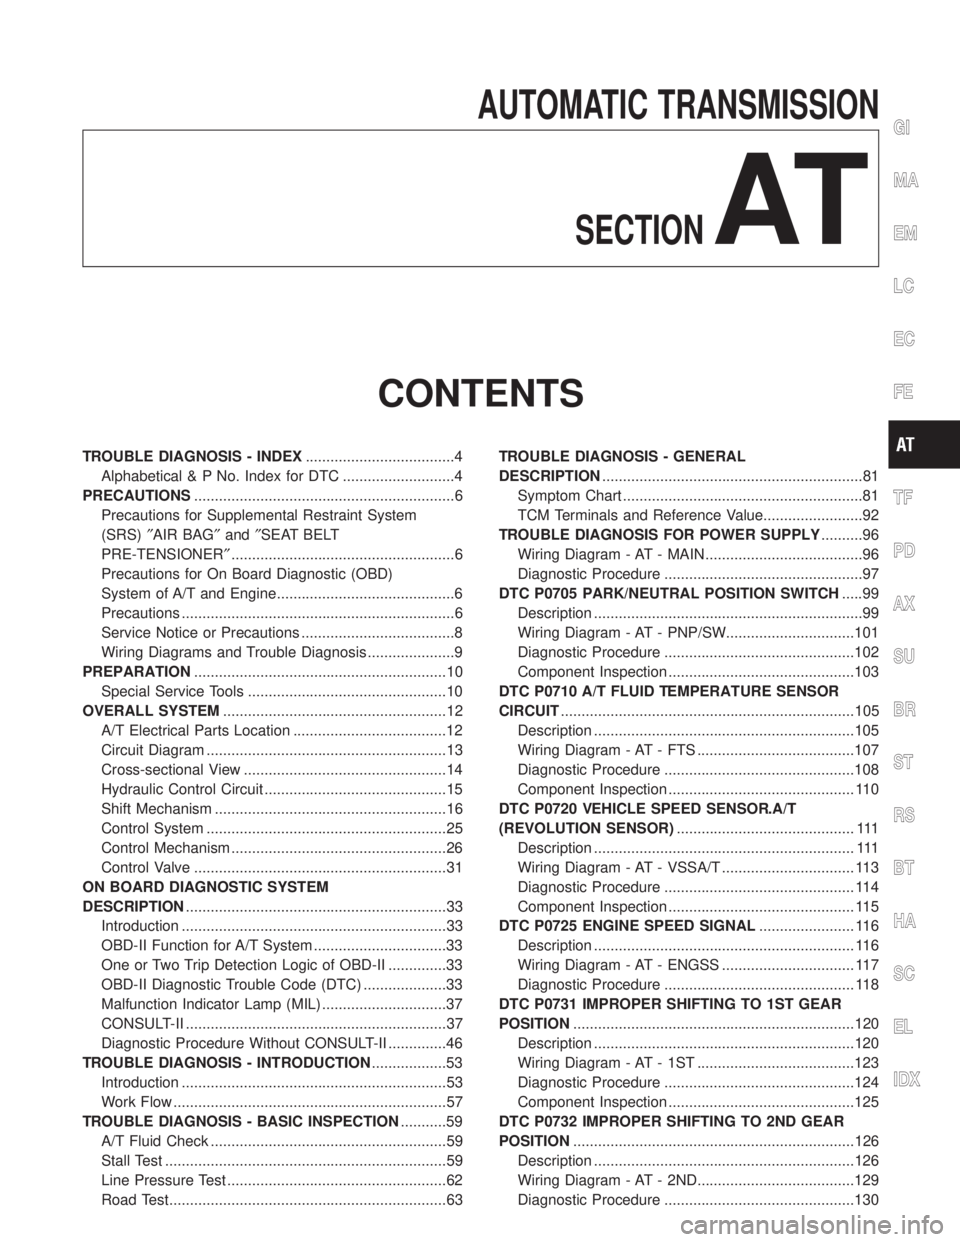
AUTOMATIC TRANSMISSION
SECTION
AT
CONTENTS
TROUBLE DIAGNOSIS - INDEX....................................4
Alphabetical & P No. Index for DTC ...........................4
PRECAUTIONS...............................................................6
Precautions for Supplemental Restraint System
(SRS)²AIR BAG²and²SEAT BELT
PRE-TENSIONER²......................................................6
Precautions for On Board Diagnostic (OBD)
System of A/T and Engine...........................................6
Precautions ..................................................................6
Service Notice or Precautions .....................................8
Wiring Diagrams and Trouble Diagnosis .....................9
PREPARATION.............................................................10
Special Service Tools ................................................10
OVERALL SYSTEM......................................................12
A/T Electrical Parts Location .....................................12
Circuit Diagram ..........................................................13
Cross-sectional View .................................................14
Hydraulic Control Circuit ............................................15
Shift Mechanism ........................................................16
Control System ..........................................................25
Control Mechanism ....................................................26
Control Valve .............................................................31
ON BOARD DIAGNOSTIC SYSTEM
DESCRIPTION...............................................................33
Introduction ................................................................33
OBD-II Function for A/T System ................................33
One or Two Trip Detection Logic of OBD-II ..............33
OBD-II Diagnostic Trouble Code (DTC) ....................33
Malfunction Indicator Lamp (MIL) ..............................37
CONSULT-II ...............................................................37
Diagnostic Procedure Without CONSULT-II ..............46
TROUBLE DIAGNOSIS - INTRODUCTION..................53
Introduction ................................................................53
Work Flow ..................................................................57
TROUBLE DIAGNOSIS - BASIC INSPECTION...........59
A/T Fluid Check .........................................................59
Stall Test ....................................................................59
Line Pressure Test .....................................................62
Road Test...................................................................63TROUBLE DIAGNOSIS - GENERAL
DESCRIPTION...............................................................81
Symptom Chart ..........................................................81
TCM Terminals and Reference Value........................92
TROUBLE DIAGNOSIS FOR POWER SUPPLY..........96
Wiring Diagram - AT - MAIN ......................................96
Diagnostic Procedure ................................................97
DTC P0705 PARK/NEUTRAL POSITION SWITCH.....99
Description .................................................................99
Wiring Diagram - AT - PNP/SW...............................101
Diagnostic Procedure ..............................................102
Component Inspection .............................................103
DTC P0710 A/T FLUID TEMPERATURE SENSOR
CIRCUIT.......................................................................105
Description ...............................................................105
Wiring Diagram - AT - FTS ......................................107
Diagnostic Procedure ..............................................108
Component Inspection ............................................. 110
DTC P0720 VEHICLE SPEED SENSOR.A/T
(REVOLUTION SENSOR)........................................... 111
Description ............................................................... 111
Wiring Diagram - AT - VSSA/T ................................ 113
Diagnostic Procedure .............................................. 114
Component Inspection ............................................. 115
DTC P0725 ENGINE SPEED SIGNAL....................... 116
Description ............................................................... 116
Wiring Diagram - AT - ENGSS ................................ 117
Diagnostic Procedure .............................................. 118
DTC P0731 IMPROPER SHIFTING TO 1ST GEAR
POSITION....................................................................120
Description ...............................................................120
Wiring Diagram - AT - 1ST ......................................123
Diagnostic Procedure ..............................................124
Component Inspection .............................................125
DTC P0732 IMPROPER SHIFTING TO 2ND GEAR
POSITION....................................................................126
Description ...............................................................126
Wiring Diagram - AT - 2ND......................................129
Diagnostic Procedure ..............................................130
GI
MA
EM
LC
EC
FE
TF
PD
AX
SU
BR
ST
RS
BT
HA
SC
EL
IDX
Page 7 of 2395

Component Inspection .............................................131
DTC P0733 IMPROPER SHIFTING TO 3RD GEAR
POSITION....................................................................132
Description ...............................................................132
Wiring Diagram - AT - 3RD......................................135
Diagnostic Procedure ..............................................136
Component Inspection .............................................137
DTC P0734 IMPROPER SHIFTING TO 4TH GEAR
POSITION....................................................................138
Description ...............................................................138
Wiring Diagram - AT - 4TH ......................................142
Diagnostic Procedure ..............................................143
Component Inspection .............................................147
DTC P0740 TORQUE CONVERTER CLUTCH
SOLENOID VALVE......................................................148
Description ...............................................................148
Wiring Diagram - AT - TCV......................................150
Diagnostic Procedure ..............................................151
Component Inspection .............................................152
DTC P0744 IMPROPER LOCK-UP OPERATION......153
Description ...............................................................153
Wiring Diagram - AT - TCCSIG ...............................156
Diagnostic Procedure ..............................................157
Component Inspection .............................................161
DTC P0745 LINE PRESSURE SOLENOID VALVE...162
Description ...............................................................162
Wiring Diagram - AT - LPSV....................................164
Diagnostic Procedure ..............................................165
Component Inspection .............................................167
DTC P0750 SHIFT SOLENOID VALVE A..................168
Description ...............................................................168
Wiring Diagram - AT - SSV/A ..................................169
Diagnostic Procedure ..............................................170
Component Inspection .............................................171
DTC P0755 SHIFT SOLENOID VALVE B..................172
Description ...............................................................172
Wiring Diagram - AT - SSV/B ..................................173
Diagnostic Procedure ..............................................174
Component Inspection .............................................175
DTC P1705 THROTTLE POSITION SENSOR...........176
Description ...............................................................176
Wiring Diagram - AT - TPS ......................................179
Diagnostic Procedure ..............................................180
Component Inspection .............................................184
DTC P1760 OVERRUN CLUTCH SOLENOID
VALVE..........................................................................185
Description ...............................................................185
Wiring Diagram - AT - OVRCSV..............................187
Diagnostic Procedure ..............................................188
Component Inspection .............................................189
DTC BATT/FLUID TEMP SEN (A/T FLUID TEMP
SENSOR CIRCUIT AND TCM POWER SOURCE)....190Description ...............................................................190
Wiring Diagram - AT - BA/FTS ................................192
Diagnostic Procedure ..............................................193
Component Inspection .............................................196
DTC VEHICLE SPEED SENSOR.MTR.......................197
Description ...............................................................197
Wiring Diagram - AT - VSSMTR ..............................199
Diagnostic Procedure ..............................................200
DTC TURBINE REVOLUTION SENSOR....................202
Description ...............................................................202
Wiring Diagram - AT - TRSA/T ................................204
Diagnostic Procedure ..............................................205
Component Inspection .............................................206
DTC A/T COMMUNICATION LINE.............................207
Description ...............................................................207
Wiring Diagram - AT - LAN ......................................209
Diagnostic Procedure ..............................................210
DTC CONTROL UNIT (RAM), CONTROL UNIT
(ROM)........................................................................... 211
Description ............................................................... 211
Diagnostic Procedure ..............................................212
DTC CONTROL UNIT (EEP ROM).............................213
Description ...............................................................213
Diagnostic Procedure ..............................................214
TROUBLE DIAGNOSES FOR SYMPTOMS...............215
Wiring Diagram - AT - NONDTC .............................215
1. O/D OFF Indicator Lamp Does Not Come On....218
2. Engine Cannot Be Started In²P²and²N²
Position ....................................................................221
3. In²P²Position, Vehicle Moves Forward Or
Backward When Pushed .........................................222
4. In²N²Position, Vehicle Moves ...........................223
5. Large Shock.²N²->²R²Position .......................225
6. Vehicle Does Not Creep Backward In²R²
Position ....................................................................227
7. Vehicle Does Not Creep Forward In²D²,²2²
Or²1²Position .........................................................230
8. Vehicle Cannot Be Started From D
1...................233
9. A/T Does Not Shift: D
1-> D2Or Does Not
Kickdown: D
4-> D2..................................................236
10. A/T Does Not Shift: D
2-> D3.............................239
11. A/T Does Not Shift: D
3-> D4.............................242
12. A/T Does Not Perform Lock-up .........................245
13. A/T Does Not Hold Lock-up Condition ..............247
14. Lock-up Is Not Released ...................................249
15. Engine Speed Does Not Return To Idle (Light
Braking D
4-> D3).....................................................250
16. Vehicle Does Not Start From D
1.......................252
17. A/T Does Not Shift: D
4-> D3, When
Overdrive Control Switch²ON²->²OFF²...............253
18. A/T Does Not Shift: D
3-> 22, When Selector
Lever²D²->²2²Position.........................................254
CONTENTS(Cont'd)
AT-2
Page 8 of 2395
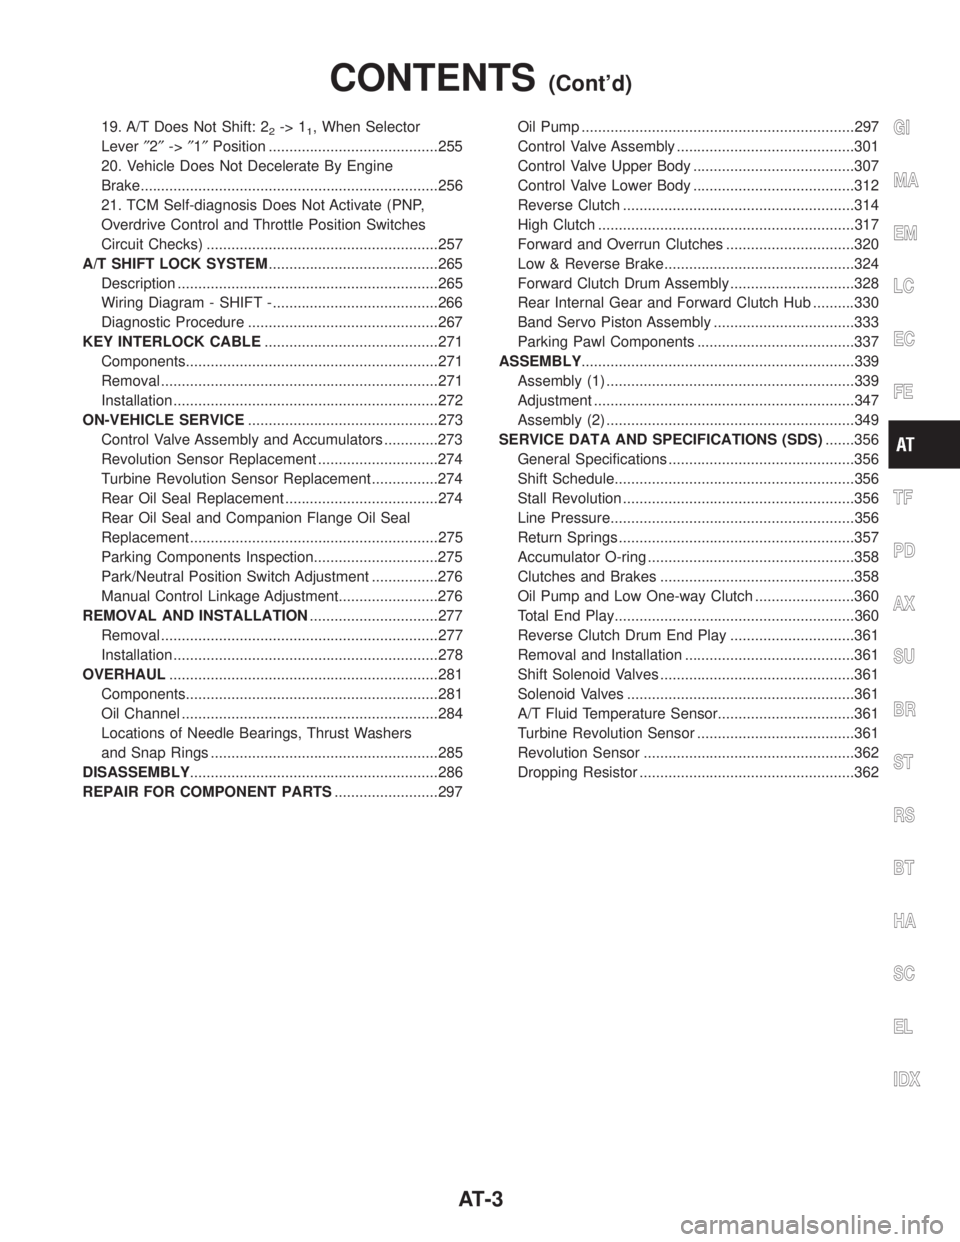
19. A/T Does Not Shift: 22-> 11, When Selector
Lever²2²->²1²Position .........................................255
20. Vehicle Does Not Decelerate By Engine
Brake........................................................................256
21. TCM Self-diagnosis Does Not Activate (PNP,
Overdrive Control and Throttle Position Switches
Circuit Checks) ........................................................257
A/T SHIFT LOCK SYSTEM.........................................265
Description ...............................................................265
Wiring Diagram - SHIFT -........................................266
Diagnostic Procedure ..............................................267
KEY INTERLOCK CABLE..........................................271
Components.............................................................271
Removal ...................................................................271
Installation ................................................................272
ON-VEHICLE SERVICE..............................................273
Control Valve Assembly and Accumulators .............273
Revolution Sensor Replacement .............................274
Turbine Revolution Sensor Replacement................274
Rear Oil Seal Replacement .....................................274
Rear Oil Seal and Companion Flange Oil Seal
Replacement ............................................................275
Parking Components Inspection..............................275
Park/Neutral Position Switch Adjustment ................276
Manual Control Linkage Adjustment........................276
REMOVAL AND INSTALLATION...............................277
Removal ...................................................................277
Installation ................................................................278
OVERHAUL.................................................................281
Components.............................................................281
Oil Channel ..............................................................284
Locations of Needle Bearings, Thrust Washers
and Snap Rings .......................................................285
DISASSEMBLY............................................................286
REPAIR FOR COMPONENT PARTS.........................297Oil Pump ..................................................................297
Control Valve Assembly ...........................................301
Control Valve Upper Body .......................................307
Control Valve Lower Body .......................................312
Reverse Clutch ........................................................314
High Clutch ..............................................................317
Forward and Overrun Clutches ...............................320
Low & Reverse Brake..............................................324
Forward Clutch Drum Assembly ..............................328
Rear Internal Gear and Forward Clutch Hub ..........330
Band Servo Piston Assembly ..................................333
Parking Pawl Components ......................................337
ASSEMBLY..................................................................339
Assembly (1) ............................................................339
Adjustment ...............................................................347
Assembly (2) ............................................................349
SERVICE DATA AND SPECIFICATIONS (SDS).......356
General Specifications .............................................356
Shift Schedule..........................................................356
Stall Revolution ........................................................356
Line Pressure...........................................................356
Return Springs .........................................................357
Accumulator O-ring ..................................................358
Clutches and Brakes ...............................................358
Oil Pump and Low One-way Clutch ........................360
Total End Play..........................................................360
Reverse Clutch Drum End Play ..............................361
Removal and Installation .........................................361
Shift Solenoid Valves ...............................................361
Solenoid Valves .......................................................361
A/T Fluid Temperature Sensor.................................361
Turbine Revolution Sensor ......................................361
Revolution Sensor ...................................................362
Dropping Resistor ....................................................362GI
MA
EM
LC
EC
FE
TF
PD
AX
SU
BR
ST
RS
BT
HA
SC
EL
IDX
CONTENTS(Cont'd)
AT-3
Page 9 of 2395
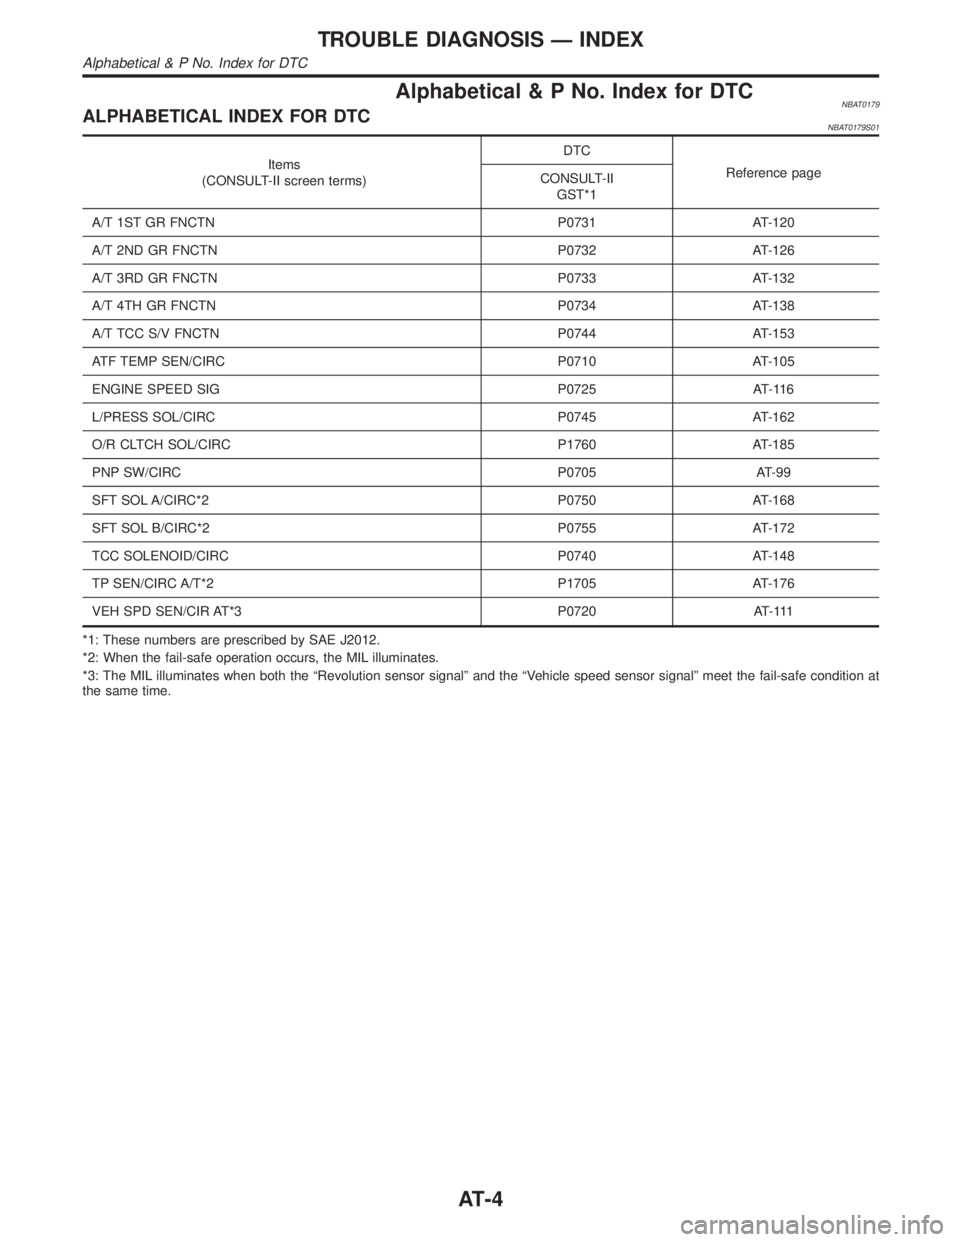
Alphabetical & P No. Index for DTCNBAT0179ALPHABETICAL INDEX FOR DTCNBAT0179S01
Items
(CONSULT-II screen terms)DTC
Reference page
CONSULT-II
GST*1
A/T 1ST GR FNCTN P0731 AT-120
A/T 2ND GR FNCTN P0732 AT-126
A/T 3RD GR FNCTN P0733 AT-132
A/T 4TH GR FNCTN P0734 AT-138
A/T TCC S/V FNCTN P0744 AT-153
ATF TEMP SEN/CIRC P0710 AT-105
ENGINE SPEED SIG P0725 AT-116
L/PRESS SOL/CIRC P0745 AT-162
O/R CLTCH SOL/CIRC P1760 AT-185
PNP SW/CIRC P0705 AT-99
SFT SOL A/CIRC*2 P0750 AT-168
SFT SOL B/CIRC*2 P0755 AT-172
TCC SOLENOID/CIRC P0740 AT-148
TP SEN/CIRC A/T*2 P1705 AT-176
VEH SPD SEN/CIR AT*3 P0720 AT-111
*1: These numbers are prescribed by SAE J2012.
*2: When the fail-safe operation occurs, the MIL illuminates.
*3: The MIL illuminates when both the ªRevolution sensor signalº and the ªVehicle speed sensor signalº meet the fail-safe condition at
the same time.
TROUBLE DIAGNOSIS Ð INDEX
Alphabetical & P No. Index for DTC
AT-4
Page 10 of 2395
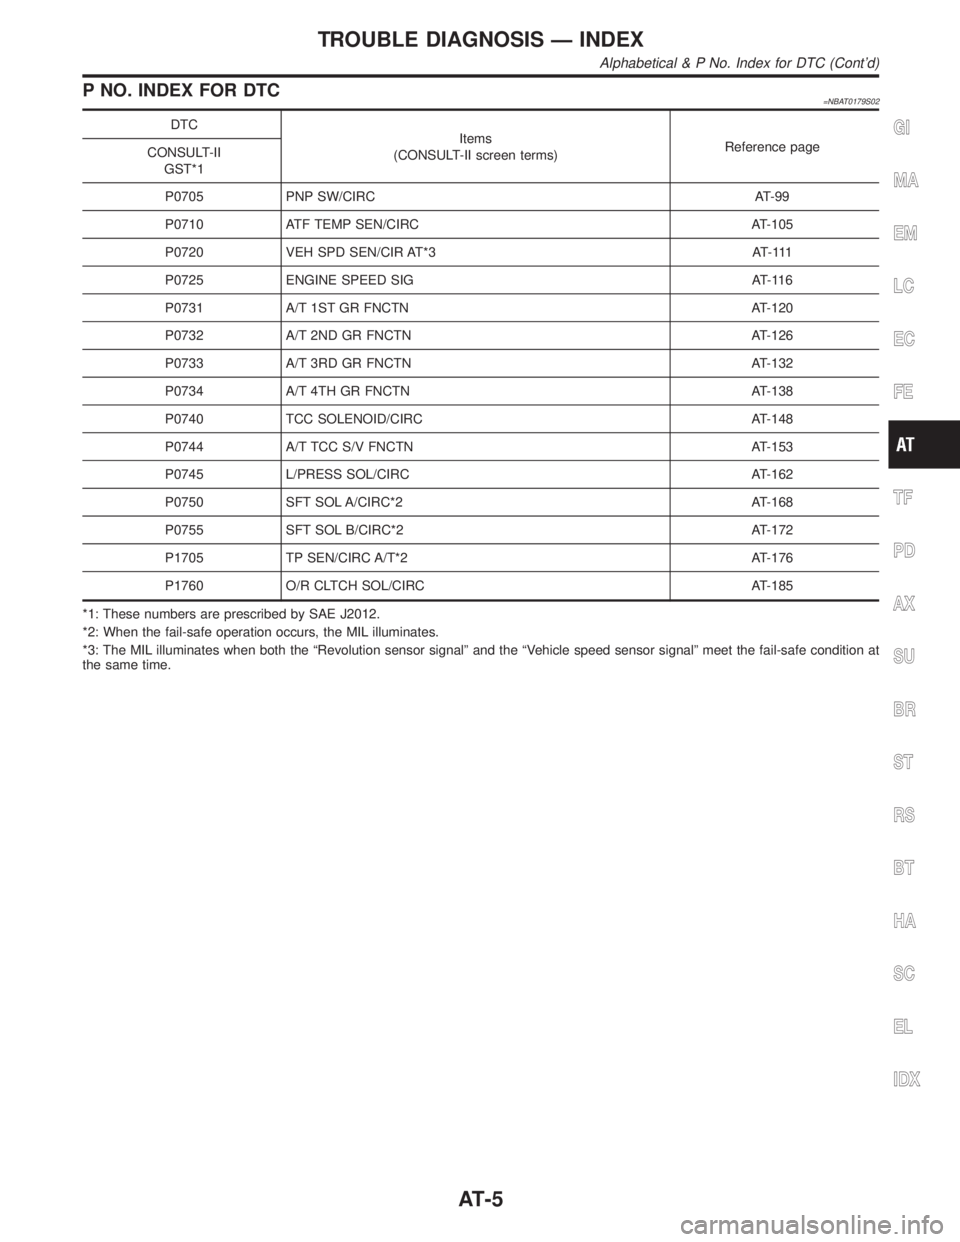
P NO. INDEX FOR DTC=NBAT0179S02
DTC
Items
(CONSULT-II screen terms)Reference page
CONSULT-II
GST*1
P0705 PNP SW/CIRC AT-99
P0710 ATF TEMP SEN/CIRC AT-105
P0720 VEH SPD SEN/CIR AT*3 AT-111
P0725 ENGINE SPEED SIG AT-116
P0731 A/T 1ST GR FNCTN AT-120
P0732 A/T 2ND GR FNCTN AT-126
P0733 A/T 3RD GR FNCTN AT-132
P0734 A/T 4TH GR FNCTN AT-138
P0740 TCC SOLENOID/CIRC AT-148
P0744 A/T TCC S/V FNCTN AT-153
P0745 L/PRESS SOL/CIRC AT-162
P0750 SFT SOL A/CIRC*2 AT-168
P0755 SFT SOL B/CIRC*2 AT-172
P1705 TP SEN/CIRC A/T*2 AT-176
P1760 O/R CLTCH SOL/CIRC AT-185
*1: These numbers are prescribed by SAE J2012.
*2: When the fail-safe operation occurs, the MIL illuminates.
*3: The MIL illuminates when both the ªRevolution sensor signalº and the ªVehicle speed sensor signalº meet the fail-safe condition at
the same time.GI
MA
EM
LC
EC
FE
TF
PD
AX
SU
BR
ST
RS
BT
HA
SC
EL
IDX
TROUBLE DIAGNOSIS Ð INDEX
Alphabetical & P No. Index for DTC (Cont'd)
AT-5
Page 11 of 2395
Precautions for Supplemental Restraint System
(SRS) ªAIR BAGº and ªSEAT BELT
PRE-TENSIONERº
NBAT0001The supplemental Restraint System such as ªAIR BAGº and ªSEAT BELT PRE-TENSIONERº used along with
a seat belt, helps to reduce the risk or severity of injury to the driver and front passenger for certain types of
collision. The SRS system composition which is available to INFINITI QX4 is as follows:
IFor a frontal collision
The Supplemental Restraint System consists of driver air bag module (located in the center of the steer-
ing wheel), front passenger air bag module (located on the instrument panel on passenger side), seat belt
pre-tensioners, a diagnosis sensor unit, warning lamp, wiring harness and spiral cable.
IFor a side collision
The Supplemental Restraint System consists of front side air bag module (located in the outer side of front
seat), satellite sensor, diagnosis sensor unit (one of components of air bags for a frontal collision), wiring
harness, warning lamp (one of components of air bags for a frontal collision).
Information necessary to service the system safely is included in theRS sectionof this Service Manual.
WARNING:
ITo avoid rendering the SRS inoperative, which could increase the risk of personal injury or death
in the event of a collision which would result in air bag inflation, all maintenance must be performed
by an authorized INFINITI dealer.
IImproper maintenance, including incorrect removal and installation of the SRS, can lead to per-
sonal injury caused by unintentional activation of the system. For removal of Spiral Cable and Air
Bag Module, see the RS section.
IDo not use electrical test equipment on any circuit related to the SRS unless instructed to in this
Service Manual. Spiral cable and wiring harnesses covered with yellow insulation tape either just
before the harness connectors or for the complete harness are related to the SRS.
Precautions for On Board Diagnostic (OBD)
System of A/T and Engine
NBAT0002The ECM has an on board diagnostic system. It will light up the malfunction indicator lamp (MIL) to warn the
driver of a malfunction causing emission deterioration.
CAUTION:
IBe sure to turn the ignition switch ªOFFº and disconnect the negative battery terminal before any
repair or inspection work. The open/short circuit of related switches, sensors, solenoid valves, etc.
will cause the MIL to light up.
IBe sure to connect and lock the connectors securely after work. A loose (unlocked) connector will
cause the MIL to light up due to an open circuit. (Be sure the connector is free from water, grease,
dirt, bent terminals, etc.)
IBe sure to route and secure the harnesses properly after work. Interference of the harness with a
bracket, etc. may cause the MIL to light up due to a short circuit.
IBe sure to connect rubber tubes properly after work. A misconnected or disconnected rubber tube
may cause the MIL to light up due to a malfunction of the EGR system or fuel injection system,
etc.
IBe sure to erase the unnecessary malfunction information (repairs completed) from the TCM and
ECM before returning the vehicle to the customer.
SEF289H
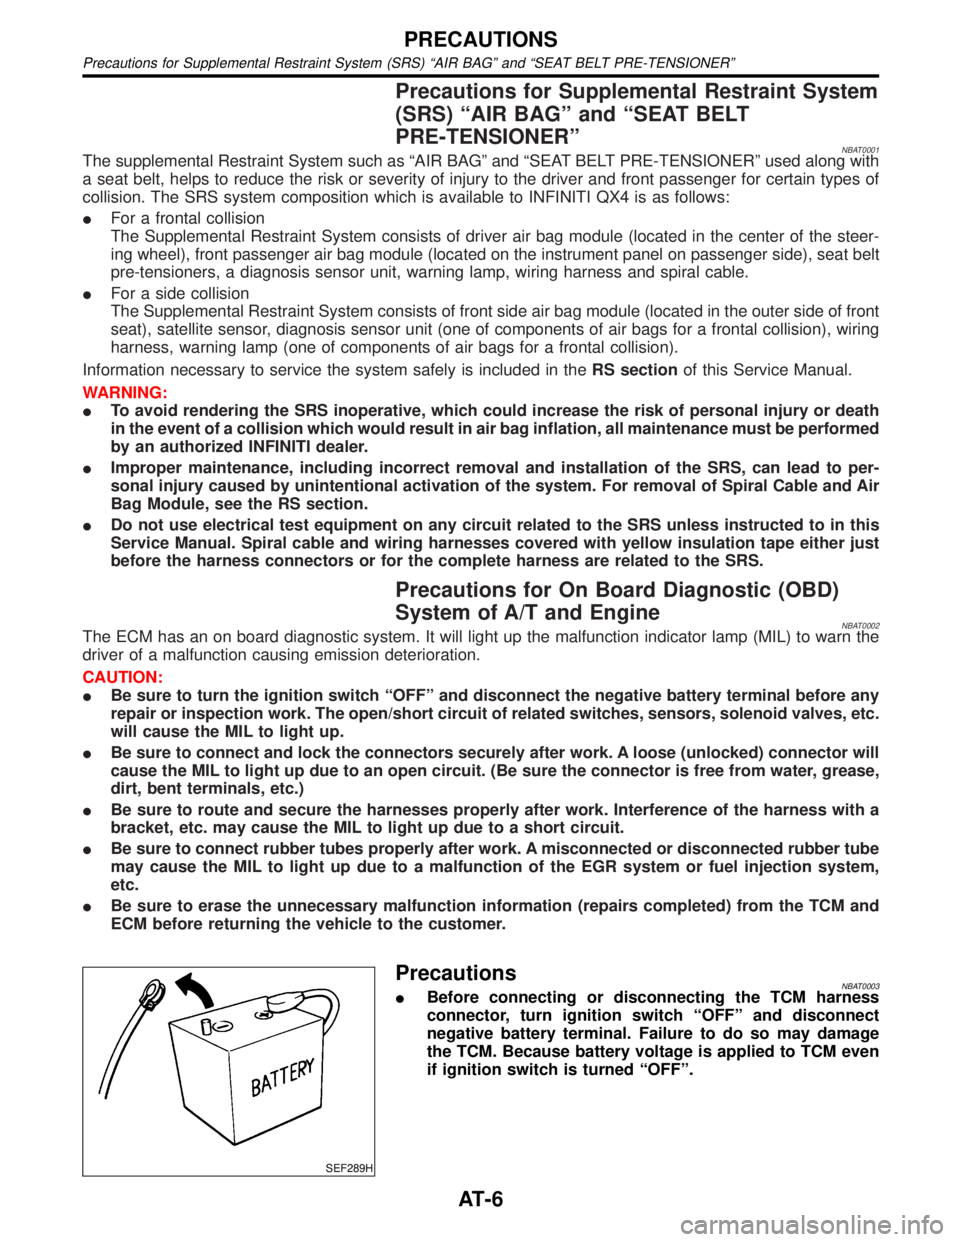
PrecautionsNBAT0003IBefore connecting or disconnecting the TCM harness
connector, turn ignition switch ªOFFº and disconnect
negative battery terminal. Failure to do so may damage
the TCM. Because battery voltage is applied to TCM even
if ignition switch is turned ªOFFº.
PRECAUTIONS
Precautions for Supplemental Restraint System (SRS) ªAIR BAGº and ªSEAT BELT PRE-TENSIONERº
AT-6
Page 13 of 2395
IBefore assembly, apply a coat of recommended ATF to all
parts. Apply petroleum jelly to protect O-rings and seals, or
hold bearings and washers in place during assembly. Do not
use grease.
IExtreme care should be taken to avoid damage to O-rings,
seals and gaskets when assembling.
IReplace ATF cooler if excessive foreign material is found in oil
pan or clogging strainer. Refer to ªATF COOLER SERVICEº,
AT-9.
IAfter overhaul, refill the transmission with new ATF.
IWhen the A/T drain plug is removed, only some of the fluid is
drained. Old A/T fluid will remain in torque converter and ATF
cooling system.
Always follow the procedures when changing A/T fluid. Refer
to MA-21, ªChanging A/T Fluidº.
Service Notice or PrecautionsNBAT0004FAIL-SAFENBAT0004S01The TCM has an electronic Fail-Safe (limp home mode). This allows the vehicle to be driven even if a major
electrical input/output device circuit is damaged.
Under Fail-Safe, the vehicle always runs in third gear, even with a shift lever position of ª1º, ª2º or ªDº. The
customer may complain of sluggish or poor acceleration.
When the ignition key is turned ªONº following Fail-Safe operation, O/D OFF indicator lamp blinks for about
8 seconds. (For ªTCM SELF-DIAGNOSTIC PROCEDURE (No Tools)º, refer to AT-46.)
Fail-Safe may occur without electrical circuit damage if the vehicle is driven under extreme conditions (such
as excessive wheel spin followed by sudden braking). To recover normal shift pattern, turn the ignition key
ªOFFº for 5 seconds, then ªONº.
The blinking of the O/D OFF indicator lamp for about 8 seconds will appear only once and be cleared. The
customer may resume normal driving conditions.
Always follow the ªWORK FLOWº (Refer to AT-57).
The SELF-DIAGNOSIS results will be as follows:
The first SELF-DIAGNOSIS will indicate damage to the vehicle speed sensor or the revolution sensor.
During the next SELF-DIAGNOSIS, performed after checking the sensor, no damages will be indicated.
TORQUE CONVERTER SERVICENBAT0004S04The torque converter should be replaced under any of the following conditions:
IExternal leaks in the hub weld area.
IConverter hub is scored or damaged.
IConverter pilot is broken, damaged or fits poorly into crankshaft.
ISteel particles are found after flushing the cooler and cooler lines.
IPump is damaged or steel particles are found in the converter.
IVehicle has TCC shudder and/or no TCC apply. Replace only after all hydraulic and electrical diagnoses
have been made. (Converter clutch material may be glazed.)
IConverter is contaminated with engine coolant containing antifreeze.
IInternal failure of stator roller clutch.
IHeavy clutch debris due to overheating (blue converter).
ISteel particles or clutch lining material found in fluid filter or on magnet when no internal parts in unit are
worn or damaged Ð indicates that lining material came from converter.
The torque converter should not be replaced if:
IThe fluid has an odor, is discolored, and there is no evidence of metal or clutch facing particles.
PRECAUTIONS
Precautions (Cont'd)
AT-8
Page 21 of 2395
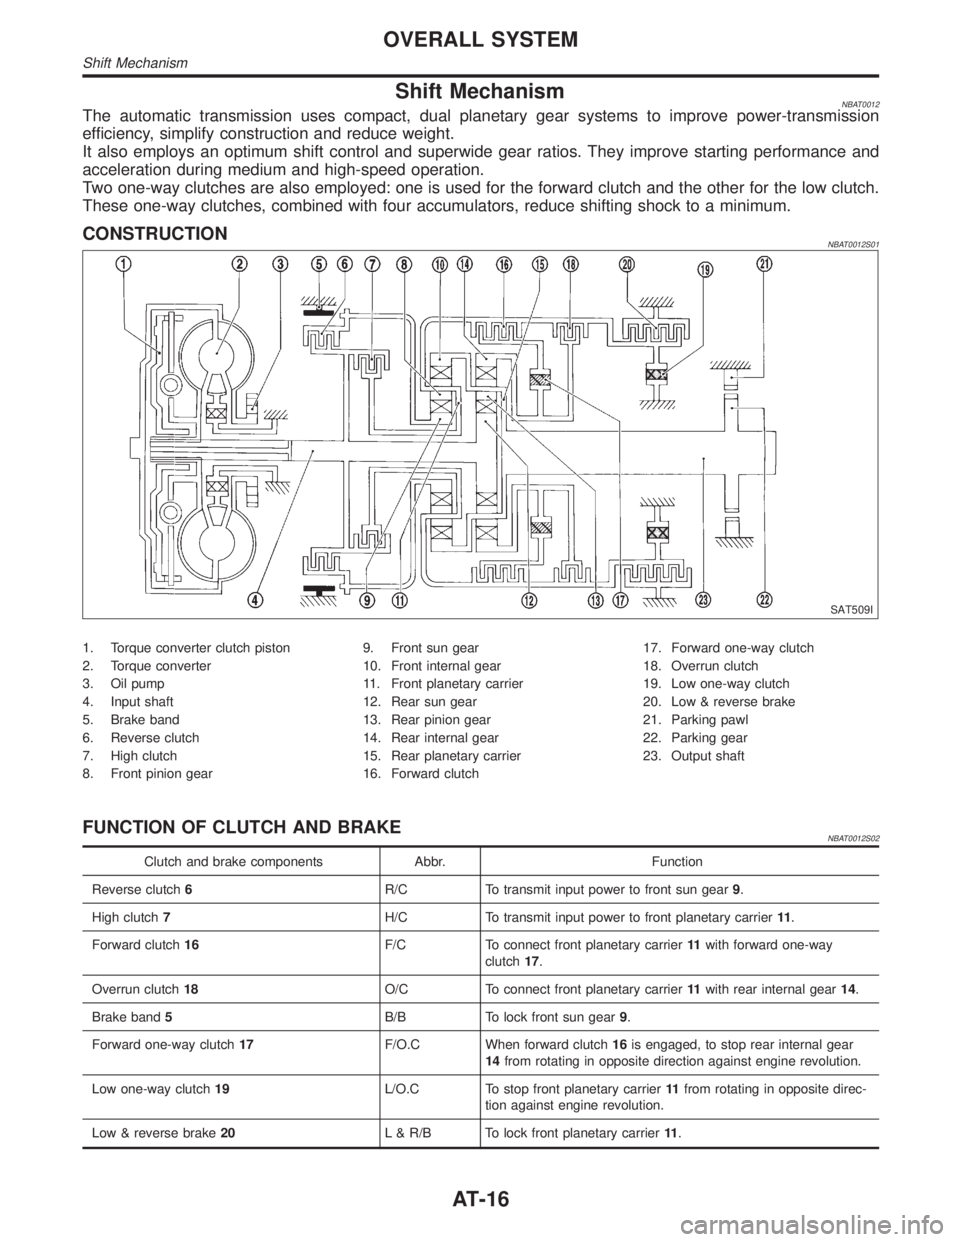
Shift MechanismNBAT0012The automatic transmission uses compact, dual planetary gear systems to improve power-transmission
efficiency, simplify construction and reduce weight.
It also employs an optimum shift control and superwide gear ratios. They improve starting performance and
acceleration during medium and high-speed operation.
Two one-way clutches are also employed: one is used for the forward clutch and the other for the low clutch.
These one-way clutches, combined with four accumulators, reduce shifting shock to a minimum.
CONSTRUCTIONNBAT0012S01
SAT509I
1. Torque converter clutch piston
2. Torque converter
3. Oil pump
4. Input shaft
5. Brake band
6. Reverse clutch
7. High clutch
8. Front pinion gear9. Front sun gear
10. Front internal gear
11. Front planetary carrier
12. Rear sun gear
13. Rear pinion gear
14. Rear internal gear
15. Rear planetary carrier
16. Forward clutch17. Forward one-way clutch
18. Overrun clutch
19. Low one-way clutch
20. Low & reverse brake
21. Parking pawl
22. Parking gear
23. Output shaft
FUNCTION OF CLUTCH AND BRAKENBAT0012S02
Clutch and brake components Abbr. Function
Reverse clutch6R/C To transmit input power to front sun gear9.
High clutch7H/C To transmit input power to front planetary carrier11.
Forward clutch16F/C To connect front planetary carrier11with forward one-way
clutch17.
Overrun clutch18O/C To connect front planetary carrier11with rear internal gear14.
Brake band5B/B To lock front sun gear9.
Forward one-way clutch17F/O.C When forward clutch16is engaged, to stop rear internal gear
14from rotating in opposite direction against engine revolution.
Low one-way clutch19L/O.C To stop front planetary carrier11from rotating in opposite direc-
tion against engine revolution.
Low & reverse brake20L & R/B To lock front planetary carrier11.
OVERALL SYSTEM
Shift Mechanism
AT-16
Page 22 of 2395
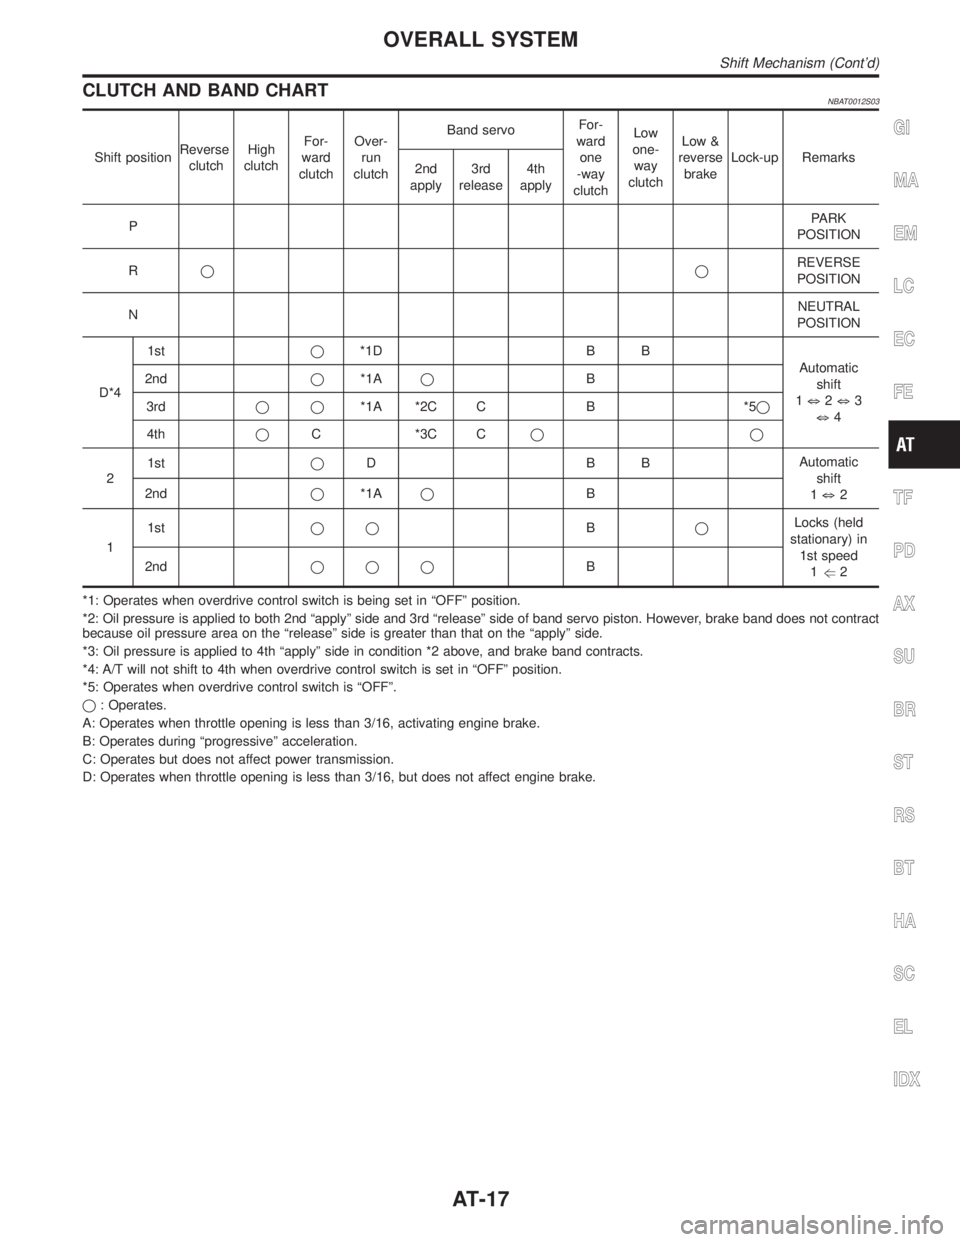
CLUTCH AND BAND CHARTNBAT0012S03
Shift positionReverse
clutchHigh
clutchFor-
ward
clutchOver-
run
clutchBand servoFor-
ward
one
-way
clutchLow
one-
way
clutchLow &
reverse
brakeLock-up Remarks
2nd
apply3rd
release4th
apply
PPARK
POSITION
RqqREVERSE
POSITION
NNEUTRAL
POSITION
D*41stq*1D B B
Automatic
shift
1k2k3
k4 2ndq*1AqB
3rdqq*1A *2C C B *5q
4thqC *3C Cqq
21stqDBBAutomatic
shift
1k2 2ndq*1AqB
11stqqBqLocks (held
stationary) in
1st speed
1g2 2ndqqqB
*1: Operates when overdrive control switch is being set in ªOFFº position.
*2: Oil pressure is applied to both 2nd ªapplyº side and 3rd ªreleaseº side of band servo piston. However, brake band does not contract
because oil pressure area on the ªreleaseº side is greater than that on the ªapplyº side.
*3: Oil pressure is applied to 4th ªapplyº side in condition *2 above, and brake band contracts.
*4: A/T will not shift to 4th when overdrive control switch is set in ªOFFº position.
*5: Operates when overdrive control switch is ªOFFº.
q: Operates.
A: Operates when throttle opening is less than 3/16, activating engine brake.
B: Operates during ªprogressiveº acceleration.
C: Operates but does not affect power transmission.
D: Operates when throttle opening is less than 3/16, but does not affect engine brake.
GI
MA
EM
LC
EC
FE
TF
PD
AX
SU
BR
ST
RS
BT
HA
SC
EL
IDX
OVERALL SYSTEM
Shift Mechanism (Cont'd)
AT-17