information screen INFINITI QX50 2019 Navigation Manual
[x] Cancel search | Manufacturer: INFINITI, Model Year: 2019, Model line: QX50, Model: INFINITI QX50 2019Pages: 288, PDF Size: 1.42 MB
Page 154 of 288
![INFINITI QX50 2019 Navigation Manual 8. Information and settings
Step 1 Step 2 Setting itemResult
Push <MENU> [Settings] [Screen] Set the Screen display to the preferred settings.
“Screen settings” (page 2-17)
[Volume Adjustment] Set INFINITI QX50 2019 Navigation Manual 8. Information and settings
Step 1 Step 2 Setting itemResult
Push <MENU> [Settings] [Screen] Set the Screen display to the preferred settings.
“Screen settings” (page 2-17)
[Volume Adjustment] Set](/img/42/34995/w960_34995-153.png)
8. Information and settings
Step 1 Step 2 Setting itemResult
Push
Page 157 of 288
![INFINITI QX50 2019 Navigation Manual QUICK SETTING MENU SCREEN
Touch [] on the lower touch screen
display (lower display) to set the display of
the setting menu items.
The following items are available settings.
Setting item Result
[Day/ INFINITI QX50 2019 Navigation Manual QUICK SETTING MENU SCREEN
Touch [] on the lower touch screen
display (lower display) to set the display of
the setting menu items.
The following items are available settings.
Setting item Result
[Day/](/img/42/34995/w960_34995-156.png)
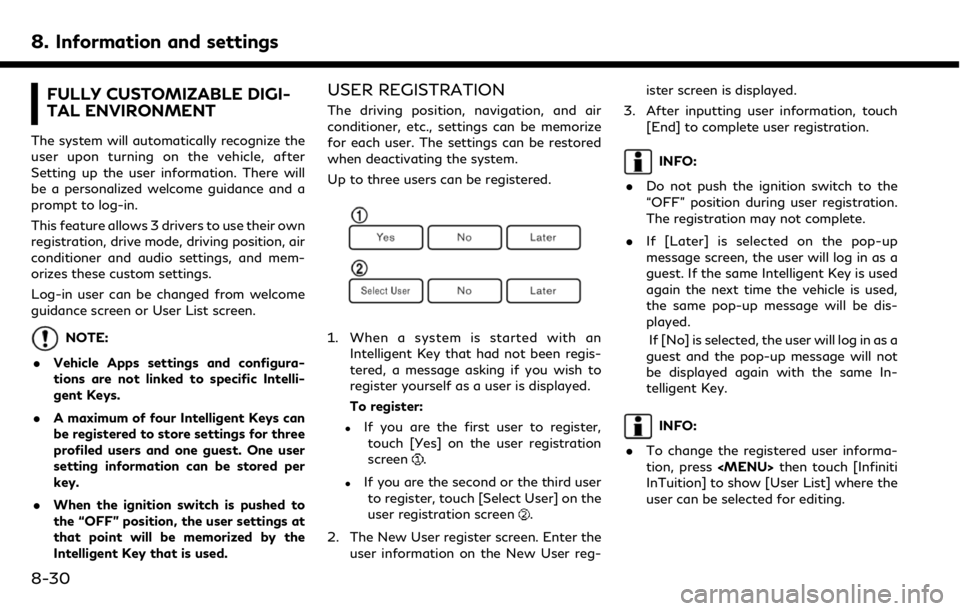
QUICK SETTING MENU SCREEN
Touch [] on the lower touch screen
display (lower display) to set the display of
the setting menu items.
The following items are available settings.
Setting item Result
[Day/Night]: Adjust the upper and lower screen brightness. Toggle the map color
between the day screen and night screen.
[Bass]: Adjust the speaker tone quality and sound balance by touching
[+]/[-], [L]/[R] or [R]/[F].
[Treble]:
[Balance]:
[Fade]:
[Volume Adjustment]: This turns on and off, as well as adjusts, the volume for various functions including, phone, navigation voice guidance (if so
equipped), as well as system beeps
8. Information and settings
8-29
Page 158 of 288

8. Information and settings
FULLY CUSTOMIZABLE DIGI-
TAL ENVIRONMENT
The system will automatically recognize the
user upon turning on the vehicle, after
Setting up the user information. There will
be a personalized welcome guidance and a
prompt to log-in.
This feature allows 3 drivers to use their own
registration, drive mode, driving position, air
conditioner and audio settings, and mem-
orizes these custom settings.
Log-in user can be changed from welcome
guidance screen or User List screen.
NOTE:
. Vehicle Apps settings and configura-
tions are not linked to specific Intelli-
gent Keys.
. A maximum of four Intelligent Keys can
be registered to store settings for three
profiled users and one guest. One user
setting information can be stored per
key.
. When the ignition switch is pushed to
the “OFF” position, the user settings at
that point will be memorized by the
Intelligent Key that is used.
USER REGISTRATION
The driving position, navigation, and air
conditioner, etc., settings can be memorize
for each user. The settings can be restored
when deactivating the system.
Up to three users can be registered.
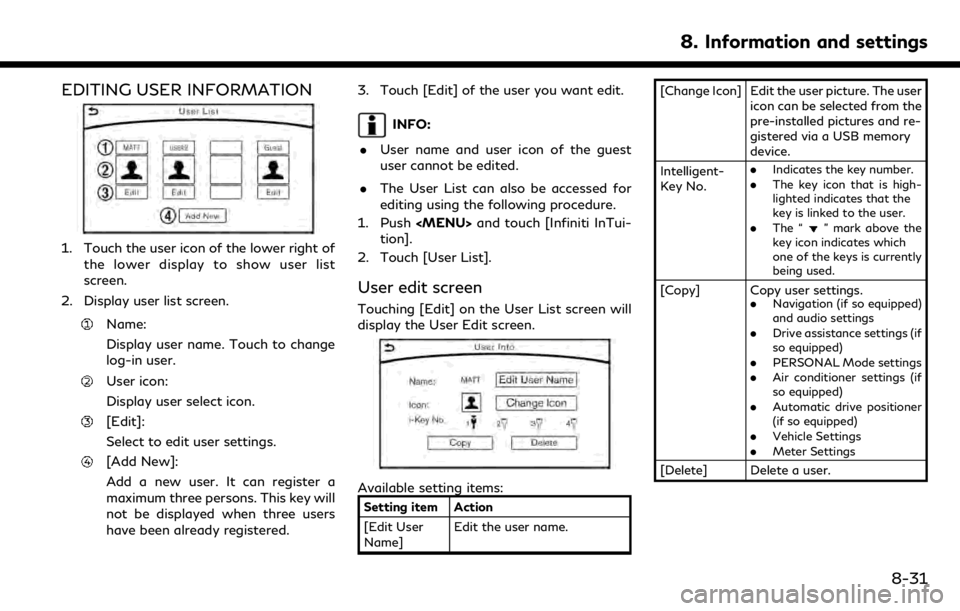
1. When a system is started with an
Intelligent Key that had not been regis-
tered, a message asking if you wish to
register yourself as a user is displayed.
To register:
.If you are the first user to register,touch [Yes] on the user registration
screen
.
.If you are the second or the third userto register, touch [Select User] on the
user registration screen
.
2. The New User register screen. Enter the user information on the New User reg- ister screen is displayed.
3. After inputting user information, touch [End] to complete user registration.
INFO:
. Do not push the ignition switch to the
“OFF” position during user registration.
The registration may not complete.
. If [Later] is selected on the pop-up
message screen, the user will log in as a
guest. If the same Intelligent Key is used
again the next time the vehicle is used,
the same pop-up message will be dis-
played.
If [No] is selected, the user will log in as a
guest and the pop-up message will not
be displayed again with the same In-
telligent Key.
INFO:
. To change the registered user informa-
tion, press
Page 159 of 288

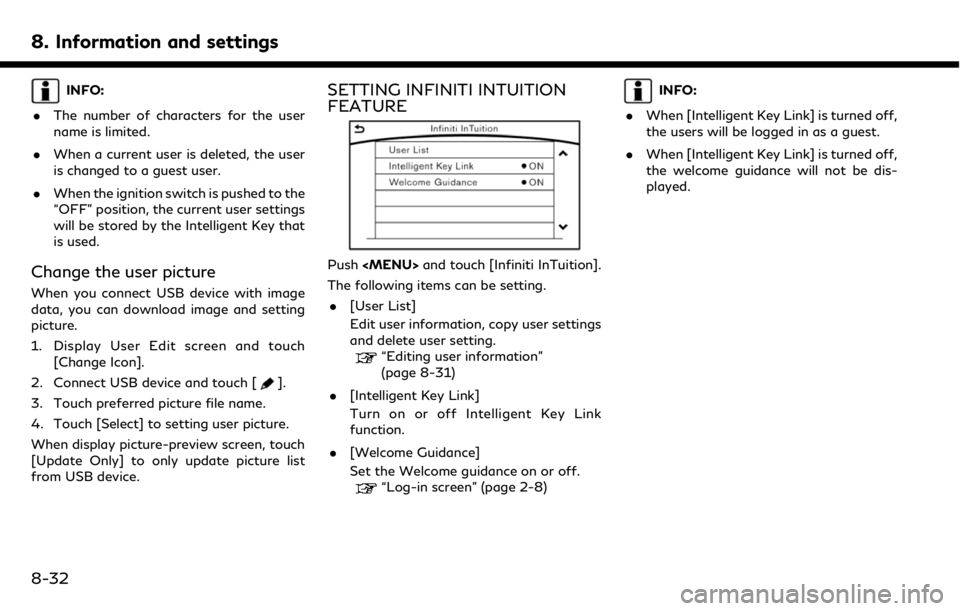
EDITING USER INFORMATION
1. Touch the user icon of the lower right ofthe lower display to show user list
screen.
2. Display user list screen.
Name:
Display user name. Touch to change
log-in user.
User icon:
Display user select icon.
[Edit]:
Select to edit user settings.
[Add New]:
Add a new user. It can register a
maximum three persons. This key will
not be displayed when three users
have been already registered. 3. Touch [Edit] of the user you want edit.
INFO:
. User name and user icon of the guest
user cannot be edited.
. The User List can also be accessed for
editing using the following procedure.
1. Push
Page 160 of 288

8. Information and settings
INFO:
. The number of characters for the user
name is limited.
. When a current user is deleted, the user
is changed to a guest user.
. When the ignition switch is pushed to the
“OFF” position, the current user settings
will be stored by the Intelligent Key that
is used.
Change the user picture
When you connect USB device with image
data, you can download image and setting
picture.
1. Display User Edit screen and touch
[Change Icon].
2. Connect USB device and touch [
].
3. Touch preferred picture file name.
4. Touch [Select] to setting user picture.
When display picture-preview screen, touch
[Update Only] to only update picture list
from USB device.
SETTING INFINITI INTUITION
FEATURE
Push
Page 163 of 288

9 Navigation (if so equipped)
Safety information ........................................................... 9-3
Map data authentication ................................................ 9-3
Map operation ................................................................... 9-4Map types ..................................................................... 9-4
Road color ..................................................................... 9-6
Displaying current vehicle location ......................... 9-7
Moving map ................................................................... 9-7
Changing scale of map .............................................. 9-8
Change map .................................................................. 9-9
Setting split screen ................................................... 9-10
Map view settings .................................................... 9-10
Setting information on map ................................... 9-13
Traffic information on map .................................... 9-13
Setting destination ......................................................... 9-14 Changing region ........................................................ 9-14
Destination screen .................................................... 9-15
Finding address .......................................................... 9-18
Finding points of interest ....................................... 9-19
Setting home as destination .................................. 9-21
Setting intersection .................................................. 9-21
Finding nearby place ................................................ 9-22
Using Journey Planner ............................................. 9-22
Searching from history ............................................ 9-23
Setting freeway entrance/exit .............................. 9-23
Setting city center ..................................................... 9-24 Searching from Stored Locations ...................... 9-24
Setting by phone number ..................................... 9-25
Setting from stored routes ................................... 9-25
Setting by INFINITI InTouch
TMServices .......... 9-25
Setting point on map ............................................. 9-27
Procedures after setting route ............................ 9-27
Route guidance ............................................................... 9-29
About route guidance ............................................ 9-29
Guidance screen settings ...................................... 9-34
Canceling Route ...................................................... 9-34
Route menu screen ................................................. 9-34
Editing route ............................................................. 9-35
Recalculating route ................................................. 9-37
Searching for detour route using
traffic information .................................................. 9-38
Setting detour route ............................................... 9-39
Route guidance settings ....................................... 9-39
Viewing traffic information ........................................ 9-44
Viewing available traffic information ....................... 9-45
Viewing traffic information list ........................... 9-46
Display urgent traffic information ..................... 9-46
Traffic Information Settings ................................ 9-46
Traffic information on map .................................. 9-47
Storing a location/route ............................................. 9-48 Storing location ...................................................... 9-48
Page 165 of 288

SAFETY INFORMATION
The navigation system is primarily designed
to help you reach your destination. However,
you, the driver, must use the system safely
and properly. Information concerning road
conditions, traffic signs and the availability
of services may not always be up to date.
The system is not a substitute for safe,
proper, and legal driving.
WARNING
.Do not rely on route guidance alone.
Always be sure that all driving man-
euvers are legal and safe in order to
avoid accidents.
MAP DATA AUTHENTICATION
When using a navigation system for the first
time, map data authentication is necessary.
1. The system starts when the ignition
switch is pushed to the “ACC” or “ON”
position for the first time. The map data
authentication screen is displayed.
2. Enter the 16 alphanumeric characters in four parts containing four characters
each. Each of the four parts is displayed
separately.
9. Navigation (if so equipped)
9-3
Page 166 of 288

9. Navigation (if so equipped)
MAP OPERATION
MAP TYPES
Maps are displayed on the upper touch
screen display (upper display).
Two types of map views are available: 2D
map and Birdview™ (3D) map.
2D map
The 2D map displays the map in a two-
dimensional environment similar to a road
map.
Screen information:
Arrow:
Indicates the turning direction of the
next guide point. Distance to the guide
point is also indicated above the arrow.
This indicator will appear when a desti-
nation or waypoint is set and route
guidance is started.
Traffic indicator:
Displays the reception condition of
traffic information transmitted from
the traffic information provider. When the reception condition of traffic
information transmitted from the pro-
vider is not detected, the traffic indica-
tor will not be displayed.
Waypoint:
Displays the set locations between the
starting point and the destination. A
maximum of five waypoints can be set.
Guide point:
Indicates a guide point on the route.
Vehicle icon:
Indicates the current vehicle location
9-4
Page 171 of 288

Using INFINITI controller
1. Turn the center dial when the map screenis displayed.
2. Use the center dial to adjust the map scale.
Clockwise: Zoom in
Counterclockwise: Zoom out
Free zoom:
Depending on the setting, using the center
dial to change the map scale may adjust the
scale normally, or it may engage the free
zoom (finer scale adjustment in smaller
steps).
“Settings screen” (page 8-24)
Map scale
Any required map scale (map coverage)
between 320 miles (640 km) and 1/64 mile
(25 m) can be selected.
US Units Metric Units
320 miles 640 km
80 miles 160 km
32 miles 64 km
8 miles 16 km
5 miles 10 km
2 miles 4 km 1 mile
2 km
1/2 mile 1 km
1/4 mile 500 m
1/8 mile 200 m
1/16 mile 100 m
1/32 mile 50 m
1/64 mile 25 m
INFO:
The traffic information icons are not dis-
played on the map screen when the map
scale is set to 8 miles (16 km) or higher.
“Traffic information on map”
(page 9-47)
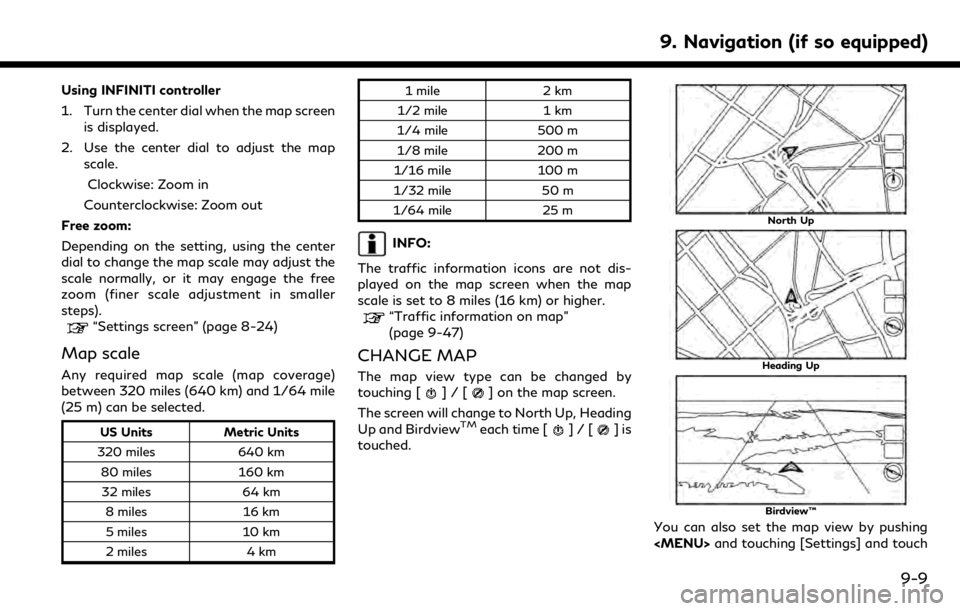
CHANGE MAP
The map view type can be changed by
touching []/[] on the map screen.
The screen will change to North Up, Heading
Up and Birdview
TMeach time []/[]is
touched.
North Up
Heading Up
Birdview™
You can also set the map view by pushing
Page 172 of 288
![INFINITI QX50 2019 Navigation Manual 9. Navigation (if so equipped)
[Navigation].“Map view settings” (page 9-10)
SETTING SPLIT SCREEN
It is possible to view the two types of map
view or the map view, and other information
at the same INFINITI QX50 2019 Navigation Manual 9. Navigation (if so equipped)
[Navigation].“Map view settings” (page 9-10)
SETTING SPLIT SCREEN
It is possible to view the two types of map
view or the map view, and other information
at the same](/img/42/34995/w960_34995-171.png)
9. Navigation (if so equipped)
[Navigation].“Map view settings” (page 9-10)
SETTING SPLIT SCREEN
It is possible to view the two types of map
view or the map view, and other information
at the same time. The right screen displays
the map screen, and the left screen displays
a turn list or an information screen.
Upper display
1. Push