sensor INFINITI QX50 2023 Owner's Manual
[x] Cancel search | Manufacturer: INFINITI, Model Year: 2023, Model line: QX50, Model: INFINITI QX50 2023Pages: 548, PDF Size: 6.17 MB
Page 177 of 548
DOOR LOCKS/UNLOCKS
PRECAUTION
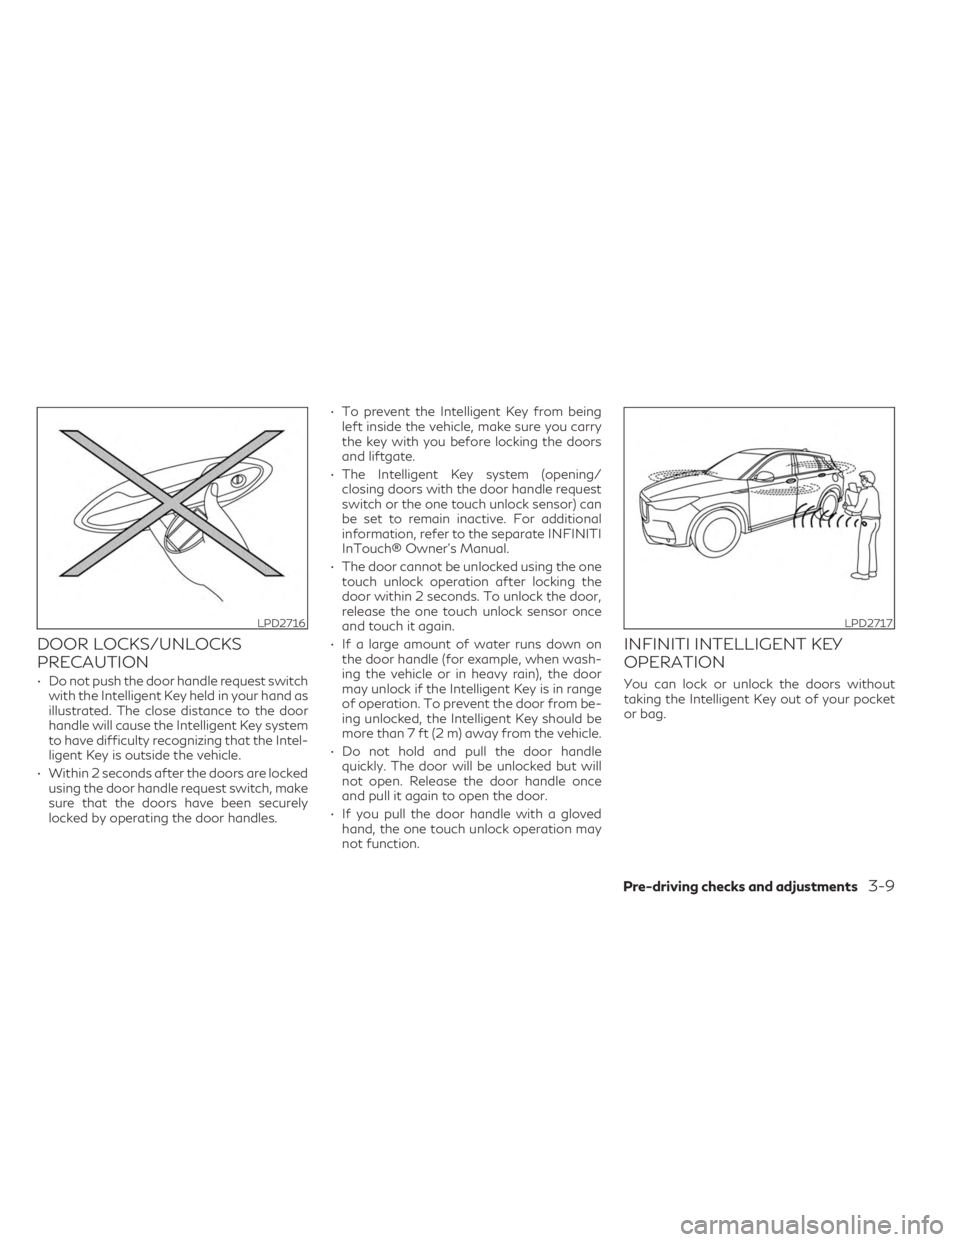
• Do not push the door handle request switchwith the Intelligent Key held in your hand as
illustrated. The close distance to the door
handle will cause the Intelligent Key system
to have difficulty recognizing that the Intel-
ligent Key is outside the vehicle.
• Within 2 seconds after the doors are locked using the door handle request switch, make
sure that the doors have been securely
locked by operating the door handles. • To prevent the Intelligent Key from being
left inside the vehicle, make sure you carry
the key with you before locking the doors
and liftgate.
• The Intelligent Key system (opening/ closing doors with the door handle request
switch or the one touch unlock sensor) can
be set to remain inactive. For additional
information, refer to the separate INFINITI
InTouch® Owner’s Manual.
• The door cannot be unlocked using the one touch unlock operation after locking the
door within 2 seconds. To unlock the door,
release the one touch unlock sensor once
and touch it again.
• If a large amount of water runs down on the door handle (for example, when wash-
ing the vehicle or in heavy rain), the door
may unlock if the Intelligent Key is in range
of operation. To prevent the door from be-
ing unlocked, the Intelligent Key should be
more than 7 ft (2 m) away from the vehicle.
• Do not hold and pull the door handle quickly. The door will be unlocked but will
not open. Release the door handle once
and pull it again to open the door.
• If you pull the door handle with a gloved hand, the one touch unlock operation may
not function.
INFINITI INTELLIGENT KEY
OPERATION
You can lock or unlock the doors without
taking the Intelligent Key out of your pocket
or bag.
LPD2716LPD2717
Pre-driving checks and adjustments3-9
Page 178 of 548
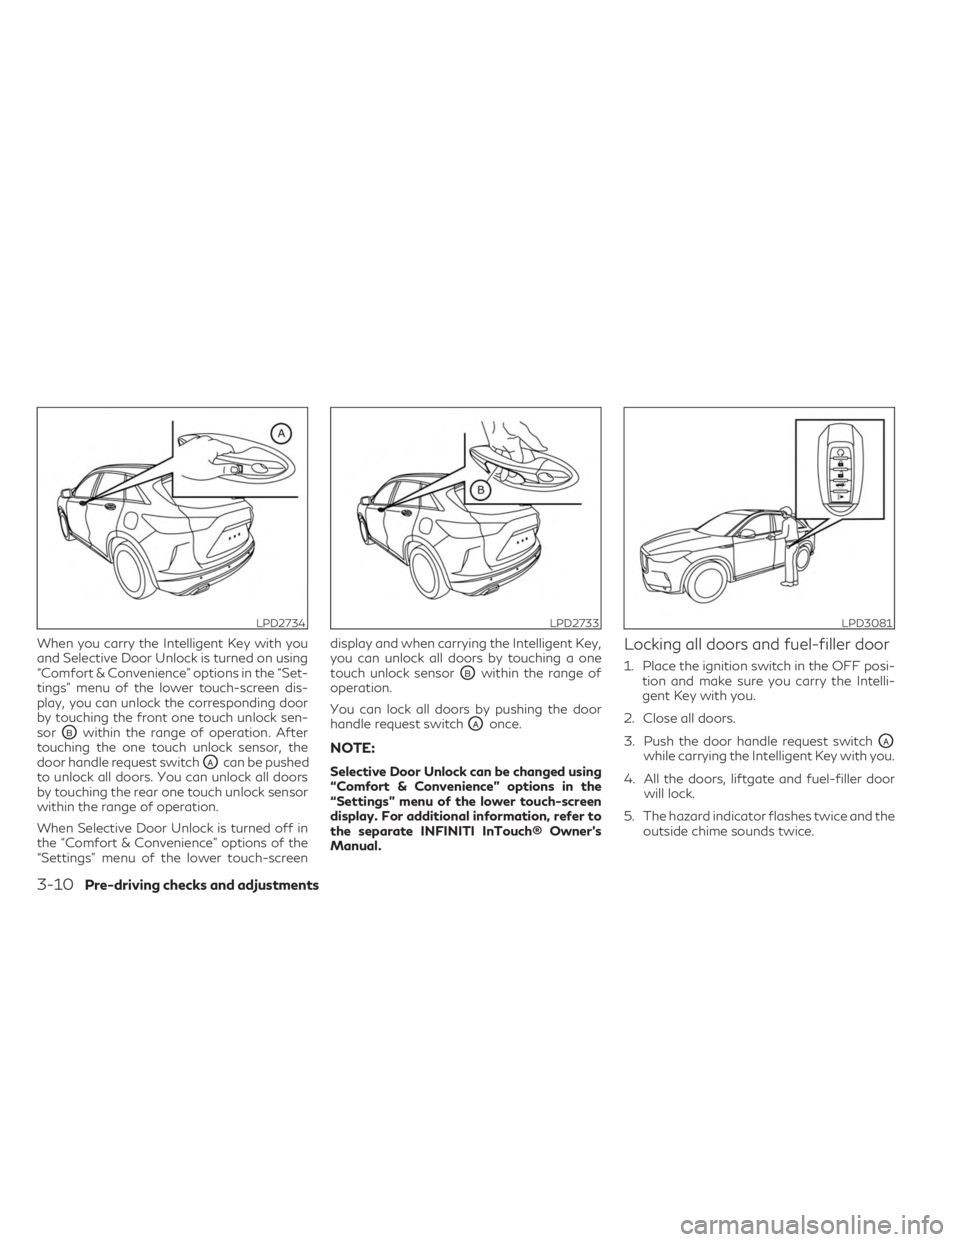
When you carry the Intelligent Key with you
and Selective Door Unlock is turned on using
“Comfort & Convenience” options in the “Set-
tings” menu of the lower touch-screen dis-
play, you can unlock the corresponding door
by touching the front one touch unlock sen-
sor
OBwithin the range of operation. After
touching the one touch unlock sensor, the
door handle request switch
OAcan be pushed
to unlock all doors. You can unlock all doors
by touching the rear one touch unlock sensor
within the range of operation.
When Selective Door Unlock is turned off in
the “Comfort & Convenience” options of the
“Settings” menu of the lower touch-screen display and when carrying the Intelligent Key,
you can unlock all doors by touching a one
touch unlock sensor
OBwithin the range of
operation.
You can lock all doors by pushing the door
handle request switch
OAonce.
NOTE:
Selective Door Unlock can be changed using
“Comfort & Convenience” options in the
“Settings” menu of the lower touch-screen
display. For additional information, refer to
the separate INFINITI InTouch® Owner’s
Manual.
Locking all doors and fuel-filler door
1. Place the ignition switch in the OFF posi- tion and make sure you carry the Intelli-
gent Key with you.
2. Close all doors.
3. Push the door handle request switch
OAwhile carrying the Intelligent Key with you.
4. All the doors, liftgate and fuel-filler door will lock.
5. The hazard indicator flashes twice and the outside chime sounds twice.
LPD2734LPD2733LPD3081
3-10Pre-driving checks and adjustments
Page 179 of 548
NOTE:
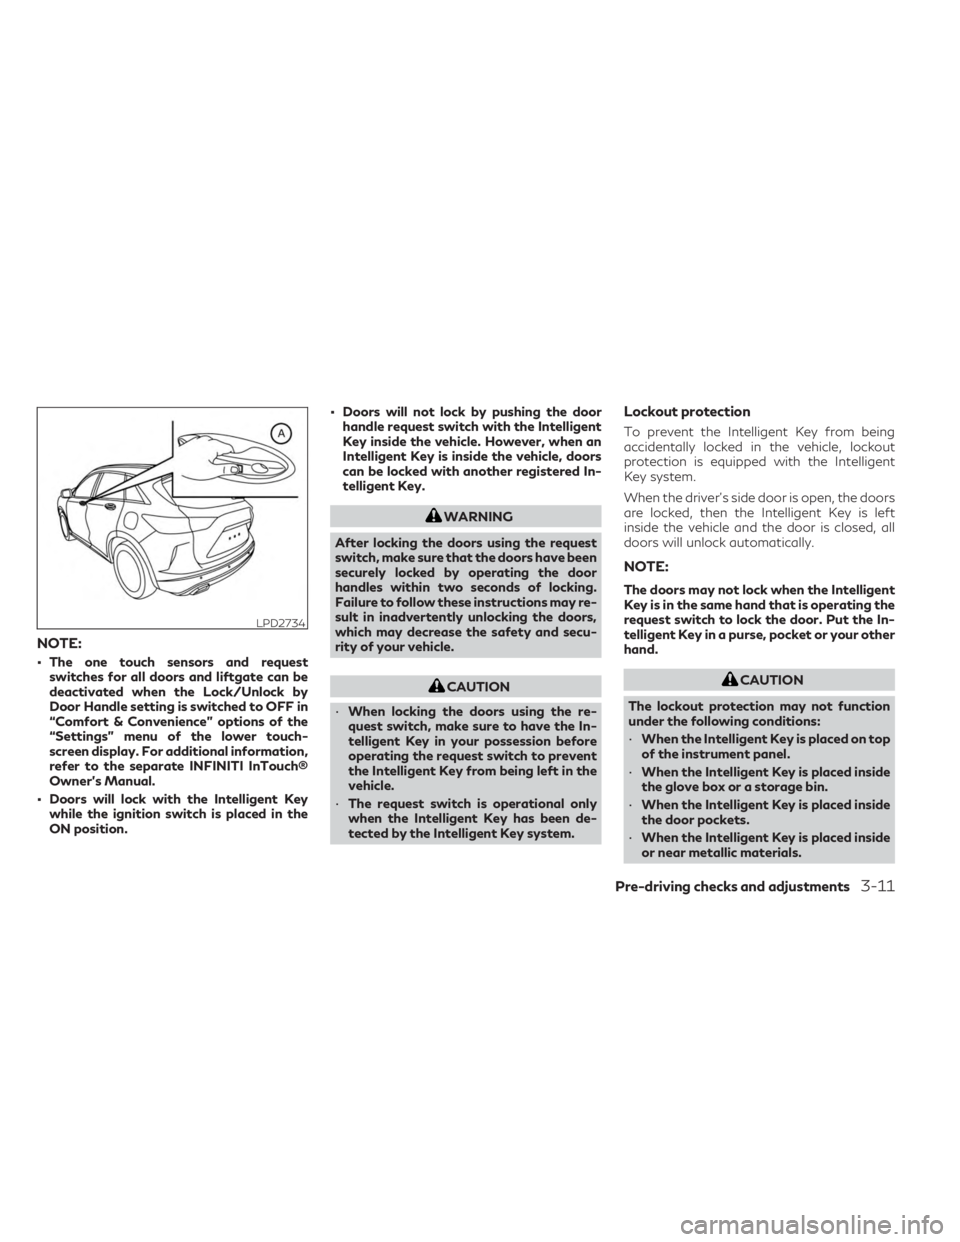
• The one touch sensors and requestswitches for all doors and liftgate can be
deactivated when the Lock/Unlock by
Door Handle setting is switched to OFF in
“Comfort & Convenience” options of the
“Settings” menu of the lower touch-
screen display. For additional information,
refer to the separate INFINITI InTouch®
Owner’s Manual.
• Doors will lock with the Intelligent Key while the ignition switch is placed in the
ON position. • Doors will not lock by pushing the door
handle request switch with the Intelligent
Key inside the vehicle. However, when an
Intelligent Key is inside the vehicle, doors
can be locked with another registered In-
telligent Key.
WARNING
After locking the doors using the request
switch, make sure that the doors have been
securely locked by operating the door
handles within two seconds of locking.
Failure to follow these instructions may re-
sult in inadvertently unlocking the doors,
which may decrease the safety and secu-
rity of your vehicle.
CAUTION
• When locking the doors using the re-
quest switch, make sure to have the In-
telligent Key in your possession before
operating the request switch to prevent
the Intelligent Key from being left in the
vehicle.
• The request switch is operational only
when the Intelligent Key has been de-
tected by the Intelligent Key system.
Lockout protection
To prevent the Intelligent Key from being
accidentally locked in the vehicle, lockout
protection is equipped with the Intelligent
Key system.
When the driver’s side door is open, the doors
are locked, then the Intelligent Key is left
inside the vehicle and the door is closed, all
doors will unlock automatically.
NOTE:
The doors may not lock when the Intelligent
Key is in the same hand that is operating the
request switch to lock the door. Put the In-
telligent Key in a purse, pocket or your other
hand.
CAUTION
The lockout protection may not function
under the following conditions:
• When the Intelligent Key is placed on top
of the instrument panel.
• When the Intelligent Key is placed inside
the glove box or a storage bin.
• When the Intelligent Key is placed inside
the door pockets.
• When the Intelligent Key is placed inside
or near metallic materials.
LPD2734
Pre-driving checks and adjustments3-11
Page 180 of 548
Unlocking doors and fuel-filler door
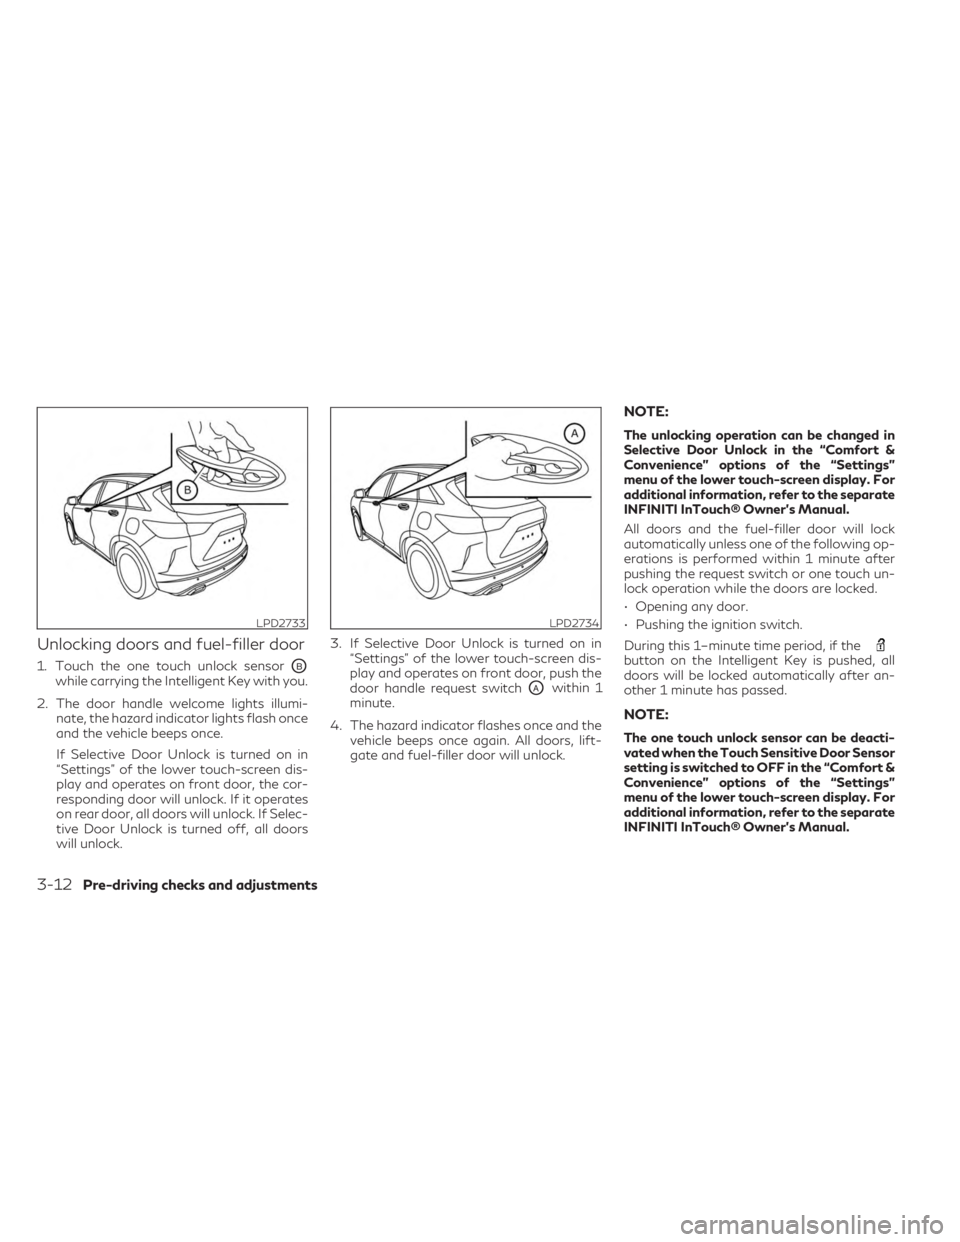
1. Touch the one touch unlock sensorOBwhile carrying the Intelligent Key with you.
2. The door handle welcome lights illumi- nate, the hazard indicator lights flash once
and the vehicle beeps once.
If Selective Door Unlock is turned on in
“Settings” of the lower touch-screen dis-
play and operates on front door, the cor-
responding door will unlock. If it operates
on rear door, all doors will unlock. If Selec-
tive Door Unlock is turned off, all doors
will unlock. 3. If Selective Door Unlock is turned on in
“Settings” of the lower touch-screen dis-
play and operates on front door, push the
door handle request switchOAwithin 1
minute.
4. The hazard indicator flashes once and the vehicle beeps once again. All doors, lift-
gate and fuel-filler door will unlock.
NOTE:
The unlocking operation can be changed in
Selective Door Unlock in the “Comfort &
Convenience” options of the “Settings”
menu of the lower touch-screen display. For
additional information, refer to the separate
INFINITI InTouch® Owner’s Manual.
All doors and the fuel-filler door will lock
automatically unless one of the following op-
erations is performed within 1 minute after
pushing the request switch or one touch un-
lock operation while the doors are locked.
• Opening any door.
• Pushing the ignition switch.
During this 1–minute time period, if the
button on the Intelligent Key is pushed, all
doors will be locked automatically after an-
other 1 minute has passed.
NOTE:
The one touch unlock sensor can be deacti-
vated when the Touch Sensitive Door Sensor
setting is switched to OFF in the “Comfort &
Convenience” options of the “Settings”
menu of the lower touch-screen display. For
additional information, refer to the separate
INFINITI InTouch® Owner’s Manual.
LPD2733LPD2734
3-12Pre-driving checks and adjustments
Page 181 of 548
If a door handle is pulled too quickly while
unlocking the doors using the one touch un-
lock sensor, you may be unable to open the
door. Returning the door handle to its original
position will allow you to open the door.
Using the interior lights
The interior lights illuminate for a period of
time when a door is unlocked.
The lights can be turned off without waiting by
performing one of the following operations:
• Placing the ignition switch in the ONposition.
• Locking the doors with the Intelligent Key.
• Switching the interior light switch to the OFF position.
For additional information, see “Interior
lights” (P. 2-78).
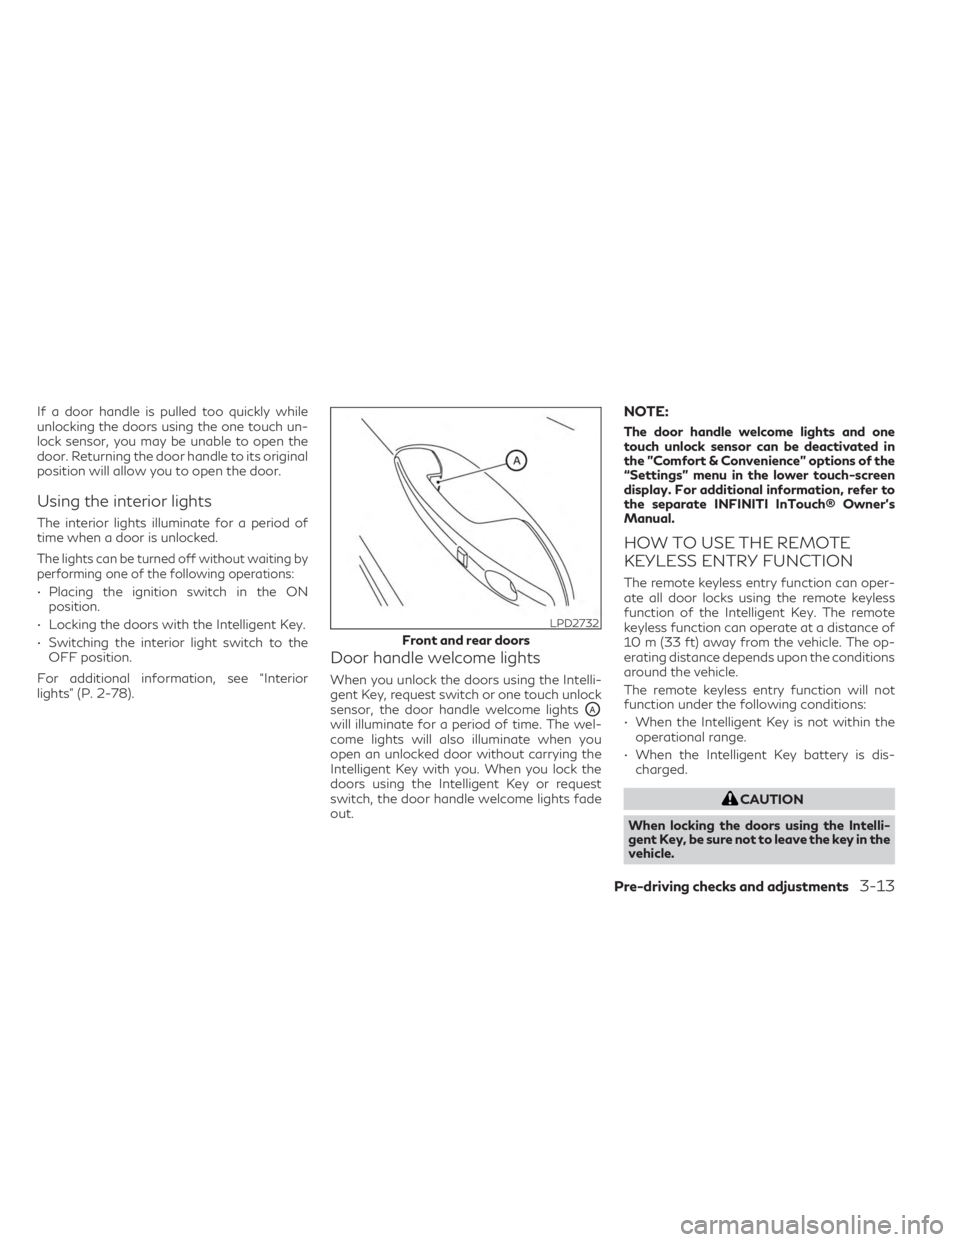
Door handle welcome lights
When you unlock the doors using the Intelli-
gent Key, request switch or one touch unlock
sensor, the door handle welcome lights
OAwill illuminate for a period of time. The wel-
come lights will also illuminate when you
open an unlocked door without carrying the
Intelligent Key with you. When you lock the
doors using the Intelligent Key or request
switch, the door handle welcome lights fade
out.
NOTE:
The door handle welcome lights and one
touch unlock sensor can be deactivated in
the ”Comfort & Convenience” options of the
“Settings” menu in the lower touch-screen
display. For additional information, refer to
the separate INFINITI InTouch® Owner’s
Manual.
HOW TO USE THE REMOTE
KEYLESS ENTRY FUNCTION
The remote keyless entry function can oper-
ate all door locks using the remote keyless
function of the Intelligent Key. The remote
keyless function can operate at a distance of
10 m (33 ft) away from the vehicle. The op-
erating distance depends upon the conditions
around the vehicle.
The remote keyless entry function will not
function under the following conditions:
• When the Intelligent Key is not within the operational range.
• When the Intelligent Key battery is dis- charged.
CAUTION
When locking the doors using the Intelli-
gent Key, be sure not to leave the key in the
vehicle.
LPD2732
Front and rear doors
Pre-driving checks and adjustments3-13
Page 197 of 548
•Touch the one touch unlock sensor while
carrying the Intelligent Key with you. For
additional information, see “Unlocking
doors and fuel-filler door” (P. 3-12).
2. To open the fuel-filler door, push the right side of the fuel-filler door to release.
To lock, close the fuel-filler door securely and
lock the doors.
FUEL-FILLER CAP
WARNING
• Gasoline is extremely flammable and
highly explosive under certain condi-
tions. You could be burned or seriously
injured if it is misused or mishandled. Al-
ways stop the engine and do not smoke
or allow open flames or sparks near the
vehicle when refueling.
• Do not attempt to top off the fuel tank
after the fuel pump nozzle shuts off au-
tomatically. Continued refueling may
cause fuel overflow, resulting in fuel
spray and possibly a fire. •
Use only an original equipment type fuel-
filler cap as a replacement. It has a
built-in safety valve needed for proper
operation of the fuel system and emis-
sion control system. An incorrect cap can
result in a serious malfunction and pos-
sible injury. It could also cause the
Malfunction Indicator Light (MIL) to
come on.
• Never pour fuel into the throttle body to
attempt to start your vehicle.
• Do not fill a portable fuel container in the
vehicle or trailer. Static electricity can
cause an explosion of flammable liquid,
vapor or gas in any vehicle or trailer. To
reduce the risk of serious injury or death
when filling portable fuel containers:
– Always place the container on the
ground when filling.
– Do not use electronic devices when
filling.
– Keep the pump nozzle in contact with
the container while you are filling it.
– Use only approved portable fuel con-
tainers for flammable liquid.
CAUTION
• Do not use a fuel containing more than
15% ethanol in your vehicle. For addi-
tional information, see “Fuel recommen-
dation” (P. 10-4).
•
The Loose Fuel Cap warning message will
be displayed if the fuel-filler cap is not
properly tightened. It may take a few driv-
ing trips for the message to be displayed.
Failure to tighten the fuel-filler cap prop-
erly after the Loose Fuel Cap warning
is displayed may cause the Malfunction
Indicator Light (MIL) to illuminate.
• Failure to tighten the fuel-filler cap
properly may cause theMalfunc-
tion Indicator Light (MIL) to illuminate.
If the
light illuminates because the
fuel-filler cap is loose or missing, tighten
or install the cap and continue to drive
the vehicle. The
light should turn off
after a few driving trips. If thelight
does not turn off after a few driving
trips, have the vehicle inspected. It is rec-
ommended that you visit an INFINITI
retailer for this service.
Pre-driving checks and adjustments3-29
Page 202 of 548
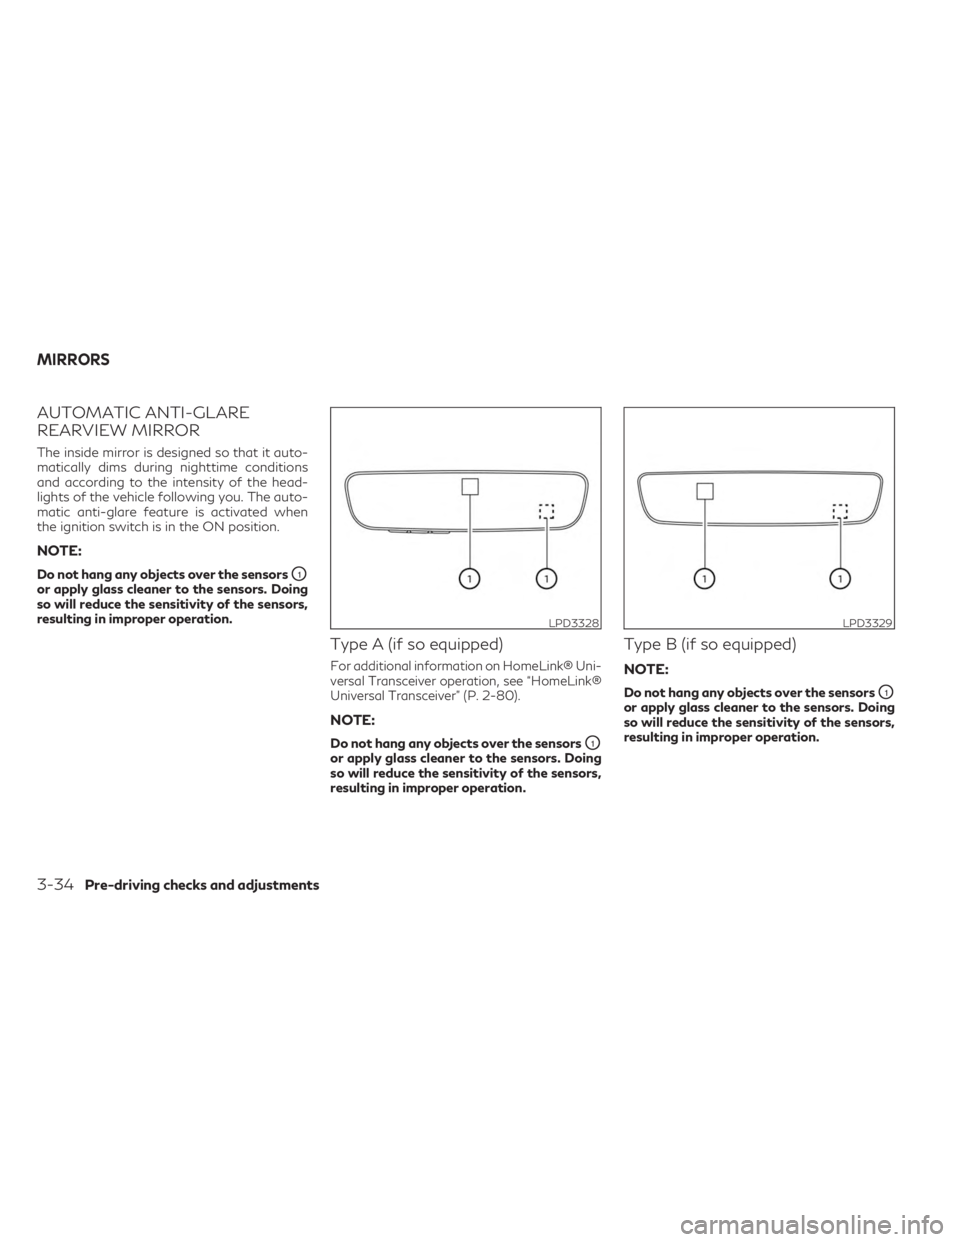
AUTOMATIC ANTI-GLARE
REARVIEW MIRROR
The inside mirror is designed so that it auto-
matically dims during nighttime conditions
and according to the intensity of the head-
lights of the vehicle following you. The auto-
matic anti-glare feature is activated when
the ignition switch is in the ON position.
NOTE:
Do not hang any objects over the sensorsO1
or apply glass cleaner to the sensors. Doing
so will reduce the sensitivity of the sensors,
resulting in improper operation.
Type A (if so equipped)
For additional information on HomeLink® Uni-
versal Transceiver operation, see “HomeLink®
Universal Transceiver” (P. 2-80).
NOTE:
Do not hang any objects over the sensorsO1
or apply glass cleaner to the sensors. Doing
so will reduce the sensitivity of the sensors,
resulting in improper operation.
Type B (if so equipped)
NOTE:
Do not hang any objects over the sensorsO1
or apply glass cleaner to the sensors. Doing
so will reduce the sensitivity of the sensors,
resulting in improper operation.
LPD3328LPD3329
MIRRORS
3-34Pre-driving checks and adjustments
Page 209 of 548
4 Monitor, climate, audio, phone and voice
recognition systems
INFINITI InTouch® Owner’s Manual..............4-2
RearView Monitor (if so equipped) ................4-3
RearView Monitor system operation ...........4-4
How to read the displayed lines ................4-5
Difference between predicted and actual
distances .....................................4-5
How to park with predicted course lines .......4-7
Adjusting the screen ......................... 4-8
How to turn on and off predicted course
lines ..........................................4-9
RearView Monitor system limitations ..........4-9
System maintenance ........................ 4-10
Around View® Monitor (if so equipped) ..........4-11
Around View® Monitor system operation ....4-13
Difference between predicted and actual
distances .................................... 4-17
How to park with predicted course lines .....4-19
How to switch the display ...................4-20
Around View® Monitor settings .............4-20
Adjusting the screen ........................ 4-21
Around View® Monitor system
limitations .................................. 4-22
System maintenance ........................ 4-24
Camera aiding sonar (parking sensor) (if so
equipped) ...................................... 4-24Sonar system operation
.....................4-25
Turning on and off the sonar function ........4-26
Sonar system limitations ....................4-28
System maintenance ........................ 4-28
Moving Object Detection (MOD) (if so
equipped) ...................................... 4-29
MOD system operation .....................4-30
Turning MOD on and off ....................4-32
MOD system limitations .....................4-32
System maintenance ........................ 4-33
Vents .......................................... 4-34
Heater and air conditioner (automatic) ..........4-35
Automatic operation ........................ 4-36
Manual operation ........................... 4-37
Operating tips .............................. 4-38
CLIMATE setting screen ....................4-39
Rear climate control (if so equipped) .........4-41
Heater and air conditioner settings (if so
equipped) ...................................... 4-42
Servicing
air conditioner ........................ 4-43
Antenna ....................................... 4-43
Roof Mounted Antenna .....................4-43
Car phone or CB radio ......................... 4-44
iPod®/iPhone® ................................ 4-44
Page 228 of 548
4. Maneuver the steering wheel to make thevehicle width guide lines
ODparallel to the
parking space
OCwhile referring to the
predicted course lines.
5. When the vehicle is parked in the space completely, press the P (Park) button lo-
cated near the shift lever to place the
vehicle in the P (Park) position and apply
the parking brake.
HOW TO SWITCH THE DISPLAY
With the ignition switch in the ON position,
press theCAMERA button or with the
engine running, move the shift lever to the R
(Reverse) position to operate the Around
View® Monitor.
The Around View® Monitor displays differ-
ent split screen views depending on the posi-
tion of the shift lever. When activating the
Around View® Monitor, the guide lines, the
icons and the messages may not be displayed
immediately. Press the
CAMERA but-
ton or touch the “Change View” key to switch
between the available views. If the shift lever is in the R (Reverse) position,
the available views are:
• Rear view/bird’s-eye view split screen
• Rear view/front-side view split screen
• Rear-wide view
If the shift position is in the P (Park) or D
(Drive) position, the available views are:
• Front view/bird’s-eye view split screen
• Front view/front-side view split screen
• Front-wide view
The display will switch from the Around
View® Monitor screen when:
• The shift lever is in the D (Drive) position
and the vehicle speed increases above ap-
proximately 6 mph (10 km/h).
• A different screen is selected.
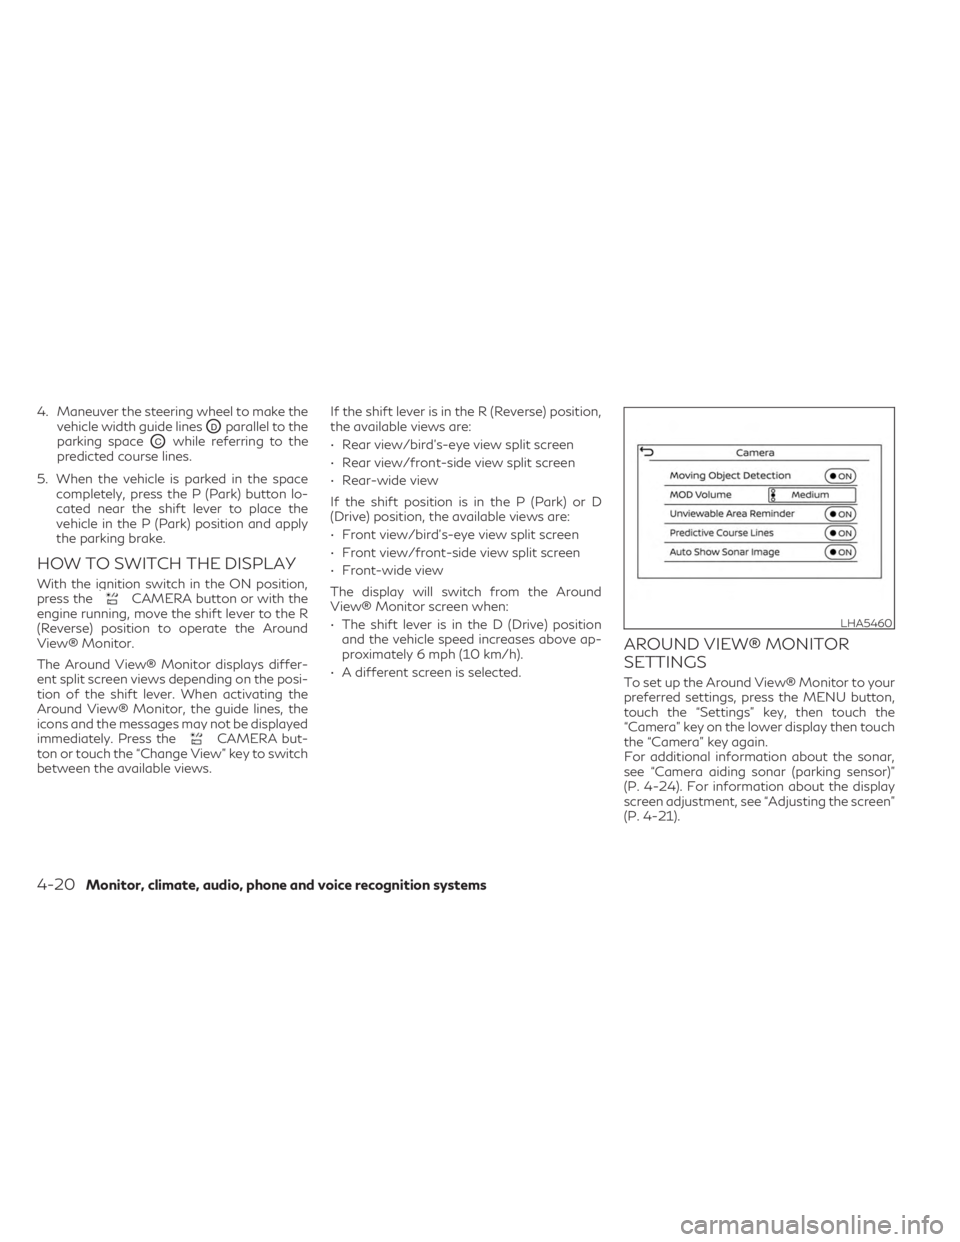
AROUND VIEW® MONITOR
SETTINGS
To set up the Around View® Monitor to your
preferred settings, press the MENU button,
touch the “Settings” key, then touch the
“Camera” key on the lower display then touch
the “Camera” key again.
For additional information about the sonar,
see “Camera aiding sonar (parking sensor)”
(P. 4-24). For information about the display
screen adjustment, see “Adjusting the screen”
(P. 4-21).
LHA5460
4-20Monitor, climate, audio, phone and voice recognition systems
Page 232 of 548
SYSTEM MAINTENANCE
CAUTION
• Do not use alcohol, benzine or thinner
to clean the camera. This will cause
discoloration.
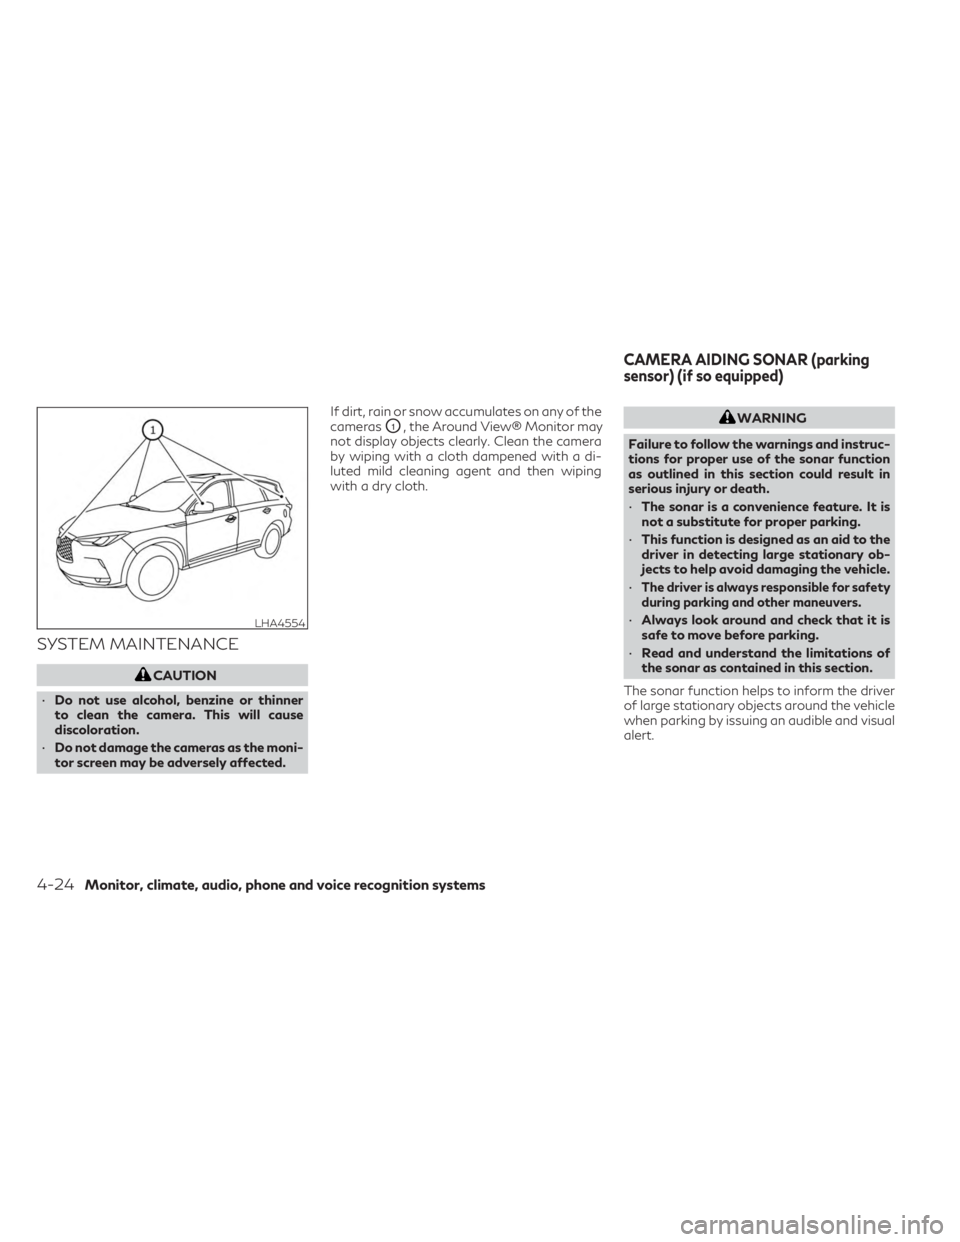
• Do not damage the cameras as the moni-
tor screen may be adversely affected. If dirt, rain or snow accumulates on any of the
cameras
O1, the Around View® Monitor may
not display objects clearly. Clean the camera
by wiping with a cloth dampened with a di-
luted mild cleaning agent and then wiping
with a dry cloth.WARNING
Failure to follow the warnings and instruc-
tions for proper use of the sonar function
as outlined in this section could result in
serious injury or death.
• The sonar is a convenience feature. It is
not a substitute for proper parking.
• This function is designed as an aid to the
driver in detecting large stationary ob-
jects to help avoid damaging the vehicle.
•
The driver is always responsible for safety
during parking and other maneuvers.
• Always look around and check that it is
safe to move before parking.
• Read and understand the limitations of
the sonar as contained in this section.
The sonar function helps to inform the driver
of large stationary objects around the vehicle
when parking by issuing an audible and visual
alert.LHA4554
CAMERA AIDING SONAR (parking
sensor) (if so equipped)
4-24Monitor, climate, audio, phone and voice recognition systems