console box INFINITI QX80 2021 Owner's Manual
[x] Cancel search | Manufacturer: INFINITI, Model Year: 2021, Model line: QX80, Model: INFINITI QX80 2021Pages: 529, PDF Size: 2.05 MB
Page 19 of 529

0-6Illustrated table of contents
WAA0131X
1. Cargo light (P.2-75)
2. Cup holders (3rd row seat) (P.2-62)
3. Rear ventilators (P.4-27)
4. Coat hooks (P.2-65)
5. Rear personal lights (P.2-72)6. Door armrest
— Power window controls (P.2-68)
— Power door lock switch (P.3-5)
— Outside rearview mirror remote con-
trol switch (driver’s side) (P.3-37) 7. Automatic drive positioner switch
(P.3-40)
8. Sun visors (P.3-30)
9. Map lights (P.2-72)
10. Moonroof switch (P.2-70)
11. E-Call (SOS) button (if so equipped) (P.2-59)
12. Sunglasses holder (P.2-62)
13. Inside rearview mirror (P.3-30) — Smart Rearview Mirror (if so
equipped) (P.3-31)
— HomeLink
®universal transceiver
(P.2-75, P.2-79)
14. Cargo area — Power outlet (P.2-56)
— Cargo floor box (P.2-66)
— Luggage hooks (P.2-66)
— Jacking tools (P.6-5)
15. Rear console box (P.2-64) — Cup holders (2nd row seat) (if so
equipped) (P.2-60)
— Pocket (if so equipped) (P.2-64)
16. Cup holders (2nd row seat) (if so equipped) (P.2-60)
17. Mobile Entertainment System (MES) (if so equipped) (See INFINITI InTouch
TM
Owner’s Manual.)
PASSENGER COMPARTMENT
Page 20 of 529

18. Console box (P.2-63)— Power outlet (P.2-56)
— USB charging connector (P.2-58)
— Rear Media Interface (See INFINITI
InTouch
TMOwner’s Manual.)
— Rear automatic air conditioning sys-
tem (P.4-33)
— Heated seat switch (if so equipped)
(P.2-48)
19. Front cup holders (P.2-60)/Tray (P.2-65)
Illustrated table of contents0-7
Page 23 of 529

0-10Illustrated table of contents
WAA0133X
1. Side ventilator (P.4-27)
2. Meters and gauges (P.2-6)
3. Hazard warning flasher switch (P.6-2)
4. Center ventilator (P.4-27)
5. Upper touch screen display (upper dis-play) (See INFINITI InTouch
TMOwner’s Manual.)
— Around View
®Monitor (P.4-3)
— Navigation system (See INFINITI
InTouch
TMOwner’s Manual.) 6. Lower touch screen display (lower dis-
play) (See INFINITI InTouch
TMOwner’s
Manual.)
7. Heater and air conditioner control (P.4-28)
— Heated seats switch (P.2-48)
— Climate controlled seats switch (if so
equipped) (P.2-50)
— Defroster switch (P.2-39)
8. Front passenger air bag status light (P.1-60)
9. Audio system (See INFINITI InTouch
TM
Owner’s Manual.)
10. Front passenger supplemental air bag (P.1-52)
11. Fuse box (P.8-20)
12. Parking brake (P.5-22)
13. Hood release handle (P.3-21)
14. Steering wheel — Horn (P.2-48)
— Driver supplemental air bag (P.1-52)
— Power steering system (P.5-123)
15. Push-button ignition switch (P.5-12)
16. Front console — Power outlet (P.2-56)
— USB connection port (See Infiniti
InTouch Owner’s Manual.)
INSTRUMENT PANEL
Page 37 of 529

1-10Safety — seats, seat belts and supplemental restraint system
secured, passengers may be injured in
an accident or sudden stop.
. Properly secure all cargo to help
prevent it from sliding or shifting.
Do not place cargo higher than the
seatbacks. In a sudden stop or colli-
sion, unsecured cargo could cause
personal injury.
WAB0052X
Front seats
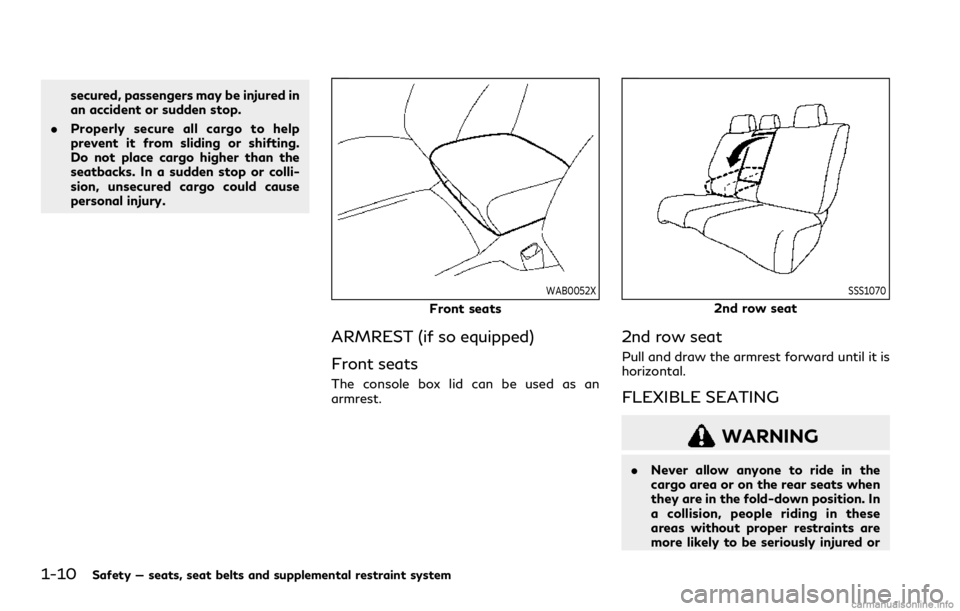
ARMREST (if so equipped)
Front seats
The console box lid can be used as an
armrest.
SSS1070
2nd row seat
2nd row seat
Pull and draw the armrest forward until it is
horizontal.
FLEXIBLE SEATING
WARNING
.Never allow anyone to ride in the
cargo area or on the rear seats when
they are in the fold-down position. In
a collision, people riding in these
areas without proper restraints are
more likely to be seriously injured or
Page 62 of 529

CAUTION
Store the loose LATCH covers (for
example, in the console box) where they
will not get damaged to avoid losing
them. (See “Console box” (P.2-63).)
SSS0643
LATCH webbing-mounted attachment
Installing child restraint LATCH
lower anchor attachments
LATCH compatible child restraints include
two rigid or webbing-mounted attachments
that can be connected to two anchors
located at certain seating positions in your
vehicle. With this system, you do not have to
use a vehicle seat belt to secure the child
restraint. Check your child restraint for a
label stating that it is compatible with
LATCH. This information may also be in
the instructions provided by the child re-
straint manufacturer.
SSS0644
LATCH rigid-mounted attachment
When installing a child restraint, carefully
read and follow the instructions in this
manual and those supplied with the child
restraint.
Safety — seats, seat belts and supplemental restraint system1-35
Page 99 of 529

How to temporarily disable the rear door
alert system ................................................................ 2-55
Power outlet .................................................................... 2-56 USB (Universal Serial Bus)
charging connector ................................................... 2-58
E-Call (SOS) Button (if so equipped) ........................ 2-59 Emergency support ................................................... 2-59
Storage ........................................................................\
..... 2-60
Cup holders ................................................................ 2-60
Sunglasses holder ...................................................... 2-62
Glove box ..................................................................... 2-63
Console box ................................................................ 2-63
Tray ........................................................................\
....... 2-65
Coat hooks .................................................................. 2-65
Luggage hooks .......................................................... 2-66
Cargo floor box .......................................................... 2-66
Roof rack ..................................................................... 2-67
Windows ........................................................................\
... 2-68
Power windows ......................................................... 2-68
Moonroof ........................................................................\
.. 2-70 Power moonroof ....................................................... 2-70
Welcome light .................................................................. 2-72 Battery saver system .............................................. 2-72
Interior lights .................................................................... 2-72
Interior light switch .................................................. 2-73
Console light ............................................................... 2-73
Map lights ................................................................... 2-74
Rear personal lights .................................................. 2-74 Vanity mirror lights ........................................................ 2-74
Cargo light ....................................................................... 2-75
HomeLink
®Universal Transceiver (Type A)
(if so equipped) ............................................................... 2-75
Programming HomeLink
®..................................... 2-76
Programming HomeLink®for Canadian
customers and gate openers ............................... 2-77
Operating the HomeLink
®
Universal Transceiver ............................................. 2-77
Programming troubleshooting ............................ 2-78
Clearing the programmed information ............. 2-78
Reprogramming a single
HomeLink
®button .................................................. 2-78
If your vehicle is stolen .......................................... 2-78
HomeLink
®Universal Transceiver (Type B) (if
so equipped) .................................................................... 2-79
Programming HomeLink
®.................................... 2-80
Using the garage door
two-way communication ...................................... 2-82
Programming HomeLink
®for Canadian
customers and gate openers ............................... 2-83
Operating the HomeLink
®
Universal Transceiver ............................................. 2-83
Programming troubleshooting ............................ 2-83
Clearing the programmed information ............ 2-84
Reprogramming a single
HomeLink
®button ................................................. 2-84
If your vehicle is stolen ......................................... 2-84
Page 102 of 529

WAA0133X
1. Side ventilator
2. Meters and gauges
3. Hazard warning flasher switch
4. Center ventilator5. Upper touch screen display (upper dis-
play)
— Around View
®Monitor
— Navigation system
6. Lower touch screen display (lower dis- play) 7. Heater and air conditioner control
— Heated seats switch
— Climate controlled seats switch (if so
equipped)
— Defroster switch
8. Front passenger air bag status light
9. Audio system
10. Front passenger supplemental air bag
11. Fuse box
12. Parking brake
13. Hood release handle
14. Steering wheel — Horn
— Driver supplemental air bag
— Power steering system
15. Push-button ignition switch
16. Front console — Power outlet
— USB connection port
17. Cup holder/Tray
18. Glove box
Instruments and controls2-5
INSTRUMENT PANEL
Page 154 of 529

SIC4391
Luggage room
Type A (if so equipped)
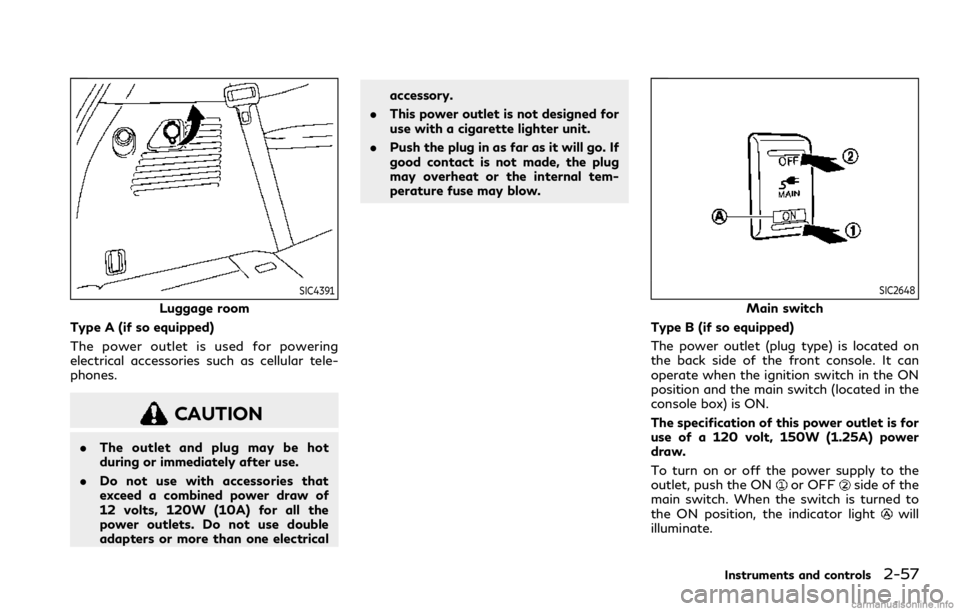
The power outlet is used for powering
electrical accessories such as cellular tele-
phones.
CAUTION
. The outlet and plug may be hot
during or immediately after use.
. Do not use with accessories that
exceed a combined power draw of
12 volts, 120W (10A) for all the
power outlets. Do not use double
adapters or more than one electrical accessory.
. This power outlet is not designed for
use with a cigarette lighter unit.
. Push the plug in as far as it will go. If
good contact is not made, the plug
may overheat or the internal tem-
perature fuse may blow.
SIC2648
Main switch
Type B (if so equipped)
The power outlet (plug type) is located on
the back side of the front console. It can
operate when the ignition switch in the ON
position and the main switch (located in the
console box) is ON.
The specification of this power outlet is for
use of a 120 volt, 150W (1.25A) power
draw.
To turn on or off the power supply to the
outlet, push the ON
or OFFside of the
main switch. When the switch is turned to
the ON position, the indicator light
will
illuminate.
Instruments and controls2-57
Page 160 of 529

CAUTION
.Do not use for anything other than
glasses.
. Do not leave glasses in the sunglasses
holder while parking in direct sun-
light. The heat may damage the
glasses.
SIC4393
GLOVE BOX
WARNING
Keep glove box lid closed while driving to
help prevent injury in an accident or a
sudden stop.
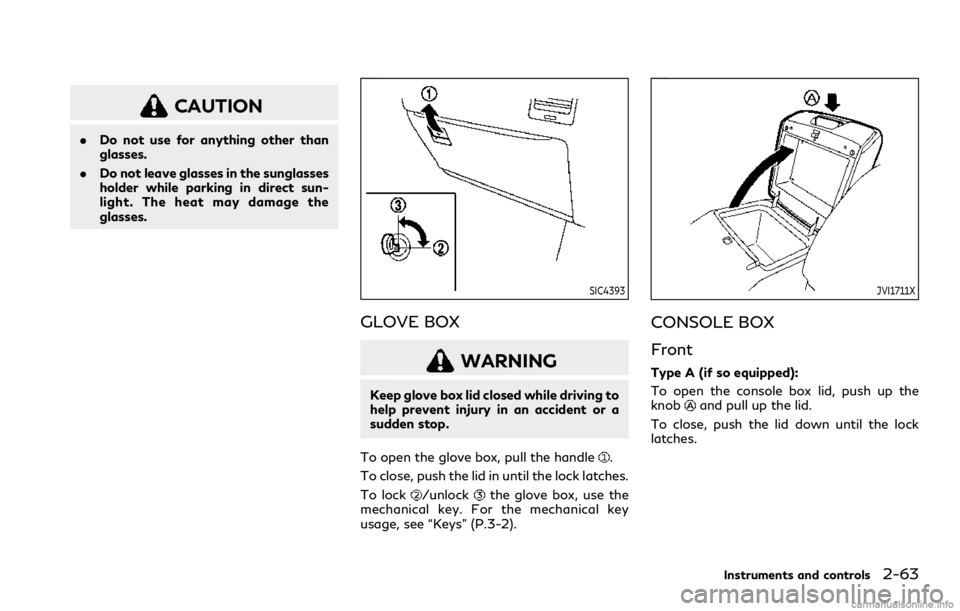
To open the glove box, pull the handle
.
To close, push the lid in until the lock latches.
To lock
/unlockthe glove box, use the
mechanical key. For the mechanical key
usage, see “Keys” (P.3-2).
JVI1711X
CONSOLE BOX
Front
Type A (if so equipped):
To open the console box lid, push up the
knob
and pull up the lid.
To close, push the lid down until the lock
latches.
Instruments and controls2-63
Page 161 of 529

2-64Instruments and controls
JVI1509X
Type B (if so equipped):
To open the console box lid from the front
seat, push up the knob
and pull up the lid.
To open the console box lid from the 2nd
row seat, push the knob
.
To close, push the lid down until the lock
latches.
SIC4422
Rear (if so equipped)
To open the lid, push the knob upand pull
up the lid.
To close, push the lid down until the lock
latches.