ISUZU TROOPER 1998 Service Repair Manual
Manufacturer: ISUZU, Model Year: 1998, Model line: TROOPER, Model: ISUZU TROOPER 1998Pages: 3573, PDF Size: 60.36 MB
Page 941 of 3573
POWER ASSISTED BRAKE SYSTEM 5C – 63
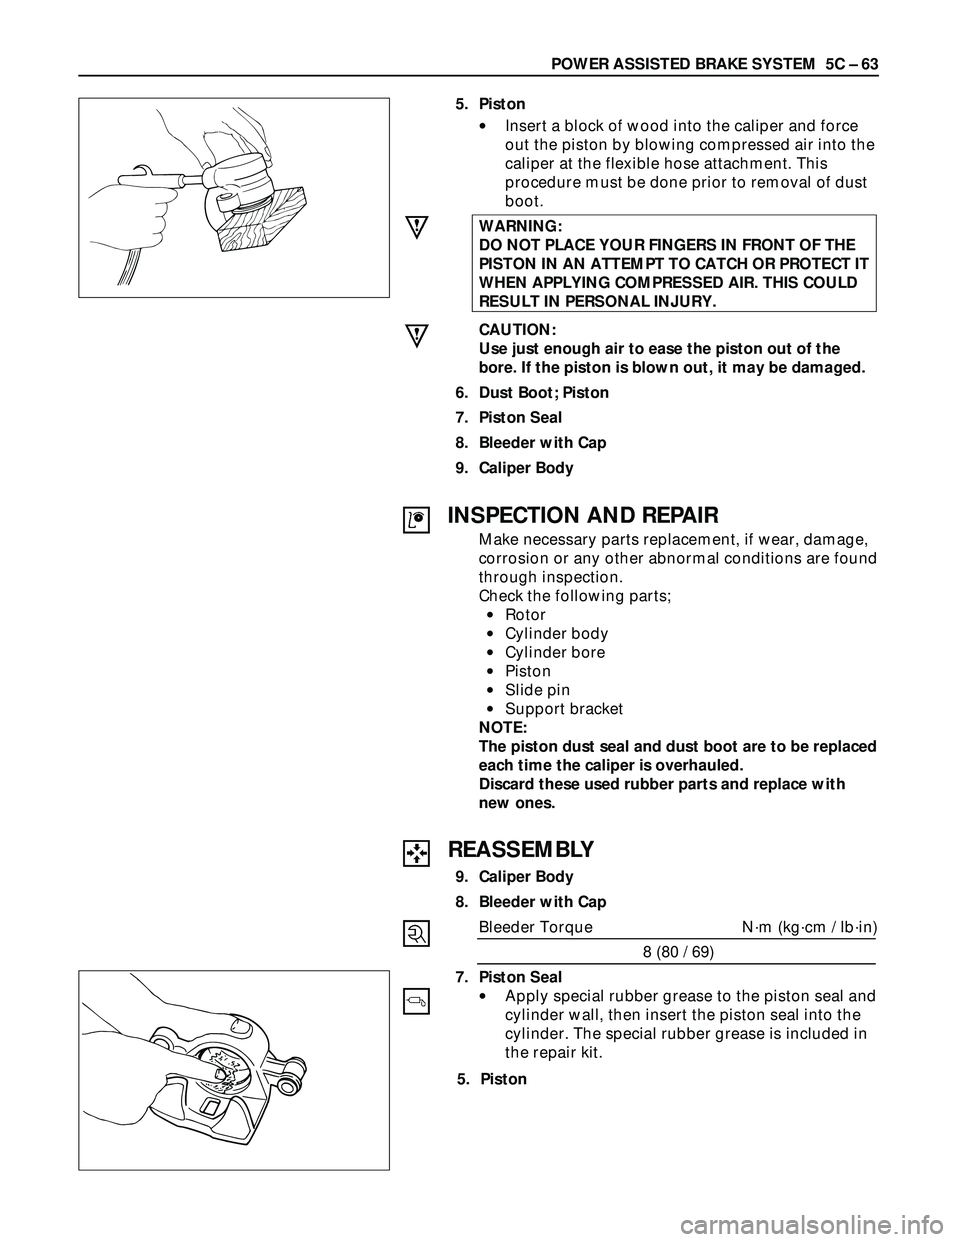
5. Piston
•Insert a block of wood into the caliper and force
out the piston by blowing compressed air into the
caliper at the flexible hose attachment. This
procedure must be done prior to removal of dust
boot.
WARNING:
DO NOT PLACE YOUR FINGERS IN FRONT OF THE
PISTON IN AN ATTEMPT TO CATCH OR PROTECT IT
WHEN APPLYING COMPRESSED AIR. THIS COULD
RESULT IN PERSONAL INJURY.
CAUTION:
Use just enough air to ease the piston out of the
bore. If the piston is blown out, it may be damaged.
6. Dust Boot; Piston
7. Piston Seal
8. Bleeder with Cap
9. Caliper Body
REASSEMBLY
9. Caliper Body
8. Bleeder with Cap
Bleeder Torque N·m (kg·cm / lb·in)
8 (80 / 69)
7. Piston Seal
•Apply special rubber grease to the piston seal and
cylinder wall, then insert the piston seal into the
cylinder. The special rubber grease is included in
the repair kit.
INSPECTION AND REPAIR
Make necessary parts replacement, if wear, damage,
corrosion or any other abnormal conditions are found
through inspection.
Check the following parts;
•Rotor
•Cylinder body
•Cylinder bore
•Piston
•Slide pin
•Support bracket
NOTE:
The piston dust seal and dust boot are to be replaced
each time the caliper is overhauled.
Discard these used rubber parts and replace with
new ones.
5. Piston
Page 942 of 3573
5C – 64 POWER ASSISTED BRAKE SYSTEM
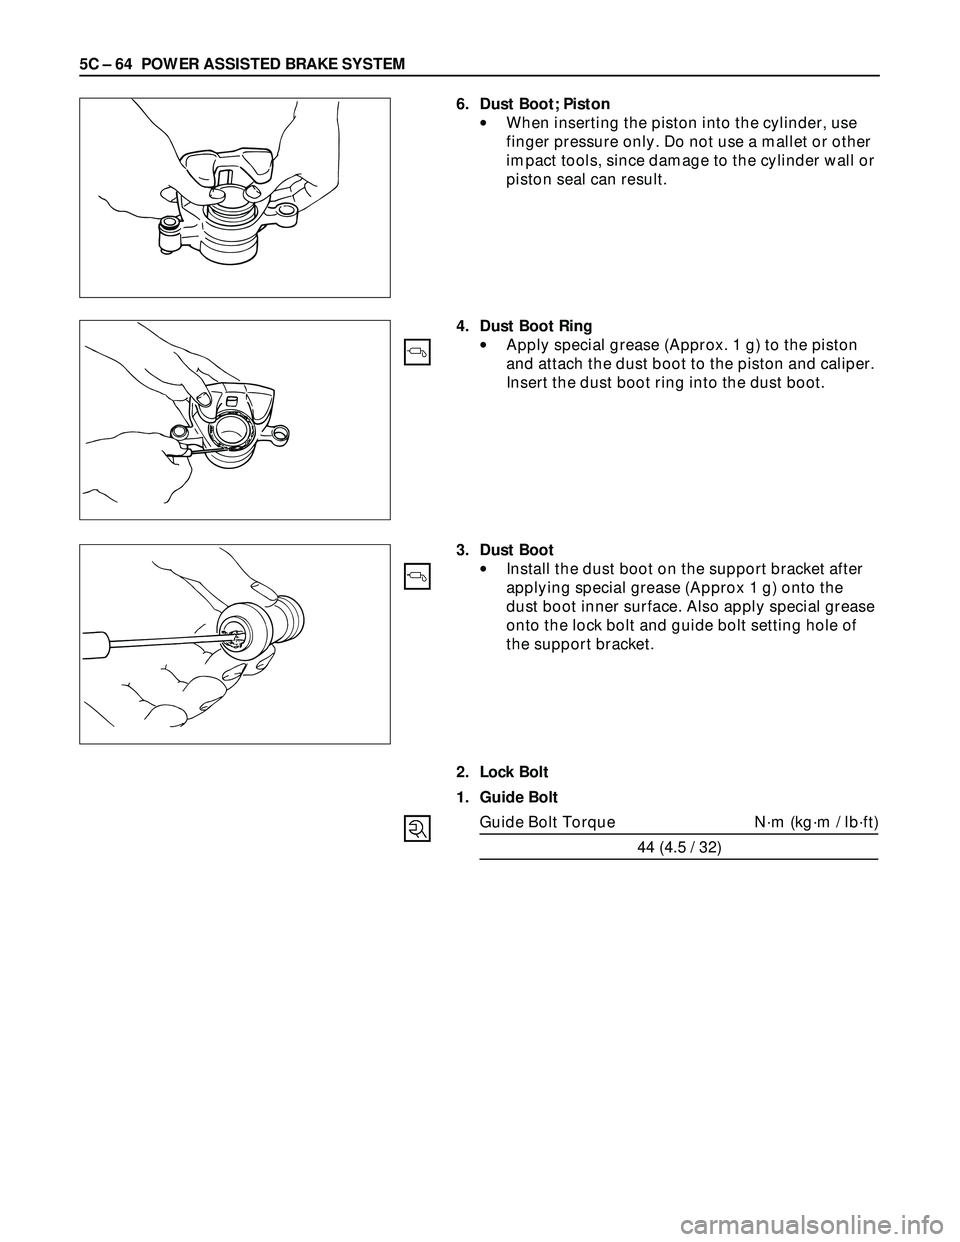
6. Dust Boot; Piston
•When inserting the piston into the cylinder, use
finger pressure only. Do not use a mallet or other
impact tools, since damage to the cylinder wall or
piston seal can result.
4. Dust Boot Ring
•Apply special grease (Approx. 1 g) to the piston
and attach the dust boot to the piston and caliper.
Insert the dust boot ring into the dust boot.
3. Dust Boot
•Install the dust boot on the support bracket after
applying special grease (Approx 1 g) onto the
dust boot inner surface. Also apply special grease
onto the lock bolt and guide bolt setting hole of
the support bracket.
2. Lock Bolt
1. Guide Bolt
Guide Bolt Torque N·m (kg·m / lb·ft)
44 (4.5 / 32)
Page 943 of 3573
POWER ASSISTED BRAKE SYSTEM 5C – 65
UNIT REPAIR
MASTER CYLINDER
The master cylinder is not repairable and must be
replaced as complete assembly if found defective.
INSPECTION
Excessive brake pedal travel, malfunction or dragging
brake suggests that the master cylinder is defective.
In such cases perform the following visual check.
Visual check
Make parts replacement as required if wear,
distortion, nicks, cuts, corrosion, or other abnormal
conditions are found through the following parts
inspection;
•Master cylinder body
•Fluid reservoir
•O-ring
Primary piston
FUNCTIONAL INSPECTION OF MASTER
CYLINDER PISTON
Push the primary piston with your fingers to check
that it travels smoothly. If the motion is questionable,
replace the master cylinder as a complete assembly.
FUNCTIONAL INSPECTION OF MASTER
CYLINDER
Inspect the master cylinder for function as follows. If
any abnormal function is found, replace with a new
one.
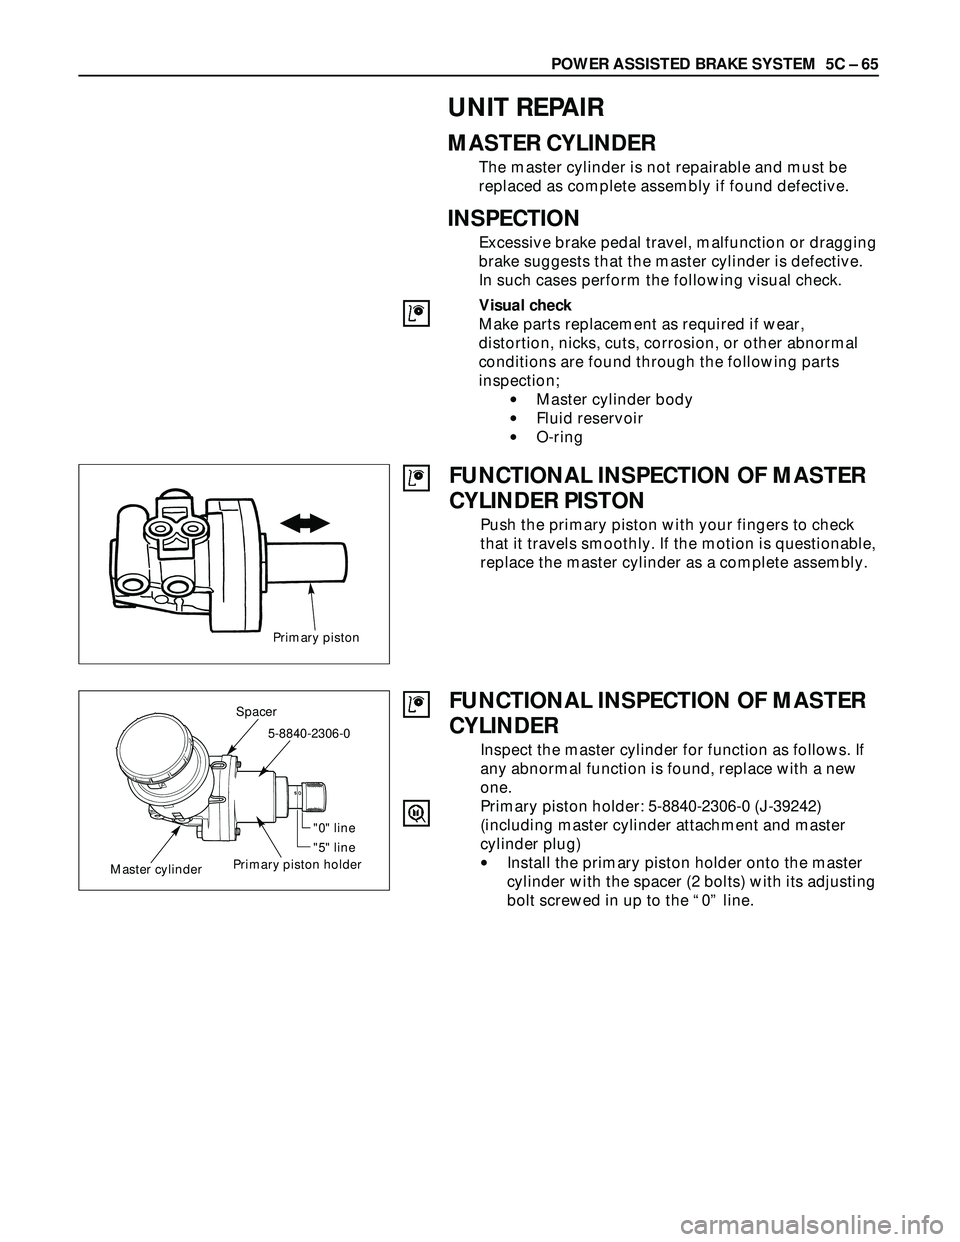
Primary piston holder: 5-8840-2306-0 (J-39242)
(including master cylinder attachment and master
cylinder plug)
•Install the primary piston holder onto the master
cylinder with the spacer (2 bolts) with its adjusting
bolt screwed in up to the “0” line.
Master cylinder
Spacer
5-8840-2306-0
Primary piston holder"0" line
"5" line
Page 944 of 3573
5C – 66 POWER ASSISTED BRAKE SYSTEM
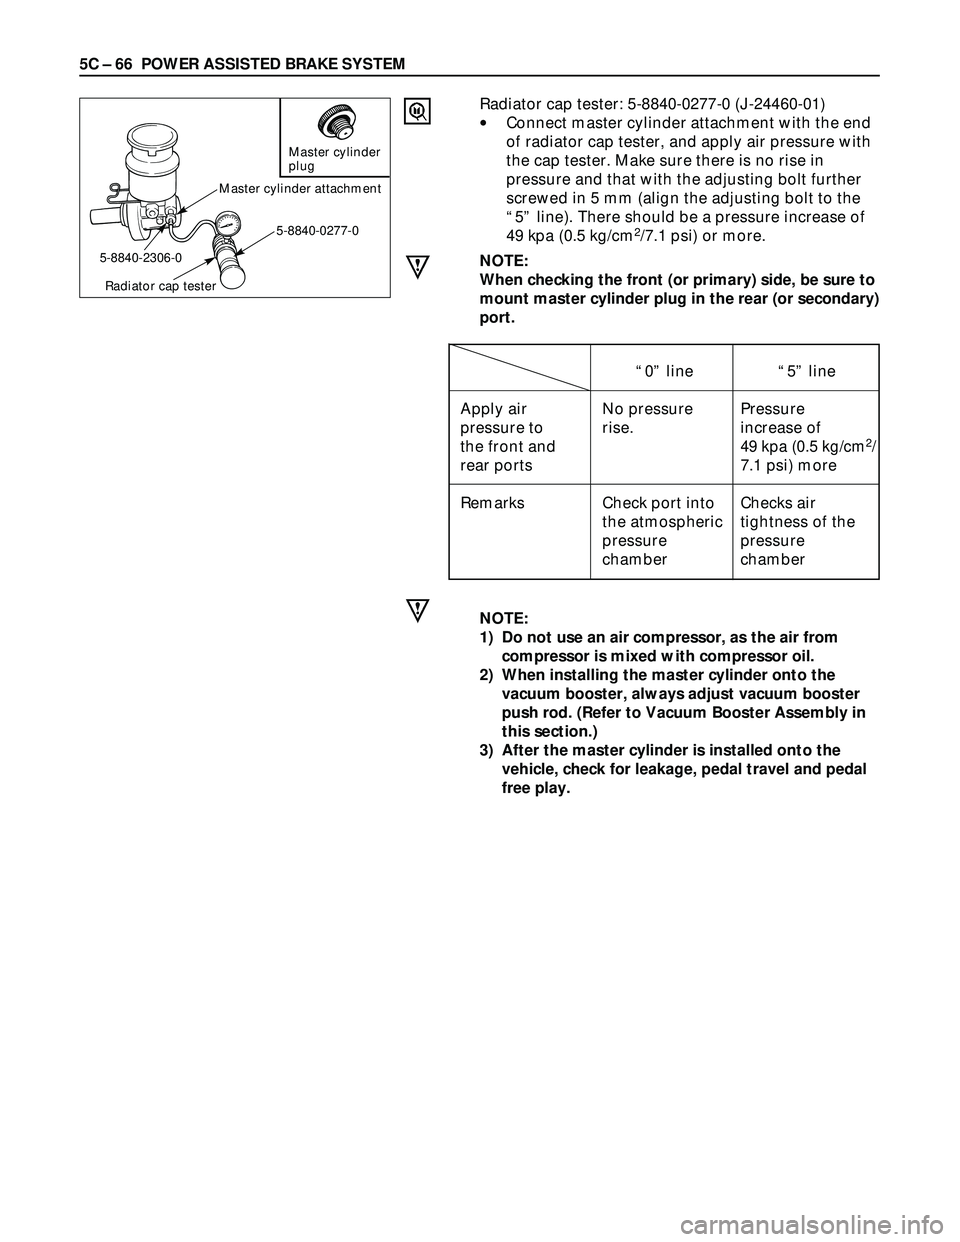
Radiator cap tester: 5-8840-0277-0 (J-24460-01)
•Connect master cylinder attachment with the end
of radiator cap tester, and apply air pressure with
the cap tester. Make sure there is no rise in
pressure and that with the adjusting bolt further
screwed in 5 mm (align the adjusting bolt to the
“5” line). There should be a pressure increase of
49 kpa (0.5 kg/cm
2/7.1 psi) or more.
NOTE:
When checking the front (or primary) side, be sure to
mount master cylinder plug in the rear (or secondary)
port.
NOTE:
1) Do not use an air compressor, as the air from
compressor is mixed with compressor oil.
2) When installing the master cylinder onto the
vacuum booster, always adjust vacuum booster
push rod. (Refer to Vacuum Booster Assembly in
this section.)
3) After the master cylinder is installed onto the
vehicle, check for leakage, pedal travel and pedal
free play.
Master cylinder
plug
Master cylinder attachment
5-8840-0277-0
Radiator cap tester
5-8840-2306-0
“0” line“5” line
Apply air No pressure Pressure
pressure to rise. increase of
the front and
49 kpa (0.5 kg/cm2/
rear ports 7.1 psi) more
Remarks Check port into Checks air
the atmospheric tightness of the
pressure pressure
chamber chamber
Page 945 of 3573
POWER ASSISTED BRAKE SYSTEM 5C – 67
VACUUM BOOSTER
•The vacuum booster cannot be disassembled for
repair. Replace a defective vacuum booster with a
new one.
Page 946 of 3573
PARKING BRAKES 5D Ð 1
SECTION 5D
PARKING BRAKES
CONTENTS
PAGE
Service Precaution .............................................................................................................5D- 1
Main Data and Specifications ........................................................................................... 5D- 2
Service Standard................................................................................................................ 5D- 2
Servicing ............................................................................................................................. 5D- 3
Fixing Torque ...................................................................................................................... 5D- 5
General Description ........................................................................................................... 5D- 6
On-Vehicle Service .............................................................................................................5D- 7
Parking Brake Lever Replacement ............................................................................... 5D- 7
Parking Brake Cable ...................................................................................................... 5D- 9
SERVICE PRECAUTION
WARNING:
IF SO EQUIPPED WITH A SUPPLEMENTAL RESTRAINT SYSTEM (SRS), REFER TO THE SRS COMPONENT
AND WIRING LOCATION VIEW IN ORDER TO DETERMINE WHETHER YOU ARE PERFORMING SERVICE ON
OR NEAR THE SRS COMPONENTS OR THE SRS WIRING. WHEN YOU ARE PERFORMING SERVICE ON OR
NEAR THE SRS COMPONENTS OR THE SRS WIRING, REFER TO THE SRS SERVICE INFORMATION.
FAILURE TO FOLLOW WARNINGS COULD RESULT IN POSSIBLE AIR BAG DEPLOYMENT, PERSONAL
INJURY, OR OTHERWISE UNNEEDED SRS SYSTEM REPAIRS.
CAUTION:
Always use the correct fastener in the proper location. When you replace a fastener, use ONLY the exact
part number for that application. ISUZU will call out those fasteners that require a replacement after
removal. ISUZU will also call out the fasteners that require thread lockers or thread sealant. UNLESS
OTHERWISE SPECIFIED, do not use supplemental coatings (Paints, greases, or other corrosion inhibitors)
on threaded fasteners or fastener joint interfaces. Generally, such coatings adversely affect the fastener
torque and the joint clamping force, and may damage the fastener. When you install fasteners, use the
correct tightening sequence and specification. Following these instructions can help you avoid damage to
parts and systems.
Page 947 of 3573
5D Ð 2 PARKING BRAKES
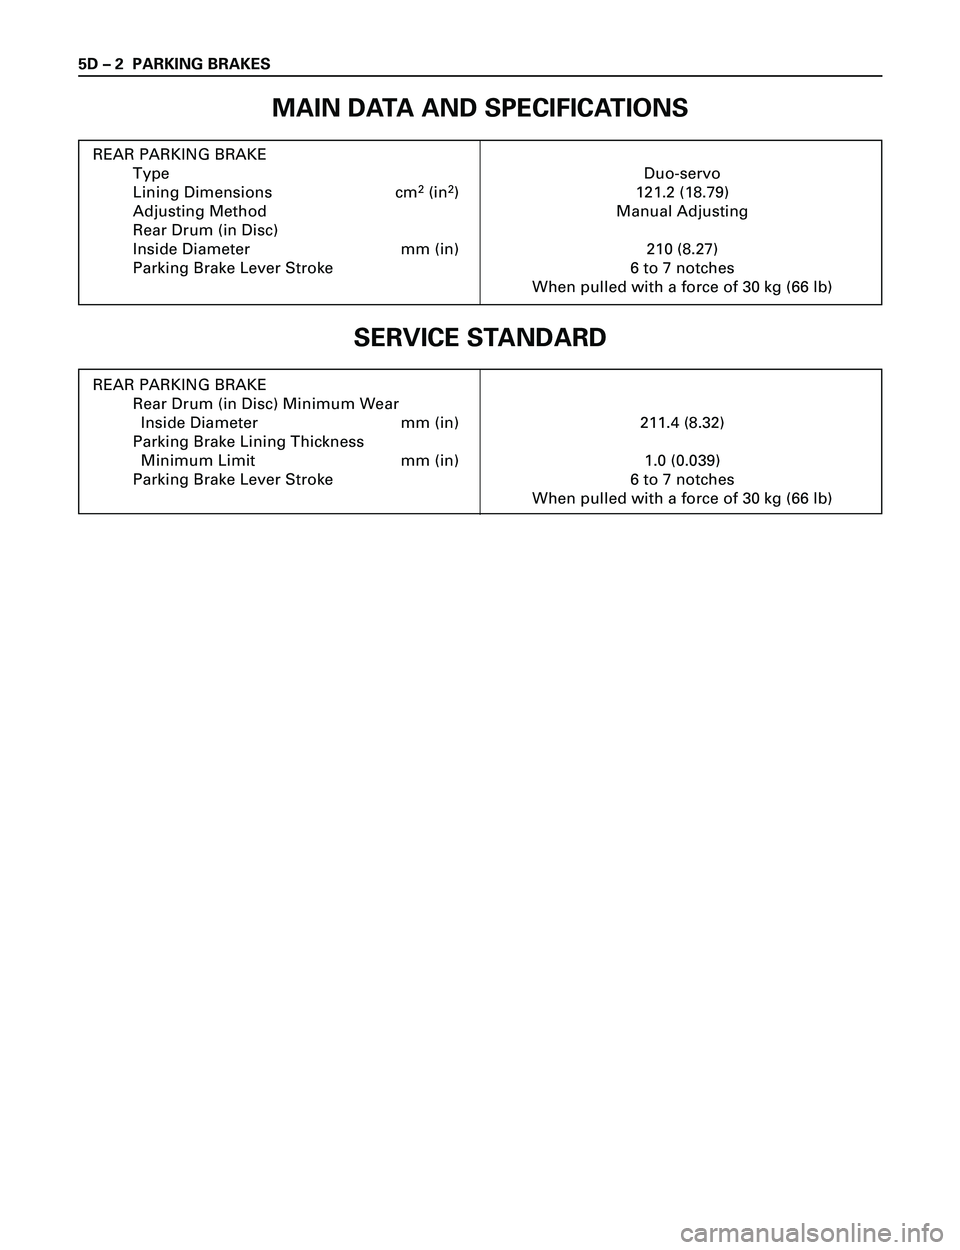
MAIN DATA AND SPECIFICATIONS
REAR PARKING BRAKE
Type Duo-servo
Lining Dimensions cm
2(in2) 121.2 (18.79)
Adjusting Method Manual Adjusting
Rear Drum (in Disc)
Inside Diameter mm (in) 210 (8.27)
Parking Brake Lever Stroke 6 to 7 notches
When pulled with a force of 30 kg (66 lb)
SERVICE STANDARD
REAR PARKING BRAKE
Rear Drum (in Disc) Minimum Wear
Inside Diameter mm (in) 211.4 (8.32)
Parking Brake Lining Thickness
Minimum Limit mm (in) 1.0 (0.039)
Parking Brake Lever Stroke 6 to 7 notches
When pulled with a force of 30 kg (66 lb)
Page 948 of 3573
PARKING BRAKES 5D Ð 3
REAR DRUM (IN DISC) INSIDE
DIAMETER CHECK
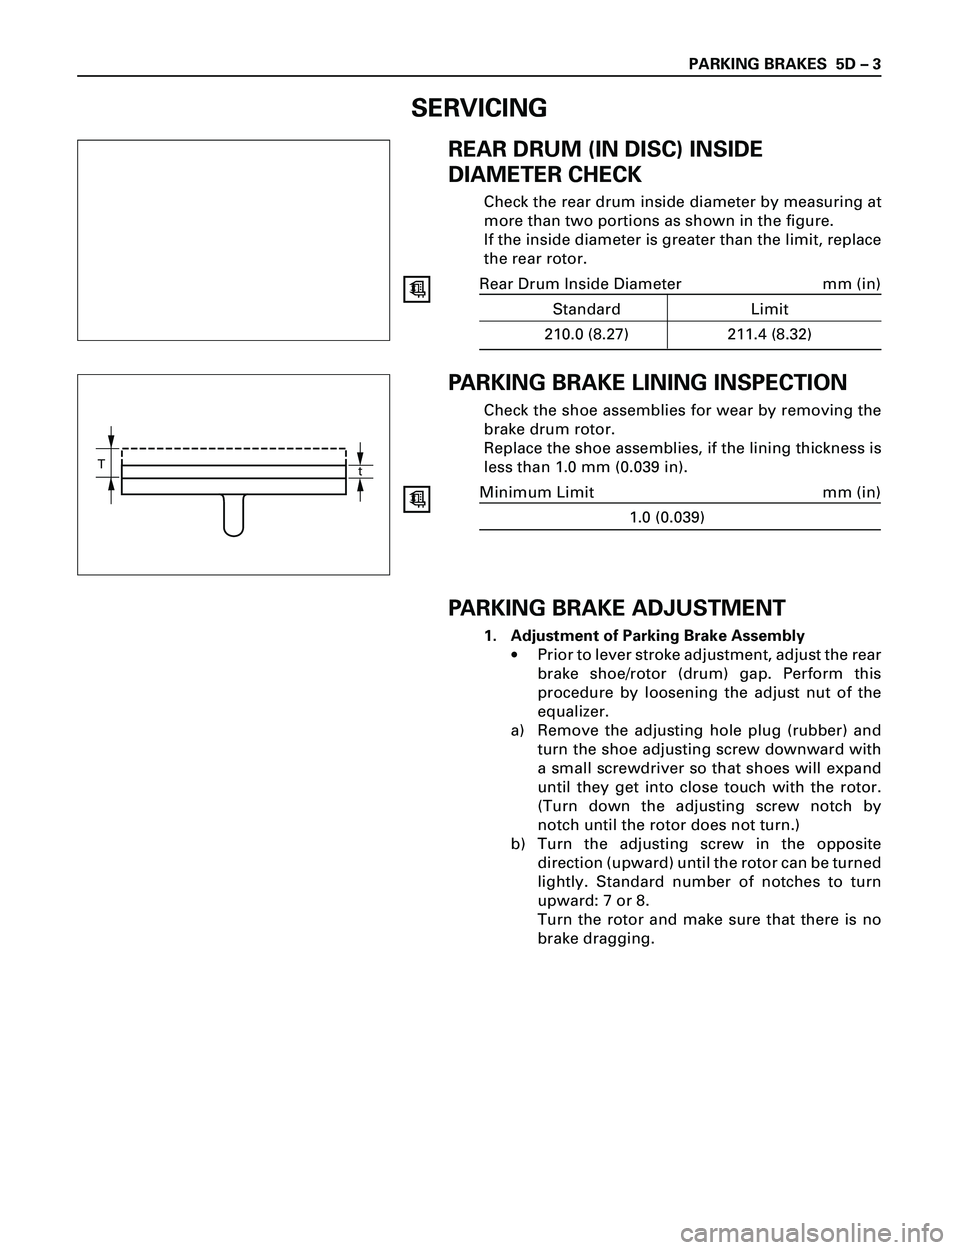
Check the rear drum inside diameter by measuring at
more than two portions as shown in the figure.
If the inside diameter is greater than the limit, replace
the rear rotor.
Rear Drum Inside Diameter mm (in)
Standard Limit
210.0 (8.27) 211.4 (8.32)
PARKING BRAKE LINING INSPECTION
Check the shoe assemblies for wear by removing the
brake drum rotor.
Replace the shoe assemblies, if the lining thickness is
less than 1.0 mm (0.039 in).
Minimum Limit mm (in)
1.0 (0.039)
PARKING BRAKE ADJUSTMENT
1. Adjustment of Parking Brake Assembly
·Prior to lever stroke adjustment, adjust the rear
brake shoe/rotor (drum) gap. Perform this
procedure by loosening the adjust nut of the
equalizer.
a) Remove the adjusting hole plug (rubber) and
turn the shoe adjusting screw downward with
a small screwdriver so that shoes will expand
until they get into close touch with the rotor.
(Turn down the adjusting screw notch by
notch until the rotor does not turn.)
b) Turn the adjusting screw in the opposite
direction (upward) until the rotor can be turned
lightly. Standard number of notches to turn
upward: 7 or 8.
Turn the rotor and make sure that there is no
brake dragging.
T
t
SERVICING
Page 949 of 3573
5D Ð 4 PARKING BRAKES
2. Adjustment of Parking Brake Cable
a) Turn the equalizer nut so that the parking
brake lever travels 6 or 7 notches when pulled
up with a force of 30 kg (66 lb).
b) Make sure there is no brake dragging and
tighten the cable lock nut.
Cable Lock Nut Torque Nám (kgácm/lbáin)
6 (60 / 52)
3. Break-in of Parking Brake Shoe
·When poor braking effect possibly resulting
from insufficient break-in is felt, or just after
replacement of parking brake shoe, be sure to
conduct break-in by driving vehicle as follows:
a) Forward 50 km/h (30 mph) x 400 m (About 30
seconds) with a lever pull force of 15 kg (33 lb),
and
b) Backward 10 km/h (6 mph) x 50 m (18 seconds)
with a lever pull force of 15kg (33 lb).
NOTE:
Break-in procedure must be performed under the
safety conditions and traffic rules.
·If braking effect still remains poor after the
above break-in, wait for some time until
parking brake shoe cools down and repeat the
procedures a) and b) notes above.
·On completion of break-in, inspect parking
brake lever stroke, and if the lever does not
come within the specified number of notches
when pulled up, readjust.
·Excessive break-in may cause premature wear
of the parking brake lining.
Page 950 of 3573
PARKING BRAKES 5D Ð 5
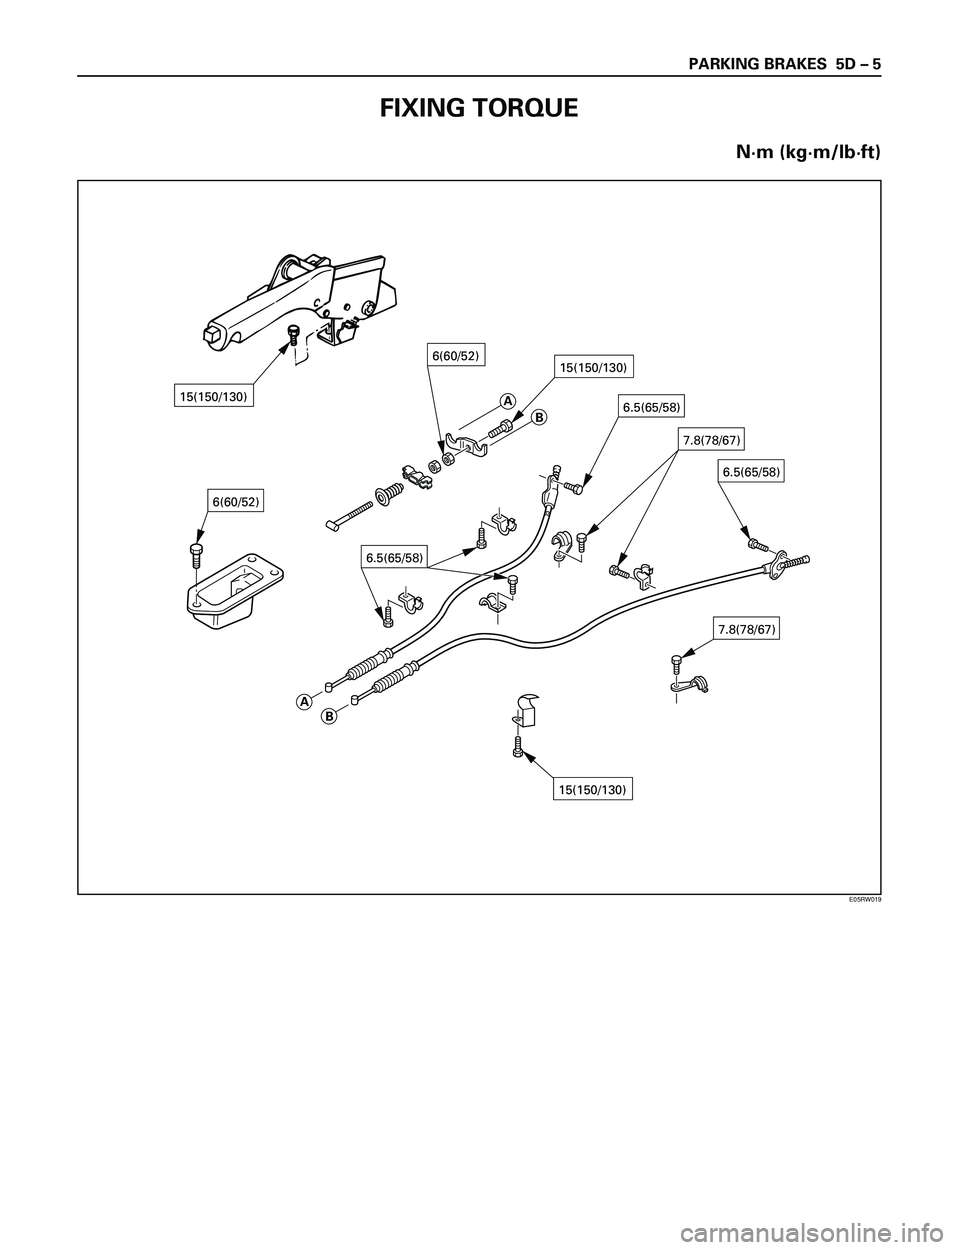
FIXING TORQUE
Nám (kgám/lbáft)
15(150/130)
6(60/52)
6.5(65/58)6.5(65/58)
6.5(65/58)
15(150/130)
6(60/52)15(150/130)
7.8(78/67)
7.8(78/67)
A
B
AB
E05RW019