speaker JAGUAR X308 1998 2.G Workshop Manual
[x] Cancel search | Manufacturer: JAGUAR, Model Year: 1998, Model line: X308, Model: JAGUAR X308 1998 2.GPages: 2490, PDF Size: 69.81 MB
Page 23 of 2490

В
В В В В В 413‐08:В Information В and В Message В Ce nter В
В В В В В В В В В В В В В В В В Descriptio
n
В and В Operation В
В В В В В В В В В В В В В В В В В В В В Information В and В Message В Center В
В В В В В В В В В В В В В В В В Diagnosis В and В Testing В
В В В В В В В В В В В В В В В В В В В В Information В and В Message В Center В
В В В В В В В В В В В В В В В В RemovalВ and В Installation В
В В В В В В В В В В В В В В В В В В В В MessageВ Center В Switch В (86.66.11) В
В
В В В В В В В В В В В В 413‐13: В ParkingВ AidВ
В В В В В В В В В В В В В В В В Description В and В Operation В
В В В В В В В В В В В В В В В В В В В В ParkingВ Aid В
В В В В В В В В В В В В В В В В Diagnosis В and В Testing В
В В В В В В В В В В В В В В В В В В В В ParkingВ Aid В
В В В В В В В В В В В В В В В В RemovalВ andВ Installation В
В В В В В В В В В В В В В В В В В В В В ParkingВ Aid В Module В (86.80.39) В
В В В В В В В В В В В В В В В В В В В В RearВ Parking В Aid В Sensor В (86.54.
14)В (86.62.01) В
В В В В В В В В В В В В В В В В В В В В RearВ Parking В Aid В Speaker В (86.54.19) В (86.62.02) В
В
В В В В В В В В 414: В Battery В and В Charging В System В
В
В В В В В В В В В В В В 414‐00: В Battery В and В ChargingВ System ‐ General В Information В
В В В В В В В В В В В В В В В В Description В and В Operation В
В В В В В В В В В В В В В В В В В В В В В В В В В В В В В В В В В В В В В В В В
В В В В В В В В В В В В В В В В В В В В В
В В В В В В В В В В В В 414
‐01:  Battery,  Mounting  and  Ca
bles В
В В В В В В В В В В В В В В В В Description
В and В Operation В
В В В В В В В В В В В В В В В В В В В В Battery
В and В Cables В
В В В В В В В В В В В В В В В В General
В Procedures В
В В В В В В В В В В В В В В В В В В В В Battery
В Connect В (86.15.15) В
В В В В В В В В В В В В В В В В Removal
В and В Installation В
В В В В В В В В В В В В В В В В В В В В Battery
В (86.15.01) В
В В В В В В В В В В В В В В В В В В В В Battery
В Ground В Cable В (86.15.19) В
В В В В В В В В В В В В В В В В В В В В Battery
В Positive В Cable В (86.15.17) В
В В В В В В В В В В В В В В В В В В В В Battery
В Retaining В Bracket В (86.15.12) В
Page 24 of 2490

В
В В В В В В В В В В В В В
В В В В В В В В В 414‐02: В Generator В and В Regulator В
В В В В В В В В В В В В В В В В Descriptio nВ and В Operati
on
В
В В В В В В В В В В В В В В В В В В В В GeneratorВ
В В В В В В В В В В В В В В В В Diagnosis В and В Testing В
В В В В В В В В В В В В В В В В В В В В GeneratorВ
В В В В В В В В В В В В В В В В RemovalВ and В Installation В
В В В В В В В В В В В В В В В В В В В В GeneratorВ (86.10.02)  ‐ 3.2L В NA В V8  ‐ AJ26/4.0L В NA В V8  ‐ AJ27 В
В В В В В В В В В В В В В В В В В В В В GeneratorВ (86.10.02)  ‐ 4.0L В SCВ V8 ‐ AJ26 В
В В В В В В В В В В В В В В В В В В В В VoltageВ Regulator В (86.10.28) В
В
В В В В В В В В 415: В Information В and В Entertainment В Systems В
В
В В В В В В В В В В В В 415‐01: В Audio В Unit В
В В В В В В В В В В В В В В В В Description В and В Operati
onВ
В В В В В В В В В В В В В В В В В В В В AudioВ System В
В В В В В В В В В В В В В В В В Diagnosis В and В Testing В
В В В В В В В В В В В В В В В В В В В В AudioВ System В
В В В В В В В В В В В В В В В В RemovalВ and В Installation В
В В В В В В В В В В В В В В В В В В В В CapacitorВ (86.10.33) В
В
В В В В В В В В В В В В 415‐02: В Antenna В
В В В В В В В В В В В В В В В В Description В and В Operation В
В В В В В В В В В В В В В В В В В В В В AntennaВ
В В В В В В В В В В В В В В В В Diagnosis В and В Testing В
В В В В В В В В В В В В В В В В В В В В AntennaВ
В
В В В В В В В В В В В В 415‐03: В Speakers В
В В В В В В В В В В В В В В В В Description В and В Operation В
В В В В В В В В В В В В В В В В В В В В SpeakersВ
В В В В В В В В В В В В В В В В Diagnosis В and В Testing В
В В В В В В В В В В В В В В В В В В В В SpeakersВ
В В В В В В В В В В В В В В В В RemovalВ and В Installation В
                    A‐Pillar T
weeter В Speaker В LH В
В В В В В В В В В В В В В В В В В В В В A‐PillarВ Tweeter В Speaker В RH В (86.50.65) В
В В В В В В В В В В В В В В В В В В В В DoorВ Speaker В (86.50.13) В
Page 25 of 2490

В В В В В В В В В В В В В В В В В В В В RearВ Door В Speaker В (86.50.14) В
В В В В В В В В В В В В В В В В В В В В RearВ Door В Tweeter В Speaker В (86.50.62) В
В В В В В В В В В В В В В В В В В В В В Subwoofer
В
Speaker В (86.51.05) В
В
В В В В В В В В 417: В Lighting В
В
В В В В В В В В В В В В 417‐01: В Exterior В Lighting В
В В В В В В В В В В В В В В В В Specification В
В В В В В В В В В В В В В В В В Description В and В Operation В
В В В В В В В В В В В В В В В В В В В В ExteriorВ Lighting В
В В В В В В В В В В В В В В В В Diagnosis В and В Testing В
В В В В В В В В В В В В В В В В В В В В ExteriorВ Lighting В
В В В В В В В В В В В В В В В В RemovalВ and В Installation В
В В В В В В В В В В В В В В В В В В В В BrakeВ Pedal В Position В (BPP) В Switch В
В В В В В В В В В В В В В В В В В В В В FogВ Lamp В Switch В (86.65.10) В
В В В В В В В В В В В В В В В В В В В В FrontВ Fog В Lamp В (86.
40.96) В
В В В В В В В В В В В В В В В В В В В В FrontВ Fog В Lamp В Bulb В (86.40.94) В
В В В В В В В В В В В В В В В В В В В В FrontВ Side В Marker В Lamp В (86.40.59) В
В В В В В В В В В В В В В В В В В В В В FrontВ Side В Marker В Lamp В Bulb В (86.40.58) В
В В В В В В В В В В В В В В В В В В В В FrontВ Turn В SignalВ LampВ Bulb В (86.40.41) В
В В В В В В В В В В В В В В В В В В В В HeadlampВ AssemblyВ (86.41.33) В
В В В В В В В В В В В В В В В В В В В В HeadlampВ LevelingВ Motor В (86.42.04) В
В В В В В В В В В В В В В В В В В В В В HighВ Beam В Headlamp В (86.41.34) В
В В В В В В В В В В В В В В В В В В В В HighВ Beam В Headlamp В Bulb В (86.40.12) В
В В В В В В В В В В В В В В В В В В В В HighВ MountedВ StoplampВ (86.41.01) В (86.41.32) В
В В В В В В В В В В В В В В В В В В В В HighВ Mo
untedВ StoplampВ BulbВ (86.41.02) В
В В В В В В В В В В В В В В В В В В В В LicenseВ Plate В Lamp В (86.40.86) В
В В В В В В В В В В В В В В В В В В В В LicenseВ Plate В Lamp В Bulb В (86.40.85) В
В В В В В В В В В В В В В В В В В В В В LowВ Beam В Headlamp В (86.41.35)  ‐ VehiclesВ Without: В HeadlampВ LevelingВ
В В В В В В В В В В В В В В В В В В В В LowВ Beam В Headlamp В (86.41.35)  ‐ VehiclesВ With:В Headlamp В Leveling В
В В В В В В В В В В В В В В В В В В В В LowВ Beam В Headlamp В Bulb В (86.40.08) В
В В В В В В В В В В В В В В В В В В В В RearВ Lamp В Assembly В (86.40.70) В
В В В В В В В В В В В В В В В В В В В В RearВ Lamp В Assembly В Bulb В (86.40.73) В
В В В В В В В В В В В В В В В В В В В В RearВ Side В Marker В La
mp В (86.41.08) В
В В В В В В В В В В В В В В В В В В В В RearВ Side В Marker В LampВ BulbВ (86.41.07) В
В В В В В В В В В В В В В В В В В В В В SideВ Lamp В Bulb В (86.40.27) В
В В В В В В В В В В В В В В В В В В В В SideВ Lamp/Front В TurnВ Signal В LampВ (86.40.39) В
Page 1869 of 2490
The functi
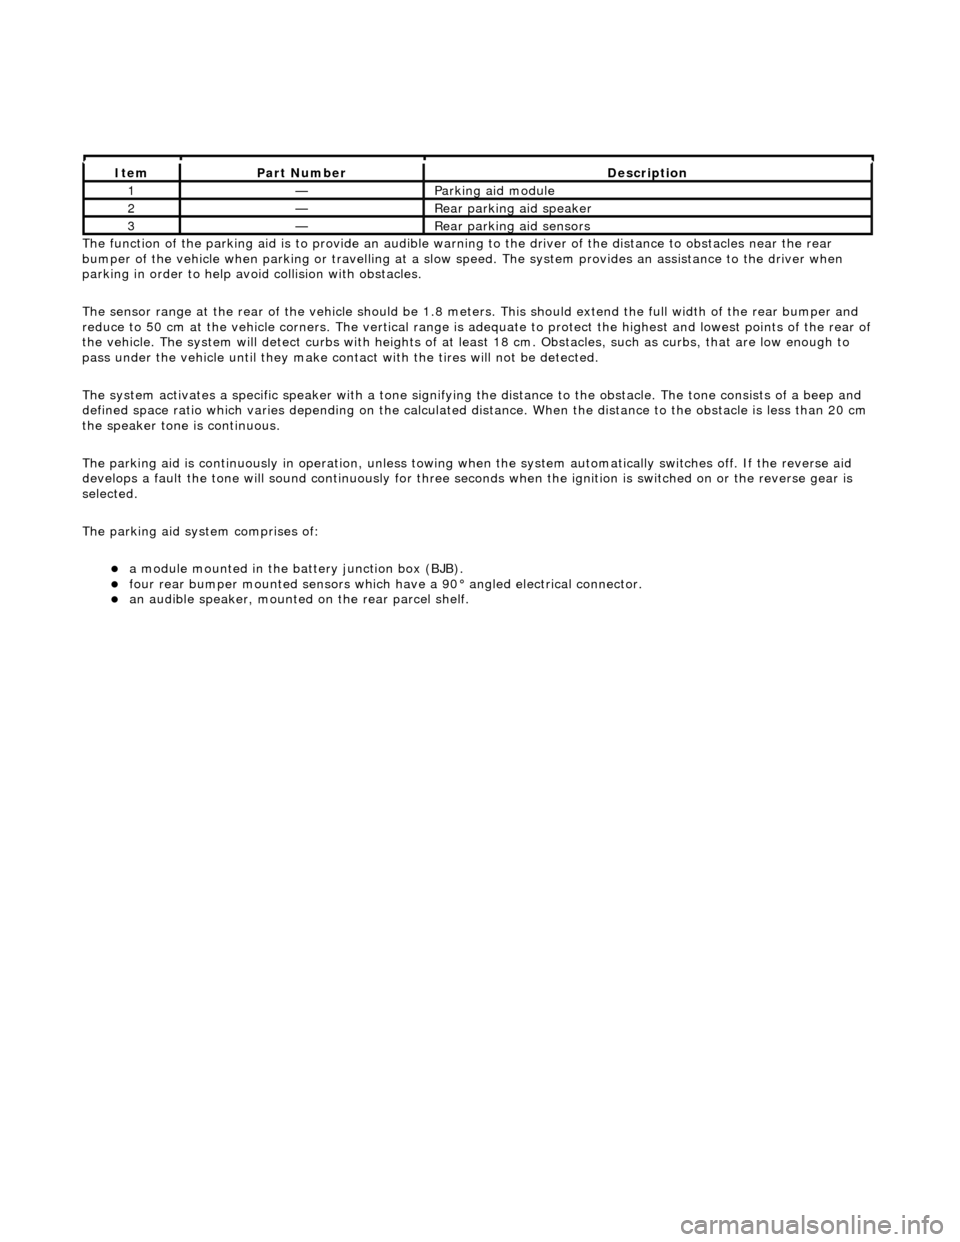
on of the parking aid is to prov
ide an audible warning to the driver of the distance to obstacles near the rear
bumper of the vehicle when parking or travelling at a slow sp eed. The system provides an assistance to the driver when
parking in order to help avoid collision with obstacles.
The sensor range at the rear of the vehicl e should be 1.8 meters. This should extend the full width of the rear bumper and
reduce to 50 cm at the vehicle co rners. The vertical range is adequate to protec t the highest and lowest points of the rear of
the vehicle. The system will detect curbs with heights of at least 18 cm. Obstacles, such as curbs, that are low enough to
pass under the vehicle until they make contact with the tires will not be detected.
The system activates a specific speaker with a tone signifying the distance to the obstacle. The tone consists of a beep and
defined space ratio which varies depending on the calculated distance. When the distance to the obstacle is less than 20 cm
the speaker tone is continuous.
The parking aid is continuously in operation, unless towing wh en the system automatically switches off. If the reverse aid
develops a fault the tone will sound continuously for three seconds when the igni tion is switched on or the reverse gear is
selected.
The parking aid system comprises of:
пЃ¬a
module mounted in the batte
ry junction box (BJB).
пЃ¬fou
r rear bumper mounted sensors which have a 90В° angled electrical connector.
пЃ¬an audible speaker, moun
ted on
the rear parcel shelf.
It
em
Par
t Number
De
scription
1—Parkin
g aid module
2—Rear
parking aid speaker
3—Rear
parking aid sensors
Page 1870 of 2490
Parking Aid - Parking Aid
Diagnosis and Testing
Inspection and Verification
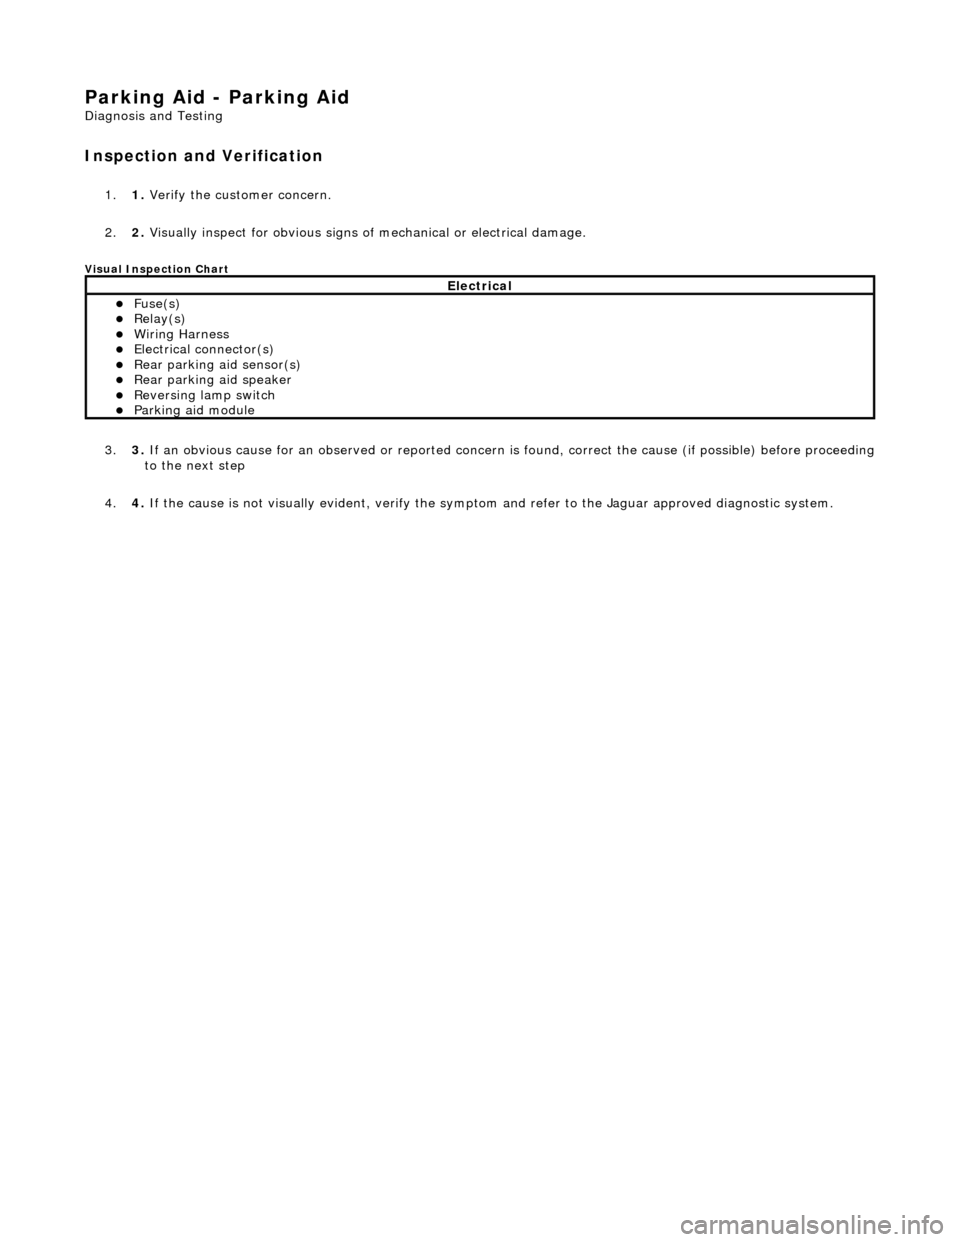
1.1. Verify the customer concern.
2. 2. Visually inspect for obvious signs of mechanical or electrical damage.
Visual Inspection Chart
3. 3. If an obvious cause for an observed or reported concern is found, correct the cause (if possible) before proceeding to the next step
4. 4. If the cause is not visually evident, verify the sympto m and refer to the Jaguar approved diagnostic system.
Electrical
пЃ¬Fuse(s) пЃ¬Relay(s) пЃ¬Wiring Harness пЃ¬Electrical connector(s) пЃ¬Rear parking aid sensor(s) пЃ¬Rear parking aid speaker пЃ¬Reversing lamp switch пЃ¬Parking aid module
Page 1874 of 2490

Parking Aid - Rear Parking Aid Speaker
Removal and Installation
Removal
Installation
1.
Remove the parcel shelf.
For additional information, refer to: Parcel Shelf
(501-05
Interior Trim and Ornamentatio n, Removal and Installation).
2. Reposition the sound insulation.
3. Disconnect the electrical connector.
4. Remove the rear parking aid speaker.
1. To install, reverse the removal procedure.
Page 1904 of 2490
Audio Unit - Audio System
Description and Operation
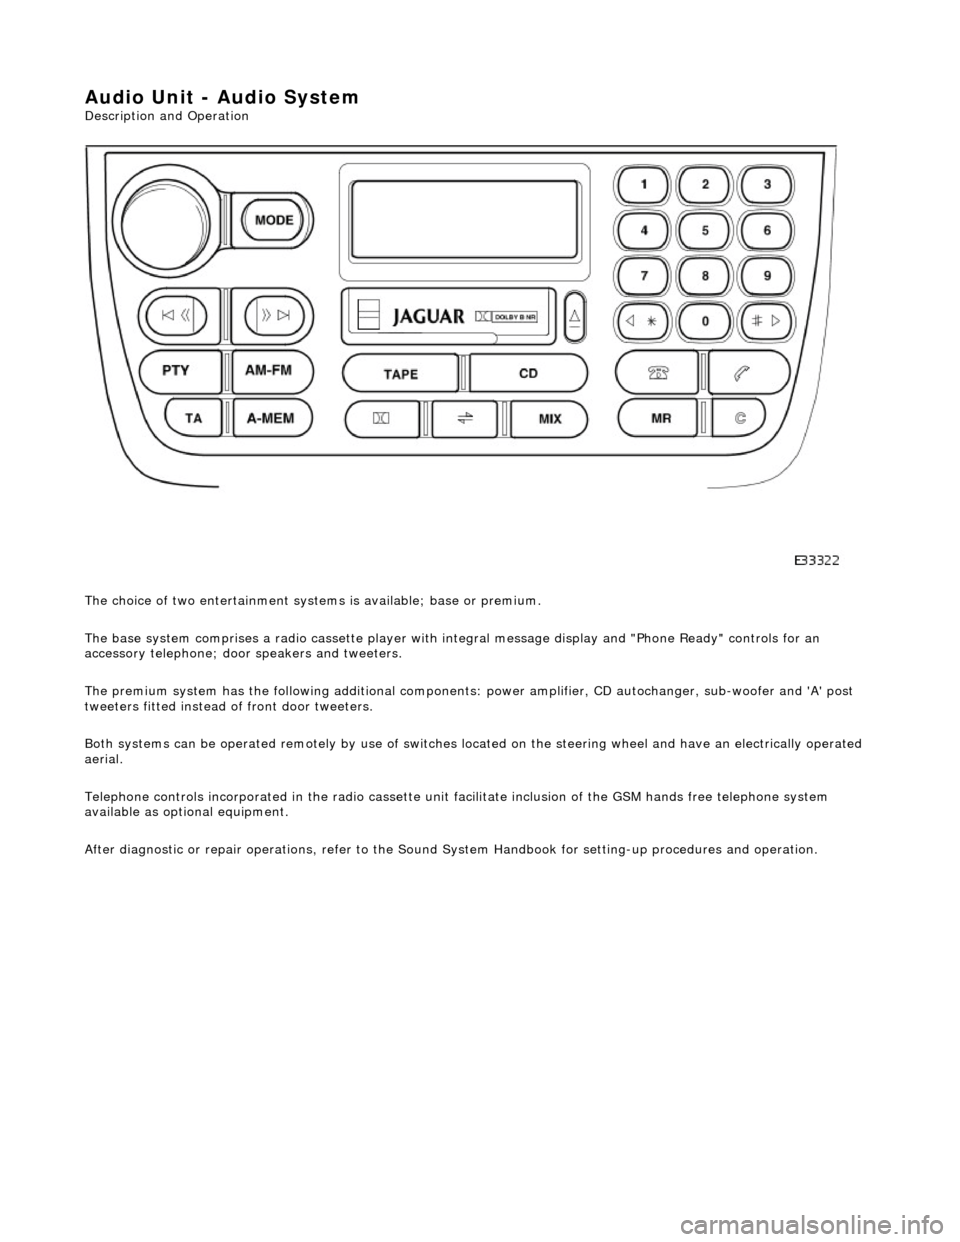
The choice of two entertainment system s is available; base or premium.
The base system comprises a radio cassette player with in tegral message display and "Phone Ready" controls for an
accessory telephone; door speakers and tweeters.
The premium system has the following additional components: power amplifier, CD autochanger, sub-woofer and 'A' post
tweeters fitted instead of front door tweeters.
Both systems can be operated remotely by use of switches loca ted on the steering wheel and have an electrically operated
aerial.
Telephone controls incorporated in the ra dio cassette unit facilitate inclusion of the GSM hands free telephone system
available as optional equipment.
After diagnostic or repair operations, refer to the Sound System Handbook for setting-up procedures and operation.
Page 1906 of 2490
Audio Unit - Audio System
Diagnosis and Testing
Tests Using the Portable Diagnostic Unit
Refer to PDU User Guide
The PDU is unable to diagnose radio head, CD autochanger or amplifier faults; there are no self-diagnostics associated with
these components.
PDU is able to test the speakers and the antenna, along with associated wiring and connections, therefore by a process of
elimination, the other components can be diagnosed.
Page 1910 of 2490

Speakers - Speakers
Description and Operation
Speaker Location
Parts List
ItemPart NumberDescription
1—Door Speaker
2—Front Door Tweeter (Base System)
3—Rear Door Tweeter
4—CD Autochanger (P remium System)
5—Amplifier (Premium System)
6—Sub-woofer (Premium System)
7—'A' Post Tweeter (Premium System)
Page 1911 of 2490

Speakers - Speakers
Diagnosis and Testing
Tests Using the Portable Diagnostic Unit
Refer to PDU User Guide
PDU can test for correct operation of each speaker and can provide fault guidance for any that fail to function.
PDU can indicate problems such as a faulty radio head output power signal, faulty power amplifier (where fitted), faulty
wiring, loss of power due to a blown fuse.