bonnet JAGUAR X308 1998 2.G User Guide
[x] Cancel search | Manufacturer: JAGUAR, Model Year: 1998, Model line: X308, Model: JAGUAR X308 1998 2.GPages: 2490, PDF Size: 69.81 MB
Page 923 of 2490

be 'hun
g up' within the engine because it is not up to operating
temperature.
Should the oil level subsequently be topped-up, the level could
become too high, causing oil burning.
Typically, 0.875L is hung up.
Refill the engine with the correct specification engine oil.
58. Refill the automatic transmission. Refer to Section 307-01A,
Operation 44.24. 02.
59. Refill and bleed the power stee ring system. Refer to Section
211-02 General Procedures.
60. Repressurise the air conditioni ng system. Refer to Operation
82.30.30 and note all Wa rnings and Cautions.
61
.
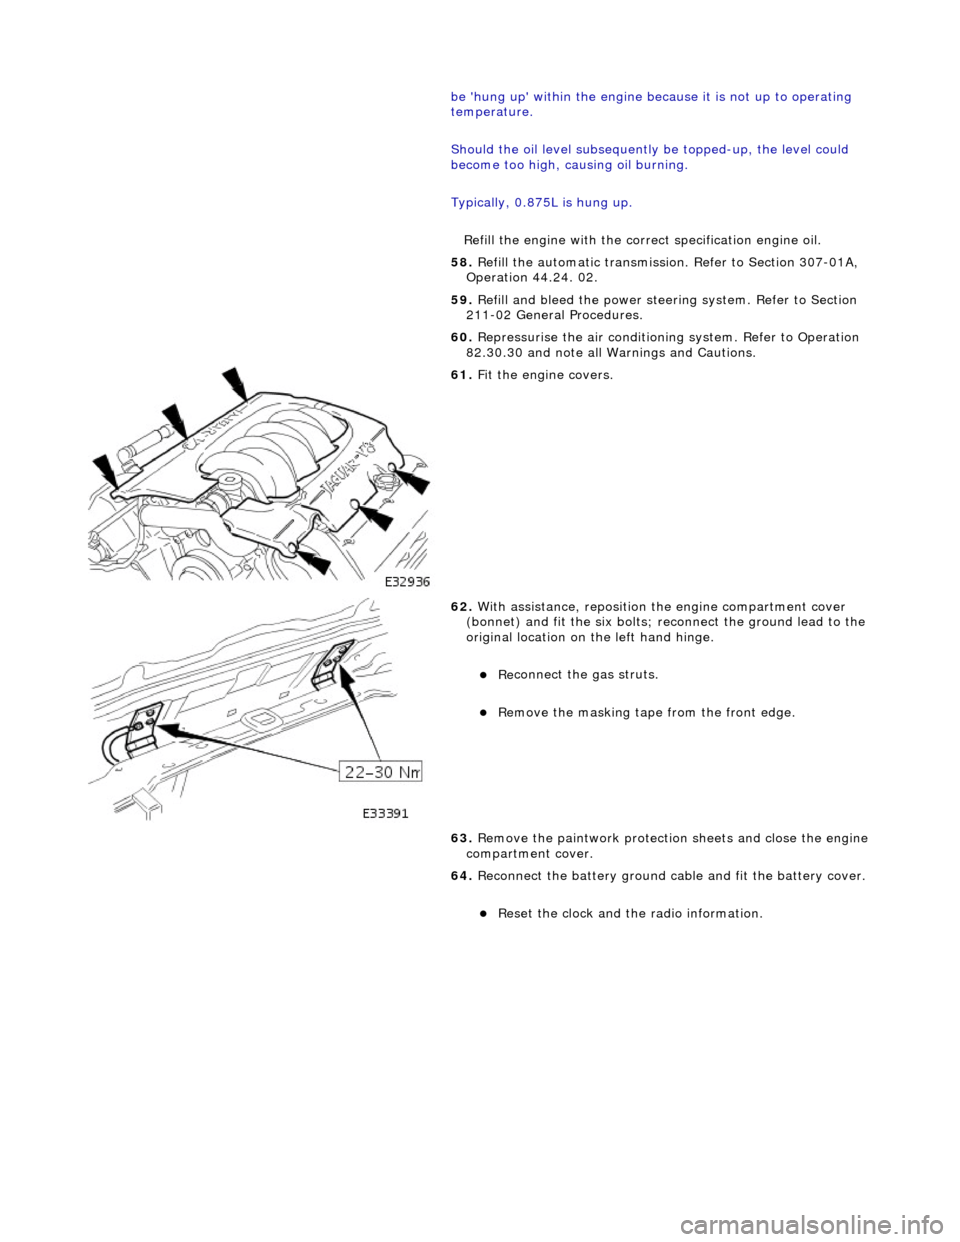
Fit the engine covers.
62
.
With assistance, reposition the engine compartment cover
(bonnet) and fit the si x bolts; reconnect the ground lead to the
original location on the left hand hinge.
Re
connect the gas struts.
R
emove the masking tape from the front edge.
63. Remove the paintwork protection sheets and close the engine
compartment cover.
64. Reconnect the battery ground cable and fit the battery cover.
Re
set the clock and the radio information.
Page 975 of 2490

3
. Fit blanking plugs to the
hose and to the condenser.
14
.
Disconnect the condenser jump hose from the receiver /
drier.
1. Remove the bolt which secures the condenser jump hose and discon nect the hose.
2. Remove and discard the O-ring seal from the hose.
3. Fit blanking plugs to the hose and to the receiver / drier.
15
.
Remove the radiator top retaining panel.
1. Remove the panel.
2. Remove the radiator top mounting bushes.
16. Disconnect the bonnet switch harness.
17
.
Remove the radiator.
R
emove the radiator assembly.
Cl
ean coolant spillage from the radiator lower carrier
panel.
18. Remove the condenser from the radiator.
1. Remove the two bolts which secure the condenser to the radiator.
2. Remove the condenser.
If
necessary, remove the jump
hose from the condenser.
Page 982 of 2490

3.
Fit blanking plugs to the
hose and to the condenser.
14 . Di
sconnect the condenser jump
hose from the receiver /
drier.
1. Remove the bolt which secures the condenser jump hose and discon nect the hose.
2. Remove and discard the O-ring seal from the hose.
3. Fit blanking plugs to the hose and to the receiver / drier.
15 . Remove the
radiator top retaining panel.
1. Remove the panel.
2. Remove the radiator top mounting bushes.
16. Disconnect the bonnet switch harness.
17. R
emove the radiator.
Re
move the radiator assembly.
Cl
ean coolant spil
lage from the radiator lower carrier
panel.
18. Remove the condenser from the radiator.
1. Remove the two bolts which secure the condenser to the radiator.
2. Remove the condenser.
If necessary, remove the jump hose from the
condenser.
Page 1985 of 2490

Module Communications Network - Front Auxiliary Junction Box
Removal and Installation
Removal
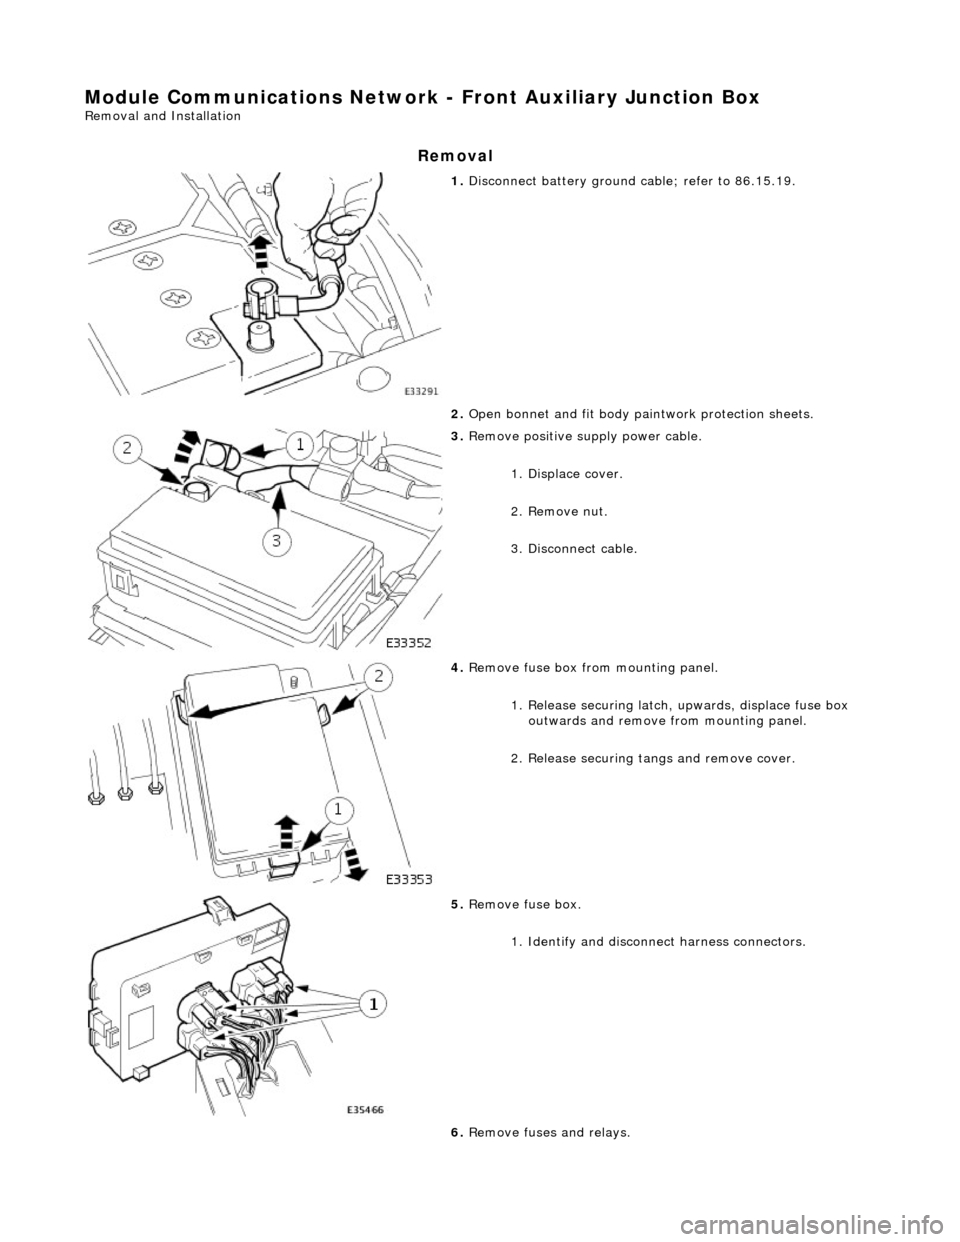
1. Disconnect battery ground cable; refer to 86.15.19.
2. Open bonnet and fit body pa intwork protection sheets.
3. Remove positive supply power cable.
1. Displace cover.
2. Remove nut.
3. Disconnect cable.
4. Remove fuse box fro m mounting panel.
1. Release securing latch, upwards, displace fuse box
outwards and remove from mounting panel.
2. Release securing tangs and remove cover.
5. Remove fuse box.
1. Identify and disconne ct harness connectors.
6. Remove fuses and relays.
Page 1987 of 2490

Module Communications Network - Rear Auxiliary Junction Box
Removal and Installation
Removal
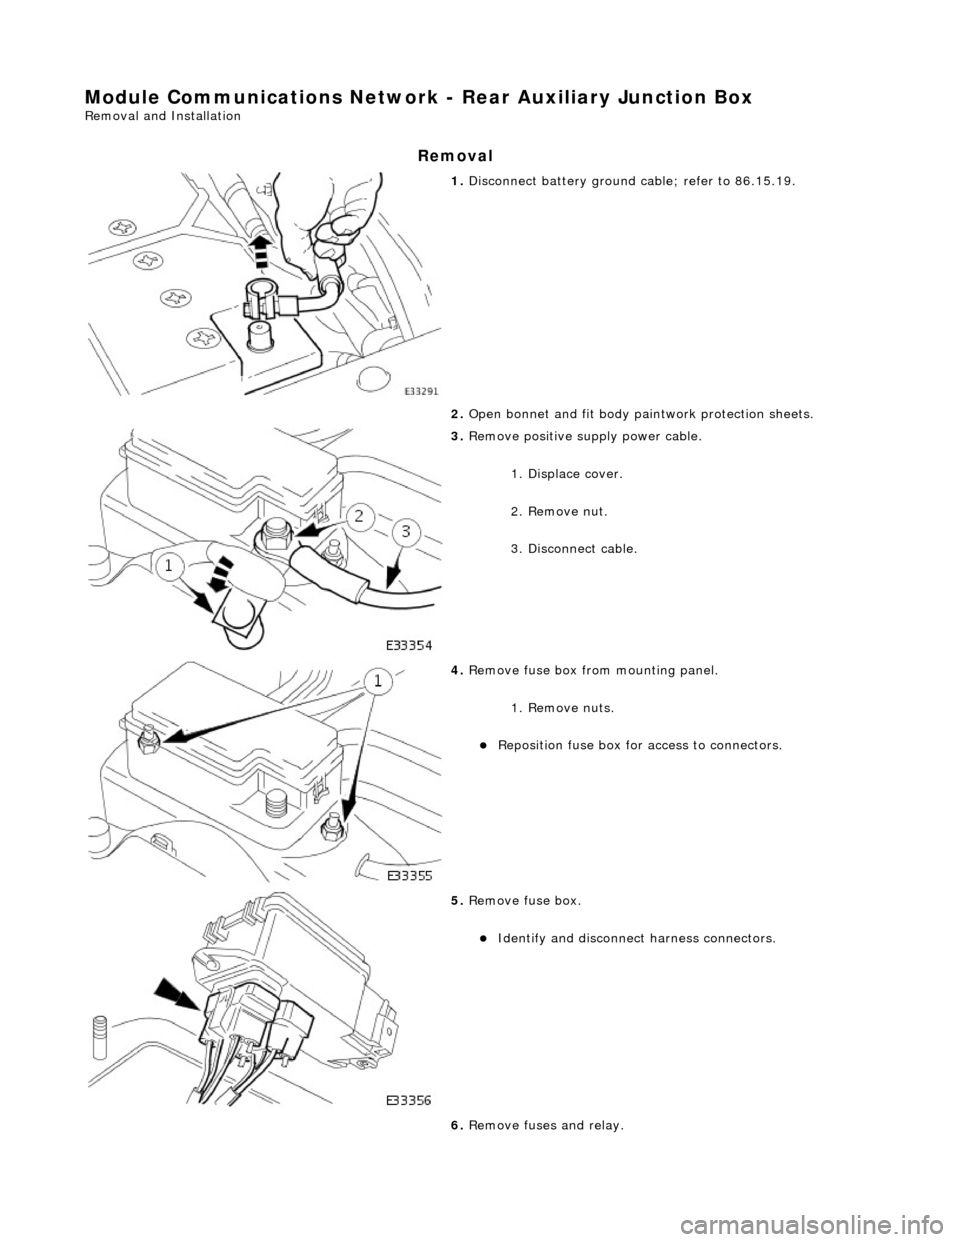
1. Disconnect battery ground cable; refer to 86.15.19.
2. Open bonnet and fit body pa intwork protection sheets.
3. Remove positive supply power cable.
1. Displace cover.
2. Remove nut.
3. Disconnect cable.
4. Remove fuse box fro m mounting panel.
1. Remove nuts.
Reposition fuse box for access to connectors.
5. Remove fuse box.
Identify and disconnect harness connectors.
6. Remove fuses and relay.