lock JAGUAR XJ 2004 X350 / 3.G Owner's Guide
[x] Cancel search | Manufacturer: JAGUAR, Model Year: 2004, Model line: XJ, Model: JAGUAR XJ 2004 X350 / 3.GPages: 227, PDF Size: 4.22 MB
Page 52 of 227

Before Driving 3 - 13
Inertia reel mechanism check
Static test: Whilst seated, fasten the seat
belt and grip the shoulder belt at
approximately shoulder level with the
opposite hand. Pull the belt sharply
downwards, the belt should lock.
Road test: The following road test must
be carried out only under maximum safe
road conditions.
With the seat belt correctly fitted to the
driver and passenger(s), drive the vehicle
at 5 mph (8 km/h) and, ensuring that it is
safe to do so, brake sharply.
The seat belt(s) should lock automatically,
holding both driver and passenger(s)
securely in position.
It is important when braking that the
reactions of both driver and passenger(s)
are normal, that is, the body must not be
thrown forward in anticipation, thus
causing a snatching action of the belt
which would operate the locking
mechanism.
If the belt fails to lock on either test,
consult a Jaguar Retailer.
!WARNING:
1. Seat belts are designed to bear upon the bony structure of the
body. The lap section of the belt
must be worn low across the front
of the pelvis and NOT across the
abdominal area. Always ensure
that the webbing is midway
between the neck and the edge of
the shoulder.
2. Care should be taken to avoid contamination of the webbing
with polishes, oils and chemicals,
and particularly battery acid.
Cleaning may safely be carried out
using mild soap and water.
If webbing becomes frayed,
contaminated or damaged,
discard it and fit a new seat belt.
3. It is essential to renew the entire assembly after it has been worn in
a severe impact even if damage to
the assembly is not obvious. 4. Belts should not be worn with the
webbing twisted.
5. Each seat belt assembly must only be used by one occupant; it is
dangerous to put a seat belt
around a child being carried on
the occupant’s lap.
6. No modifications or additions s h o u l d b e m a d e b y t h e u s e r w h i c h
will prevent the seat belt adjusting
devices from operating.
7. Should the seat belt not retract and remain at its static length,
consult your nearest Jaguar
Retailer immediately.
Page 64 of 227
Before Driving 3 - 25
Securing child restraints with an
adult seat belt
All passenger seat belts (not the driver’s)
have an automatic locking device for use
with child seats.
If engaged, this device allows the belt to
be retracted (tightened) but not pulled
out. When used to secure a child seat,
therefore, the belt will automatically lock
at any point to which it has retracted.
Always ensure that child restraint
assemblies are fitted in strict accordance
with the child restraint manufacturer’s
instructions. Keep the fitting instructions
for future reference.
The following checks should always be
carried out:
• Fit the child seat in the correct position and secure with the seat belt
in accordance with the
manufacturer’s instructions.
If necessary, remove the headrest to
accommodate a larger child seat.
• Pull the seat belt all the way out to engage the locking device.
• Make sure the child seat is fitted firmly to the car seat. There should
not be excessive forward or sideways
movement. • To fix the seat firm
ly, retract the belt
back onto the reel; a ratchet
operation may be felt as the belt
retracts. Continue to pay the belt back
onto the reel until it fits snugly around
the child seat.
• Regularly check and refit the child seat to ensure there is no slack in the
installation.
• The seat belt must not be twisted and
the buckle must not rest on the child
seat frame, as it may snap open in an
accident.
• Never modify the seat, or install it differently to the instructions.
The above is a guide only. Depending on
the features of a particular child seat,
e.g. forward or rearwa rd-facing, engage
the locking device before or after
attaching the belt, as convenient.
Unbuckling the belt and releasing the
child seat will allow th e belt to resume its
normal operation.
Always secure an unoccupied child seat
safely. In an accident an unsecured child
seat may pose a risk to the vehicle
occupants. Safe use of child restraints
!WARNING:
The top tether anchor point must
always be used to secure forward-
facing child seats (see page 3 - 29).
Ensure that there is no slack in the
webbing and that the restraints fits the
child snugly across the rib cage and hips.
These are the parts of the body most able
to take the force of an impact.
• Ensure the path and position of an integral harness across the shoulders
is appropriate for your child’s
development – consult the
manufacturer’s instructions.
• The lap strap should pass across the top of the child’s thighs, bearing on
the pelvis, not the abdominal area.
• Adjust the harness every time so that one or two fingers only can be
inserted between the child and the
harness. Different clothing on a child
can make a difference to the correct
fitting of the harness.
• Make sure that the webbing is not twisted.
Page 65 of 227
3 - 26 Before Driving
• Never modify the seat harness or buckles as this may affect the quick
release mechanism.
• Always secure your child correctly, even for a short journey.
• Follow the manufacturer’s instructions for harness adjustments.
Booster seats
If a booster seat is used, position the lap
section of the adult seat belt over the
child’s pelvis. The diagonal seat belt
should rest on the child’s shoulder,
not the neck.Check List – Non-LATCH Child
Restraints
Follow the check list each time a child
travels in the vehicle:
• Always attach the top tether when
installing a forward-facing child seat.
• Carefully follow the instructions provided by the manufacturer of the
restraint system.
• Always use the appropriate child restraints and adjust harnesses for
every child, every trip.
• Avoid dressing a child in bulky clothing and do not place any objects
between the child and the restraint
system.
• No child seat is completely child- proof. Encourage your child not to
play with buckle or harness. • Regularly check the fit of your child
seat and replace seats or harnesses
that show signs of wear.
• Ensure that you have removed all slack from the adult seat belt and that
the automatic locking device is
activated.
• Never leave a child unsupervised in the vehicle.
• Activate the rear door child safety locks (see page 2 - 14).
• Ensure your child does not exit the vehicle from the side where there is
traffic.
• Set your child a good example – always wear your seat belt.
Page 67 of 227
3 - 28 Before Driving
Fitting LATCH seats
For further information regarding a LATCH child seat, please
consult your Jaguar Retailer.
Always use the additional top tether anchorage.
LATCH child seats can only be fi tted to the two outer rear seat
positions, as shown on the previous page.
Caution: When fitting a LATCH child seat, the seat
manufacturers instructions must always be followed.
The following is a guide only.
Note: So as not to interfere with the fitment of large child seats,
push the adult seat buckles into their buckle recesses and,
if necessary, remove the headrest.
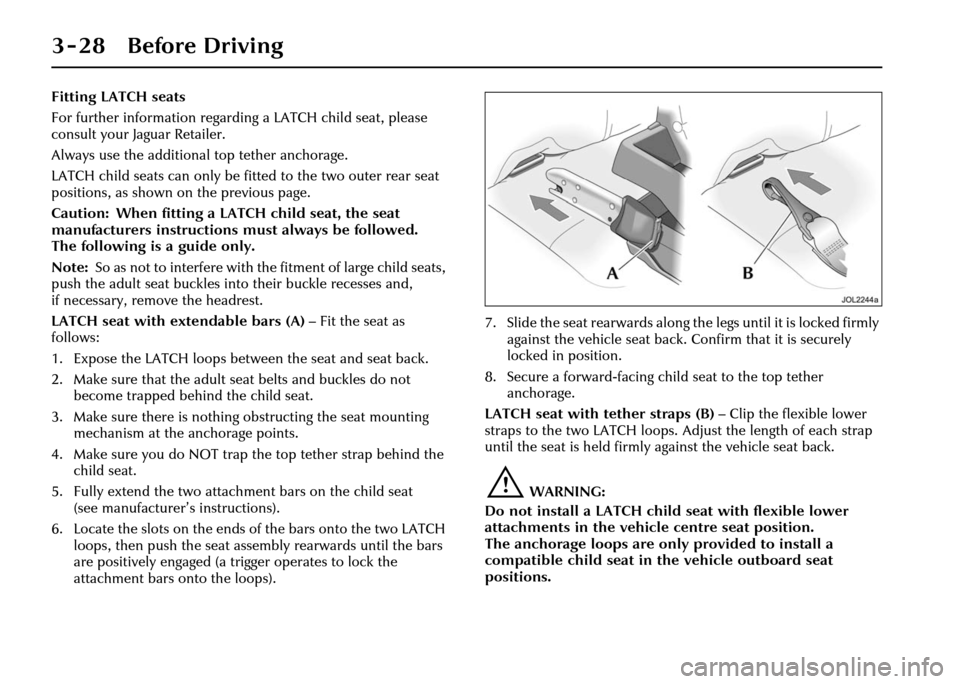
LATCH seat with extendable bars (A) – Fit the seat as
follows:
1. Expose the LATCH loops between the seat and seat back.
2. Make sure that the adult seat belts and buckles do not become trapped behind the child seat.
3. Make sure there is nothing obstructing the seat mounting mechanism at the anchorage points.
4. Make sure you do NOT trap the top tether strap behind the child seat.
5. Fully extend the two attachme nt bars on the child seat
(see manufacturer’s instructions).
6. Locate the slots on the ends of the bars onto the two LATCH
loops, then push the seat asse mbly rearwards until the bars
are positively engaged (a trigger operates to lock the
attachment bars onto the loops). 7. Slide the seat rearwards along the legs until it is locked firmly
against the vehicle seat back. Confirm that it is securely
locked in position.
8. Secure a forward-facing ch ild seat to the top tether
anchorage.
LATCH seat with tether straps (B) – Clip the flexible lower
straps to the two LATCH loops. Adjust the length of each strap
until the seat is held firmly against the vehicle seat back.
!WARNING:
Do not install a LATCH child seat with flexible lower
attachments in the vehicle centre seat position.
The anchorage loops are only provided to install a
compatible child seat in the vehicle outboard seat
positions.
Page 69 of 227
3 - 30 Before Driving
Check List – LATCH Child
Restraints
Follow the check list each time your child
travels in the vehicle:
• Always attach the top tether when installing a forward-facing seat.
• Carefully follow the instructions supplied with the child seat.
• Always give the seat a final pull to ensure the lower anchors are secure,
even if the seat has indicators to show
that the seat connectors are latched.
• Always use the appropriate child restraints and adjust harnesses for
every child, every trip.
• Make sure you use a seat with the correct weight range for your child. • Avoid dressing your child in bulky
clothing and do not place any objects
between the child and the restraint
system.
• Regularly check the fit of your child seat and replace seats or harnesses
that show signs of wear.
• No child seat is completely child- proof. Encourage your child not to
play with the buckle or harness.
• Never leave a child unsupervised in the vehicle.
• Activate the rear door child safety locks (see page 2 - 14).
• Ensure your child does not exit the vehicle from the side where there is
traffic.
• Set your child a good example – always wear your seat belt.
Page 71 of 227
3 - 32 Before Driving
Memory recall using an integrated
key
The integrated key will recall a memory
position when the unlock button is
pressed when set as follows:
1. Adjust the seat, steering column, pedals and exterior rear view mirrors
to the desired positions.
2. Press the M button: The red LED will illuminate for a five second period.
3. Press button ‘1’, ‘2’ or ‘3’ and then press any button on the integrated
key. Both button presses must occur
while the red LED is illuminated.
4. Repeat for the other integrated key, pressing the remaining memory
buttons.
To cancel integrated key memory recall:
1. Place a key into the ignition switch and leave in the OFF position.
2. Press the M button: The red LED will illuminate for a five second period.
3. Press any button on the integrated key
(except the panic button, if fitted) then
press the M button again. Both button
presses must occur while the red LED
is illuminated. Note:
If memory recall is performed
using an integrated ke y with the vehicle in
entry/exit position, the steering column
and seat will not return to the memorised
position until either the integrated key is
placed in the ignition switch or the
driver’s door is closed.
Driving position memory system
operating tips
• When making adjustments to a set driving position, reset the new
position in the same memory channel.
• A driving position will only be memorised during the five second
period when the red memory LED is
illuminated.
• Previous memory is erased when a new driving position is entered.
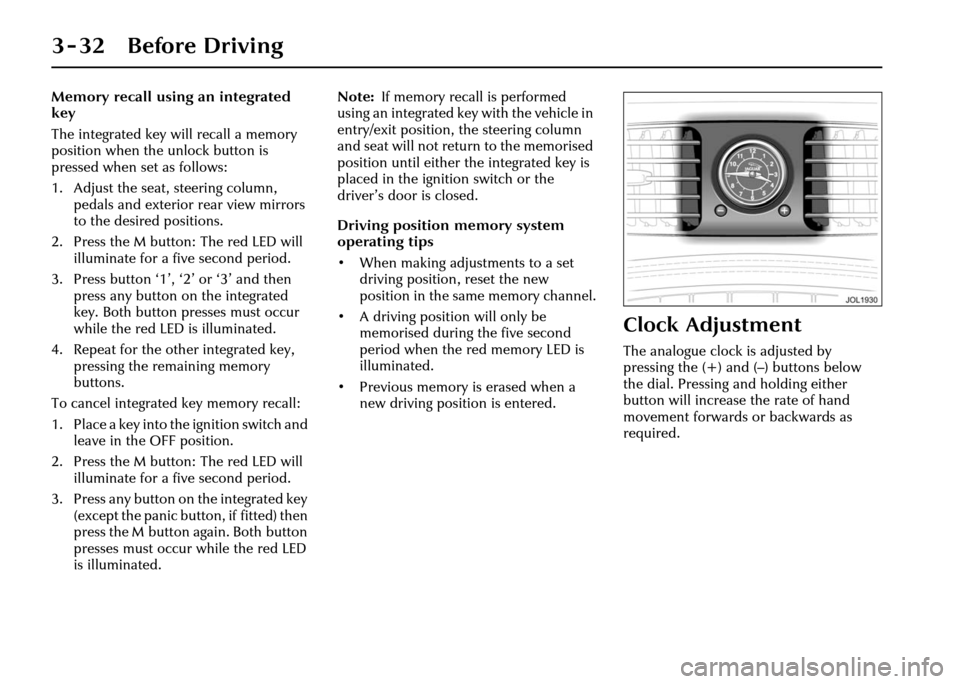
Clock Adjustment
The analogue clock is adjusted by
pressing the (+) and (–) buttons below
the dial. Pressing and holding either
button will increase the rate of hand
movement forwards or backwards as
required.
Page 75 of 227
4-4 On the Road
Engine Temperature (E)
Drive at moderate road and engine
speeds until normal operating
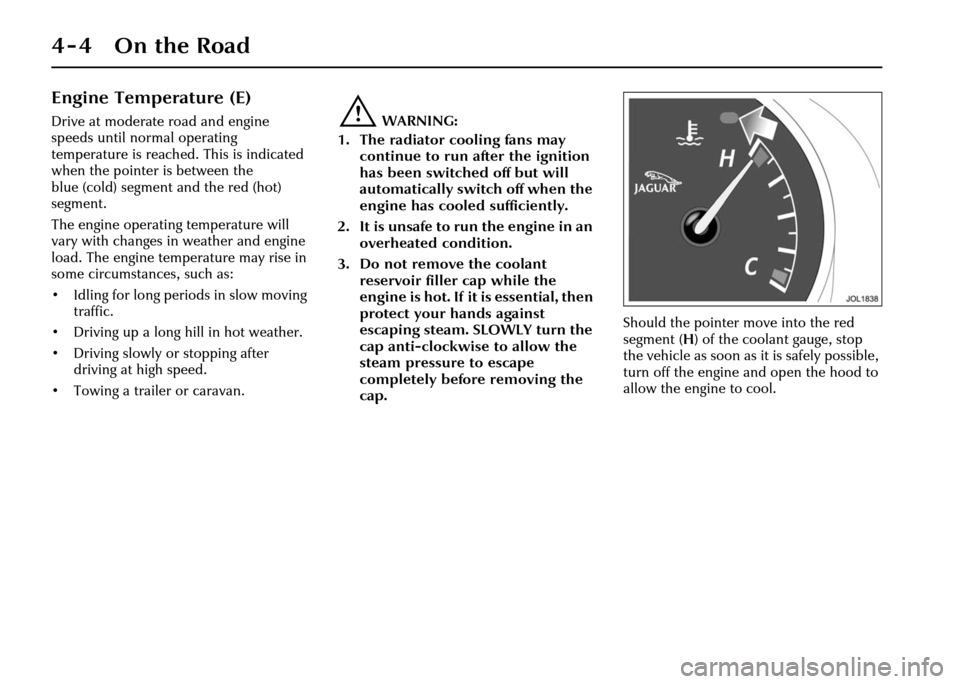
temperature is reached. This is indicated
when the pointer is between the
blue (cold) segment and the red (hot)
segment.
The engine operating temperature will
vary with changes in weather and engine
load. The engine temperature may rise in
some circumstances, such as:
• Idling for long periods in slow moving traffic.
• Driving up a long hill in hot weather.
• Driving slowly or stopping after driving at high speed.
• Towing a trailer or caravan.!WARNING:
1. The radiator cooling fans may continue to run after the ignition
has been switched off but will
automatically switch off when the
engine has cooled sufficiently.
2. It is unsafe to run the engine in an overheated condition.
3. Do not remove the coolant reservoir filler cap while the
engine is hot. If it is essential, then
protect your hands against
escaping steam. SLOWLY turn the
cap anti-clockwise to allow the
steam pressure to escape
completely before removing the
cap. Should the pointer move into the red
segment (
H) of the coolant gauge, stop
the vehicle as soon as it is safely possible,
turn off the engine and open the hood to
allow the engine to cool.
Page 78 of 227
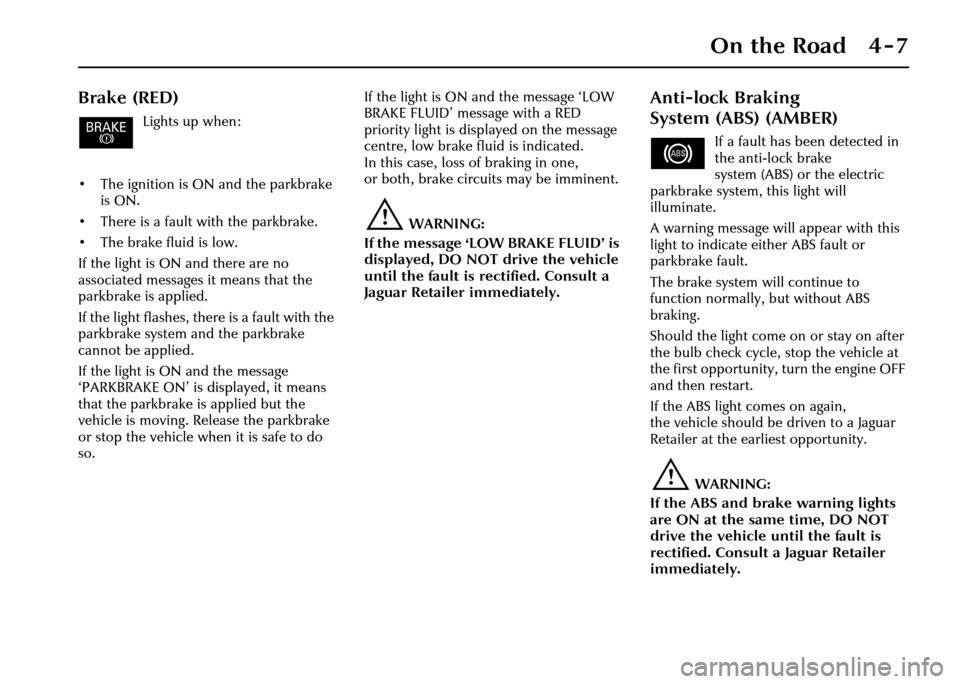
On the Road 4 - 7
Brake (RED)
Lights up when:
• The ignition is ON and the parkbrake is ON.
• There is a fault with the parkbrake.
• The brake fluid is low.
If the light is ON and there are no
associated messages it means that the
parkbrake is applied.
If the light flashes, th ere is a fault with the
parkbrake system and the parkbrake
cannot be applied.
If the light is ON and the message
‘PARKBRAKE ON’ is displayed, it means
that the parkbrake is applied but the
vehicle is moving. Release the parkbrake
or stop the vehicle when it is safe to do
so. If the light is ON and the message ‘LOW
BRAKE FLUID’ message with a RED
priority light is displayed on the message
centre, low brake fluid is indicated.
In this case, loss of braking in one,
or both, brake circuits may be imminent.
!WARNING:
If the message ‘LOW BRAKE FLUID’ is
displayed, DO NOT drive the vehicle
until the fault is rectified. Consult a
Jaguar Retailer immediately.
Anti-lock Braking
System (ABS) (AMBER)
If a fault has been detected in
the anti-lock brake
system (ABS) or the electric
parkbrake system, this light will
illuminate.
A warning message will appear with this
light to indicate either ABS fault or
parkbrake fault.
The brake system will continue to
function normally, but without ABS
braking.
Should the light come on or stay on after
the bulb check cycle, stop the vehicle at
the first opportunity, turn the engine OFF
and then restart.
If the ABS light comes on again,
the vehicle should be driven to a Jaguar
Retailer at the earliest opportunity.
!WARNING:
If the ABS and brake warning lights
are ON at the same time, DO NOT
drive the vehicle until the fault is
rectified. Consult a Jaguar Retailer
immediately.
Page 81 of 227
4-10 On the Road
Audible Warnings
Various sounds are produced for warning and notification purposes as follows:
Hazard or Condition Remedy/chime or tone
Air bag system failure. A tone sequence is repeated five times. Report the fault to a Jaguar Retailer as
soon as possible.
External lights remain ON when the driver’s door
is opened. A chime will sound for 10 seconds as a warning that the lights are on when
the ignition is off and the drivers door is opened. Switch lights off.
Note:
The chime will not sound if the switch is in Autolamp position.
Key in ignition switch. A chime will sound if the key has been left in the ignition and the driver’s
door is opened after the ignition has been switched off or turned to
position ‘I’.
Hazard warning indicators ON. A ticking will sound until the hazard indicators are switched OFF.
Vehicle armed. This warns that the alarm will sound shortly unless the system is disarmed by
either pressing the unlock button on the key transmitter or by placing the key
in the ignition switch.
Left or right direction indicators ON. If the switch has not turned itself OFF, switch the turn indicator OFF when
the manoeuvre is completed. A ticking will sound until the indicators are
switched OFF.
Memory 1, 2 or 3 configuration saved. A short tone as the memory selection is saved.
Page 88 of 227
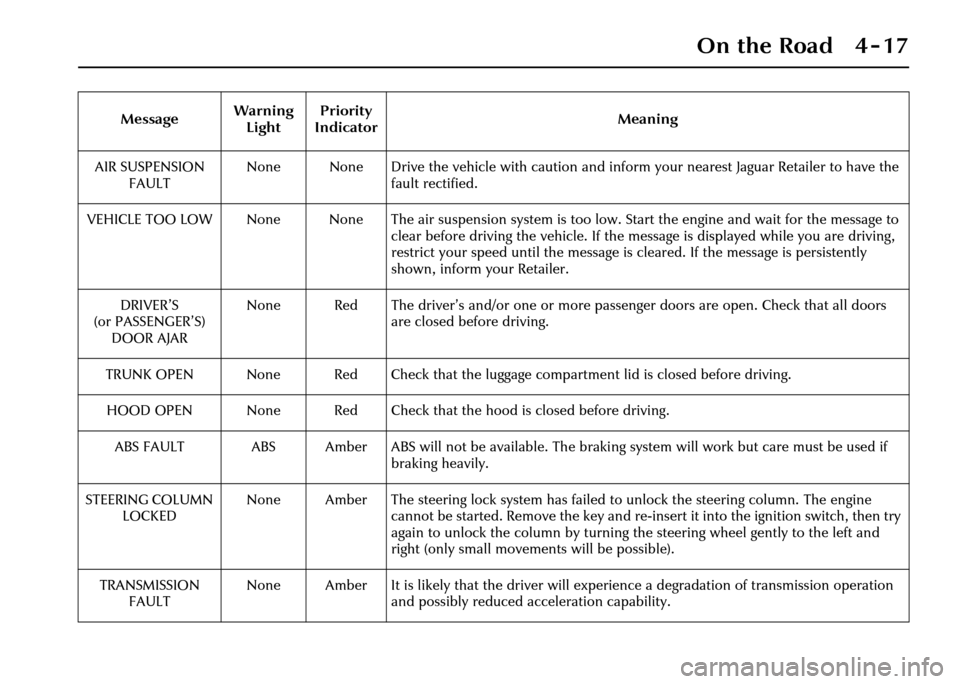
On the Road 4 - 17
AIR SUSPENSION FAULT None None Drive the vehicle with caution and inform your nearest Jaguar Retailer to have the
fault rectified.
VEHICLE TOO LOW None None The air suspension system is too low. Start the engine and wait for the message to clear before driving the vehicle. If the message is displayed while you are driving,
restrict your speed until the message is cleared. If the message is persistently
shown, inform your Retailer.
DRIVER’S
(or PASSENGER’S) DOOR AJAR None Red The driver’s and/or one or more passenger doors are open. Check that all doors
are closed before driving.
TRUNK OPEN None Red Check that the luggage co mpartment lid is closed before driving.
HOOD OPEN None Red Check that the hood is closed before driving.
ABS FAULT ABS Amber ABS will not be available. The braki ng system will work but care must be used if
braking heavily.
STEERING COLUMN LOCKED None Amber The steering lock system has failed to unlock the steering column. The engine
cannot be started. Remove the key and re-insert it into th e ignition switch, then try
again to unlock the column by turning the steering wheel gently to the left and
right (only small movements will be possible).
TRANSMISSION FAULT None Amber It is likely that the driver will expe
rience a degradation of transmission operation
and possibly reduced ac celeration capability.
Message
Warning
Light Priority
Indicator Meaning