engine JEEP CHEROKEE 2014 KL / 5.G Owner's Manual
[x] Cancel search | Manufacturer: JEEP, Model Year: 2014, Model line: CHEROKEE, Model: JEEP CHEROKEE 2014 KL / 5.GPages: 204, PDF Size: 3.84 MB
Page 68 of 204
Uconnect® Access Remote Features
If you own a compatible iPhone®or Android®powered device, the Uconnect®Access
App allows you to remotely lock or unlock your doors, start your engine or activate your
horn and lights from virtually anywhere (Vehicle must be within the United States and
have network coverage). You can download the App from Mopar Owner Connect or from
the App Store (iPhone) or Google Play store. Visit UconnectPhone.com to determine if
your device is compatible. For Uconnect
®Phone customer support and to determine if
your device is compatible.
U.S. residents - visit UconnectPhone.com or call 1–877–855–8400
Remote Start — This feature provides the ability to start the engine on your vehicle,
without the keys and from virtually any distance. You can send a request to your
vehicle in one of two ways:
1. Using the Uconnect
®Access App from a compatible smartphone.
2. From the Mopar Owner Connect website.
• You can also send a command to turn-off an engine that has been remotestarted.
• After 15 minutes if you have not entered your vehicle with the key, the engine will shut off automatically.
• This remote function requires your vehicle to be equipped with a factory- installed Remote Start system. To use this feature after the Uconnect
®Access
App is downloaded, login with your user name and Uconnect®Security PIN.
• You can set-up notifications for your account to receive an email or text (SMS) message every time a command is sent. Login to Mopar Owner Connect
(moparownerconnect.com) and click on Edit Profile to manage Uconnect
®
Notifications.
Remote Door Lock/Unlock — This feature provides the ability to lock or unlock the door
on your vehicle, without the keys and from virtually any distance. You can send a
request to your vehicle in one of three ways:
1. Using the Uconnect
®Access App from a compatible smartphone.
2. From the Mopar Owner Connect website.
3. By contacting the Uconnect
®Care on the phone.
To use this feature after the Uconnect
®Access App is downloaded, login using your
user name and Uconnect®Security PIN. Press the “App” button on your smartphone
with the closed lock icon to lock the door, and press the “open lock” icon to unlock
the driver’s door.
You can set-up notifications for your account to receive an email or text (SMS) message
every time a command is sent. Login to Mopar Owner Connect (moparownerconnect.com)
and click on Edit Profile to manage Uconnect
®Notifications.
ELECTRONICS
66
Page 124 of 204
PROGRAMMABLE FEATURES
Uconnect® Customer Programmable Features
The Uconnect®system allows you to access Customer Programmable feature
settings such as Display, Clock, Safety/Assistance, Lights, Doors & Locks, Auto-On
Comfort & Remote Start, Engine Off Operation, Audio, Phone/Bluetooth
®and
SiriusXM Setup and System Information through soft-keys.
• Touch the “Apps” soft-key located near the bottom of the screen, then touch the “Settings” soft-key to access the Settings screen. When making a selection, scroll
up or down until the preferred setting is highlighted, then press and release the
preferred setting until a check-mark appears next to the setting, showing that
setting has been selected. The following feature settings are available:
• Display • Clock
• Safety/Assistance • Doors & Locks
• Auto-On Comfort & Remote Start • Engine Off Options
• Phone/Bluetooth
®• Audio
• Lights • SiriusXM Setup
• Units • System Information
• Voice
NOTE:
Depending on the vehicles options, feature settings may vary.
UNIVERSAL GARAGE DOOR OPENER (HomeLink®)
• HomeLink®replaces up to three hand-
held transmitters that operate devices
such as garage door openers, motor-
ized gates, lighting or home security
systems. The HomeLink
®unit is pow-
ered by your vehicles 12 Volt battery.
• The HomeLink
®buttons that are lo-
cated in the overhead console or sun-
visor designate the three different
HomeLink
®channels.
• The HomeLink
®indicator is located
above the center button.
ELECTRONICS
122
Page 128 of 204
POWER OUTLET
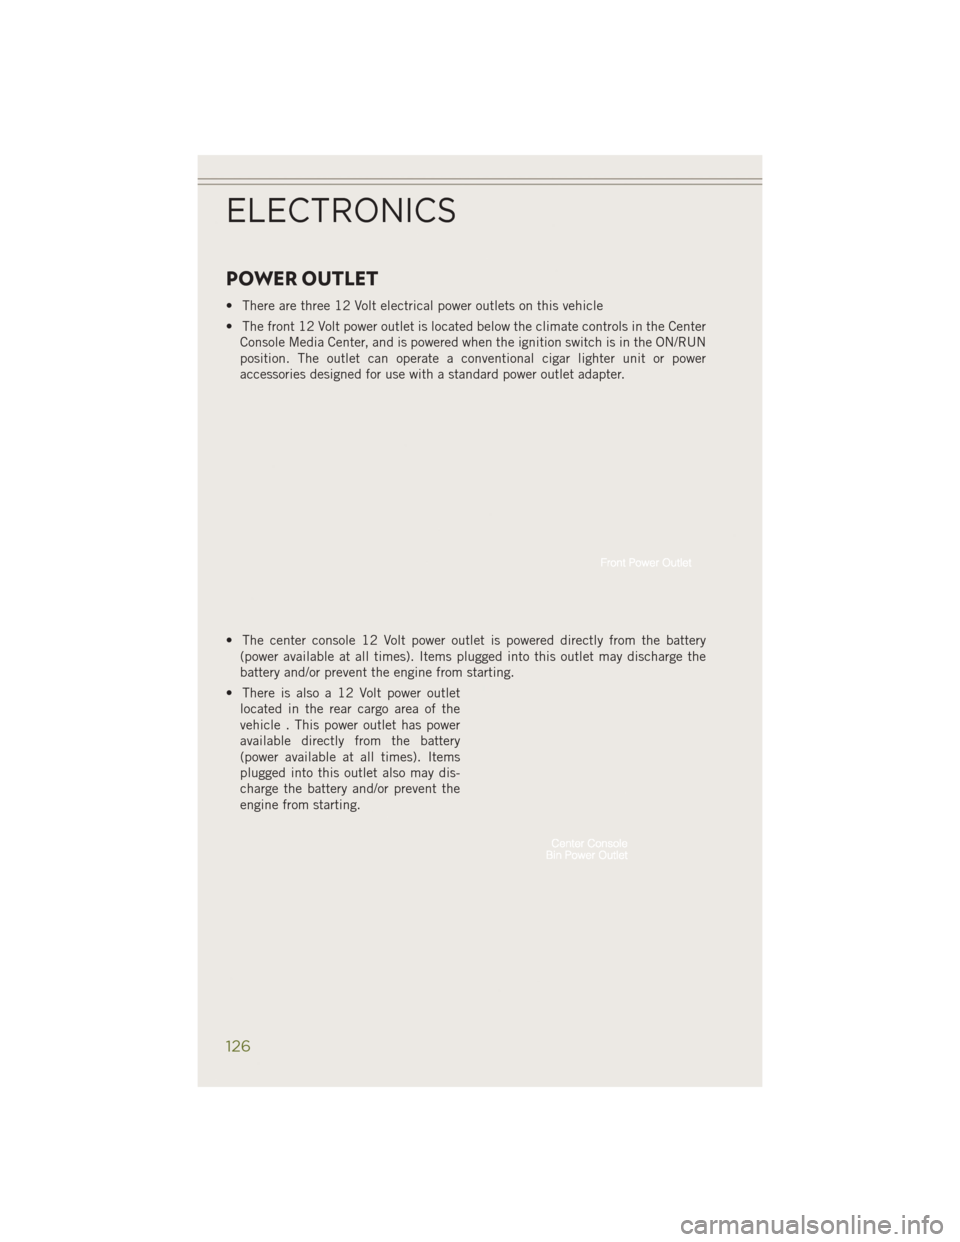
• There are three 12 Volt electrical power outlets on this vehicle
• The front 12 Volt power outlet is located below the climate controls in the CenterConsole Media Center, and is powered when the ignition switch is in the ON/RUN
position. The outlet can operate a conventional cigar lighter unit or power
accessories designed for use with a standard power outlet adapter.
• The center console 12 Volt power outlet is powered directly from the battery (power available at all times). Items plugged into this outlet may discharge the
battery and/or prevent the engine from starting.
• There is also a 12 Volt power outlet located in the rear cargo area of the
vehicle . This power outlet has power
available directly from the battery
(power available at all times). Items
plugged into this outlet also may dis-
charge the battery and/or prevent the
engine from starting.
ELECTRONICS
126
Page 133 of 204
FOUR-WHEEL DRIVE OPERATION
1–SPEED FOUR-WHEEL DRIVE (4WD)
• This feature provides on-demandFour-Wheel Drive (4WD) with no driver
inputs or additional driving skills re-
quired.
• Under normal driving conditions, the front wheels provide most of the trac-
tion.
• If the front wheels begin to lose trac- tion, power is shifted automatically to
the rear wheels.
NOTE:
On dry pavement under heavy throttle
input (where one may have no wheel
spin), torque will be sent to the rear
wheels to improve vehicle launch and
performance characteristics.
2–SPEED FOUR-WHEEL DRIVE (4WD)
•This electronically shifted Power Trans-
fer Unit provides three mode positions:
• Four-wheel drive low range (4WD
LOW)
• REAR LOCK
• NEUTRAL (N)
• The 4WD LOW range can be used when additional traction is required to
force the front and rear wheels to ro-
tate at the same speed.
• 4WD LOW is intended for loose, slip- pery road surfaces only.
NOTE:
In 4WD LOW the engine speed is approximately three times that of the normal driving
mode at a given road speed. Take care not to overspeed the engine and do not exceed
25 mph (40 km/h).
OFF-ROAD CAPABILITIES
131
Page 134 of 204
Shifting Procedures
4WD HI To 4WD LOW
• With the vehicle at speeds of 0 to 3 mph (0 to 5 km/h), the ignition switch in theON position or the engine running, shift the transmission into NEUTRAL, and
press the “4WD LOW” button once. The “4WD LOW” indicator light in the
instrument cluster will begin to flash and remain on solid when the shift is
complete.
NOTE:
If shift conditions/interlocks are not met a message will flash from the Electronic
Vehicle Information Center (EVIC) with instructions on how to complete the re-
quested shift. Refer to the Understanding Your Instrument Panel section of your
vehicle’s Owner’s Manual on the DVD for further details.
4WD LOW To 4WD HI
• With the vehicle at speeds of 0 to 3 mph (0 to 5 km/h), the ignition switch in the ON position or the engine running, shift the transmission into NEUTRAL, and
press the “4WD LOW” button once. The “4WD LOW” indicator light in the
instrument cluster will flash and go out when the shift is complete.
NOTE:
If shift conditions/interlocks are not met a message will flash from the Electronic
Vehicle Information Center (EVIC) with instructions on how to complete the re-
quested shift. Refer to “Electronic Vehicle Information Center (EVIC)” in “Under-
standing Your Instrument Panel” for further information.
NEUTRAL Shift Procedure
1. Bring the vehicle to a complete stop and shift the transmission to PARK.
2. Turn the engine OFF.
3. Turn the ignition switch to the ON/RUN position, but do not start the engine.
4. Press and hold the brake pedal.
5. Shift the transmission into NEUTRAL.
6. Using a ballpoint pen or similar object, press and hold the recessed Power Transfer Unit NEUTRAL (N) button (located by the selector switch) for four
seconds. The light behind the NEUTRAL (N) symbol will blink, indicating shift in
progress. The light will stop blinking (stay on solid) when the shift to NEUTRAL
(N) is complete.
7. After the shift is completed and the NEUTRAL light stays on, release the NEUTRAL (N) button.
8. Start the engine.
9. Shift the transmission into REVERSE.
OFF-ROAD CAPABILITIES
132
Page 135 of 204
10. Release the brake pedal for five seconds and ensure that there is no vehiclemovement.
11. Shift the transmission to NEUTRAL.
12. Apply the parking brake.
NOTE:
Repeat these Steps to shift out of NEUTRAL.
REAR ELECTRONIC LOCKER (E-LOCKER) SYSTEM
• The Rear E-Locker System features a mechanical locking rear differential to provide better traction in the 4WD LOW position. The “REAR LOCK” button is on
the Selec-Terrain Knob
Activating The Rear E-Locker
• To activate the Rear E-Locker System, the following conditions must be met: • The 4WD system must be in 4WD LOW.
• The ignition switch in the ON position or the engine running.
• Vehicle speed must be below 15 MPH (24 km/h).
• To engage Rear E-Locker, press the REAR LOCK button once.
Deactivating The Rear E-Locker System
• To deactivate the Rear E-Locker System, the following conditions must be met: • Rear E-Locker must be engaged, and the REAR LOCK indicator light on.
• The ignition switch in the ON position or the engine running.
• To disengage Rear E-Locker , press the REAR LOCK button once.
NOTE:
• It may also be necessary to drive slowly steering back and forth to complete engagement and disengagement of the E- Locker.
• When engaging Rear E-Locker, the indicator lights in the instrument cluster and on the REAR LOCK button will begin to flash. When the shift is complete the REAR
LOCK indicator lights will remain on.
• When disengaging Rear E-Locker, the indicator lights in the instrument cluster and on the REAR LOCK button will begin to flash. When the shift is complete the
REAR LOCK indicator lights will remain off.
• Shifting into or out of Rear E-Locker is possible with the vehicle completely stopped; however, difficulty may occur due to the mating clutch teeth not being
properly aligned. Several attempts may be required for clutch teeth alignment and
shift completion to occur. The preferred method is for the vehicle to be rolling,
below 15 MPH (24 km/h), while including right and left steering maneuvers to
allow for the clutch teeth to align.
OFF-ROAD CAPABILITIES
133
Page 136 of 204
• The Rear E-Locker System must be disengaged prior to taking the vehicle out of4WD LOW range. If 4WD LOW shift conditions/interlocks are not met, a message
will flash from the Electronic Vehicle Information Center (EVIC) with instructions
on how to complete the requested shift.
SELEC-TERRAIN™
• Selec-Terrain™ combines the capa-bilities of the vehicle control systems,
along with driver input, to provide the
best performance for all terrains.
Rotate the mode control knob to select
the following Selec-Terrain™ positions:
• Auto — Fully automatic full time four-
wheel drive operation can be used on
and off road. Balances traction with
seamless steering feel to provide im-
proved handling and acceleration over
two-wheel drive vehicles.
• Snow — Tuning set for additional sta-
bility in inclement weather. Use on and
off road on loose traction surfaces such as snow. When in SNOW mode (depending
on certain operating conditions), the transmission may use second gear (rather
than first gear) during launches, to minimize wheel slippage.
• Sport — This mode alters the transmission's automatic shift schedule for sportier
driving. Upshift speeds are increased to make full use of available engine power.
• Sand/Mud — Off road calibration for use on low traction surfaces such as mud,
sand, or wet grass. Driveline is maximized for traction. Some binding may be felt
on less forgiving surfaces. The electronic brake controls are set to limit traction
control management of throttle and wheel spin.
• Rock — Off-road calibration only available in 4WD LOW range. Traction based
tuning with improved steer-ability for use on high traction off-road surfaces.
Activate the Hill Descent Control for steep downhill control. Use for low speed
obstacles such as large rocks, deep ruts, etc.
NOTE:
SPORT mode is not available when 4WD LOW is selected.
OFF-ROAD CAPABILITIES
134
Page 137 of 204
CARGO AREA FEATURES
• The cargo load floor system has a load capacity of 400 lbs (181 kg). The load floorhas a built-in storage bin that can hold a variety of items. The underside of the
storage bin cover also contains a plastic-lined tray. The cover can be installed with
either side facing up for added utility.
Cargo Tie-Down Hooks and Loops
• The tie-downs located on the cargo area floor should be used to secure loads safelywhen the vehicle is moving.
WARNING!
• Cargo tie-downs are not safe anchors for a child seat tether strap. In a sudden
stop or a collision, a tie-down could pull loose and allow the child seat to come
loose. A child could be badly injured. Use only the anchors provided for child
seat tethers.
• To help protect against personal injury, passengers should not be seated in the
rear cargo area. The rear cargo space is intended for load carrying purposes
only, not for passengers, who should sit in seats and use seat belts.
TRAILER TOWING WEIGHTS (MAXIMUM TRAILER
WEIGHT RATINGS)
Engine/
Transmission Model Frontal Area Max. GTW
(Gross Trailer Wt.)Tongue Wt.
(See Note)
2.4L/
Automatic
with or with- out Trailer
Tow Package FWD or
4WD 32 sq. ft
(2.97 sq. m) 2,000 lbs (907 kg) 200 lbs (91 kg)
3.2L/
Automatic FWD or
4WD 32 sq. ft
(2.97 sq. m) 2,000 lbs (907 kg) 200 lbs (91 kg)
3.2L/
Automatic
with Trailer
Tow Package FWD or
4WD 32 sq. ft
(2.97 sq. m) 4,500 lbs
(2 041 kg) 450 lbs (204 kg)
Refer to local laws for maximum trailer towing speeds.
NOTE: The trailer tongue weight must be considered as part of the combined weight of oc- cupants and cargo, and should never exceed the weight referenced on the Tire and Load- ing Information placard.
UTILITY
135
Page 138 of 204
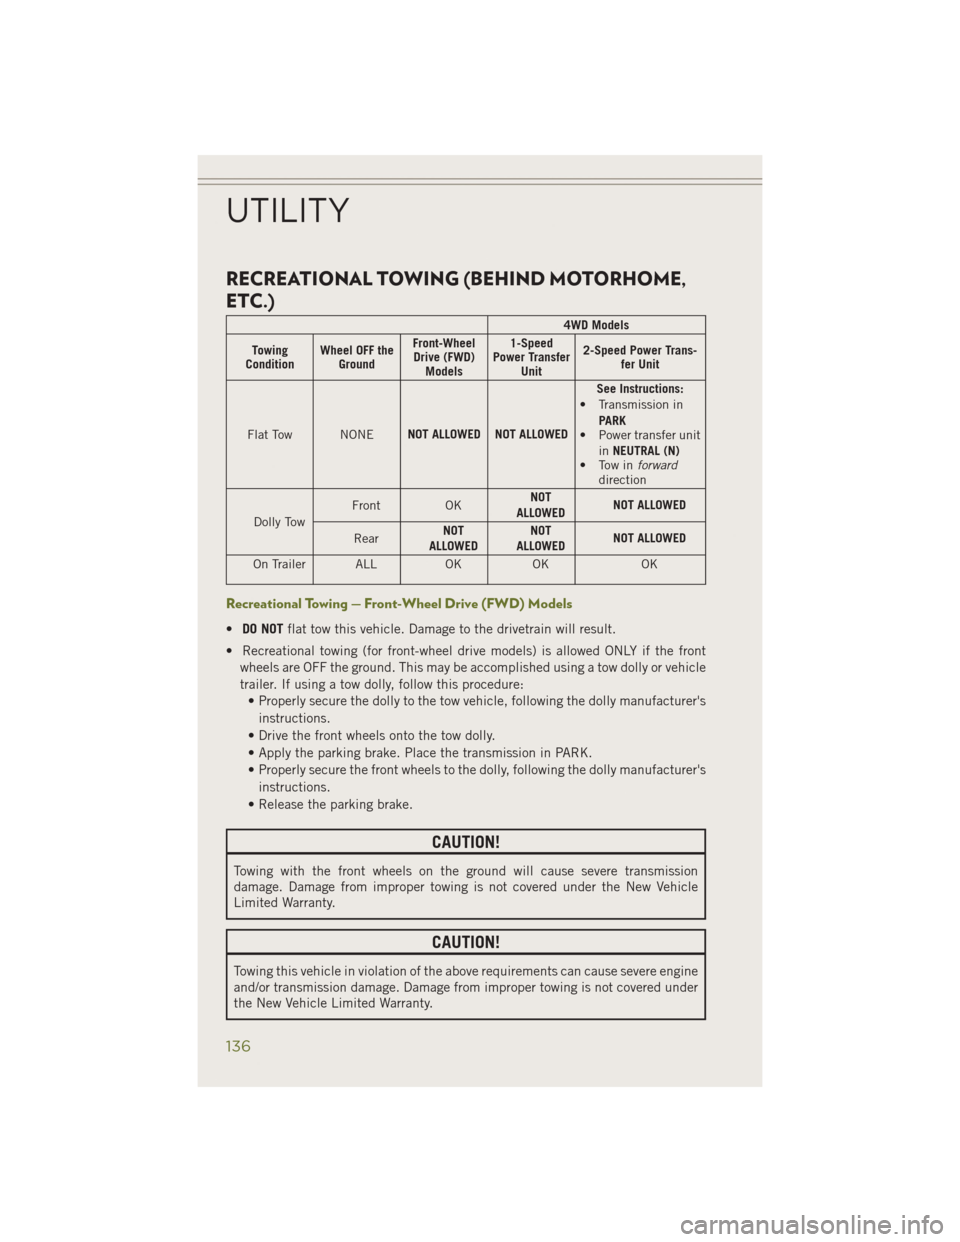
RECREATIONAL TOWING (BEHIND MOTORHOME,
ETC.)
4WD Models
Towing
Condition Wheel OFF the
Ground Front-Wheel
Drive (FWD) Models 1-Speed
Power Transfer Unit 2-Speed Power Trans-
fer Unit
Flat Tow NONE NOT ALLOWED NOT ALLOWED See Instructions:
• Transmission in
PARK
• Power transfer unit
inNEUTRAL (N)
• Tow in forward
direction
Dolly Tow Front
OKNOT
ALLOWED NOT ALLOWED
Rear NOT
ALLOWED NOT
ALLOWED NOT ALLOWED
On Trailer ALL OKOK OK
Recreational Towing — Front-Wheel Drive (FWD) Models
•DO NOT flat tow this vehicle. Damage to the drivetrain will result.
• Recreational towing (for front-wheel drive models) is allowed ONLY if the front wheels are OFF the ground. This may be accomplished using a tow dolly or vehicle
trailer. If using a tow dolly, follow this procedure:• Properly secure the dolly to the tow vehicle, following the dolly manufacturer's
instructions.
• Drive the front wheels onto the tow dolly.
• Apply the parking brake. Place the transmission in PARK.
• Properly secure the front wheels to the dolly, following the dolly manufacturer's instructions.
• Release the parking brake.
CAUTION!
Towing with the front wheels on the ground will cause severe transmission
damage. Damage from improper towing is not covered under the New Vehicle
Limited Warranty.
CAUTION!
Towing this vehicle in violation of the above requirements can cause severe engine
and/or transmission damage. Damage from improper towing is not covered under
the New Vehicle Limited Warranty.
UTILITY
136
Page 140 of 204
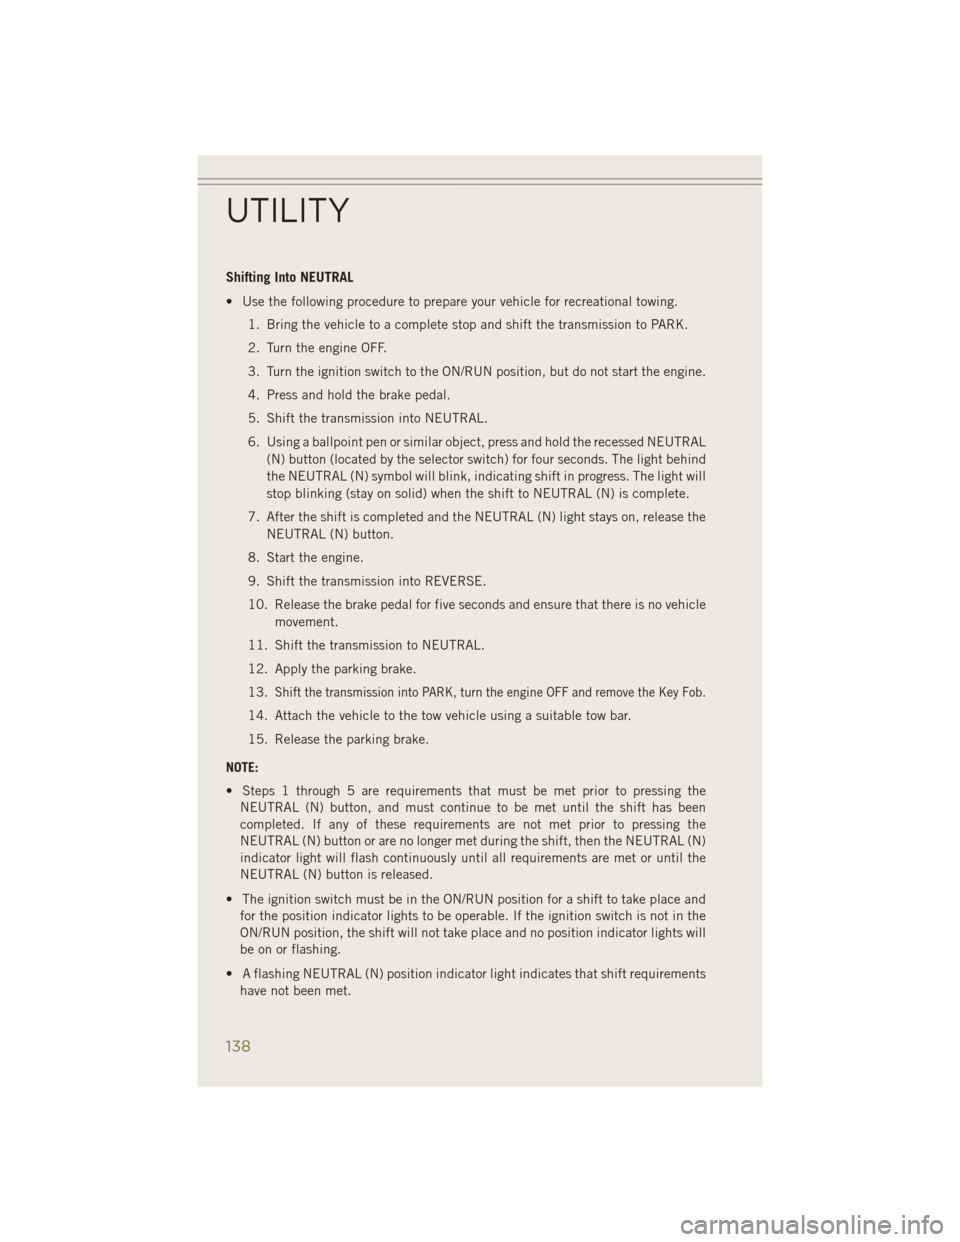
Shifting Into NEUTRAL
• Use the following procedure to prepare your vehicle for recreational towing.1. Bring the vehicle to a complete stop and shift the transmission to PARK.
2. Turn the engine OFF.
3. Turn the ignition switch to the ON/RUN position, but do not start the engine.
4. Press and hold the brake pedal.
5. Shift the transmission into NEUTRAL.
6. Using a ballpoint pen or similar object, press and hold the recessed NEUTRAL(N) button (located by the selector switch) for four seconds. The light behind
the NEUTRAL (N) symbol will blink, indicating shift in progress. The light will
stop blinking (stay on solid) when the shift to NEUTRAL (N) is complete.
7. After the shift is completed and the NEUTRAL (N) light stays on, release the NEUTRAL (N) button.
8. Start the engine.
9. Shift the transmission into REVERSE.
10. Release the brake pedal for five seconds and ensure that there is no vehicle movement.
11. Shift the transmission to NEUTRAL.
12. Apply the parking brake.
13.
Shift the transmission into PARK, turn the engine OFF and remove the Key Fob.
14. Attach the vehicle to the tow vehicle using a suitable tow bar.
15. Release the parking brake.
NOTE:
• Steps 1 through 5 are requirements that must be met prior to pressing the NEUTRAL (N) button, and must continue to be met until the shift has been
completed. If any of these requirements are not met prior to pressing the
NEUTRAL (N) button or are no longer met during the shift, then the NEUTRAL (N)
indicator light will flash continuously until all requirements are met or until the
NEUTRAL (N) button is released.
• The ignition switch must be in the ON/RUN position for a shift to take place and for the position indicator lights to be operable. If the ignition switch is not in the
ON/RUN position, the shift will not take place and no position indicator lights will
be on or flashing.
• A flashing NEUTRAL (N) position indicator light indicates that shift requirements have not been met.
UTILITY
138