radio JEEP CHEROKEE 2020 Owner handbook (in English)
[x] Cancel search | Manufacturer: JEEP, Model Year: 2020, Model line: CHEROKEE, Model: JEEP CHEROKEE 2020Pages: 332, PDF Size: 8.87 MB
Page 113 of 332
111
Front Air Bag Operation
Front Air Bags are designed to provide addi-
tional protection by supplementing the seat
belts. Front air bags are not expected to
reduce the risk of injury in rear, side, or roll -
over collisions. The front air bags will not
deploy in all frontal collisions, including
some that may produce substantial vehicle
damage — for example, some pole colli -
sions, truck underrides, and angle offset
collisions.
On the other hand, depending on the type
and location of impact, front air bags may
deploy in crashes with little vehicle front-end
damage but that produce a severe initial
deceleration.
Because air bag sensors measure vehicle
deceleration over time, vehicle speed and
damage by themselves are not good indica -
tors of whether or not an air bag should have
deployed.
Seat belts are necessary for your protection
in all collisions, and also are needed to help
keep you in position, away from an inflating
air bag. When the ORC detects a collision requiring
the front air bags, it signals the inflator units.
A large quantity of non-toxic gas is generated
to inflate the front air bags.
The steering wheel hub trim cover and the
upper passenger side of the instrument
panel separate and fold out of the way as the
air bags inflate to their full size. The front air
bags fully inflate in less time than it takes to
blink your eyes. The front air bags then
quickly deflate while helping to restrain the
driver and front passenger.
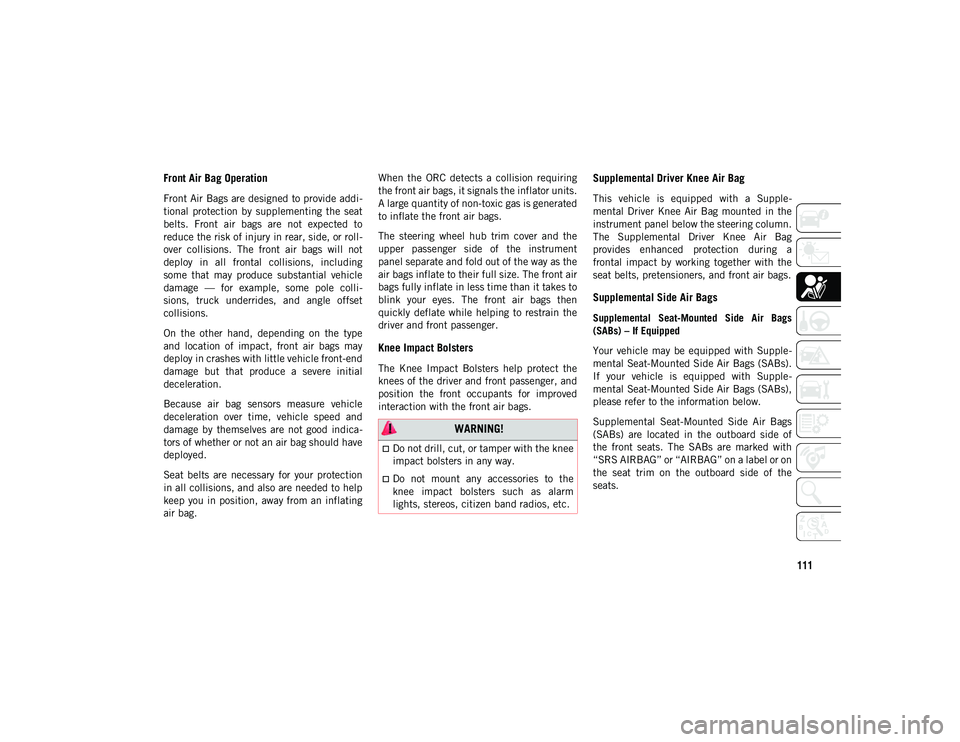
Knee Impact Bolsters
The Knee Impact Bolsters help protect the
knees of the driver and front passenger, and
position the front occupants for improved
interaction with the front air bags.
Supplemental Driver Knee Air Bag
This vehicle is equipped with a Supple
-
mental Driver Knee Air Bag mounted in the
instrument panel below the steering column.
The Supplemental Driver Knee Air Bag
provides enhanced protection during a
frontal impact by working together with the
seat belts, pretensioners, and front air bags.
Supplemental Side Air Bags
Supplemental Seat-Mounted Side Air Bags
(SABs) – If Equipped
Your vehicle may be equipped with Supple -
mental Seat-Mounted Side Air Bags (SABs).
If your vehicle is equipped with Supple -
mental Seat-Mounted Side Air Bags (SABs),
please refer to the information below.
Supplemental Seat-Mounted Side Air Bags
(SABs) are located in the outboard side of
the front seats. The SABs are marked with
“SRS AIRBAG” or “AIRBAG” on a label or on
the seat trim on the outboard side of the
seats.
WARNING!
Do not drill, cut, or tamper with the knee
impact bolsters in any way.
Do not mount any accessories to the
knee impact bolsters such as alarm
lights, stereos, citizen band radios, etc.
2020_JEEP_CHEROKEE_UG_RHD_UK.book Page 111
Page 167 of 332
165
Enabling And Disabling ParkSense
ParkSense can be enabled and disabled with
the ParkSense switch located below the
Uconnect display.When the ParkSense switch is
pushed to disable the system, the
instrument cluster will display the
“PARKSENSE OFF” message for
approximately five seconds. When the gear
selector is moved to REVERSE and the
system is disabled, the instrument cluster
display will display the “PARKSENSE OFF”
message for as long as the vehicle is in
REVERSE.
Refer to “Instrument Cluster Display” in
“Getting To Know Your Instrument Panel” in
your Owner’s Manual for further information.
The ParkSense switch LED will be on when
ParkSense is disabled or requires service.
The ParkSense switch LED will be off when
the system is enabled. If the ParkSense
switch is pushed, and the system requires
service, the ParkSense switch LED will blink
momentarily, and then the LED will be on.
ParkSense System Usage Precautions
NOTE:
Ensure that the rear bumper is free of
snow, ice, mud, dirt and debris to keep the
ParkSense system operating properly.
Jackhammers, large trucks, and other
vibrations could affect the performance of
ParkSense.
When you turn ParkSense off, the instru -
ment cluster will display “PARKSENSE
OFF.” Furthermore, once you turn Park-
Sense off, it remains off until you turn it
on again, even if you cycle the ignition.
When you move the gear selector to the
REVERSE position and ParkSense is
turned off, the instrument cluster display
will display “PARKSENSE OFF” message
for as long as the vehicle is in REVERSE.
ParkSense, when on, will reduce the
volume of the radio when it is sounding a
tone.
Clean the ParkSense sensors regularly,
taking care not to scratch or damage them.
The sensors must not be covered with ice,
snow, slush, mud, dirt or debris. Failure to
do so can result in the system not working
properly. The ParkSense system might not
detect an obstacle behind the fascia/
bumper, or it could provide a false indica-
tion that an obstacle is behind the fascia/
bumper.
Use the ParkSense switch to turn the
ParkSense system off if objects such as
bicycle carriers, trailer hitches, etc. are
placed within 12 inches (30 cm) from the
rear fascia/bumper. Failure to do so can
result in the system misinterpreting a
close object as a sensor problem, causing
the “PARKSENSE UNAVAILABLE
SERVICE REQUIRED” message to be
displayed in the instrument cluster
display.
ParkSense should be disabled when the
liftgate is in the open position and the
vehicle is in REVERSE. An open liftgate
could provide a false indication that an
obstacle is behind the vehicle.
2020_JEEP_CHEROKEE_UG_RHD_UK.book Page 165
Page 192 of 332
IN CASE OF EMERGENCY
190
F6910 Amp Red –Transfer Case Switch (TSBM)/Active Grill Shutter
(AGS) – If Equipped With Gas Engine (*)
F70 5 Amp Tan –Intelligent Battery Sensor (IBS)
(*)
F71 – – Not Used
F72 10 Amp Red –Heated Mirrors (Gas) / PM Sensor (Diesel)
F73 –20 Amp Blue NOX Sensor #1 & #2 / Trailer Tow Backup (NAFTA
& Gas)(*)
F74 –30 Amp Pink Rear Defroster (EBL)
F75 20 Amp Yellow –Cigar Lighter – If Equipped
F76 20 Amp Yellow –Rear Differential Module (RDM) - If Equipped
(*)
F77 10 Amp Red –Hands Free Module, Brake Pedal Switch
(*)
F78 10 Amp Red –Diagnostic Port / Digital TV / TBM
(*)
F79 10 Amp Red –Integrated Center Stack (ICS)/Electric Park Brake
(EPB) SW/CD Module/Steering Control Module (SCCM)/HVAC/Instrument Panel Cluster (IPC) (*)
F80 20 Amp Yellow – Radio
CavityBlade Fuse Cartridge Fuse Description
2020_JEEP_CHEROKEE_UG_RHD_UK.book Page 190
Page 212 of 332
IN CASE OF EMERGENCY
210
(Continued)
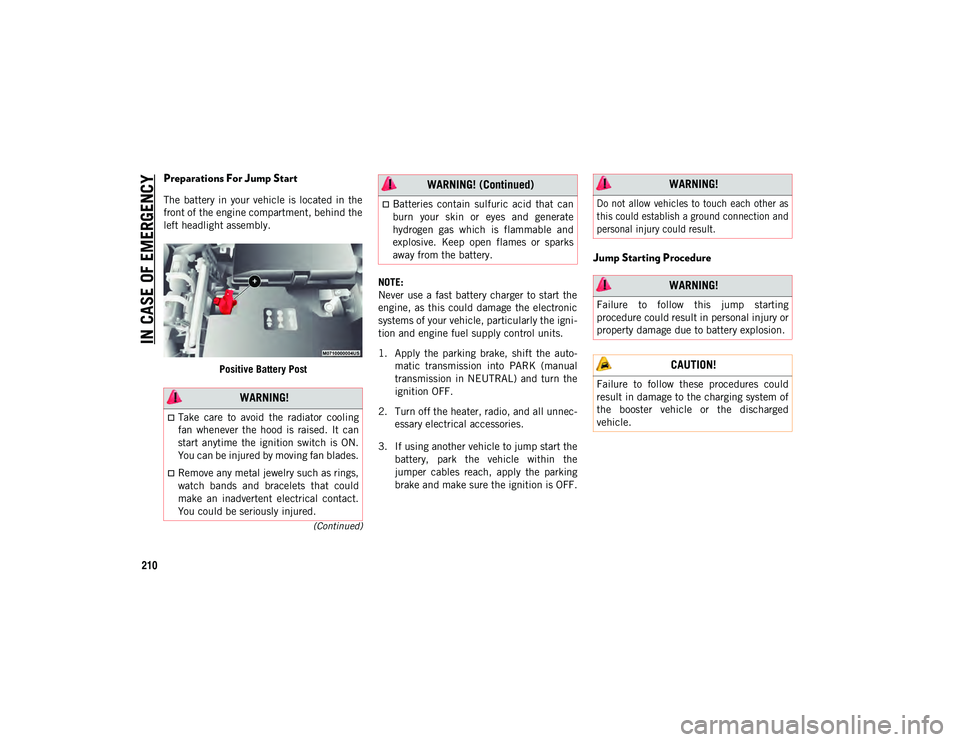
Preparations For Jump Start
The battery in your vehicle is located in the
front of the engine compartment, behind the
left headlight assembly.Positive Battery Post NOTE:
Never use a fast battery charger to start the
engine, as this could damage the electronic
systems of your vehicle, particularly the igni
-
tion and engine fuel supply control units.
1. Apply the parking brake, shift the auto -
matic transmission into PARK (manual
transmission in NEUTRAL) and turn the
ignition OFF.
2. Turn off the heater, radio, and all unnec -
essary electrical accessories.
3. If using another vehicle to jump start the battery, park the vehicle within the
jumper cables reach, apply the parking
brake and make sure the ignition is OFF.
Jump Starting Procedure
WARNING!
Take care to avoid the radiator cooling
fan whenever the hood is raised. It can
start anytime the ignition switch is ON.
You can be injured by moving fan blades.
Remove any metal jewelry such as rings,
watch bands and bracelets that could
make an inadvertent electrical contact.
You could be seriously injured.
Batteries contain sulfuric acid that can
burn your skin or eyes and generate
hydrogen gas which is flammable and
explosive. Keep open flames or sparks
away from the battery.
WARNING! (Continued) WARNING!
Do not allow vehicles to touch each other as
this could establish a ground connection and
personal injury could result.
WARNING!
Failure to follow this jump starting
procedure could result in personal injury or
property damage due to battery explosion.
CAUTION!
Failure to follow these procedures could
result in damage to the charging system of
the booster vehicle or the discharged
vehicle.
2020_JEEP_CHEROKEE_UG_RHD_UK.book Page 210
Page 256 of 332
SERVICING AND MAINTENAN
CE
254
Plastic And Coated Parts
Use a specific product to clean vinyl
upholstery.
Cleaning Plastic Instrument Cluster Lenses
The lenses in front of the instruments in this
vehicle are molded in clear plastic. When
cleaning the lenses, care must be taken to
avoid scratching the plastic.
1. Clean with a wet soft cloth. A mild soapsolution may be used, but do not use
high alcohol content or abrasive
cleaners. If soap is used, wipe clean with
a clean damp cloth.
2. Dry with a soft cloth.
Leather Parts
Your leather upholstery can be best
preserved by regular cleaning with a damp
soft cloth. Small particles of dirt can act as
an abrasive and damage the leather uphol -
stery and should be removed promptly with a
damp cloth. Care should be taken to avoid
soaking your leather upholstery with any
liquid. Please do not use polishes, oils,
cleaning fluids, solvents, detergents, or
ammonia-based cleaners to clean your
leather upholstery. Application of a leather
conditioner is not required to maintain the
original condition.
NOTE:
If equipped with light colored leather, it
tends to show any foreign material, dirt, and
fabric dye transfer more so than darker
colors. The leather is designed for easy
cleaning.
Glass Surfaces
All glass surfaces should be cleaned on a
regular basis with any commercial house -
hold-type glass cleaner. Never use an abra -
sive type cleaner. Use caution when cleaning
the inside rear window equipped with elec -
tric defrosters or windows equipped with
radio antennas. Do not use scrapers or other
sharp instruments that may scratch the
elements.
When cleaning the rear view mirror, spray
cleaner on the towel or cloth that you are
using. Do not spray cleaner directly on the
mirror.
CAUTION!
Direct contact of air fresheners, insect
repellents, suntan lotions, or hand
sanitizers to the plastic, painted, or
decorated surfaces of the interior may
cause permanent damage. Wipe away
immediately.
Damage caused by these type of
products may not be covered by your
New Vehicle Limited Warranty.
CAUTION!
Do not use Alcohol and Alcohol-based and/
or Ketone based cleaning products to
clean leather upholstery, as damage to the
upholstery may result.
2020_JEEP_CHEROKEE_UG_RHD_UK.book Page 254
Page 271 of 332
269
UCONNECT 3 WITH 5-INCH
DISPLAY — IF EQUIPPED
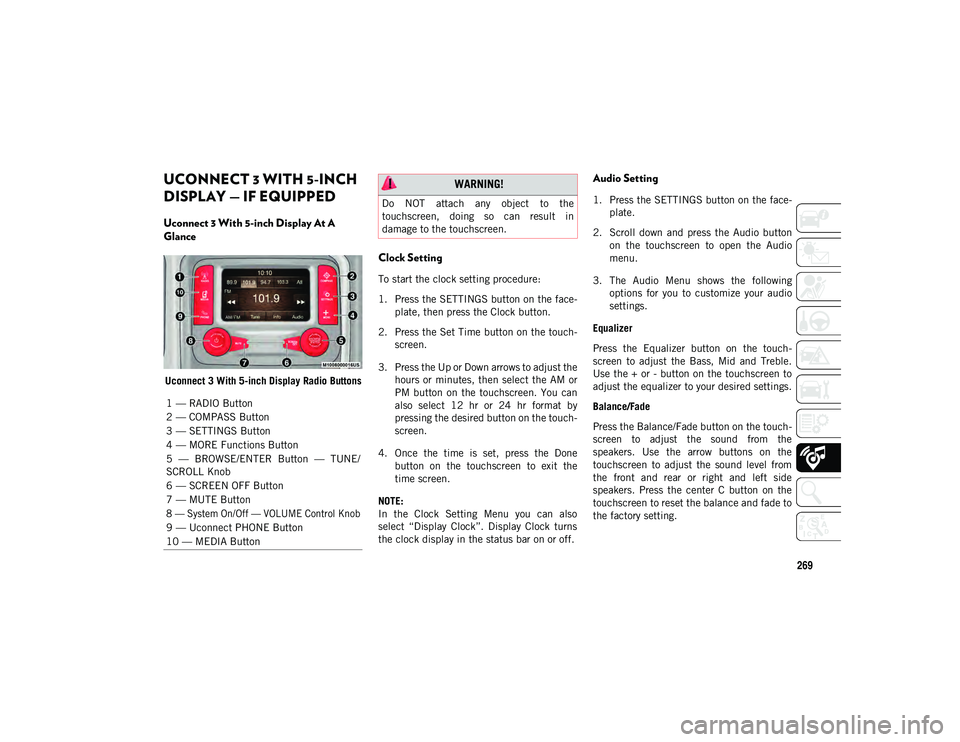
Uconnect 3 With 5-inch Display At A
Glance
Uconnect 3 With 5-inch Display Radio Buttons
Clock Setting
To start the clock setting procedure:
1. Press the SETTINGS button on the face-
plate, then press the Clock button.
2. Press the Set Time button on the touch -
screen.
3. Press the Up or Down arrows to adjust the hours or minutes, then select the AM or
PM button on the touchscreen. You can
also select 12 hr or 24 hr format by
pressing the desired button on the touch -
screen.
4. Once the time is set, press the Done button on the touchscreen to exit the
time screen.
NOTE:
In the Clock Setting Menu you can also
select “Display Clock”. Display Clock turns
the clock display in the status bar on or off.
Audio Setting
1. Press the SETTINGS button on the face -
plate.
2. Scroll down and press the Audio button on the touchscreen to open the Audio
menu.
3. The Audio Menu shows the following options for you to customize your audio
settings.
Equalizer
Press the Equalizer button on the touch -
screen to adjust the Bass, Mid and Treble.
Use the + or - button on the touchscreen to
adjust the equalizer to your desired settings.
Balance/Fade
Press the Balance/Fade button on the touch -
screen to adjust the sound from the
speakers. Use the arrow buttons on the
touchscreen to adjust the sound level from
the front and rear or right and left side
speakers. Press the center C button on the
touchscreen to reset the balance and fade to
the factory setting.
1 — RADIO Button
2 — COMPASS Button
3 — SETTINGS Button
4 — MORE Functions Button
5 — BROWSE/ENTER Button — TUNE/
SCROLL Knob
6 — SCREEN OFF Button
7 — MUTE Button
8 — System On/Off — VOLUME Control Knob
9 — Uconnect PHONE Button
10 — MEDIA Button
WARNING!
Do NOT attach any object to the
touchscreen, doing so can result in
damage to the touchscreen.
2020_JEEP_CHEROKEE_UG_RHD_UK.book Page 269
Page 272 of 332
MULTIMEDIA
270
Speed Adjusted Volume — If Equipped
Press the Speed Adjusted Volume button on
the touchscreen to select between OFF, 1, 2
or 3. This will decrease the radio volume
relative to a decrease in vehicle speed.
Loudness — If Equipped
Press the Loudness button on the touch-
screen to select the Loudness feature. When
this feature is activated, it improves sound
quality at lower volumes.
Surround Sound — If Equipped
Press the Surround Sound button on the
touchscreen, select On or Off followed by
pressing the back arrow button on the touch -
screen. When this feature is activated, it
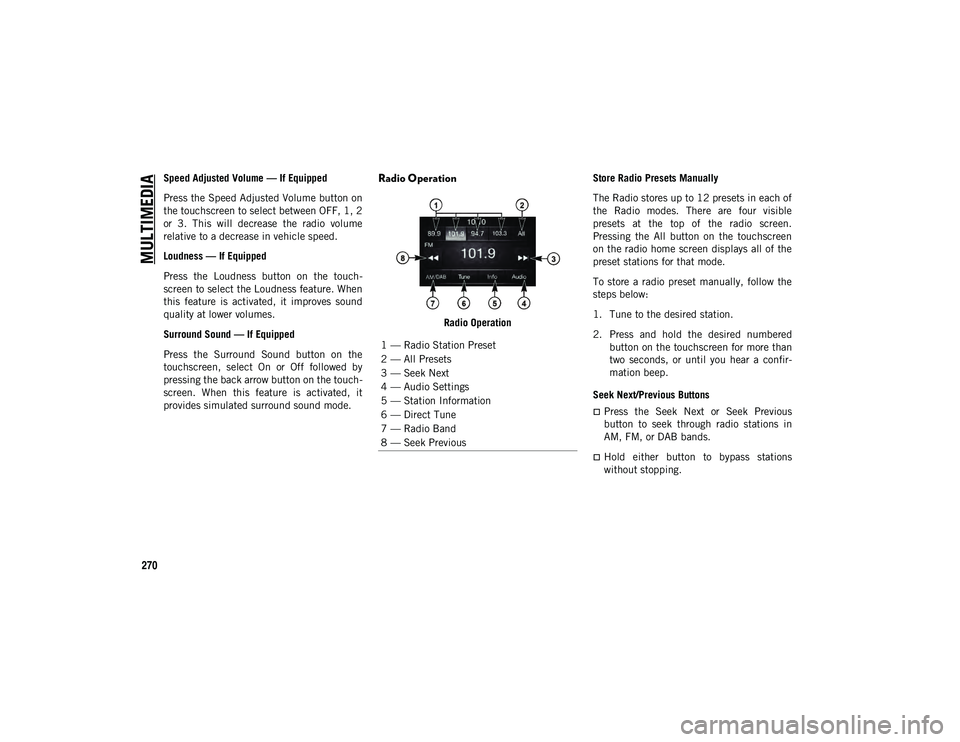
provides simulated surround sound mode.Radio Operation
Radio Operation Store Radio Presets Manually
The Radio stores up to 12 presets in each of
the Radio modes. There are four visible
presets at the top of the radio screen.
Pressing the All button on the touchscreen
on the radio home screen displays all of the
preset stations for that mode.
To store a radio preset manually, follow the
steps below:
1. Tune to the desired station.
2. Press and hold the desired numbered
button on the touchscreen for more than
two seconds, or until you hear a confir -
mation beep.
Seek Next/Previous Buttons
Press the Seek Next or Seek Previous
button to seek through radio stations in
AM, FM, or DAB bands.
Hold either button to bypass stations
without stopping.
1 — Radio Station Preset
2 — All Presets
3 — Seek Next
4 — Audio Settings
5 — Station Information
6 — Direct Tune
7 — Radio Band
8 — Seek Previous
2020_JEEP_CHEROKEE_UG_RHD_UK.book Page 270
Page 274 of 332
MULTIMEDIA
272
UCONNECT 4 WITH 7-INCH
DISPLAY
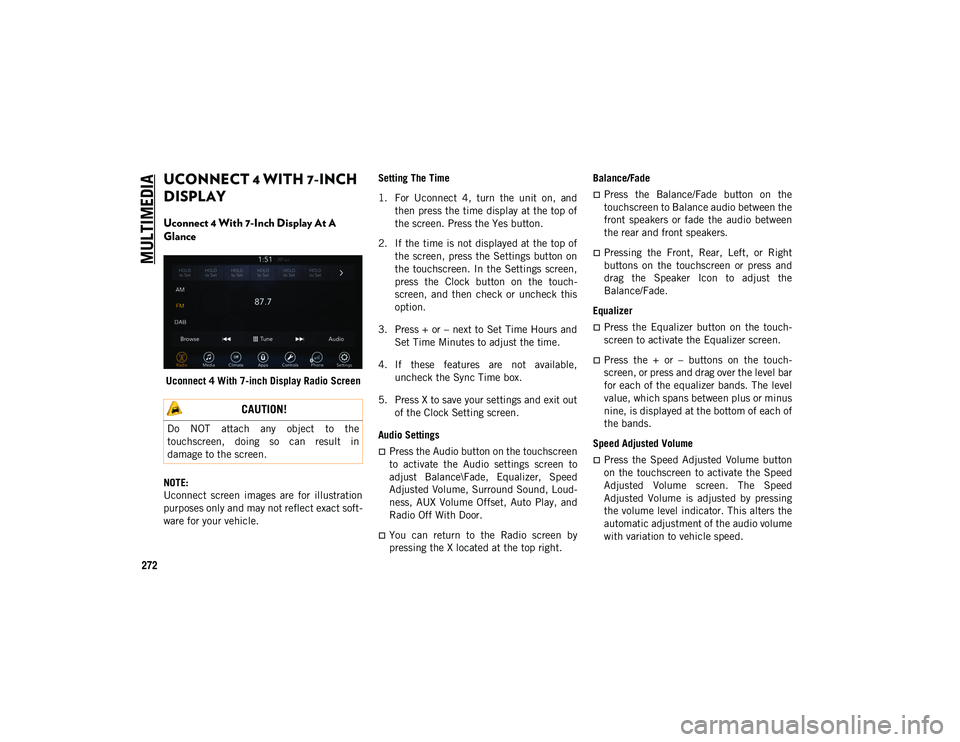
Uconnect 4 With 7-Inch Display At A
Glance
Uconnect 4 With 7-inch Display Radio Screen
NOTE:
Uconnect screen images are for illustration
purposes only and may not reflect exact soft -
ware for your vehicle. Setting The Time
1. For Uconnect 4, turn the unit on, and
then press the time display at the top of
the screen. Press the Yes button.
2. If the time is not displayed at the top of the screen, press the Settings button on
the touchscreen. In the Settings screen,
press the Clock button on the touch -
screen, and then check or uncheck this
option.
3. Press + or – next to Set Time Hours and Set Time Minutes to adjust the time.
4. If these features are not available, uncheck the Sync Time box.
5. Press X to save your settings and exit out of the Clock Setting screen.
Audio Settings
Press the Audio button on the touchscreen
to activate the Audio settings screen to
adjust Balance\Fade, Equalizer, Speed
Adjusted Volume, Surround Sound, Loud -
ness, AUX Volume Offset, Auto Play, and
Radio Off With Door.
You can return to the Radio screen by
pressing the X located at the top right. Balance/Fade
Press the Balance/Fade button on the
touchscreen to Balance audio between the
front speakers or fade the audio between
the rear and front speakers.
Pressing the Front, Rear, Left, or Right
buttons on the touchscreen or press and
drag the Speaker Icon to adjust the
Balance/Fade.
Equalizer
Press the Equalizer button on the touch -
screen to activate the Equalizer screen.
Press the + or – buttons on the touch -
screen, or press and drag over the level bar
for each of the equalizer bands. The level
value, which spans between plus or minus
nine, is displayed at the bottom of each of
the bands.
Speed Adjusted Volume
Press the Speed Adjusted Volume button
on the touchscreen to activate the Speed
Adjusted Volume screen. The Speed
Adjusted Volume is adjusted by pressing
the volume level indicator. This alters the
automatic adjustment of the audio volume
with variation to vehicle speed.
CAUTION!
Do NOT attach any object to the
touchscreen, doing so can result in
damage to the screen.
2020_JEEP_CHEROKEE_UG_RHD_UK.book Page 272
Page 275 of 332
273
Loudness — If Equipped
Press the On button on the touchscreen to
activate Loudness. Press Off to deactivate
this feature. When Loudness is On, the
sound quality at lower volumes improves.
AUX Volume Offset
Press the AUX Volume Offset button on
the touchscreen to activate the AUX
Volume Offset screen. The AUX Volume
Offset is adjusted by pressing of the + and
– buttons. This alters the AUX input audio
volume. The level value, which spans
between plus or minus three, is displayed
above the adjustment bar.
Auto Play — If Equipped
Press the Auto Play button on the touch -
screen to activate the Auto Play screen.
The Auto Play feature has two settings, On
and Off. With Auto Play On, music begins
playing from a connected device immedi -
ately after it is connected to the radio. Auto On Radio — If Equipped
The Radio automatically turns on when
vehicle is in ON/Run or will recall whether
it was on or off at last ignition OFF.
Radio Off With Door — If Equipped
Press the Radio Off With Door button on
the touchscreen to activate the Radio Off
With Door screen. The Radio Off With Door
feature, when activated, keeps the radio
on until the driver or passenger door is
opened, or when the Radio Off Delay
selected time has expired.
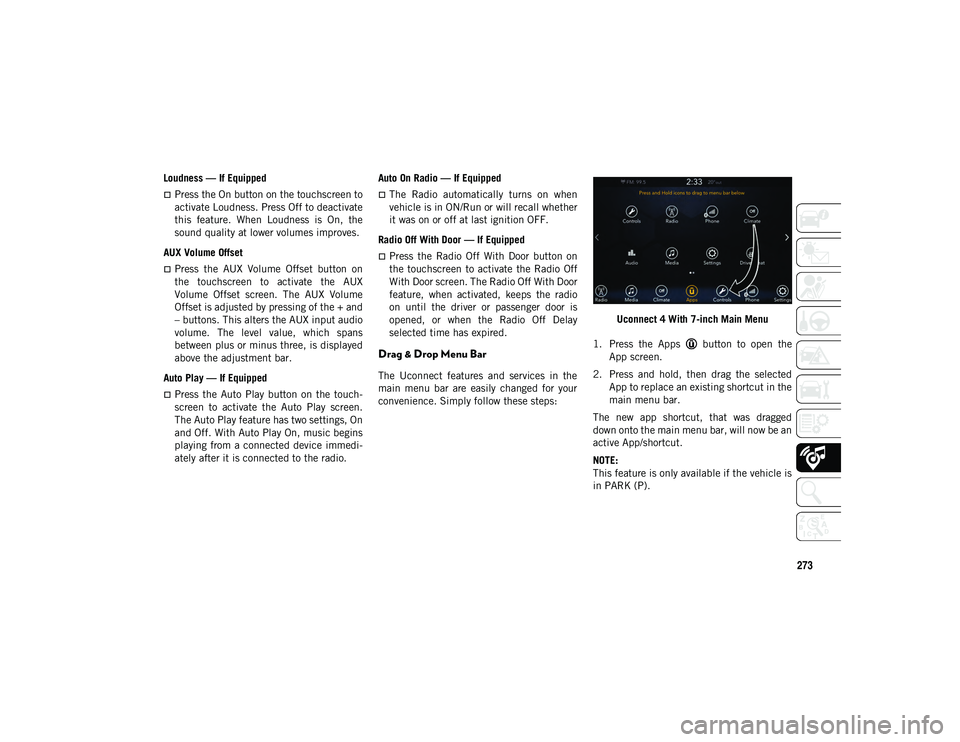
Drag & Drop Menu Bar
The Uconnect features and services in the
main menu bar are easily changed for your
convenience. Simply follow these steps: Uconnect 4 With 7-inch Main Menu
1. Press the Apps button to open the App screen.
2. Press and hold, then drag the selected App to replace an existing shortcut in the
main menu bar.
The new app shortcut, that was dragged
down onto the main menu bar, will now be an
active App/shortcut.
NOTE:
This feature is only available if the vehicle is
in PARK (P).
2020_JEEP_CHEROKEE_UG_RHD_UK.book Page 273
Page 276 of 332
MULTIMEDIA
274
Radio
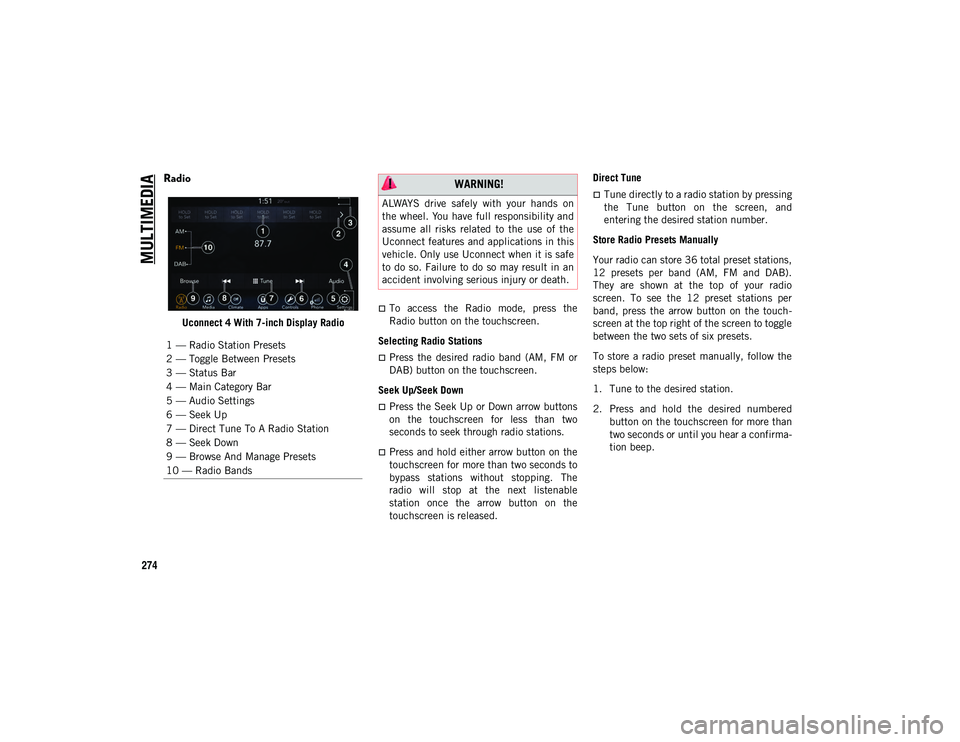
Uconnect 4 With 7-inch Display Radio
To access the Radio mode, press the
Radio button on the touchscreen.
Selecting Radio Stations
Press the desired radio band (AM, FM or
DAB) button on the touchscreen.
Seek Up/Seek Down
Press the Seek Up or Down arrow buttons
on the touchscreen for less than two
seconds to seek through radio stations.
Press and hold either arrow button on the
touchscreen for more than two seconds to
bypass stations without stopping. The
radio will stop at the next listenable
station once the arrow button on the
touchscreen is released. Direct Tune
Tune directly to a radio station by pressing
the Tune button on the screen, and
entering the desired station number.
Store Radio Presets Manually
Your radio can store 36 total preset stations,
12 presets per band (AM, FM and DAB).
They are shown at the top of your radio
screen. To see the 12 preset stations per
band, press the arrow button on the touch -
screen at the top right of the screen to toggle
between the two sets of six presets.
To store a radio preset manually, follow the
steps below:
1. Tune to the desired station.
2. Press and hold the desired numbered button on the touchscreen for more than
two seconds or until you hear a confirma -
tion beep.
1 — Radio Station Presets
2 — Toggle Between Presets
3 — Status Bar
4 — Main Category Bar
5 — Audio Settings
6 — Seek Up
7 — Direct Tune To A Radio Station
8 — Seek Down
9 — Browse And Manage Presets
10 — Radio Bands WARNING!
ALWAYS drive safely with your hands on
the wheel. You have full responsibility and
assume all risks related to the use of the
Uconnect features and applications in this
vehicle. Only use Uconnect when it is safe
to do so. Failure to do so may result in an
accident involving serious injury or death.
2020_JEEP_CHEROKEE_UG_RHD_UK.book Page 274