display JEEP COMPASS 2015 1.G Owner's Manual
[x] Cancel search | Manufacturer: JEEP, Model Year: 2015, Model line: COMPASS, Model: JEEP COMPASS 2015 1.GPages: 132, PDF Size: 21.94 MB
Page 50 of 132
Equalizer, Balance And Fade
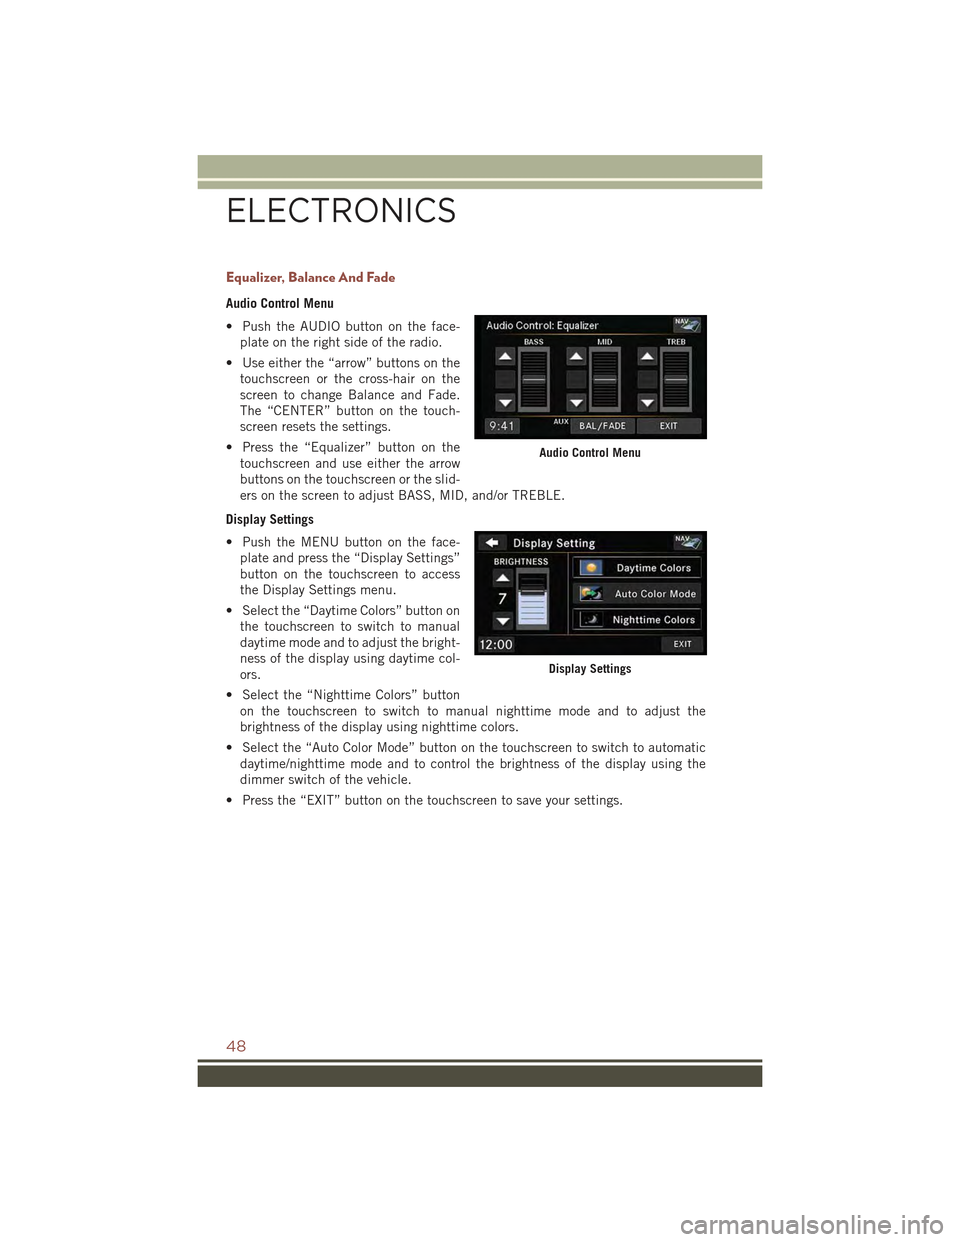
Audio Control Menu
• Push the AUDIO button on the face-
plate on the right side of the radio.
• Use either the “arrow” buttons on the
touchscreen or the cross-hair on the
screen to change Balance and Fade.
The “CENTER” button on the touch-
screen resets the settings.
• Press the “Equalizer” button on the
touchscreen and use either the arrow
buttons on the touchscreen or the slid-
ers on the screen to adjust BASS, MID, and/or TREBLE.
Display Settings
• Push the MENU button on the face-
plate and press the “Display Settings”
button on the touchscreen to access
the Display Settings menu.
• Select the “Daytime Colors” button on
the touchscreen to switch to manual
daytime mode and to adjust the bright-
ness of the display using daytime col-
ors.
• Select the “Nighttime Colors” button
on the touchscreen to switch to manual nighttime mode and to adjust the
brightness of the display using nighttime colors.
• Select the “Auto Color Mode” button on the touchscreen to switch to automatic
daytime/nighttime mode and to control the brightness of the display using the
dimmer switch of the vehicle.
• Press the “EXIT” button on the touchscreen to save your settings.
Audio Control Menu
Display Settings
ELECTRONICS
48
Page 52 of 132
Store Radio Presets
• Select the radio band by pressing either the “AM,” “FM,” or “SAT” button on the
touchscreen.
• Find the station to store by either pressing the “Seek Up” or “Seek Down” buttonson the touchscreen, pressing the “SCAN” button on the touchscreen, or by usingthe “DIRECT TUNE” button on the touchscreen.
• Once the station is found, press and hold one of the “PRESET” buttons on the
touchscreen in the list to the right, until you hear a confirmation beep.
NOTE:
If the Presets are not visible on the right side of the screen, press the “PRESETS”
button on the touchscreen.
CD/DVD Disc Operation
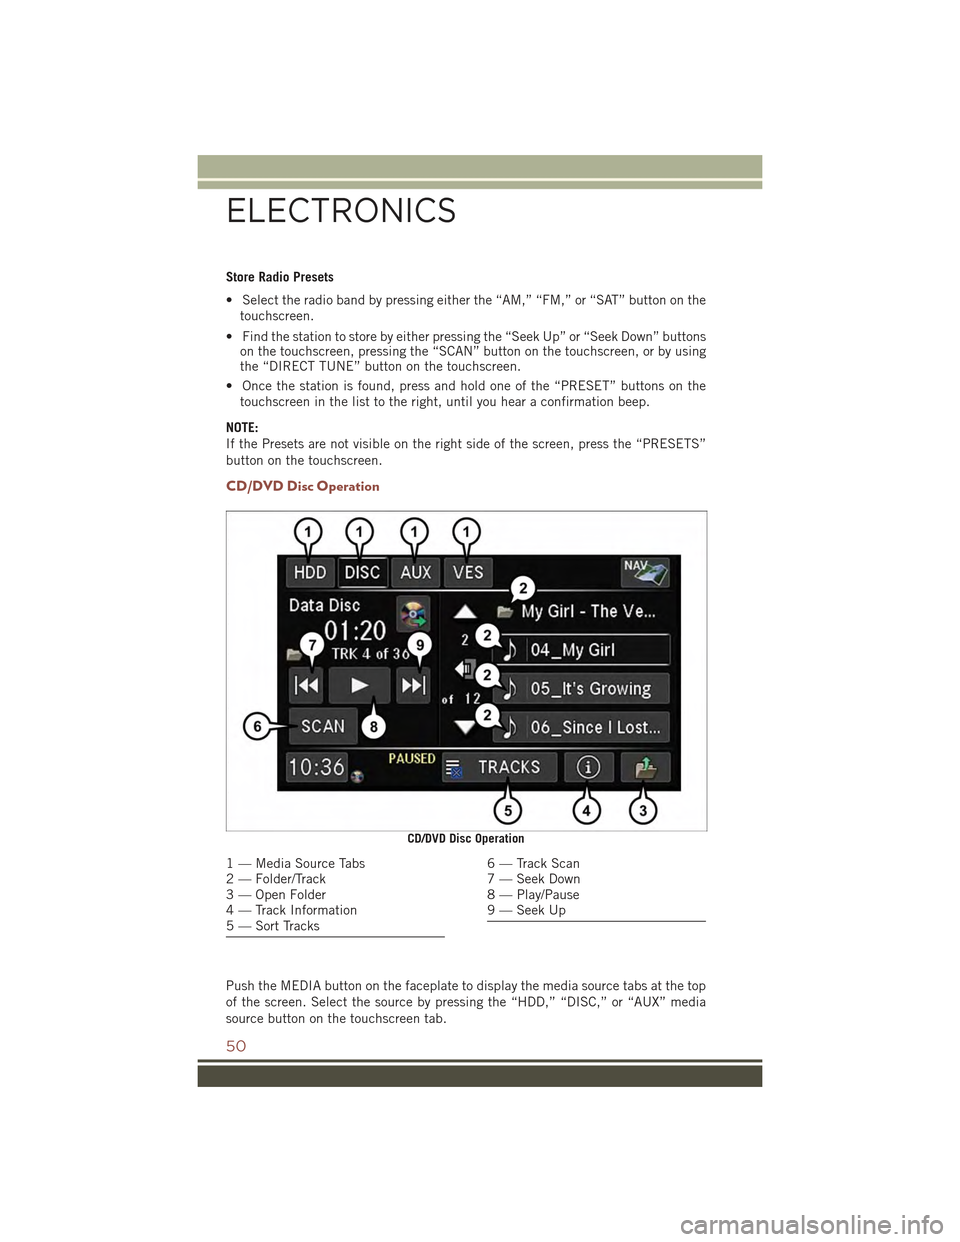
Push the MEDIA button on the faceplate to display the media source tabs at the top
of the screen. Select the source by pressing the “HDD,” “DISC,” or “AUX” media
source button on the touchscreen tab.
CD/DVD Disc Operation
1 — Media Source Tabs2 — Folder/Track3 — Open Folder4 — Track Information5 — Sort Tracks
6 — Track Scan7 — Seek Down8 — Play/Pause9 — Seek Up
ELECTRONICS
50
Page 53 of 132
NOTE:
Your Touchscreen Radio will automatically switch to the appropriate mode when
something is first connected or inserted into the system.
Insert a CD/DVD Disc
• To insert a disc, push the LOAD button on the faceplate.
• With the printed side upwards, insert the disc into the disc slot of the radio. The
radio pulls the disc in automatically and closes the flip screen. The radio selects
the appropriate mode after the disc is recognized, and starts playing the first track.
The display shows “Reading...” during this process.
Seek Up/Seek Down
• Push the “Seek Up” or “Seek Down” buttons on the touchscreen to seek through
tracks in Disc Mode. Hold either Seek button to bypass tracks without stopping.
Audio Jack Operation
• The AUX/Audio Jack provides a means to connect a portable audio device, such as
an MP3 player or an iPod®, to the vehicle’s sound system. This requires the use of
a 3.5 mm stereo audio patch cable.
• Push the MEDIA button on the faceplate then the “AUX” button on the touch-
screen to change the mode to auxiliary device if the Audio Jack is connected,
allowing the music from your portable device to play through the vehicle's
speakers.
• The functions of the portable device are controlled using the device itself, not the
buttons on the radio. However, the volume may be controlled using the radio or
portable device.
Hard Disk Drive (HDD) Operation
• The Hard Disk Drive (HDD) mode gives you access to the audio files on the internal
hard disk drive. It functions similar to a CD player, with the exception that the
internal HDD can hold more tracks.
• It is also possible to import display pictures to the internal hard disk drive. The
pictures can be displayed on the right half of the radio screen.
• Before using the HDD mode, you will need to copy songs and pictures to the
internal hard drive. Songs and pictures can be added to the hard drive by using a
CD or USB device (e.g. thumb drive or memory stick).
NOTE:
• HDD supports only .jpg/JPEG formats for photos.
• WMA/MP3 Files and Selective Songs from a CD can also be added to the HDD. See
the Uconnect®430/430N User's Manual for more information.
ELECTRONICS
51
Page 55 of 132
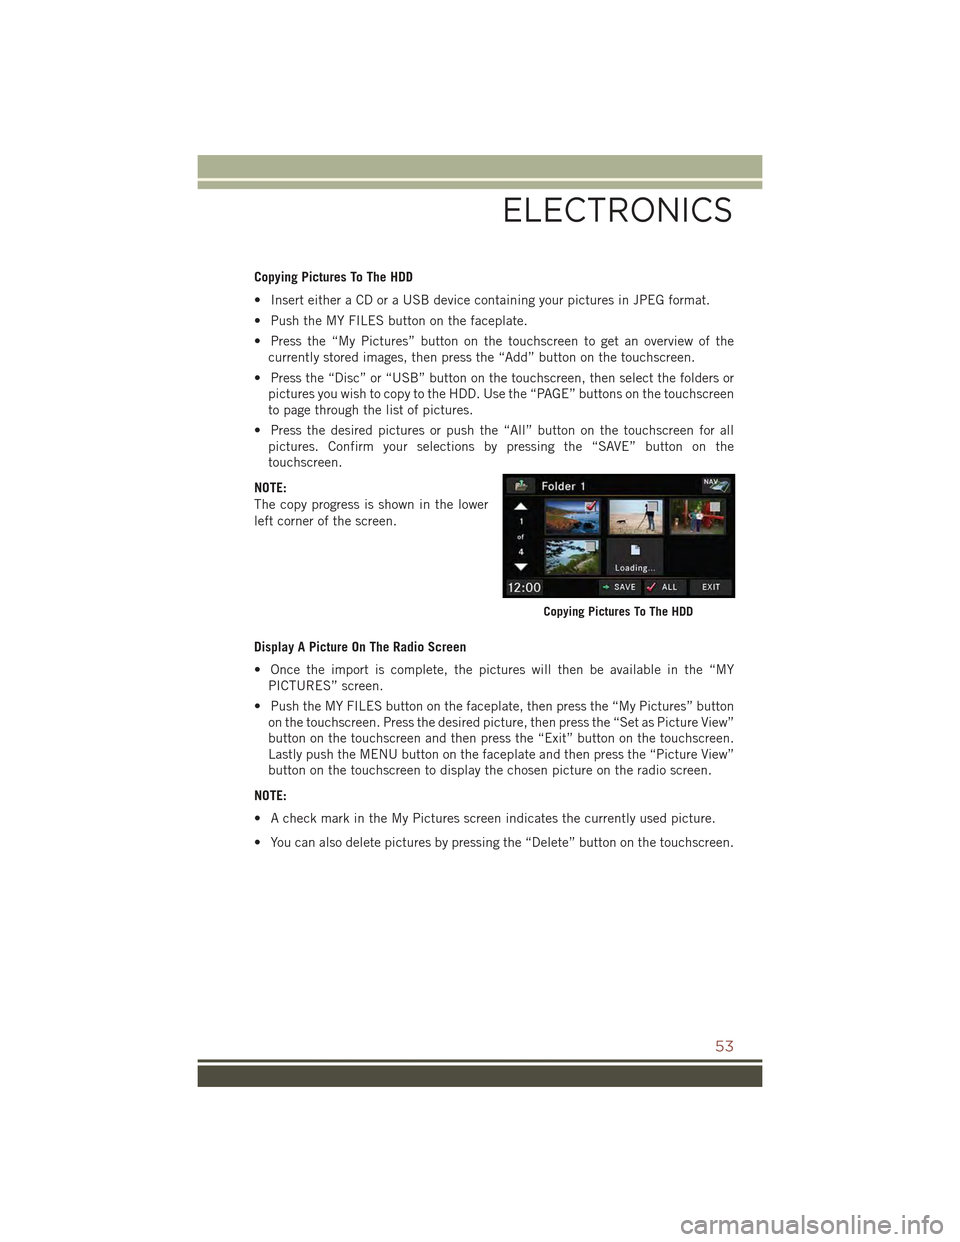
Copying Pictures To The HDD
• Insert either a CD or a USB device containing your pictures in JPEG format.
• Push the MY FILES button on the faceplate.
• Press the “My Pictures” button on the touchscreen to get an overview of the
currently stored images, then press the “Add” button on the touchscreen.
• Press the “Disc” or “USB” button on the touchscreen, then select the folders or
pictures you wish to copy to the HDD. Use the “PAGE” buttons on the touchscreen
to page through the list of pictures.
• Press the desired pictures or push the “All” button on the touchscreen for all
pictures. Confirm your selections by pressing the “SAVE” button on the
touchscreen.
NOTE:
The copy progress is shown in the lower
left corner of the screen.
Display A Picture On The Radio Screen
• Once the import is complete, the pictures will then be available in the “MY
PICTURES” screen.
• Push the MY FILES button on the faceplate, then press the “My Pictures” button
on the touchscreen. Press the desired picture, then press the “Set as Picture View”
button on the touchscreen and then press the “Exit” button on the touchscreen.
Lastly push the MENU button on the faceplate and then press the “Picture View”
button on the touchscreen to display the chosen picture on the radio screen.
NOTE:
• A check mark in the My Pictures screen indicates the currently used picture.
• You can also delete pictures by pressing the “Delete” button on the touchscreen.
Copying Pictures To The HDD
ELECTRONICS
53
Page 56 of 132
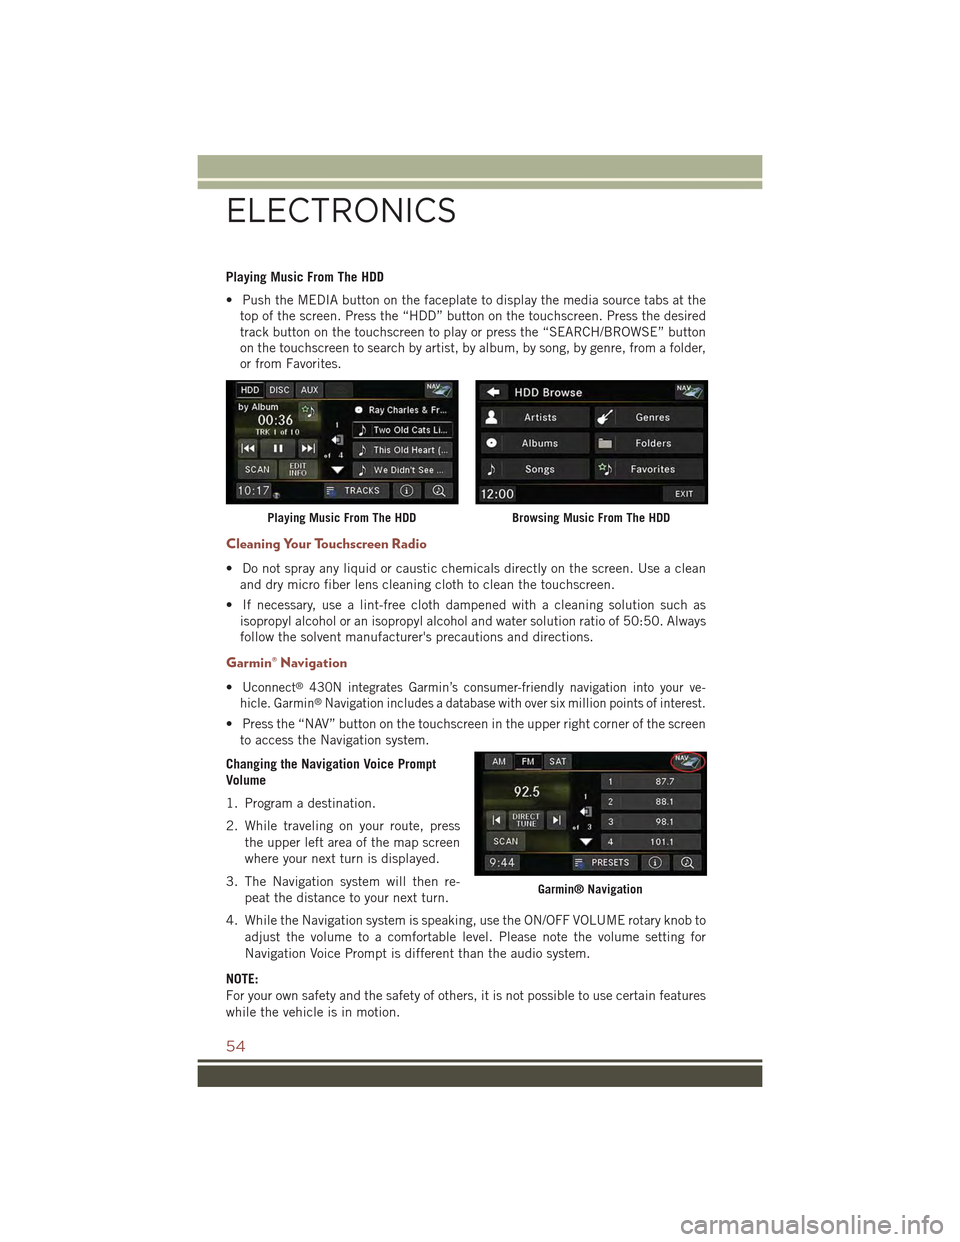
Playing Music From The HDD
• Push the MEDIA button on the faceplate to display the media source tabs at the
top of the screen. Press the “HDD” button on the touchscreen. Press the desired
track button on the touchscreen to play or press the “SEARCH/BROWSE” button
on the touchscreen to search by artist, by album, by song, by genre, from a folder,
or from Favorites.
Cleaning Your Touchscreen Radio
• Do not spray any liquid or caustic chemicals directly on the screen. Use a clean
and dry micro fiber lens cleaning cloth to clean the touchscreen.
• If necessary, use a lint-free cloth dampened with a cleaning solution such as
isopropyl alcohol or an isopropyl alcohol and water solution ratio of 50:50. Always
follow the solvent manufacturer's precautions and directions.
Garmin® Navigation
•Uconnect®430N integrates Garmin’s consumer-friendly navigation into your ve-
hicle. Garmin®Navigation includes a database with over six million points of interest.
• Press the “NAV” button on the touchscreen in the upper right corner of the screen
to access the Navigation system.
Changing the Navigation Voice Prompt
Volume
1. Program a destination.
2. While traveling on your route, press
the upper left area of the map screen
where your next turn is displayed.
3. The Navigation system will then re-
peat the distance to your next turn.
4. While the Navigation system is speaking, use the ON/OFF VOLUME rotary knob to
adjust the volume to a comfortable level. Please note the volume setting for
Navigation Voice Prompt is different than the audio system.
NOTE:
For your own safety and the safety of others, it is not possible to use certain features
while the vehicle is in motion.
Playing Music From The HDDBrowsing Music From The HDD
Garmin® Navigation
ELECTRONICS
54
Page 59 of 132
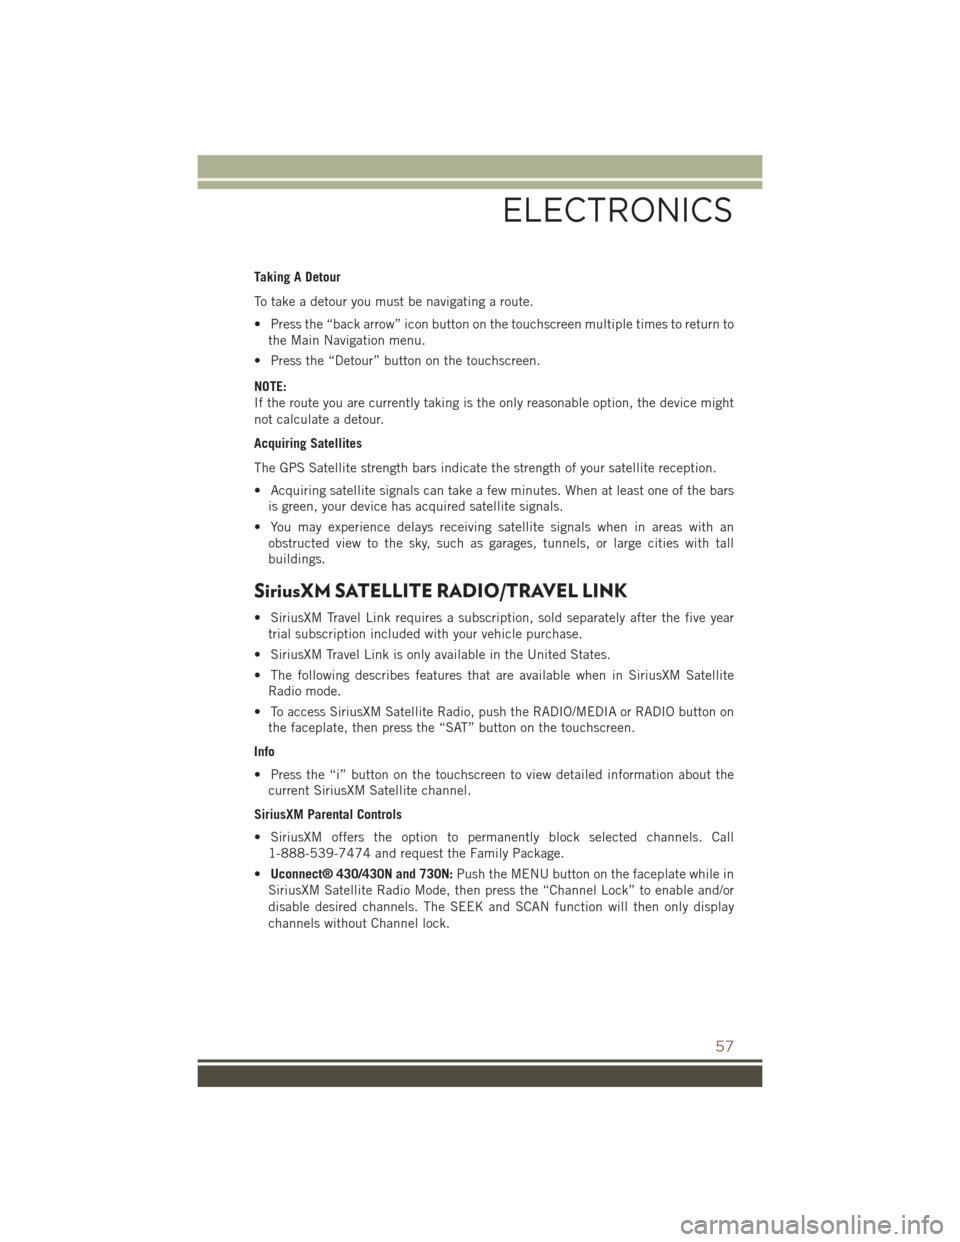
Taking A Detour
To take a detour you must be navigating a route.
• Press the “back arrow” icon button on the touchscreen multiple times to return to
the Main Navigation menu.
• Press the “Detour” button on the touchscreen.
NOTE:
If the route you are currently taking is the only reasonable option, the device might
not calculate a detour.
Acquiring Satellites
The GPS Satellite strength bars indicate the strength of your satellite reception.
• Acquiring satellite signals can take a few minutes. When at least one of the bars
is green, your device has acquired satellite signals.
• You may experience delays receiving satellite signals when in areas with an
obstructed view to the sky, such as garages, tunnels, or large cities with tall
buildings.
SiriusXM SATELLITE RADIO/TRAVEL LINK
• SiriusXM Travel Link requires a subscription, sold separately after the five year
trial subscription included with your vehicle purchase.
• SiriusXM Travel Link is only available in the United States.
• The following describes features that are available when in SiriusXM Satellite
Radio mode.
• To access SiriusXM Satellite Radio, push the RADIO/MEDIA or RADIO button on
the faceplate, then press the “SAT” button on the touchscreen.
Info
• Press the “i” button on the touchscreen to view detailed information about the
current SiriusXM Satellite channel.
SiriusXM Parental Controls
• SiriusXM offers the option to permanently block selected channels. Call
1-888-539-7474 and request the Family Package.
•Uconnect® 430/430N and 730N:Push the MENU button on the faceplate while in
SiriusXM Satellite Radio Mode, then press the “Channel Lock” to enable and/or
disable desired channels. The SEEK and SCAN function will then only display
channels without Channel lock.
ELECTRONICS
57
Page 61 of 132
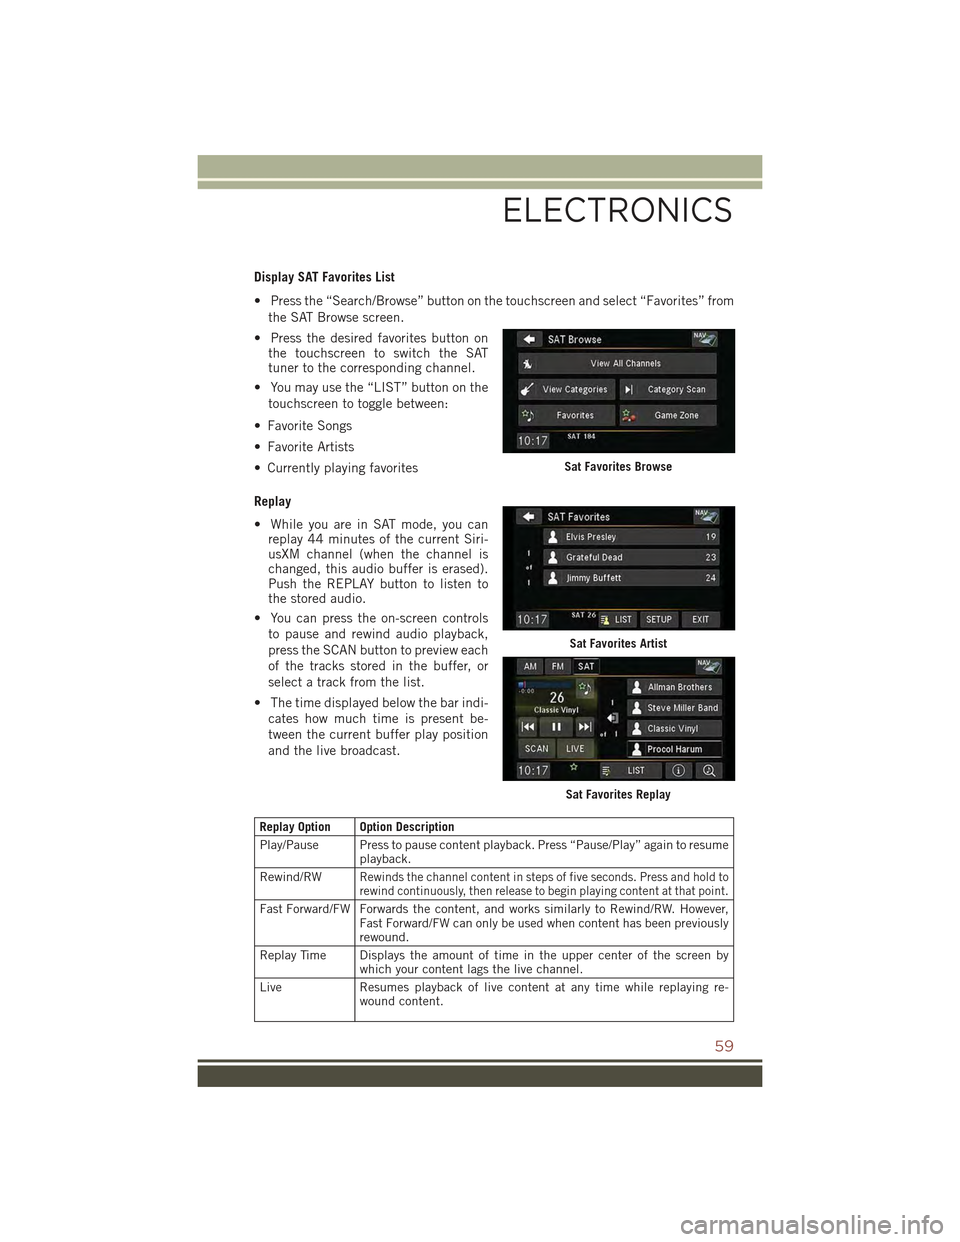
Display SAT Favorites List
• Press the “Search/Browse” button on the touchscreen and select “Favorites” from
the SAT Browse screen.
• Press the desired favorites button onthe touchscreen to switch the SATtuner to the corresponding channel.
• You may use the “LIST” button on the
touchscreen to toggle between:
• Favorite Songs
• Favorite Artists
• Currently playing favorites
Replay
• While you are in SAT mode, you canreplay 44 minutes of the current Siri-usXM channel (when the channel ischanged, this audio buffer is erased).Push the REPLAY button to listen tothe stored audio.
• You can press the on-screen controls
to pause and rewind audio playback,
press the SCAN button to preview each
of the tracks stored in the buffer, or
select a track from the list.
• The time displayed below the bar indi-
cates how much time is present be-
tween the current buffer play position
and the live broadcast.
Replay Option Option Description
Play/Pause Press to pause content playback. Press “Pause/Play” again to resumeplayback.
Rewind/RWRewinds the channel content in steps of five seconds. Press and hold torewind continuously, then release to begin playing content at that point.
Fast Forward/FW Forwards the content, and works similarly to Rewind/RW. However,Fast Forward/FW can only be used when content has been previouslyrewound.
Replay Time Displays the amount of time in the upper center of the screen bywhich your content lags the live channel.
Live Resumes playback of live content at any time while replaying re-wound content.
Sat Favorites Browse
Sat Favorites Artist
Sat Favorites Replay
ELECTRONICS
59
Page 69 of 132
Voice Text Reply
• If equipped with Uconnect®Voice Command, your Uconnect®430N / 730N radio
may be able to play incoming Short Message Service (SMS) messages (text
messages) through the vehicle's sound system.
• It also allows you to respond by selecting from various predefined phrases.
• Not all phones are compatible with this feature. Refer to the phone compatibility
list at UconnectPhone.com. Connected mobile phones must be bluetooth-
compatible and paired with your radio.
• Push the “Voice Command” buttonand after the BEEP, say “SMS” to get
started.
NOTE:
To access the tutorial, push the “Voice Command” button. After the BEEP,
say “tutorial.” Push any button on the faceplate or press any button on the
touchscreen to cancel the tutorial.
WARNING!
Any voice commanded system should be used only in safe driving conditions
following applicable laws regarding phone use. Your attention should be focused
on safely operating the vehicle. Failure to do so may result in a collision causing
you and others to be severely injured or killed.
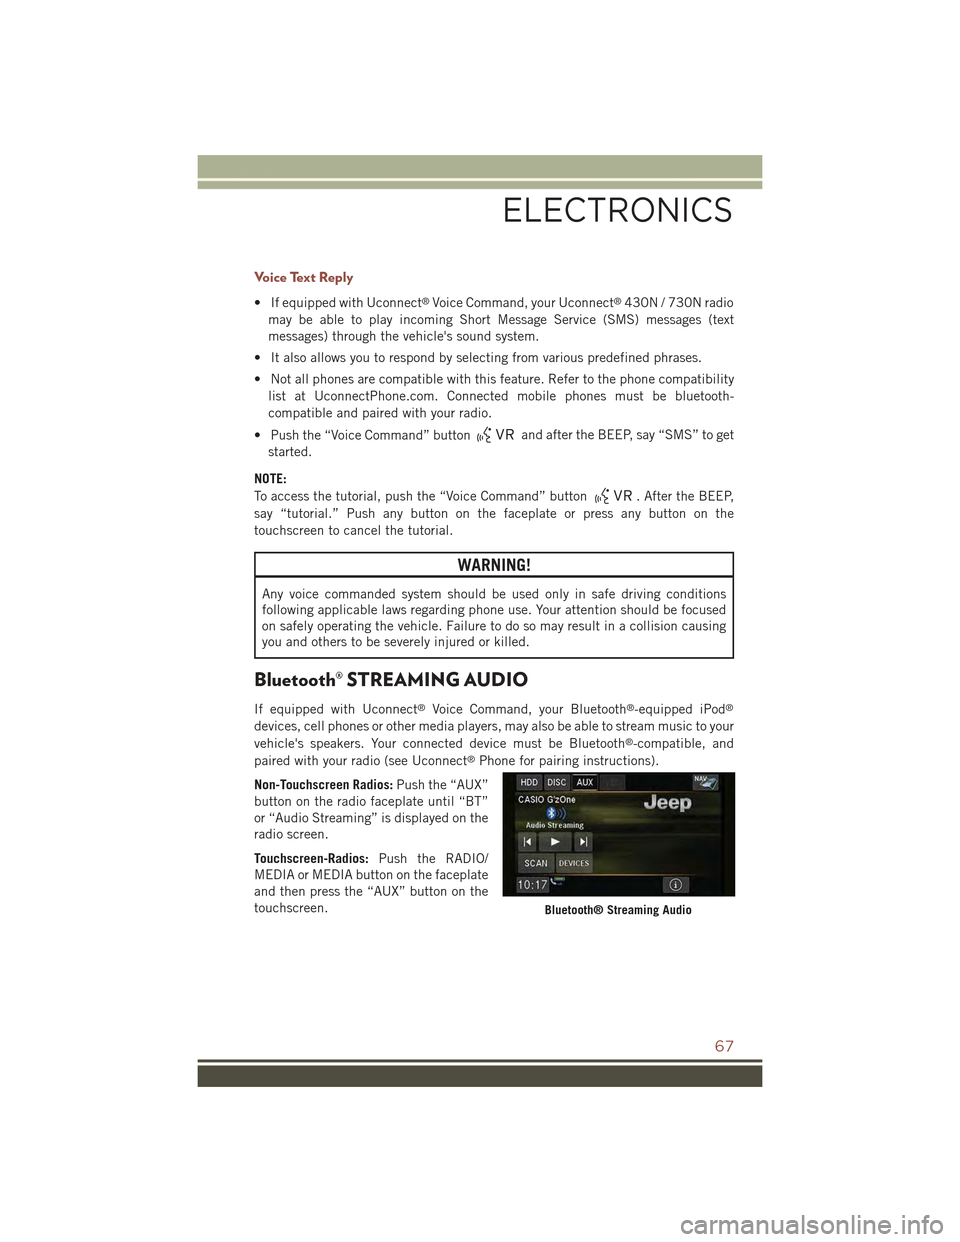
Bluetooth® STREAMING AUDIO
If equipped with Uconnect®Voice Command, your Bluetooth®-equipped iPod®
devices, cell phones or other media players, may also be able to stream music to your
vehicle's speakers. Your connected device must be Bluetooth®-compatible, and
paired with your radio (see Uconnect®Phone for pairing instructions).
Non-Touchscreen Radios:Push the “AUX”
button on the radio faceplate until “BT”
or “Audio Streaming” is displayed on the
radio screen.
Touchscreen-Radios:Push the RADIO/
MEDIA or MEDIA button on the faceplate
and then press the “AUX” button on the
touchscreen.Bluetooth® Streaming Audio
ELECTRONICS
67
Page 70 of 132
ELECTRONIC VEHICLE INFORMATION CENTER
(EVIC)
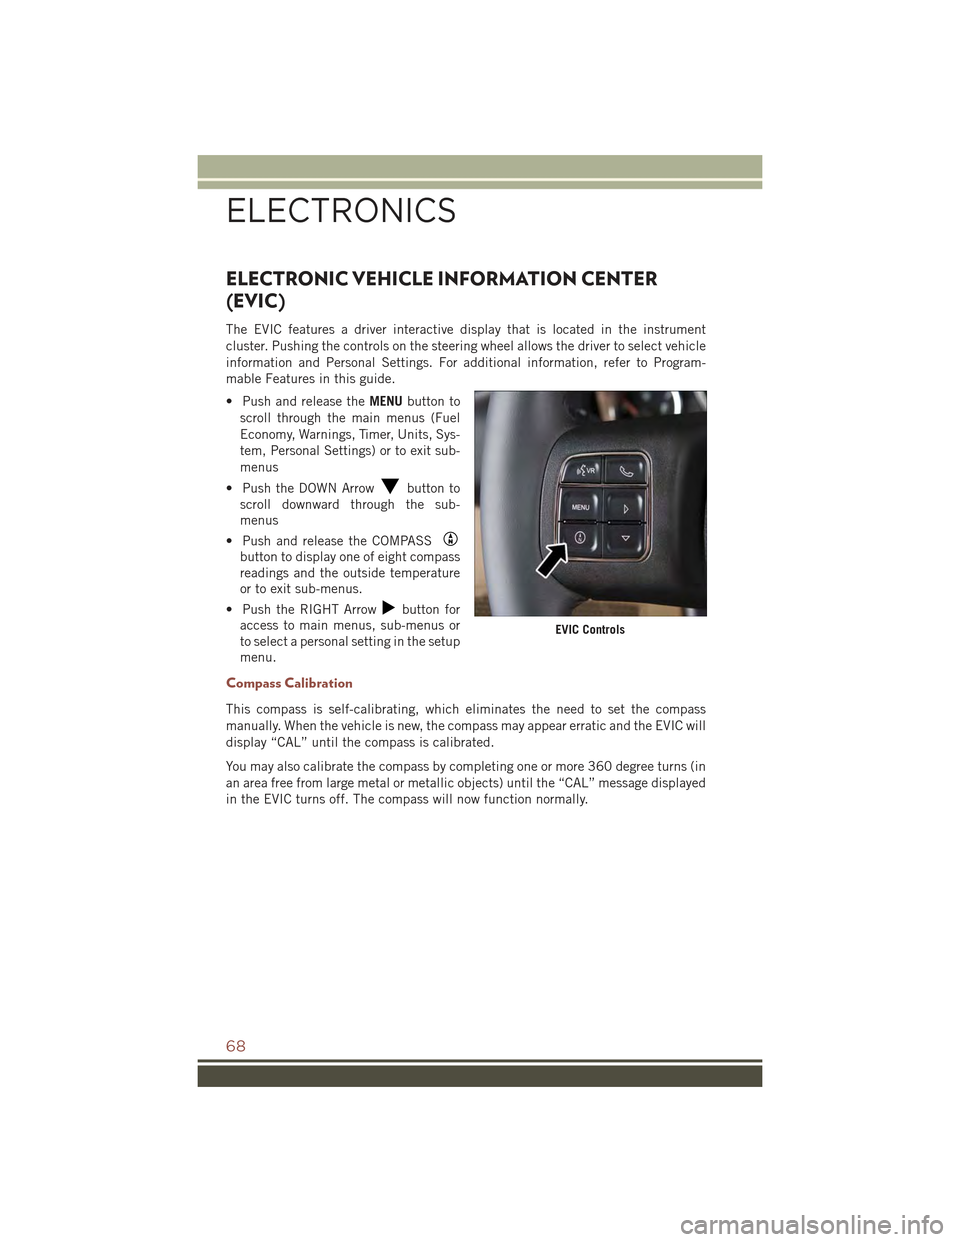
The EVIC features a driver interactive display that is located in the instrument
cluster. Pushing the controls on the steering wheel allows the driver to select vehicle
information and Personal Settings. For additional information, refer to Program-
mable Features in this guide.
• Push and release theMENUbutton to
scroll through the main menus (Fuel
Economy, Warnings, Timer, Units, Sys-
tem, Personal Settings) or to exit sub-
menus
• Push the DOWN Arrowbutton to
scroll downward through the sub-
menus
• Push and release the COMPASS
button to display one of eight compass
readings and the outside temperature
or to exit sub-menus.
• Push the RIGHT Arrowbutton for
access to main menus, sub-menus or
to select a personal setting in the setup
menu.
Compass Calibration
This compass is self-calibrating, which eliminates the need to set the compass
manually. When the vehicle is new, the compass may appear erratic and the EVIC will
display “CAL” until the compass is calibrated.
You may also calibrate the compass by completing one or more 360 degree turns (in
an area free from large metal or metallic objects) until the “CAL” message displayed
in the EVIC turns off. The compass will now function normally.
EVIC Controls
ELECTRONICS
68
Page 71 of 132
PROGRAMMABLE FEATURES
Electronic Vehicle Information Center (EVIC)
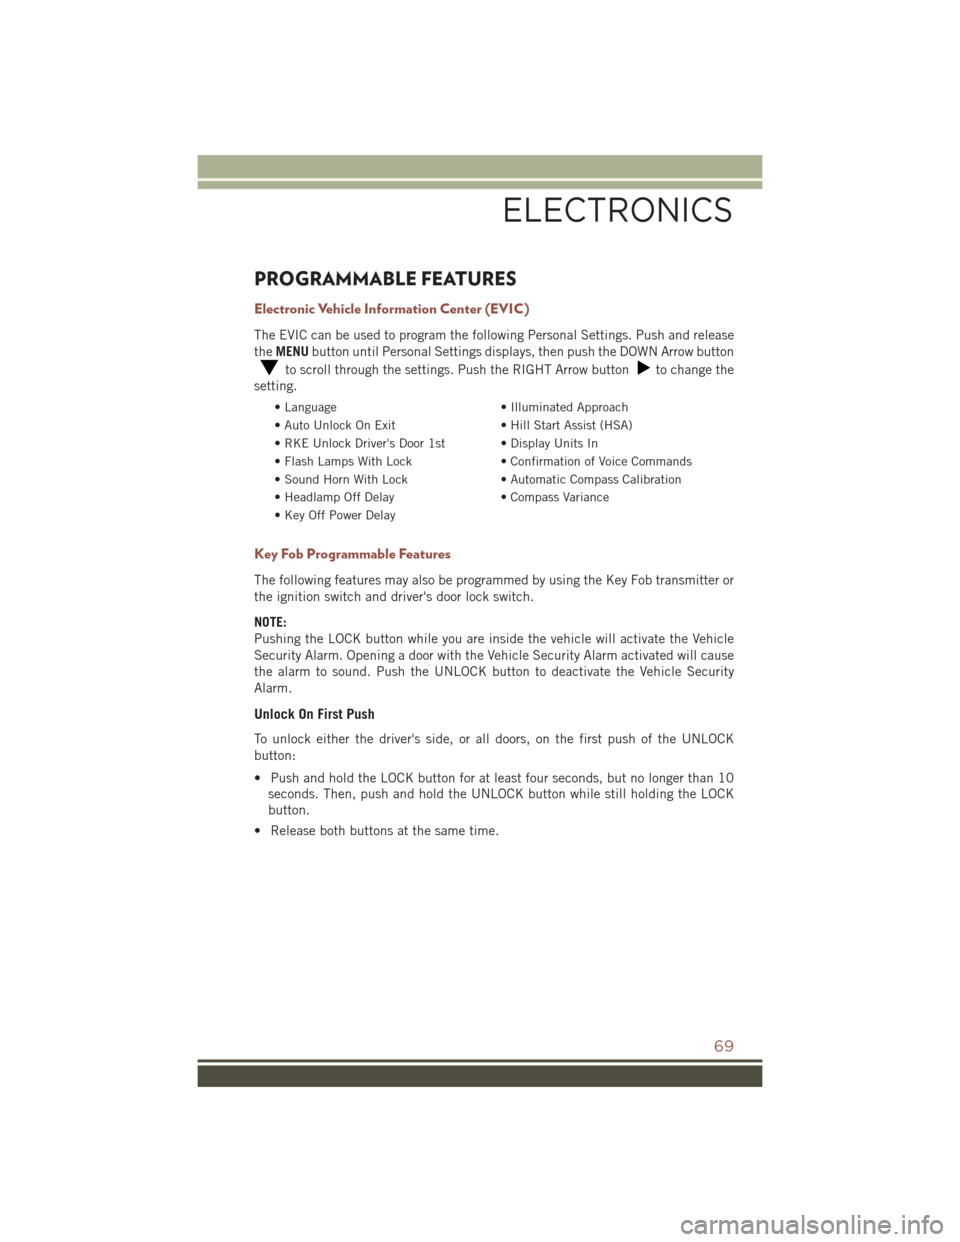
The EVIC can be used to program the following Personal Settings. Push and release
theMENUbutton until Personal Settings displays, then push the DOWN Arrow button
to scroll through the settings. Push the RIGHT Arrow buttonto change the
setting.
• Language• Illuminated Approach
• Auto Unlock On Exit• Hill Start Assist (HSA)
• RKE Unlock Driver's Door 1st • Display Units In
• Flash Lamps With Lock• Confirmation of Voice Commands
• Sound Horn With Lock• Automatic Compass Calibration
• Headlamp Off Delay• Compass Variance
• Key Off Power Delay
Key Fob Programmable Features
The following features may also be programmed by using the Key Fob transmitter or
the ignition switch and driver's door lock switch.
NOTE:
Pushing the LOCK button while you are inside the vehicle will activate the Vehicle
Security Alarm. Opening a door with the Vehicle Security Alarm activated will cause
the alarm to sound. Push the UNLOCK button to deactivate the Vehicle Security
Alarm.
Unlock On First Push
To unlock either the driver's side, or all doors, on the first push of the UNLOCK
button:
• Push and hold the LOCK button for at least four seconds, but no longer than 10
seconds. Then, push and hold the UNLOCK button while still holding the LOCK
button.
• Release both buttons at the same time.
ELECTRONICS
69