check engine JEEP COMPASS 2019 Owner handbook (in English)
[x] Cancel search | Manufacturer: JEEP, Model Year: 2019, Model line: COMPASS, Model: JEEP COMPASS 2019Pages: 362, PDF Size: 6.23 MB
Page 9 of 362
Power Inverter — If Equipped.......... 58
ROOF LUGGAGE RACK — IF EQUIPPED......... 59
GETTING TO KNOW YOUR
INSTRUMENT PANEL
INSTRUMENT CLUSTER DISPLAY............ 60Instrument Cluster Display Location
And Controls.................... 60
Oil Change Indicator System — If Equipped . 61
Gear Shift Indicator (GSI) — If Equipped . . . 61
Instrument Cluster Display Menu Items.... 62
Fuel System Messages.............. 62
TRIP COMPUTER..................... 64
WARNING LIGHTS AND MESSAGES.......... 64
Red Warning Lights................ 64
Yellow Warning Lights............... 68
Yellow Indicator Lights.............. 72
Green Indicator Lights.............. 74
White Indicator Lights.............. 75
Blue Indicator Lights............... 76
Gray Indicator Lights............... 76
ONBOARD DIAGNOSTIC SYSTEM — OBD II...... 76Onboard Diagnostic System (OBD II)
Cybersecurity.................... 77
EMISSIONS INSPECTION AND MAINTENANCE
PROGRAMS....................... 77
SAFETY
SAFETY FEATURES................... 79Anti-Lock Brake System (ABS)......... 79
Electronic Brake Control System........ 80
AUXILIARY DRIVING SYSTEMS............. 88Blind Spot Monitoring (BSM) — If Equipped . 88Forward Collision Warning (FCW)
With Mitigation — If Equipped......... 91
Tire Pressure Monitor System (TPMS)..... 94
OCCUPANT RESTRAINT SYSTEMS........... 98Occupant Restraint Systems Features..... 98
Important Safety Precautions.......... 98
Seat Belt Systems................ 99
Supplemental Restraint Systems (SRS) . . . 106
Child Restraints — Carrying
Children Safely................. 122
Transporting Pets................ 137
SAFETY TIPS..................... 138Transporting Passengers............ 138
Exhaust Gas................... 138
Safety Checks You Should Make Inside
The Vehicle.................... 138
Periodic Safety Checks You Should Make
Outside The Vehicle............... 140
STARTING AND OPERATING
STARTING THE ENGINE................ 141Normal Starting — Gasoline Engine..... 141
Stopping The Engine.............. 143
Normal Starting — Diesel Engine....... 143
PARK BRAKE...................... 145Electric Park Brake (EPB)........... 145
MANUAL TRANSMISSION — IF EQUIPPED...... 147Shifting...................... 148
Downshifting................... 149
Parking....................... 150
AUTOMATIC TRANSMISSION — IF EQUIPPED.... 151Ignition Park Interlock.............. 152
Brake/Transmission Shift Interlock System . 152
Nine-Speed Automatic Transmission..... 152
FOUR-WHEEL DRIVE OPERATION — IF EQUIPPED . . 158
Jeep Active Drive................. 158
SELEC-TERRAIN — IF EQUIPPED........... 160Mode Selection Guide.............. 160
STOP/START SYSTEM — IF EQUIPPED........ 161Operating Modes................. 161
Manual Activation / Deactivation....... 162
ACTIVE SPEED LIMITER — IF EQUIPPED....... 162Activation..................... 163
Exceeding The Set Speed............ 163
Deactivation.................... 163
SPEED CONTROL — IF EQUIPPED.......... 163To Activate.................... 164
To Set A Desired Speed............. 164
To Resume Speed................ 164
To Deactivate................... 164
ADAPTIVE CRUISE CONTROL (ACC) —
IF EQUIPPED...................... 165
To Activate/Deactivate.............. 165
To Set A Desired ACC Speed.......... 165
To Resume.................... 166
To Vary The Speed Setting........... 166
Setting The Following Distance In ACC.... 167
PARKSENSE REAR PARK ASSIST — IF EQUIPPED . . 168ParkSense Sensors................ 168
ParkSense Warning Display........... 168
Enabling And Disabling ParkSense...... 168
ParkSense System Usage Precautions.... 169
PARKSENSE FRONT AND REAR PARK ASSIST —
IF EQUIPPED...................... 170
ParkSense Sensors................ 170
Enabling And Disabling ParkSense...... 171
Side Distance Warning System......... 171
PARKSENSE ACTIVE PARK ASSIST SYSTEM —
IF EQUIPPED...................... 173
7
Page 10 of 362
Enabling And Disabling The ParkSense
Active Park Assist System........... 173
Exiting The Parking Space........... 174
LANESENSE — IF EQUIPPED............. 176LaneSense Operation.............. 176
Turning LaneSense On Or Off......... 177
LaneSense Warning Message.......... 177
Changing LaneSense Status.......... 179
PARKVIEW REAR BACK UP CAMERA —
IF EQUIPPED...................... 179
REFUELING THE VEHICLE............... 180
Emergency Fuel Filler Door Release..... 181
REFUELING THE VEHICLE — DIESEL ENGINE.... 183Adblue (UREA) — If Equipped........ 184
TRAILER TOWING................... 187Common Towing Definitions.......... 187
Trailer Towing Weights (Maximum
Trailer Weight Ratings)............. 189
Towing Requirements.............. 189
RECREATIONAL TOWING (BEHIND MOTORHOME,
ETC.).......................... 191
Towing This Vehicle Behind Another
Vehicle....................... 191
Recreational Towing — Front-Wheel Drive (FWD)
Models....................... 191
Recreational Towing — 4X4 Models..... 192
IN CASE OF EMERGENCY
HAZARD WARNING FLASHERS............ 193
BULB REPLACEMENT................. 193
Replacement Bulbs............... 193
Replacing Exterior Bulbs............ 195
FUSES......................... 199General Information............... 200Fuse Location................... 200
Engine Compartment Fuses/Distribution
Unit........................ 200
Engine Compartment Fuses/Auxiliary Unit . . 204
Interior Fuses................... 205
Rear Cargo Fuse/Relay Distribution Unit . . . 206
JACKING AND TIRE CHANGING............ 208Jack Location/Spare Tire Stowage....... 208
Preparations For Jacking............ 209
Jacking Instructions............... 210
Road Tire Installation.............. 213
EC Declaration Of Conformance........ 213
Jack Usage Precautions............ 214
TIRE SERVICE KIT — IF EQUIPPED.......... 215
JUMP STARTING.................... 220
Preparations For Jump Start.......... 221
Jump Starting Procedure............ 222
REFUELING IN EMERGENCY.............. 223
IF YOUR ENGINE OVERHEATS............. 223
GEAR SELECTOR OVERRIDE.............. 224
FREEING A STUCK VEHICLE.............. 225
TOWING A DISABLED VEHICLE............ 226
Without The Key Fob.............. 227
Front-Wheel Drive (FWD) Models —
WithKeyFob ................... 227
4x4 Models.................... 227
Emergency Tow Hooks.............. 228
Tow Eye Usage — If Equipped......... 229
ENHANCED ACCIDENT RESPONSE SYSTEM (EARS) . 230
EVENT DATA RECORDER (EDR)............ 230
SERVICING AND MAINTENANCE
SCHEDULED SERVICING................ 2311.4L Gasoline Engine.............. 231Diesel Engines.................. 235
ENGINE COMPARTMENT............... 2401.4L Engine.................... 240
2.0L Diesel Engine............... 241
1.6L Diesel Engine............... 242
Checking Oil Level................ 243
Adding Washer Fluid.............. 243
Maintenance-Free Battery........... 244
DEALER SERVICE................... 245Air Conditioner Maintenance.......... 245
Wiper Blades................... 245
Exhaust System................. 246
Cooling System.................. 247
Brake System.................. 248
Manual Transmission — If Equipped..... 249
Automatic Transmission............. 249
RAISING THE VEHICLE................. 250
TIRES.......................... 250
Tires — General Information......... 250
Tire Types..................... 255
Spare Tires — If Equipped.......... 256
Tire Chains (Traction Devices)......... 257
Tire Rotation Recommendations........ 258
STORING THE VEHICLE................ 259
BODYWORK....................... 260
Preserving The Bodywork............ 260
INTERIORS....................... 261Seats And Fabric Parts............. 261
Plastic And Coated Parts............ 262
Leather Parts................... 262
Glass Surfaces.................. 262
TECHNICAL SPECIFICATIONS
IDENTIFICATION DATA................. 263Vehicle Identification Number......... 263
TABLE OF CONTENTS
8
Page 19 of 362
REMOTE STARTING
SYSTEM — IF EQUIPPED
• Push the remote start button
on the key fob twice within five
seconds. Pushing the remote
start button a third time shuts
the engine off.
• To drive the vehicle, push the START/STOP
button to turn the ignition to the ON/RUN
mode.
• With remote start, the engine will only run
for 15 minutes (timeout) unless the igni-
tion is placed in the ON/RUN mode.
• The vehicle must be started with the key
after two consecutive timeouts.
WARNING!
• Do not start or run an engine in a closed
garage or confined area. Exhaust gas
contains Carbon Monoxide (CO) which is
odorless and colorless. Carbon Monox-
ide is poisonous and can cause serious
injury or death when inhaled.
WARNING!
• Keep key fobs away from children. Op-
eration of the Remote Start System, win-
dows, door locks or other controls could
cause serious injury or death.
How To Use Remote Start — If Equipped
Push remote start button on the key fob twice
within five seconds. Pushing the remote start
button a third time shuts the engine off.
To drive the vehicle, push unlock button,
insert the key in the ignition and turn to the
ON/RUN position.
NOTE:
• With remote start, the engine will only run
for 15 minutes (timeout) unless the igni-
tion key is placed in the ON/RUN position.
• The vehicle must be started with the key
after two consecutive timeouts.
All of the following conditions must be met
before the engine will remote start:
• Gear selector in PARK
• Doors closed• Hood closed
• Liftgate closed
• Hazard switch off
• Brake switch inactive (brake pedal not
pushed)
• Battery at an acceptable charge level
• Check engine light shall not be present
• System not disabled from previous remote
start event
• Vehicle alarm system indicator flashing
• Ignition in STOP/OFF position
• Fuel level meets minimum requirement
• Vehicle security alarm is not signaling an
intrusion
WARNING!
• Do not start or run an engine in a closed
garage or confined area. Exhaust gas
contains Carbon Monoxide (CO) which is
odorless and colorless. Carbon Monox-
ide is poisonous and can cause serious
injury or death when inhaled.
17
Page 66 of 362
MESSAGE DESCRIPTION
Engine Will Not Start Service
AdBlue System See DealerNOTE:
• The display may take up to five seconds to update after adding 2 gallons (7.5 Liters) or more of AdBlue
(UREA) to the AdBlue (UREA) tank. If you have a fault related to the AdBlue (UREA) system, the display
may not update to the new level. See an authorized dealer for service.
• AdBlue freezes at temperatures lower than 12°F (-11°C). If the car stands for a long time at this
temperature, refilling could be difficult. For this reason, it is advised to park the vehicle in a garage
and/or heated environment, and wait for the AdBlue (UREA) to return to liquid state before topping up.
TRIP COMPUTER
Push and release the up or down arrow button
until the Trip A or Trip B icon is highlighted in
the instrument cluster display (Toggle left or
right to select Trip A or Trip B). Push and
release the OK button to display the Trip
information.
WARNING LIGHTS
AND MESSAGES
The warning/indicator lights will illuminate in
the instrument panel together with a dedi-
cated message and/or acoustic signal when
applicable. These indications are indicative
and precautionary and as such must not be
considered as exhaustive and/or alternative
to the information contained in the Owner’s
Manual, which you are advised to read care-
fully in all cases. Always refer to the informa-
tion in this chapter in the event of a failure
indication. All active telltales will display first
if applicable. The system check menu may
appear different based upon equipment op-
tions and current vehicle status. Some tell-
tales are optional and may not appear.
Red Warning Lights
— Air Bag Warning Light
This warning light will illuminate to indicate
a fault with the air bag, and will turn on for
four to eight seconds as a bulb check when
the ignition is placed in the ON/RUN or
ACC/ON/RUN position. This light will illumi-
nate with a single chime when a fault with the
air bag has been detected, it will stay on until
the fault is cleared. If the light is either not on
during startup, stays on, or turns on while
driving, have the system inspected at an
authorized dealer as soon as possible.
GETTING TO KNOW YOUR INSTRUMENT PANEL
64
Page 68 of 362
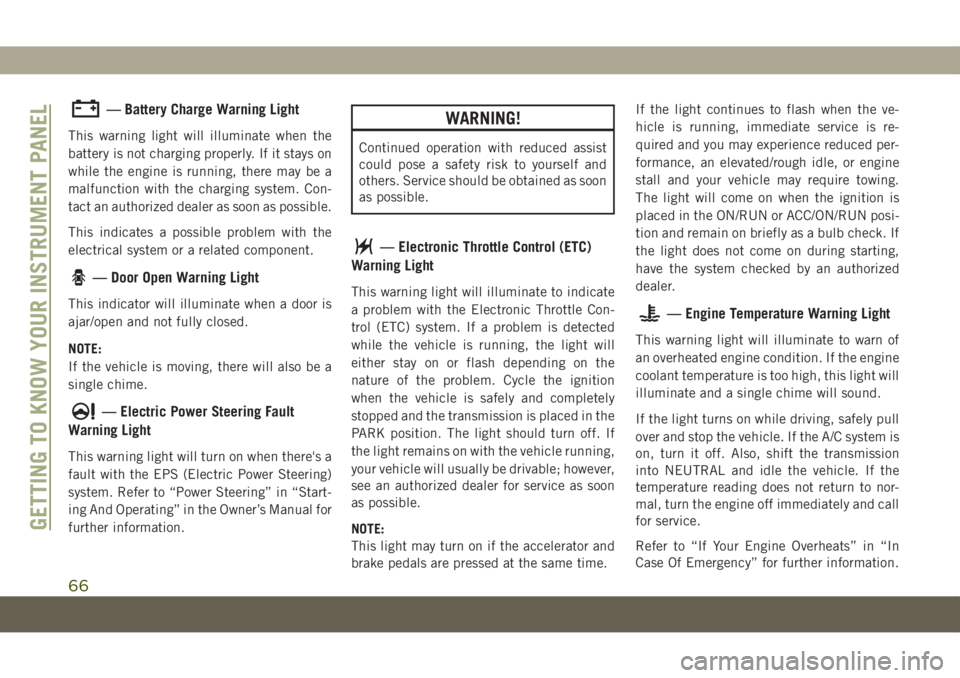
— Battery Charge Warning Light
This warning light will illuminate when the
battery is not charging properly. If it stays on
while the engine is running, there may be a
malfunction with the charging system. Con-
tact an authorized dealer as soon as possible.
This indicates a possible problem with the
electrical system or a related component.
— Door Open Warning Light
This indicator will illuminate when a door is
ajar/open and not fully closed.
NOTE:
If the vehicle is moving, there will also be a
single chime.
— Electric Power Steering Fault
Warning Light
This warning light will turn on when there's a
fault with the EPS (Electric Power Steering)
system. Refer to “Power Steering” in “Start-
ing And Operating” in the Owner’s Manual for
further information.
WARNING!
Continued operation with reduced assist
could pose a safety risk to yourself and
others. Service should be obtained as soon
as possible.
— Electronic Throttle Control (ETC)
Warning Light
This warning light will illuminate to indicate
a problem with the Electronic Throttle Con-
trol (ETC) system. If a problem is detected
while the vehicle is running, the light will
either stay on or flash depending on the
nature of the problem. Cycle the ignition
when the vehicle is safely and completely
stopped and the transmission is placed in the
PARK position. The light should turn off. If
the light remains on with the vehicle running,
your vehicle will usually be drivable; however,
see an authorized dealer for service as soon
as possible.
NOTE:
This light may turn on if the accelerator and
brake pedals are pressed at the same time.If the light continues to flash when the ve-
hicle is running, immediate service is re-
quired and you may experience reduced per-
formance, an elevated/rough idle, or engine
stall and your vehicle may require towing.
The light will come on when the ignition is
placed in the ON/RUN or ACC/ON/RUN posi-
tion and remain on briefly as a bulb check. If
the light does not come on during starting,
have the system checked by an authorized
dealer.
— Engine Temperature Warning Light
This warning light will illuminate to warn of
an overheated engine condition. If the engine
coolant temperature is too high, this light will
illuminate and a single chime will sound.
If the light turns on while driving, safely pull
over and stop the vehicle. If the A/C system is
on, turn it off. Also, shift the transmission
into NEUTRAL and idle the vehicle. If the
temperature reading does not return to nor-
mal, turn the engine off immediately and call
for service.
Refer to “If Your Engine Overheats” in “In
Case Of Emergency” for further information.
GETTING TO KNOW YOUR INSTRUMENT PANEL
66
Page 69 of 362
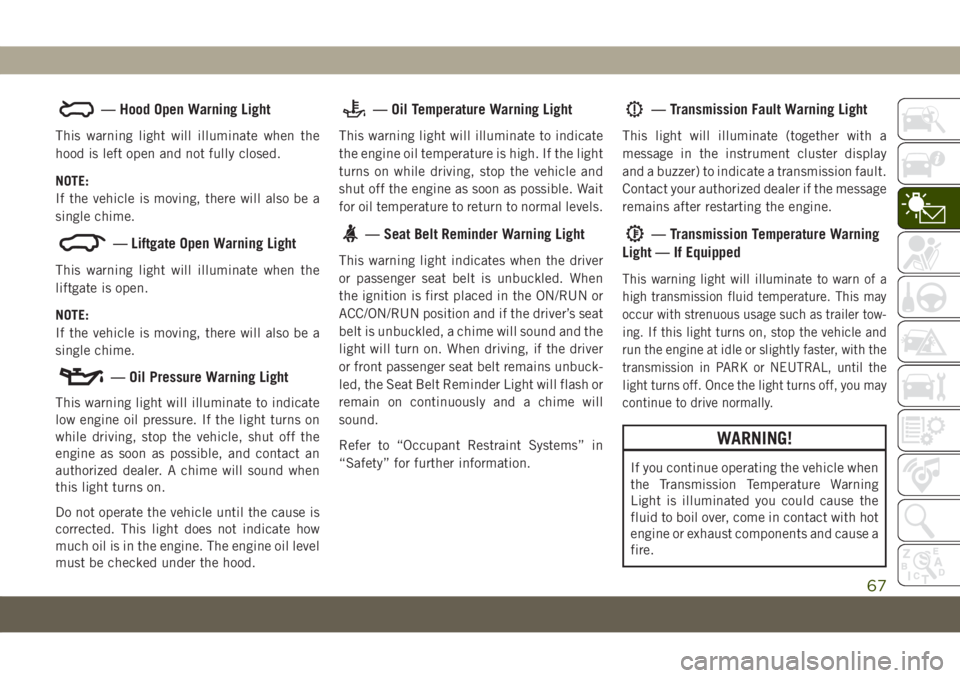
— Hood Open Warning Light
This warning light will illuminate when the
hood is left open and not fully closed.
NOTE:
If the vehicle is moving, there will also be a
single chime.
— Liftgate Open Warning Light
This warning light will illuminate when the
liftgate is open.
NOTE:
If the vehicle is moving, there will also be a
single chime.
— Oil Pressure Warning Light
This warning light will illuminate to indicate
low engine oil pressure. If the light turns on
while driving, stop the vehicle, shut off the
engine as soon as possible, and contact an
authorized dealer. A chime will sound when
this light turns on.
Do not operate the vehicle until the cause is
corrected. This light does not indicate how
much oil is in the engine. The engine oil level
must be checked under the hood.
— Oil Temperature Warning Light
This warning light will illuminate to indicate
the engine oil temperature is high. If the light
turns on while driving, stop the vehicle and
shut off the engine as soon as possible. Wait
for oil temperature to return to normal levels.
— Seat Belt Reminder Warning Light
This warning light indicates when the driver
or passenger seat belt is unbuckled. When
the ignition is first placed in the ON/RUN or
ACC/ON/RUN position and if the driver’s seat
belt is unbuckled, a chime will sound and the
light will turn on. When driving, if the driver
or front passenger seat belt remains unbuck-
led, the Seat Belt Reminder Light will flash or
remain on continuously and a chime will
sound.
Refer to “Occupant Restraint Systems” in
“Safety” for further information.
— Transmission Fault Warning Light
This light will illuminate (together with a
message in the instrument cluster display
and a buzzer) to indicate a transmission fault.
Contact your authorized dealer if the message
remains after restarting the engine.
— Transmission Temperature Warning
Light — If Equipped
This warning light will illuminate to warn of a
high transmission fluid temperature. This may
occur with strenuous usage such as trailer tow-
ing. If this light turns on, stop the vehicle and
run the engine at idle or slightly faster, with the
transmission in PARK or NEUTRAL, until the
light turns off. Once the light turns off, you may
continue to drive normally.
WARNING!
If you continue operating the vehicle when
the Transmission Temperature Warning
Light is illuminated you could cause the
fluid to boil over, come in contact with hot
engine or exhaust components and cause a
fire.
67
Page 71 of 362
Each time the ignition is turned to ON/RUN
or ACC/ON/RUN, the ESC system will be on,
even if it was turned off previously.
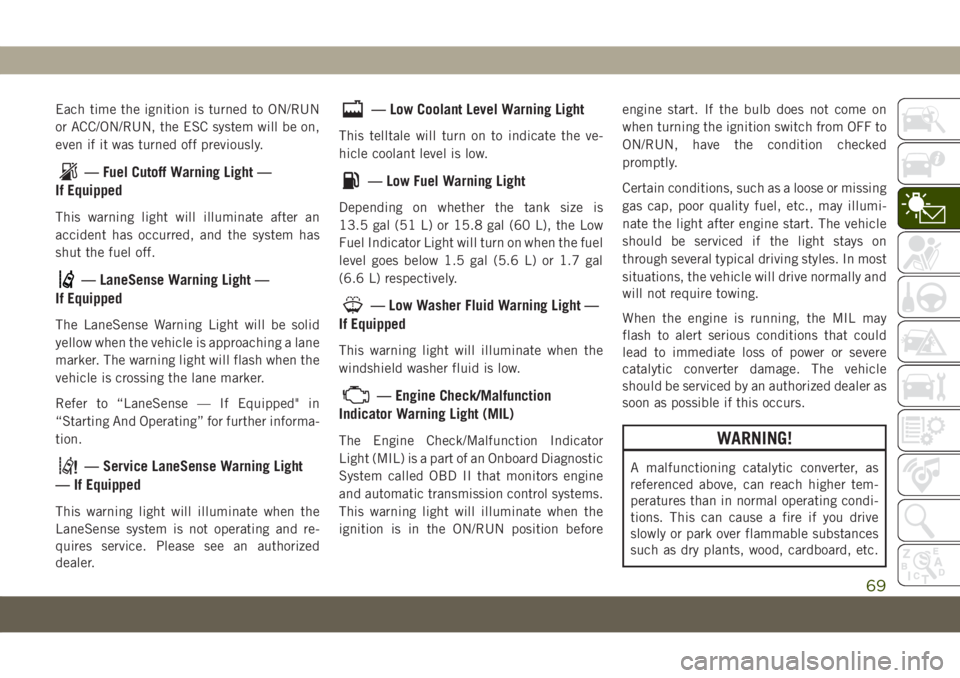
— Fuel Cutoff Warning Light —
If Equipped
This warning light will illuminate after an
accident has occurred, and the system has
shut the fuel off.
— LaneSense Warning Light —
If Equipped
The LaneSense Warning Light will be solid
yellow when the vehicle is approaching a lane
marker. The warning light will flash when the
vehicle is crossing the lane marker.
Refer to “LaneSense — If Equipped" in
“Starting And Operating” for further informa-
tion.
— Service LaneSense Warning Light
— If Equipped
This warning light will illuminate when the
LaneSense system is not operating and re-
quires service. Please see an authorized
dealer.
— Low Coolant Level Warning Light
This telltale will turn on to indicate the ve-
hicle coolant level is low.
— Low Fuel Warning Light
Depending on whether the tank size is
13.5 gal (51 L) or 15.8 gal (60 L), the Low
Fuel Indicator Light will turn on when the fuel
level goes below 1.5 gal (5.6 L) or 1.7 gal
(6.6 L) respectively.
— Low Washer Fluid Warning Light —
If Equipped
This warning light will illuminate when the
windshield washer fluid is low.
— Engine Check/Malfunction
Indicator Warning Light (MIL)
The Engine Check/Malfunction Indicator
Light (MIL) is a part of an Onboard Diagnostic
System called OBD II that monitors engine
and automatic transmission control systems.
This warning light will illuminate when the
ignition is in the ON/RUN position beforeengine start. If the bulb does not come on
when turning the ignition switch from OFF to
ON/RUN, have the condition checked
promptly.
Certain conditions, such as a loose or missing
gas cap, poor quality fuel, etc., may illumi-
nate the light after engine start. The vehicle
should be serviced if the light stays on
through several typical driving styles. In most
situations, the vehicle will drive normally and
will not require towing.
When the engine is running, the MIL may
flash to alert serious conditions that could
lead to immediate loss of power or severe
catalytic converter damage. The vehicle
should be serviced by an authorized dealer as
soon as possible if this occurs.WARNING!
A malfunctioning catalytic converter, as
referenced above, can reach higher tem-
peratures than in normal operating condi-
tions. This can cause a fire if you drive
slowly or park over flammable substances
such as dry plants, wood, cardboard, etc.
69
Page 76 of 362
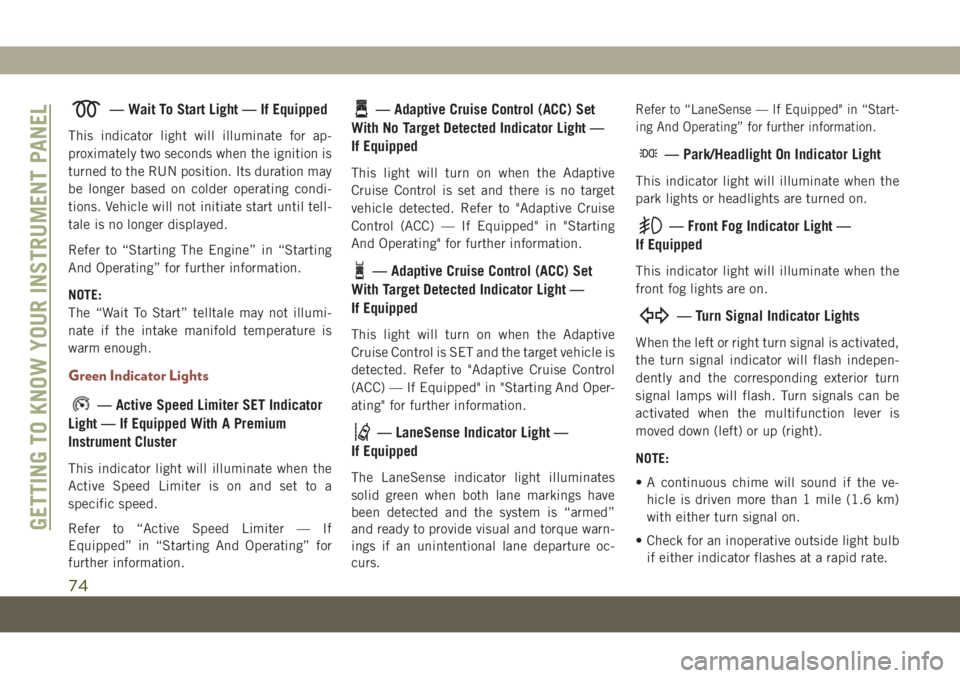
— Wait To Start Light — If Equipped
This indicator light will illuminate for ap-
proximately two seconds when the ignition is
turned to the RUN position. Its duration may
be longer based on colder operating condi-
tions. Vehicle will not initiate start until tell-
tale is no longer displayed.
Refer to “Starting The Engine” in “Starting
And Operating” for further information.
NOTE:
The “Wait To Start” telltale may not illumi-
nate if the intake manifold temperature is
warm enough.
Green Indicator Lights
— Active Speed Limiter SET Indicator
Light — If Equipped With A Premium
Instrument Cluster
This indicator light will illuminate when the
Active Speed Limiter is on and set to a
specific speed.
Refer to “Active Speed Limiter — If
Equipped” in “Starting And Operating” for
further information.
— Adaptive Cruise Control (ACC) Set
With No Target Detected Indicator Light —
If Equipped
This light will turn on when the Adaptive
Cruise Control is set and there is no target
vehicle detected. Refer to "Adaptive Cruise
Control (ACC) — If Equipped" in "Starting
And Operating" for further information.
— Adaptive Cruise Control (ACC) Set
With Target Detected Indicator Light —
If Equipped
This light will turn on when the Adaptive
Cruise Control is SET and the target vehicle is
detected. Refer to "Adaptive Cruise Control
(ACC) — If Equipped" in "Starting And Oper-
ating" for further information.
— LaneSense Indicator Light —
If Equipped
The LaneSense indicator light illuminates
solid green when both lane markings have
been detected and the system is “armed”
and ready to provide visual and torque warn-
ings if an unintentional lane departure oc-
curs.
Refer to “LaneSense — If Equipped" in “Start-
ing And Operating” for further information.
— Park/Headlight On Indicator Light
This indicator light will illuminate when the
park lights or headlights are turned on.
— Front Fog Indicator Light —
If Equipped
This indicator light will illuminate when the
front fog lights are on.
— Turn Signal Indicator Lights
When the left or right turn signal is activated,
the turn signal indicator will flash indepen-
dently and the corresponding exterior turn
signal lamps will flash. Turn signals can be
activated when the multifunction lever is
moved down (left) or up (right).
NOTE:
• A continuous chime will sound if the ve-
hicle is driven more than 1 mile (1.6 km)
with either turn signal on.
• Check for an inoperative outside light bulb
if either indicator flashes at a rapid rate.
GETTING TO KNOW YOUR INSTRUMENT PANEL
74
Page 79 of 362
CAUTION!
• Prolonged driving with the MIL on could
cause further damage to the emission
control system. It could also affect fuel
economy and driveability. The vehicle
must be serviced before any emissions
tests can be performed.
• If the MIL is flashing while the vehicle is
running, severe catalytic converter dam-
age and power loss will soon occur. Im-
mediate service is required.
Onboard Diagnostic System (OBD II)
Cybersecurity
Your vehicle is required to have an Onboard
Diagnostic system (OBD II) and a connection
port to allow access to information related to
the performance of your emissions controls.
Authorized service technicians may need to
access this information to assist with the
diagnosis and service of your vehicle and
emissions system.
WARNING!
• ONLY an authorized service technician
should connect equipment to the OBD II
connection port in order to read the VIN,
diagnose, or service your vehicle.
• If unauthorized equipment is connected
to the OBD II connection port, such as a
driver-behavior tracking device, it may:
• Be possible that vehicle systems,
including safety related systems,
could be impaired or a loss of ve-
hicle control could occur that may
result in an accident involving seri-
ous injury or death.
• Access, or allow others to access,
information stored in your vehicle
systems, including personal infor-
mation.
For further information, refer to “Cybersecu-
rity” in “Multimedia”.
EMISSIONS INSPECTION
AND MAINTENANCE
PROGRAMS
In some localities, it may be a legal require-
ment to pass an inspection of your vehicle's
emissions control system. Failure to pass
could prevent vehicle registration.
Normally, the OBD II system will
be ready. The OBD II system may
notbe ready if your vehicle was
recently serviced, recently had a dead battery
or a battery replacement. If the OBD II sys-
tem should be determined not ready for the
I/M test, your vehicle may fail the test.
Your vehicle has a simple ignition actuated
test, which you can use prior to going to the
test station. To check if your vehicle's OBD II
system is ready, you must do the following:
1. Cycle the ignition switch to the ON posi-
tion, but do not crank or start the engine.
NOTE:
If you crank or start the engine, you will
have to start this test over.
77
Page 80 of 362
2. As soon as you cycle the ignition switch to
the ON position, you will see the “Mal-
function Indicator Light (MIL)” symbol
come on as part of a normal bulb check.
3. Approximately 15 seconds later, one of
two things will happen:
• The MIL will flash for about ten seconds
and then return to being fully illuminated
until you turn OFF the ignition or start the
engine. This means that your vehicle's OBD
II system isnot readyand you shouldnot
proceed to the I/M station.
• The MIL will not flash at all and will remain
fully illuminated until you place the igni-
tion in the off position or start the engine.
This means that your vehicle's OBD II sys-
tem isreadyand you can proceed to the I/M
station.If your OBD II system isnot ready,you should
see an authorized dealer or repair facility. If
your vehicle was recently serviced or had a
battery failure or replacement, you may need
to do nothing more than drive your vehicle as
you normally would in order for your OBD II
system to update. A recheck with the above
test routine may then indicate that the sys-
tem isnow ready.
Regardless of whether your vehicle's OBD II
system is ready or not, if the MIL is illumi-
nated during normal vehicle operation you
should have your vehicle serviced before go-
ing to the I/M station. The I/M station can fail
your vehicle because the MIL is on with the
engine running.
GETTING TO KNOW YOUR INSTRUMENT PANEL
78