ECU JEEP COMPASS 2020 Owner handbook (in English)
[x] Cancel search | Manufacturer: JEEP, Model Year: 2020, Model line: COMPASS, Model: JEEP COMPASS 2020Pages: 328, PDF Size: 8.85 MB
Page 24 of 328
GETTING TO KNOW YOUR VEHICLE
22
FOBIK-Safe only executes in vehicles with
Passive Entry. There are three situations that
trigger a FOBIK-Safe search in any Passive
Entry vehicle:
A lock request is made by a valid Passive
Entry key fob while a door is open.
A lock request is made by the Passive
Entry door handle while a door is open.
A lock request is made by the door panel
switch while the door is open.
When any of these situations occur, after all
open doors are shut, the FOBIK-Safe search
will be executed. If it finds a Passive Entry
key fob inside the vehicle and it does not find
any Passive Entry key fobs outside the
vehicle, then the vehicle will unlock and alert
the customer.
NOTE:
The vehicle will only unlock the doors when
a valid Passive Entry key fob is detected
inside the vehicle. The vehicle will not
unlock the doors when any of the following
conditions are true:
The doors are manually locked using the
door lock knobs.
There is a valid Passive Entry key fob
outside the vehicle and within 5 ft (1.5 m) of either Passive Entry door handle.
Three attempts are made to lock the doors
using the door panel switch and then close
the doors.
To Unlock/Enter The Liftgate
The liftgate Passive Entry unlock feature is
built into liftgate handle release. With a valid
Passive Entry key fob within 5 ft (1.5 m) of
the liftgate, push the electronic liftgate
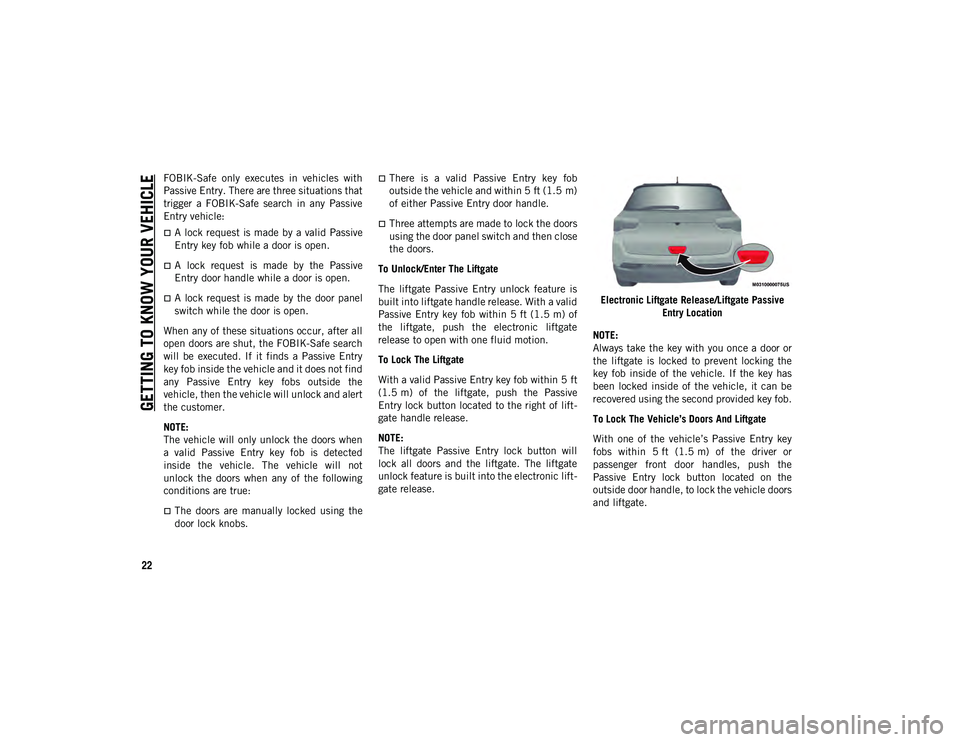
release to open with one fluid motion.
To Lock The Liftgate
With a valid Passive Entry key fob within 5 ft
(1.5 m) of the liftgate, push the Passive
Entry lock button located to the right of lift -
gate handle release.
NOTE:
The liftgate Passive Entry lock button will
lock all doors and the liftgate. The liftgate
unlock feature is built into the electronic lift -
gate release. Electronic Liftgate Release/Liftgate Passive
Entry Location
NOTE:
Always take the key with you once a door or
the liftgate is locked to prevent locking the
key fob inside of the vehicle. If the key has
been locked inside of the vehicle, it can be
recovered using the second provided key fob.
To Lock The Vehicle’s Doors And Liftgate
With one of the vehicle’s Passive Entry key
fobs within 5 ft (1.5 m) of the driver or
passenger front door handles, push the
Passive Entry lock button located on the
outside door handle, to lock the vehicle doors
and liftgate.
2020_JEEP_M6_UG_UK.book Page 22
Page 27 of 328
25
NOTE:
Prior to folding the rear seat, it may be
necessary to position the front seat to its
mid-track position. Also, be sure that the
front seats are fully upright and positioned
forward. This will allow the rear seat to fold
down easily.
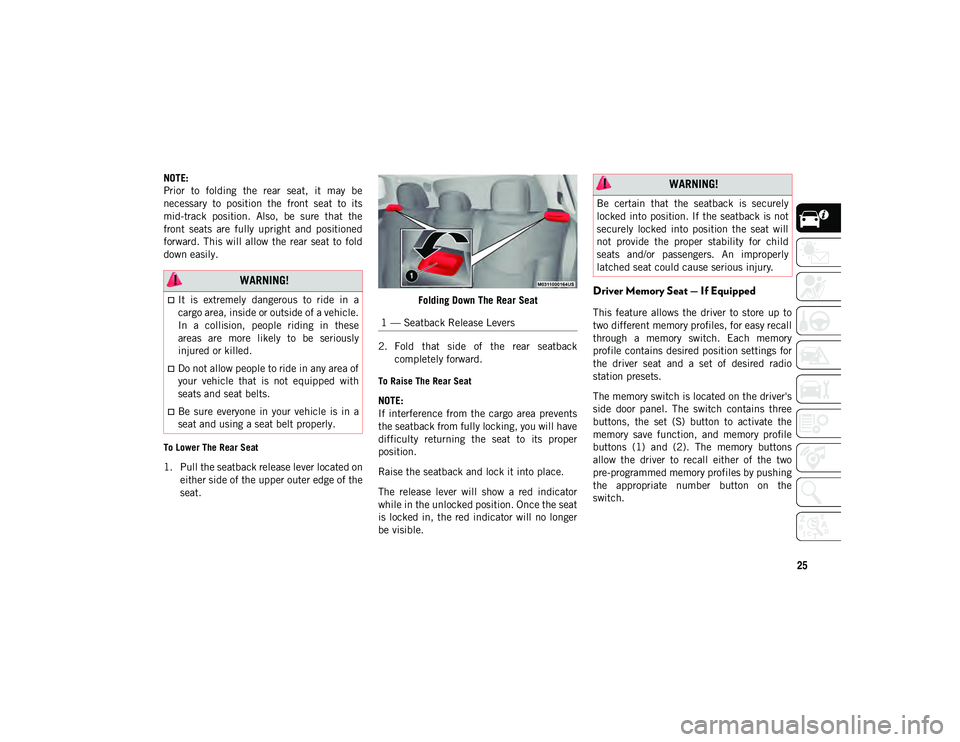
To Lower The Rear Seat
1. Pull the seatback release lever located oneither side of the upper outer edge of the
seat. Folding Down The Rear Seat
2. Fold that side of the rear seatback completely forward.
To Raise The Rear Seat
NOTE:
If interference from the cargo area prevents
the seatback from fully locking, you will have
difficulty returning the seat to its proper
position.
Raise the seatback and lock it into place.
The release lever will show a red indicator
while in the unlocked position. Once the seat
is locked in, the red indicator will no longer
be visible.
Driver Memory Seat — If Equipped
This feature allows the driver to store up to
two different memory profiles, for easy recall
through a memory switch. Each memory
profile contains desired position settings for
the driver seat and a set of desired radio
station presets.
The memory switch is located on the driver's
side door panel. The switch contains three
buttons, the set (S) button to activate the
memory save function, and memory profile
buttons (1) and (2). The memory buttons
allow the driver to recall either of the two
pre-programmed memory profiles by pushing
the appropriate number button on the
switch.
WARNING!
It is extremely dangerous to ride in a
cargo area, inside or outside of a vehicle.
In a collision, people riding in these
areas are more likely to be seriously
injured or killed.
Do not allow people to ride in any area of
your vehicle that is not equipped with
seats and seat belts.
Be sure everyone in your vehicle is in a
seat and using a seat belt properly.
1 — Seatback Release Levers
WARNING!
Be certain that the seatback is securely
locked into position. If the seatback is not
securely locked into position the seat will
not provide the proper stability for child
seats and/or passengers. An improperly
latched seat could cause serious injury.
2020_JEEP_M6_UG_UK.book Page 25
Page 30 of 328
GETTING TO KNOW YOUR VEHICLE
28
Front Ventilated Seats — If Equipped
If your vehicle is equipped with ventilated
seats, the seat cushion and seat back will
have fans that draw the air from the
passenger compartment and move air
through fine perforations in the seat cover to
help keep the driver and front passenger
cooler in higher ambient temperatures. The
fans operate at two speeds, HI and LO.
The front ventilated seats control buttons are
located within the Uconnect system. You can
gain access to the control buttons through
the climate screen or the controls screen.
Press the ventilated seat button once to
choose HI.
Press the ventilated seat button a
second time to choose LO.
Press the ventilated seat button a third
time to turn the ventilated seat off.
NOTE:
The engine must be running for the venti -
lated seats to operate.
Vehicles With Remote Start — If Equipped
On models that are equipped with remote start,
the ventilated seats can be programmed to
come on during a remote start.
This feature can be programmed through the
Uconnect system. Refer to “Uconnect
Settings” in “Multimedia” in the Owner's
Manual for further details.
40/20/40 Rear Seat Armrest— If Equipped
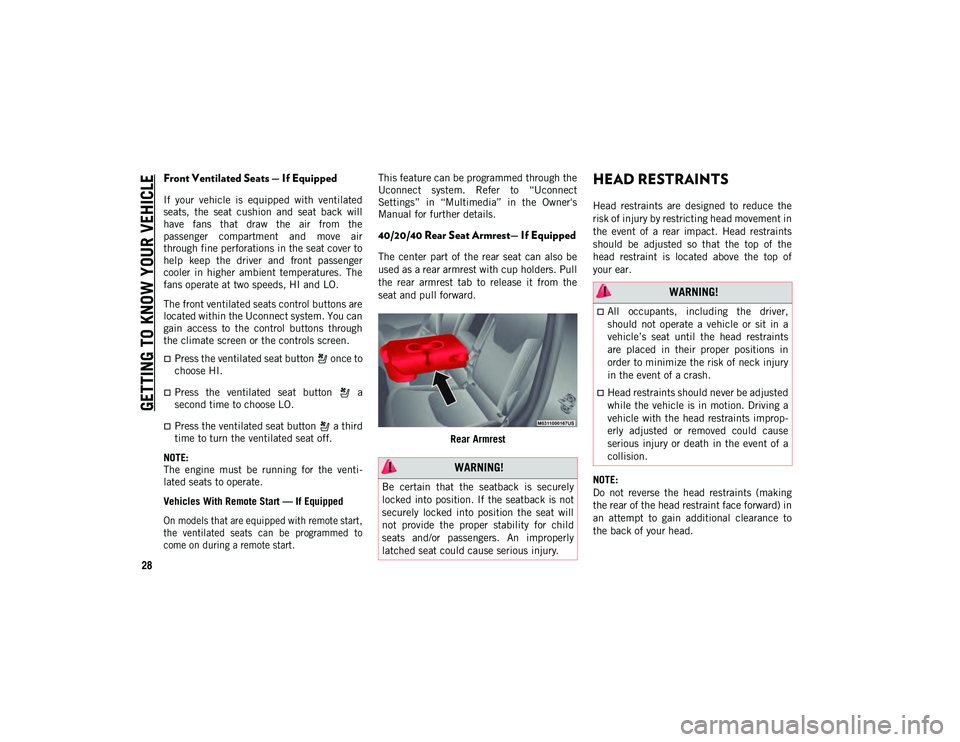
The center part of the rear seat can also be
used as a rear armrest with cup holders. Pull
the rear armrest tab to release it from the
seat and pull forward.
Rear Armrest
HEAD RESTRAINTS
Head restraints are designed to reduce the
risk of injury by restricting head movement in
the event of a rear impact. Head restraints
should be adjusted so that the top of the
head restraint is located above the top of
your ear.
NOTE:
Do not reverse the head restraints (making
the rear of the head restraint face forward) in
an attempt to gain additional clearance to
the back of your head.
WARNING!
Be certain that the seatback is securely
locked into position. If the seatback is not
securely locked into position the seat will
not provide the proper stability for child
seats and/or passengers. An improperly
latched seat could cause serious injury.
WARNING!
All occupants, including the driver,
should not operate a vehicle or sit in a
vehicle’s seat until the head restraints
are placed in their proper positions in
order to minimize the risk of neck injury
in the event of a crash.
Head restraints should never be adjusted
while the vehicle is in motion. Driving a
vehicle with the head restraints improp -
erly adjusted or removed could cause
serious injury or death in the event of a
collision.
2020_JEEP_M6_UG_UK.book Page 28
Page 48 of 328
GETTING TO KNOW YOUR VEHICLE
46
Window Lockout Switch
The window lockout switch on the driver's
door trim panel allows you to disable the
window controls on the rear passenger doors.
To disable the window controls, push and
release the window lockout button (the indi-
cator light on the button with turn on). To
enable the window controls, push and
release the window lockout button again (the
indicator light on the button will turn back
off).
Window Lockout Switch
Wind Buffeting
Wind buffeting can be described as the
perception of pressure on the ears or a heli -
copter-type sound in the ears. Your vehicle
may exhibit wind buffeting with the windows
down, or the sunroof (if equipped) in certain open or partially open positions. This is a
normal occurrence and can be minimized. If
the buffeting occurs with the rear windows
open, open the front and rear windows
together to minimize the buffeting. If the
buffeting occurs with the sunroof open,
adjust the sunroof opening to minimize the
buffeting or open any window.
POWER SUNROOF WITH
POWER SHADE — IF
EQUIPPED
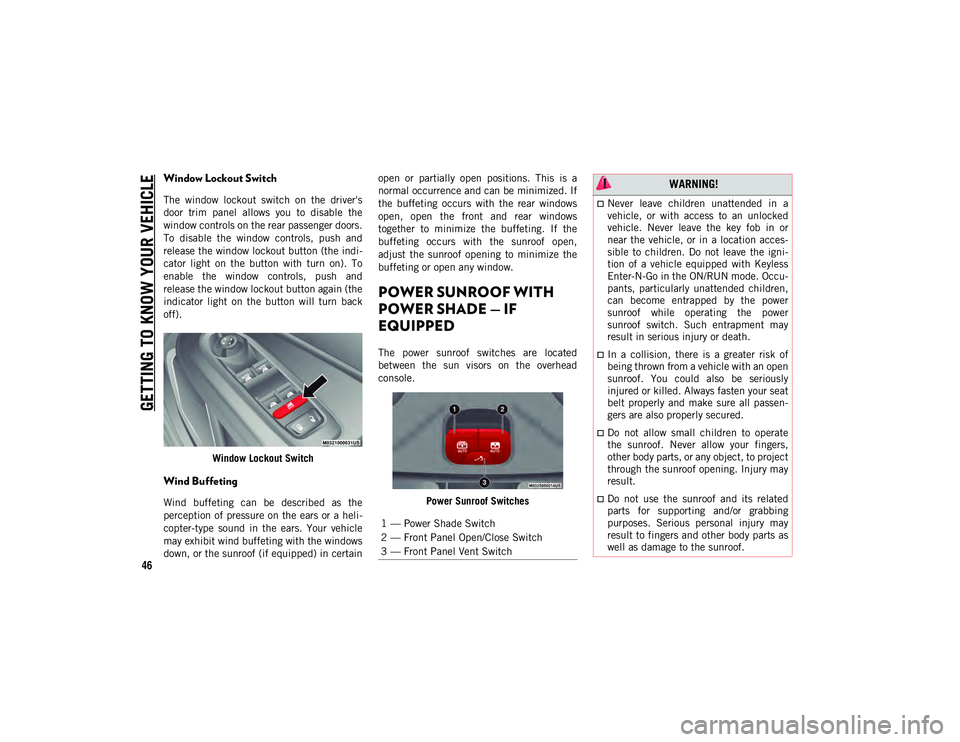
The power sunroof switches are located
between the sun visors on the overhead
console.
Power Sunroof Switches
1 — Power Shade Switch
2 — Front Panel Open/Close Switch
3 — Front Panel Vent Switch
WARNING!
Never leave children unattended in a
vehicle, or with access to an unlocked
vehicle. Never leave the key fob in or
near the vehicle, or in a location acces-
sible to children. Do not leave the igni -
tion of a vehicle equipped with Keyless
Enter-N-Go in the ON/RUN mode. Occu -
pants, particularly unattended children,
can become entrapped by the power
sunroof while operating the power
sunroof switch. Such entrapment may
result in serious injury or death.
In a collision, there is a greater risk of
being thrown from a vehicle with an open
sunroof. You could also be seriously
injured or killed. Always fasten your seat
belt properly and make sure all passen -
gers are also properly secured.
Do not allow small children to operate
the sunroof. Never allow your fingers,
other body parts, or any object, to project
through the sunroof opening. Injury may
result.
Do not use the sunroof and its related
parts for supporting and/or grabbing
purposes. Serious personal injury may
result to fingers and other body parts as
well as damage to the sunroof.
2020_JEEP_M6_UG_UK.book Page 46
Page 50 of 328
GETTING TO KNOW YOUR VEHICLE
48
Manual Mode
Push and hold the sunshade switch, the
sunshade will open to the half open position
and stop automatically. Push and hold the
sunshade switch again and the sunshade will
open to the full open position. Any release of
the switch will stop the movement and the
sunshade will remain in a partially opened
condition until the switch is pushed again.
Closing Power Shade
If the sunroof is open/vented, the sunshade
cannot be closed beyond the half open posi-
tion. Pulling the sunshade close switch when
the sunshade is at the half open position
(with sunroof open/vented), will automati -
cally close the sunroof prior to the sunshade
closing.
Express
Pull the sunshade switch down and release it
within one-half second. If the sunroof is in
closed position, the sunshade will full close
automatically from any position. If the
sunroof is open or vented, the sunshade will
close to the half open position and stop; pull
and release the sunshade switch again to
automatically close both the sunroof and sunshade completely. This is called “Express
Close”. During Express Close operation, any
movement of the switch will stop the
sunshade.
Manual
Pull and hold the sunshade switch down. If
the sunroof is in closed position, the
sunshade will fully close from any position. If
the sunroof is open or vented, the sunshade
will close to the half open position and stop;
pulling and holding the sunshade switch
again will close both the sunroof and
sunshade completely. Any release of the
switch will stop the movement and the
sunshade will remain in a partially closed
condition until the switch is pulled again.
Pinch Protect Feature
This feature will detect an obstruction in the
opening of the sunroof during Express Close
operation. If an obstruction in the path of the
sunroof is detected, the sunroof will auto
-
matically retract. Remove the obstruction if
this occurs. Next, pull the sunroof close
switch and release to Express Close. NOTE:
If three consecutive sunroof close attempts
result in Pinch Protect reversals, Pinch
Protect will disable and the sunroof must be
closed in Manual Mode.
Sunroof Maintenance
Use only a non-abrasive cleaner and a soft
cloth to clean the glass panel.
Ignition Off Operation
The power sunroof switch will remain active
for up to approximately 10 minutes after the
ignition is placed in the OFF position.
Opening either front door will cancel this
feature.
NOTE:
Ignition Off time is programmable through
the Uconnect System. Refer to “Uconnect
Settings” in “Multimedia” in the Owner’s
Manual for further information.
2020_JEEP_M6_UG_UK.book Page 48
Page 56 of 328
GETTING TO KNOW YOUR VEHICLE
54
(Continued)
ROOF LUGGAGE RACK — IF
EQUIPPED
The load carried on the roof, when equipped
with a luggage rack, must not exceed 150 lbs
(68 kg), and it should be uniformly distrib-
uted over the cargo area.
Crossbars should always be used whenever
cargo is placed on the roof rack. Check the
straps frequently to be sure that the load
remains securely attached.
NOTE:
Crossbars can be purchased at your autho -
rized dealer through Mopar parts.
External racks do not increase the total load
carrying capacity of the vehicle. Be sure that
the total occupant and luggage load inside
the vehicle, plus the load on the luggage
rack, do not exceed the maximum vehicle
load capacity.
WARNING!
Cargo must be securely tied down before
driving your vehicle. Improperly secured
loads can fly off the vehicle, particularly at
high speeds, resulting in personal injury or
property damage. Follow the roof rack
cautions when carrying cargo on your roof
rack.
CAUTION!
To avoid damage to the roof rack and
vehicle, do not exceed the maximum roof
rack load capacity. Always distribute
heavy loads as evenly as possible and
secure the load appropriately.
Long loads, which extend over the wind -
shield, should be secured to both the
front and rear of the vehicle.
Place a blanket or other protection
between the surface of the roof and the
load.
Travel at reduced speeds and turn
corners carefully when carrying large or
heavy loads on the roof rack. Wind
forces, due to natural causes or nearby
truck traffic, can add sudden upward
loads. It is recommended to not carry
large flat loads, such as wood panels or
surfboards, which may result in damage
to the cargo or your vehicle.
Load should always be secured to cross
bars first, with tie down loops used as
additional securing points if needed. Tie
loops are intended as supplementary tie
down points only. Do not use ratcheting
mechanisms with the tie loops. Check
the straps frequently to be sure that the
load remains securely attached.
CAUTION! (Continued)
2020_JEEP_M6_UG_UK.book Page 54
Page 64 of 328
GETTING TO KNOW YOUR INSTRUMENT PANEL
62
much oil is in the engine. The engine oil level
must be checked under the hood.
Oil Temperature Warning Light
This warning light will illuminate to
indicate the engine oil temperature
is high. If the light turns on while
driving, stop the vehicle and shut off
the engine as soon as possible. Wait for oil
temperature to return to normal levels.
Seat Belt Reminder Warning Light
This warning light indicates when
the driver or passenger seat belt is
unbuckled. When the ignition is first
placed in the ON/RUN or ACC/ON/
RUN position and if the driver’s seat belt is
unbuckled, a chime will sound and the light
will turn on. When driving, if the driver or
front passenger seat belt remains unbuckled,
the Seat Belt Reminder Light will flash or
remain on continuously and a chime will
sound.
Refer to “Occupant Restraint Systems” in
“Safety” for further information.
Transmission Fault Warning Light
This light will illuminate (together
with a message in the instrument
cluster display and a buzzer) to indi -cate a transmission fault. Contact an autho
-
rized dealer if the message remains after
restarting the engine.
Transmission Temperature Warning Light —
If Equipped
This warning light will illuminate to
warn of a high transmission fluid
temperature. This may occur with
strenuous usage such as trailer towing. If this
light turns on, stop the vehicle and run the
engine at idle or slightly faster, with the
transmission in PARK or NEUTRAL, until the
light turns off. Once the light turns off, you
may continue to drive normally.
Vehicle Security Warning Light — If
Equipped
This light will flash at a fast rate for
approximately 15 seconds when the
vehicle security alarm is arming,
and then will flash slowly until the vehicle is
disarmed.
Yellow Warning Lights
Anti-Lock Brake (ABS) Warning Light
This warning light monitors the
Anti-Lock Brake System (ABS). The
light will turn on when the ignition is
placed in the ON/RUN or ACC/ON/RUN posi -
tion and may stay on for as long as four
seconds.
If the ABS light remains on or turns on while
driving, then the Anti-Lock portion of the
brake system is not functioning and service
is required as soon as possible. However, the
conventional brake system will continue to
operate normally, assuming the Brake
Warning Light is not also on.
If the ABS light does not turn on when the
ignition is placed in the ON/RUN or ACC/ON/
RUN position, have the brake system
inspected by an authorized dealer.
WARNING!
If you continue operating the vehicle when
the Transmission Temperature Warning
Light is illuminated you could cause the
fluid to boil over, come in contact with hot
engine or exhaust components and cause a
fire.
CAUTION!
Continuous driving with the Transmission
Temperature Warning Light illuminated
will eventually cause severe transmission
damage or transmission failure.
2020_JEEP_M6_UG_UK.book Page 62
Page 69 of 328
67
Active Speed Limiter Fault Indicator Light —
If Equipped
This warning light will illuminate to
signal when there is a fault detected
with the Active Speed Limiter.
Diesel Particulate Filter (DPF) Cleaning In
Progress Indicator Light — Diesel Versions
With DPF Only (If Equipped)
This indicator light will illuminate,
or a message will appear, to indicate
that the DPF system needs to elimi-
nate the trapped pollutants (particulate)
through the regeneration process. The light/
message does not switch on during every
DPF regeneration, but only when driving
conditions require that the driver is notified.
To turn off the symbol, keep the vehicle in
motion until the regeneration process is over.
On average, the process lasts 15 minutes.
Optimal conditions for completing the
process are achieved by traveling at 37 mph
(60 km/h) with engine speed above 2000
rpm.
When this light/message switches on, it does
not indicate a vehicle failure and thus it
should not be taken to a workshop. NOTE:
On some versions, together with the symbol
switching on, the display shows a dedicated
message.
Forward Collision Indicator Light — If
Equipped
This telltale will turn on to warn you
of a possible collision with the
vehicle in front of you.
Forward Collision Warning Off Indicator Light
— If Equipped
This indicator light illuminates to
indicate that Forward Collision
Warning is off.
Immobilizer Fail / VPS Electrical Alarm
Indicator Light
This telltale will illuminate when the
vehicle security alarm system has
detected an attempt to break into
the vehicle.
NOTE:
After cycling the ignition to the ON/RUN
position, the Vehicle Security Warning Light
could illuminate if a problem with the system
is detected. This condition will result in the
engine being shut off after two seconds.
Low Diesel Emissions Additive AdBlue®
(UREA) Indicator Light — If Equipped
The Low Diesel Exhaust Emissions
Additive AdBlue® (UREA) indicator
light illuminates when the AdBlue®
(UREA) level is low.
Fill the AdBlue® (UREA) tank as soon as
possible with at least 1.3 gallons (5 liters) of
AdBlue® (UREA).
CAUTION!
Vehicle travel speed should always be
adapted to the traffic and weather
conditions, and must always comply with
traffic regulations.
The engine can be turned off if the DPF
warning light is on; however, repeated
interruptions of the regeneration process
could cause premature deterioration of the
engine oil. For this reason, it is important
to wait for the symbol to turn off before
turning off the engine. Do not complete
the DPF regeneration process when the
vehicle is stopped.
2020_JEEP_M6_UG_UK.book Page 67
Page 73 of 328
71
Gray Indicator Lights
Cruise Control Ready Indicator Light — If
Equipped With Base Instrument Cluster
This light will turn on when the
speed control has been turned on,
but not set. Refer to “Speed Control
— If Equipped” in “Starting And Operating”
for further information.
Active Speed Limiter Ready Indicator Light
— If Equipped With A Base Instrument
Cluster
This light will turn on when the
Active Speed Limiter is on, but not
set.
ONBOARD DIAGNOSTIC
SYSTEM — OBD II
Your vehicle is equipped with a sophisticated
Onboard Diagnostic system called OBD II.
This system monitors the performance of the
emissions, engine, and automatic transmis -
sion control systems. When these systems
are operating properly, your vehicle will
provide excellent performance and fuel
economy, as well as emissions well within
current government regulations. If any of these systems require service, the
OBD II system will turn on the Malfunction
Indicator Light (MIL). It will also store diag
-
nostic codes and other information to assist
your service technician in making repairs.
Although your vehicle will usually be drivable
and not need towing, see an authorized
dealer for service as soon as possible.Onboard Diagnostic System (OBD II)
Cybersecurity
Your vehicle is required to have an Onboard
Diagnostic system (OBD II) and a connection
port to allow access to information related to
the performance of your emissions controls. Authorized service technicians may need to
access this information to assist with the
diagnosis and service of your vehicle and
emissions system.
For further information, refer to “Cybersecu
-
rity” in “Multimedia”.
CAUTION!
Prolonged driving with the MIL on could
cause further damage to the emission
control system. It could also affect fuel
economy and driveability. The vehicle
must be serviced before any emissions
tests can be performed.
If the MIL is flashing while the vehicle is
running, severe catalytic converter
damage and power loss will soon occur.
Immediate service is required.
WARNING!
ONLY an authorized service technician
should connect equipment to the OBD II
connection port in order to read the VIN,
diagnose, or service your vehicle.
If unauthorized equipment is connected
to the OBD II connection port, such as a
driver-behavior tracking device, it may:
Be possible that vehicle systems, including safety related systems,could be impaired or a loss of vehicle
control could occur that may result in
an accident involving serious injury
or death.
Access, or allow others to access, information stored in your vehicle
systems, including personal informa-
tion.
2020_JEEP_M6_UG_UK.book Page 71
Page 93 of 328
91
(Continued)
2. A child who is not big enough to wear thevehicle seat belt properly (Refer to “Child
Restraints” in this section for further
information) must be secured in the
appropriate child restraint or belt-posi -
tioning booster seat in a rear seating
position.
3. If a child from 2 to 12 years old (not in a rear-facing child restraint) must ride in
the front passenger seat, move the seat
as far back as possible and use the
proper child restraint (Refer to “Child
Restraints” in this section for further
information).
4. Never allow children to slide the shoulder belt behind them or under their arm.
5. You should read the instructions provided with your child restraint to make
sure that you are using it properly.
6. All occupants should always wear their lap and shoulder belts properly.
7. The driver and front passenger seats should be moved back as far as practical
to allow the front air bags room to inflate. 8. Do not lean against the door or window.
If your vehicle has side air bags, and
deployment occurs, the side air bags will
inflate forcefully into the space between
occupants and the door and occupants
could be injured.
9. If the air bag system in this vehicle needs to be modified to accommodate a
disabled person, refer to the “Customer
Assistance” section for customer service
contact information.
Seat Belt Systems
Buckle up even though you are an excellent
driver, even on short trips. Someone on the
road may be a poor driver and could cause a
collision that includes you. This can happen
far away from home or on your own street.
WARNING!
NEVER use a rearward facing child
restraint on a seat protected by an
ACTIVE AIRBAG in front of it, DEATH or
SERIOUS INJURY to the CHILD can
occur.
It is advisable to always carry children in
a child restraint system on the rear seat,
which is the most protected position in
the event of a collision.
Should it be necessary to carry a child on
the passenger side front seat in a
rear-facing child restraint system, the
passenger side front air bag must be
deactivated. Always make sure the
airbag deactivation indicator light is illu -
minated when using a child restraint
system. The passenger seat must also be
positioned backward as far as possible to
avoid the child restraint system from
coming into contact with the dashboard.
A deploying passenger front air bag can
cause death or serious injury to a child
12 years or younger, including a child in
a rear-facing child restraint.
WARNING! (Continued)
2020_JEEP_M6_UG_UK.book Page 91