warning lights JEEP COMPASS 2020 Owner handbook (in English)
[x] Cancel search | Manufacturer: JEEP, Model Year: 2020, Model line: COMPASS, Model: JEEP COMPASS 2020Pages: 328, PDF Size: 8.85 MB
Page 72 of 328
GETTING TO KNOW YOUR INSTRUMENT PANEL
70
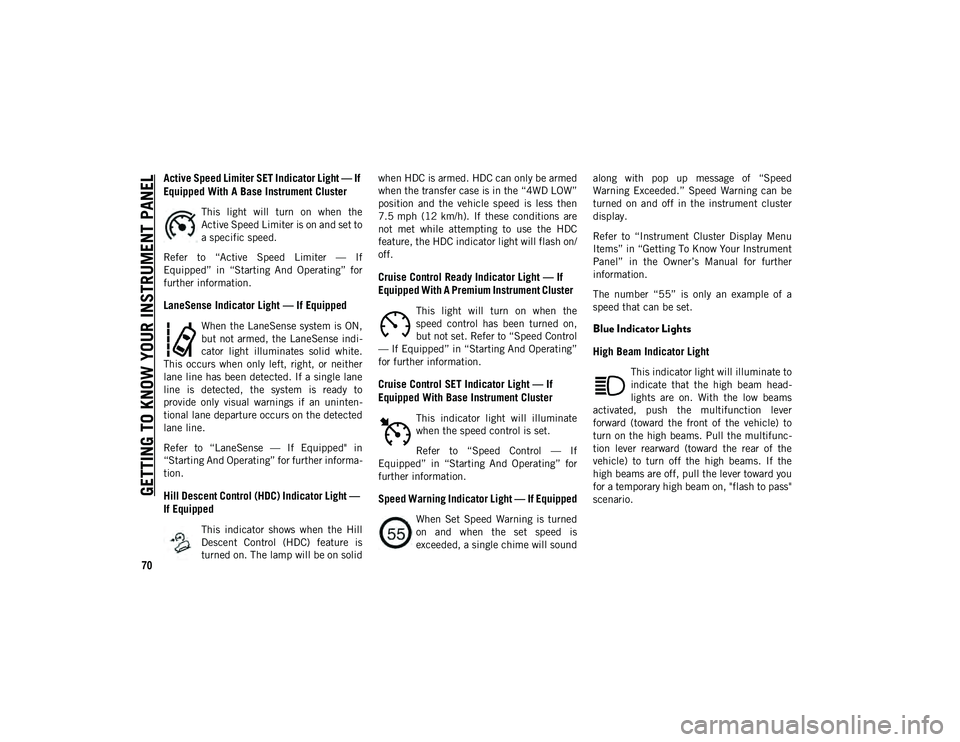
Active Speed Limiter SET Indicator Light — If
Equipped With A Base Instrument Cluster
This light will turn on when the
Active Speed Limiter is on and set to
a specific speed.
Refer to “Active Speed Limiter — If
Equipped” in “Starting And Operating” for
further information.
LaneSense Indicator Light — If Equipped
When the LaneSense system is ON,
but not armed, the LaneSense indi -
cator light illuminates solid white.
This occurs when only left, right, or neither
lane line has been detected. If a single lane
line is detected, the system is ready to
provide only visual warnings if an uninten -
tional lane departure occurs on the detected
lane line.
Refer to “LaneSense — If Equipped" in
“Starting And Operating” for further informa -
tion.
Hill Descent Control (HDC) Indicator Light —
If Equipped
This indicator shows when the Hill
Descent Control (HDC) feature is
turned on. The lamp will be on solid when HDC is armed. HDC can only be armed
when the transfer case is in the “4WD LOW”
position and the vehicle speed is less then
7.5 mph (12 km/h). If these conditions are
not met while attempting to use the HDC
feature, the HDC indicator light will flash on/
off.
Cruise Control Ready Indicator Light — If
Equipped With A Premium Instrument Cluster
This light will turn on when the
speed control has been turned on,
but not set. Refer to “Speed Control
— If Equipped” in “Starting And Operating”
for further information.
Cruise Control SET Indicator Light — If
Equipped With Base Instrument Cluster
This indicator light will illuminate
when the speed control is set.
Refer to “Speed Control — If
Equipped” in “Starting And Operating” for
further information.
Speed Warning Indicator Light — If Equipped
When Set Speed Warning is turned
on and when the set speed is
exceeded, a single chime will sound along with pop up message of “Speed
Warning Exceeded.” Speed Warning can be
turned on and off in the instrument cluster
display.
Refer to “Instrument Cluster Display Menu
Items” in “Getting To Know Your Instrument
Panel” in the Owner’s Manual for further
information.
The number “55” is only an example of a
speed that can be set.
Blue Indicator Lights
High Beam Indicator Light
This indicator light will illuminate to
indicate that the high beam head
-
lights are on. With the low beams
activated, push the multifunction lever
forward (toward the front of the vehicle) to
turn on the high beams. Pull the multifunc -
tion lever rearward (toward the rear of the
vehicle) to turn off the high beams. If the
high beams are off, pull the lever toward you
for a temporary high beam on, "flash to pass"
scenario.
2020_JEEP_M6_UG_UK.book Page 70
Page 73 of 328
71
Gray Indicator Lights
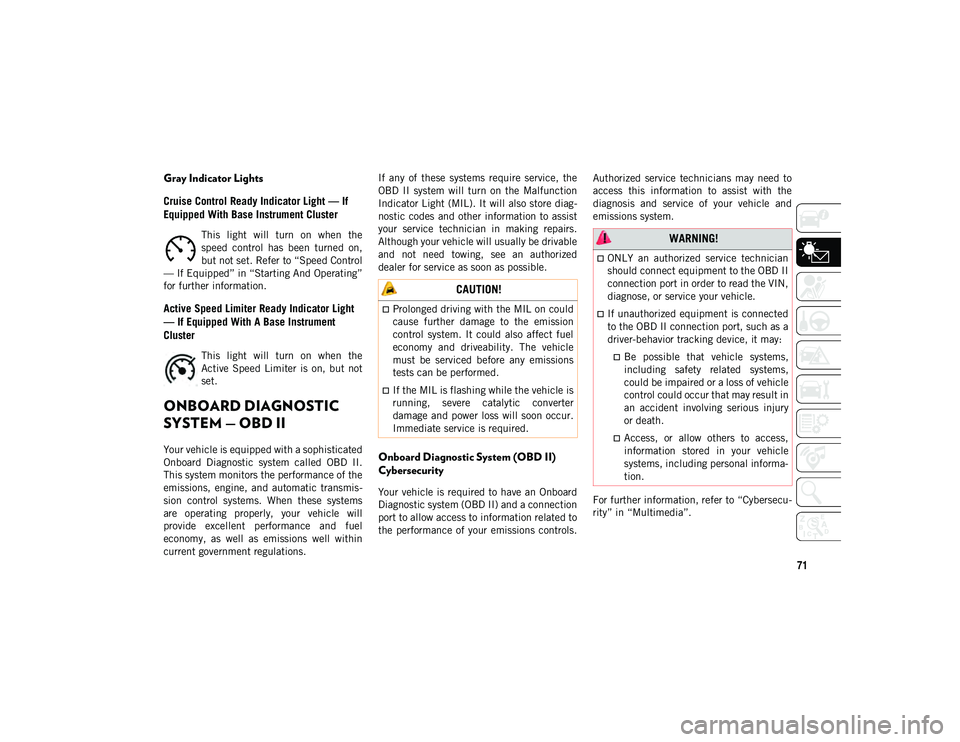
Cruise Control Ready Indicator Light — If
Equipped With Base Instrument Cluster
This light will turn on when the
speed control has been turned on,
but not set. Refer to “Speed Control
— If Equipped” in “Starting And Operating”
for further information.
Active Speed Limiter Ready Indicator Light
— If Equipped With A Base Instrument
Cluster
This light will turn on when the
Active Speed Limiter is on, but not
set.
ONBOARD DIAGNOSTIC
SYSTEM — OBD II
Your vehicle is equipped with a sophisticated
Onboard Diagnostic system called OBD II.
This system monitors the performance of the
emissions, engine, and automatic transmis -
sion control systems. When these systems
are operating properly, your vehicle will
provide excellent performance and fuel
economy, as well as emissions well within
current government regulations. If any of these systems require service, the
OBD II system will turn on the Malfunction
Indicator Light (MIL). It will also store diag
-
nostic codes and other information to assist
your service technician in making repairs.
Although your vehicle will usually be drivable
and not need towing, see an authorized
dealer for service as soon as possible.Onboard Diagnostic System (OBD II)
Cybersecurity
Your vehicle is required to have an Onboard
Diagnostic system (OBD II) and a connection
port to allow access to information related to
the performance of your emissions controls. Authorized service technicians may need to
access this information to assist with the
diagnosis and service of your vehicle and
emissions system.
For further information, refer to “Cybersecu
-
rity” in “Multimedia”.
CAUTION!
Prolonged driving with the MIL on could
cause further damage to the emission
control system. It could also affect fuel
economy and driveability. The vehicle
must be serviced before any emissions
tests can be performed.
If the MIL is flashing while the vehicle is
running, severe catalytic converter
damage and power loss will soon occur.
Immediate service is required.
WARNING!
ONLY an authorized service technician
should connect equipment to the OBD II
connection port in order to read the VIN,
diagnose, or service your vehicle.
If unauthorized equipment is connected
to the OBD II connection port, such as a
driver-behavior tracking device, it may:
Be possible that vehicle systems, including safety related systems,could be impaired or a loss of vehicle
control could occur that may result in
an accident involving serious injury
or death.
Access, or allow others to access, information stored in your vehicle
systems, including personal informa-
tion.
2020_JEEP_M6_UG_UK.book Page 71
Page 85 of 328
83
Rear Cross Path (RCP)
The Rear Cross Path (RCP) feature is
intended to aid the driver when backing out
of parking spaces where their vision of
oncoming vehicles may be blocked. Proceed
slowly and cautiously out of the parking
space until the rear end of the vehicle is
exposed. The RCP system will then have a
clear view of the cross traffic and if an
oncoming vehicle is detected, alert the
driver.
RCP monitors the rear detection zones on
both sides of the vehicle, for objects that are
moving toward the side of the vehicle with a
minimum speed of approximately 3 mph(5 km/h), to objects moving a maximum of
approximately 20 mph (32 km/h), such as in
parking lot situations.
NOTE:
In a parking lot situation, oncoming vehicles
can be obscured by vehicles parked on either
side. If the sensors are blocked by other
structures or vehicles, the system will not be
able to alert the driver.
When RCP is on and the vehicle is in
REVERSE, the driver is alerted using both
the visual and audible alarms, including
reducing the radio volume.
Modes Of Operation
Three selectable modes of operation are
available in the Uconnect System. Refer to
“Uconnect Settings” in “Multimedia” in the
Owner’s Manual for further information.
Blind Spot Alert Lights Only (Default Setting)
When operating in Blind Spot Alert mode,
the BSM system will provide a visual alert in
the appropriate side view mirror based on a
detected object. However, when the system
is operating in Rear Cross Path (RCP) mode,
the system will respond with both visual and
audible alerts when a detected object is
present. Whenever an audible alert is
requested, the radio is muted.
Blind Spot Alert Lights/Chime
When operating in Blind Spot Alert Lights/
Chime mode, the BSM system will provide a
visual alert in the appropriate side view
mirror based on a detected object. If the turn
signal is then activated, and it corresponds
to an alert present on that side of the vehicle,
an audible chime will also be sounded.
Whenever a turn signal and detected object
are present on the same side at the same
WARNING!
The Blind Spot Monitoring system is only
an aid to help detect objects in the blind
spot zones. The BSM system is not
designed to detect pedestrians, bicyclists,
or animals. Even if your vehicle is
equipped with the BSM system, always
check your vehicle’s mirrors, glance over
your shoulder, and use your turn signal
before changing lanes. Failure to do so can
result in serious injury or death.
WARNING!
Rear Cross Path Detection (RCP) is not a
back up aid system. It is intended to be
used to help a driver detect an oncoming
vehicle in a parking lot situation. Drivers
must be careful when backing up, even
when using RCP. Always check carefully
behind your vehicle, look behind you, and
be sure to check for pedestrians, animals,
other vehicles, obstructions, and blind
spots before backing up. Failure to do so
can result in serious injury or death.
2020_JEEP_M6_UG_UK.book Page 83
Page 104 of 328
SAFETY
102
The Passenger Advanced Front Air Bag can
be ENABLED (ON) or DISABLED (OFF) by
selecting the desired setting in the instru-
ment cluster display menu. For more infor -
mation on how to access the instrument
cluster display, refer to “Instrument Cluster
Display” in “Getting To Know Your Instru -
ment Panel” for further information.
The Passenger Air Bag DISABLE Feature
consists of the following:
Occupant Restraint Controller (ORC)
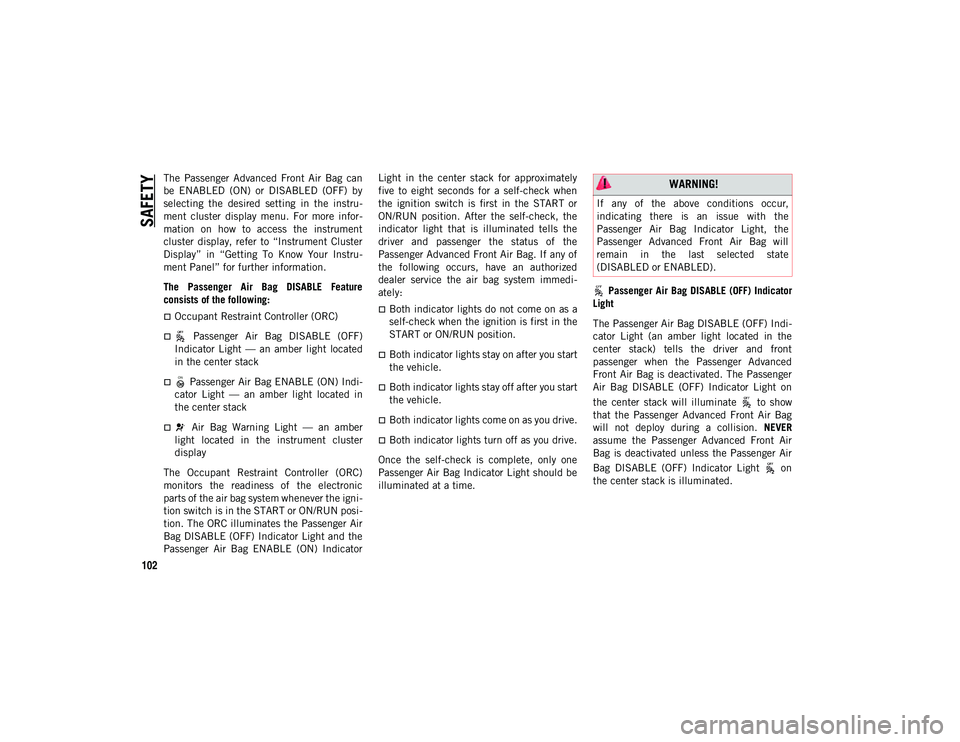
Passenger Air Bag DISABLE (OFF)
Indicator Light — an amber light located
in the center stack
Passenger Air Bag ENABLE (ON) Indi -
cator Light — an amber light located in
the center stack
Air Bag Warning Light — an amber
light located in the instrument cluster
display
The Occupant Restraint Controller (ORC)
monitors the readiness of the electronic
parts of the air bag system whenever the igni -
tion switch is in the START or ON/RUN posi -
tion. The ORC illuminates the Passenger Air
Bag DISABLE (OFF) Indicator Light and the
Passenger Air Bag ENABLE (ON) Indicator Light in the center stack for approximately
five to eight seconds for a self-check when
the ignition switch is first in the START or
ON/RUN position. After the self-check, the
indicator light that is illuminated tells the
driver and passenger the status of the
Passenger Advanced Front Air Bag. If any of
the following occurs, have an authorized
dealer service the air bag system immedi
-
ately:
Both indicator lights do not come on as a
self-check when the ignition is first in the
START or ON/RUN position.
Both indicator lights stay on after you start
the vehicle.
Both indicator lights stay off after you start
the vehicle.
Both indicator lights come on as you drive.
Both indicator lights turn off as you drive.
Once the self-check is complete, only one
Passenger Air Bag Indicator Light should be
illuminated at a time.
Passenger Air Bag DISABLE (OFF) Indicator
Light
The Passenger Air Bag DISABLE (OFF) Indi -
cator Light (an amber light located in the
center stack) tells the driver and front
passenger when the Passenger Advanced
Front Air Bag is deactivated. The Passenger
Air Bag DISABLE (OFF) Indicator Light on
the center stack will illuminate to show
that the Passenger Advanced Front Air Bag
will not deploy during a collision. NEVER
assume the Passenger Advanced Front Air
Bag is deactivated unless the Passenger Air
Bag DISABLE (OFF) Indicator Light on
the center stack is illuminated.
WARNING!
If any of the above conditions occur,
indicating there is an issue with the
Passenger Air Bag Indicator Light, the
Passenger Advanced Front Air Bag will
remain in the last selected state
(DISABLED or ENABLED).
2020_JEEP_M6_UG_UK.book Page 102
Page 109 of 328
107
(Continued)
Knee Impact Bolsters
The Knee Impact Bolsters help protect the
knees of the driver and front passenger, and
position the front occupants for improved
interaction with the front air bags.
Supplemental Seat-Mounted Side Air Bags
(SABs) (If Equipped)
Your vehicle may be equipped with Supple-
mental Seat-Mounted Side Air Bags (SABs).
If your vehicle is equipped with Supple -
mental Seat-Mounted Side Air Bags (SABs),
please refer to the information below.
Supplemental Seat-Mounted Side Air Bags
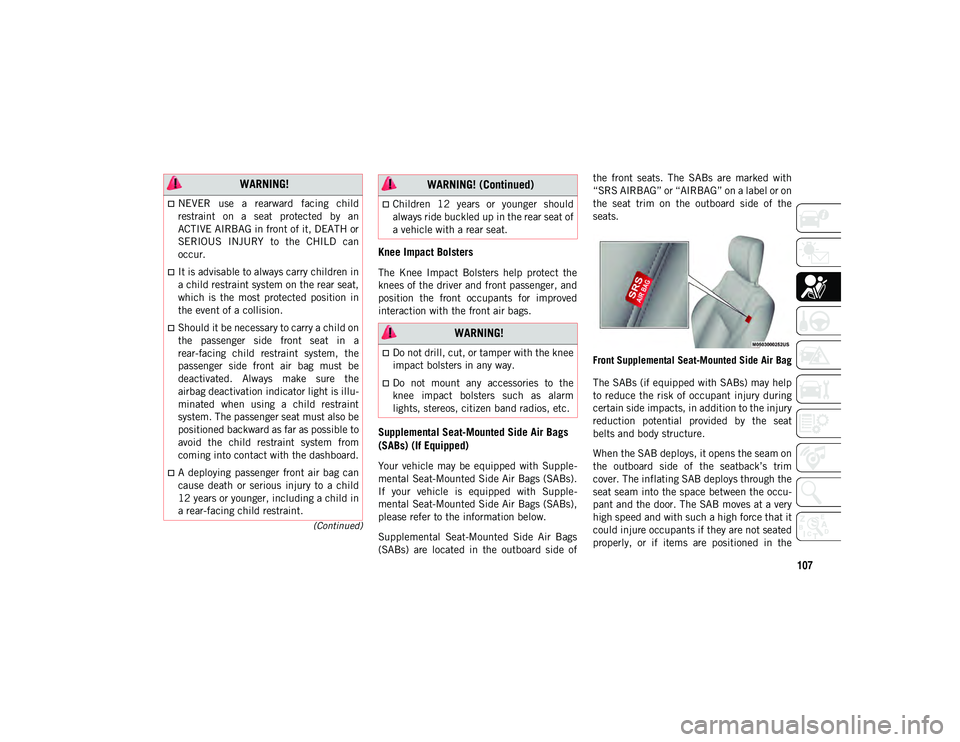
(SABs) are located in the outboard side of the front seats. The SABs are marked with
“SRS AIRBAG” or “AIRBAG” on a label or on
the seat trim on the outboard side of the
seats.
Front Supplemental Seat-Mounted Side Air Bag
The SABs (if equipped with SABs) may help
to reduce the risk of occupant injury during
certain side impacts, in addition to the injury
reduction potential provided by the seat
belts and body structure.
When the SAB deploys, it opens the seam on
the outboard side of the seatback’s trim
cover. The inflating SAB deploys through the
seat seam into the space between the occu -
pant and the door. The SAB moves at a very
high speed and with such a high force that it
could injure occupants if they are not seated
properly, or if items are positioned in the
WARNING!
NEVER use a rearward facing child
restraint on a seat protected by an
ACTIVE AIRBAG in front of it, DEATH or
SERIOUS INJURY to the CHILD can
occur.
It is advisable to always carry children in
a child restraint system on the rear seat,
which is the most protected position in
the event of a collision.
Should it be necessary to carry a child on
the passenger side front seat in a
rear-facing child restraint system, the
passenger side front air bag must be
deactivated. Always make sure the
airbag deactivation indicator light is illu -
minated when using a child restraint
system. The passenger seat must also be
positioned backward as far as possible to
avoid the child restraint system from
coming into contact with the dashboard.
A deploying passenger front air bag can
cause death or serious injury to a child
12 years or younger, including a child in
a rear-facing child restraint.
Children 12 years or younger should
always ride buckled up in the rear seat of
a vehicle with a rear seat.
WARNING!
Do not drill, cut, or tamper with the knee
impact bolsters in any way.
Do not mount any accessories to the
knee impact bolsters such as alarm
lights, stereos, citizen band radios, etc.
WARNING! (Continued)
2020_JEEP_M6_UG_UK.book Page 107
Page 115 of 328
113(Continued)
If a reset procedure step is not completed
within 60 seconds, then the turn signal
lights will blink and the reset procedure must
be performed again in order to be successful.
Maintaining Your Air Bag System Event Data Recorder (EDR)
This vehicle is equipped with an Event Data
Recorder (EDR). The main purpose of an
EDR is to record, in certain crash or near
crash-like situations, such as an air bag
deployment or hitting a road obstacle, data
that will assist in understanding how a
vehicle’s systems performed. The EDR is
designed to record data related to vehicle
dynamics and safety systems for a short
period of time, typically 30 seconds or less.
The EDR in this vehicle is designed to record
such data as:
How various systems in your vehicle were
operating;
Whether or not the driver and passenger
safety belts were buckled/fastened;
11. Turn ignition STOP/OFF/LOCK.
12. Turn ignition MAR/ACC/ON/RUN. (Entire sequence needs to be
completed within one minute or sequence will need to be repeated).
System is now reset and the engine may be started.
Turn hazard flashers OFF (Manually).
Customer Action Customer Will SeeNOTE:
Each step MUST BE held for at least two seconds
WARNING!
Modifications to any part of the air bag
system could cause it to fail when you
need it. You could be injured if the air
bag system is not there to protect you.
Do not modify the components or wiring,
including adding any kind of badges or
stickers to the steering wheel hub trim
cover or the upper passenger side of the
instrument panel. Do not modify the
front bumper, vehicle body structure, or
add aftermarket side steps or running
boards.
It is dangerous to try to repair any part of
the air bag system yourself. Be sure to
tell anyone who works on your vehicle
that it has an air bag system.
Do not attempt to modify any part of your
air bag system. The air bag may inflate
accidentally or may not function properly if
modifications are made. Take your vehicle
to an authorized dealer for any air bag
system service. If your seat, including your
trim cover and cushion, needs to be
serviced in any way (including removal or
loosening/tightening of seat attachment
bolts), take the vehicle to an authorized
dealer. Only manufacturer approved seat
accessories may be used. If it is necessary
to modify the air bag system for persons
with disabilities, contact an authorized
dealer.
WARNING! (Continued)
2020_JEEP_M6_UG_UK.book Page 113
Page 132 of 328
SAFETY
130
Periodic Safety Checks You Should Make
Outside The Vehicle
Tires
Examine tires for excessive tread wear and
uneven wear patterns. Check for stones,
nails, glass, or other objects lodged in the
tread or sidewall. Inspect the tread for cuts
and cracks. Inspect sidewalls for cuts,
cracks, and bulges. Check the wheel nuts for
tightness. Check the tires (including spare)
for proper cold inflation pressure.
Lights
Have someone observe the operation of
brake lights and exterior lights while you
work the controls. Check turn signal and high
beam indicator lights on the instrument
panel.
Door Latches
Check for proper closing, latching, and
locking.
Fluid Leaks
Check area under the vehicle after overnight
parking for fuel, coolant, oil, or other fluid
leaks. Also, if gasoline fumes are detected or
if fuel, or brake fluid leaks are suspected, the
cause should be located and corrected
immediately.
NEVER place any objects under the floor
mat (e.g., towels, keys, etc.). These
objects could change the position of the
floor mat and may cause interference
with the accelerator, brake, or clutch
pedals.
If the vehicle carpet has been removed
and re-installed, always properly attach
carpet to the floor and check the floor
mat fasteners are secure to the vehicle
carpet. Fully depress each pedal to
check for interference with the acceler-
ator, brake, or clutch pedals then
re-install the floor mats.
It is recommended to only use mild soap
and water to clean your floor mats. After
cleaning, always check your floor mat
has been properly installed and is
secured to your vehicle using the floor
mat fasteners by lightly pulling mat.
WARNING! (Continued)
2020_JEEP_M6_UG_UK.book Page 130
Page 171 of 328
169
AdBlue® (UREA) — If Equipped
The vehicle is equipped with an UREA injec -
tion system and Selective Catalytic Reduc -
tion to meet emission standards. These two
systems ensure compliance with the diesel
emissions requirements; at the same time,
they ensure fuel-efficiency, handling, torque
and power. For messages and system warn -
ings, refer to the "Warning Lights And
Messages" in the "Getting To Know Your
Instrument Panel" section. AdBlue® (UREA)
is a very stable product with a long shelf life.
Stored at temperatures LOWER than 90°F
(32°C), it has a shelf life of at least one year.
For more information on the AdBlue® liquid
type, see the “Fluids and lubricants” in the
“Technical specifications” section. The
vehicle is equipped with an automatic
AdBlue® heating system when the engine
starts allowing the system to work correctly
at temperatures lower than 12°F (-11°C).
NOTE:
AdBlue® freezes at temperatures lower than
12 °F (-11 °C).
AdBlue® (UREA) Storage
AdBlue® (UREA) is considered a very stable
product with a long shelf life. If AdBlue®
(UREA) is kept in temperatures between 10°
and 90°F (-12° and 32°C), it will last a
minimum of one year.
AdBlue® (UREA) is subject to freezing at the
lowest temperatures. For example, AdBlue®
(UREA) may freeze at temperatures at or
below 12°F (-11°C). The system has been
designed to operate in this environment.
NOTE:
When working with AdBlue® (UREA), it is
important to know that:
Any containers or parts that come into
contact with AdBlue® (UREA) must be
AdBlue® (UREA) compatible (plastic or
stainless steel). Copper, brass, aluminum,
iron or non-stainless steel should be
avoided as they are subject to corrosion by
AdBlue® (UREA).
If AdBlue® (UREA) is spilled, it should be
wiped up completely.
Adding AdBlue® (UREA)
Preliminary Conditions
AdBlue® (UREA) freezes at temperatures
lower than 12°F (-11°C). If the car stands for
a long time at this temperature refilling
could be difficult. For this reason, it is
advised to park the vehicle in a garage and/
or heated environment and wait for the urea
to return to liquid state before topping up.
Proceed as follows:
Park the car on flat ground and stop the
engine by cycling the ignition to the OFF
position.
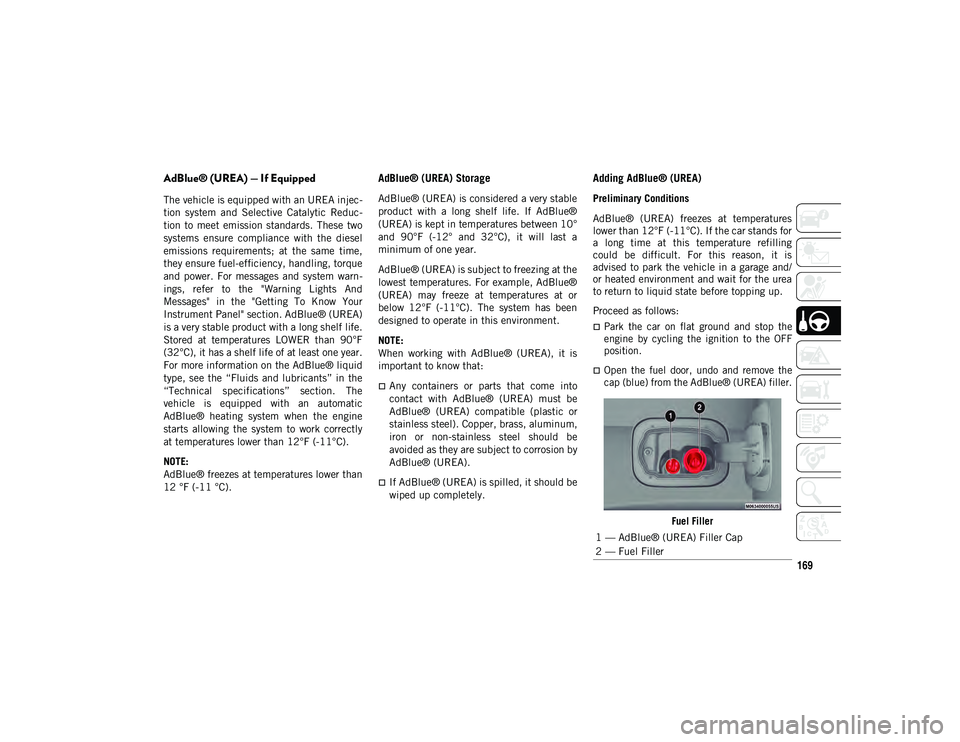
Open the fuel door, undo and remove the
cap (blue) from the AdBlue® (UREA) filler.
Fuel Filler
1 — AdBlue® (UREA) Filler Cap
2 — Fuel Filler
2020_JEEP_M6_UG_UK.book Page 169
Page 172 of 328
STARTING AND OPERATING
170
Refilling With Nozzles
You can fill up at any AdBlue® (UREA)
distributor.
Proceed as follows:
Insert the AdBlue® (UREA) nozzle in the
filler, start refilling and stop refilling at the
first shut-off (the shut-off indicates that
the AdBlue® (UREA) tank is full). Do not
proceed with the refilling, to prevent
spillage of AdBlue® (UREA).
Extract the nozzle.
Refilling With Containers
Proceed as follows:
Check the expiration date.
Read the advice for use on the label before
pouring the content of the bottle into the
AdBlue® (UREA) tank.
If systems which cannot be screwed in
(e.g. tanks) are used for refilling, after the
indication appears on the instrument
panel display refer to “Warning lights And
Messages" in the “Getting To Know Your
Instrument Panel” for further information,
fill the AdBlue® (UREA) tank with no
more than 2 Gallons (8 liters).
If containers which can be screwed to the
filler are used, the reservoir is full when
the AdBlue® (UREA) level in the
container stops pouring out. Do not
proceed further.
Operations After Refilling
Proceed as follows:
Fit the cap back on the AdBlue® (UREA)
filler by turning it clockwise and screwing
it completely.
Cycle the ignition to RUN (it is not neces-
sary to start the engine).
Wait for the indication on the instrument
panel to switch off before moving the car.
The indication may stay on for a few
seconds to approximately half a minute. If
the engine is started and the car is moved,
the indication will remain on for longer.
This will not compromise engine opera-
tion.
If the AdBlue® (UREA) was topped up
when the tank was empty, wait for
2 minutes before starting the engine. NOTE:
If AdBlue® (UREA) is spilled out of the
filler neck, clean up well the area and
proceed to filling up again. If the liquid
crystallizes, eliminate it with a sponge and
warm water.
DO NOT EXCEED THE MAXIMUM LEVEL:
this could cause damage to the reservoir.
AdBlue® (UREA) freezes at under 12°F
(-11°C). Although the system is designed
to operate below the freezing point of the
UREA, it is advisable not to fill the tank
beyond the maximum level because if the
UREA freezes the system can be
damaged. Follow the instructions in this
section.
If the AdBlue® (UREA) is spilled on
painted surfaces or aluminium, immedi
-
ately clean the area with water and use
absorbent material to collect the fluid that
has been spilled on the ground.
Do not try to start the engine if AdBlue®
(UREA) was accidentally added to the
diesel fuel tank, this can result in serious
engine damage, contact an authorized
dealer.
2020_JEEP_M6_UG_UK.book Page 170
Page 173 of 328
171
Do not add additives or other fluids to
AdBlue® (UREA), doing so could damage
the system.
The use of non-conforming or degraded
AdBlue® (UREA) may lead to indications
appearing on the instrument panel display
refer to “Warning Lights And Messages" in
the “Getting To Know Your Instrument
Panel” for further information.
Never pour AdBlue® (UREA) into another
container: it could be contaminated.
If the AdBlue® (UREA) runs out, see refer
to “Warning Lights And Messages" in the
“Getting To Know Your Instrument Panel”
for further information to continue using
the car normally.
VEHICLE LOADING
Certification Label
As required by local traffic regulations, your
vehicle has a certification label affixed to the
driver's side door or pillar.
Refer to “Tire Safety” in “Servicing And
Maintenance” for further informationThis label contains the month and year of
manufacture, Gross Vehicle Weight Rating
(GVWR), Gross Axle Weight Rating (GAWR)
front and rear, and Vehicle Identification
Number (VIN). A Month-Day-Hour (MDH)
number is included on this label and indi
-
cates the Month, Day and Hour of manufac -
ture. The bar code that appears on the
bottom of the label is your VIN.
TRAILER TOWING
Common Towing Definitions
The following trailer towing related defini -
tions will assist you in understanding the
following information:
Gross Vehicle Weight Rating (GVWR)
The GVWR is the total allowable weight of
your vehicle. This includes driver, passen -
gers, cargo and tongue weight. The total load
must be limited so that you do not exceed
the GVWR. Refer to “Vehicle Loading/Vehicle
Certification Label” in “Starting And Oper -
ating” for further information.
Gross Trailer Weight (GTW)
The GTW is the weight of the trailer plus the
weight of all cargo, consumables and equip -
ment (permanent or temporary) loaded in or
on the trailer in its "loaded and ready for
operation" condition.
The recommended way to measure GTW is to
put your fully loaded trailer on a vehicle
scale. The entire weight of the trailer must be
supported by the scale.
Gross Axle Weight Rating (GAWR)
The GAWR is the maximum capacity of the
front and rear axles. Distribute the load over
the front and rear axles evenly. Make sure
that you do not exceed either front or rear
GAWR. Refer to “Vehicle Loading/Vehicle
Certification Label” in “Starting And Oper -
ating” for further information.
WARNING!
It is important that you do not exceed the
maximum front or rear GAWR. A dangerous
driving condition can result if either rating
is exceeded. You could lose control of the
vehicle and have a collision.
2020_JEEP_M6_UG_UK.book Page 171