instrument cluster JEEP COMPASS 2020 Owner handbook (in English)
[x] Cancel search | Manufacturer: JEEP, Model Year: 2020, Model line: COMPASS, Model: JEEP COMPASS 2020Pages: 328, PDF Size: 8.85 MB
Page 79 of 328
77
ESC Activation/Malfunction Indicator Light
And ESC OFF Indicator Light
The “ESC Activation/Malfunction
Indicator Light” in the instrument
cluster will come on when the igni-
tion is turned to the ON mode. It should go
out with the engine running. If the “ESC
Activation/Malfunction Indicator Light”
comes on continuously with the engine
running, a malfunction has been detected in
the ESC system. If this light remains on after
several ignition cycles, and the vehicle has
been driven several miles (kilometers) at
speeds greater than 30 mph (48 km/h), see an authorized dealer as soon as possible to
have the problem diagnosed and corrected.
The “ESC Activation/Malfunction Indicator
Light” (located in the instrument cluster)
starts to flash as soon as the tires lose trac -
tion and the ESC system becomes active.
The “ESC Activation/Malfunction Indicator
Light” also flashes when TCS is active. If the
“ESC Activation/Malfunction Indicator
Light” begins to flash during acceleration,
ease up on the accelerator and apply as little
throttle as possible. Be sure to adapt your
speed and driving to the prevailing road
conditions. NOTE:
The “ESC Activation/Malfunction Indi
-
cator Light” and the “ESC Off Indicator
Light” come on momentarily each time
the ignition is turned ON.
Each time the ignition is turned ON, the
ESC system will be on even if it was turned
off previously.
The ESC system will make buzzing or
clicking sounds when it is active. This is
normal; the sounds will stop when ESC
becomes inactive following the maneuver
that caused the ESC activation.
The “ESC Off Indicator Light” indi -
cates the customer has elected to
have the Electronic Stability Control
(ESC) in a reduced mode.
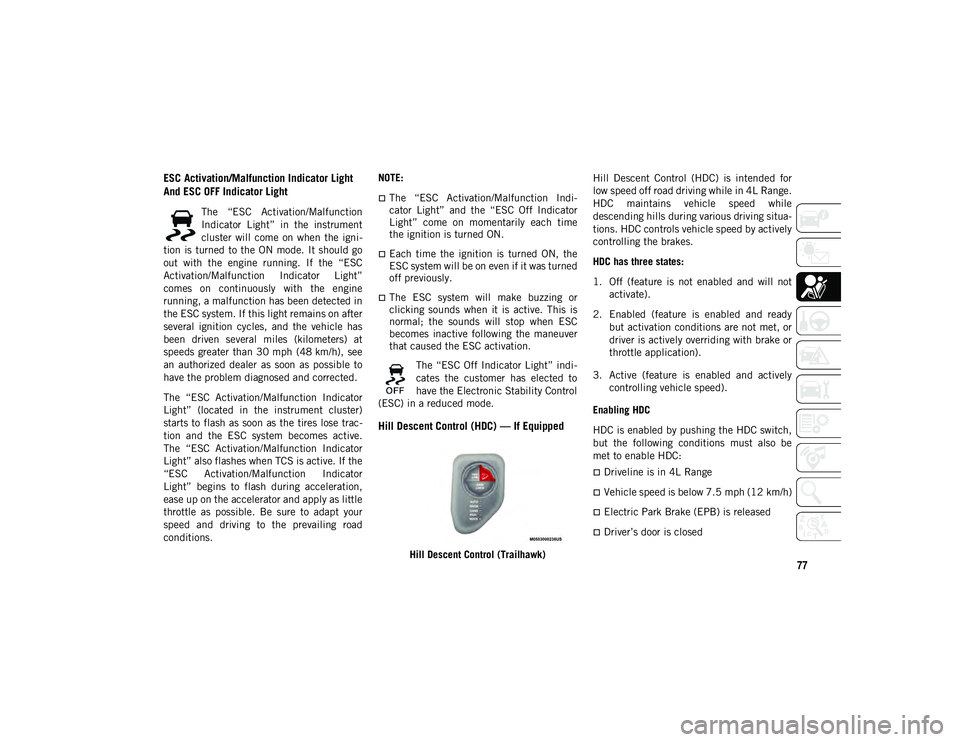
Hill Descent Control (HDC) — If Equipped
Hill Descent Control (Trailhawk) Hill Descent Control (HDC) is intended for
low speed off road driving while in 4L Range.
HDC maintains vehicle speed while
descending hills during various driving situa
-
tions. HDC controls vehicle speed by actively
controlling the brakes.
HDC has three states:
1. Off (feature is not enabled and will not activate).
2. Enabled (feature is enabled and ready but activation conditions are not met, or
driver is actively overriding with brake or
throttle application).
3. Active (feature is enabled and actively controlling vehicle speed).
Enabling HDC
HDC is enabled by pushing the HDC switch,
but the following conditions must also be
met to enable HDC:
Driveline is in 4L Range
Vehicle speed is below 7.5 mph (12 km/h)
Electric Park Brake (EPB) is released
Driver’s door is closed
2020_JEEP_M6_UG_UK.book Page 77
Page 80 of 328
SAFETY
78
Activating HDC
Once HDC is enabled, it will activate auto-
matically if driven down a grade of sufficient
magnitude (greater than approximately 8%).
The set speed for HDC is selectable by the
driver and can be adjusted within the thresh -
olds by using throttle or brake application.
Driver Override:
The driver may override HDC activation
speed with throttle or brake application at
anytime.
Deactivating HDC
HDC will be deactivated but remain available
if any of the following conditions occur:
Driver overrides HDC set speed with a
speed exceeding 7.5 mph (12 km/h) but
remains below 25 mph (40 km/h).
Vehicle is on a downhill grade of insuffi -
cient magnitude (less than approximately
8%), is on level ground, or is on an uphill
grade.
Vehicle is shifted to PARK. Disabling HDC
HDC will be deactivated and disabled if any
of the following conditions occur:
The driver pushes the HDC switch.
The driveline is shifted out of 4L Range.
The driver’s door opens.
The vehicle is driven greater than 25 mph
(40 km/h) (HDC exits immediately.)
Feedback To The Driver:
The instrument cluster has an HDC icon and
the HDC switch has an LED which offer feed -
back to the driver about the state HDC is in.
The cluster icon and switch lamp will illu -
minate and remain solid when HDC is
enabled or activated. This is the normal
operating condition for HDC.
The switch lamp will flash for several
seconds then extinguish when the driver
pushes the HDC switch when enable
conditions have not been met.
The Hill Descent Switch is located within the
Selec-Terrain knob in the upper right posi -
tion.
Hill Start Assist (HSA)
The Hill Start Assist (HSA) system is
designed to mitigate roll back from a
complete stop while on an incline. If the
driver releases the brake while stopped on an
incline, HSA will continue to hold the brake
pressure for a short period. If the driver does
not apply the throttle before this time
expires, the system will release brake pres -
sure and the vehicle will roll down the hill as
normal.
The following conditions must be met in
order for HSA to activate:
The feature must be enabled.
The vehicle must be stopped.
The park brake must be off.
The driver door must be closed.
The vehicle must be on a sufficient grade.
WARNING!
HDC is only intended to assist the driver in
controlling vehicle speed when descending
hills. The driver must remain attentive to
the driving conditions and is responsible
for maintaining a safe vehicle speed.
2020_JEEP_M6_UG_UK.book Page 78
Page 86 of 328
SAFETY
84
time, both the visual and audible alerts will
be issued. In addition to the audible alert the
radio (if on) will also be muted.
NOTE:
Whenever an audible alert is requested by
the BSM system, the radio is also muted.
When the system is in RCP, the system shall
respond with both visual and audible alerts
when a detected object is present. Whenever
an audible alert is requested, the radio
volume is reduced. Turn/hazard signal status
is ignored; the RCP state always requests the
chime.
Blind Spot Alert Off
When the BSM system is turned off there will
be no visual or audible alerts from either the
BSM or RCP systems.
NOTE:
The BSM system will store the current oper-
ating mode when the vehicle is shut off.
Each time the vehicle is started the previ -
ously stored mode will be recalled and used.
Blocked Sensor
If the system detects degraded performance
due to contamination or foreign objects, a
message will warn you of a blocked sensor and the warning indicators in side view
mirrors will be illuminated. The warning indi
-
cators will remain illuminated until blockage
clearing conditions are met. First clear the
fascia area around the sensors of the
blockage. After removing the blockage, reset
the system by placing the ignition from ON to
OFF and then back ON.
Forward Collision Warning (FCW) With
Mitigation — If Equipped
Forward Collision Warning (FCW) With
Mitigation Operation
The Forward Collision Warning (FCW) system
with mitigation provides the driver with
audible warnings, visual warnings (within the
instrument cluster display), and may apply a
brake jerk to warn the driver when it detects
a potential frontal collision. The warnings
and limited braking are intended to provide
the driver with enough time to react, avoid or
mitigate the potential collision.
NOTE:
FCW monitors the information from the
forward looking sensors as well as the Elec -
tronic Brake Controller (EBC), to calculate
the probability of a forward collision. When
the system determines that a forward colli -sion is probable, the driver will be provided
with audible and visual warnings and may
provide a brake jerk warning.
If the driver does not take action based upon
these progressive warnings, then the system
will provide a limited level of active braking
to help slow the vehicle and mitigate the
potential forward collision. If the driver
reacts to the warnings by braking and the
system determines that the driver intends to
avoid the collision by braking but has not
applied sufficient brake force, the system
will compensate and provide additional
brake force as required.
If a Forward Collision Warning with Mitiga
-
tion event begins at a speed below 26 mph
(42 km/h), the system may provide the
maximum braking possible to mitigate the
potential forward collision. If the Forward
Collision Warning with Mitigation event stops
the vehicle completely, the system will hold
the vehicle at standstill for two seconds and
then release the brakes.
2020_JEEP_M6_UG_UK.book Page 84
Page 88 of 328
SAFETY
86
Changing the FCW status to the “Near”
setting, allows the system to warn the driver
of a possible collision with the vehicle in
front when the distance between the vehicle
in the front is much closer. This setting
provides less reaction time than the “Far”
and “Medium” settings, which allows for a
more dynamic driving experience.
NOTE:
The system will NOT retain the last setting
selected by the driver after ignition shut
down. The system will reset to Medium
sensitivity with FCW "Full On" setting
when the vehicle is restarted.
FCW may not react to irrelevant objects
such as overhead objects, ground reflec-
tions, objects not in the path of the
vehicle, stationary objects that are far
away, oncoming traffic, or leading vehicles
with the same or higher rate of speed.
If FCW is disabled, unavailable screens
will be displayed.
FCW Limited Warning
If the instrument cluster display reads “ACC/
FCW Limited Functionality” or “ACC/FCW
Limited Functionality Clean Front Wind-
shield” momentarily, there may be a condi -tion that limits FCW functionality. Although
the vehicle is still drivable under normal
conditions, the active braking may not be
fully available. Once the condition that
limited the system performance is no longer
present, the system will return to its full
performance state. If the problem persists,
see an authorized dealer.
Service FCW Warning
If the system turns off, and the instrument
cluster display reads “FCW Unavailable
Service Required”, this indicates there is an
internal system fault. Although the vehicle is
still drivable under normal conditions, have
the system checked by an authorized dealer.
Tire Pressure Monitoring System (TPMS)
The Tire Pressure Monitoring System (TPMS)
will warn the driver of a low tire pressure
based on the vehicle recommended cold
placard pressure.
The tire pressure will vary with temperature
by approximately 1 psi (7 kPa) for every 12°F
(6.5°C). This means that when the outside
temperature decreases, the tire pressure will
decrease. Tire pressure should always be set
based on cold inflation tire pressure. This is
defined as the tire pressure after the vehicle
has not been driven for at least three hours,
or driven less than 1 mile (1.6 km) after a
three hour period. The cold tire inflation
pressure must not exceed the maximum
inflation pressure molded into the tire side
-
wall. Refer to “Tires” in “Servicing And
Maintenance” for information on how to
properly inflate the vehicle’s tires. The tire
pressure will also increase as the vehicle is
driven. This is normal and there should be no
adjustment for this increased pressure.
The TPMS will warn the driver of a low tire
pressure if the tire pressure falls below the
low-pressure warning limit for any reason,
including low temperature effects and
natural pressure loss through the tire. The
TPMS will continue to warn the driver of low
tire pressure as long as the condition exists,
and will not turn off until the tire pressure is
at or above the recommended cold placard
pressure.
NOTE:
Once the low tire pressure warning (TPMS
Warning Light) illuminates, you must
increase the tire pressure to the recom -
mended cold placard pressure in order for
the TPMS Warning Light to turn off.
2020_JEEP_M6_UG_UK.book Page 86
Page 90 of 328
SAFETY
88
Premium System
The Tire Pressure Monitoring System (TPMS)
uses wireless technology with wheel rim
mounted electronic sensors to monitor tire
pressure levels. Sensors, mounted to each
wheel as part of the valve stem, transmit tire
pressure readings to the receiver module.
NOTE:
It is particularly important for you to check
the tire pressure in all of the tires on your
vehicle monthly and to maintain the proper
pressure.
The TPMS consists of the following compo-
nents:
Receiver Module
Four Tire Pressure Monitoring sensors
Various Tire Pressure Monitoring System
messages, which will display in the instru -
ment cluster display.
Tire Pressure Monitoring System Warning
Light
Tire Pressure Monitoring Low Pressure
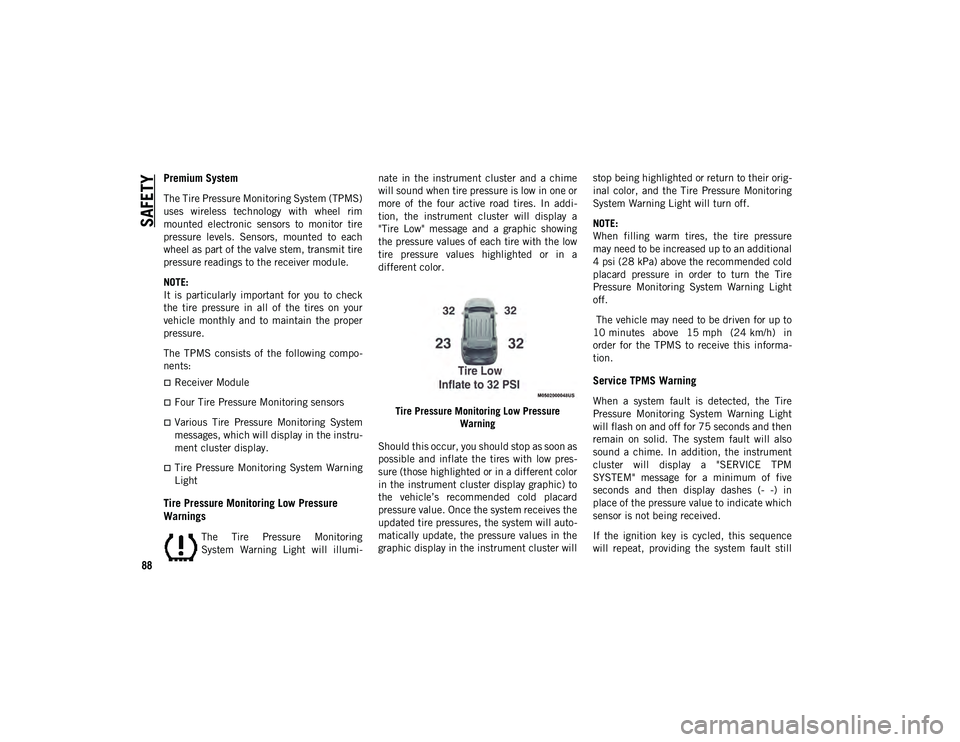
Warnings
The Tire Pressure Monitoring
System Warning Light will illumi -nate in the instrument cluster and a chime
will sound when tire pressure is low in one or
more of the four active road tires. In addi
-
tion, the instrument cluster will display a
"Tire Low" message and a graphic showing
the pressure values of each tire with the low
tire pressure values highlighted or in a
different color.
Tire Pressure Monitoring Low Pressure Warning
Should this occur, you should stop as soon as
possible and inflate the tires with low pres -
sure (those highlighted or in a different color
in the instrument cluster display graphic) to
the vehicle’s recommended cold placard
pressure value. Once the system receives the
updated tire pressures, the system will auto -
matically update, the pressure values in the
graphic display in the instrument cluster will stop being highlighted or return to their orig
-
inal color, and the Tire Pressure Monitoring
System Warning Light will turn off.
NOTE:
When filling warm tires, the tire pressure
may need to be increased up to an additional
4 psi (28 kPa) above the recommended cold
placard pressure in order to turn the Tire
Pressure Monitoring System Warning Light
off.
The vehicle may need to be driven for up to
10 minutes above 15 mph (24 km/h) in
order for the TPMS to receive this informa -
tion.
Service TPMS Warning
When a system fault is detected, the Tire
Pressure Monitoring System Warning Light
will flash on and off for 75 seconds and then
remain on solid. The system fault will also
sound a chime. In addition, the instrument
cluster will display a "SERVICE TPM
SYSTEM" message for a minimum of five
seconds and then display dashes (- -) in
place of the pressure value to indicate which
sensor is not being received.
If the ignition key is cycled, this sequence
will repeat, providing the system fault still
2020_JEEP_M6_UG_UK.book Page 88
Page 91 of 328
89
exists. If the system fault no longer exists,
the Tire Pressure Monitoring System Warning
Light will no longer flash, and the “SERVICE
TPM SYSTEM” message will no longer
display, and a pressure value will display in
place of the dashes. A system fault can occur
due to any of the following:
Jamming due to electronic devices or
driving next to facilities emitting the same
radio frequencies as the TPMS sensors.
Installing some form of aftermarket
window tinting that affects radio wave
signals.
Lots of snow or ice around the wheels or
wheel housings.
Using tire chains on the vehicle.
Using wheels/tires not equipped with
TPMS sensors.
Vehicles With Compact Spare or Non-Matching
Full Size Spare
1. The compact spare tire or non-matching full size does not have a Tire Pressure
Monitoring sensor. Therefore, the TPMS
will not monitor the pressure in the
compact or non-matching full size spare
tire. 2. If you install the compact or
non-matching full size spare tire in place
of a road tire that has a pressure below
the low-pressure warning limit, upon the
next ignition key cycle, the Tire Pressure
Monitoring System Warning Light will
remain on and a chime will sound. In
addition, the graphic in the instrument
cluster will still display a different color
or highlighted pressure value.
3. After driving the vehicle for up to 10 minutes above 15 mph (24 km/h),
the Tire Pressure Monitoring System
Warning Light will flash on and off for
75 seconds and then remain on solid. In
addition, the instrument cluster will
display a “SERVICE TPM SYSTEM”
message for five seconds and then
display dashes (- -) in place of the pres -
sure value.
4. For each subsequent ignition key cycle, a chime will sound, the Tire Pressure
Monitoring System Warning Light will
flash on and off for 75 seconds and then
remain on solid, and the instrument
cluster will display a “SERVICE TPM
SYSTEM” message for five seconds and
then display dashes (- -) in place of the
pressure value. 5. Once you repair or replace the original
road tire and reinstall it on the vehicle in
place of the compact spare, the TPMS
will update automatically. In addition,
the Tire Pressure Monitoring System
Warning Light will turn off and the
graphic in the instrument cluster will
display a new pressure value instead of
dashes (- -), as long as no tire pressure is
below the low-pressure warning limit in
any of the four active road tires. The
vehicle may need to be driven for up to
10 minutes above 15 mph (24 km/h) in
order for the TPMS to receive this infor -
mation.
TPMS Deactivation — If Equipped
The TPMS can be deactivated if replacing all
four wheel and tire assemblies (road tires)
with wheel and tire assemblies that do not
have TPMS Sensors, such as when installing
winter wheel and tire assemblies on your
vehicle.
To deactivate the TPMS, first replace all four
wheel and tire assemblies (road tires) with
tires not equipped with Tire Pressure Moni -
toring (TPM) sensors. Then, drive the vehicle
for 10 minutes above 15 mph (24 km/h). The TPMS will chime, the Tire Pressure
2020_JEEP_M6_UG_UK.book Page 89
Page 92 of 328
SAFETY
90
Monitoring System Warning Light will flash
on and off for 75 seconds and then remain
on. The instrument cluster will display the
“SERVICE TPM SYSTEM” message and then
display dashes (--) in place of the pressure
values.
Beginning with the next ignition cycle, the
TPMS will no longer chime or display the
“SERVICE TPM SYSTEM” message in the
instrument cluster but dashes (--) will
remain in place of the pressure values.
To reactivate the TPMS, replace all four
wheel and tire assemblies (road tires) with
tires equipped with TPM sensors. Then, drive
the vehicle for up to 10 minutes above
15 mph (24 km/h). The TPMS will chime,
the Tire Pressure Monitoring System Warning
Light will flash on and off for 75 seconds and
then turn off. The instrument cluster will
display the “SERVICE TPM SYSTEM”
message and then display pressure values in
place of the dashes. On the next ignition
cycle the "SERVICE TPM SYSTEM" message
will no longer be displayed as long as no
system fault exists.OCCUPANT RESTRAINT
SYSTEMS
Some of the most important safety features
in your vehicle are the restraint systems:
Occupant Restraint Systems Features
Seat Belt Systems
Supplemental Restraint Systems (SRS)
Air Bags
Child Restraints
Some of the safety features described in this
section may be standard equipment on some
models, or may be optional equipment on
others. If you are not sure, ask an authorized
dealer.
Important Safety Precautions
Please pay close attention to the information
in this section. It tells you how to use your
restraint system properly, to keep you and
your passengers as safe as possible. Here are some simple steps you can take to
minimize the risk of harm from a deploying
air bag:
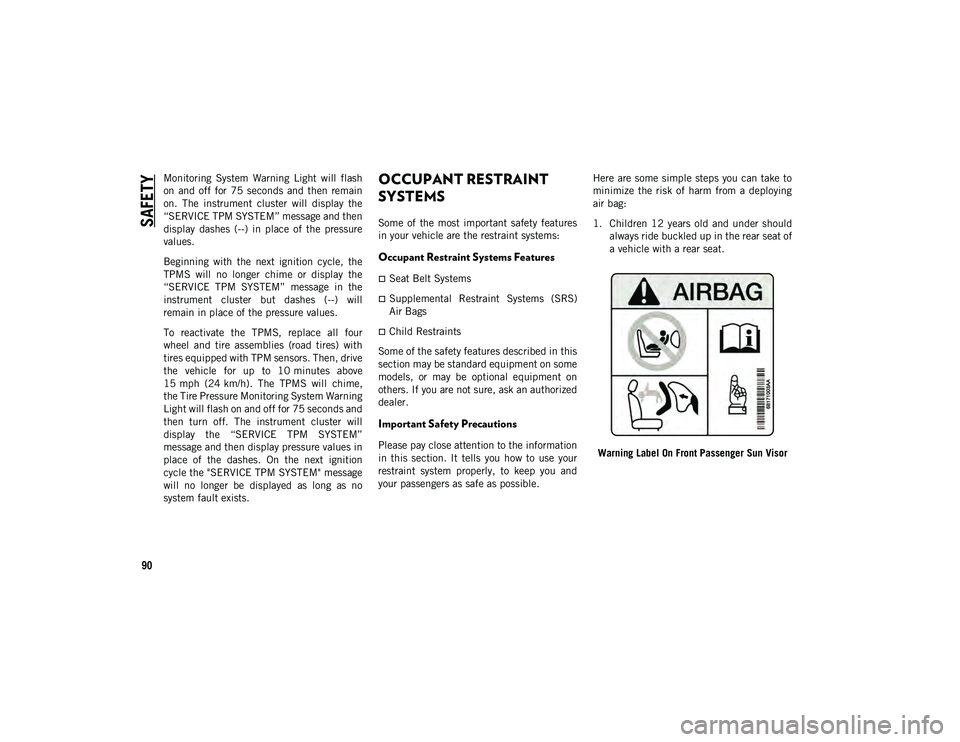
1. Children 12 years old and under should
always ride buckled up in the rear seat of
a vehicle with a rear seat.
Warning Label On Front Passenger Sun Visor
2020_JEEP_M6_UG_UK.book Page 90
Page 104 of 328
SAFETY
102
The Passenger Advanced Front Air Bag can
be ENABLED (ON) or DISABLED (OFF) by
selecting the desired setting in the instru-
ment cluster display menu. For more infor -
mation on how to access the instrument
cluster display, refer to “Instrument Cluster
Display” in “Getting To Know Your Instru -
ment Panel” for further information.
The Passenger Air Bag DISABLE Feature
consists of the following:
Occupant Restraint Controller (ORC)
Passenger Air Bag DISABLE (OFF)
Indicator Light — an amber light located
in the center stack
Passenger Air Bag ENABLE (ON) Indi -
cator Light — an amber light located in
the center stack
Air Bag Warning Light — an amber
light located in the instrument cluster
display
The Occupant Restraint Controller (ORC)
monitors the readiness of the electronic
parts of the air bag system whenever the igni -
tion switch is in the START or ON/RUN posi -
tion. The ORC illuminates the Passenger Air
Bag DISABLE (OFF) Indicator Light and the
Passenger Air Bag ENABLE (ON) Indicator Light in the center stack for approximately
five to eight seconds for a self-check when
the ignition switch is first in the START or
ON/RUN position. After the self-check, the
indicator light that is illuminated tells the
driver and passenger the status of the
Passenger Advanced Front Air Bag. If any of
the following occurs, have an authorized
dealer service the air bag system immedi
-
ately:
Both indicator lights do not come on as a
self-check when the ignition is first in the
START or ON/RUN position.
Both indicator lights stay on after you start
the vehicle.
Both indicator lights stay off after you start
the vehicle.
Both indicator lights come on as you drive.
Both indicator lights turn off as you drive.
Once the self-check is complete, only one
Passenger Air Bag Indicator Light should be
illuminated at a time.
Passenger Air Bag DISABLE (OFF) Indicator
Light
The Passenger Air Bag DISABLE (OFF) Indi -
cator Light (an amber light located in the
center stack) tells the driver and front
passenger when the Passenger Advanced
Front Air Bag is deactivated. The Passenger
Air Bag DISABLE (OFF) Indicator Light on
the center stack will illuminate to show
that the Passenger Advanced Front Air Bag
will not deploy during a collision. NEVER
assume the Passenger Advanced Front Air
Bag is deactivated unless the Passenger Air
Bag DISABLE (OFF) Indicator Light on
the center stack is illuminated.
WARNING!
If any of the above conditions occur,
indicating there is an issue with the
Passenger Air Bag Indicator Light, the
Passenger Advanced Front Air Bag will
remain in the last selected state
(DISABLED or ENABLED).
2020_JEEP_M6_UG_UK.book Page 102
Page 105 of 328
103
(Continued)
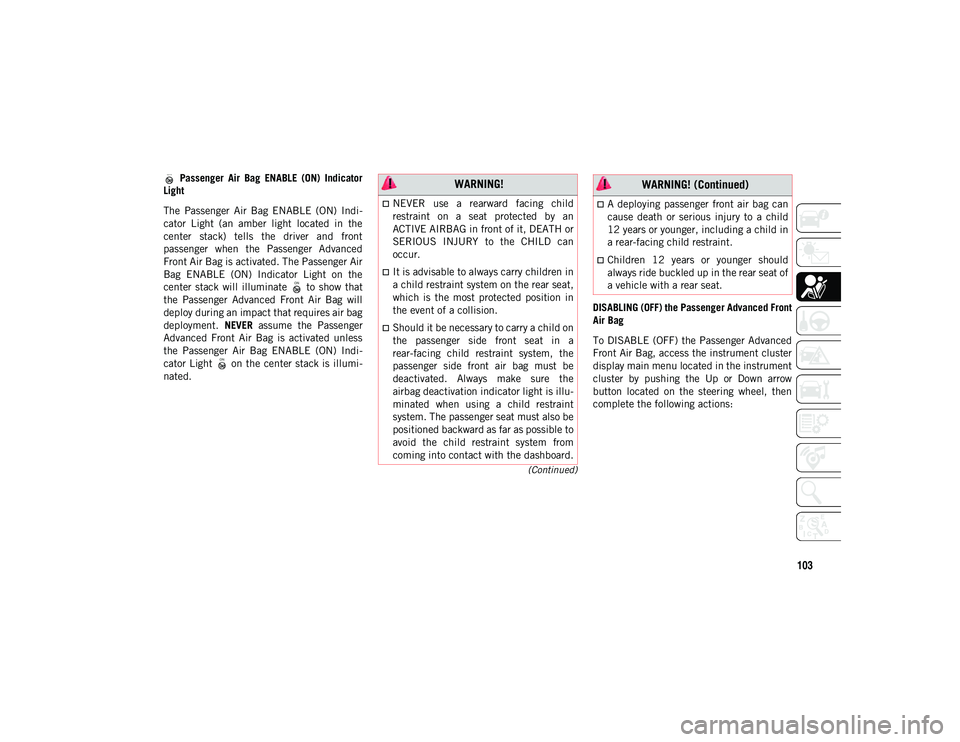
Passenger Air Bag ENABLE (ON) Indicator
Light
The Passenger Air Bag ENABLE (ON) Indi -
cator Light (an amber light located in the
center stack) tells the driver and front
passenger when the Passenger Advanced
Front Air Bag is activated. The Passenger Air
Bag ENABLE (ON) Indicator Light on the
center stack will illuminate to show that
the Passenger Advanced Front Air Bag will
deploy during an impact that requires air bag
deployment. NEVER assume the Passenger
Advanced Front Air Bag is activated unless
the Passenger Air Bag ENABLE (ON) Indi -
cator Light on the center stack is illumi -
nated. DISABLING (OFF) the Passenger Advanced Front
Air Bag
To DISABLE (OFF) the Passenger Advanced
Front Air Bag, access the instrument cluster
display main menu located in the instrument
cluster by pushing the Up or Down arrow
button located on the steering wheel, then
complete the following actions: WARNING!
NEVER use a rearward facing child
restraint on a seat protected by an
ACTIVE AIRBAG in front of it, DEATH or
SERIOUS INJURY to the CHILD can
occur.
It is advisable to always carry children in
a child restraint system on the rear seat,
which is the most protected position in
the event of a collision.
Should it be necessary to carry a child on
the passenger side front seat in a
rear-facing child restraint system, the
passenger side front air bag must be
deactivated. Always make sure the
airbag deactivation indicator light is illu
-
minated when using a child restraint
system. The passenger seat must also be
positioned backward as far as possible to
avoid the child restraint system from
coming into contact with the dashboard.
A deploying passenger front air bag can
cause death or serious injury to a child
12 years or younger, including a child in
a rear-facing child restraint.
Children 12 years or younger should
always ride buckled up in the rear seat of
a vehicle with a rear seat.
WARNING! (Continued)
2020_JEEP_M6_UG_UK.book Page 103
Page 107 of 328
105
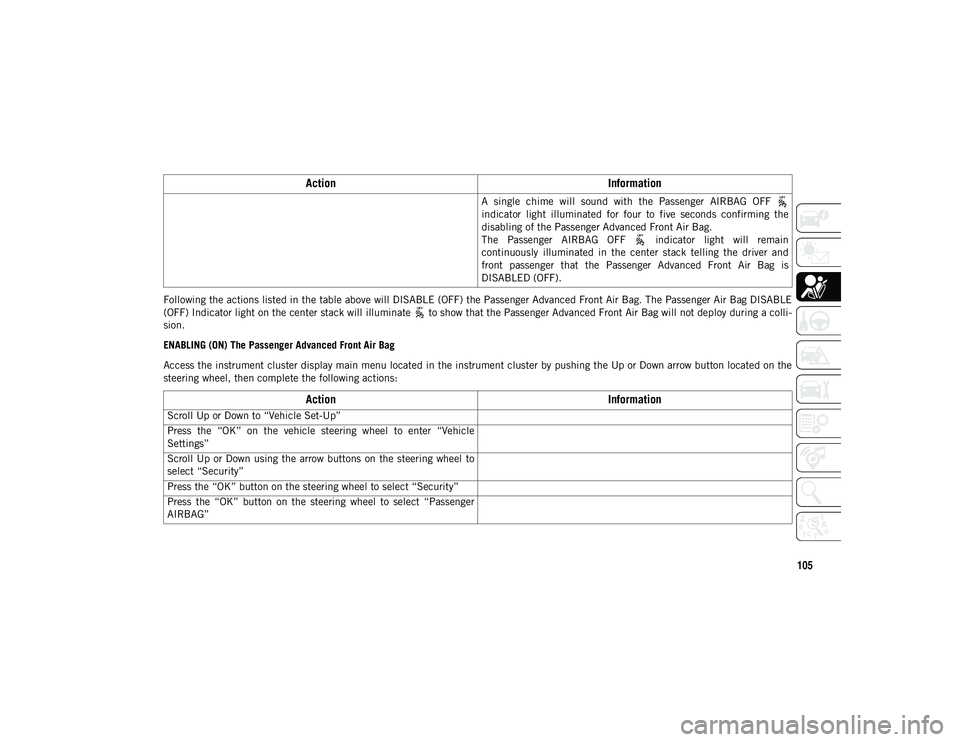
Following the actions listed in the table above will DISABLE (OFF) the Passenger Advanced Front Air Bag. The Passenger Air Bag DISABLE
(OFF) Indicator light on the center stack will illuminate to show that the Passenger Advanced Front Air Bag will not deploy during a colli-
sion.
ENABLING (ON) The Passenger Advanced Front Air Bag
Access the instrument cluster display main menu located in the instrument cluster by pushing the Up or Down arrow button located on the
steering wheel, then complete the following actions: A single chime will sound with the Passenger AIRBAG OFF
indicator light illuminated for four to five seconds confirming the
disabling of the Passenger Advanced Front Air Bag.
The Passenger AIRBAG OFF indicator light will remain
continuously illuminated in the center stack telling the driver and
front passenger that the Passenger Advanced Front Air Bag is
DISABLED (OFF).
Action
Information
Scroll Up or Down to “Vehicle Set-Up”
Press the “OK” on the vehicle steering wheel to enter “Vehicle
Settings”
Scroll Up or Down using the arrow buttons on the steering wheel to
select “Security”
Press the “OK” button on the steering wheel to select “Security”
Press the “OK” button on the steering wheel to select “Passenger
AIRBAG”
ActionInformation
2020_JEEP_M6_UG_UK.book Page 105