display JEEP COMPASS 2020 Owner handbook (in English)
[x] Cancel search | Manufacturer: JEEP, Model Year: 2020, Model line: COMPASS, Model: JEEP COMPASS 2020Pages: 328, PDF Size: 8.85 MB
Page 9 of 328
7
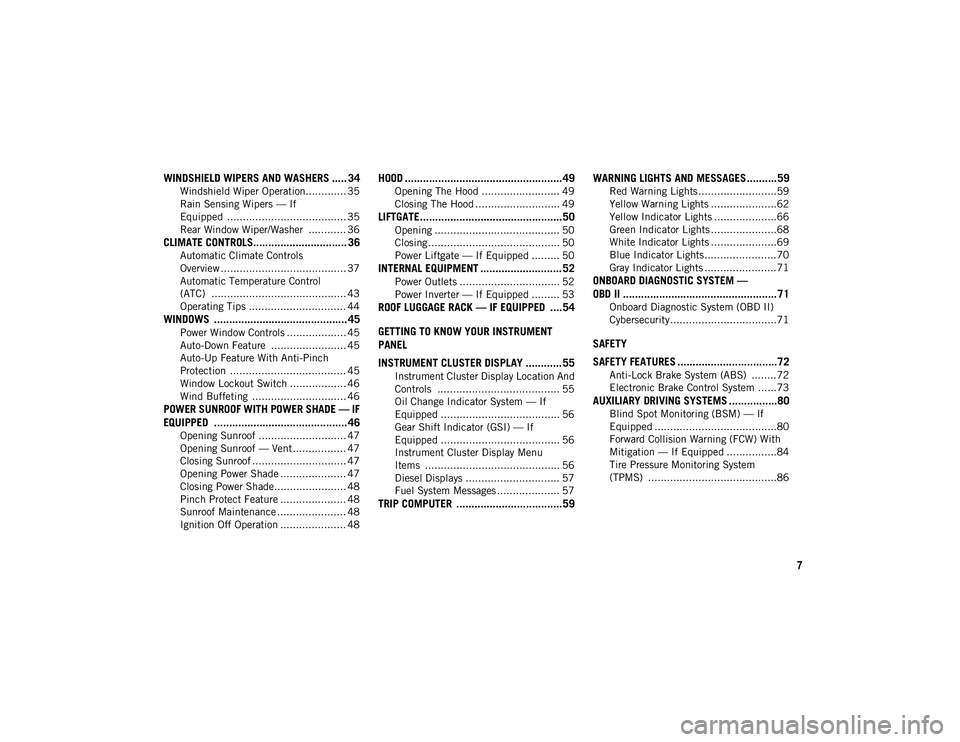
WINDSHIELD WIPERS AND WASHERS ..... 34
Windshield Wiper Operation............. 35
Rain Sensing Wipers — If
Equipped ...................................... 35 Rear Window Wiper/Washer ............ 36
CLIMATE CONTROLS............................... 36
Automatic Climate Controls
Overview ........................................ 37 Automatic Temperature Control
(ATC) ........................................... 43 Operating Tips ............................... 44
WINDOWS ............................................ 45
Power Window Controls ................... 45
Auto-Down Feature ........................ 45
Auto-Up Feature With Anti-Pinch
Protection ..................................... 45 Window Lockout Switch .................. 46
Wind Buffeting .............................. 46
POWER SUNROOF WITH POWER SHADE — IF
EQUIPPED ............................................ 46
Opening Sunroof ............................ 47
Opening Sunroof — Vent ................. 47
Closing Sunroof .............................. 47
Opening Power Shade ..................... 47
Closing Power Shade....................... 48
Pinch Protect Feature ..................... 48
Sunroof Maintenance ...................... 48
Ignition Off Operation ..................... 48
HOOD ....................................................49
Opening The Hood ......................... 49
Closing The Hood ........................... 49
LIFTGATE...............................................50
Opening ........................................ 50
Closing .......................................... 50
Power Liftgate — If Equipped ......... 50
INTERNAL EQUIPMENT ........................... 52
Power Outlets ................................ 52
Power Inverter — If Equipped ......... 53
ROOF LUGGAGE RACK — IF EQUIPPED ....54
GETTING TO KNOW YOUR INSTRUMENT
PANEL
INSTRUMENT CLUSTER DISPLAY ............ 55
Instrument Cluster Display Location And
Controls ....................................... 55 Oil Change Indicator System — If
Equipped ...................................... 56 Gear Shift Indicator (GSI) — If
Equipped ...................................... 56 Instrument Cluster Display Menu
Items ........................................... 56 Diesel Displays .............................. 57
Fuel System Messages .................... 57
TRIP COMPUTER ...................................59 WARNING LIGHTS AND MESSAGES ..........59
Red Warning Lights .........................59
Yellow Warning Lights .....................62
Yellow Indicator Lights ....................66
Green Indicator Lights .....................68
White Indicator Lights .....................69
Blue Indicator Lights .......................70
Gray Indicator Lights .......................71
ONBOARD DIAGNOSTIC SYSTEM —
OBD II ...................................................71
Onboard Diagnostic System (OBD II)
Cybersecurity..................................71
SAFETY
SAFETY FEATURES .................................72
Anti-Lock Brake System (ABS) ........72
Electronic Brake Control System ......73
AUXILIARY DRIVING SYSTEMS ................80
Blind Spot Monitoring (BSM) — If
Equipped .......................................80 Forward Collision Warning (FCW) With
Mitigation — If Equipped ................84 Tire Pressure Monitoring System
(TPMS) .........................................86
2020_JEEP_M6_UG_UK.book Page 7
Page 10 of 328
8
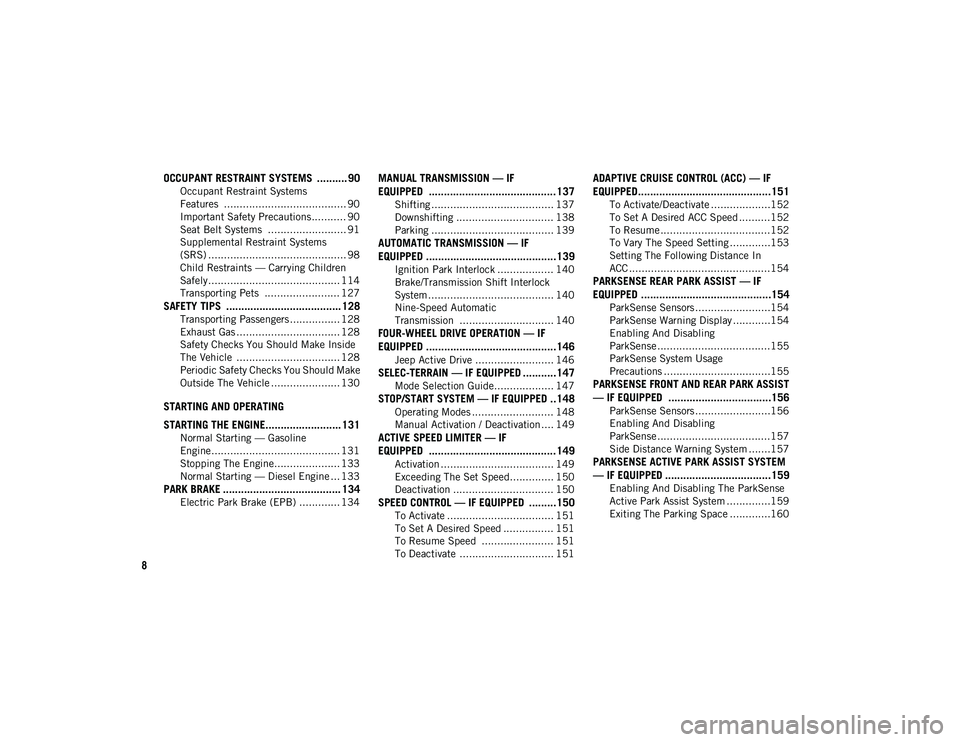
OCCUPANT RESTRAINT SYSTEMS .......... 90
Occupant Restraint Systems
Features ....................................... 90 Important Safety Precautions ........... 90
Seat Belt Systems ......................... 91
Supplemental Restraint Systems
(SRS) ............................................ 98 Child Restraints — Carrying Children
Safely.......................................... 114 Transporting Pets ........................ 127
SAFETY TIPS ...................................... 128
Transporting Passengers ................ 128
Exhaust Gas ................................. 128
Safety Checks You Should Make Inside
The Vehicle ................................. 128 Periodic Safety Checks You Should Make
Outside The Vehicle ...................... 130
STARTING AND OPERATING
STARTING THE ENGINE......................... 131
Normal Starting — Gasoline
Engine......................................... 131 Stopping The Engine..................... 133
Normal Starting — Diesel Engine ... 133
PARK BRAKE ....................................... 134
Electric Park Brake (EPB) ............. 134
MANUAL TRANSMISSION — IF
EQUIPPED ..........................................137
Shifting ....................................... 137
Downshifting ............................... 138
Parking ....................................... 139
AUTOMATIC TRANSMISSION — IF
EQUIPPED ...........................................139
Ignition Park Interlock .................. 140
Brake/Transmission Shift Interlock
System ........................................ 140 Nine-Speed Automatic
Transmission .............................. 140
FOUR-WHEEL DRIVE OPERATION — IF
EQUIPPED ...........................................146
Jeep Active Drive ......................... 146
SELEC-TERRAIN — IF EQUIPPED ...........147
Mode Selection Guide................... 147
STOP/START SYSTEM — IF EQUIPPED ..148
Operating Modes .......................... 148
Manual Activation / Deactivation .... 149
ACTIVE SPEED LIMITER — IF
EQUIPPED ..........................................149
Activation .................................... 149
Exceeding The Set Speed.............. 150
Deactivation ................................ 150
SPEED CONTROL — IF EQUIPPED .........150
To Activate .................................. 151
To Set A Desired Speed ................ 151
To Resume Speed ....................... 151
To Deactivate .............................. 151
ADAPTIVE CRUISE CONTROL (ACC) — IF
EQUIPPED............................................151
To Activate/Deactivate ...................152
To Set A Desired ACC Speed ..........152
To Resume ...................................152
To Vary The Speed Setting .............153
Setting The Following Distance In
ACC .............................................154
PARKSENSE REAR PARK ASSIST — IF
EQUIPPED ...........................................154
ParkSense Sensors ........................154
ParkSense Warning Display ............154
Enabling And Disabling
ParkSense ....................................155 ParkSense System Usage
Precautions ..................................155
PARKSENSE FRONT AND REAR PARK ASSIST
— IF EQUIPPED ..................................156
ParkSense Sensors ........................156
Enabling And Disabling
ParkSense ....................................157 Side Distance Warning System .......157
PARKSENSE ACTIVE PARK ASSIST SYSTEM
— IF EQUIPPED ...................................159
Enabling And Disabling The ParkSense
Active Park Assist System ..............159 Exiting The Parking Space .............160
2020_JEEP_M6_UG_UK.book Page 8
Page 12 of 328
10
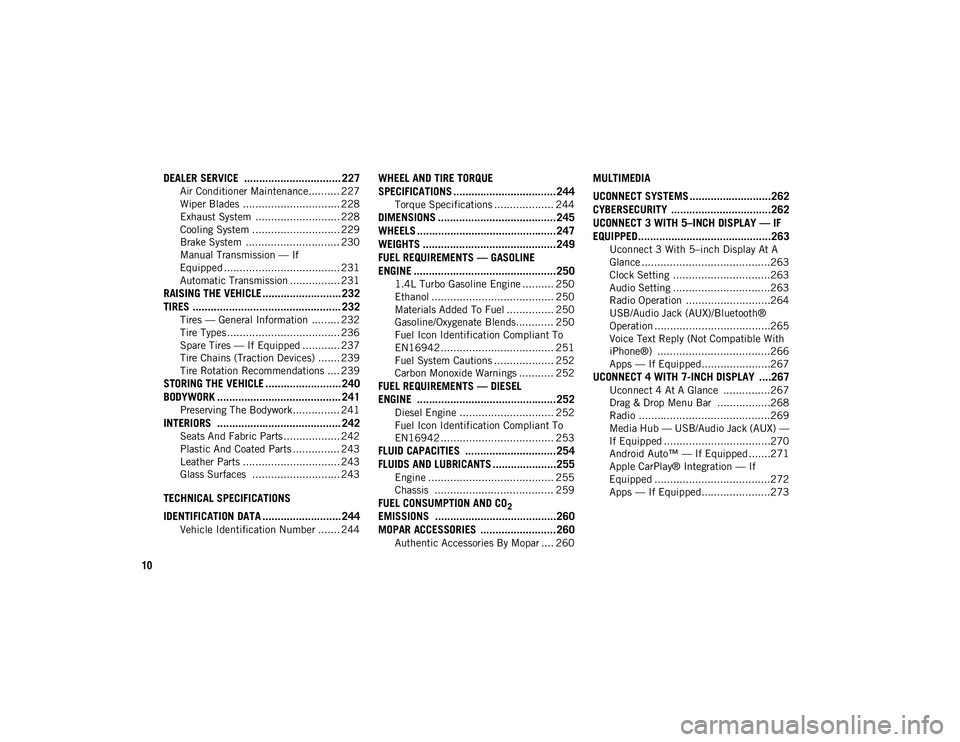
DEALER SERVICE ................................ 227
Air Conditioner Maintenance.......... 227
Wiper Blades ............................... 228
Exhaust System ........................... 228
Cooling System ............................ 229
Brake System .............................. 230
Manual Transmission — If
Equipped ..................................... 231 Automatic Transmission ................ 231
RAISING THE VEHICLE .......................... 232TIRES ................................................. 232
Tires — General Information ......... 232
Tire Types .................................... 236
Spare Tires — If Equipped ............ 237
Tire Chains (Traction Devices) ....... 239
Tire Rotation Recommendations .... 239
STORING THE VEHICLE ......................... 240
BODYWORK ......................................... 241
Preserving The Bodywork ............... 241
INTERIORS ......................................... 242
Seats And Fabric Parts .................. 242
Plastic And Coated Parts ............... 243
Leather Parts ............................... 243
Glass Surfaces ............................ 243
TECHNICAL SPECIFICATIONS
IDENTIFICATION DATA .......................... 244
Vehicle Identification Number ....... 244
WHEEL AND TIRE TORQUE
SPECIFICATIONS ..................................244
Torque Specifications ................... 244
DIMENSIONS .......................................245
WHEELS ..............................................247
WEIGHTS ............................................249
FUEL REQUIREMENTS — GASOLINE
ENGINE ...............................................250
1.4L Turbo Gasoline Engine .......... 250
Ethanol ....................................... 250
Materials Added To Fuel ............... 250
Gasoline/Oxygenate Blends............ 250
Fuel Icon Identification Compliant To
EN16942 .................................... 251 Fuel System Cautions ................... 252
Carbon Monoxide Warnings ........... 252
FUEL REQUIREMENTS — DIESEL
ENGINE ..............................................252
Diesel Engine .............................. 252
Fuel Icon Identification Compliant To
EN16942 .................................... 253
FLUID CAPACITIES ..............................254 FLUIDS AND LUBRICANTS .....................255
Engine ........................................ 255
Chassis ...................................... 259
FUEL CONSUMPTION AND CO2
EMISSIONS ........................................260 MOPAR ACCESSORIES .........................260
Authentic Accessories By Mopar .... 260
MULTIMEDIA
UCONNECT SYSTEMS ...........................262
CYBERSECURITY .................................262
UCONNECT 3 WITH 5–INCH DISPLAY — IF
EQUIPPED............................................263
Uconnect 3 With 5–inch Display At A
Glance .........................................263 Clock Setting ...............................263
Audio Setting ...............................263
Radio Operation ...........................264
USB/Audio Jack (AUX)/Bluetooth®
Operation .....................................265 Voice Text Reply (Not Compatible With
iPhone®) ....................................266 Apps — If Equipped......................267
UCONNECT 4 WITH 7-INCH DISPLAY ....267
Uconnect 4 At A Glance ...............267
Drag & Drop Menu Bar .................268
Radio ..........................................269
Media Hub — USB/Audio Jack (AUX) —
If Equipped ..................................270 Android Auto™ — If Equipped .......271
Apple CarPlay® Integration — If
Equipped .....................................272 Apps — If Equipped......................273
2020_JEEP_M6_UG_UK.book Page 10
Page 13 of 328
11
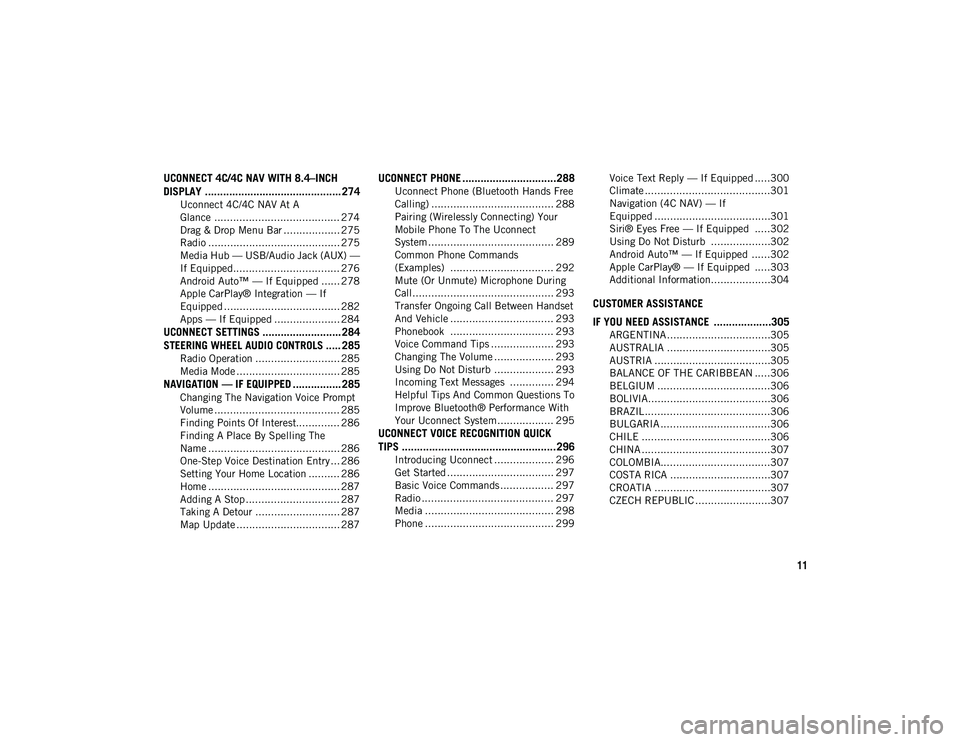
UCONNECT 4C/4C NAV WITH 8.4–INCH
DISPLAY ............................................. 274
Uconnect 4C/4C NAV At A
Glance ........................................ 274 Drag & Drop Menu Bar .................. 275
Radio .......................................... 275
Media Hub — USB/Audio Jack (AUX) —
If Equipped.................................. 276 Android Auto™ — If Equipped ...... 278
Apple CarPlay® Integration — If
Equipped ..................................... 282 Apps — If Equipped ..................... 284
UCONNECT SETTINGS .......................... 284STEERING WHEEL AUDIO CONTROLS ..... 285
Radio Operation ........................... 285
Media Mode ................................. 285
NAVIGATION — IF EQUIPPED ................ 285
Changing The Navigation Voice Prompt
Volume ........................................ 285 Finding Points Of Interest.............. 286
Finding A Place By Spelling The
Name .......................................... 286 One-Step Voice Destination Entry ... 286
Setting Your Home Location .......... 286
Home .......................................... 287
Adding A Stop .............................. 287
Taking A Detour ........................... 287
Map Update ................................. 287
UCONNECT PHONE ...............................288
Uconnect Phone (Bluetooth Hands Free
Calling) ....................................... 288 Pairing (Wirelessly Connecting) Your
Mobile Phone To The Uconnect
System ........................................ 289 Common Phone Commands
(Examples) ................................. 292 Mute (Or Unmute) Microphone During
Call............................................. 293 Transfer Ongoing Call Between Handset
And Vehicle ................................. 293 Phonebook ................................. 293
Voice Command Tips .................... 293
Changing The Volume ................... 293
Using Do Not Disturb ................... 293
Incoming Text Messages .............. 294
Helpful Tips And Common Questions To
Improve Bluetooth® Performance With
Your Uconnect System.................. 295
UCONNECT VOICE RECOGNITION QUICK
TIPS ...................................................296
Introducing Uconnect ................... 296
Get Started .................................. 297
Basic Voice Commands ................. 297
Radio .......................................... 297
Media ......................................... 298
Phone ......................................... 299 Voice Text Reply — If Equipped .....300
Climate ........................................301
Navigation (4C NAV) — If
Equipped .....................................301 Siri® Eyes Free — If Equipped .....302
Using Do Not Disturb ...................302
Android Auto™ — If Equipped ......302
Apple CarPlay® — If Equipped .....303
Additional Information...................304
CUSTOMER ASSISTANCE
IF YOU NEED ASSISTANCE ...................305
ARGENTINA .................................305
AUSTRALIA .................................305
AUSTRIA .....................................305
BALANCE OF THE CARIBBEAN .....306
BELGIUM ....................................306
BOLIVIA.......................................306
BRAZIL ........................................306
BULGARIA ...................................306
CHILE .........................................306
CHINA .........................................307
COLOMBIA...................................307
COSTA RICA ................................307
CROATIA .....................................307
CZECH REPUBLIC ........................307
2020_JEEP_M6_UG_UK.book Page 11
Page 15 of 328
13
GETTING TO KNOW YOUR VEHICLE
KEYS
Key Fobs
Your vehicle uses either a key start ignition
system or keyless ignition system. The igni-
tion system consists of a key fob with a
Remote Keyless Entry (RKE) and an ignition
switch. The keyless ignition system consists
of a key fob and Keyless Enter-N-Go button.
NOTE:
The key fob may not be found if it is located
next to a mobile phone, laptop or other elec -
tronic device; these devices may block the
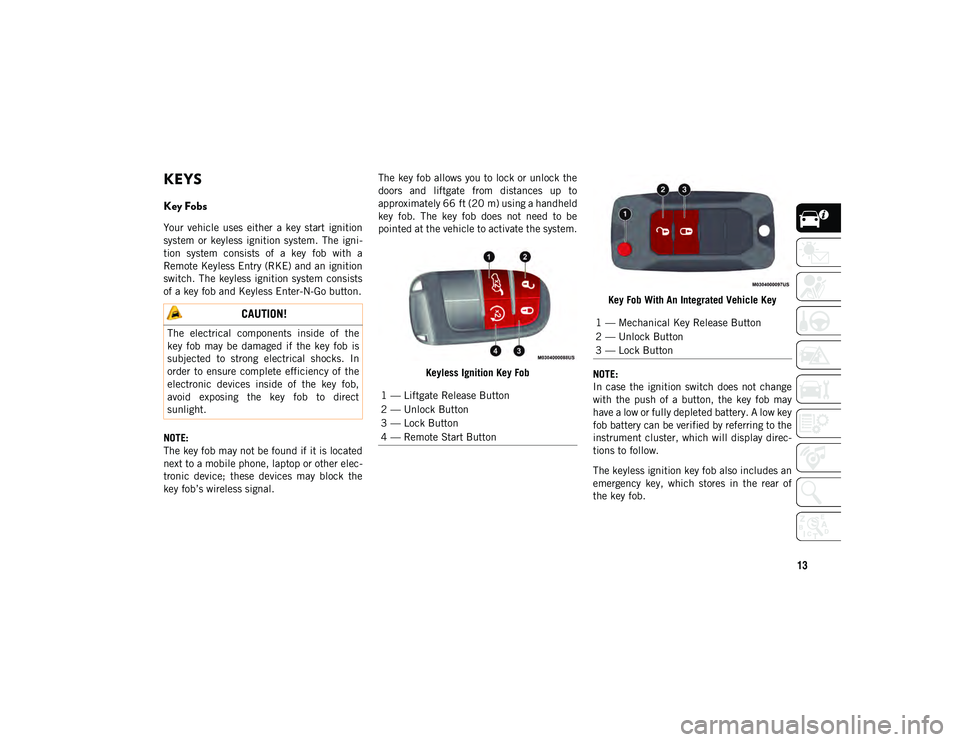
key fob’s wireless signal. The key fob allows you to lock or unlock the
doors and liftgate from distances up to
approximately 66 ft (20 m) using a handheld
key fob. The key fob does not need to be
pointed at the vehicle to activate the system.
Keyless Ignition Key Fob Key Fob With An Integrated Vehicle Key
NOTE:
In case the ignition switch does not change
with the push of a button, the key fob may
have a low or fully depleted battery. A low key
fob battery can be verified by referring to the
instrument cluster, which will display direc -
tions to follow.
The keyless ignition key fob also includes an
emergency key, which stores in the rear of
the key fob.
CAUTION!
The electrical components inside of the
key fob may be damaged if the key fob is
subjected to strong electrical shocks. In
order to ensure complete efficiency of the
electronic devices inside of the key fob,
avoid exposing the key fob to direct
sunlight.
1 — Liftgate Release Button
2 — Unlock Button
3 — Lock Button
4 — Remote Start Button
1 — Mechanical Key Release Button
2 — Unlock Button
3 — Lock Button
2020_JEEP_M6_UG_UK.book Page 13
Page 20 of 328
GETTING TO KNOW YOUR VEHICLE
18
NOTE:
If an engine fault is present or fuel level is
low, the vehicle will start and then shut
down in 10 seconds.
The park lamps will turn on and remain on
during Remote Start mode.
For security, power window and power
sunroof operations (if equipped) are
disabled when the vehicle is in the
Remote Start mode.
The engine can be started two consecutive
times with the key fob. However, the igni-
tion must be cycled by pushing the
START/STOP ignition button twice (or the
ignition switch must be placed in the ON/
RUN position) before you can repeat the
start sequence for a third cycle.
VEHICLE SECURITY ALARM
— IF EQUIPPED
The vehicle security alarm monitors the
vehicle doors, hood, liftgate, and the Keyless
Enter-N-Go — Ignition for unauthorized
operation. While the vehicle security alarm is
armed, interior switches for door locks and
liftgate release are disabled. If something
triggers the alarm, the vehicle security alarm will provide the following audible and visible
signals:
The horn will pulse
The turn signals will flash
The vehicle security light in the instru
-
ment cluster display will flash
To Arm The System
Follow these steps to arm the vehicle secu -
rity alarm:
1. Make sure the vehicle’s ignition is placed in the OFF position.
For vehicles equipped with KeylessEntry, make sure the vehicle’s keyless
ignition system is OFF.
2. Perform one of the following methods to lock the vehicle:
Push the lock button on the interiorpower door lock switch with the driverand/or passenger door open.
Push the lock button on the exterior Passive Entry Door Handle with a valid
key fob available in the same exterior
zone. Refer to "Doors" in this chapter for further information.
Push the lock button on the exterior Passive Entry Door Handle with a valid
key fob available in the same exterior
zone.
Push the lock button on the key fob.
3. If any doors are open, close them.
To Disarm The System
The vehicle security alarm can be disarmed
using any of the following methods:
Push the unlock button on the key fob.
Grasp the passive entry door handle to
unlock the door, refer to "Doors" in this
chapter for further information.
Cycle the ignition out of the OFF position
to disarm the system.
NOTE:
The driver's door key cylinder and the lift -
gate button on the key fob cannot arm or
disarm the vehicle security alarm.
The vehicle security alarm remains armed
during power liftgate entry. Pushing the
liftgate button will not disarm the vehicle
2020_JEEP_M6_UG_UK.book Page 18
Page 28 of 328
GETTING TO KNOW YOUR VEHICLE
26
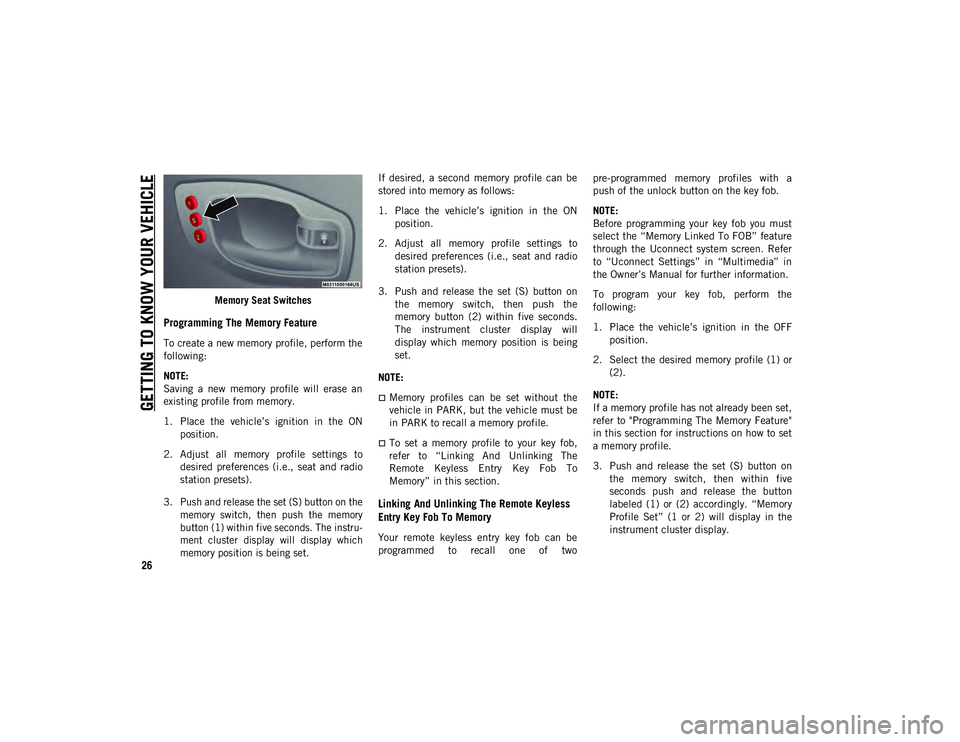
Memory Seat Switches
Programming The Memory Feature
To create a new memory profile, perform the
following:
NOTE:
Saving a new memory profile will erase an
existing profile from memory.
1. Place the vehicle’s ignition in the ONposition.
2. Adjust all memory profile settings to desired preferences (i.e., seat and radio
station presets).
3. Push and release the set (S) button on the memory switch, then push the memory
button (1) within five seconds. The instru -
ment cluster display will display which
memory position is being set.
If desired, a second memory profile can be
stored into memory as follows:
1. Place the vehicle’s ignition in the ON
position.
2. Adjust all memory profile settings to desired preferences (i.e., seat and radio
station presets).
3. Push and release the set (S) button on the memory switch, then push the
memory button (2) within five seconds.
The instrument cluster display will
display which memory position is being
set.
NOTE:
Memory profiles can be set without the
vehicle in PARK, but the vehicle must be
in PARK to recall a memory profile.
To set a memory profile to your key fob,
refer to “Linking And Unlinking The
Remote Keyless Entry Key Fob To
Memory” in this section.
Linking And Unlinking The Remote Keyless
Entry Key Fob To Memory
Your remote keyless entry key fob can be
programmed to recall one of two pre-programmed memory profiles with a
push of the unlock button on the key fob.
NOTE:
Before programming your key fob you must
select the “Memory Linked To FOB” feature
through the Uconnect system screen. Refer
to “Uconnect Settings” in “Multimedia” in
the Owner’s Manual for further information.
To program your key fob, perform the
following:
1. Place the vehicle’s ignition in the OFF
position.
2. Select the desired memory profile (1) or (2).
NOTE:
If a memory profile has not already been set,
refer to "Programming The Memory Feature"
in this section for instructions on how to set
a memory profile.
3. Push and release the set (S) button on the memory switch, then within five
seconds push and release the button
labeled (1) or (2) accordingly. “Memory
Profile Set” (1 or 2) will display in the
instrument cluster display.
2020_JEEP_M6_UG_UK.book Page 26
Page 29 of 328
27
4. Push and release the lock button on thekey fob within 10 seconds.
NOTE:
Your key fob can be unlinked to your memory
settings by pushing the set (S) button,
followed by pushing the unlock button on the
key fob within 10 seconds.
Memory Position Recall
NOTE:
The vehicle must be in PARK to recall
memory positions. If a recall is attempted
when the vehicle is not in PARK, a message
will display in the instrument cluster display.
To recall the memory settings for driver
one, push memory button (1) or the unlock
button on the key fob linked to memory
position 1.
To recall the memory settings for driver
two, push memory button (2) or the unlock
button on the key fob linked to memory
position 2.
A recall can be canceled by pushing any of
the memory buttons (S, 1, or 2) during a
recall. When a recall is canceled, the driver
seat will stop moving. A delay of one second
will occur before another recall can be
selected.
Front Heated Seats — If Equipped
The front heated seats control buttons are
located within the Uconnect system. You can
gain access to the control buttons through
the climate screen or the controls screen.
Press the heated seat button once to
turn the HI setting on.
Press the heated seat button a second
time to turn the LO setting on.
Press the heated seat button a third
time to turn the heating elements off.
If your vehicle is equipped with automatic
temperature controls with an integrated
center stack, or manual temperature
controls, you’ll find the heated seat switches
on the switch bank below the radio screen.
If the HI level setting is selected, the system
will automatically switch to LO level after
approximately 60 minutes of continuous
operation. At that time, the display will
change from HI to LO, indicating the change.
The LO level setting will turn off automati -
cally after approximately 45 minutes.
NOTE:
The engine must be running for the heated
seats to operate. Vehicles With Remote Start — If Equipped
On models that are equipped with remote
start, the heated seats can be programmed to
come on during a remote start.
This feature can be programmed through the
Uconnect system. Refer to “Uconnect
Settings” in “Multimedia” in the Owner’s
Manual for further information.
WARNING!
Persons who are unable to feel pain to
the skin because of advanced age,
chronic illness, diabetes, spinal cord
injury, medication, alcohol use, exhaus-
tion or other physical condition must
exercise care when using the seat heater.
It may cause burns even at low tempera-
tures, especially if used for long periods
of time.
Do not place anything on the seat or
seatback that insulates against heat,
such as a blanket or cushion. This may
cause the seat heater to overheat. Sitting
in a seat that has been overheated could
cause serious burns due to the increased
surface temperature of the seat.
2020_JEEP_M6_UG_UK.book Page 27
Page 35 of 328
33
NOTE:
The lights must be turned off within 45
seconds of placing the ignition in the OFF
position to activate this feature. If the
headlight switch is in the AUTO position
prior to the ignition being placed in the
OFF position, there is no need to turn the
headlight switch to off to activate Head-
light Delay.
The headlight delay time is programmable
using the Uconnect System. Refer to
“Uconnect Settings” in “Multimedia” in
the Owner’s Manual for further details.
Lights-On Reminder — If Equipped
If the headlights or parking lights are on after
the ignition is in the OFF position, a chime
will sound to alert the driver when the
driver's door is opened.
NOTE:
Leaving the headlights, or parking lights, on
after the ignition is in the OFF position (when
the vehicle is not equipped with the
Lights-On Reminder feature) may result in
vehicle battery depletion.
Front And Rear Fog Lights — If Equipped
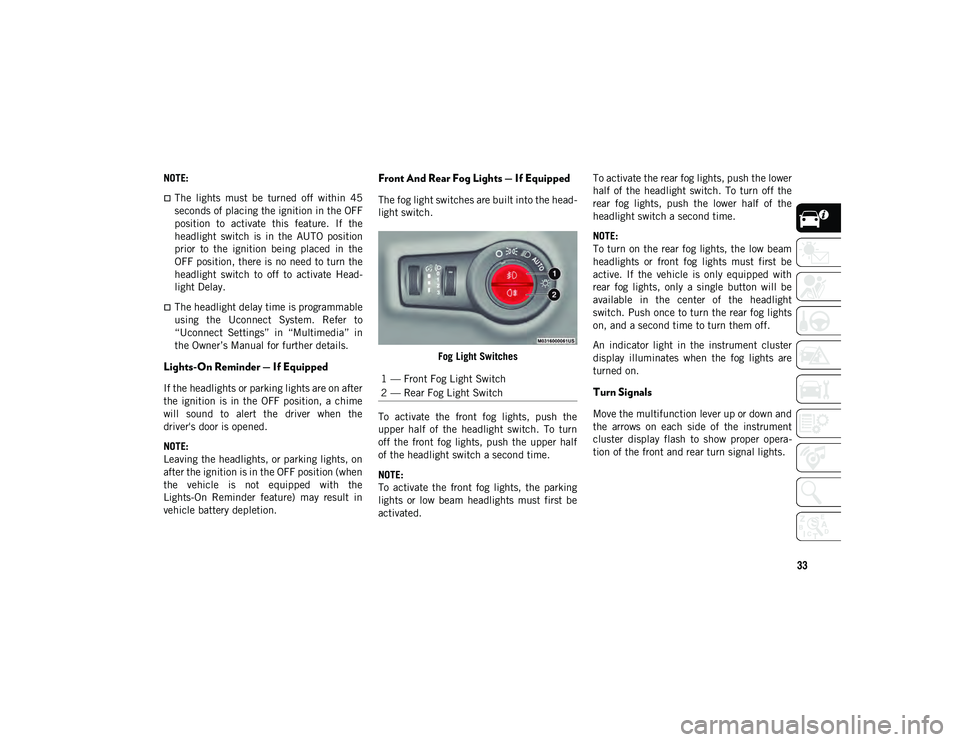
The fog light switches are built into the head -
light switch.
Fog Light Switches
To activate the front fog lights, push the
upper half of the headlight switch. To turn
off the front fog lights, push the upper half
of the headlight switch a second time.
NOTE:
To activate the front fog lights, the parking
lights or low beam headlights must first be
activated. To activate the rear fog lights, push the lower
half of the headlight switch. To turn off the
rear fog lights, push the lower half of the
headlight switch a second time.
NOTE:
To turn on the rear fog lights, the low beam
headlights or front fog lights must first be
active. If the vehicle is only equipped with
rear fog lights, only a single button will be
available in the center of the headlight
switch. Push once to turn the rear fog lights
on, and a second time to turn them off.
An indicator light in the instrument cluster
display illuminates when the fog lights are
turned on.
Turn Signals
Move the multifunction lever up or down and
the arrows on each side of the instrument
cluster display flash to show proper opera
-
tion of the front and rear turn signal lights.
1 — Front Fog Light Switch
2 — Rear Fog Light Switch
2020_JEEP_M6_UG_UK.book Page 33
Page 36 of 328
GETTING TO KNOW YOUR VEHICLE
34
NOTE:
If either light remains on and does not
flash, or there is a very fast flash rate,
check for a defective outside light bulb. If
an indicator fails to light when the lever is
moved, it would suggest that the indicator
bulb is defective.
A “Turn Signal On” message will appear in
the instrument cluster display and a
continuous chime will sound if the vehicle
is driven more than 1 mile (1.6 km) witheither turn signal on.
When the Daytime Running Lights are on
and a turn signal is activated, the Daytime
Running Lamp will turn off on the side of
the vehicle in which the turn signal is
flashing. The Daytime Running Lamp will
turn back on when the turn signal is
turned off.
Headlight Leveling System — If Equipped
This system allows the driver to maintain
proper headlight beam position with the road
surface regardless of vehicle load.
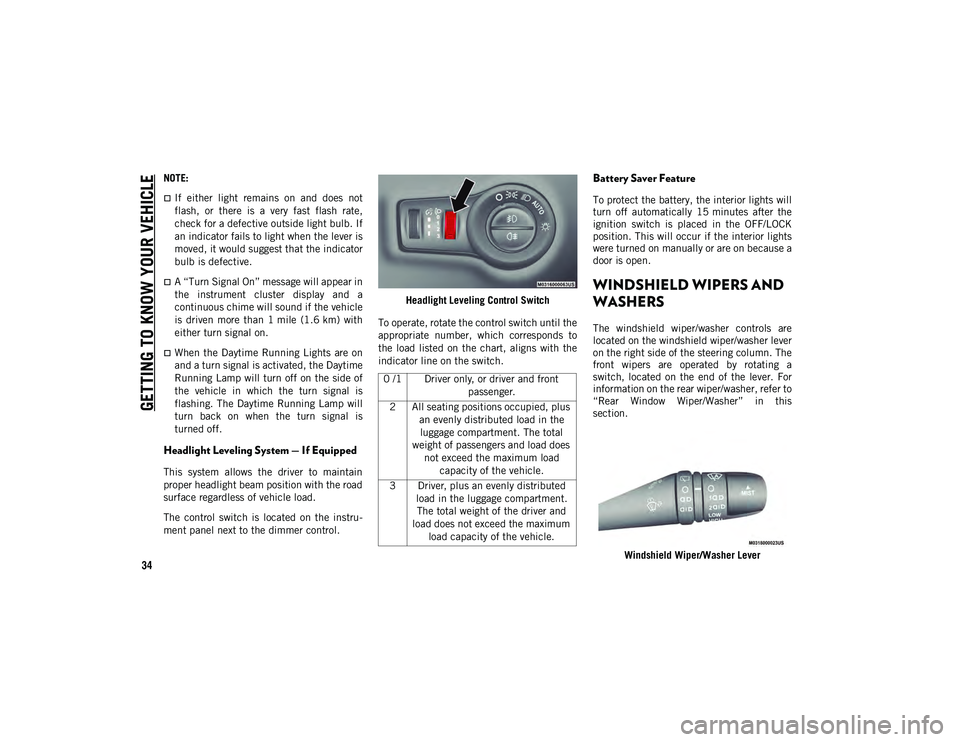
The control switch is located on the instru -
ment panel next to the dimmer control. Headlight Leveling Control Switch
To operate, rotate the control switch until the
appropriate number, which corresponds to
the load listed on the chart, aligns with the
indicator line on the switch.
Battery Saver Feature
To protect the battery, the interior lights will
turn off automatically 15 minutes after the
ignition switch is placed in the OFF/LOCK
position. This will occur if the interior lights
were turned on manually or are on because a
door is open.
WINDSHIELD WIPERS AND
WASHERS
The windshield wiper/washer controls are
located on the windshield wiper/washer lever
on the right side of the steering column. The
front wipers are operated by rotating a
switch, located on the end of the lever. For
information on the rear wiper/washer, refer to
“Rear Window Wiper/Washer” in this
section.
Windshield Wiper/Washer Lever
0 /1 Driver only, or driver and front
passenger.
2 All seating positions occupied, plus an evenly distributed load in the luggage compartment. The total
weight of passengers and load does not exceed the maximum load capacity of the vehicle.
3 Driver, plus an evenly distributed load in the luggage compartment. The total weight of the driver and
load does not exceed the maximum load capacity of the vehicle.
2020_JEEP_M6_UG_UK.book Page 34