4WD JEEP COMPASS 2020 Owner handbook (in English)
[x] Cancel search | Manufacturer: JEEP, Model Year: 2020, Model line: COMPASS, Model: JEEP COMPASS 2020Pages: 328, PDF Size: 8.85 MB
Page 67 of 328
65
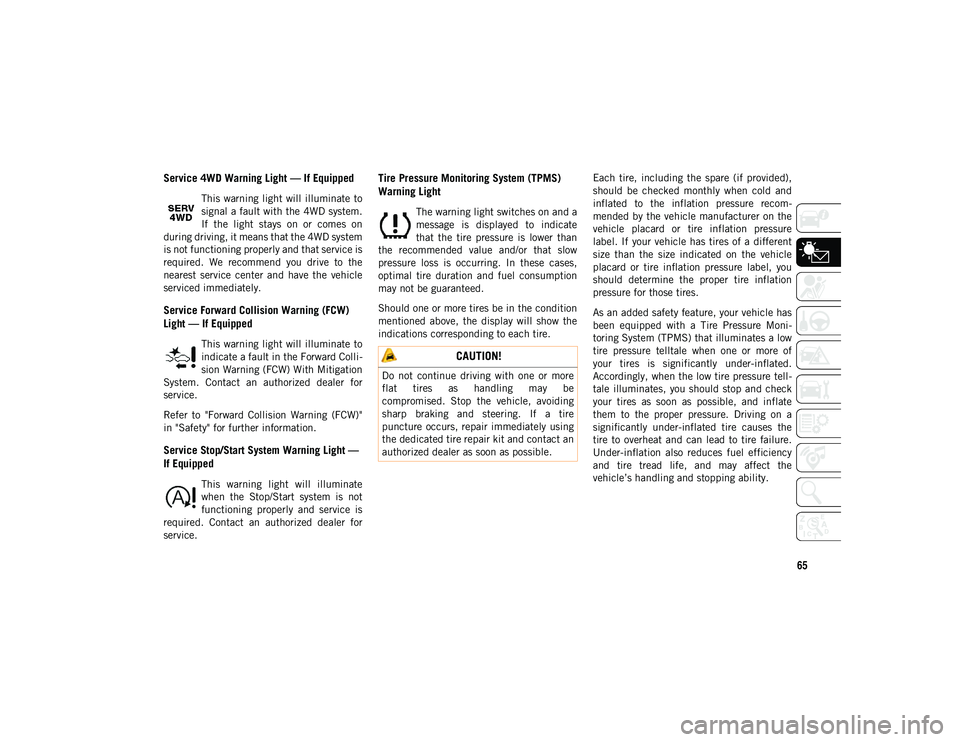
Service 4WD Warning Light — If Equipped
This warning light will illuminate to
signal a fault with the 4WD system.
If the light stays on or comes on
during driving, it means that the 4WD system
is not functioning properly and that service is
required. We recommend you drive to the
nearest service center and have the vehicle
serviced immediately.
Service Forward Collision Warning (FCW)
Light — If Equipped
This warning light will illuminate to
indicate a fault in the Forward Colli -
sion Warning (FCW) With Mitigation
System. Contact an authorized dealer for
service.
Refer to "Forward Collision Warning (FCW)"
in "Safety" for further information.
Service Stop/Start System Warning Light —
If Equipped
This warning light will illuminate
when the Stop/Start system is not
functioning properly and service is
required. Contact an authorized dealer for
service.
Tire Pressure Monitoring System (TPMS)
Warning Light
The warning light switches on and a
message is displayed to indicate
that the tire pressure is lower than
the recommended value and/or that slow
pressure loss is occurring. In these cases,
optimal tire duration and fuel consumption
may not be guaranteed.
Should one or more tires be in the condition
mentioned above, the display will show the
indications corresponding to each tire. Each tire, including the spare (if provided),
should be checked monthly when cold and
inflated to the inflation pressure recom
-
mended by the vehicle manufacturer on the
vehicle placard or tire inflation pressure
label. If your vehicle has tires of a different
size than the size indicated on the vehicle
placard or tire inflation pressure label, you
should determine the proper tire inflation
pressure for those tires.
As an added safety feature, your vehicle has
been equipped with a Tire Pressure Moni -
toring System (TPMS) that illuminates a low
tire pressure telltale when one or more of
your tires is significantly under-inflated.
Accordingly, when the low tire pressure tell -
tale illuminates, you should stop and check
your tires as soon as possible, and inflate
them to the proper pressure. Driving on a
significantly under-inflated tire causes the
tire to overheat and can lead to tire failure.
Under-inflation also reduces fuel efficiency
and tire tread life, and may affect the
vehicle’s handling and stopping ability.
CAUTION!
Do not continue driving with one or more
flat tires as handling may be
compromised. Stop the vehicle, avoiding
sharp braking and steering. If a tire
puncture occurs, repair immediately using
the dedicated tire repair kit and contact an
authorized dealer as soon as possible.
2020_JEEP_M6_UG_UK.book Page 65
Page 68 of 328
GETTING TO KNOW YOUR INSTRUMENT PANEL
66
Please note that the TPMS is not a substitute
for proper tire maintenance, and it is the
driver’s responsibility to maintain correct tire
pressure, even if under-inflation has not
reached the level to trigger illumination of
the TPMS low tire pressure telltale.
Your vehicle has also been equipped with a
TPMS malfunction indicator to indicate
when the system is not operating properly.
The TPMS malfunction indicator is
combined with the low tire pressure telltale.
When the system detects a malfunction, the
telltale will flash for approximately one
minute and then remain continuously illumi-
nated. This sequence will continue upon
subsequent vehicle start-ups as long as the
malfunction exists. When the malfunction
indicator is illuminated, the system may not
be able to detect or signal low tire pressure
as intended. TPMS malfunctions may occur
for a variety of reasons, including the instal -
lation of replacement or alternate tires or
wheels on the vehicle that prevent the TPMS
from functioning properly. Always check the
TPMS malfunction telltale after replacing
one or more tires or wheels on your vehicle to
ensure that the replacement or alternate
tires and wheels allow the TPMS to continue
to function properly.
Towing Hook Breakdown Warning Light — If
Equipped
This light illuminates when there is
a failure with the tow hook. Contact
an authorized dealer for service.
Yellow Indicator Lights
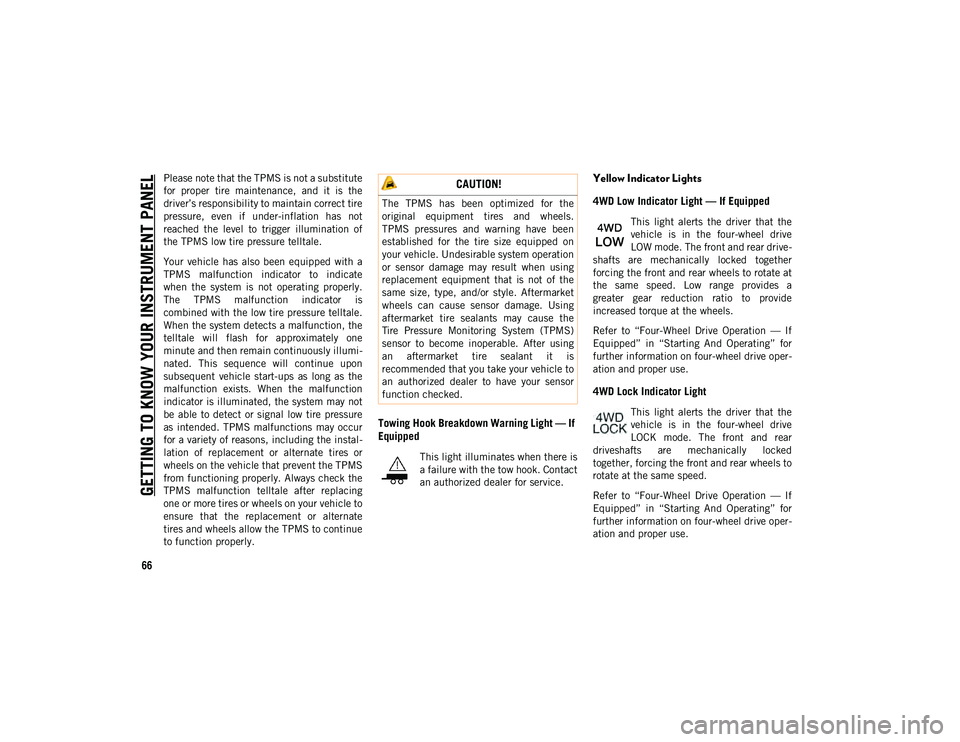
4WD Low Indicator Light — If Equipped
This light alerts the driver that the
vehicle is in the four-wheel drive
LOW mode. The front and rear drive -
shafts are mechanically locked together
forcing the front and rear wheels to rotate at
the same speed. Low range provides a
greater gear reduction ratio to provide
increased torque at the wheels.
Refer to “Four-Wheel Drive Operation — If
Equipped” in “Starting And Operating” for
further information on four-wheel drive oper -
ation and proper use.
4WD Lock Indicator Light
This light alerts the driver that the
vehicle is in the four-wheel drive
LOCK mode. The front and rear
driveshafts are mechanically locked
together, forcing the front and rear wheels to
rotate at the same speed.
Refer to “Four-Wheel Drive Operation — If
Equipped” in “Starting And Operating” for
further information on four-wheel drive oper -
ation and proper use.
CAUTION!
The TPMS has been optimized for the
original equipment tires and wheels.
TPMS pressures and warning have been
established for the tire size equipped on
your vehicle. Undesirable system operation
or sensor damage may result when using
replacement equipment that is not of the
same size, type, and/or style. Aftermarket
wheels can cause sensor damage. Using
aftermarket tire sealants may cause the
Tire Pressure Monitoring System (TPMS)
sensor to become inoperable. After using
an aftermarket tire sealant it is
recommended that you take your vehicle to
an authorized dealer to have your sensor
function checked.
2020_JEEP_M6_UG_UK.book Page 66
Page 72 of 328
GETTING TO KNOW YOUR INSTRUMENT PANEL
70
Active Speed Limiter SET Indicator Light — If
Equipped With A Base Instrument Cluster
This light will turn on when the
Active Speed Limiter is on and set to
a specific speed.
Refer to “Active Speed Limiter — If
Equipped” in “Starting And Operating” for
further information.
LaneSense Indicator Light — If Equipped
When the LaneSense system is ON,
but not armed, the LaneSense indi -
cator light illuminates solid white.
This occurs when only left, right, or neither
lane line has been detected. If a single lane
line is detected, the system is ready to
provide only visual warnings if an uninten -
tional lane departure occurs on the detected
lane line.
Refer to “LaneSense — If Equipped" in
“Starting And Operating” for further informa -
tion.
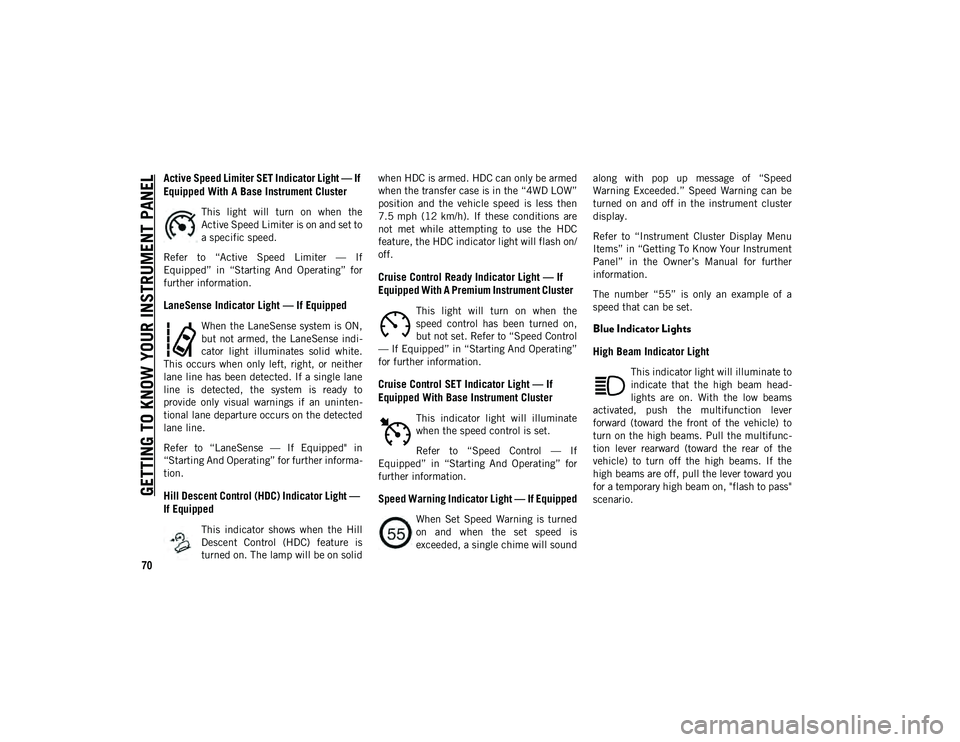
Hill Descent Control (HDC) Indicator Light —
If Equipped
This indicator shows when the Hill
Descent Control (HDC) feature is
turned on. The lamp will be on solid when HDC is armed. HDC can only be armed
when the transfer case is in the “4WD LOW”
position and the vehicle speed is less then
7.5 mph (12 km/h). If these conditions are
not met while attempting to use the HDC
feature, the HDC indicator light will flash on/
off.
Cruise Control Ready Indicator Light — If
Equipped With A Premium Instrument Cluster
This light will turn on when the
speed control has been turned on,
but not set. Refer to “Speed Control
— If Equipped” in “Starting And Operating”
for further information.
Cruise Control SET Indicator Light — If
Equipped With Base Instrument Cluster
This indicator light will illuminate
when the speed control is set.
Refer to “Speed Control — If
Equipped” in “Starting And Operating” for
further information.
Speed Warning Indicator Light — If Equipped
When Set Speed Warning is turned
on and when the set speed is
exceeded, a single chime will sound along with pop up message of “Speed
Warning Exceeded.” Speed Warning can be
turned on and off in the instrument cluster
display.
Refer to “Instrument Cluster Display Menu
Items” in “Getting To Know Your Instrument
Panel” in the Owner’s Manual for further
information.
The number “55” is only an example of a
speed that can be set.
Blue Indicator Lights
High Beam Indicator Light
This indicator light will illuminate to
indicate that the high beam head
-
lights are on. With the low beams
activated, push the multifunction lever
forward (toward the front of the vehicle) to
turn on the high beams. Pull the multifunc -
tion lever rearward (toward the rear of the
vehicle) to turn off the high beams. If the
high beams are off, pull the lever toward you
for a temporary high beam on, "flash to pass"
scenario.
2020_JEEP_M6_UG_UK.book Page 70
Page 146 of 328
STARTING AND OPERATING
144
lower gear will improve performance and
extend transmission life by reducing exces-
sive shifting and heat buildup.
If the transmission temperature exceeds
normal operating limits, the transmission
controller may modify the transmission shift
schedule, reduce engine torque, and/or
expand the range of torque converter clutch
engagement. This is done to prevent trans -
mission damage due to overheating.
If the transmission becomes extremely hot,
the "Transmission Temperature Warning
Light" may illuminate, and the transmission
may operate differently until the transmis -
sion cools down.
During cold temperatures, transmission
operation may be modified depending on
engine and/or transmission temperature as
well as vehicle speed. This feature improves
warm up time of the engine and transmission
to achieve maximum efficiency. Engagement
of the torque converter clutch (and, for the
nine-speed, shifts into 8th or 9th gear), are
inhibited until the engine and/or transmis -
sion is warm (refer to the “Note” under
“Torque Converter Clutch” in this section).
Normal operation will resume once the
temperature(s) have risen to a suitable level.AUTOSTICK
AutoStick is a driver-interactive transmission
feature providing manual shift control, giving
you more control of the vehicle. AutoStick
allows you to maximize engine braking, elim -
inate undesirable upshifts and downshifts,
and improve overall vehicle performance.
This system can also provide you with more
control during passing, city driving, cold slip -
pery conditions, mountain driving, trailer
towing, and many other situations.
Operation
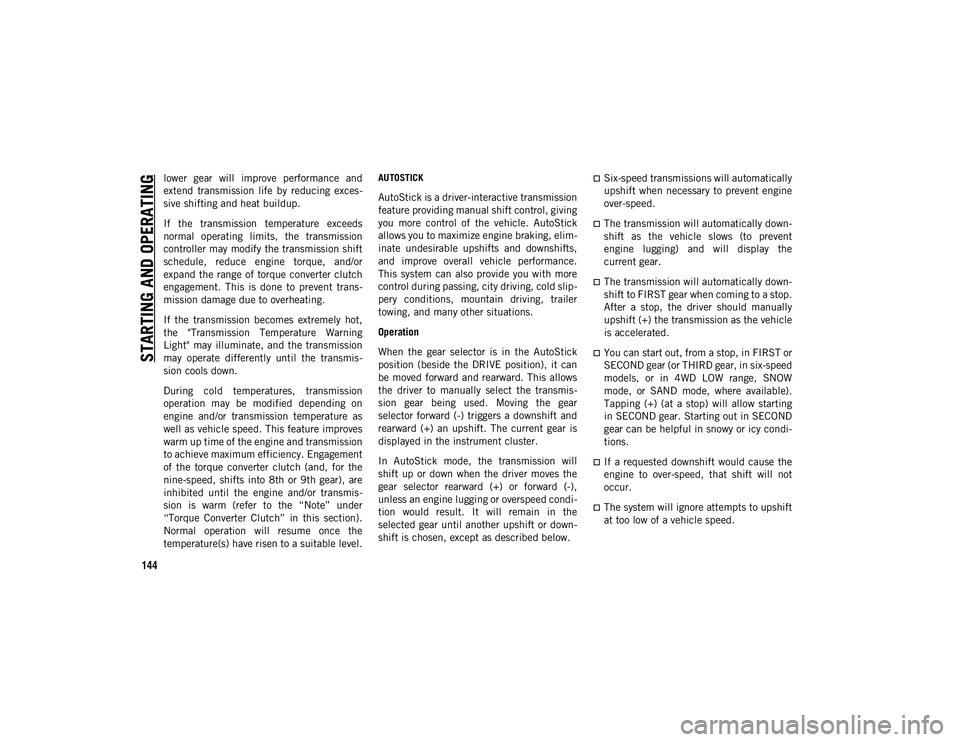
When the gear selector is in the AutoStick
position (beside the DRIVE position), it can
be moved forward and rearward. This allows
the driver to manually select the transmis -
sion gear being used. Moving the gear
selector forward (-) triggers a downshift and
rearward (+) an upshift. The current gear is
displayed in the instrument cluster.
In AutoStick mode, the transmission will
shift up or down when the driver moves the
gear selector rearward (+) or forward (-),
unless an engine lugging or overspeed condi -
tion would result. It will remain in the
selected gear until another upshift or down -
shift is chosen, except as described below.
Six-speed transmissions will automatically
upshift when necessary to prevent engine
over-speed.
The transmission will automatically down -
shift as the vehicle slows (to prevent
engine lugging) and will display the
current gear.
The transmission will automatically down -
shift to FIRST gear when coming to a stop.
After a stop, the driver should manually
upshift (+) the transmission as the vehicle
is accelerated.
You can start out, from a stop, in FIRST or
SECOND gear (or THIRD gear, in six-speed
models, or in 4WD LOW range, SNOW
mode, or SAND mode, where available).
Tapping (+) (at a stop) will allow starting
in SECOND gear. Starting out in SECOND
gear can be helpful in snowy or icy condi -
tions.
If a requested downshift would cause the
engine to over-speed, that shift will not
occur.
The system will ignore attempts to upshift
at too low of a vehicle speed.
2020_JEEP_M6_UG_UK.book Page 144
Page 148 of 328
STARTING AND OPERATING
146
FOUR-WHEEL DRIVE
OPERATION — IF EQUIPPED
Jeep Active Drive
Your vehicle may be equipped with a Power
Transfer Unit (PTU). This system is auto-
matic with no driver inputs or additional
driving skills required. Under normal driving
conditions, the front wheels provide most of
the traction. If the front wheels begin to lose
traction, power is shifted automatically to
the rear wheels. The greater the front wheel
traction loss, the greater the power transfer
to the rear wheels.
Additionally, on dry pavement under heavy
throttle input (where one may have no wheel
spin), torque will be sent to the rear in a
preemptive effort to improve vehicle launch
and performance characteristics.
Four Wheel Drive (4x4)
The four wheel drive (4WD) is fully automatic
in normal driving mode.
NOTE:
It is not possible to carry out the change of
mode when the vehicle exceeds the speed of
75 mph (120 km/h).
Enabling Four Wheel Drive (4x4)
The buttons for the activation of four wheel
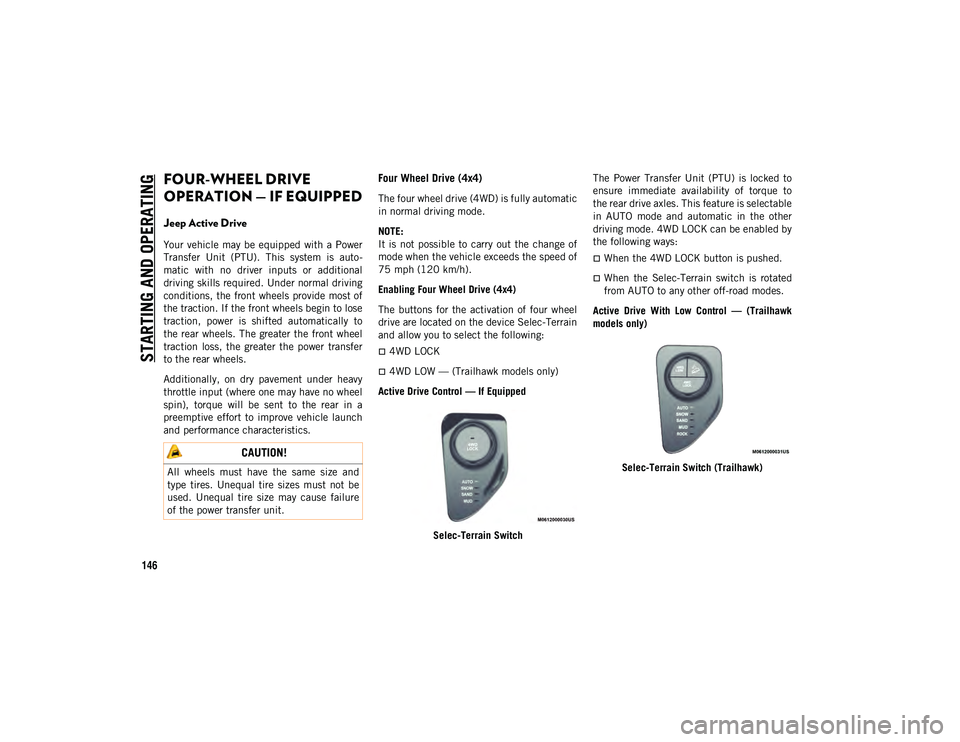
drive are located on the device Selec-Terrain
and allow you to select the following:
4WD LOCK
4WD LOW — (Trailhawk models only)
Active Drive Control — If Equipped
Selec-Terrain Switch The Power Transfer Unit (PTU) is locked to
ensure immediate availability of torque to
the rear drive axles. This feature is selectable
in AUTO mode and automatic in the other
driving mode. 4WD LOCK can be enabled by
the following ways:
When the 4WD LOCK button is pushed.
When the Selec-Terrain switch is rotated
from AUTO to any other off-road modes.
Active Drive With Low Control — (Trailhawk
models only)
Selec-Terrain Switch (Trailhawk)
CAUTION!
All wheels must have the same size and
type tires. Unequal tire sizes must not be
used. Unequal tire size may cause failure
of the power transfer unit.
2020_JEEP_M6_UG_UK.book Page 146
Page 149 of 328
147
The 4WD LOW mode helps to improve the
off-road performance in all modes. To enable
4WD LOW, please follow the steps below:
Enabling 4WD LOW
With the vehicle stationary, the ignition in
the ON/RUN position or with the engine
running, shift the transmission into
NEUTRAL and push the button once 4WD
LOW. The instrument cluster will display the
message "4WD LOW" once the shift is
complete.
NOTE:
Both LOCK and LOW LED lights will blink
and then become active on the
Selec-Terrain switch until the shift is
complete.
The instrument cluster display will illumi-
nate the "4WD LOW" icon.
Disabling 4WD LOW
To disable the 4WD LOW mode, the vehicle
must be stationary and the transmission
shifted into NEUTRAL. Push the 4WD LOW
button once.
SELEC-TERRAIN — IF
EQUIPPED
Selec-Terrain combines the capabilities of
the vehicle control systems, along with driver
input, to provide the best performance for all
terrains.
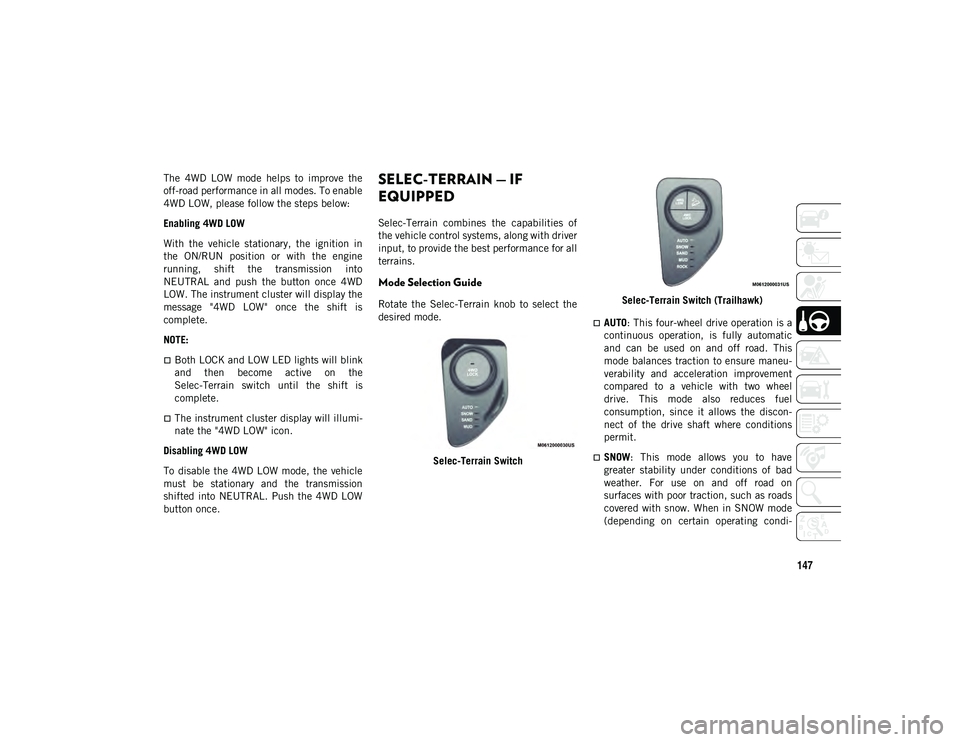
Mode Selection Guide
Rotate the Selec-Terrain knob to select the
desired mode.
Selec-Terrain Switch Selec-Terrain Switch (Trailhawk)
AUTO
: This four-wheel drive operation is a
continuous operation, is fully automatic
and can be used on and off road. This
mode balances traction to ensure maneu -
verability and acceleration improvement
compared to a vehicle with two wheel
drive. This mode also reduces fuel
consumption, since it allows the discon -
nect of the drive shaft where conditions
permit.
SNOW: This mode allows you to have
greater stability under conditions of bad
weather. For use on and off road on
surfaces with poor traction, such as roads
covered with snow. When in SNOW mode
(depending on certain operating condi -
2020_JEEP_M6_UG_UK.book Page 147
Page 150 of 328
STARTING AND OPERATING
148
tions), the transmission may use SECOND
gear (rather than FIRST gear) during
launches, to minimize wheel slippage.
SAND: For off-road driving or use on
surfaces with poor traction, such as dry
sand. The transmission is set to provide
maximum traction.
MUD: For off-road driving or use on
surfaces with poor traction, such as roads
covered by mud or wet grass.
ROCK (Trailhawk only): This mode is only
available in 4WD LOW range. The device
sets the vehicle to maximize traction and
allow the highest steering capacity for
off-road surfaces. This mode gives you the
maximum performance off-road. Use for
low speed obstacles such as large rocks,
deep ruts, etc.
NOTE:
Rock mode is only available on the vehi -
cles equipped with the Off-Road package.
Activate the Hill Descent Control for steep
downhill control. See “Electronic Brake
Control System” in “Safety” for further
information.
STOP/START SYSTEM — IF
EQUIPPED
The Stop/Start function is developed to
reduce fuel consumption. The system will
stop the engine automatically during a
vehicle stop if the required conditions are
met. Releasing the brake pedal, clutch pedal
or pressing the accelerator pedal will auto -
matically re-start the engine.
Operating Modes
Engine Stopping Mode
Models equipped with a manual transmis -
sion:
With the vehicle stopped, the engine stops
with transmission in neutral and clutch
pedal released.
Models equipped with an automatic trans -
mission:
With vehicle at a standstill and brake pedal
pressed, the engine switches off if the gear
selector is in a position other than REVERSE.
In the event of stops uphill, the engine
switching will be disabled to activate the
"Hill Start Assist" function (works only with
the engine running).
The warning light on the instrument panel
switches on to signal that the engine was
stopped.
WARNING!
Before opening the hood, make sure that
the engine is off and that the ignition is in
the OFF mode. Follow the indications on
the plate underneath the hood. We
recommend that you remove the key fob if
other people remain in the vehicle. The
vehicle should only be exited after the key
fob has been removed and the ignition is
in the OFF mode. During refueling, make
sure that the engine is off (ignition device
in the OFF mode).
CAUTION!
When replacing the battery, always contact
your authorized dealer. Replace the battery
with the same type (HEAVY DUTY) and
with the same specifications.
2020_JEEP_M6_UG_UK.book Page 148
Page 175 of 328
173
(Continued)
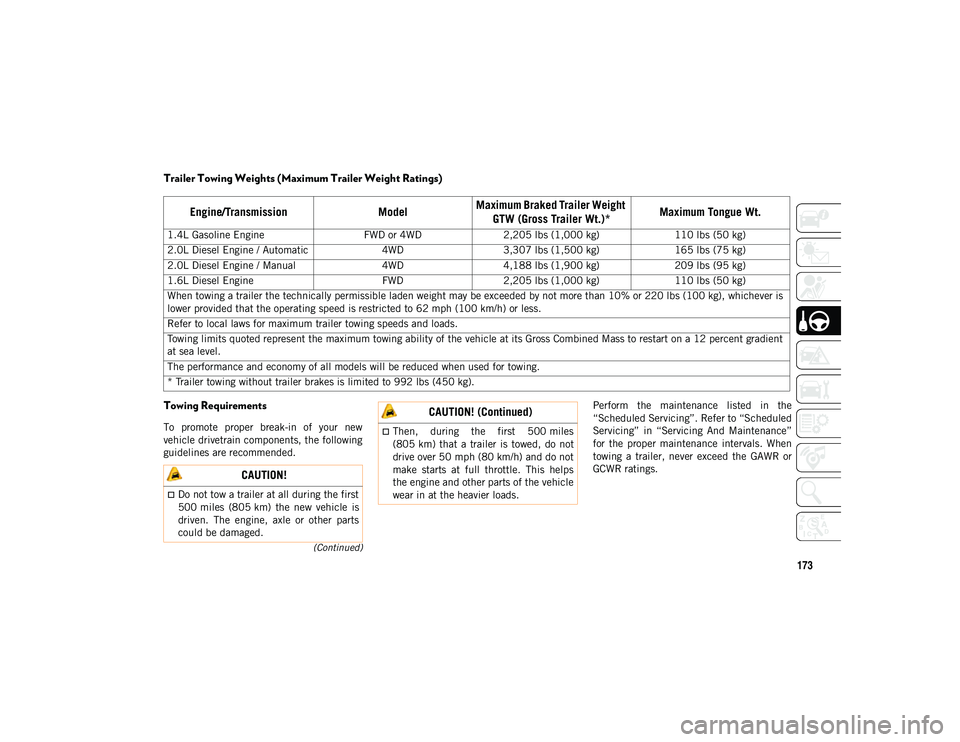
Trailer Towing Weights (Maximum Trailer Weight Ratings)
Towing Requirements
To promote proper break-in of your new
vehicle drivetrain components, the following
guidelines are recommended.Perform the maintenance listed in the
“Scheduled Servicing”. Refer to “Scheduled
Servicing” in “Servicing And Maintenance”
for the proper maintenance intervals. When
towing a trailer, never exceed the GAWR or
GCWR ratings.
Engine/Transmission
ModelMaximum Braked Trailer Weight
GTW (Gross Trailer Wt.)* Maximum Tongue Wt.
1.4L Gasoline Engine
FWD or 4WD2,205 lbs (1,000 kg) 110 lbs (50 kg)
2.0L Diesel Engine / Automatic 4WD3,307 lbs (1,500 kg) 165 lbs (75 kg)
2.0L Diesel Engine / Manual 4WD4,188 lbs (1,900 kg) 209 lbs (95 kg)
1.6L Diesel Engine FWD2,205 lbs (1,000 kg) 110 lbs (50 kg)
When towing a trailer the technically permissible laden weight may be exceeded by not more than 10% or 220 lbs (100 kg), whichever is
lower provided that the operating speed is restricted to 62 mph (100 km/h) or less.
Refer to local laws for maximum trailer towing speeds and loads.
Towing limits quoted represent the maximum towing ability of the vehicle at its Gross Combined Mass to restart on a 12 percent gradient
at sea level.
The performance and economy of all models will be reduced when used for towing.
* Trailer towing without trailer brakes is limited to 992 lbs (450 kg).
CAUTION!
Do not tow a trailer at all during the first
500 miles (805 km) the new vehicle is
driven. The engine, axle or other parts
could be damaged.
Then, during the first 500 miles
(805 km) that a trailer is towed, do not
drive over 50 mph (80 km/h) and do not
make starts at full throttle. This helps
the engine and other parts of the vehicle
wear in at the heavier loads.
CAUTION! (Continued)
2020_JEEP_M6_UG_UK.book Page 173
Page 177 of 328
175
RECREATIONAL TOWING (BEHIND MOTORHOME, ETC.)
Towing This Vehicle Behind Another Vehicle
NOTE:
When towing your vehicle, always follow
applicable state and provincial laws.
Contact state and local authorities offices
for additional details.
You must ensure that the Auto Park Brake
feature is disabled before towing this
vehicle, to avoid inadvertent Electric Park
Brake engagement. The Auto Park Brake
feature is enabled or disabled via the
customer programmable features in the
Uconnect Settings.
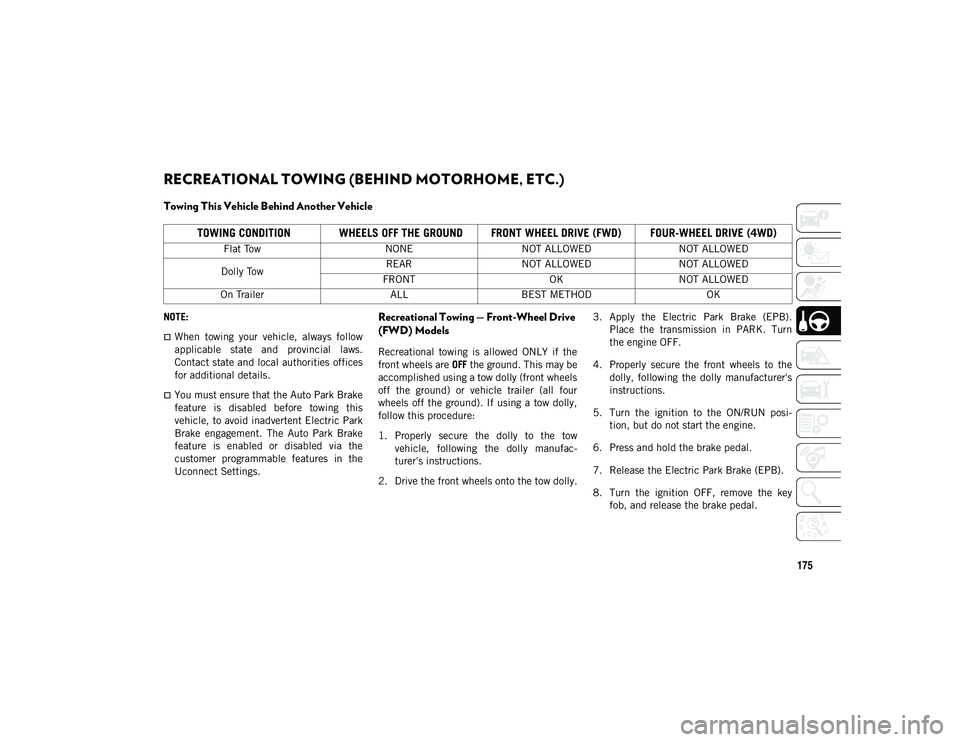
Recreational Towing — Front-Wheel Drive
(FWD) Models
Recreational towing is allowed ONLY if the
front wheels are OFF the ground. This may be
accomplished using a tow dolly (front wheels
off the ground) or vehicle trailer (all four
wheels off the ground). If using a tow dolly,
follow this procedure:
1. Properly secure the dolly to the tow vehicle, following the dolly manufac -
turer's instructions.
2. Drive the front wheels onto the tow dolly. 3. Apply the Electric Park Brake (EPB).
Place the transmission in PARK. Turn
the engine OFF.
4. Properly secure the front wheels to the dolly, following the dolly manufacturer's
instructions.
5. Turn the ignition to the ON/RUN posi -
tion, but do not start the engine.
6. Press and hold the brake pedal.
7. Release the Electric Park Brake (EPB).
8. Turn the ignition OFF, remove the key fob, and release the brake pedal.
TOWING CONDITION WHEELS OFF THE GROUND FRONT WHEEL DRIVE (FWD) FOUR-WHEEL DRIVE (4WD)
Flat Tow NONENOT ALLOWED NOT ALLOWED
Dolly Tow REAR
NOT ALLOWED NOT ALLOWED
FRONT OKNOT ALLOWED
On Trailer ALLBEST METHOD OK
2020_JEEP_M6_UG_UK.book Page 175
Page 242 of 328
SERVICING AND MAINTENANCE
240
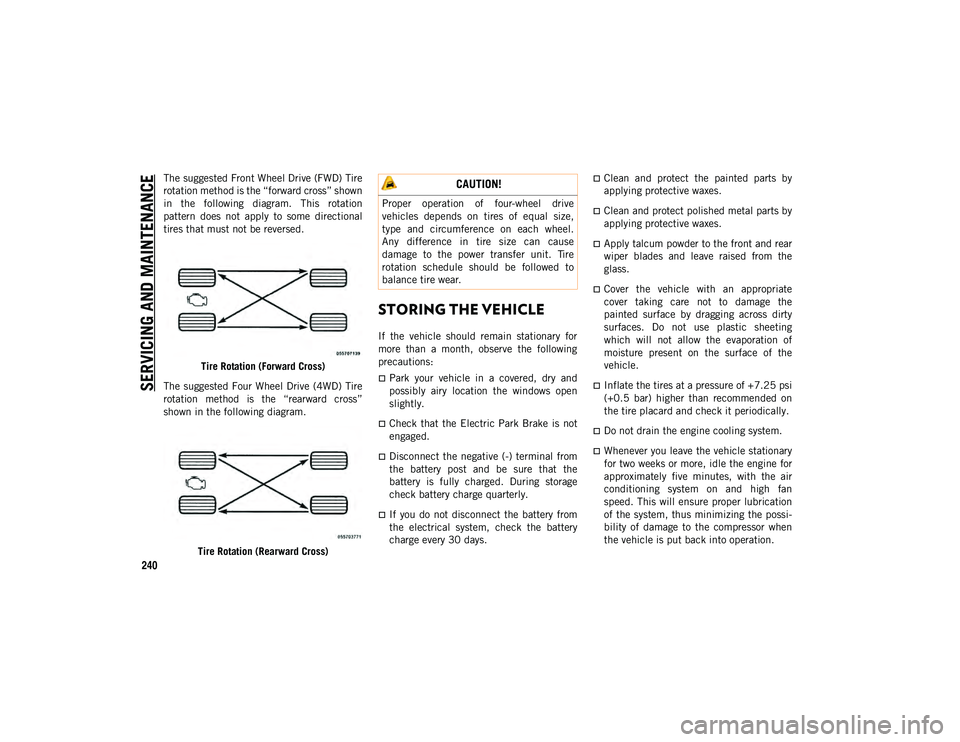
The suggested Front Wheel Drive (FWD) Tire
rotation method is the “forward cross” shown
in the following diagram. This rotation
pattern does not apply to some directional
tires that must not be reversed.Tire Rotation (Forward Cross)
The suggested Four Wheel Drive (4WD) Tire
rotation method is the “rearward cross”
shown in the following diagram.
Tire Rotation (Rearward Cross)
STORING THE VEHICLE
If the vehicle should remain stationary for
more than a month, observe the following
precautions:
Park your vehicle in a covered, dry and
possibly airy location the windows open
slightly.
Check that the Electric Park Brake is not
engaged.
Disconnect the negative (-) terminal from
the battery post and be sure that the
battery is fully charged. During storage
check battery charge quarterly.
If you do not disconnect the battery from
the electrical system, check the battery
charge every 30 days.
Clean and protect the painted parts by
applying protective waxes.
Clean and protect polished metal parts by
applying protective waxes.
Apply talcum powder to the front and rear
wiper blades and leave raised from the
glass.
Cover the vehicle with an appropriate
cover taking care not to damage the
painted surface by dragging across dirty
surfaces. Do not use plastic sheeting
which will not allow the evaporation of
moisture present on the surface of the
vehicle.
Inflate the tires at a pressure of +7.25 psi
(+0.5 bar) higher than recommended on
the tire placard and check it periodically.
Do not drain the engine cooling system.
Whenever you leave the vehicle stationary
for two weeks or more, idle the engine for
approximately five minutes, with the air
conditioning system on and high fan
speed. This will ensure proper lubrication
of the system, thus minimizing the possi -
bility of damage to the compressor when
the vehicle is put back into operation.
CAUTION!
Proper operation of four-wheel drive
vehicles depends on tires of equal size,
type and circumference on each wheel.
Any difference in tire size can cause
damage to the power transfer unit. Tire
rotation schedule should be followed to
balance tire wear.
2020_JEEP_M6_UG_UK.book Page 240