key JEEP COMPASS 2023 Owner's Guide
[x] Cancel search | Manufacturer: JEEP, Model Year: 2023, Model line: COMPASS, Model: JEEP COMPASS 2023Pages: 344, PDF Size: 18.8 MB
Page 104 of 344
102STARTING AND OPERATING
STOPPING THE ENGINE
Vehicles Equipped With Electronic Key (Keyless
Enter ’n Go™):
To shut off the engine with vehicle speed greater
than 5 mph (8 km/h), you must push and hold the
ignition or push the ENGINE START/STOP button
three times consecutively within a few seconds.
The engine will shut down, and the ignition will be
placed in the ON/RUN position. Turning off the car (placing the ignition from the
ON/RUN position to the OFF position), the power
supply to the accessories are maintained for a
period of three minutes.
Opening the driver’s side door with the ignition in
ON/RUN will sound a short chime that reminds the
driver to place the ignition to OFF.
When the ignition is in the OFF position, the
window switches remain active for three minutes.
Opening a front door will cancel this function.
After severe driving, idle the engine to allow the
temperature inside the engine compartment to
cool before shutting off the engine.
ENGINE BLOCK HEATER — IF EQUIPPED
The engine block heater warms the engine and
permits quicker starts in cold weather.
Connect the cord to a 110-115 Volt AC electrical
outlet with a grounded, three-wire extension cord.
For ambient temperatures below 0°F (-18°C), the
engine block heater is recommended. For ambient
temperatures below -20°F (-29°C), the engine
block heater is required.
The engine block heater cord is routed under the
hood, behind to the driver’s side headlamp.
NOTE:
The engine block heater cord is a factory
installed option. If your vehicle is not equipped,
heater cords are available from an authorized
dealer.
The engine block heater will require 110 Volt AC
and 6.5 Amps to activate the heater element.
The engine block heater must be plugged in at
least one hour to have an adequate warming
effect on the engine.
ENGINE BREAK-IN RECOMMENDATIONS
A long break-in period is not required for the engine
and drivetrain (transmission and axle) in your
vehicle.
Drive moderately during the first 300 miles
(500 km). After the initial 60 miles (100 km),
speeds up to 50 or 55 mph (80 or 90 km/h) are
desirable.
WARNING!
Never pour fuel or other flammable liquid into
the throttle body air inlet opening in an
attempt to start the vehicle. This could result
in flash fire causing serious personal injury.
Do not attempt to push or tow your vehicle to
get it started. Vehicles equipped with an auto -
matic transmission cannot be started this
way. Unburned fuel could enter the catalytic
converter and once the engine has started,
ignite and damage the converter and vehicle.
If the vehicle has a discharged battery,
booster cables may be used to obtain a start
from a booster battery or the battery in
another vehicle. This type of start can be
dangerous if done improperly Ú page 258.
WARNING!
Remember to disconnect the engine block
heater cord before driving. Damage to the
110-115 Volt electrical cord could cause
electrocution.
22_MP_OM_EN_USC_t.book Page 102
Page 106 of 344
104STARTING AND OPERATING
(Continued)
brake is fully disengaged, the Brake Warning Light
in the instrument cluster and the LED indicator on
the switch will extinguish.
NOTE:When parking on a hill, it is important to turn the
front wheels toward the curb on a downhill grade
and away from the curb on an uphill grade. Apply
the parking brake before placing the gear selector
in PARK, otherwise the load on the transmission
locking mechanism may make it difficult to move
the gear selector out of PARK. The parking brake
should always be applied whenever the driver is
not in the vehicle.
If exceptional circumstances should make it
necessary to engage the parking brake while the
vehicle is in motion, maintain upward pressure on
the EPB switch for as long as engagement is
desired. The BRAKE warning lamp will illuminate,
and a continuous chime will sound. The rear stop
lamps will also be illuminated automatically while
the vehicle remains in motion.
To disengage the parking brake while the vehicle is
in motion, release the switch. If the vehicle is
brought to a complete stop using the parking
brake, when the vehicle reaches approximately
3 mph, (5 km/h) the parking brake will remain
engaged.
WARNING!
Do not rely on the parking brake to operate
effectively if the rear brakes have been
immersed in water or mud.
Never use the PARK position as a substitute
for the parking brake. Always apply the
parking brake fully when parked to guard
against vehicle movement and possible injury
or damage.
When leaving the vehicle, always remove the
key fob from the ignition and lock your vehicle.
Never leave children alone in a vehicle, or with
access to an unlocked vehicle. Allowing chil
-
dren to be in a vehicle unattended is
dangerous for a number of reasons. A child or
others could be seriously or fatally injured.
Children should be warned not to touch the
parking brake, brake pedal or the gear
selector.
Do not leave the key fob in or near the vehicle,
or in a location accessible to children, and do
not leave the ignition of a vehicle equipped
with Keyless Enter ’n Go™ in the ACC or ON/
RUN position. A child could operate power
windows, other controls, or move the vehicle.
Be sure the parking brake is fully disengaged
before driving; failure to do so can lead to
brake failure and a collision.
Always fully apply the parking brake when
leaving your vehicle, or it may roll and cause
damage or injury. Also be certain to leave the
transmission in PARK. Failure to do so may
allow the vehicle to roll and cause damage or
injury.
WARNING!CAUTION!
If the Brake System Warning Light remains on
with the parking brake released, a brake system
malfunction is indicated. Have the brake system
serviced by an authorized dealer immediately.
WARNING!
Driving the vehicle with the parking brake
engaged, or repeated use of the parking brake
to slow the vehicle, may cause serious damage
to the brake system. Be sure the parking brake
is fully disengaged before driving; failure to do
so can lead to brake failure and a collision.
22_MP_OM_EN_USC_t.book Page 104
Page 109 of 344
STARTING AND OPERATING107
IGNITION PARK INTERLOCK
This vehicle is equipped with an Ignition Park
Interlock which requires the transmission to be in
PARK (P) before the ignition can be turned to the
OFF position. This helps the driver avoid
inadvertently leaving the vehicle without placing
the transmission in PARK. This system also locks
the transmission in PARK whenever the ignition is
in the OFF position.
BRAKE/TRANSMISSION SHIFT
I
NTERLOCK (BTSI) SYSTEM
This vehicle is equipped with a BTSI that holds the
transmission gear selector in PARK (P) unless the
brakes are applied. To shift the transmission out of
PARK, the ignition must be in the ON/RUN position
(whether the engine is running or not), and the
brake pedal must be pressed. The brake pedal
must also be pressed to shift from NEUTRAL (N)
into DRIVE (D) or REVERSE (R) when the vehicle is
stopped or moving at low speeds.
6-SPEED OR 9-SPEED AUTOMATIC
T
RANSMISSION
NOTE:Your vehicle may be equipped with a 6-speed or
9-speed automatic transmission, depending on
model. This section describes operation of both
the 6-speed and 9-speed transmissions.
The transmission gear range (PRND) is displayed
both beside the gear selector and in the
instrument cluster. To select a gear range, push
the lock button on the gear selector and move the
selector rearward or forward. You must also press
the brake pedal to shift the transmission out of
PARK (P) (or NEUTRAL (N), when the vehicle is
stopped or moving at low speeds). Select the
DRIVE (D) range for normal driving.
Unintended movement of a vehicle could
injure those in or near the vehicle. As with all
vehicles, you should never exit a vehicle while
the engine is running. Before exiting a vehicle,
always come to a complete stop, then apply
the parking brake, shift the transmission into
PARK, and turn the ignition OFF. When the
ignition is in the OFF position, the transmis -
sion is locked in PARK, securing the vehicle
against unwanted movement.
When leaving the vehicle, always make sure
the ignition is in the OFF position, remove the
key fob from the vehicle, and lock the vehicle.
Never leave children alone in a vehicle, or with
access to an unlocked vehicle. Allowing chil -
dren to be in a vehicle unattended is
dangerous for a number of reasons. A child or
others could be seriously or fatally injured.
Children should be warned not to touch the
parking brake, brake pedal or the transmis -
sion gear selector.
Do not leave the key fob in or near the vehicle
(or in a location accessible to children), and do
not leave the ignition in the ON/RUN position.
A child could operate power windows, other
controls, or move the vehicle.
WARNING!CAUTION!
Damage to the transmission may occur if the
following precautions are not observed:
Shift into or out of PARK or REVERSE only after
the vehicle has come to a complete stop.
Do not shift between PARK, REVERSE,
NEUTRAL, or DRIVE when the engine is above
idle speed.
Before shifting into any gear, make sure your
foot is firmly pressing the brake pedal.4
22_MP_OM_EN_USC_t.book Page 107
Page 111 of 344
STARTING AND OPERATING109
(Continued)
(Continued)
When parking on a hill, apply the parking brake
before shifting the transmission to PARK,
otherwise the load on the transmission locking
mechanism may make it difficult to move the gear
selector out of PARK. As an added precaution, turn
the front wheels toward the curb on a downhill
grade and away from the curb on an uphill grade.
When exiting the vehicle, always:
1. Apply the parking brake.
2. Shift the transmission into PARK.
3. Turn the engine off.
4. Remove the key fob from the vehicle.
NOTE:Block the wheels with a wedge or a stone if the
vehicle is parked on a steep slope.
WARNING!
Never use the PARK (P) position as a substi
-
tute for the parking brake. Always apply the
parking brake fully when exiting the vehicle to
guard against vehicle movement and possible
injury or damage.
Your vehicle could move and injure you and
others if it is not in PARK. Check by trying to
move the gear selector out of PARK with the
brake pedal released. Make sure the trans -
mission is in PARK before exiting the vehicle.
It is dangerous to shift out of PARK or
NEUTRAL (N) if the engine speed is higher
than idle speed. If your foot is not firmly
pressing the brake pedal, the vehicle could
accelerate quickly forward or in reverse.
You could lose control of the vehicle and hit
someone or something. Only shift into gear
when the engine is idling normally and your
foot is firmly pressing the brake pedal.
The vehicle may not engage a newly selected
gear when shifting between PARK, REVERSE
(R), or DRIVE (D) if the vehicle is moving while
shifting.
Unintended movement of a vehicle could
injure those in or near the vehicle. As with all
vehicles, you should never exit a vehicle while
the engine is running. Before exiting a vehicle,
always come to a complete stop, then apply
the parking brake, shift the transmission into
PARK, and turn the ignition OFF. When the
ignition is in the OFF position, the transmis -
sion is locked in PARK, securing the vehicle
against unwanted movement.
When leaving the vehicle, always make sure
the ignition is in the OFF position, remove the
key fob from the vehicle, and lock the vehicle.
WARNING!
Never leave children alone in a vehicle, or with
access to an unlocked vehicle. Allowing chil -
dren to be in a vehicle unattended is
dangerous for a number of reasons. A child or
others could be seriously or fatally injured.
Children should be warned not to touch the
parking brake, brake pedal or the transmis -
sion gear selector.
Do not leave the key fob in or near the vehicle
(or in a location accessible to children), and do
not leave the ignition in the ON/RUN position.
A child could operate power windows, other
controls, or move the vehicle.
CAUTION!
Before moving the transmission gear selector
out of PARK, you must turn the ignition to the
ON/RUN position, and also press the brake
pedal. Otherwise, damage to the gear selector
could result.
DO NOT race the engine when shifting from
PARK or NEUTRAL into another gear range, as
this can damage the drivetrain.
WARNING!
4
22_MP_OM_EN_USC_t.book Page 109
Page 141 of 344
STARTING AND OPERATING139
NOTE:The vehicle needs to be driven approximately one
car length in order for the Side Distance Warning
system to activate.
Operation With A Trailer
The system is automatically deactivated when the
trailer's electric plug is inserted in the vehicle's tow
hook socket. The rear sensors are automatically
reactivated when the trailer's cable plug is
removed.
ParkSense Usage Precautions
Some conditions may influence the performance
of the Side Distance Warning system:
NOTE:
Ensure that the front and rear bumper are free
of snow, ice, mud, dirt and debris to keep the
ParkSense system operating properly.
Construction equipment, large trucks, and
other vibrations could affect the performance
of ParkSense.
When you turn ParkSense off, the message
in the instrument cluster display will read
“PARKSENSE OFF.” Furthermore, once you turn
ParkSense off, it remains off until you turn it on
again, even if you cycle the ignition key.
ParkSense, when on, will reduce the volume of
the radio when it is sounding a tone.
Clean the ParkSense sensors regularly, taking
care not to scratch or damage them. The
sensors must not be covered with ice, snow,
slush, mud, dirt or debris. Failure to do so can
result in the system not working properly. The
ParkSense system might not detect an obstacle
behind or in front of the fascia/bumper, or it
could provide a false indication that an obstacle
is behind or in front of the fascia/bumper.
The presence of a tow hook without a trailer may
interfere with the correct operation of the
parking sensors. Before using the ParkSense
system, it is recommended to remove the
removable tow hook ball assembly and any
attachments from the vehicle when it is not
used for towing operations. If you leave the tow
hook fitted when not towing a trailer, the tow
hook could be detected as an obstacle by the
sensors. Contact your authorized dealer to
update the ParkSense system operations.
WARNING!
Drivers must be careful when backing up even
when using ParkSense. Always check carefully
behind your vehicle, look behind you, and be
sure to check for pedestrians, animals, other
vehicles, obstructions, and blind spots before
backing up. You are responsible for safety and
must continue to pay attention to your
surroundings. Failure to do so can result in
serious injury or death.
Before using ParkSense, it is strongly recom -
mended that the ball mount and hitch ball
assembly be disconnected from the vehicle
when the vehicle is not used for towing. Failure
to do so can result in injury or damage to vehi -
cles or obstacles because the hitch ball will be
much closer to the obstacle than the rear
fascia when the vehicle sounds the continuous
tone. Also, the sensors could detect the ball
mount and hitch ball assembly, depending on
its size and shape, giving a false indication that
an obstacle is behind the vehicle.
4
22_MP_OM_EN_USC_t.book Page 139
Page 152 of 344
150STARTING AND OPERATING
SURROUND VIEW CAMERA SYSTEM —
IF EQUIPPED
Your vehicle may be equipped with the Surround
View Camera system that allows you to see an
on-screen image of the surroundings and Top View
of your vehicle whenever the gear selector is put
into REVERSE or a different view is selected
through the touchscreen soft buttons. The Top
View of the vehicle will show which doors are open.
The image will be displayed on the touchscreen
display along with a caution note “Check Entire
Surroundings” across the top of the screen.
After five seconds, this note will disappear. The
Surround View Camera system is comprised of four
sequential cameras located in the front grille, rear
liftgate and side mirrors.
NOTE:The Surround View Camera system has program -
mable settings that may be selected through the
Uconnect system Ú page 165.
Press this button on the touchscreen to
enter the Surround View Camera menu in
the Uconnect system.
When the vehicle is shifted into REVERSE, the Rear
View and Top View is the default view of the
system.
When the vehicle is shifted out of REVERSE with
camera delay turned on, the camera image will
continue to be displayed for up to 10 seconds
unless the vehicle speed exceeds 8 mph (13 km/h),
the vehicle is shifted into PARK or the ignition is
placed in the OFF position. There is a touchscreen
button X to disable the display of the camera image.
When the vehicle is shifted out of REVERSE with
camera delay turned off, the Surround View
Camera mode is exited and the last known screen
appears again.
When enabled, active guidelines are overlaid on
the image to illustrate the width of the vehicle,
including the side view mirrors and its projected
backup path based on the steering wheel position.
Different colored zones indicate the distance to
the rear of the vehicle.
The following table shows the approximate
distances for each zone:
Modes Of Operation
Manual activation of the Surround View Camera is
selected by pressing the Surround View Camera
soft key located in the Controls menu within the
Uconnect system.
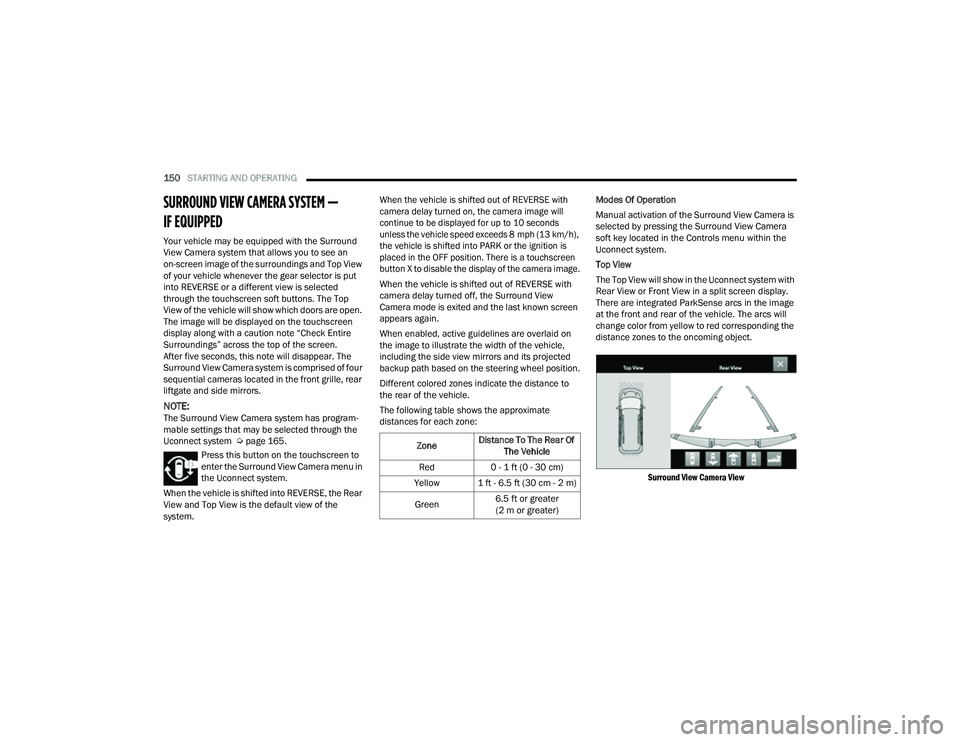
Top View
The Top View will show in the Uconnect system with
Rear View or Front View in a split screen display.
There are integrated ParkSense arcs in the image
at the front and rear of the vehicle. The arcs will
change color from yellow to red corresponding the
distance zones to the oncoming object.
Surround View Camera View
Zone Distance To The Rear Of
The Vehicle
Red 0 - 1 ft (0 - 30 cm)
Yellow 1 ft - 6.5 ft (30 cm - 2 m)
Green 6.5 ft or greater
(2 m or greater)
22_MP_OM_EN_USC_t.book Page 150
Page 153 of 344
STARTING AND OPERATING151
NOTE:
Front tires will be in image when the tires are
turned.
Due to wide angle cameras in the mirrors, the
image will appear distorted.
Top View will show which doors are open.
Open front doors will cancel outside image.
Open liftgate will cancel rear image while in
Top View.
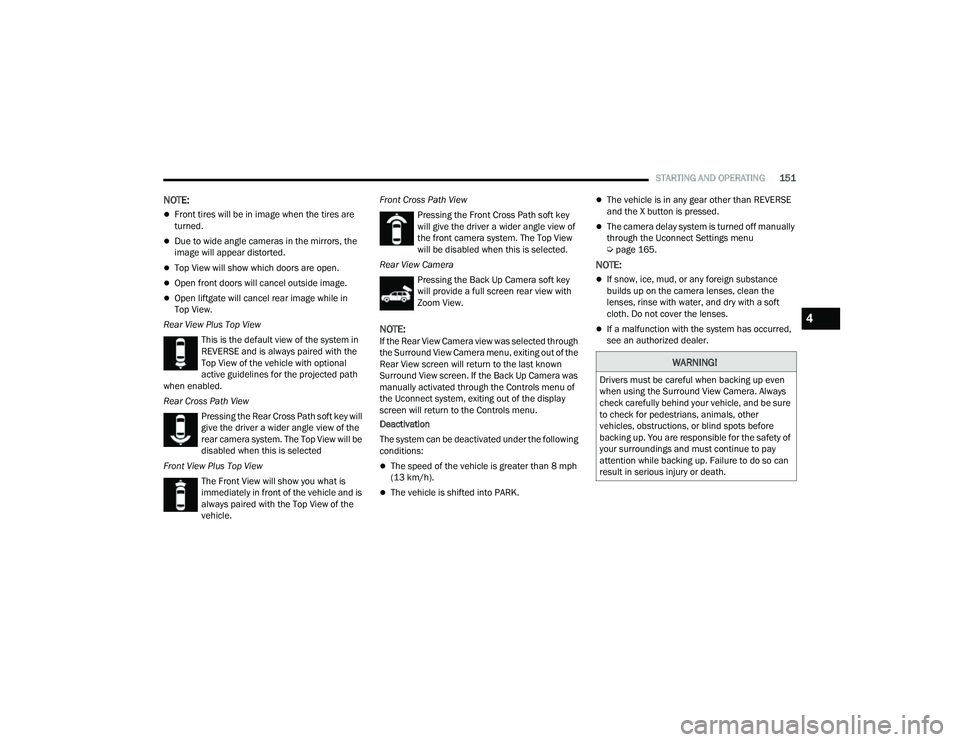
Rear View Plus Top View This is the default view of the system in
REVERSE and is always paired with the
Top View of the vehicle with optional
active guidelines for the projected path
when enabled.
Rear Cross Path View
Pressing the Rear Cross Path soft key will
give the driver a wider angle view of the
rear camera system. The Top View will be
disabled when this is selected
Front View Plus Top View The Front View will show you what is
immediately in front of the vehicle and is
always paired with the Top View of the
vehicle. Front Cross Path View
Pressing the Front Cross Path soft key
will give the driver a wider angle view of
the front camera system. The Top View
will be disabled when this is selected.
Rear View Camera Pressing the Back Up Camera soft key
will provide a full screen rear view with
Zoom View.
NOTE:If the Rear View Camera view was selected through
the Surround View Camera menu, exiting out of the
Rear View screen will return to the last known
Surround View screen. If the Back Up Camera was
manually activated through the Controls menu of
the Uconnect system, exiting out of the display
screen will return to the Controls menu.
Deactivation
The system can be deactivated under the following
conditions:
The speed of the vehicle is greater than 8 mph
(13 km/h).
The vehicle is shifted into PARK.
The vehicle is in any gear other than REVERSE
and the X button is pressed.
The camera delay system is turned off manually
through the Uconnect Settings menu
Úpage 165.
NOTE:
If snow, ice, mud, or any foreign substance
builds up on the camera lenses, clean the
lenses, rinse with water, and dry with a soft
cloth. Do not cover the lenses.
If a malfunction with the system has occurred,
see an authorized dealer.
WARNING!
Drivers must be careful when backing up even
when using the Surround View Camera. Always
check carefully behind your vehicle, and be sure
to check for pedestrians, animals, other
vehicles, obstructions, or blind spots before
backing up. You are responsible for the safety of
your surroundings and must continue to pay
attention while backing up. Failure to do so can
result in serious injury or death.
4
22_MP_OM_EN_USC_t.book Page 151
Page 162 of 344
160STARTING AND OPERATING
RECREATIONAL TOWING (BEHIND MOTORHOME)
TOWING THIS VEHICLE BEHIND ANOTHER VEHICLE
NOTE:
When towing your vehicle, always follow appli -
cable state and provincial laws. Contact state
and provincial Highway Safety offices for addi -
tional details.
You must ensure that the Auto Park Brake
feature is disabled before towing this vehicle, to
avoid inadvertent Electric Park Brake engage -
ment. The Auto Park Brake feature is enabled or
disabled via the Customer Programmable
Features in the Uconnect Settings.
RECREATIONAL TOWING —
F
RONT-WHEEL DRIVE (FWD) MODELS
Recreational towing is allowed ONLY if the front
wheels are OFF the ground. This may be
accomplished using a tow dolly (front wheels off
the ground) or vehicle trailer (all four wheels off the
ground). If using a tow dolly, follow this procedure:
1. Properly secure the dolly to the tow vehicle, following the dolly manufacturer's
instructions.
2. Drive the front wheels onto the tow dolly. 3. Apply the Electric Park Brake (EPB). Place the
transmission in PARK (P). Turn the engine off.
4. Properly secure the front wheels to the dolly, following the dolly manufacturer's instructions.
5. Turn the ignition to the ON/RUN position, but do not start the engine.
6. Press and hold the brake pedal.
7. Release the EPB.
8. Turn the ignition OFF, remove the key fob, and release the brake pedal.
TOWING CONDITION WHEELS OFF THE GROUND FRONT-WHEEL DRIVE (FWD) FOUR-WHEEL DRIVE (4WD)
Flat Tow NONENOT ALLOWEDNOT ALLOWED
Dolly Tow REAR
NOT ALLOWEDNOT ALLOWED
FRONT OKNOT ALLOWED
On Trailer ALLBEST METHODOK
22_MP_OM_EN_USC_t.book Page 160
Page 180 of 344
178MULTIMEDIA
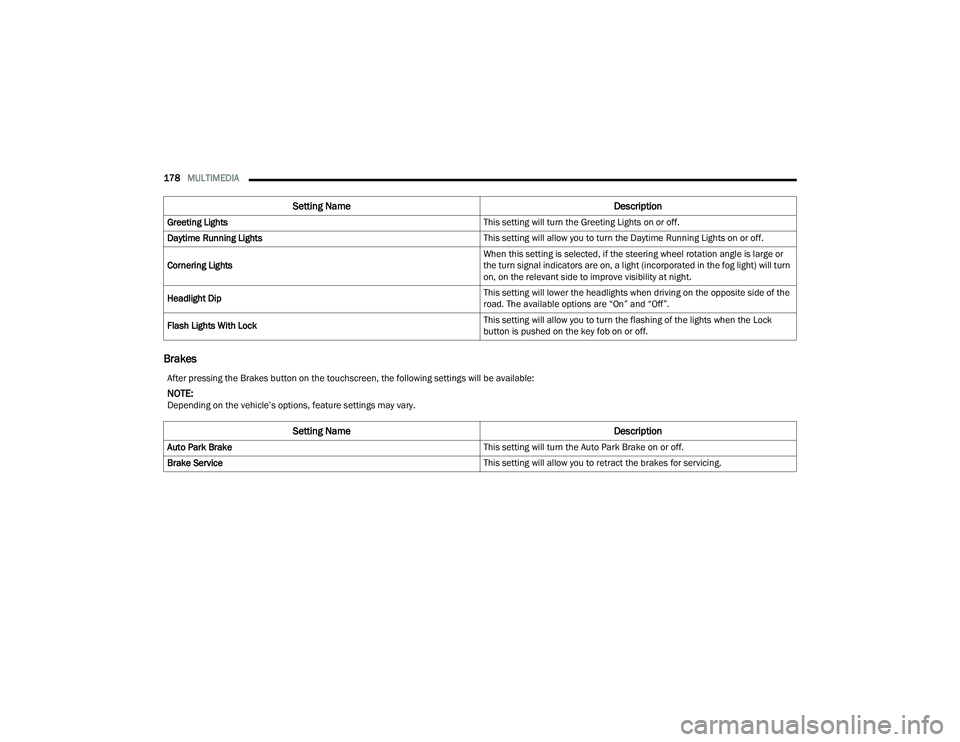
Brakes
Greeting Lights This setting will turn the Greeting Lights on or off.
Daytime Running Lights This setting will allow you to turn the Daytime Running Lights on or off.
Cornering Lights When this setting is selected, if the steering wheel rotation angle is large or
the turn signal indicators are on, a light (incorporated in the fog light) will turn
on, on the relevant side to improve visibility at night.
Headlight Dip This setting will lower the headlights when driving on the opposite side of the
road. The available options are “On” and “Off”.
Flash Lights With Lock This setting will allow you to turn the flashing of the lights when the Lock
button is pushed on the key fob on or off.
Setting Name
Description
After pressing the Brakes button on the touchscreen, the following settings will be available:
NOTE:Depending on the vehicle’s options, feature settings may vary.
Setting NameDescription
Auto Park Brake This setting will turn the Auto Park Brake on or off.
Brake Service This setting will allow you to retract the brakes for servicing.
22_MP_OM_EN_USC_t.book Page 178
Page 181 of 344
MULTIMEDIA179
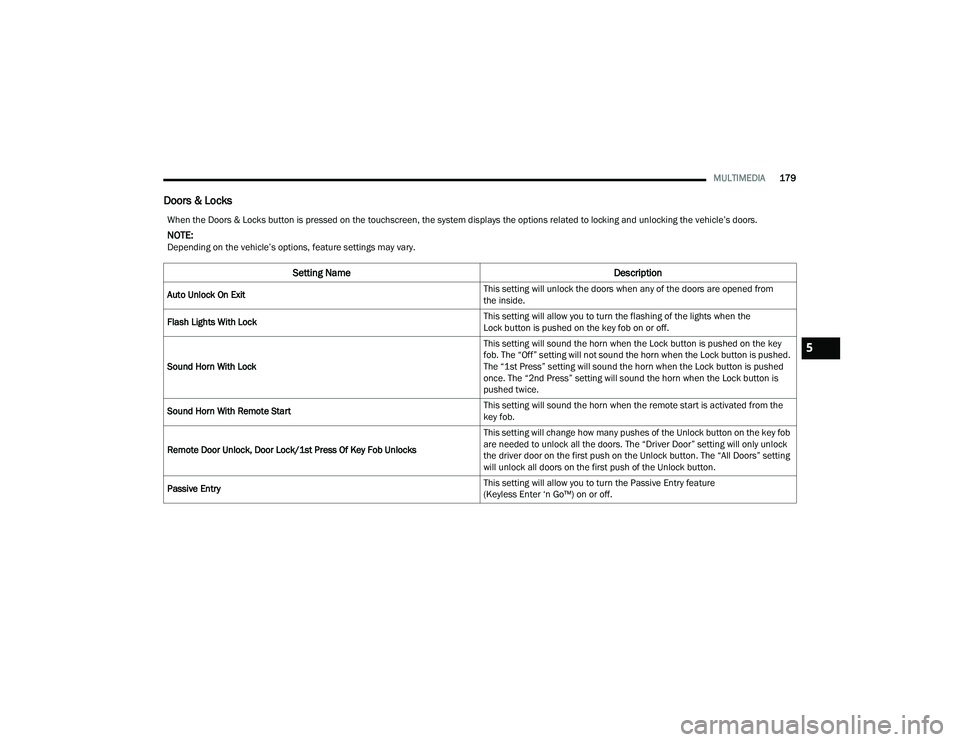
Doors & Locks
When the Doors & Locks button is pressed on the touchscreen, the system displays the options related to locking and unlocking the vehicle’s doors.
NOTE:Depending on the vehicle’s options, feature settings may vary.
Setting Name Description
Auto Unlock On Exit This setting will unlock the doors when any of the doors are opened from
the inside.
Flash Lights With Lock This setting will allow you to turn the flashing of the lights when the
Lock button is pushed on the key fob on or off.
Sound Horn With Lock This setting will sound the horn when the Lock button is pushed on the key
fob. The “Off” setting will not sound the horn when the Lock button is pushed.
The “1st Press” setting will sound the horn when the Lock button is pushed
once. The “2nd Press” setting will sound the horn when the Lock button is
pushed twice.
Sound Horn With Remote Start This setting will sound the horn when the remote start is activated from the
key fob.
Remote Door Unlock, Door Lock/1st Press Of Key Fob Unlocks This setting will change how many pushes of the Unlock button on the key fob
are needed to unlock all the doors. The “Driver Door” setting will only unlock
the driver door on the first push on the Unlock button. The “All Doors” setting
will unlock all doors on the first push of the Unlock button.
Passive Entry This setting will allow you to turn the Passive Entry feature
(Keyless Enter ‘n Go™) on or off.
5
22_MP_OM_EN_USC_t.book Page 179