Front JEEP COMPASS 2023 Service Manual
[x] Cancel search | Manufacturer: JEEP, Model Year: 2023, Model line: COMPASS, Model: JEEP COMPASS 2023Pages: 344, PDF Size: 18.8 MB
Page 98 of 344
96GETTING TO KNOW YOUR INSTRUMENT PANEL
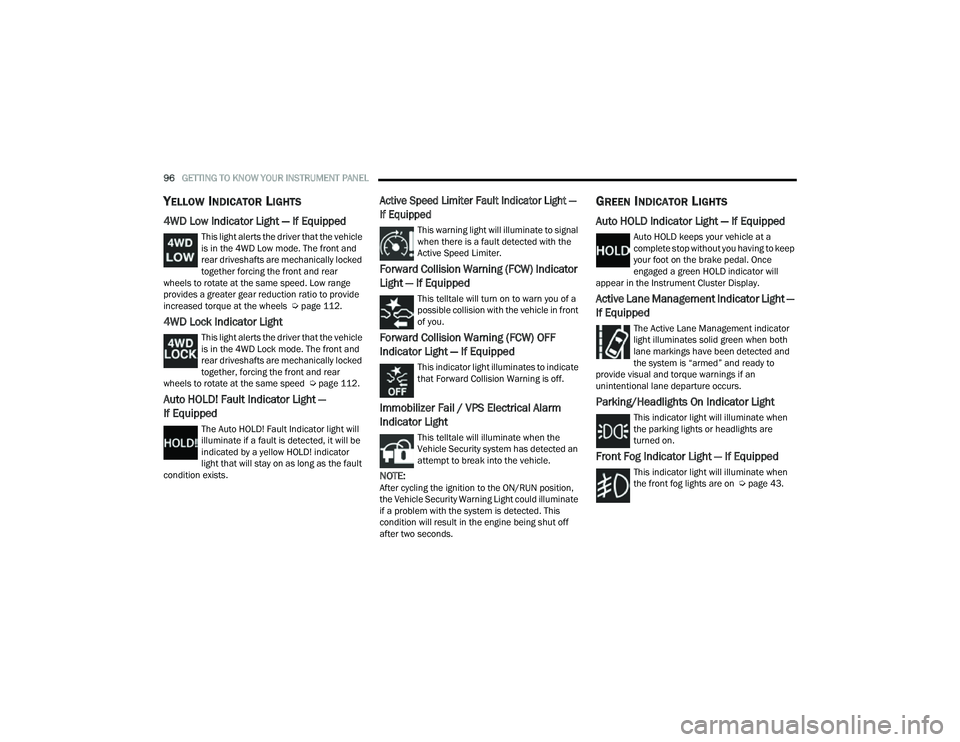
YELLOW INDICATOR LIGHTS
4WD Low Indicator Light — If Equipped
This light alerts the driver that the vehicle
is in the 4WD Low mode. The front and
rear driveshafts are mechanically locked
together forcing the front and rear
wheels to rotate at the same speed. Low range
provides a greater gear reduction ratio to provide
increased torque at the wheels Ú page 112.
4WD Lock Indicator Light
This light alerts the driver that the vehicle
is in the 4WD Lock mode. The front and
rear driveshafts are mechanically locked
together, forcing the front and rear
wheels to rotate at the same speed Ú page 112.
Auto HOLD! Fault Indicator Light —
If Equipped
The Auto HOLD! Fault Indicator light will
illuminate if a fault is detected, it will be
indicated by a yellow HOLD! indicator
light that will stay on as long as the fault
condition exists.
Active Speed Limiter Fault Indicator Light —
If Equipped
This warning light will illuminate to signal
when there is a fault detected with the
Active Speed Limiter.
Forward Collision Warning (FCW) Indicator
Light — If Equipped
This telltale will turn on to warn you of a
possible collision with the vehicle in front
of you.
Forward Collision Warning (FCW) OFF
Indicator Light — If Equipped
This indicator light illuminates to indicate
that Forward Collision Warning is off.
Immobilizer Fail / VPS Electrical Alarm
Indicator Light
This telltale will illuminate when the
Vehicle Security system has detected an
attempt to break into the vehicle.
NOTE:After cycling the ignition to the ON/RUN position,
the Vehicle Security Warning Light could illuminate
if a problem with the system is detected. This
condition will result in the engine being shut off
after two seconds.
GREEN INDICATOR LIGHTS
Auto HOLD Indicator Light — If Equipped
Auto HOLD keeps your vehicle at a
complete stop without you having to keep
your foot on the brake pedal. Once
engaged a green HOLD indicator will
appear in the Instrument Cluster Display.
Active Lane Management Indicator Light —
If Equipped
The Active Lane Management indicator
light illuminates solid green when both
lane markings have been detected and
the system is “armed” and ready to
provide visual and torque warnings if an
unintentional lane departure occurs.
Parking/Headlights On Indicator Light
This indicator light will illuminate when
the parking lights or headlights are
turned on.
Front Fog Indicator Light — If Equipped
This indicator light will illuminate when
the front fog lights are on Ú page 43.
22_MP_OM_EN_USC_t.book Page 96
Page 99 of 344
GETTING TO KNOW YOUR INSTRUMENT PANEL97
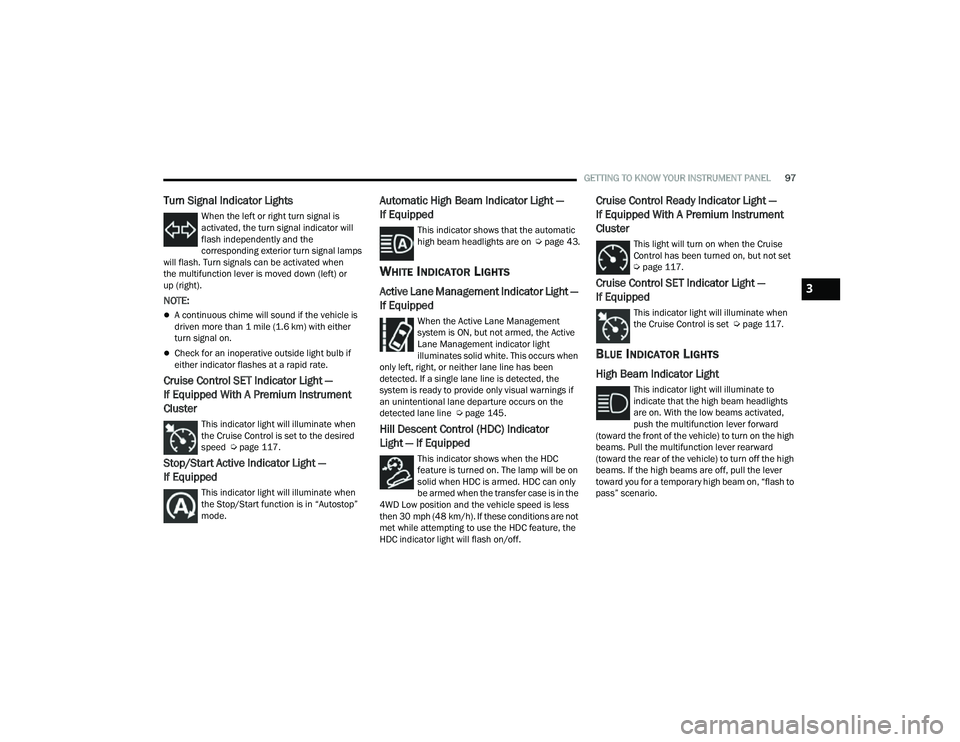
Turn Signal Indicator Lights
When the left or right turn signal is
activated, the turn signal indicator will
flash independently and the
corresponding exterior turn signal lamps
will flash. Turn signals can be activated when
the multifunction lever is moved down (left) or
up (right).
NOTE:
A continuous chime will sound if the vehicle is
driven more than 1 mile (1.6 km) with either
turn signal on.
Check for an inoperative outside light bulb if
either indicator flashes at a rapid rate.
Cruise Control SET Indicator Light —
If Equipped With A Premium Instrument
Cluster
This indicator light will illuminate when
the Cruise Control is set to the desired
speed Ú page 117.
Stop/Start Active Indicator Light —
If Equipped
This indicator light will illuminate when
the Stop/Start function is in “Autostop”
mode.
Automatic High Beam Indicator Light —
If Equipped
This indicator shows that the automatic
high beam headlights are on Úpage 43.
WHITE INDICATOR LIGHTS
Active Lane Management Indicator Light —
If Equipped
When the Active Lane Management
system is ON, but not armed, the Active
Lane Management indicator light
illuminates solid white. This occurs when
only left, right, or neither lane line has been
detected. If a single lane line is detected, the
system is ready to provide only visual warnings if
an unintentional lane departure occurs on the
detected lane line Ú page 145.
Hill Descent Control (HDC) Indicator
Light — If Equipped
This indicator shows when the HDC
feature is turned on. The lamp will be on
solid when HDC is armed. HDC can only
be armed when the transfer case is in the
4WD Low position and the vehicle speed is less
then 30 mph (48 km/h). If these conditions are not
met while attempting to use the HDC feature, the
HDC indicator light will flash on/off.
Cruise Control Ready Indicator Light —
If Equipped With A Premium Instrument
Cluster
This light will turn on when the Cruise
Control has been turned on, but not set
Ú page 117.
Cruise Control SET Indicator Light —
If Equipped
This indicator light will illuminate when
the Cruise Control is set Ú page 117.
BLUE INDICATOR LIGHTS
High Beam Indicator Light
This indicator light will illuminate to
indicate that the high beam headlights
are on. With the low beams activated,
push the multifunction lever forward
(toward the front of the vehicle) to turn on the high
beams. Pull the multifunction lever rearward
(toward the rear of the vehicle) to turn off the high
beams. If the high beams are off, pull the lever
toward you for a temporary high beam on, “flash to
pass” scenario.
3
22_MP_OM_EN_USC_t.book Page 97
Page 104 of 344
102STARTING AND OPERATING
STOPPING THE ENGINE
Vehicles Equipped With Electronic Key (Keyless
Enter ’n Go™):
To shut off the engine with vehicle speed greater
than 5 mph (8 km/h), you must push and hold the
ignition or push the ENGINE START/STOP button
three times consecutively within a few seconds.
The engine will shut down, and the ignition will be
placed in the ON/RUN position. Turning off the car (placing the ignition from the
ON/RUN position to the OFF position), the power
supply to the accessories are maintained for a
period of three minutes.
Opening the driver’s side door with the ignition in
ON/RUN will sound a short chime that reminds the
driver to place the ignition to OFF.
When the ignition is in the OFF position, the
window switches remain active for three minutes.
Opening a front door will cancel this function.
After severe driving, idle the engine to allow the
temperature inside the engine compartment to
cool before shutting off the engine.
ENGINE BLOCK HEATER — IF EQUIPPED
The engine block heater warms the engine and
permits quicker starts in cold weather.
Connect the cord to a 110-115 Volt AC electrical
outlet with a grounded, three-wire extension cord.
For ambient temperatures below 0°F (-18°C), the
engine block heater is recommended. For ambient
temperatures below -20°F (-29°C), the engine
block heater is required.
The engine block heater cord is routed under the
hood, behind to the driver’s side headlamp.
NOTE:
The engine block heater cord is a factory
installed option. If your vehicle is not equipped,
heater cords are available from an authorized
dealer.
The engine block heater will require 110 Volt AC
and 6.5 Amps to activate the heater element.
The engine block heater must be plugged in at
least one hour to have an adequate warming
effect on the engine.
ENGINE BREAK-IN RECOMMENDATIONS
A long break-in period is not required for the engine
and drivetrain (transmission and axle) in your
vehicle.
Drive moderately during the first 300 miles
(500 km). After the initial 60 miles (100 km),
speeds up to 50 or 55 mph (80 or 90 km/h) are
desirable.
WARNING!
Never pour fuel or other flammable liquid into
the throttle body air inlet opening in an
attempt to start the vehicle. This could result
in flash fire causing serious personal injury.
Do not attempt to push or tow your vehicle to
get it started. Vehicles equipped with an auto -
matic transmission cannot be started this
way. Unburned fuel could enter the catalytic
converter and once the engine has started,
ignite and damage the converter and vehicle.
If the vehicle has a discharged battery,
booster cables may be used to obtain a start
from a booster battery or the battery in
another vehicle. This type of start can be
dangerous if done improperly Ú page 258.
WARNING!
Remember to disconnect the engine block
heater cord before driving. Damage to the
110-115 Volt electrical cord could cause
electrocution.
22_MP_OM_EN_USC_t.book Page 102
Page 106 of 344
104STARTING AND OPERATING
(Continued)
brake is fully disengaged, the Brake Warning Light
in the instrument cluster and the LED indicator on
the switch will extinguish.
NOTE:When parking on a hill, it is important to turn the
front wheels toward the curb on a downhill grade
and away from the curb on an uphill grade. Apply
the parking brake before placing the gear selector
in PARK, otherwise the load on the transmission
locking mechanism may make it difficult to move
the gear selector out of PARK. The parking brake
should always be applied whenever the driver is
not in the vehicle.
If exceptional circumstances should make it
necessary to engage the parking brake while the
vehicle is in motion, maintain upward pressure on
the EPB switch for as long as engagement is
desired. The BRAKE warning lamp will illuminate,
and a continuous chime will sound. The rear stop
lamps will also be illuminated automatically while
the vehicle remains in motion.
To disengage the parking brake while the vehicle is
in motion, release the switch. If the vehicle is
brought to a complete stop using the parking
brake, when the vehicle reaches approximately
3 mph, (5 km/h) the parking brake will remain
engaged.
WARNING!
Do not rely on the parking brake to operate
effectively if the rear brakes have been
immersed in water or mud.
Never use the PARK position as a substitute
for the parking brake. Always apply the
parking brake fully when parked to guard
against vehicle movement and possible injury
or damage.
When leaving the vehicle, always remove the
key fob from the ignition and lock your vehicle.
Never leave children alone in a vehicle, or with
access to an unlocked vehicle. Allowing chil
-
dren to be in a vehicle unattended is
dangerous for a number of reasons. A child or
others could be seriously or fatally injured.
Children should be warned not to touch the
parking brake, brake pedal or the gear
selector.
Do not leave the key fob in or near the vehicle,
or in a location accessible to children, and do
not leave the ignition of a vehicle equipped
with Keyless Enter ’n Go™ in the ACC or ON/
RUN position. A child could operate power
windows, other controls, or move the vehicle.
Be sure the parking brake is fully disengaged
before driving; failure to do so can lead to
brake failure and a collision.
Always fully apply the parking brake when
leaving your vehicle, or it may roll and cause
damage or injury. Also be certain to leave the
transmission in PARK. Failure to do so may
allow the vehicle to roll and cause damage or
injury.
WARNING!CAUTION!
If the Brake System Warning Light remains on
with the parking brake released, a brake system
malfunction is indicated. Have the brake system
serviced by an authorized dealer immediately.
WARNING!
Driving the vehicle with the parking brake
engaged, or repeated use of the parking brake
to slow the vehicle, may cause serious damage
to the brake system. Be sure the parking brake
is fully disengaged before driving; failure to do
so can lead to brake failure and a collision.
22_MP_OM_EN_USC_t.book Page 104
Page 111 of 344
STARTING AND OPERATING109
(Continued)
(Continued)
When parking on a hill, apply the parking brake
before shifting the transmission to PARK,
otherwise the load on the transmission locking
mechanism may make it difficult to move the gear
selector out of PARK. As an added precaution, turn
the front wheels toward the curb on a downhill
grade and away from the curb on an uphill grade.
When exiting the vehicle, always:
1. Apply the parking brake.
2. Shift the transmission into PARK.
3. Turn the engine off.
4. Remove the key fob from the vehicle.
NOTE:Block the wheels with a wedge or a stone if the
vehicle is parked on a steep slope.
WARNING!
Never use the PARK (P) position as a substi
-
tute for the parking brake. Always apply the
parking brake fully when exiting the vehicle to
guard against vehicle movement and possible
injury or damage.
Your vehicle could move and injure you and
others if it is not in PARK. Check by trying to
move the gear selector out of PARK with the
brake pedal released. Make sure the trans -
mission is in PARK before exiting the vehicle.
It is dangerous to shift out of PARK or
NEUTRAL (N) if the engine speed is higher
than idle speed. If your foot is not firmly
pressing the brake pedal, the vehicle could
accelerate quickly forward or in reverse.
You could lose control of the vehicle and hit
someone or something. Only shift into gear
when the engine is idling normally and your
foot is firmly pressing the brake pedal.
The vehicle may not engage a newly selected
gear when shifting between PARK, REVERSE
(R), or DRIVE (D) if the vehicle is moving while
shifting.
Unintended movement of a vehicle could
injure those in or near the vehicle. As with all
vehicles, you should never exit a vehicle while
the engine is running. Before exiting a vehicle,
always come to a complete stop, then apply
the parking brake, shift the transmission into
PARK, and turn the ignition OFF. When the
ignition is in the OFF position, the transmis -
sion is locked in PARK, securing the vehicle
against unwanted movement.
When leaving the vehicle, always make sure
the ignition is in the OFF position, remove the
key fob from the vehicle, and lock the vehicle.
WARNING!
Never leave children alone in a vehicle, or with
access to an unlocked vehicle. Allowing chil -
dren to be in a vehicle unattended is
dangerous for a number of reasons. A child or
others could be seriously or fatally injured.
Children should be warned not to touch the
parking brake, brake pedal or the transmis -
sion gear selector.
Do not leave the key fob in or near the vehicle
(or in a location accessible to children), and do
not leave the ignition in the ON/RUN position.
A child could operate power windows, other
controls, or move the vehicle.
CAUTION!
Before moving the transmission gear selector
out of PARK, you must turn the ignition to the
ON/RUN position, and also press the brake
pedal. Otherwise, damage to the gear selector
could result.
DO NOT race the engine when shifting from
PARK or NEUTRAL into another gear range, as
this can damage the drivetrain.
WARNING!
4
22_MP_OM_EN_USC_t.book Page 109
Page 114 of 344
112STARTING AND OPERATING
5. Restart the engine.
6. Shift into the desired gear range. If the problem is no longer detected, the
transmission will return to normal operation.
NOTE:Even if the transmission can be reset, we
recommend that you visit an authorized dealer at
your earliest possible convenience. An authorized
dealer has diagnostic equipment to assess the
condition of your transmission. If the transmission
cannot be reset, authorized dealer service is
required.
TORQUE CONVERTER CLUTCH
A feature designed to improve fuel economy has
been included in the automatic transmission on
your vehicle. A clutch within the torque converter
engages automatically at calibrated speeds. This
may result in a slightly different feeling or response
during normal operation in the upper gears. When
the vehicle speed drops or during some
accelerations, the clutch automatically
disengages.
NOTE:The torque converter clutch will not engage until
the engine and/or transmission is warm (usually
after 1 to 3 miles [2 to 5 km] of driving). Because
the engine speed is higher when the torque
converter clutch is not engaged, it may seem as if the transmission is not shifting properly when the
vehicle is cold. This is normal. The torque converter
clutch will function normally once the powertrain is
sufficiently warm.
FOUR-WHEEL DRIVE OPERATION —
IF EQUIPPED
JEEP® ACTIVE DRIVE
Your vehicle may be equipped with a Power
Transfer Unit (PTU). This system is automatic
with no driver inputs or additional driving skills
required. Under normal driving conditions, the
front wheels provide most of the traction. If the
front wheels begin to lose traction, power is shifted
automatically to the rear wheels. The greater the
front wheel traction loss, the greater the power
transfer to the rear wheels.
Additionally, on dry pavement under heavy throttle
input (where one may have no wheel spin), torque
will be sent to the rear in a preemptive effort to
improve vehicle launch and performance
characteristics.
Four-Wheel Drive (4x4)
The four-wheel drive (4WD) is fully automatic in
normal driving mode.
NOTE:It is not possible to carry out the change of mode
when the vehicle exceeds the speed of 75 mph
(120 km/h).
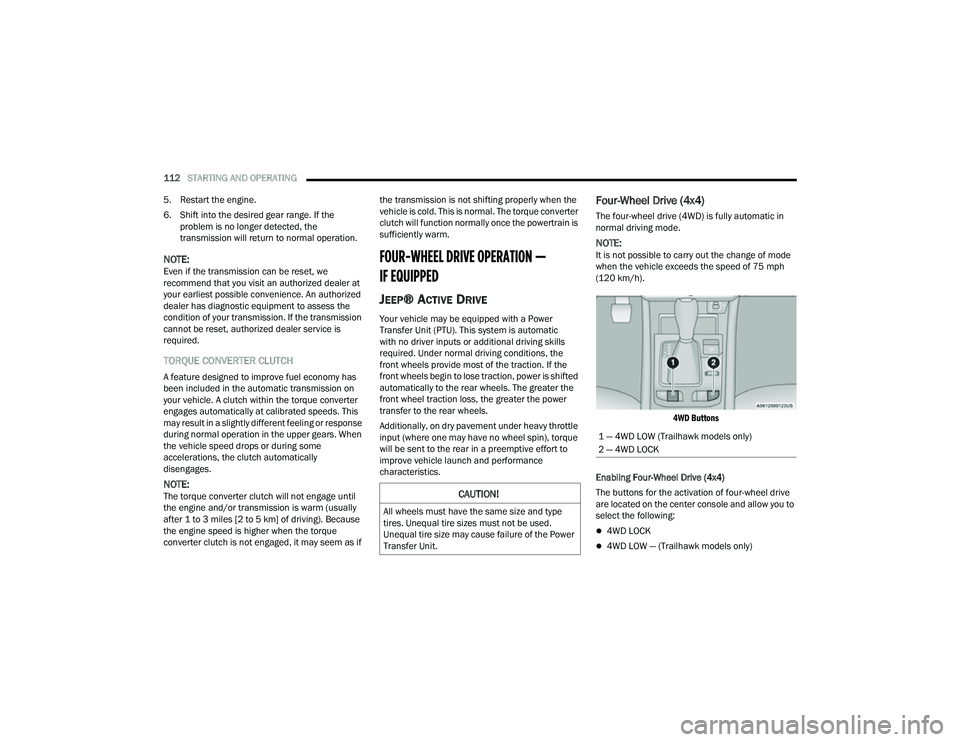
4WD Buttons
Enabling Four-Wheel Drive (4x4)
The buttons for the activation of four-wheel drive
are located on the center console and allow you to
select the following:
4WD LOCK
4WD LOW — (Trailhawk models only)
CAUTION!
All wheels must have the same size and type
tires. Unequal tire sizes must not be used.
Unequal tire size may cause failure of the Power
Transfer Unit.
1 — 4WD LOW (Trailhawk models only)
2 — 4WD LOCK
22_MP_OM_EN_USC_t.book Page 112
Page 122 of 344
120STARTING AND OPERATING
Adaptive Cruise Control (ACC) Menu
The instrument cluster display will show the
current ACC system settings. The information it
displays depends on ACC system status.
Push the Adaptive Cruise Control (ACC) on/off
button until one of the following appears in the
instrument cluster display:
Adaptive Cruise Control Off
When ACC is deactivated, the display will read
“Adaptive Cruise Control Off.”
Adaptive Cruise Control Ready
When ACC is activated, but the vehicle speed
setting has not been selected, the display will read
“Adaptive Cruise Control Ready.”
Adaptive Cruise Control Set
When the SET (+) or the SET (-) button is pushed,
the display will read “ACC SET.”
When ACC is set, the set speed will show in the
instrument cluster display.
The ACC screen may display once again if any of
the following ACC activity occurs:
System Cancel
Driver Override
System Off
ACC Proximity Warning
ACC Unavailable Warning The instrument cluster display will return to the last
display selected after five seconds of no ACC
display activity.
Activating Adaptive Cruise Control (ACC)
The minimum set speed for the ACC system is
20 mph (32 km/h).
When the system is turned on and in the ready
state, the instrument cluster display will read
“ACC Ready.”
When the system is off, the instrument cluster
display will read “Adaptive Cruise Control (ACC)
Off.”
NOTE:You cannot engage ACC under the following condi
-
tions:
When in 4WD Low
When the brakes are applied
When the parking brake is applied
When the automatic transmission is in PARK,
REVERSE or NEUTRAL
When the vehicle speed is below the minimum
speed range
When the brakes are overheated
When the driver’s door is open at low speeds
When the driver’s seat belt is unbuckled at low
speeds
When there is a stationary vehicle in front of
your vehicle in close proximity
When ESC Full Off Mode is active
To Activate/Deactivate
Push and release the Adaptive Cruise Control
(ACC) on/off button. The ACC menu in the
instrument cluster display will read “ACC Ready.”
Then proceed to setting the desired speed as
described in the next section.
To turn the system off, push and release the
Adaptive Cruise Control (ACC) on/off button again.
At this time, the system will turn off and the
instrument cluster display will read “Adaptive
Cruise Control (ACC) Off.” The system will also
turn off during any of the conditions listed in
“To Turn Off” Ú page 121.
WARNING!
Leaving the Adaptive Cruise Control (ACC)
system on when not in use is dangerous. You
could accidentally set the system or cause it to
go faster than you want. You could lose control
and have a collision. Always leave the system off
when you are not using it.
22_MP_OM_EN_USC_t.book Page 120
Page 124 of 344
122STARTING AND OPERATING
To Resume
If there is a set speed in memory, push the RES
(resume) button and remove your foot from the
accelerator pedal. The instrument cluster display
will show the last set speed.
Resume can be used at any speed above 20 mph
(32 km/h) when only Fixed Speed Cruise Control is
being used.
Resume can be used at any speed above 0 mph
(0 km/h) when ACC is active.
NOTE:
If your vehicle is at standstill longer than two
seconds, the driver will either have to push the
RES (resume) button, or apply the accelerator
pedal to reengage the Adaptive Cruise Control
(ACC) to the existing set speed
ACC cannot be resumed if there is a stationary
vehicle in front of your vehicle in close proximity.
To Vary The Speed Setting
To Increase Or Decrease The Set Speed
After setting a speed, you can increase the set
speed by pushing the SET (+) button, or decrease
speed by pushing the SET (-) button.
U.S. Speed (mph)
Pushing the SET (+) , or SET (-) button once will
result in a 1 mph speed adjustment. Each
subsequent tap of the button results in an
adjustment of 1 mph.
If the button is continually pushed, the set
speed will continue to adjust in 5 mph incre -
ments until the button is released. The new set
speed is reflected in the instrument cluster
display.
Metric Speed (km/h)
Pushing the SET (+) , or SET (-) button once will
result in a 1 km/h speed adjustment. Each
subsequent tap of the button results in an
adjustment of 1 km/h.
If the button is continually pushed, the set
speed will continue to adjust in 10 km/h incre -
ments until the button is released. The new set
speed is reflected in the instrument cluster
display.
NOTE:When you override and push the SET (+) button or
SET (-) button, the new set speed will be the current
speed of the vehicle.
When ACC Is Active
When you use the SET (-) button to decelerate, if
the engine’s braking power does not slow the
vehicle sufficiently to reach the set speed, the
brake system will automatically slow the
vehicle.
The ACC system decelerates the vehicle to a full
stop when following the vehicle in front. If your
vehicle follows the vehicle in front to a standstill,
after two seconds the driver will either have to
push the RES (resume) button, or apply the
accelerator pedal to reengage the ACC to the
existing set speed.
The ACC system maintains set speed when
driving uphill and downhill. However, a slight
speed change on moderate hills is normal. In
addition, downshifting may occur while climbing
uphill or descending downhill. This is normal
operation and necessary to maintain set speed.
When driving uphill and downhill, the ACC
system will cancel if the braking temperature
exceeds normal range (overheated).
WARNING!
The Resume function should only be used if
traffic and road conditions permit. Resuming a
set speed that is too high or too low for
prevailing traffic and road conditions could
cause the vehicle to accelerate or decelerate too
sharply for safe operation. Failure to follow these
warnings can result in a collision and death or
serious personal injury.
22_MP_OM_EN_USC_t.book Page 122
Page 125 of 344
STARTING AND OPERATING123
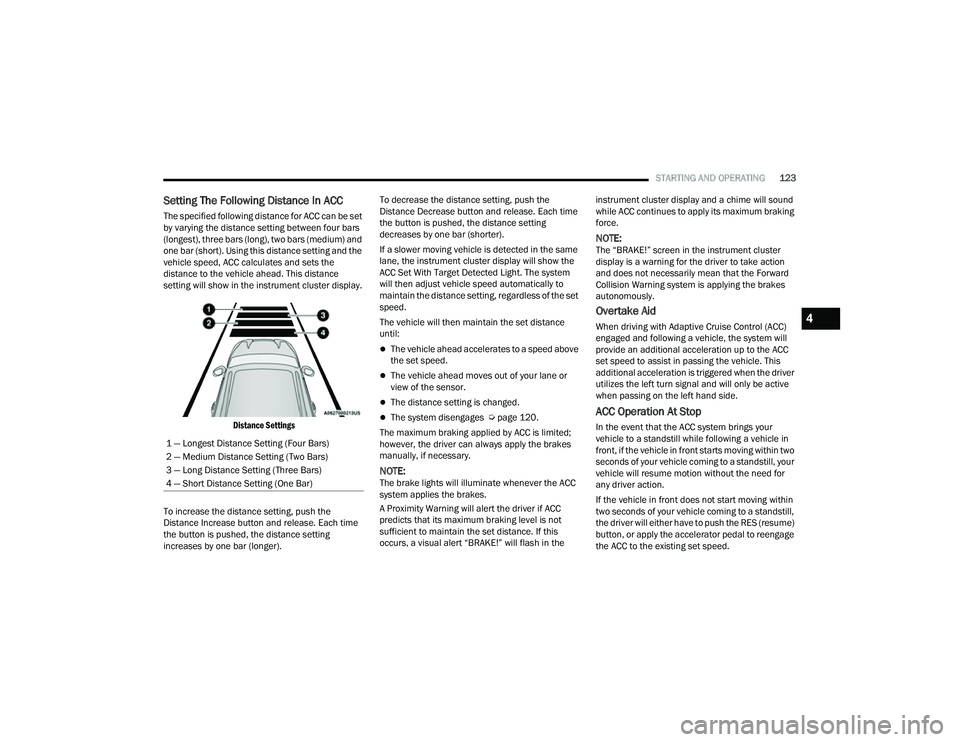
Setting The Following Distance In ACC
The specified following distance for ACC can be set
by varying the distance setting between four bars
(longest), three bars (long), two bars (medium) and
one bar (short). Using this distance setting and the
vehicle speed, ACC calculates and sets the
distance to the vehicle ahead. This distance
setting will show in the instrument cluster display.
Distance Settings
To increase the distance setting, push the
Distance Increase button and release. Each time
the button is pushed, the distance setting
increases by one bar (longer). To decrease the distance setting, push the
Distance Decrease button and release. Each time
the button is pushed, the distance setting
decreases by one bar (shorter).
If a slower moving vehicle is detected in the same
lane, the instrument cluster display will show the
ACC Set With Target Detected Light. The system
will then adjust vehicle speed automatically to
maintain the distance setting, regardless of the set
speed.
The vehicle will then maintain the set distance
until:
The vehicle ahead accelerates to a speed above
the set speed.
The vehicle ahead moves out of your lane or
view of the sensor.
The distance setting is changed.
The system disengages Ú
page 120.
The maximum braking applied by ACC is limited;
however, the driver can always apply the brakes
manually, if necessary.
NOTE:The brake lights will illuminate whenever the ACC
system applies the brakes.
A Proximity Warning will alert the driver if ACC
predicts that its maximum braking level is not
sufficient to maintain the set distance. If this
occurs, a visual alert “BRAKE!” will flash in the instrument cluster display and a chime will sound
while ACC continues to apply its maximum braking
force.
NOTE:The “BRAKE!” screen in the instrument cluster
display is a warning for the driver to take action
and does not necessarily mean that the Forward
Collision Warning system is applying the brakes
autonomously.
Overtake Aid
When driving with Adaptive Cruise Control (ACC)
engaged and following a vehicle, the system will
provide an additional acceleration up to the ACC
set speed to assist in passing the vehicle. This
additional acceleration is triggered when the driver
utilizes the left turn signal and will only be active
when passing on the left hand side.
ACC Operation At Stop
In the event that the ACC system brings your
vehicle to a standstill while following a vehicle in
front, if the vehicle in front starts moving within two
seconds of your vehicle coming to a standstill, your
vehicle will resume motion without the need for
any driver action.
If the vehicle in front does not start moving within
two seconds of your vehicle coming to a standstill,
the driver will either have to push the RES (resume)
button, or apply the accelerator pedal to reengage
the ACC to the existing set speed.
1 — Longest Distance Setting (Four Bars)
2 — Medium Distance Setting (Two Bars)
3 — Long Distance Setting (Three Bars)
4 — Short Distance Setting (One Bar)
4
22_MP_OM_EN_USC_t.book Page 123
Page 126 of 344
124STARTING AND OPERATING
NOTE:After the ACC system holds your vehicle at a stand -
still for approximately three consecutive minutes,
the parking brake will be activated, and the ACC
system will be cancelled.
While ACC is holding your vehicle at a standstill, if
the driver seat belt is unbuckled or the driver door
is opened, the parking brake will be activated, and
the ACC system will be cancelled.
Display Warnings And Maintenance
“WIPE FRONT RADAR SENSOR IN FRONT OF
VEHICLE” WARNING
The “ACC Unavailable Wipe Front Radar Sensor”
warning will display and a chime will sound when
conditions temporarily limit system performance.
This most often occurs at times of poor visibility,
such as in snow or heavy rain. The ACC system may
also become temporarily blinded due to obstructions, such as mud, dirt or ice. In these
cases, the instrument cluster display will display
the above message and the system will deactivate.
This message can sometimes be displayed while
driving in highly reflective areas (i.e. ice and snow,
or tunnels with reflective tiles). The ACC system will
recover after the vehicle has left these areas.
Under rare conditions, when the radar is not
tracking any vehicles or objects in its path this
warning may temporarily occur.
NOTE:If the “ACC Unavailable Wipe Front Radar Sensor”
warning is active, Fixed Speed Cruise Control is still
available.
If weather conditions are not a factor, the driver
should examine the sensor. It may require cleaning
or removal of an obstruction. The sensor is located
in the center of the vehicle behind the lower grille.
To keep the ACC system operating properly, it is
important to note the following maintenance
items:
Always keep the sensor clean. Carefully wipe the
sensor lens with a soft cloth. Be cautious not to
damage the sensor lens.
Do not remove any screws from the sensor.
Doing so could cause an ACC system malfunc
-
tion or failure and require a sensor realignment.
If the sensor or front end of the vehicle is
damaged due to a collision, see an authorized
dealer for service.
Do not attach or install any accessories near the
sensor, including transparent material or after -
market grilles. Doing so could cause an ACC
system failure or malfunction.
When the condition that deactivated the system is
no longer present, the system will return to the
“Adaptive Cruise Control Off” state and will resume
function by simply reactivating it.
NOTE:
If the “ACC Unavailable Wipe Front Radar
Sensor” message occurs frequently (e.g. more
than once on every trip) without any snow, rain,
mud, or other obstruction, have the radar
sensor realigned at an authorized dealer.
Installing a snow plow, front-end protector, an
aftermarket grille or modifying the grille is not
recommended. Doing so may block the sensor
and inhibit ACC operation.
WARNING!
When the ACC system is resumed, the driver
must ensure that there are no pedestrians,
vehicles or objects in the path of the vehicle.
Failure to follow these warnings can result in a
collision and death or serious personal injury.
22_MP_OM_EN_USC_t.book Page 124