key JEEP GLADIATOR 2023 Service Manual
[x] Cancel search | Manufacturer: JEEP, Model Year: 2023, Model line: GLADIATOR, Model: JEEP GLADIATOR 2023Pages: 448, PDF Size: 17.37 MB
Page 225 of 448

MULTIMEDIA223
Doors & Locks
When the Doors & Locks button is pressed on the touchscreen, the system displays the options related to locking and unlocking the vehicle’s doors.
NOTE:Depending on the vehicle’s options, feature settings may vary.
Setting Name Description
Auto Unlock On Exit This setting will unlock the doors when any of the doors are opened from the
inside.
Flash Lights With Lock This setting will allow you to turn the flashing of the lights when the Lock
button is pushed on the key fob on or off.
Sound Horn With Lock This setting will sound the horn when the Lock button is pushed on the key
fob. The “Off” setting will not sound the horn when the Lock button is pushed.
The “1st Press” setting will sound the horn when the Lock button is pushed
once. The “2nd Press” setting will sound the horn when the Lock button is
pushed twice.
Sound Horn With Remote Start This setting will sound the horn when the remote start is activated from the
key fob.
Remote Door Unlock, Door Lock/1st Press Of Key Fob Unlocks This setting will change how many pushes of the Unlock button on the key fob
are needed to unlock all the doors. The “Driver Door” setting will only unlock
the driver door on the first push on the Unlock button. The “All Doors” setting
will unlock all doors with only one push of the Unlock button.
Passive Entry This setting will allow you to turn the Passive Entry feature (Keyless
Enter ‘n Go™) on or off.
Personal Settings Linked To Key Fob This setting will recall preset radio stations and driver seat position that have
been linked to the key fob.
5
23_JT_OM_EN_USC_t.book Page 223
Page 227 of 448

MULTIMEDIA225
Key Off Options/Engine Off Options
When the Key Off Options/Engine Off Options button is pressed on the touchscreen, the system displays the options related to vehicle shutoff. These settings
will only activate when the ignition is set to OFF.
NOTE:Depending on the vehicle’s options, feature settings may vary.
Setting Name Description
Easy Exit Seat This setting adjusts the seats to make exiting the vehicle easier.
Doors On Engine Off Power Delay This setting will keep certain electrical features running after the engine is
turned on. When any door is opened, the electronics will deactivate. The
available settings are “0 sec”, “45 sec”, “5 min”, and “10 min”.
Doors Off Engine Off Power Delay This setting will keep certain electrical features running after the engine is
turned off. When any door is opened, the electronics will deactivate. The
available settings are “0 sec”, “45 sec”, “5 min”, and “10 min”.
Headlight Off Delay This setting will allow you to set the amount of time the headlights remain on
after the vehicle has been turned off. The “+” will increase the amount of
time. The “-” will decrease the amount of time.
Auto Entry/Exit Suspension This setting will automatically lower the vehicle ride height for easier entry and
exit of the vehicle.
5
23_JT_OM_EN_USC_t.book Page 225
Page 242 of 448
240MULTIMEDIA
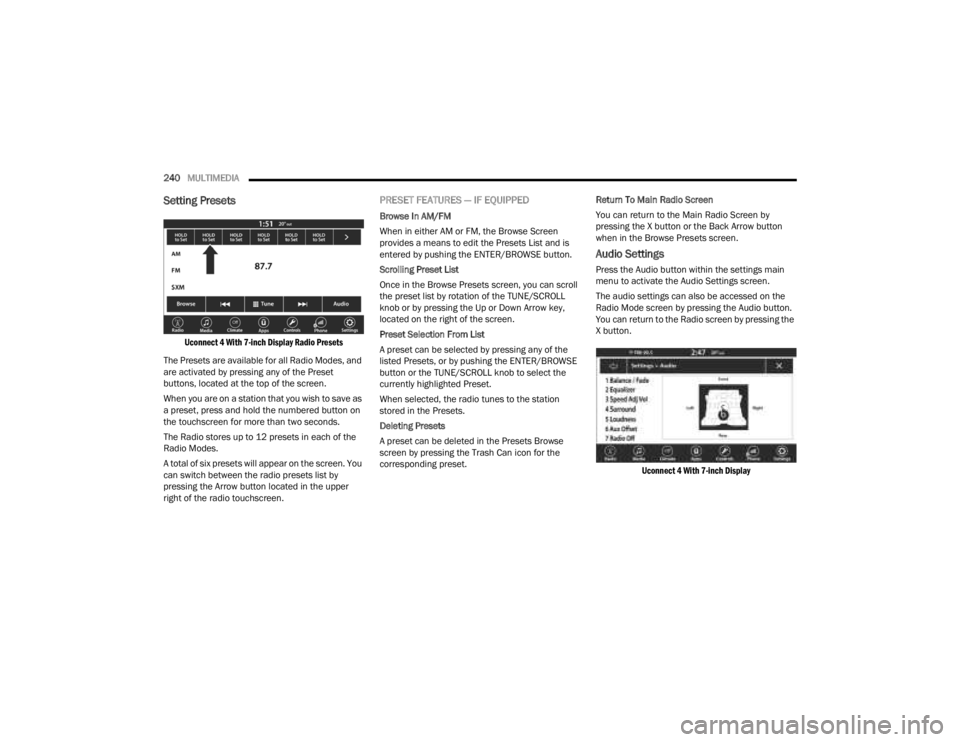
Setting Presets
Uconnect 4 With 7-inch Display Radio Presets
The Presets are available for all Radio Modes, and
are activated by pressing any of the Preset
buttons, located at the top of the screen.
When you are on a station that you wish to save as
a preset, press and hold the numbered button on
the touchscreen for more than two seconds.
The Radio stores up to 12 presets in each of the
Radio Modes.
A total of six presets will appear on the screen. You
can switch between the radio presets list by
pressing the Arrow button located in the upper
right of the radio touchscreen.
PRESET FEATURES — IF EQUIPPED
Browse In AM/FM
When in either AM or FM, the Browse Screen
provides a means to edit the Presets List and is
entered by pushing the ENTER/BROWSE button.
Scrolling Preset List
Once in the Browse Presets screen, you can scroll
the preset list by rotation of the TUNE/SCROLL
knob or by pressing the Up or Down Arrow key,
located on the right of the screen.
Preset Selection From List
A preset can be selected by pressing any of the
listed Presets, or by pushing the ENTER/BROWSE
button or the TUNE/SCROLL knob to select the
currently highlighted Preset.
When selected, the radio tunes to the station
stored in the Presets.
Deleting Presets
A preset can be deleted in the Presets Browse
screen by pressing the Trash Can icon for the
corresponding preset. Return To Main Radio Screen
You can return to the Main Radio Screen by
pressing the X button or the Back Arrow button
when in the Browse Presets screen.
Audio Settings
Press the Audio button within the settings main
menu to activate the Audio Settings screen.
The audio settings can also be accessed on the
Radio Mode screen by pressing the Audio button.
You can return to the Radio screen by pressing the
X button.
Uconnect 4 With 7-inch Display
23_JT_OM_EN_USC_t.book Page 240
Page 246 of 448
244MULTIMEDIA
Info
In USB Mode, press the Info button on the
touchscreen to display the current track
information. Press the Info or X button on the
touchscreen a second time to cancel this feature.
Tracks
In USB Mode, press the Tracks button on the
touchscreen to display a pop-up with the Song List.
The song currently playing is indicated by an arrow
and lines above and below the song title. When in
the Tracks List screen you can rotate the TUNE/
SCROLL knob to highlight a track (indicated by the
line above and below the track name) and then
push the ENTER/BROWSE knob to start playing
that track.
In Bluetooth® Mode, if the Bluetooth® device
supports this feature, press the Tracks button on
the touchscreen to display a pop-up with the Song
List. The currently playing song is indicated by a red
arrow and lines above and below the song title.
Pressing the Tracks button on the touchscreen
while the pop-up is displayed will close the pop-up.
MEDIA VOICE COMMANDS
Uconnect offers connections via USB, Bluetooth®,
and auxiliary (AUX) ports. Voice operation is only
available for connected USB and AUX devices. Push the VR button located on the steering
wheel. After the beep, say one of the following
commands and follow the prompts to switch your
media source or choose an artist:
“
Change source to Bluetooth®”
“Change source to AUX”
“Change source to USB”
“Play artist Beethoven”; “ Play album Greatest
Hits”; “ Play song Moonlight Sonata”; “ Play genre
Classical”
Did You Know: Press the Browse button on the
touchscreen to see all of the music on your USB
device. Your Voice Command must match exactly
how the artist, album, song, and genre information
is displayed.
PHONE MODE
Overview
Uconnect Phone is a voice-activated, hands-free,
in-vehicle communications system. It allows you to
dial a phone number with your mobile phone.
The feature supports the following:
Voice Activated Features
Hands-Free dialing via Voice (“Call John Smith
Mobile” or “Dial 248-555-1212”).
Hands-Free text-to-speech listening of your
incoming SMS messages.
Hands-Free Text Message Replying: Forward
one of 18 predefined SMS messages to
incoming calls/text messages.
Redialing last dialed numbers (“Redial”).
Calling Back the last incoming call number
(“Call Back”).
Viewing call logs on screen (“Show Incoming
Calls,” “Show Outgoing Calls,” “Show Missed
Calls,” or “Show Recent Calls”).
Searching Contacts phone number (“Search for
John Smith Mobile”).
Screen Activated Features
Dialing via Keypad using touchscreen.
Viewing and Calling contacts from Phonebooks
displayed on the touchscreen.
Setting Favorite Contact phone numbers so they
are easily accessible on the Main Phone screen.
Viewing and Calling contacts from Recent Call
logs.
Reviewing your recent Incoming SMS
Messages.
Pairing up to 10 phones/audio devices for easy
access to connect to them quickly.
NOTE:Your phone must be capable of SMS messaging via
Bluetooth® for messaging features to work
properly.
23_JT_OM_EN_USC_t.book Page 244
Page 252 of 448
250MULTIMEDIA
CALL CONTROLS
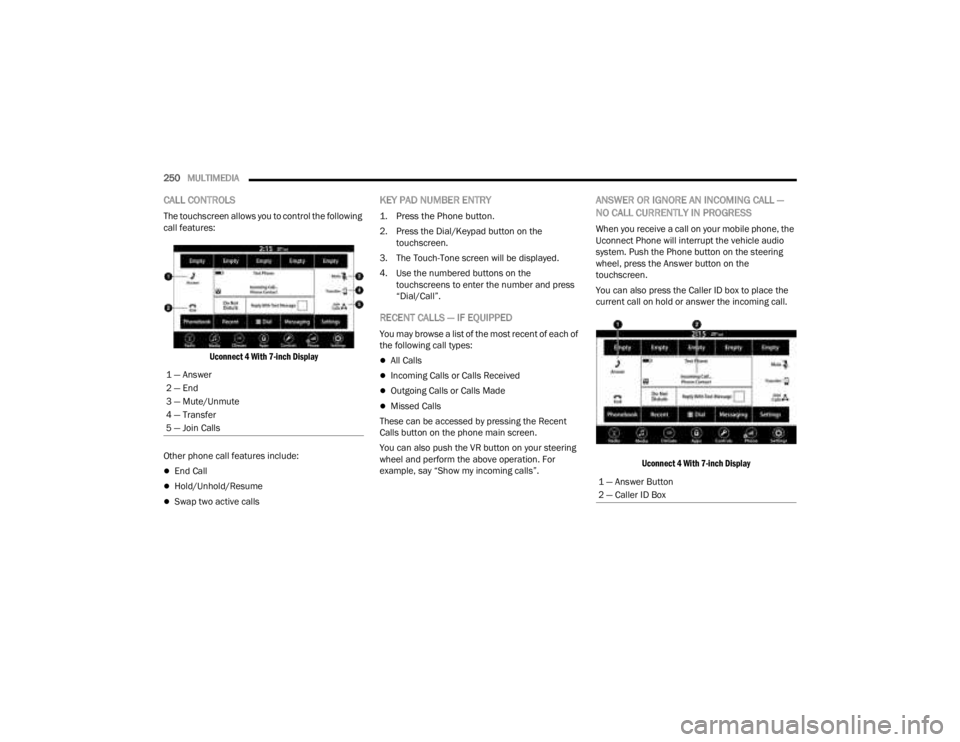
The touchscreen allows you to control the following
call features:
Uconnect 4 With 7-inch Display
Other phone call features include:
End Call
Hold/Unhold/Resume
Swap two active calls
KEY PAD NUMBER ENTRY
1. Press the Phone button.
2. Press the Dial/Keypad button on the touchscreen.
3. The Touch-Tone screen will be displayed.
4. Use the numbered buttons on the touchscreens to enter the number and press
“Dial/Call”.
RECENT CALLS — IF EQUIPPED
You may browse a list of the most recent of each of
the following call types:
All Calls
Incoming Calls or Calls Received
Outgoing Calls or Calls Made
Missed Calls
These can be accessed by pressing the Recent
Calls button on the phone main screen.
You can also push the VR button on your steering
wheel and perform the above operation. For
example, say “Show my incoming calls”.
ANSWER OR IGNORE AN INCOMING CALL —
NO CALL CURRENTLY IN PROGRESS
When you receive a call on your mobile phone, the
Uconnect Phone will interrupt the vehicle audio
system. Push the Phone button on the steering
wheel, press the Answer button on the
touchscreen.
You can also press the Caller ID box to place the
current call on hold or answer the incoming call.
Uconnect 4 With 7-inch Display
1 — Answer
2 — End
3 — Mute/Unmute
4 — Transfer
5 — Join Calls
1 — Answer Button
2 — Caller ID Box
23_JT_OM_EN_USC_t.book Page 250
Page 253 of 448
MULTIMEDIA251
ANSWER OR IGNORE AN INCOMING CALL —
CALL CURRENTLY IN PROGRESS
If a call is currently in progress and you have
another incoming call, you will hear the same
network tones for call waiting that you normally
hear when using your mobile phone. Push the
Phone button on the steering wheel, press the
Answer button on the touchscreen, or press the
Caller ID box to place the current call on hold and
answer the incoming call.
NOTE:Phones that are compatible with the Uconnect
system in the market today do not support
rejecting an incoming call when another call is in
progress. Therefore, the user can only answer an
incoming call or ignore it.
DO NOT DISTURB
With Do Not Disturb, you can disable notifications
from incoming calls and texts, allowing you to keep
your eyes on the road and hands on the wheel. For
your convenience, there is a counter display to
keep track of your missed calls and text messages
while Do Not Disturb is active.
Do Not Disturb can automatically reply with a text
message, a call, or both when declining an
incoming call and send it to voicemail. Automatic reply messages can be:
“I am driving right now, I will get back to you
shortly”.
Create a custom auto reply message up to
160 characters.
NOTE:Only the first 25 characters can be seen on the
touchscreen while typing a custom message.
While in Do Not Disturb, “Conference Call” can be
selected so you can still place a second call
without being interrupted by incoming calls.
NOTE:
Reply with text message is not compatible with
iPhone® devices.
Auto reply with text message is only available on
phones that support Bluetooth® Message
Access Profile (MAP).
PLACE/RETRIEVE A CALL FROM HOLD
During an active call, press the Hold or Call On Hold
button on the Phone main screen.
MAKING A SECOND CALL WHILE CURRENT
CALL IS IN PROGRESS
You can place a call on hold by pressing the Hold
button on the Phone main screen, then dial a
number from the keypad (if supported by your
mobile phone), recent calls, SMS Inbox or from the
phonebooks.
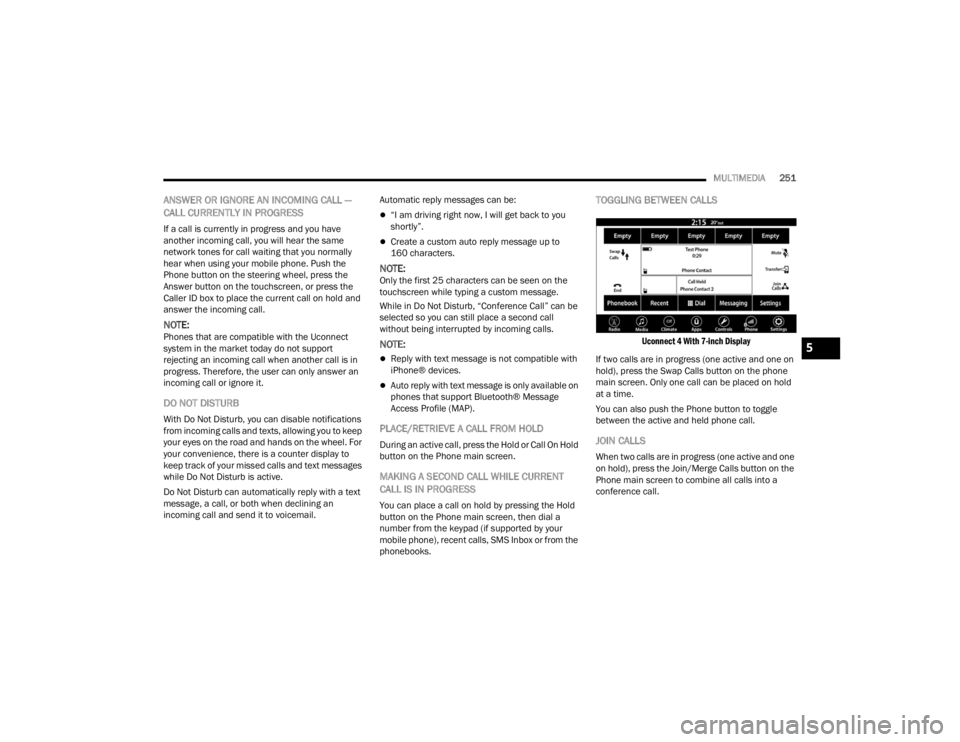
TOGGLING BETWEEN CALLS
Uconnect 4 With 7-inch Display
If two calls are in progress (one active and one on
hold), press the Swap Calls button on the phone
main screen. Only one call can be placed on hold
at a time.
You can also push the Phone button to toggle
between the active and held phone call.
JOIN CALLS
When two calls are in progress (one active and one
on hold), press the Join/Merge Calls button on the
Phone main screen to combine all calls into a
conference call.
5
23_JT_OM_EN_USC_t.book Page 251
Page 256 of 448
254MULTIMEDIA
SIRI® EYES FREE — IF EQUIPPED
When used with your Apple® iPhone® connected
to your vehicle via Bluetooth®, Siri lets you use
your voice to send text messages, select media,
place phone calls and much more. Siri uses your
natural language to understand what you mean
and responds back to confirm your requests. The
system is designed to keep your eyes on the road
and your hands on the wheel by letting Siri help you
perform useful tasks.
To enable Siri, push and hold, then release the
Uconnect Voice Recognition (VR) button on the
steering wheel. After you hear a double beep, you
can ask Siri to play podcasts and music, get
directions, read text messages, and many other
useful requests.
BLUETOOTH® COMMUNICATION LINK
Mobile phones may lose connection to the
Uconnect Phone. When this happens, the
connection can generally be re-established by
restarting the mobile phone. Your mobile phone is
recommended to remain in Bluetooth® ON mode.
POWER-UP
After switching the ignition key from OFF to either
the ON/RUN or ACC position, or after a language
change, you must wait at least 15 seconds prior to
using the system Ú page 432.
ANDROID AUTO™ & APPLE CARPLAY® —
IF EQUIPPED
ANDROID AUTO™
Use this QR code to access your
digital experience.
Android Auto™ is a feature of your
Uconnect system, and your
Android™ 6.0 or higher powered
smartphone with a data plan, that
allows you to project your
smartphone and a number of its apps onto the
touchscreen radio display. Android Auto™ brings
you useful information, and organizes it into simple
cards that appear just when they are needed.
Android Auto™ can be used with speech
technology, the steering wheel controls, the knobs
and buttons on your radio faceplate, and the radio
display’s touchscreen to control many of your
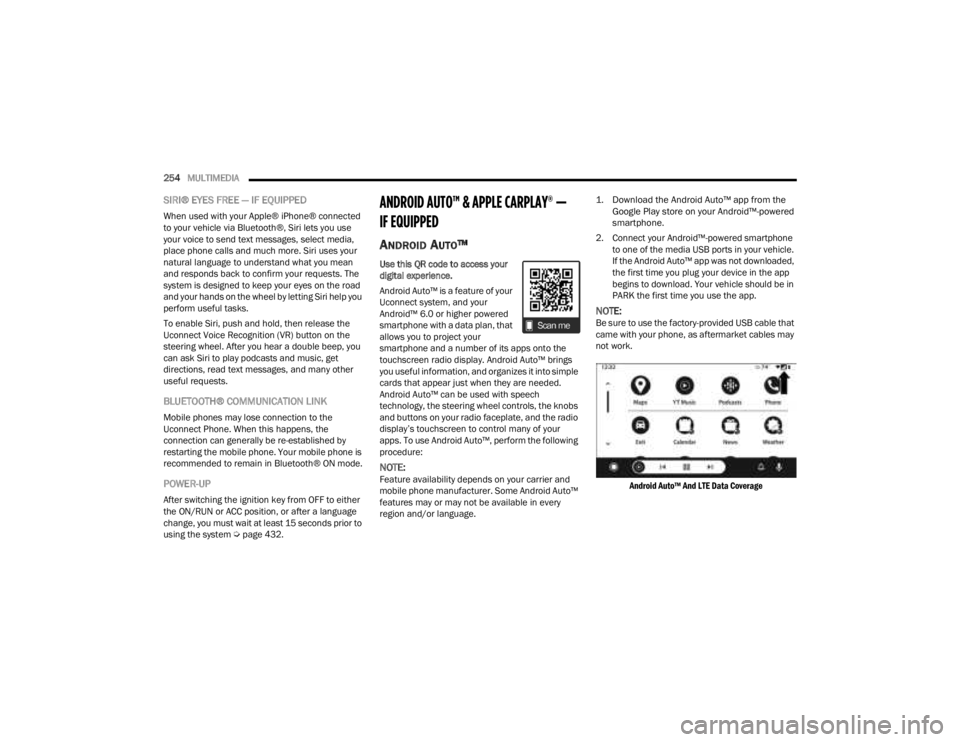
apps. To use Android Auto™, perform the following
procedure:
NOTE:Feature availability depends on your carrier and
mobile phone manufacturer. Some Android Auto™
features may or may not be available in every
region and/or language.
1. Download the Android Auto™ app from the
Google Play store on your Android™-powered
smartphone.
2. Connect your Android™-powered smartphone to one of the media USB ports in your vehicle.
If the Android Auto™ app was not downloaded,
the first time you plug your device in the app
begins to download. Your vehicle should be in
PARK the first time you use the app.
NOTE:Be sure to use the factory-provided USB cable that
came with your phone, as aftermarket cables may
not work.
Android Auto™ And LTE Data Coverage
23_JT_OM_EN_USC_t.book Page 254
Page 262 of 448
260MULTIMEDIA
GETTING STARTED WITH CONNECTED
V
EHICLE SERVICES
Download The Vehicle Branded App
Once you have activated your services, you’re only
a few steps away from using connected services.
Download the Vehicle Branded App to your
mobile device.
Use your Owner Account login and password to
open the app and then set up a PIN.
For customers in the United States, if your
vehicle is not registered at the dealership, you
will have to call the Customer Care call center
from inside your vehicle or press the in-vehicle
registration button. From there, you will be able
to register your vehicle and add your vehicle’s
VIN to your account.
For customers in Canada, register your account
via your vehicle.
a. Press the Apps button in the bottom menu bar.
b. Press the Activate Services button from the apps list.
c. Enter your email and press “OK”. A confir -
mation email will be sent to the provided
email address.
d. Press “Continue Activation” from the confir -
mation email. It may take a short time
before remote services will be available, but
you will be able to log into the Vehicle
Branded App and the Owner’s Site.
Once on the Remote screen and you have set up
your four-digit PIN, you can begin using Remote
Door Lock/Unlock, Remote Vehicle Start, and
activate your horn and lights remotely, if
equipped.
Press the Location button on the bottom menu
bar of the app to bring up a map to locate your
vehicle or send a location to your Mobile Naviga -
tion, if equipped.
Press the Settings side menu in the upper left
corner of the app to bring up app settings and
access the Assist Call Centers.
Using Your Owner’s Site
Your Owner’s Site website https://
www.mopar.com/en-us.html (US Residents), or
www.mopar.ca (Canadian Residents) provides you
with all the information you need, all in one place.
You can track your service history, find
recommended accessories for your vehicle, watch
videos about your vehicle's features, and easily
access your manuals. It is also where you can
manage your SiriusXM Guardian™ account. This
section will familiarize you with the key elements of
the website that will help you get the most of your
SiriusXM Guardian™ connected services.
For customers in the United States, press the Sign
In/Register button and enter your email address
and password.
For customers in Canada, press the My Vehicle
button. Select from “Dashboard”, “Vehicle Health
Report”, and “Recalls”. The website will then
prompt you to log in using your email address and
password.
23_JT_OM_EN_USC_t.book Page 260
Page 264 of 448

262MULTIMEDIA
How It Works
1. Push the SOS Call button; the indicator light will turn green indicating a call has been
placed.
NOTE:
In case the SOS Call button is accidentally
pushed, there is a 10-second delay before
the SOS call is placed. The system will
verbally alert you that a call is about to be
made. To cancel the SOS Call connection,
push the SOS Call button on the rearview
mirror or overhead console or press the
Cancel button on the touchscreen within 10
seconds.
During an SOS Call, the Bluetooth®-paired
phone is disconnected so incoming or
outgoing calls will go through your mobile
device versus the hands-free system which
is not available due to the SOS Call.
2. Once a connection between the vehicle and a SiriusXM Guardian™ Customer Care agent is
made, the agent will stay on the line with you.
NOTE:Calls between the vehicle occupants and the
SiriusXM Guardian™ Customer Care center may be
recorded or monitored for quality assurance
purposes. Through your enrollment in and use of
the SiriusXM Guardian™ connected services, you
consent to being recorded. SOS Call System Limitations
Vehicles that have been purchased in the US and
that travel into Mexico and Canada may have
limited services. In particular, responses to SOS
calls or other emergency services may be
unavailable or very limited. Vehicles purchased
outside the United States and Canada are unable
to receive SiriusXM Guardian™ connected
services.
If the SOS Call system detects a malfunction, any
of the following may occur at the time the
malfunction is detected:
The light will continuously be illuminated red.
The screen will display the following message
“Vehicle phone requires service. Please contact
your dealer.”
An in-vehicle audio message will state “Vehicle
phone requires service. Please contact your
dealer.”
Even if the SOS Call system is fully functional,
factors beyond FCA US LLC’s control may prevent
or stop SOS Call system operation. These include,
but are not limited to, the following factors:
The ignition key is in OFF position.
The vehicle’s electrical systems are not intact.
The vehicle battery loses power or becomes
disconnected during a vehicle crash.
The SOS Call system software and/or hardware
is damaged during a vehicle crash.
LTE (voice/data) or 4G (data) coverage and/or
GPS signals are unavailable or obstructed.
Network congestion.
Weather conditions.
Buildings, structures, geographic terrain, or
tunnels.
If your vehicle loses battery power for any reason
(including during or after an accident), the SOS Call
system, among other vehicle systems, will not
operate.
Requirements
This feature is available only on vehicles sold in
the US or Canada.
Vehicle must be properly equipped with the
SiriusXM Guardian™ connected services.
Vehicle must be registered with SiriusXM
Guardian™ and have an active subscription that
includes the applicable feature.
Vehicle must have an operable LTE (voice/data)
or 4G (data) network connection compatible
with your device.
Vehicle must be powered in the ON/RUN or ACC
(Accessory) position with a properly functioning
electrical system.
23_JT_OM_EN_USC_t.book Page 262
Page 266 of 448

264MULTIMEDIA
In the event vehicle occupants are unable to
speak, emergency services will be dispatched
based on the last known GPS coordinates.
SiriusXM Guardian™ connected services are
dependent upon an operative telematics
device, a cellular connection, navigation map
data, and GPS satellite reception, which can
limit the ability to reach the response center or
reach emergency support.
Terms of service of the Uconnect and the
SiriusXM Guardian™ subscriber agreement
apply. See terms of services for complete
service limitation.
Remote Commands
On the Remote Commands screen, you have
access to several vehicle features that can be
controlled remotely from your mobile device. These
features include locking/unlocking, remote
starting, and activating the horn and lights of the
vehicle. Remote Commands lets you send a request to your
vehicle in one of three ways:
Anywhere using your mobile device and Vehicle
Branded App
From your computer on the Owner’s Site (not
available on all functions)
Contacting SiriusXM Guardian™ Customer Care
(not available on all functions)
Using A Remote Command Through Your Mobile
Device And The Vehicle Branded App
1. Press the desired Remote Command icon on your mobile device.
2. A pop-up screen will appear asking for your SiriusXM Guardian™ Security PIN (this is the
same four-digit code established when you
activated your SiriusXM Guardian™ connected
services). Enter the SiriusXM Guardian™
Security PIN on the keypad.
3. It may take 30 seconds or more for the command to go through to your vehicle.
4. A message will let you know if the command was received by your vehicle. Using A Remote Command Through Your Owner’s
Site
1. Log on to your Owner’s Site using the username and password you used when
activating your SiriusXM Guardian™
connected services in your vehicle.
NOTE:If you forgot your username or password, links are
provided on the website to help you retrieve them.
2. If you have more than one vehicle registered into your Owner’s Site, select the vehicle you
want to send the command to by clicking on its
image along the top.
3. On your dashboard, you will see remote commands. Press the desired icon to activate
that feature.
4. You will then be asked to enter your SiriusXM Guardian™ Security PIN (this is the same
four-digit code established when you activated
your SiriusXM Guardian™ connected services).
Please enter your SiriusXM Guardian™
Security PIN.
5. A message will appear on the screen to let you know if the command was received by your
vehicle.
Lock
Press this button to
lock your vehicle.
Vehicle Start Press this button to
start your vehicle.
Horn & Lights Press this button to
sound the horn and activate your lights.
Unlock Press this button to
unlock your vehicle.
Cancel Vehicle Start Press this button to
cancel remote start.
23_JT_OM_EN_USC_t.book Page 264