JEEP GRAND CHEROKEE 2004 WK / 3.G Owners Manual
Manufacturer: JEEP, Model Year: 2004, Model line: GRAND CHEROKEE, Model: JEEP GRAND CHEROKEE 2004 WK / 3.GPages: 344, PDF Size: 6.09 MB
Page 151 of 344
Disc Up/Program Button 1
Press the DISC (button 1) button to play the next avail-
able disc.
Random Play Ð RND/Program Button 4
Press the RND (button 4) button while the CD is playing
to activate Random Play. This feature plays the selections
on the currently playing compact disc in random order to
provide an interesting change of pace.
Press the top of the SEEK button to move to the next
randomly selected track.
Press the RND (button 4) button a second time to stop
Random Play.
FF/RW Ð TUNE
Press and hold the FF button for fast forward. Press and
hold the RW button for fast reverse. The audio output can
be heard when fast forward and fast reverse are acti-
vated.
Disc Down/Program Button 5
Press the DISC (button 5) button to play the previous
disc.
Seek
Press the top of the SEEK button for the next selection on
the CD. Press the bottom of the button to return to the
beginning of the current selection, or return to the
beginning of the previous selection if the CD is within the
first second of the current selection.
Time
Press the TIME button to switch between time of day and
CD track time.
Scan
Press the SCAN button to play 10 seconds of each track.
Press the SCAN button a second time to cancel the
feature.
UNDERSTANDING YOUR INSTRUMENT PANEL 151
4
Page 152 of 344

SALES CODE RB1ÐAM/FM STEREO RADIO
WITH DVD/GPS NAVIGATION SYSTEM
The navigation system provides maps, turn identifica-
tion, selection menus and instructions for selecting a
variety of destinations and routes. Refer to your ªNavi-
gation User's Manualº for detailed operating instruc-
tions.
SATELLITE RADIO Ð IF EQUIPPED
Satellite radio uses direct satellite to receiver broadcast-
ing technology to provide clear digital sound, coast to
coast. The subscription service provider is SiriusŸ Satel-
lite Radio. This service offers up to 100 channels of music,
sports, news, entertainment, and programming for chil-
dren, directly from its satellites and broadcasting studios.
System Activation
To activate your Sirius Satellite Radio service, call the
toll-free number 888-539-7474, or visit the Sirius web site
at www.sirius.com. Please have the following informa-
tion available when activating your system:
1. The Electronic Serial Number/Sirius Identification
Number (ESN/SID).
2. Credit card information.
3. Your Vehicle Identification Number.
152 UNDERSTANDING YOUR INSTRUMENT PANEL
Page 153 of 344
Electronic Serial Number/Sirius Identification
Number (ENS/SID)
The Electronic Serial Number/Sirius Identification Num-
ber is needed to activate your Sirius Satellite Radio
system. To access the ESN/SID, refer to the following
steps:
ESN/SID Access With RBB and RBK Radios
With the ignition switch in the ACCESSORY position and
the radio OFF, press the Tape Eject or CD Eject (depend-
ing on the radio type) and Time buttons simultaneously
for 3 seconds. The first four digits of the twelve-digit
ESN/SID number will be displayed. Press the SEEK UP
button to display the next four digits. Continue to press
the SEEK UP button until all twelve ESN/SID digits have
been displayed. The SEEK DOWN will page down until
the first four digits are displayed. The radio will exit the
ESN/SID mode when any other button is pushed, the
ignition is turned OFF, or 5 minutes has passed since any
button was pushed.
ESN/SID Access With RBP, RBU, RAZ, and RBQ
Radios
With the ignition switch in the ACCESSORY position and
the radio OFF, press the CD Eject and TIME buttons
simultaneously for 3 seconds. All twelve ESN/SID num-
bers will be displayed. The radio will exit the ESN/SID
mode when any other button is pushed, the ignition is
turned OFF, or 5 minutes has passed since any button
was pushed.
Selecting Satellite Mode in RBB and RBK Radios
Press the MODE button repeatedly until9SA9appears in
the display. A CD or tape may remain in the radio while
in the Satellite radio mode.
UNDERSTANDING YOUR INSTRUMENT PANEL 153
4
Page 154 of 344

Selecting Satellite Mode in RBP, RBU, RAZ, and
RBQ Radios
Press the MODE button repeatedly until the word
9SIRIUS9appears in the display. These radios will also
display the following:
²After 3 seconds, the current channel name and channel
number will be displayed for 5 seconds.
²The current program type and channel number will
then be displayed for 5 seconds.
²The current channel number will then be displayed
until an action occurs.
A CD or tape may remain in the radio while in the
Satellite radio mode.
Selecting a Channel
Press and release the SEEK or TUNE buttons to search for
the next channel. Press the top of the button to search up
and the bottom of the button to search down. Holding the
TUNE button causes the radio to bypass channels until
the button is released.
Press and release the SCAN button (if equipped) to
automatically change channels every 7 seconds. The
radio will pause on each channel for 7 seconds before
moving on to the next channel. The word9SCAN9will
appear in the display between each channel change. Press
the SCAN button a second time to stop the search.
NOTE:Channels that may contain objectionable content
can be blocked. Contact Sirius Customer Care at 888-539-
7474 to discuss options for channel blocking or unblock-
ing. Please have your ESN/SID information available.
154 UNDERSTANDING YOUR INSTRUMENT PANEL
Page 155 of 344
Storing and Selecting Pre-Set Channels
In addition to the 10 AM and 10 FM pre-set stations, you
may also commit 10 satellite stations to push button
memory. These satellite channel pre-set stations will not
erase any AM or FM pre-set memory stations. Follow the
memory pre-set procedures that apply to your radio.
Using the PTY (Program Type) Button (if
equipped)
Follow the PTY button instructions that apply to your
radio.
PTY Button(SCAN(
When the desired program type is obtained, press the
9SCAN9button within five seconds. The radio will play 7
seconds of the selected channel before moving to the next
channel of the selected program type. Press the9SCAN9
button a second time to stop the search.NOTE:Pressing the9SEEK9or9SCAN9button while
performing a music type scan will change the channel by
one and stop the search. Pressing a pre-set memory
button during a music type scan, will call up the memory
channel and stop the search.
PTY Button(SEEK(
When the desired program is obtained, press the9SEEK9
button within five seconds. The channel will change to
the next channel that matches the program type selected.
Satellite Antenna
To ensure optimum reception, do not place items on the
roof around the rooftop antenna location. Metal objects
placed within the line of sight of the antenna will cause
decreased performance. Larger luggage items should be
placed as far forward as possible. Do not place items
directly on or above the antenna.
UNDERSTANDING YOUR INSTRUMENT PANEL 155
4
Page 156 of 344

Reception Quality
Satellite reception may be interrupted due to one of the
following reasons.
²The vehicle is parked in an underground parking
structure or under a physical obstacle.
²Dense tree coverage may interrupt reception in the
form of short audio mutes.
²Driving under wide bridges or along tall buildings can
cause intermittent reception.
²Placing objects over or too close to the antenna can
cause signal blockage.
10±DISC REMOTE CD CHANGER
Loading the CD Changer
Removing the CD Changer Magazine
NOTE:Always keep the CD changer door closed except
when ejecting or installing the magazines. The door is
designed to keep dust, dirt, and foreign objects out of the
CD changer. Handle the magazine with reasonable care.
The magazine may crack if dropped or knocked against a
hard surface.
156 UNDERSTANDING YOUR INSTRUMENT PANEL
Page 157 of 344
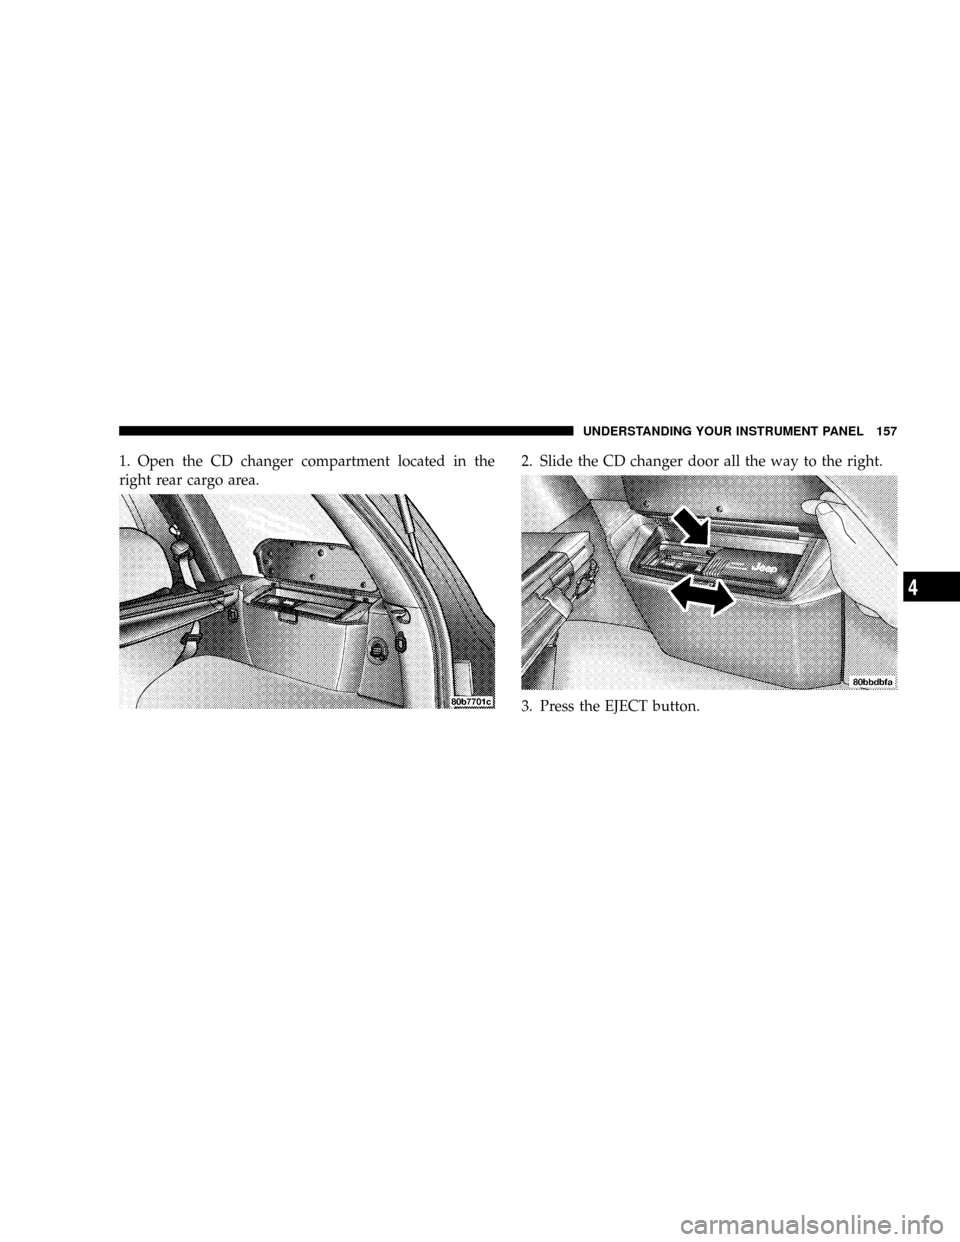
1. Open the CD changer compartment located in the
right rear cargo area.2. Slide the CD changer door all the way to the right.
3. Press the EJECT button.
UNDERSTANDING YOUR INSTRUMENT PANEL 157
4
Page 158 of 344

4. Gently remove the magazine by pulling it up and out
of the CD changer.
5. Close the CD changer door by sliding it to the left.Loading Discs into the Magazine
Gently slide the discs into the magazine with the disc
label in the direction indicated on the magazine label (up
to 10 discs). If the discs are installed upside down ªCD
Errº will be displayed on the radio.
158 UNDERSTANDING YOUR INSTRUMENT PANEL
Page 159 of 344
NOTE:Do not use 3 inch (8 cm) discs in the magazine.
If a CD adaptor for 3 inch (8 cm) discs is used, the disc
will not be ejected.
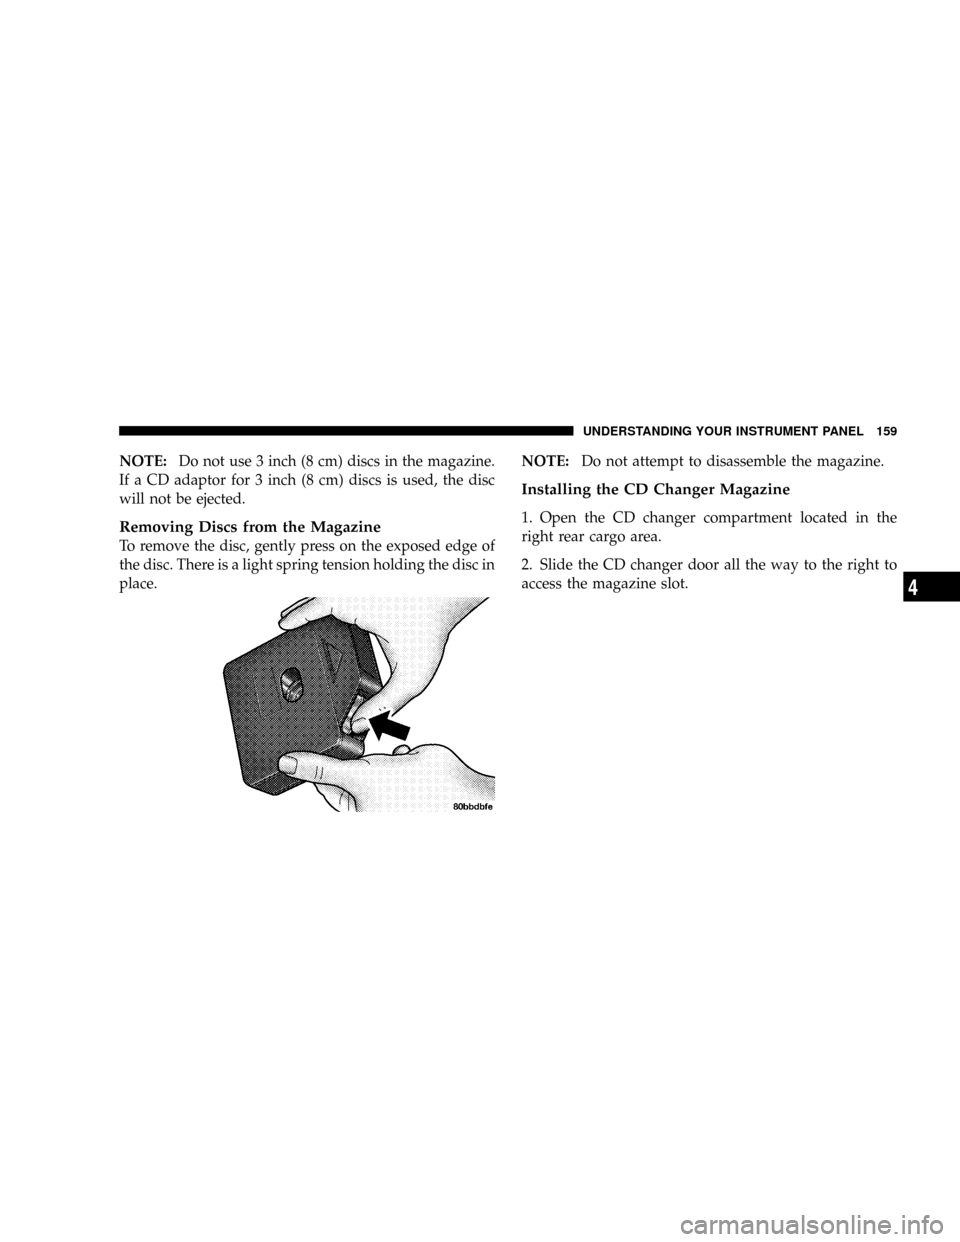
Removing Discs from the Magazine
To remove the disc, gently press on the exposed edge of
the disc. There is a light spring tension holding the disc in
place.NOTE:Do not attempt to disassemble the magazine.
Installing the CD Changer Magazine
1. Open the CD changer compartment located in the
right rear cargo area.
2. Slide the CD changer door all the way to the right to
access the magazine slot.
UNDERSTANDING YOUR INSTRUMENT PANEL 159
4
Page 160 of 344

3. Insert the magazine into the changer slot with the
writing on the magazine label facing in the same direc-
tion as the wordJeepton the changer door (disc loading
slots facing to the right).
4. Slide the changer door to the left to close the changer
door.REMOTE SOUND SYSTEM CONTROLS Ð IF
EQUIPPED
The remote sound system controls are located on the rear
surface of the steering wheel. Reach behind the wheel to
access the switches.
The right hand control is a rocker type switch with a
push-button in the center and controls the volume and
160 UNDERSTANDING YOUR INSTRUMENT PANEL