fog light JEEP GRAND CHEROKEE 2012 Owner handbook (in English)
[x] Cancel search | Manufacturer: JEEP, Model Year: 2012, Model line: GRAND CHEROKEE, Model: JEEP GRAND CHEROKEE 2012Pages: 380, PDF Size: 3.21 MB
Page 65 of 380
•DRIVER MEMORY SEAT — IF EQUIPPED ............ 101
• Setting Memory Positions And Linking Remote Keyless
Entry Transmitter To Memory ................. 102
• Memory Position Recall .................... 103
• To Disable A RKE Transmitter Linked To Memory ..... 103
• Easy Entry/Exit Seat ...................... 103
• TO OPEN AND CLOSE THE HOOD ................ 104
• LIGHTS ................................ 105
• Headlight Switch ........................ 105
• Automatic Headlights — If Equipped ............ 105
• Headlights On Automatically With Wipers ......... 106
• SmartBeam™ — If Equipped ................. 106
• Daytime Running Lights — If Equipped ........... 107
• Automatic Headlight Leveling — HID Headlights Only . . 107
• Headlight Delay ......................... 107
• Parking Lights and Panel Lights ............... 108
• Front And Rear Fog Lights — If Equipped ......... 108
• Interior Lights .......................... 108
• Lights-On Reminder ...................... 109
• Battery Saver .......................... 109
• Front Map/Reading Lights ................... 109
• Ambient Light .......................... 110
61
Page 109 of 380
WARNING!
Be sure the hood is fully latched before driving
your vehicle. If the hood is not fully latched, it
could open when the vehicle is in motion and
block your vision. Failure to follow this warn-
ing could result in serious injury or death.
LIGHTS
Headlight Switch
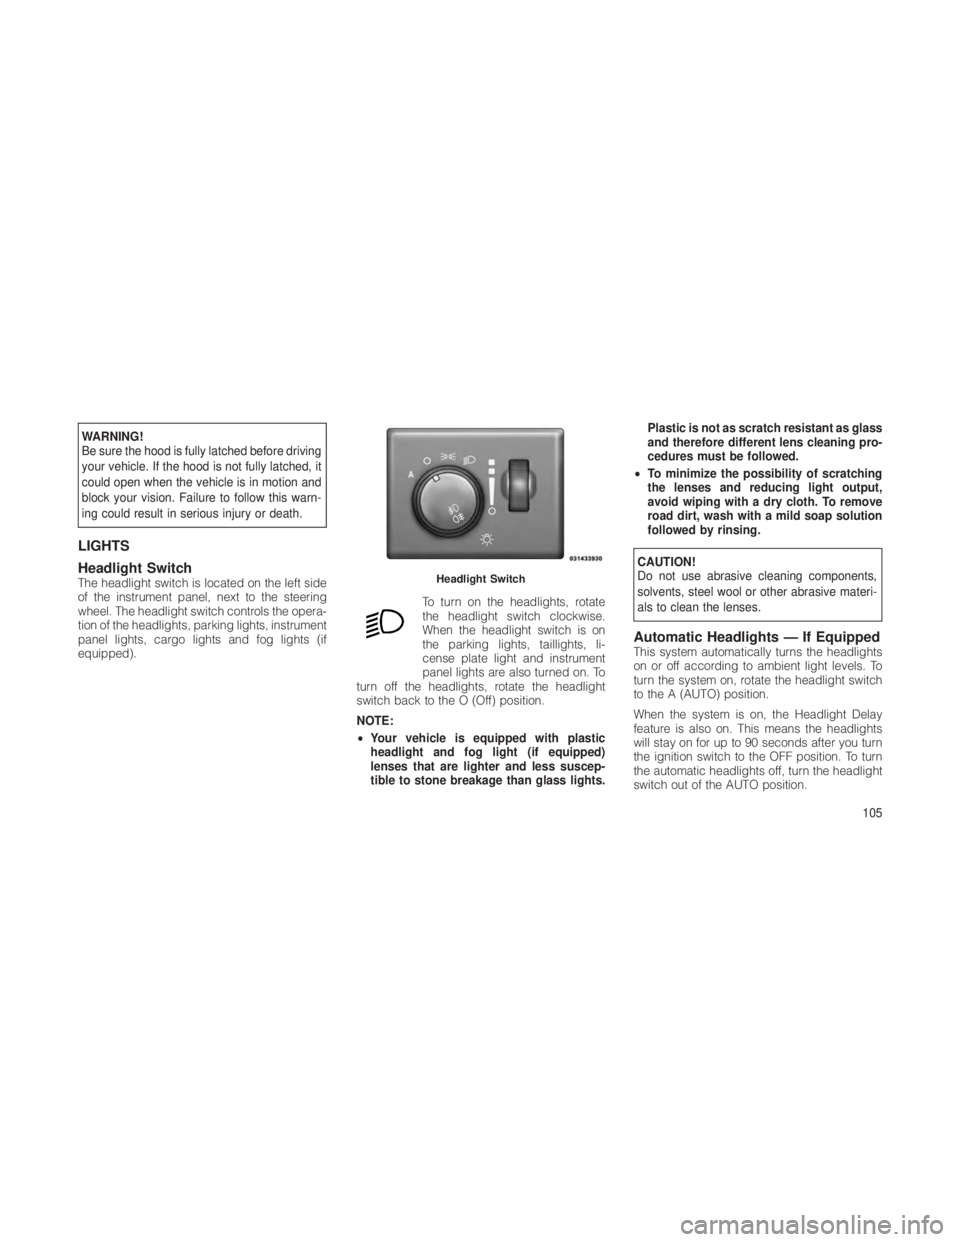
The headlight switch is located on the left side
of the instrument panel, next to the steering
wheel. The headlight switch controls the opera-
tion of the headlights, parking lights, instrument
panel lights, cargo lights and fog lights (if
equipped).To turn on the headlights, rotate
the headlight switch clockwise.
When the headlight switch is on
the parking lights, taillights, li-
cense plate light and instrument
panel lights are also turned on. To
turn off the headlights, rotate the headlight
switch back to the O (Off) position.
NOTE:
• Your vehicle is equipped with plastic
headlight and fog light (if equipped)
lenses that are lighter and less suscep-
tible to stone breakage than glass lights. Plastic is not as scratch resistant as glass
and therefore different lens cleaning pro-
cedures must be followed.
• To minimize the possibility of scratching
the lenses and reducing light output,
avoid wiping with a dry cloth. To remove
road dirt, wash with a mild soap solution
followed by rinsing.
CAUTION!
Do not use abrasive cleaning components,
solvents, steel wool or other abrasive materi-
als to clean the lenses.
Automatic Headlights — If EquippedThis system automatically turns the headlights
on or off according to ambient light levels. To
turn the system on, rotate the headlight switch
to the A (AUTO) position.
When the system is on, the Headlight Delay
feature is also on. This means the headlights
will stay on for up to 90 seconds after you turn
the ignition switch to the OFF position. To turn
the automatic headlights off, turn the headlight
switch out of the AUTO position.
Headlight Switch
105
Page 112 of 380
initiated when the ignition is turned OFF while
the headlight switch is on, and then the head-
light switch is cycled off. Headlight delay can
be cancelled by either turning the headlight
switch on then off, or by turning the ignition ON.
The headlight delay time is programmable on
vehicles equipped with an Electronic Vehicle
Information Center (EVIC). Refer to “Electronic
Vehicle Information Center (EVIC)/Customer-
Programmable Features” in “Understanding
Your Instrument Panel” for further information.
Parking Lights and Panel Lights
To turn on the parking lights and instru-
ment panel lights, rotate the headlight
switch clockwise. To turn off the park-
ing lights, rotate the headlight switch back to
the O (Off) position.
Front And Rear Fog Lights — If
Equipped
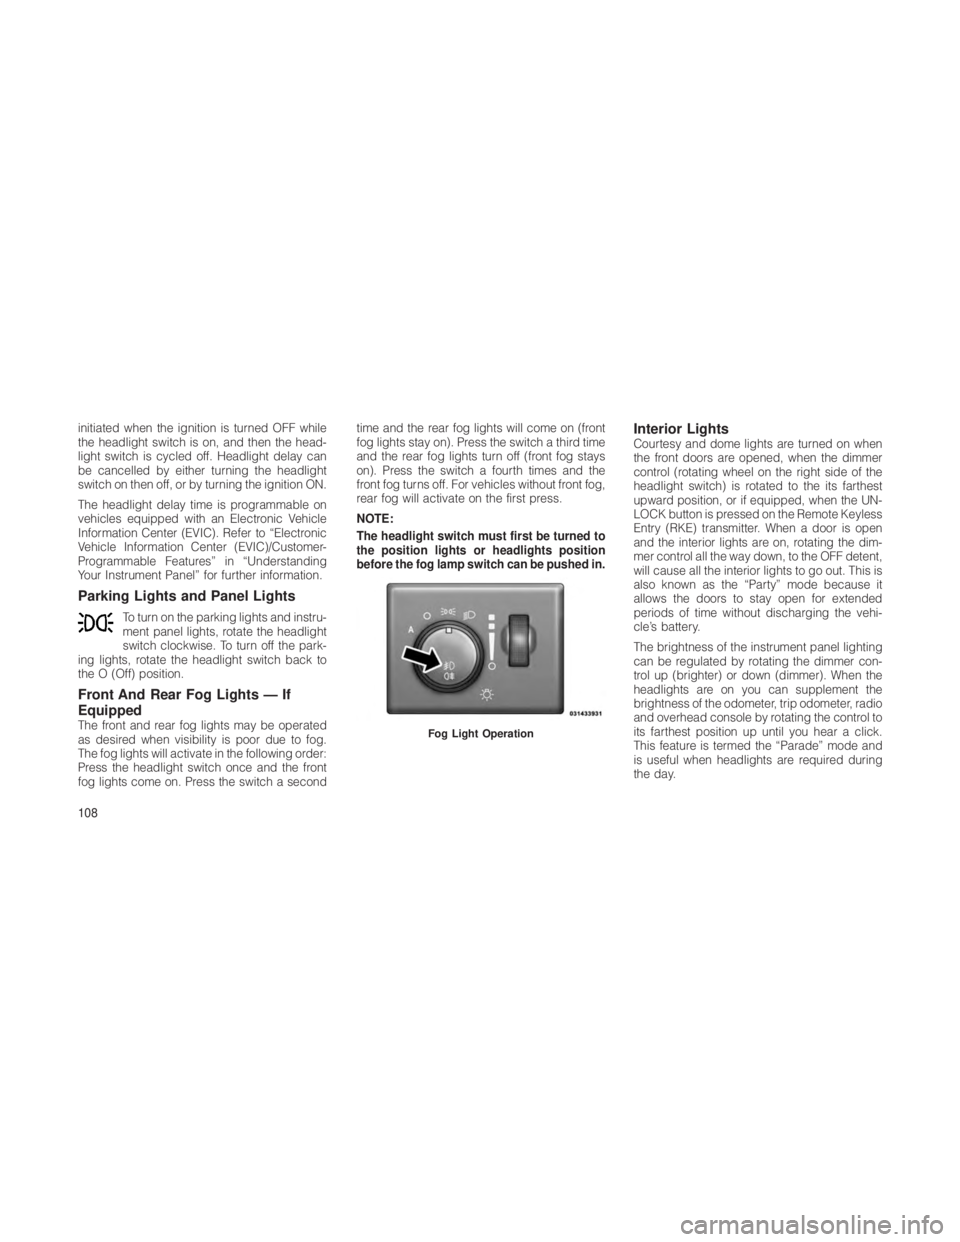
The front and rear fog lights may be operated
as desired when visibility is poor due to fog.
The fog lights will activate in the following order:
Press the headlight switch once and the front
fog lights come on. Press the switch a second time and the rear fog lights will come on (front
fog lights stay on). Press the switch a third time
and the rear fog lights turn off (front fog stays
on). Press the switch a fourth times and the
front fog turns off. For vehicles without front fog,
rear fog will activate on the first press.
NOTE:
The headlight switch must first be turned to
the position lights or headlights position
before the fog lamp switch can be pushed in.
Interior LightsCourtesy and dome lights are turned on when
the front doors are opened, when the dimmer
control (rotating wheel on the right side of the
headlight switch) is rotated to the its farthest
upward position, or if equipped, when the UN-
LOCK button is pressed on the Remote Keyless
Entry (RKE) transmitter. When a door is open
and the interior lights are on, rotating the dim-
mer control all the way down, to the OFF detent,
will cause all the interior lights to go out. This is
also known as the “Party” mode because it
allows the doors to stay open for extended
periods of time without discharging the vehi-
cle’s battery.
The brightness of the instrument panel lighting
can be regulated by rotating the dimmer con-
trol up (brighter) or down (dimmer). When the
headlights are on you can supplement the
brightness of the odometer, trip odometer, radio
and overhead console by rotating the control to
its farthest position up until you hear a click.
This feature is termed the “Parade” mode and
is useful when headlights are required during
the day.
Fog Light Operation
108
Page 164 of 380
than 30 mph (48 km/h), see your authorized
dealer as soon as possible to have the problem
diagnosed and corrected.
NOTE:
•The “ESC Off Indicator Light” and the
“ESC Activation/Malfunction Indicator
Light” come on momentarily each time
the ignition switch is turned to ON/RUN.
• Each time the ignition is turned to ON/
RUN, the ESC system will be ON, even if it
was turned off previously.
• The ESC system will make buzzing or
clicking sounds when it is active. This is
normal; the sounds will stop when ESC
becomes inactive following the maneuver
that caused the ESC activation.
5. TOW/HAUL Indicator Light — If
Equipped This light will illuminate when the
TOW/HAUL button has been se-
lected. The TOW/HAUL button is
located in the center of the instru-
ment panel (below the climate
controls). 6. Turn Signal Indicator
The arrows will flash with the exterior turn
signals when the turn signal lever is op-
erated. A tone will chime, and an EVIC
message will appear if the turn signals are left
on for more than 1 mile (1.6 km).
NOTE:
Check for an inoperative outside light bulb if
either indicator flashes at a rapid rate.
7. High Beam Indicator Indicates that headlights are on high
beam.
8. Front Fog Light Indicator — If Equipped This indicator will illuminate when the
front fog lights are on.
9. Hill Descent Control Indicator Light — If
Equipped The symbol indicates the status of
the Hill Decent Control (HDC) fea-
ture. The lamp will be on solid
when HDC is armed. HDC can
only be armed when the transfer
case is in the “4WD Low” position and the vehicle speed is less then 30 mph
(48 km/h). If these conditions are not met while
attempting to use the HDC feature, the HDC
indicator lamp will flash on/off.
10. Electronic Vehicle Information Center
(EVIC) Display/Odometer Display
The odometer display shows the total distance
the vehicle has been driven.
When the appropriate conditions exist, this
display shows the Electronic Vehicle Informa-
tion Center (EVIC) messages. Refer to “Elec-
tronic Vehicle Information Center”.
11. Tire Pressure Monitoring Telltale Light
Each tire, including the spare (if
provided), should be checked
monthly when cold and inflated to
the inflation pressure recom-
mended by the vehicle manufac-
turer on the vehicle placard or tire
inflation pressure label. (If your vehicle has tires
of a different size than the size indicated on the
vehicle placard or tire inflation pressure label,
you should determine the proper tire inflation
pressure for those tires.)
160
Page 168 of 380
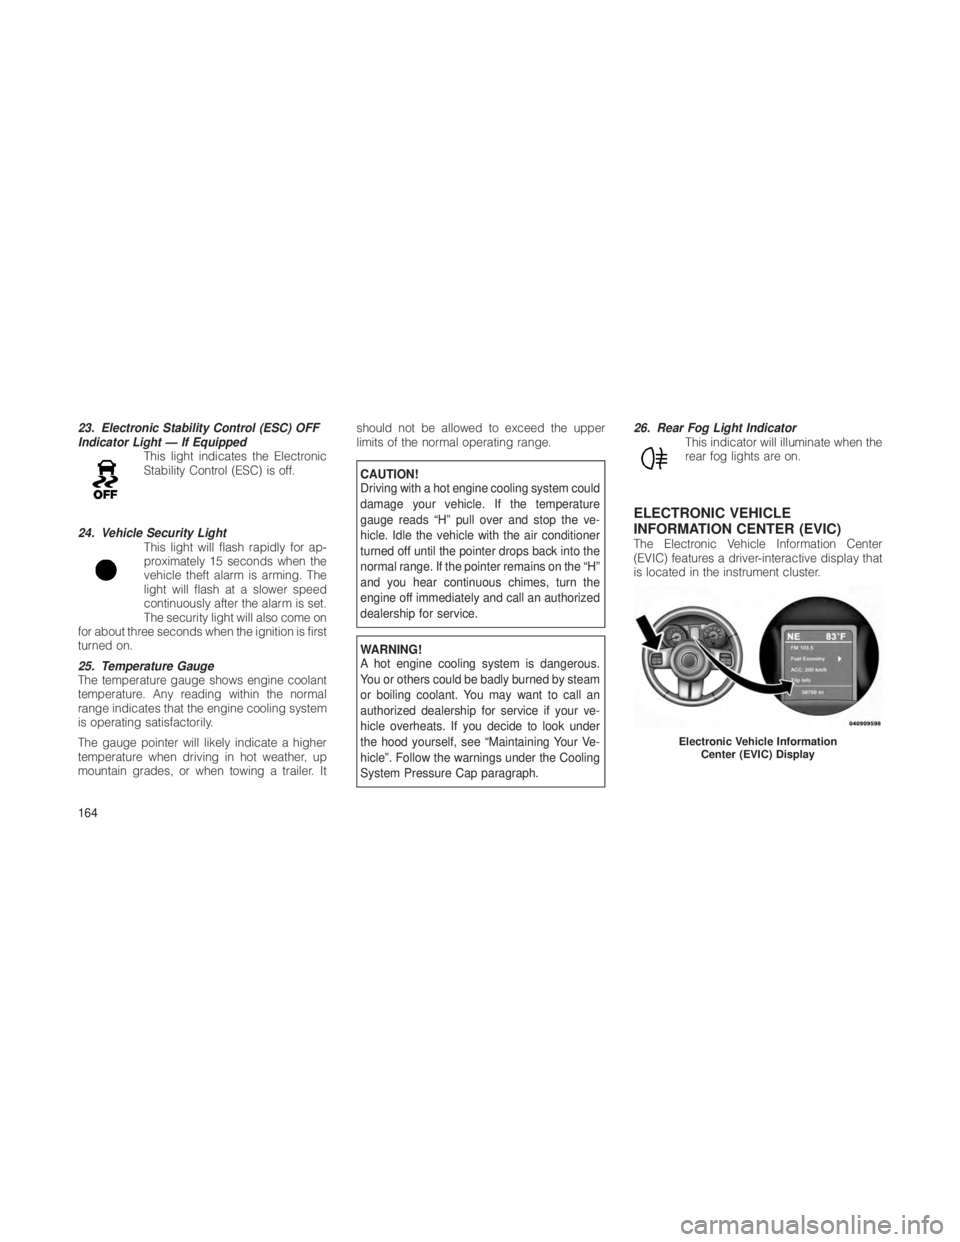
23. Electronic Stability Control (ESC) OFF
Indicator Light — If EquippedThis light indicates the Electronic
Stability Control (ESC) is off.
24. Vehicle Security Light This light will flash rapidly for ap-
proximately 15 seconds when the
vehicle theft alarm is arming. The
light will flash at a slower speed
continuously after the alarm is set.
The security light will also come on
for about three seconds when the ignition is first
turned on.
25. Temperature Gauge
The temperature gauge shows engine coolant
temperature. Any reading within the normal
range indicates that the engine cooling system
is operating satisfactorily.
The gauge pointer will likely indicate a higher
temperature when driving in hot weather, up
mountain grades, or when towing a trailer. It should not be allowed to exceed the upper
limits of the normal operating range.
CAUTION!
Driving with a hot engine cooling system could
damage your vehicle. If the temperature
gauge reads “H” pull over and stop the ve-
hicle. Idle the vehicle with the air conditioner
turned off until the pointer drops back into the
normal range. If the pointer remains on the “H”
and you hear continuous chimes, turn the
engine off immediately and call an authorized
dealership for service.
WARNING!
A hot engine cooling system is dangerous.
You or others could be badly burned by steam
or boiling coolant. You may want to call an
authorized dealership for service if your ve-
hicle overheats. If you decide to look under
the hood yourself, see “Maintaining Your Ve-
hicle”. Follow the warnings under the Cooling
System Pressure Cap paragraph.26. Rear Fog Light Indicator
This indicator will illuminate when the
rear fog lights are on.
ELECTRONIC VEHICLE
INFORMATION CENTER (EVIC)
The Electronic Vehicle Information Center
(EVIC) features a driver-interactive display that
is located in the instrument cluster.
Electronic Vehicle Information
Center (EVIC) Display
164
Page 277 of 380
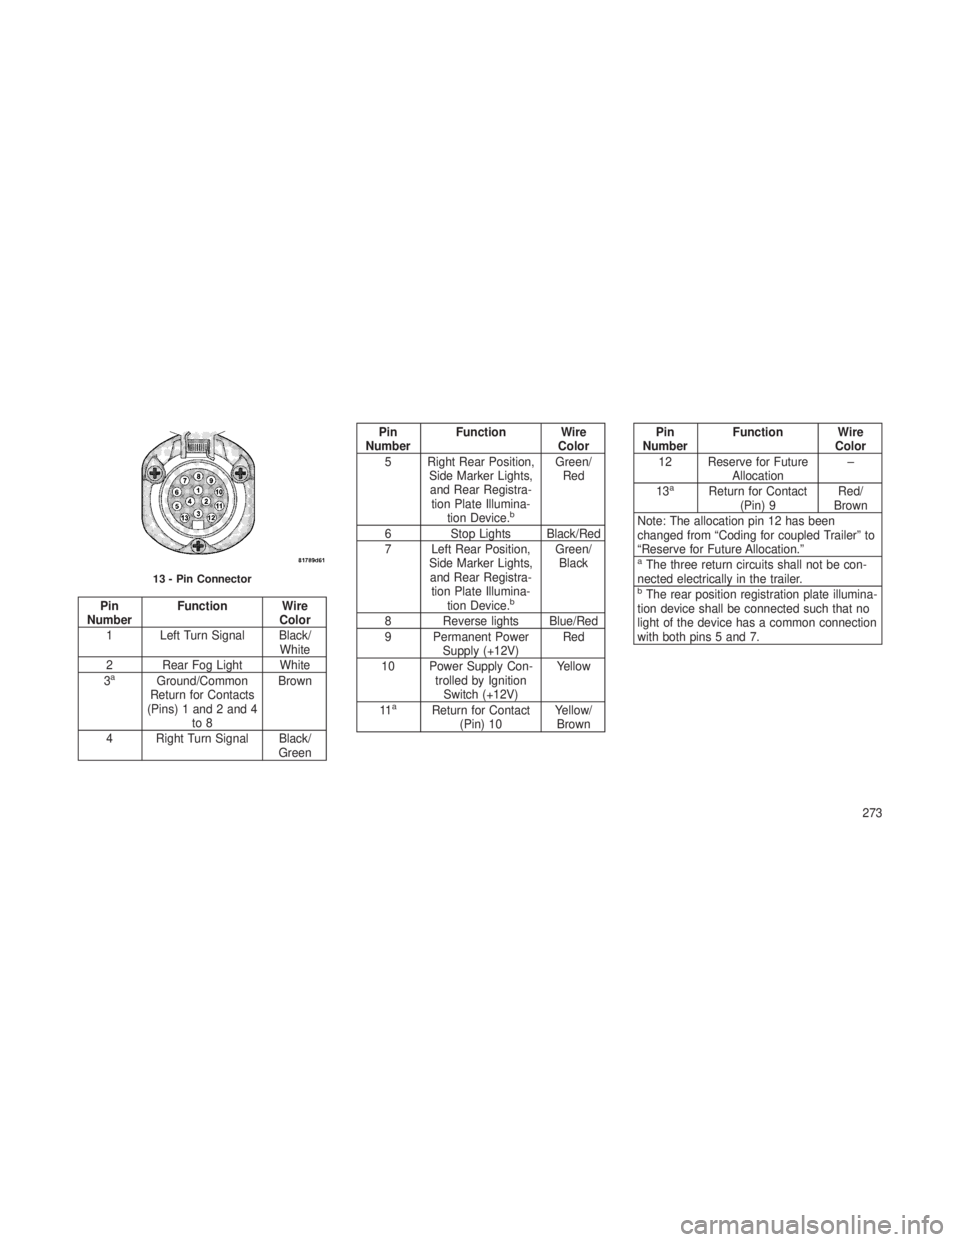
Pin
Number Function Wire
Color
1 Left Turn Signal Black/ White
2 Rear Fog Light White
3
aGround/Common
Return for Contacts
(Pins) 1 and 2 and 4 to 8 Brown
4 Right Turn Signal Black/ Green
Pin
Number Function Wire
Color
5 Right Rear Position, Side Marker Lights,and Rear Registra- tion Plate Illumina- tion Device.
b
Green/Red
6 Stop Lights Black/Red
7 Left Rear Position, Side Marker Lights,and Rear Registra- tion Plate Illumina- tion Device.
b
Green/Black
8 Reverse lights Blue/Red
9 Permanent Power Supply (+12V) Red
10 Power Supply Con- trolled by IgnitionSwitch (+12V) Yellow
11
aReturn for Contact (Pin) 10 Yellow/
Brown
Pin
Number Function Wire
Color
12 Reserve for Future Allocation –
13
aReturn for Contact (Pin) 9 Red/
Brown
Note: The allocation pin 12 has been
changed from “Coding for coupled Trailer” to
“Reserve for Future Allocation.”
aThe three return circuits shall not be con-
nected electrically in the trailer.
bThe rear position registration plate illumina-
tion device shall be connected such that no
light of the device has a common connection
with both pins 5 and 7.
13 - Pin Connector
273
Page 326 of 380
•Anytime you store your vehicle, or keep it out
of service (i.e. vacation) for two weeks or
more, run the air conditioning system at idle
for about five minutes in the fresh air and
high blower setting. This will ensure ad-
equate system lubrication to minimize the
possibility of compressor damage when the
system is started again.
REPLACEMENT BULBS
Interior Lights Bulb Type
Glove Box Lamp ..............194
Grab Handle Lamp .......L002825W5W
Overhead Console Reading Lamps . . VT4976
Rear Cargo Lamp ............ 214–2
Visor Vanity Lamp ...........V26377
Underpanel Courtesy Lamps ........906
Instrument Cluster
(General Illumination) ............103
Telltale/Hazard Lamp .............74 Exterior Lights
Bulb Type
Headlamps (Low/High Beam) – High
Intensity Discharge (HID) .........D1S
(Serviced at Authorized Dealer)
Daytime Running Lamp (DRL) /
Front Position ........3157K (P27/7WK)
Front Turn Signal Lamp . . . 7440NA(WY21W)
Front Fog Lamps ........... PSX24W
Front Side Marker .............W5W
Rear Turn Signal Lamps . . 7440NA (WY21W)
Auxiliary Liftgate Tail Lamps .......W3W
Liftgate Backup Lamps ......921(W16W)
Rear License Lamps ...........W5W
Rear Stop/Tail Lamps .....3157 (P27/7W)
Rear Fog Lamps .........7440 (W21W)
WARNING!
A transient high voltage occurs at the bulb
sockets of High Intensity Discharge (HID)
headlamps when the headlamp switch is
turned ON. It may cause serious electrical
shock or electrocution if not serviced properly.
See your authorized dealer for service. NOTE:
Numbers refer to commercial bulb types
that can be purchased from your authorized
dealer.
If a bulb needs to be replaced, visit your
authorized dealer or refer to the applicable
Service Manual.
BULB REPLACEMENT
High Intensity Discharge Headlamps
(HID) – If Equipped
The headlamps are a type of high voltage
discharge tube. High voltage can remain in the
circuit even with the headlamp switch off and
the key removed.
Because of this, you should
not attempt to service a headlamp bulb your-
self. If a headlamp bulb fails, take your
vehicle to an authorized dealer for service.
322
Page 328 of 380
6. Firmly and evenly push the bulb straight into
the lamp housing until both tabs snap firmly
into place and are fully engaged.
7. Connect the wiring harness to the front fog
lamp connector.
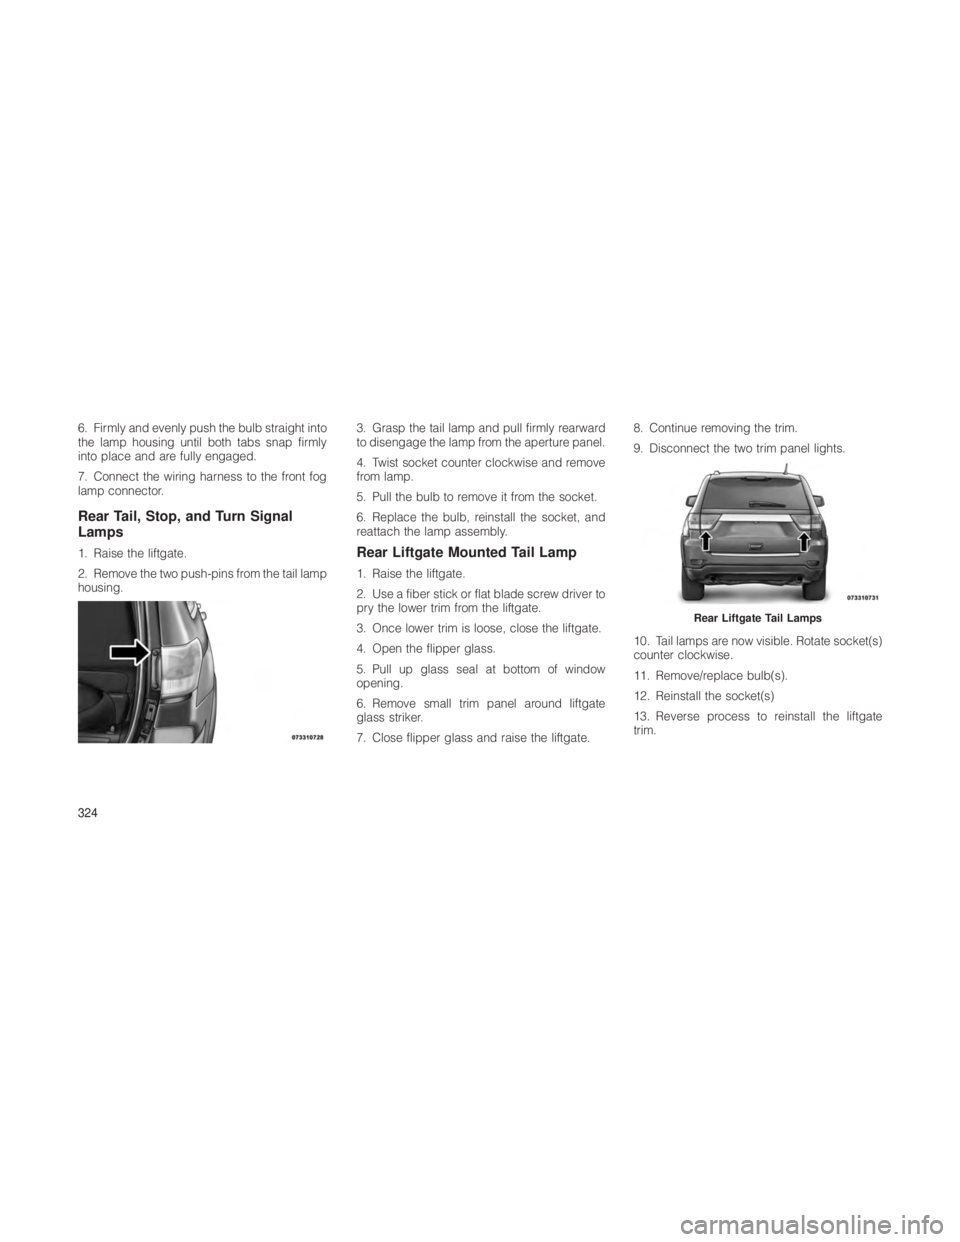
Rear Tail, Stop, and Turn Signal
Lamps
1. Raise the liftgate.
2. Remove the two push-pins from the tail lamp
housing.3. Grasp the tail lamp and pull firmly rearward
to disengage the lamp from the aperture panel.
4. Twist socket counter clockwise and remove
from lamp.
5. Pull the bulb to remove it from the socket.
6. Replace the bulb, reinstall the socket, and
reattach the lamp assembly.Rear Liftgate Mounted Tail Lamp
1. Raise the liftgate.
2. Use a fiber stick or flat blade screw driver to
pry the lower trim from the liftgate.
3. Once lower trim is loose, close the liftgate.
4. Open the flipper glass.
5. Pull up glass seal at bottom of window
opening.
6. Remove small trim panel around liftgate
glass striker.
7. Close flipper glass and raise the liftgate.8. Continue removing the trim.
9. Disconnect the two trim panel lights.
10. Tail lamps are now visible. Rotate socket(s)
counter clockwise.
11. Remove/replace bulb(s).
12. Reinstall the socket(s)
13. Reverse process to reinstall the liftgate
trim.
Rear Liftgate Tail Lamps
324
Page 372 of 380

Jump Starting..............287
Engine Air Cleaner ................304
Break-In Recommendations .......55
Compartment .........298,299,300
Compartment Identification . . 298,299,300
Cooling ..................308
Exhaust Gas Caution .........29,56
Fails to Start ...............218
Flooded, Starting ............218
Fuel Requirements .........262,326
Jump Starting ..............287
Multi-Displacement ...........244
Oil .................. 302,326
Oil Change Interval ...........302
Oil Disposal ...............304
Oil Filter .................304
Oil Selection .......... 302,303,326
Oil Synthetic ...............303
Overheating ...............282
Starting ..................216
Temperature Gauge ...........164
Engine Oil Viscosity ............303
Engine Oil Viscosity Chart ........303
Enhanced Accident Response Feature . . 44
Entry System, Illuminated ..........17
Ethanol ...................263 Event Data Recorder
............46
Exhaust Gas Caution ........29,56,307
Exhaust System ............ 56,307
Exterior Finish Care ............316
Exterior Lights ................58
Filters Air Cleaner ................304
Engine Oil ................304
Finish Care .................316
Flashers ..................282
Hazard Warning .............282
Turn Signal ......... 58,160,323,324
Flipper Glass, Liftgate ...........27
Flooded Engine Starting .........218
Fluid Capacities ..............326
Fluid Leaks .................58
Fluid Level Checks Automatic Transmission ....313,314,315
Brake ...................312
Engine Oil ................302
Power Steering .............243
Fluids, Lubricants and Genuine Parts . . 327
Fog Light Service .............323
Fog Lights ............ 108,160,323
Fog
Lights, Rear ..............164 Folding Rear Seat
.............100
Forward Collision Warning . . . 129,170,180
Four Wheel Drive ........... 231,234
Operation ................231
Systems .................231
Four Wheel Drive Operation .......231
Four-Way Hazard Flasher .........282
Freeing A Stuck Vehicle ..........289
Front Axle (Differential) ..........312
Fuel .....................262
Additives .................264
Conserving ................173
Diesel ..................264
Filler Cap (Gas Cap) ........265,266
Gasoline .................262
Gauge ..................163
Light ...................170
Octane Rating ..............262
Requirements ..............326
Saver Mode ...............173
Tank Capacity ..............326
Fuel Optimizer ...............173
Fuel Saver .................173
Fuel System Caution ............265
Fuses ....................318
368
Page 374 of 380
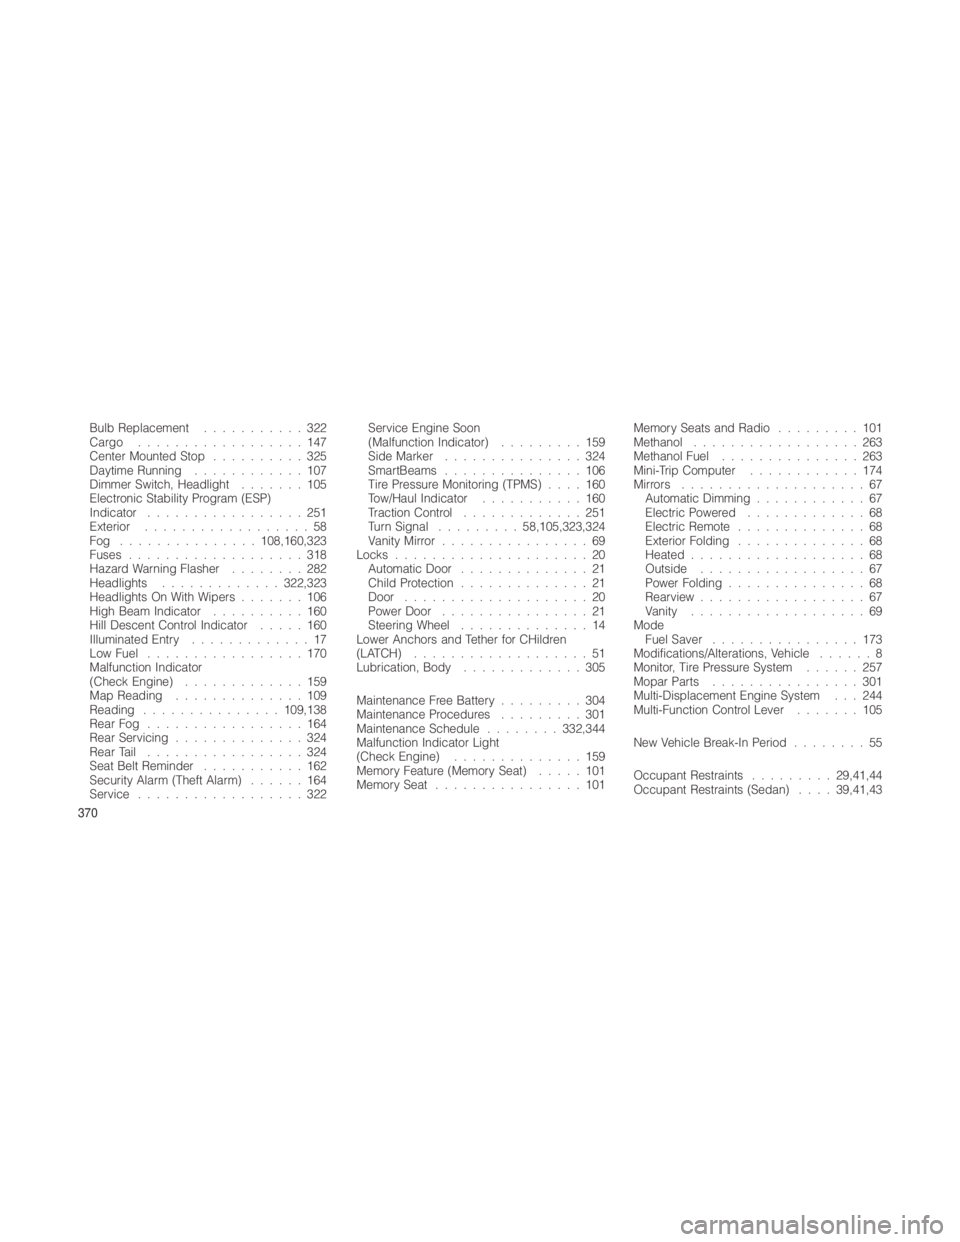
Bulb Replacement...........322
Cargo ..................147
Center Mounted Stop ..........325
Daytime Running ............107
Dimmer Switch, Headlight .......105
Electronic Stability Program (ESP)
Indicator .................251
Exterior ..................58
Fog ............... 108,160,323
Fuses ...................318
Hazard Warning Flasher ........282
Headlights ............. 322,323
Headlights On With Wipers .......106
High Beam Indicator ..........160
Hill Descent Control Indicator .....160
Illuminated Entry .............17
Low Fuel .................170
Malfunction Indicator
(Check Engine) .............159
Map Reading ..............109
Reading ............... 109,138
Rear Fog .................164
Rear Servicing ..............324
Rear Tail .................324
Seat Belt Reminder ...........162
Security Alarm (Theft Alarm) ......164
Service ..................322 Service Engine Soon
(Malfunction Indicator)
.........159
Side Marker ...............324
SmartBeams ...............106
Tire Pressure Monitoring (TPMS) ....160
Tow/Haul Indicator ...........160
Traction Control .............251
Turn Signal ......... 58,105,323,324
Vanity Mirror ................69
Locks .....................20
Automatic Door ..............21
Child Protection ..............21
Door ....................20
Power Door ................21
Steering Wheel ..............14
Lower Anchors and Tether for CHildren
(LATCH) ...................51
Lubrication, Body .............305
Maintenance Free Battery .........304
Maintenance Procedures .........301
Maintenance Schedule ........332,344
Malfunction Indicator Light
(Check Engine) ..............159
Memory Feature (Memory Seat) .....101
Memory Seat ................101 Memory Seats and Radio
.........101
Methanol .................. 263
Methanol Fuel ...............263
Mini-Trip Computer ............174
Mirrors ....................67
Automatic Dimming ............67
Electric Powered .............68
Electric Remote ..............68
Exterior Folding ..............68
Heated ...................68
Outside ..................67
Power Folding ...............68
Rearview ..................67
Vanity ...................69
Mode Fuel Saver ................173
Modifications/Alterations, Vehicle ......8
Monitor, Tire Pressure System ......257
Mopar Parts ................301
Multi-Displacement Engine System . . . 244
Multi-Function Control Lever .......105
New Vehicle Break-In Period ........55
Occupant Restraints .........29,41,44
Occupant Restraints (Sedan) ....39,41,43
370