transmission oil JEEP GRAND CHEROKEE 2012 Owner handbook (in English)
[x] Cancel search | Manufacturer: JEEP, Model Year: 2012, Model line: GRAND CHEROKEE, Model: JEEP GRAND CHEROKEE 2012Pages: 380, PDF Size: 3.21 MB
Page 59 of 380
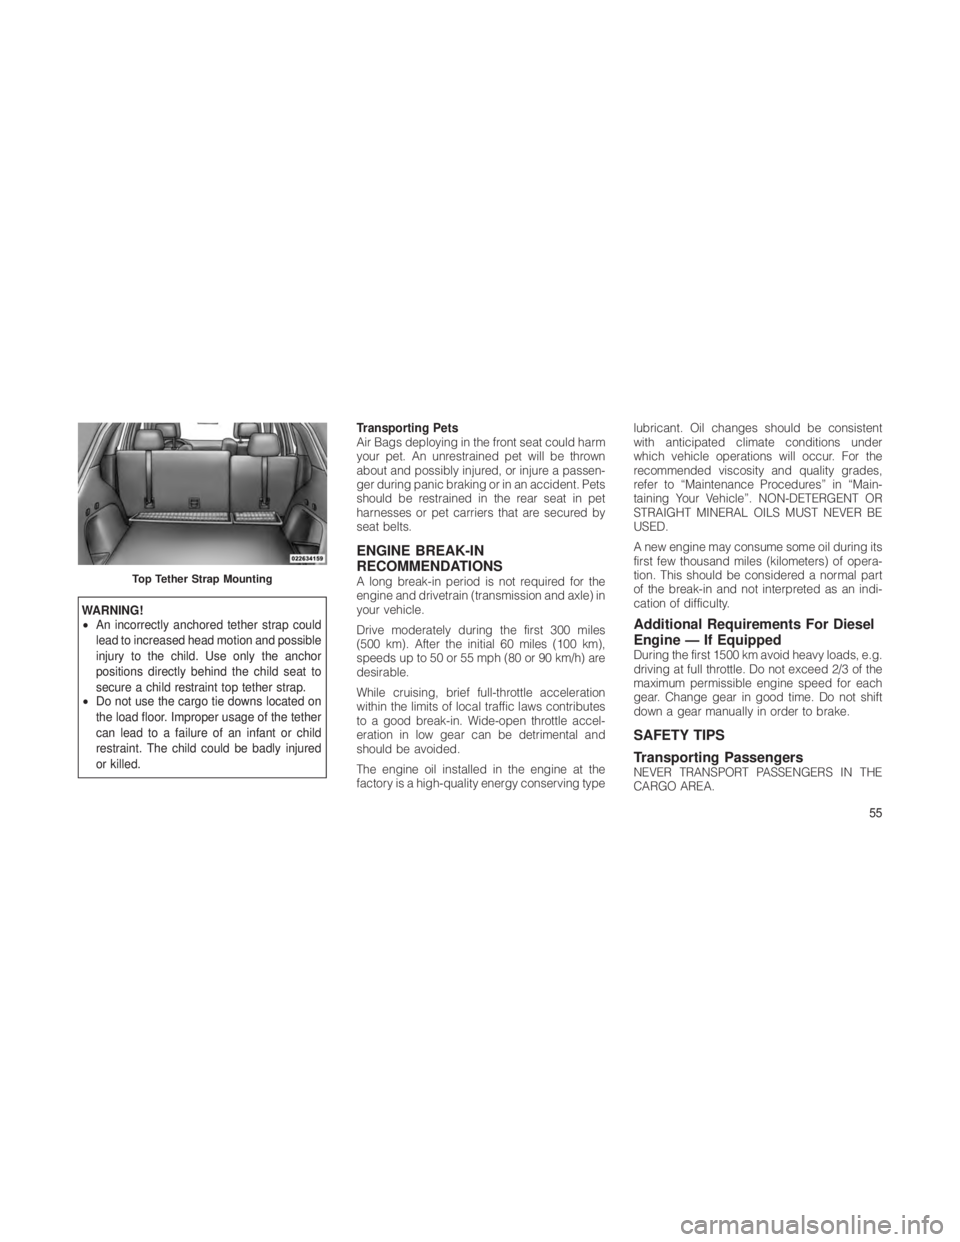
WARNING!
•An incorrectly anchored tether strap could
lead to increased head motion and possible
injury to the child. Use only the anchor
positions directly behind the child seat to
secure a child restraint top tether strap.
• Do not use the cargo tie downs located on
the load floor. Improper usage of the tether
can lead to a failure of an infant or child
restraint. The child could be badly injured
or killed. Transporting Pets
Air Bags deploying in the front seat could harm
your pet. An unrestrained pet will be thrown
about and possibly injured, or injure a passen-
ger during panic braking or in an accident. Pets
should be restrained in the rear seat in pet
harnesses or pet carriers that are secured by
seat belts.
ENGINE BREAK-IN
RECOMMENDATIONS
A long break-in period is not required for the
engine and drivetrain (transmission and axle) in
your vehicle.
Drive moderately during the first 300 miles
(500 km). After the initial 60 miles (100 km),
speeds up to 50 or 55 mph (80 or 90 km/h) are
desirable.
While cruising, brief full-throttle acceleration
within the limits of local traffic laws contributes
to a good break-in. Wide-open throttle accel-
eration in low gear can be detrimental and
should be avoided.
The engine oil installed in the engine at the
factory is a high-quality energy conserving type lubricant. Oil changes should be consistent
with anticipated climate conditions under
which vehicle operations will occur. For the
recommended viscosity and quality grades,
refer to “Maintenance Procedures” in “Main-
taining Your Vehicle”. NON-DETERGENT OR
STRAIGHT MINERAL OILS MUST NEVER BE
USED.
A new engine may consume some oil during its
first few thousand miles (kilometers) of opera-
tion. This should be considered a normal part
of the break-in and not interpreted as an indi-
cation of difficulty.
Additional Requirements For Diesel
Engine — If Equipped
During the first 1500 km avoid heavy loads, e.g.
driving at full throttle. Do not exceed 2/3 of the
maximum permissible engine speed for each
gear. Change gear in good time. Do not shift
down a gear manually in order to brake.
SAFETY TIPS
Transporting Passengers
NEVER TRANSPORT PASSENGERS IN THE
CARGO AREA.
Top Tether Strap Mounting
55
Page 176 of 380
•Engine Temperature Warning Light
This light warns of an overheated en-
gine condition. As temperatures rise
and the gauge approaches H,this
indicator will illuminate and a single
chime will sound after reaching a set threshold.
Further overheating will cause the temperature
gauge to pass H,a continuous chime will occur
until the engine is allowed to cool.
If the light turns on while driving, safely pull
over and stop the vehicle. If the A/C system is
on, turn it off. Also, shift the transmission into
NEUTRAL and idle the vehicle. If the tempera-
ture reading does not return to normal, turn the
engine off immediately and call for service.
Refer to “If Your Engine Overheats” in “What To
Do In Emergencies” for more information.
• Transmission Temperature Light
This light indicates that there is
excessive transmission fluid tem-
perature that might occur with se-
vere usage such as trailer towing.
It may also occur when operating
the vehicle in a high torque con-
verter slip condition, such as 4-wheel-drive
operation (e.g., snow plowing, off- road opera- tion). If this light comes on, stop the vehicle and
run the engine at idle or faster, with the trans-
mission in NEUTRAL until the light goes off.
CAUTION!
Continuous driving with the Transmission
Temperature Indicator illuminated will eventu-
ally cause severe transmission damage or
transmission failure.
WARNING!
If the Transmission Temperature Warning
Light is illuminated and you continue operat-
ing the vehicle, in some circumstances you
could cause the fluid to boil over, come in
contact with hot engine or exhaust compo-
nents and cause a fire.
Engine Oil Change Indicator System
Oil Change Due
Your vehicle is equipped with an engine oil
change indicator system. The “Oil Change
Due” message will flash in the EVIC display for
approximately 10 seconds after a single chime
has sounded, to indicate the next scheduled oil
change interval. The engine oil change indica-
tor system is duty cycle based, which means
the engine oil change interval may fluctuate,
dependent upon your personal driving style.
Unless reset, this message will continue to
display each time you turn the ignition switch to
the ON/RUN position or cycle the ignition to the
ON/RUN position if equipped with Keyless
Enter-N-Go. To turn off the message temporar-
ily, press and release the MENU button. To
reset the oil change indicator system (after
performing the scheduled maintenance) refer
to the following procedure.
Vehicles Equipped With Keyless
Enter-N-Go
1. Without pressing the brake pedal, push the
ENGINE START/STOP button and cycle the
ignition to the ON/RUN position (Do not start
the engine.)
2. Fully depress the accelerator pedal, slowly,
three times within 10 seconds.
172
Page 179 of 380
Elapsed Time
Shows the total elapsed time of travel since the
last reset when the ignition switch is in the ACC
position. Elapsed time will increment when the
ignition switch is in the ON or START position.
To Reset The Display
Reset will only occur while a resettable function
is being displayed. Press and release the SE-
LECT button once to clear the resettable func-
tion being displayed.
UnitsPress and release the UP or DOWN button until
“Units” displays highlighted in the EVIC and
press the SELECT button. The EVIC, odometer,
and navigation system (if equipped) can be
changed between English and Metric units of
measure. To make your selection, scroll up or
down until the preferred setting is highlighted,
then press and release the SELECT button until
a check-mark appears next to the setting,
showing that the setting has been selected.
Vehicle Info
(Customer Information Features)
Press and release the UP or DOWN button until
“Vehicle Info” displays highlighted in the EVIC
and press the SELECT button. Press the UP
and DOWN button to scroll through the avail-
able information displays, then press SELECT
to display any one of the following choices.
•Oil Temp (If Equipped)
Displays the actual oil temperature.
• Oil Pressure (If Equipped)
Displays the actual oil pressure.
• Coolant Temp
Displays the actual coolant temperature.
• Trans Temperature
Displays the actual transmission temperature
when the shift lever is in the Drive position. •
Engine Hours
Displays the number of hours of engine opera-
tion.
Tire PSI or Tire KPA
Press and release the UP or DOWN button until
“Tire PSI” or “Tire KPA” displays highlighted in
the EVIC and press the SELECT button. Press
and release the UP/DOWN buttons until one of
the following System Status messages displays
in the EVIC:
• System OK
• System Warnings Displayed (will display all
currently active System Warnings)
175
Page 244 of 380
NOTE:
Your vehicle is capable of water fording in
up to 20 inches (51 cm) of water, while
crossing small rivers or streams. To main-
tain optimal performance of your vehicle’s
heating and ventilation system it is recom-
mended to switch the system into recircula-
tion mode during water fording.
CAUTION!
When driving through water, do not exceed
5 mph (8 km/h). Always check water depth
before entering, as a precaution, and check all
fluids afterward. Driving through water may
cause damage that may not be covered by the
New Vehicle Limited Warranty.
Driving through water more than a few inches/
centimeters deep will require extra caution to
ensure safety and prevent damage to your
vehicle. If you must drive through water, try to
determine the depth and the bottom condition
(and location of any obstacles) prior to enter-
ing. Proceed with caution and maintain a steady controlled speed less than 5 mph
(8 km/h) in deep water to minimize wave ef-
fects.
Flowing Water
If the water is swift flowing and rising (as in
storm run-off), avoid crossing until the water
level recedes and/or the flow rate is reduced. If
you must cross flowing water avoid depths in
excess of 9 inches (23 cm). The flowing water
can erode the streambed, causing your vehicle
to sink into deeper water. Determine exit
point(s) that are downstream of your entry point
to allow for drifting.
Standing Water
Avoid driving in standing water deeper than
20 inches (51 cm), and reduce speed appro-
priately to minimize wave effects. Maximum
speed in 20 inches (51 cm) of water is less than
5 mph (8 km/h).
Maintenance
After driving through deep water, inspect your
vehicle fluids and lubricants (engine oil, trans-
mission oil, axle, transfer case) to assure the
fluids have not been contaminated. Contami-
nated fluid (milky, foamy in appearance) shouldbe flushed/changed as soon as possible to
prevent component damage.
Driving In Snow, Mud And SandIn heavy snow, when pulling a load, or for
additional control at slower speeds, shift the
transmission to a low gear and shift the transfer
case to 4WD LOW if necessary. Refer to “Four-
Wheel Drive Operation” in “Starting and Oper-
ating” for further information. Do not shift to a
lower gear than necessary to maintain forward
motion. Over-revving the engine can spin the
wheels and traction will be lost.
Avoid abrupt downshifts on icy or slippery
roads, because engine braking may cause
skidding and loss of control.
Hill Climbing
NOTE:
Before attempting to climb a hill, determine
the conditions at the crest and/or on the
other side.
Before climbing a steep hill,
shift the trans-
mission to a lower gear and shift the transfer
case to 4WD LOW. Use first gear and 4WD
LOW for very steep hills.
240
Page 303 of 380
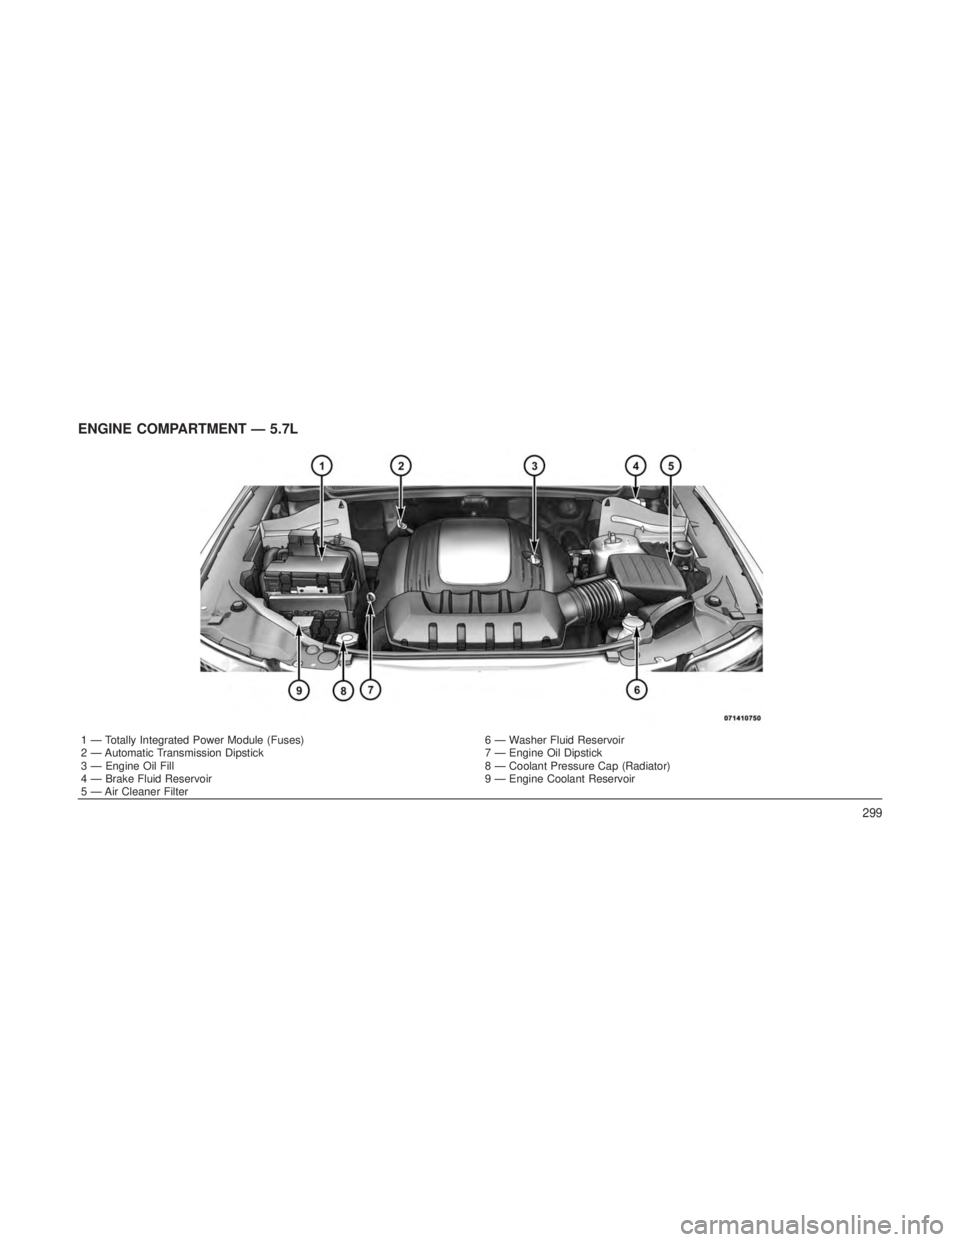
ENGINE COMPARTMENT — 5.7L
1 — Totally Integrated Power Module (Fuses)6 — Washer Fluid Reservoir
2 — Automatic Transmission Dipstick 7 — Engine Oil Dipstick
3 — Engine Oil Fill 8 — Coolant Pressure Cap (Radiator)
4 — Brake Fluid Reservoir 9 — Engine Coolant Reservoir
5 — Air Cleaner Filter
299
Page 306 of 380
CAUTION!
•Failure to properly maintain your vehicle or
perform repairs and service when neces-
sary could result in more costly repairs,
damage to other components or negatively
impact vehicle performance. Immediately
have potential malfunctions examined by
an authorized dealership or qualified repair
center.
• Your vehicle has been built with improved
fluids that protect the performance and
durability of your vehicle and also allow
extended maintenance intervals. Do not
use chemical flushes in these components
as the chemicals can damage your engine,
transmission, power steering or air condi-
tioning. Such damage is not covered by the
New Vehicle Limited Warranty. If a flush is
needed because of component malfunc-
tion, use only the specified fluid for the
flushing procedure.Engine Oil – Gasoline Engines
Checking Oil Level
To assure proper lubrication of your vehicle’s
engine, the engine oil must be maintained at
the correct level. The best time to check the
engine oil level is about five minutes after a fully
warmed up engine is shut off or before starting
the engine after it has sat overnight.
Checking the oil while the vehicle is on level
ground will improve the accuracy of the oil level
readings. Maintain the oil level in the SAFE level
range. Adding 1 U.S. Quart (0.95L) of oil when
the level is at the bottom of the SAFE range will
result in the level being at the top of the SAFE
range.
CAUTION!
Overfilling or underfilling the crankcase will
cause aeration or loss of oil pressure. This
could damage your engine. Change Engine Oil
Refer to the “Maintenance Schedule” for the
proper maintenance intervals.
Engine Oil Selection – Non ACEA
Categories
For best performance and maximum protection
under all types of operating conditions, the
manufacturer only recommends engine oils
that are API certified and meet the require-
ments of Chrysler Material Standard MS-6395.
American Petroleum Institute (API) Engine
Oil Identification Symbol
This symbol
means that the oil
has been certified
by the American
Petroleum Institute
(API). The manu-
facturer only rec-
ommends API
Certified engine
oils.
302
Page 317 of 380
Front Axle Fluid Level Check
The front axle oil level needs to be between
1/8 in (3 mm) below the bottom of the fill hole
and the bottom of the fill hole.
The front axle fill and drain plugs should be
tightened to 22 to 29 ft lbs (30 to 40 N·m).
CAUTION!
Do not over tighten the plugs as it could
damage them and cause them to leak.
Rear Axle Fluid Level Check
The rear axle oil level needs to be between
1/8 in (3 mm) below the bottom of the fill hole
and the bottom of the fill hole.
The rear axle fill and drain plugs should be
tightened to 22 to 29 ft lbs (30 to 40 N·m) on
axles with aluminum housings. The rear axle fill
and drain plugs should be tightened to 22 to
52 ft lbs (30 to 70 N·m) on axles with cast iron
housings.
CAUTION!
Do not over tighten the plugs as it could
damage then and cause them to leak.
Selection Of Lubricant
Use only the manufacturer’s recommended
fluid. Refer to “Fluids, Lubricants, and Genuine
Parts” in “Maintaining Your Vehicle” for further
information.
Transfer Case
Fluid Level Check
Inspect the transfer case for fluid leaks. If a fluid
leak is found, the transfer case fluid level can
be checked by removing the filler plug located
on the back side of the transfer case. The fluid
level should be at the bottom edge of the filler
plug hole when the vehicle is in a level position.
Adding Fluid
Add fluid at the filler hole, until it runs out of the
hole, when the vehicle is in a level position. Drain
First remove fill plug, then remove drain plug.
Recommended tightening torque for drain and
fill plugs is 15 to 25 ft lbs (20 to 34 N·m).
CAUTION!
When installing plugs, do not overtighten. You
could damage them and cause them to leak.
Selection Of Lubricant
Use only the manufacturer’s recommended
fluid. Refer to “Fluids, Lubricants, and Genuine
Parts” in “Maintaining Your Vehicle” for further
information.
Automatic Transmission
Selection Of Lubricant
It is important that the proper lubricant is used
in the transmission to assure optimum transmis-
sion performance. Use only the manufacturer’s
recommended transmission fluid. Refer to “Flu-
ids, Lubricants, and Genuine Parts” in “Main-
taining Your Vehicle” for further information. It is
important that the transmission fluid be main-
tained at the prescribed level using the recom-
mended fluid. 313
Page 319 of 380
Fluid Level Check – 5.7L Engine
Check the fluid level while the transmission is at
normal operating temperature. This occurs af-
ter at least 15 miles (25 km) of driving. At
normal operating temperature the fluid cannot
be held comfortably between the fingertips.
To check the fluid level properly, the following
procedure must be used:
1. Operate the engine at idle speed and nor-
mal operating temperature.
2. The vehicle must be on level ground.
3. Fully apply the parking brake, and press the
brake pedal.
4. Place the shift lever momentarily in each
gear position ending with the shift lever in
PARK.
5. Remove the dipstick, wipe it clean and
reinsert it until seated.6. Remove the dipstick again, and note the
fluid level on both sides. The fluid level should
be between the “HOT” (upper) reference holes
on the dipstick at normal operating tempera-
ture. The fluid level is only valid if there is a solid
coating of oil on both sides of the dipstick. If the
fluid is low, add as required into the dipstick
tube.
Do not overfill. After adding any quantity
of oil through the oil fill tube, wait a minimum of
two minutes for the oil to fully drain into the
transmission before rechecking the fluid level.
NOTE:
If it is necessary to check the transmission
below the operating temperature, the fluid
level should be between the two “COLD”
(lower) holes on the dipstick with the fluid at
approximately 70°F (21°C) (room tempera-
ture). If the fluid level is correctly estab-
lished at room temperature, it should be
between the “HOT” (upper) reference holes
when the transmission reaches 180°F
(82°C). Remember it is best to check the
level at the normal operating temperature.CAUTION!
Be aware that if the fluid temperature is below
50°F (10°C) it may not register on the dipstick.
Do not add fluid until the temperature is
elevated enough to produce an accurate
reading.
7. Check for leaks. Release parking brake.
To prevent dirt and water from entering the
transmission after checking or replenishing
fluid, make certain that the dipstick cap is
properly reseated. It is normal for the dipstick
cap to spring back slightly from its fully seated
position, as long as its seal remains engaged in
the dipstick tube.
Appearance Care And Protection
From Corrosion
Protection Of Body And Paint From
Corrosion
Vehicle body care requirements vary according
to geographic locations and usage. Chemicals
that make roads passable in snow and ice, and
those that are sprayed on trees and road
315
Page 337 of 380
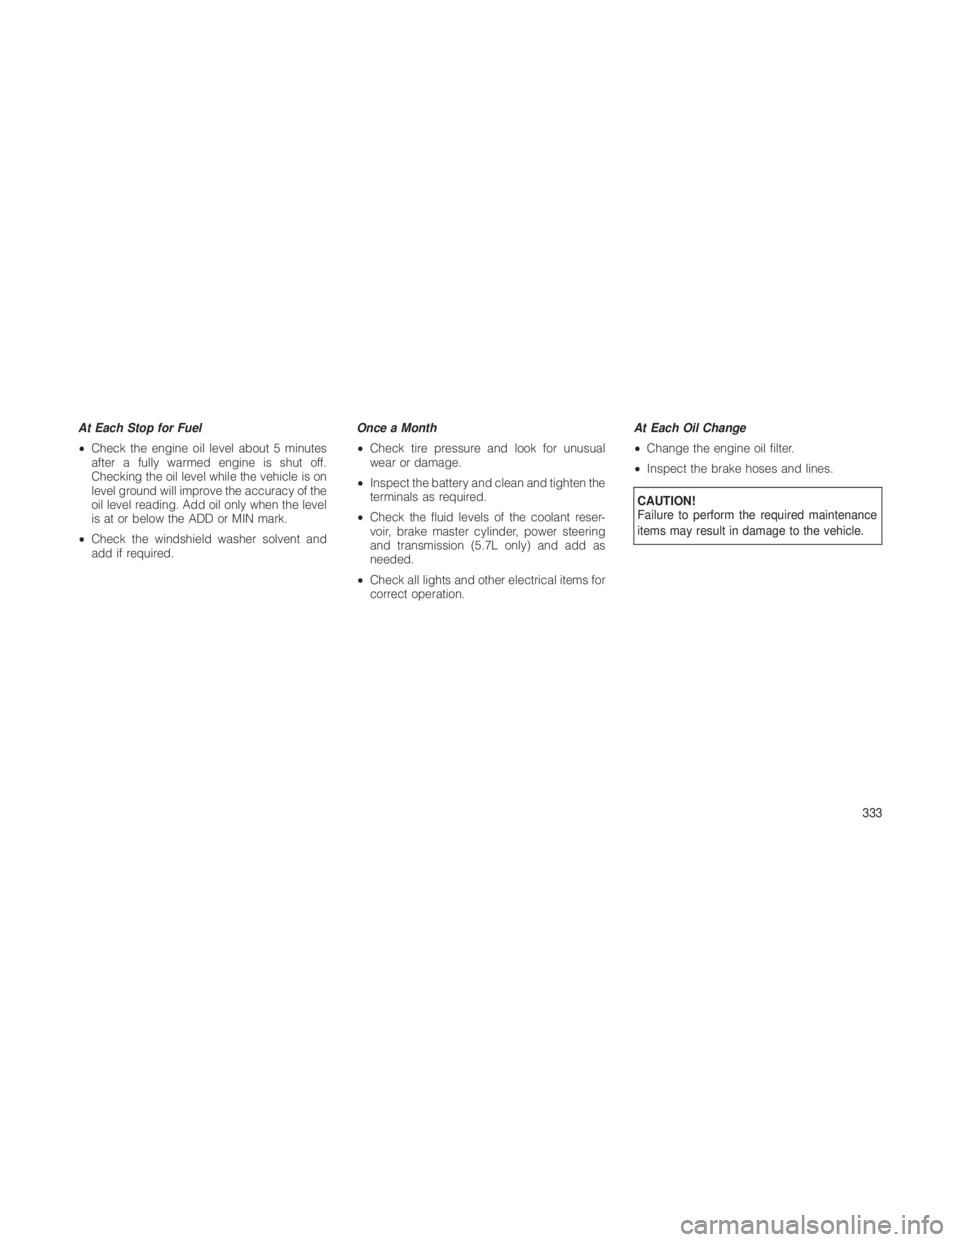
At Each Stop for Fuel
•Check the engine oil level about 5 minutes
after a fully warmed engine is shut off.
Checking the oil level while the vehicle is on
level ground will improve the accuracy of the
oil level reading. Add oil only when the level
is at or below the ADD or MIN mark.
• Check the windshield washer solvent and
add if required. Once a Month
•
Check tire pressure and look for unusual
wear or damage.
• Inspect the battery and clean and tighten the
terminals as required.
• Check the fluid levels of the coolant reser-
voir, brake master cylinder, power steering
and transmission (5.7L only) and add as
needed.
• Check all lights and other electrical items for
correct operation. At Each Oil Change
•
Change the engine oil filter.
• Inspect the brake hoses and lines.
CAUTION!
Failure to perform the required maintenance
items may result in damage to the vehicle.
333
Page 341 of 380
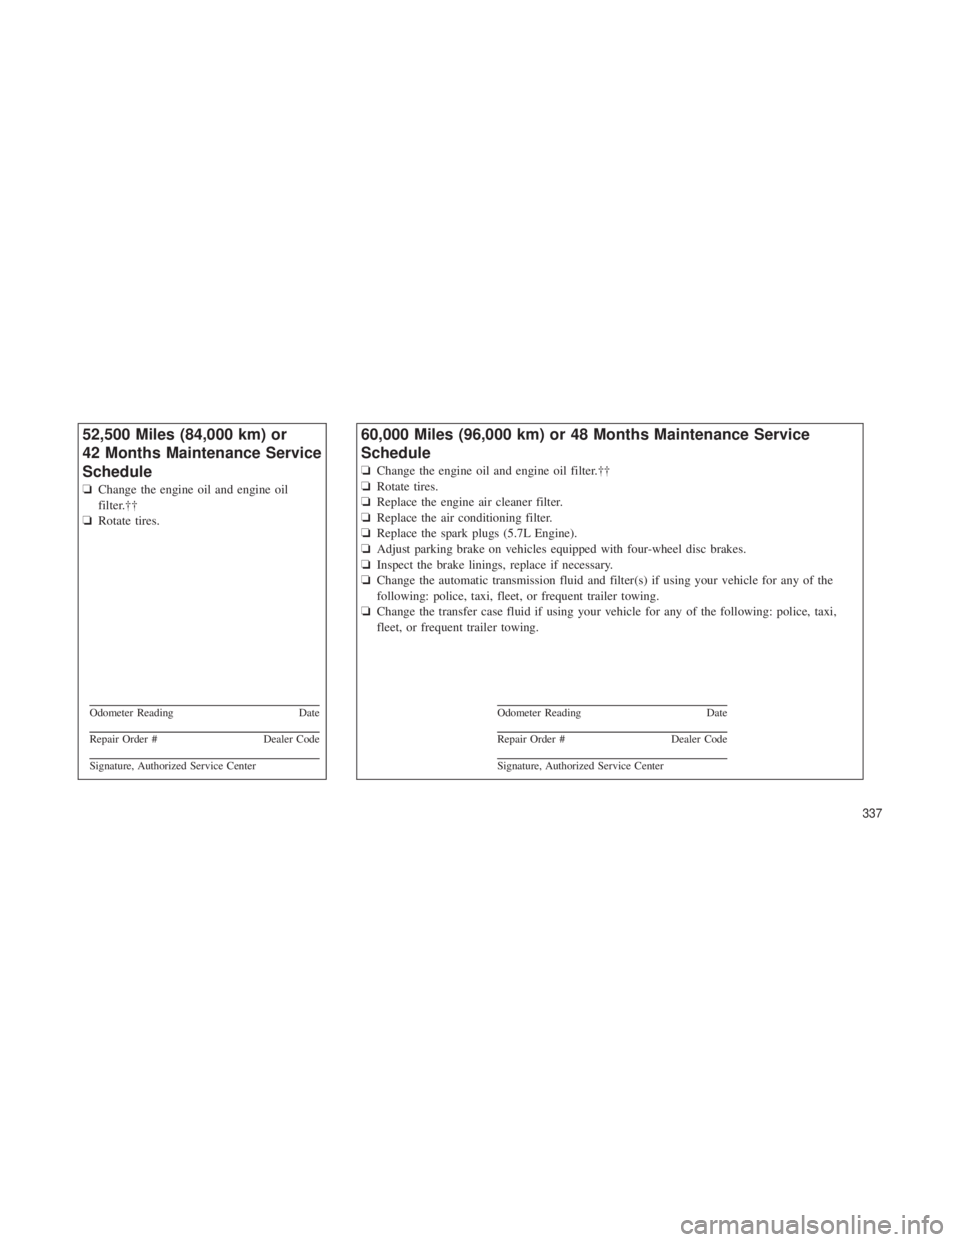
52,500 Miles (84,000 km) or
42 Months Maintenance Service
Schedule
❏Change the engine oil and engine oil
filter.††
❏ Rotate tires.
Odometer Reading Date
Repair Order #Dealer Code
Signature, Authorized Service Center
60,000 Miles (96,000 km) or 48 Months Maintenance Service
Schedule
❏Change the engine oil and engine oil filter.††
❏ Rotate tires.
❏ Replace the engine air cleaner filter.
❏ Replace the air conditioning filter.
❏ Replace the spark plugs (5.7L Engine).
❏ Adjust parking brake on vehicles equipped with four-wheel disc brakes.
❏ Inspect the brake linings, replace if necessary.
❏ Change the automatic transmission fluid and filter(s) if using your vehicle for any of the
following: police, taxi, fleet, or frequent trailer towing.
❏ Change the transfer case fluid if using your vehicle for any of the following: police, taxi,
fleet, or frequent trailer towing.
Odometer Reading Date
Repair Order #Dealer Code
Signature, Authorized Service Center
337