engine JEEP GRAND CHEROKEE 2013 Owner handbook (in English)
[x] Cancel search | Manufacturer: JEEP, Model Year: 2013, Model line: GRAND CHEROKEE, Model: JEEP GRAND CHEROKEE 2013Pages: 408, PDF Size: 3.21 MB
Page 98 of 408
NOTE:
Keep in mind that you have to press the
Voice Command
button first and wait
for the beep before speaking the “Barge In”
commands.
Voice TrainingFor users experiencing difficulty with the system
recognizing their voice commands or numbers
the Uconnect® Voice “Voice Training” feature
may be used.
1. Press the Voice Command
button, say
“System Setup” and once you are in that menu
then say “Voice Training.” This will train your
own voice to the system and will improve rec-
ognition.
2. Repeat the words and phrases when
prompted by Uconnect® Voice. For best results,
the Voice Training session should be completed
when the vehicle is parked, engine running, all
windows closed, and the blower fan switched
off. This procedure may be repeated with a new
user. The system will adapt to the last trained
voice only.
SEATS
Seats are part of the Occupant Restraint Sys-
tem of the vehicle.
WARNING!
• It is dangerous to ride in a cargo area,
inside or outside of a vehicle. In a collision,
people riding in these areas are more likely
to be seriously injured or killed.
• Do not allow people to ride in any area of
your vehicle that is not equipped with seats
and seat belts. In a collision, people riding
in these areas are more likely to be seri-
ously injured or killed.
• Be sure everyone in your vehicle is in a
seat and using a seat belt properly.
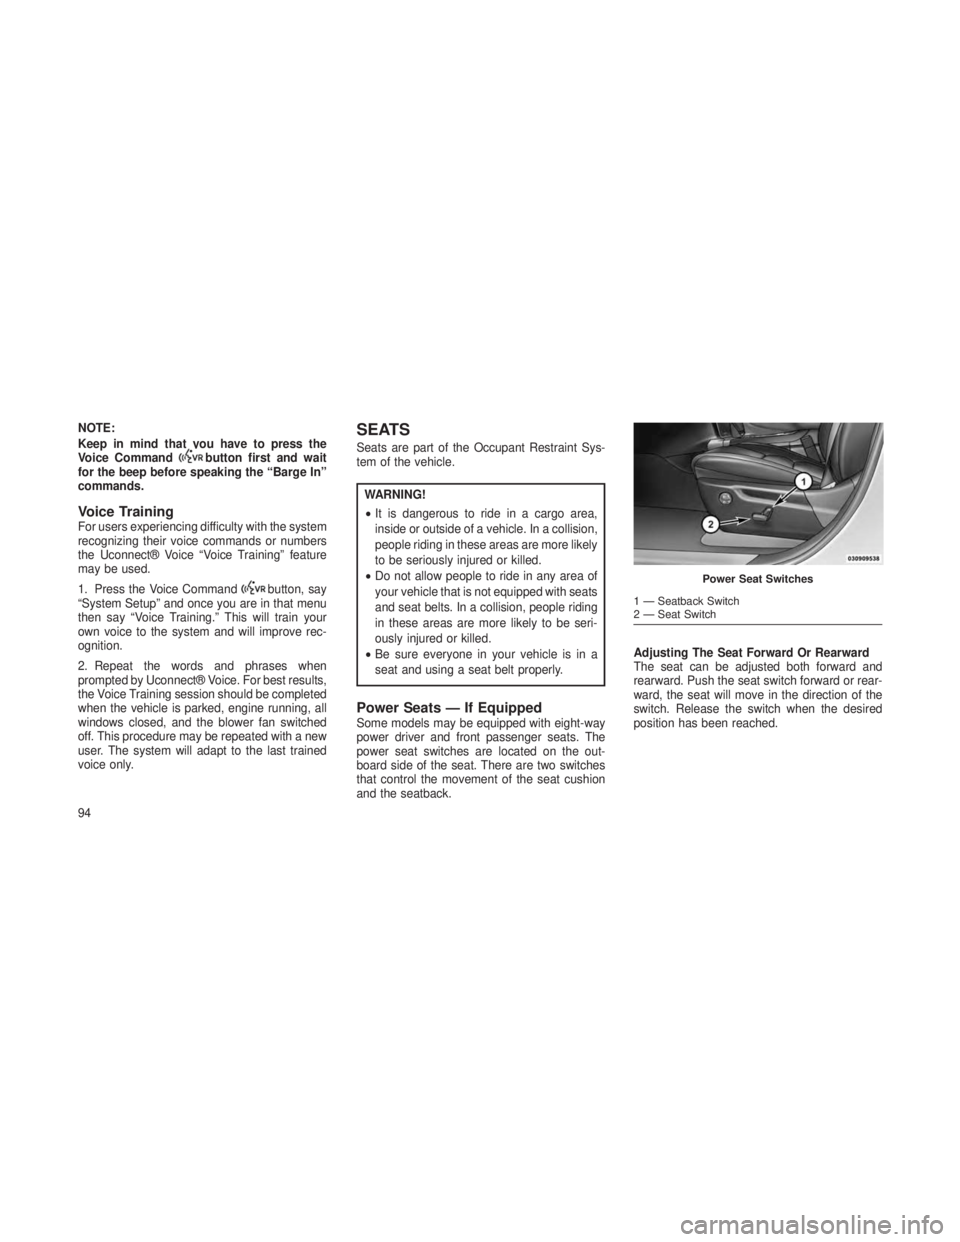
Power Seats — If EquippedSome models may be equipped with eight-way
power driver and front passenger seats. The
power seat switches are located on the out-
board side of the seat. There are two switches
that control the movement of the seat cushion
and the seatback. Adjusting The Seat Forward Or Rearward
The seat can be adjusted both forward and
rearward. Push the seat switch forward or rear-
ward, the seat will move in the direction of the
switch. Release the switch when the desired
position has been reached.
Power Seat Switches
1 — Seatback Switch
2 — Seat Switch
94
Page 102 of 408
NOTE:
Once a heat setting is selected, heat will be
felt within two to five minutes.
When the HIGH-level setting is selected, the
heater will provide a boosted heat level during
the first four minutes of operation. Then, the
heat output will drop to the normal HIGH-level. If
the HIGH-level setting is selected, the system
will automatically switch to LOW-level after ap-
proximately 60 minutes of continuous opera-
tion. At that time, the number of illuminated
LEDs changes from two to one, indicating the
change. The LOW-level setting will turn OFF
automatically after approximately 45 minutes.
Ventilated Seats — If EquippedOn some models, both the driver and passen-
ger seats are ventilated. Located in the seat
cushion and seatback are small fans that draw
the air from the passenger compartment and
pull air through fine perforations in the seat
cover to help keep the driver and front passen-
ger cooler in higher ambient temperatures.There are two ventilated seat soft—keys that
allow the driver and passenger to operate the
seats independently. The ventilated seat soft—
keys are located in the radio screen.
The ventilated seat soft—keys are used to
control the speed of the fans located in the seat.
Press the soft—keys once to choose HIGH,
press it a second time to choose LOW. Pressing
the soft—key a third time will turn the ventilated
seat OFF.
NOTE:
The engine must be running for the venti-
lated seats to operate.
Vehicles Equipped With Remote Start
On models that are equipped with remote start,
the driver’s ventilated seat can be programmed
to come on during a remote start. Refer to
“Remote Starting System — If Equipped” in
“Things To Know Before Starting Your Vehicle”
for further information.
Head RestraintsHead restraints are designed to reduce the risk
of injury by restricting head movement in the
event of a rear-impact. Head restraints should
be adjusted so that the top of the head restraint
is located above the top of your ear.
WARNING!
The head restraints for all occupants must be
properly adjusted prior to operating the ve-
hicle or occupying a seat. Head restraints
should never be adjusted while the vehicle is
in motion. Driving a vehicle with the head
restraints improperly adjusted or removed
could cause serious injury or death in the
event of a collision.
Active Head Restraints — Front Seats
Active Head Restraints are passive, deployable
components, and vehicles with this equipment
cannot be readily identified by any markings, only
through visual inspection of the head restraint.
The head restraint will be split in two halves, with
the front half being soft foam and trim, the back
half being decorative plastic.
98
Page 107 of 408
Programming The Memory Feature
NOTE:
To create a new memory profile, perform the
following:
Vehicles Equipped With Keyless Enter-N-Go
1. Without pressing the brake pedal, push the
ENGINE START/STOP button and cycle the
ignition to the ON/RUN position (Do not start the
engine).
2. Adjust all memory profile settings to desired
preferences (i.e., seat, side mirror, adjustable
pedals [if equipped], power tilt and telescopic
steering column [if equipped], and radio station
presets).
3. Press and release the S (Set) button on the
memory switch.
4. Within 5 seconds, press and release either
of the memory buttons (1) or (2). The Electronic
Vehicle Information Center (EVIC) will display
which memory position has been set.Vehicles Not Equipped With Keyless
Enter-N-Go
1.
Insert the ignition key fob, and turn the ignition
switch to the ON/RUN position.
2. Adjust all memory profile settings to desired
preferences (i.e., seat, side mirror, adjustable
pedals [if equipped], power tilt and telescopic
steering column [if equipped], and radio station
presets).
3. Press and release the S (Set) button on the
memory switch.
4. Within 5 seconds, press and release either
of the memory buttons (1) or (2). The Electronic
Vehicle Information Center (EVIC) will display
which memory position has been set.
NOTE:
• Memory profiles can be set without the
vehicle in PARK, but the vehicle must be
in PARK to recall a memory profile. •
The Recall Memory with Remote Linked to
Memory feature can be enabled through the
Electronic Vehicle Information Center (EVIC),
refer to “Electronic Vehicle Information Cen-
ter (EVIC)/Customer-Programmable Fea-
tures” in “Understanding Your Instrument
Panel” for further information.
Linking And Unlinking The Remote
Keyless Entry Transmitter To Memory
Your RKE transmitters can be programmed to
recall one of two pre-programmed memory pro-
files by pressing the UNLOCK button on the
RKE transmitter.
NOTE:
Before programming your RKE transmitters
you must select the “Remote Linked to
Memory” feature through the Electronic Vehicle
Information Center (EVIC), refer to “Electronic
Vehicle Information Center (EVIC)/Customer-
Programmable Features” in “Understanding
Your Instrument Panel” for further information.
103
Page 111 of 408
Automatic Headlights — If EquippedThis system automatically turns the headlights
on or off according to ambient light levels. To
turn the system on, rotate the headlight switch
to the A (AUTO) position.
When the system is on, the Headlight Delay
feature is also on. This means the headlights
will stay on for up to 90 seconds after you turn
the ignition switch to the OFF position. To turn
the automatic headlights off, turn the headlight
switch out of the AUTO position.
NOTE:
The engine must be running before the head-
lights will turn on in the Automatic Mode.
Headlights On Automatically With
Wipers
If your vehicle is equipped with Automatic Head-
lights, it also has this customer-programmable
feature. When your headlights are in the auto-
matic mode and the engine is running, they will
automatically turn on when the wiper system is
on. Refer to “Electronic Vehicle Information Cen-
ter (EVIC)/Customer-Programmable Features” in
“Understanding Your Instrument Panel” for further
information.
If your vehicle is equipped with a “Rain Sensi-
tive Wiper System” and it is activated, the
headlights will automatically turn on after the
wipers complete five wipe cycles within approxi-
mately one minute, and they will turn off ap-
proximately four minutes after the wipers com-
pletely stop. Refer to “Windshield Wipers and
Washers” in this section for further information.
NOTE:
When your headlights come on during the
daytime, the instrument panel lights will
automatically dim to the lower nighttime
intensity. Refer to “Lights” in this section for
further information.
SmartBeam™ — If EquippedThe SmartBeam™ system provides increased
forward lighting at night by automating high beam
control through the use of a digital camera
mounted on the inside rearview mirror. This cam-
era detects vehicle specific light and automatically
switches from high beams to low beams until the
approaching vehicle is out of view.
NOTE:
•If the windshield or SmartBeam™ mirror
is replaced, the SmartBeam™ mirror must
be re-aimed to ensure proper perfor-
mance. See your local authorized dealer.
• Broken, muddy, or obstructed headlights
and taillights of vehicles in the field of
view will cause headlights to remain on
longer (closer to the vehicle). Also, dirt,
film, and other obstructions (sticker, toll
box, etc.) on the windshield or camera
lens will cause the system to function
improperly.
To Activate
1. Enable the Automatic High Beams. Refer to
“Electronic Vehicle Information Center (EVIC)/
Customer-Programmable Features” in “Under-
standing Your Instrument Panel” for further in-
formation.
2. Turn the headlight switch to the AUTO head-
light position.
3. Push the multifunction lever away from you
(toward front of vehicle) to engage the high
beam mode.
107
Page 112 of 408
NOTE:
This system will not activate until the ve-
hicle is at or above 20 mph (32 km/h).
To Deactivate
1. Pull the multifunction lever toward you (or
rearward in car) to manually deactivate the
system (normal operation of low beams).
2. Push back on the multifunction lever once
again to reactivate the system.
Daytime Running Lights — If
Equipped
The Daytime Running Lights (low intensity)
come on whenever the engine is running, and
the transmission is not in the PARK position.
The lights will remain on until the ignition is
switched to the OFF or ACC position or the
parking brake is engaged. Also, if a turn signal is
activated, the DRL lamp on the same side of the
vehicle will turn off for the duration of the turn
signal activation. Once the turn signal is no
longer active, the DRL lamp will illuminate. The
headlight switch must be used for normal night-
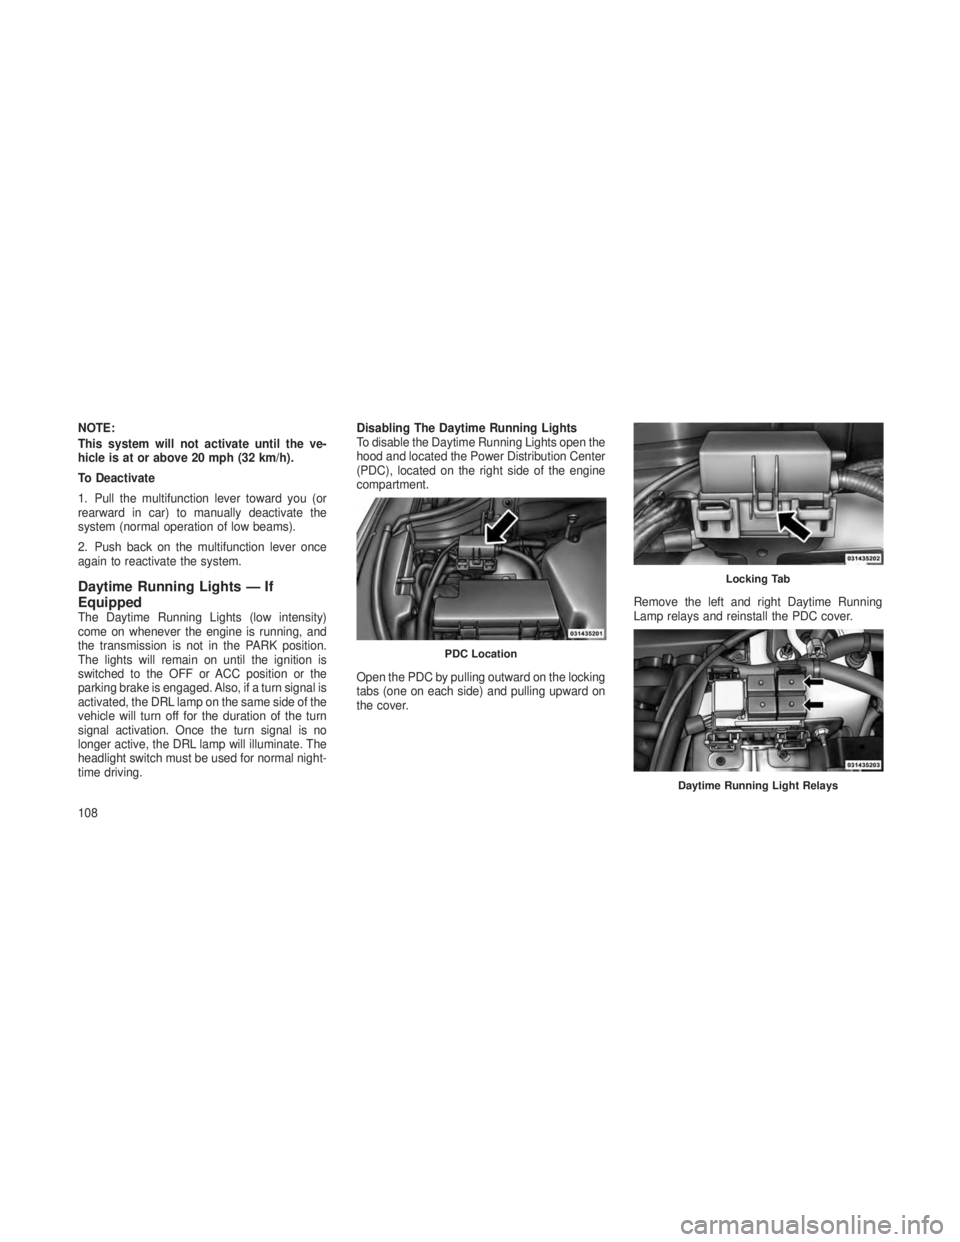
time driving.Disabling The Daytime Running Lights
To disable the Daytime Running Lights open the
hood and located the Power Distribution Center
(PDC), located on the right side of the engine
compartment.
Open the PDC by pulling outward on the locking
tabs (one on each side) and pulling upward on
the cover.
Remove the left and right Daytime Running
Lamp relays and reinstall the PDC cover.
PDC Location
Locking Tab
Daytime Running Light Relays
108
Page 120 of 408
POWER TILT/TELESCOPING
STEERING COLUMN — IF
EQUIPPED
This feature allows you to tilt the steering col-
umn upward or downward. It also allows you to
lengthen or shorten the steering column. The
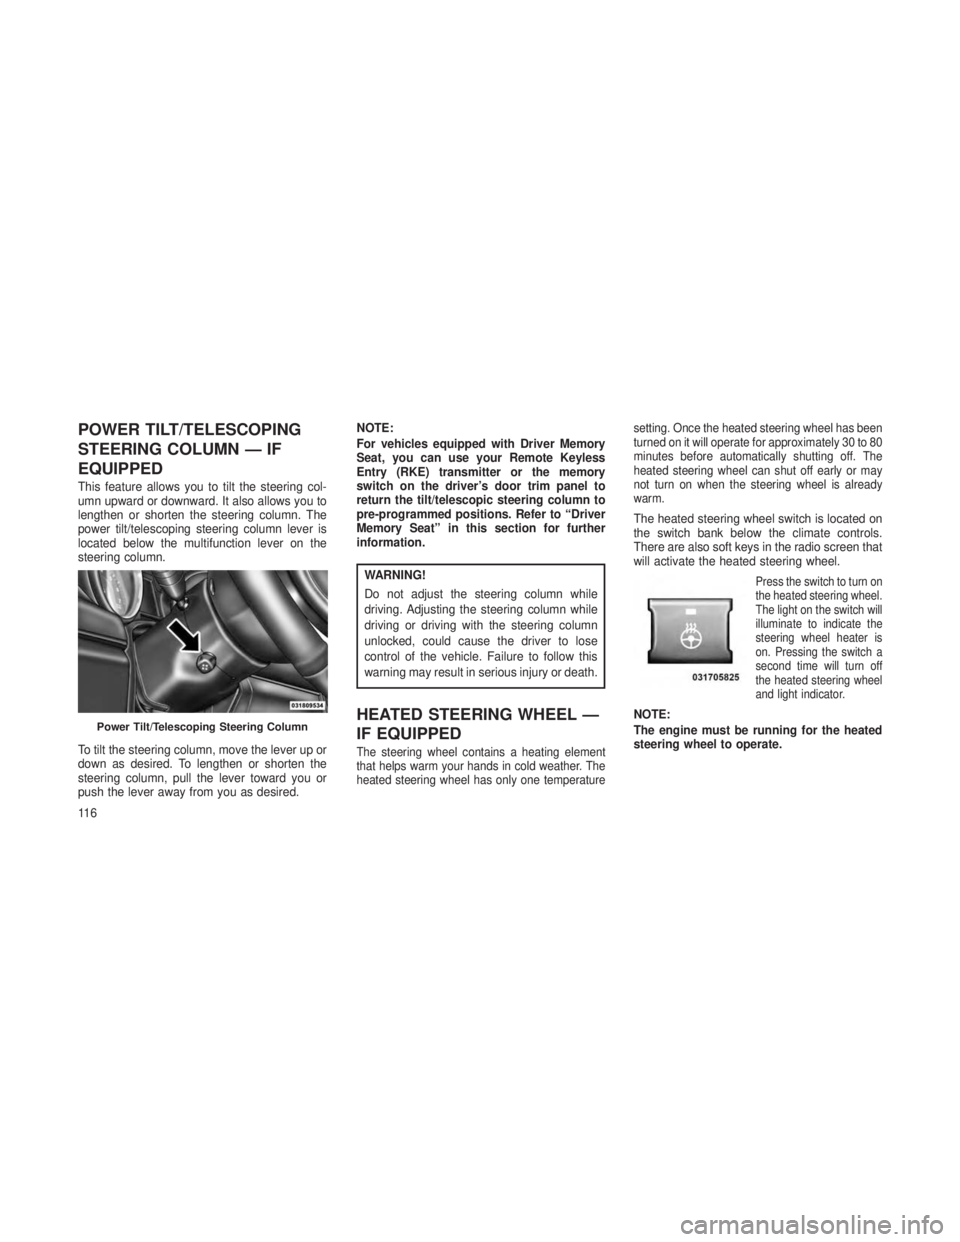
power tilt/telescoping steering column lever is
located below the multifunction lever on the
steering column.
To tilt the steering column, move the lever up or
down as desired. To lengthen or shorten the
steering column, pull the lever toward you or
push the lever away from you as desired.NOTE:
For vehicles equipped with Driver Memory
Seat, you can use your Remote Keyless
Entry (RKE) transmitter or the memory
switch on the driver’s door trim panel to
return the tilt/telescopic steering column to
pre-programmed positions. Refer to “Driver
Memory Seat” in this section for further
information.
WARNING!
Do not adjust the steering column while
driving. Adjusting the steering column while
driving or driving with the steering column
unlocked, could cause the driver to lose
control of the vehicle. Failure to follow this
warning may result in serious injury or death.
HEATED STEERING WHEEL —
IF EQUIPPED
The steering wheel contains a heating element
that helps warm your hands in cold weather. The
heated steering wheel has only one temperature
setting. Once the heated steering wheel has been
turned on it will operate for approximately 30 to 80
minutes before automatically shutting off. The
heated steering wheel can shut off early or may
not turn on when the steering wheel is already
warm.
The heated steering wheel switch is located on
the switch bank below the climate controls.
There are also soft keys in the radio screen that
will activate the heated steering wheel.
Press the switch to turn on
the heated steering wheel.
The light on the switch will
illuminate to indicate the
steering wheel heater is
on. Pressing the switch a
second time will turn off
the heated steering wheel
and light indicator.
NOTE:
The engine must be running for the heated
steering wheel to operate.Power Tilt/Telescoping Steering Column
11 6
Page 127 of 408
To Resume SpeedPress the RES+button and release. Then
remove your foot from the accelerator pedal.
The EVIC will display the last set speed.
NOTE:
You can resume ACC from a minimum of
18 mph (30 km/h).
WARNING!
The Resume function should only be used if
traffic and road conditions permit. Resuming
a set speed that is too high or too low for
prevailing traffic and road conditions could
cause the vehicle to accelerate or decelerate
too sharply for safe operation. Failure to
follow these warnings can result in a collision
and death or serious personal injury.
To Vary The Speed SettingWhile ACC is set, you can increase the set
speed by pressing and holding the RES +
button. If the button is continually pressed, the
set speed will continue to increase in 5 mph
(10 km/h) increments until the button is re-
leased. The increase in set speed is reflected in
the EVIC display.
Pressing the RES +button once will result in a
1 mph (1 km/h) increase in set speed. Each
subsequent tap of the button results in an
increase of 1 mph (1 km/h).
While ACC is set, the set speed can be de-
creased by pressing and holding the SET -
button. If the button is continually pressed, the
set speed will continue to decrease in 5 mph
(10 km/h) increments until the button is re-
leased. The decrease in set speed is reflected
in the EVIC display.
Pressing the SET -button once will result in a
1 mph (1 km/h) decrease in set speed. Each
subsequent tap of the button results in a de-
crease of 1 mph (1 km/h). NOTE:
•
When you use the SET - button to decel-
erate, if the engine’s braking power does
not slow the vehicle sufficiently to reach
the set speed, the brake system will auto-
matically slow the vehicle.
• The ACC system can only apply a maxi-
mum of 25% of the vehicle’s braking ca-
pability and will not bring the vehicle to a
complete stop.
•
The ACC system maintains set speed when
driving up hill and down hill. However, a
slight speed change on moderate hills is
normal. In addition, downshifting may oc-
cur while climbing uphill or descending
downhill. This is normal operation and nec-
essary to maintain set speed.
123
Page 152 of 408
WARNING!
To avoid serious injury or death:
•Only devices designed for use in this type
of outlet should be inserted into any 12 Volt
outlet.
• Do not touch with wet hands.
• Close the lid when not in use and while
driving the vehicle.
• If this outlet is mishandled, it may cause an
electric shock and failure.
CAUTION!
•Many accessories that can be plugged in
draw power from the vehicle’s battery,
even when not in use (i.e., cellular phones,
etc.). Eventually, if plugged in long enough,
the vehicle’s battery will discharge suffi-
ciently to degrade battery life and/or pre-
vent the engine from starting.
(Continued)
CAUTION!(Continued)
•Accessories that draw higher power (i.e.,
coolers, vacuum cleaners, lights, etc.) will
degrade the battery even more quickly.
Only use these intermittently and with
greater caution.
• After the use of high power draw accesso-
ries, or long periods of the vehicle not
being started (with accessories still
plugged in), the vehicle must be driven a
sufficient length of time to allow the gen-
erator to recharge the vehicle’s battery.
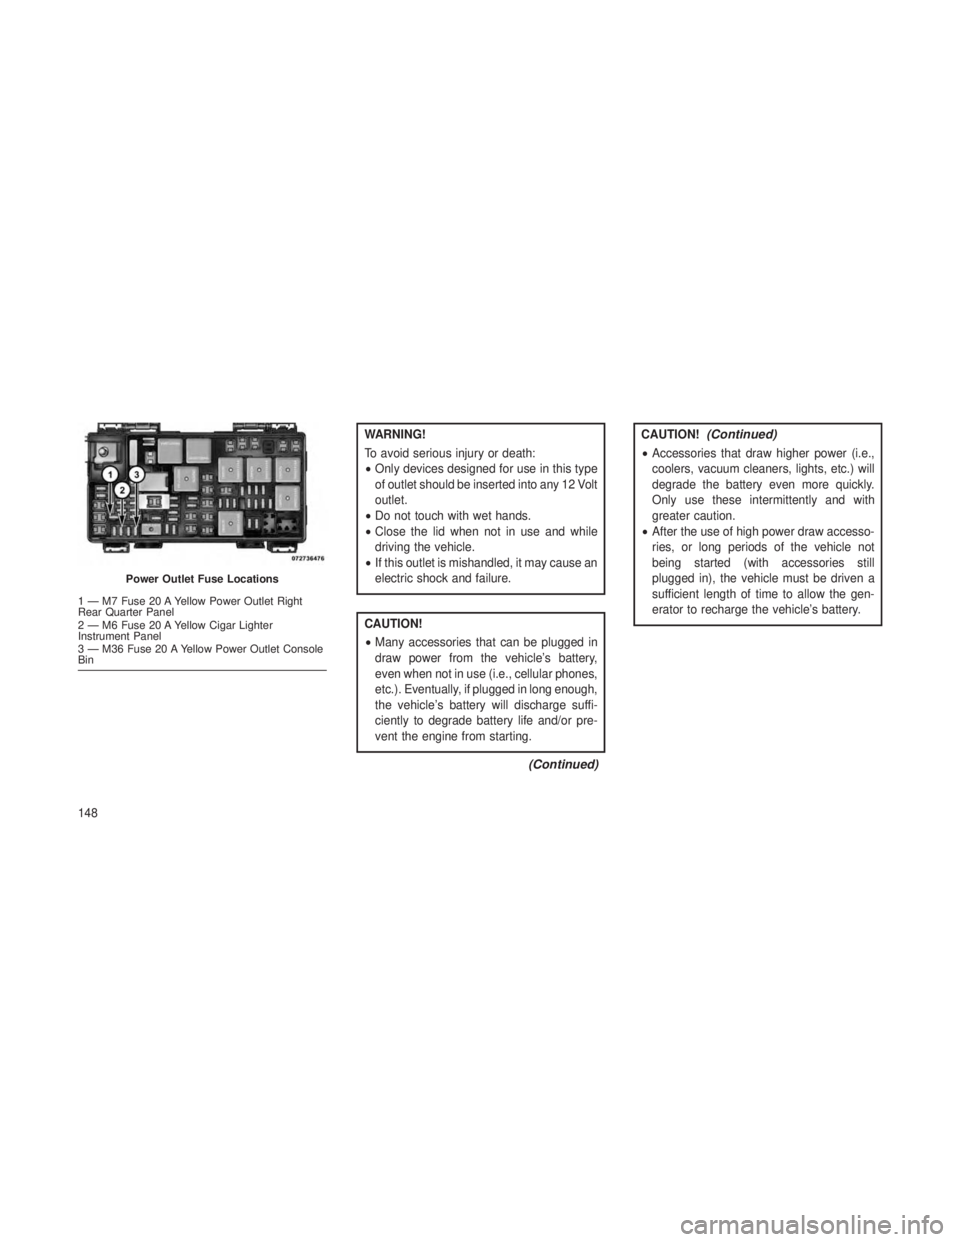
Power Outlet Fuse Locations
1 — M7 Fuse 20 A Yellow Power Outlet Right
Rear Quarter Panel
2 — M6 Fuse 20 A Yellow Cigar Lighter
Instrument Panel
3 — M36 Fuse 20 A Yellow Power Outlet Console
Bin
148
Page 158 of 408
REAR WINDOW FEATURES
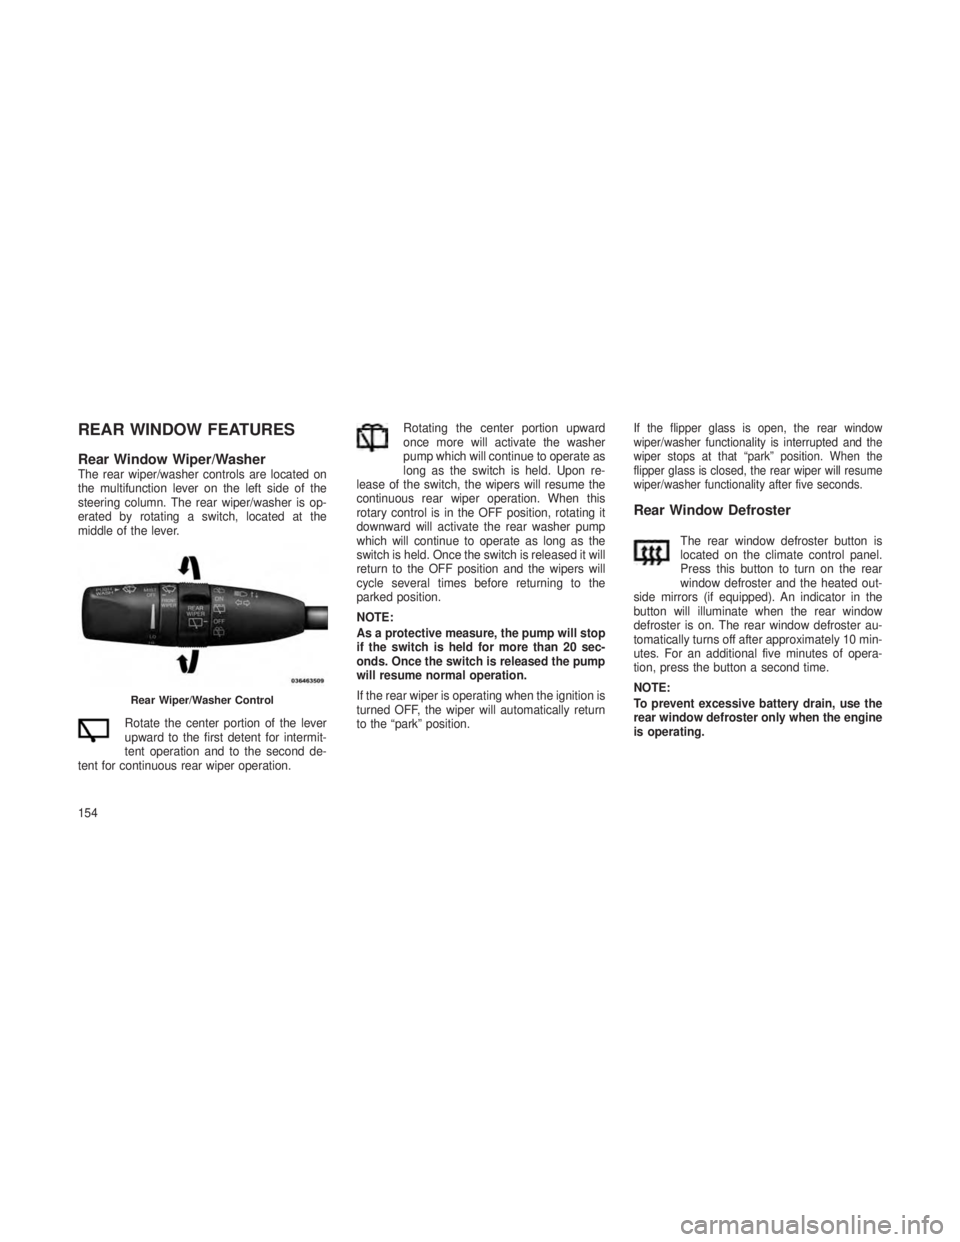
Rear Window Wiper/WasherThe rear wiper/washer controls are located on
the multifunction lever on the left side of the
steering column. The rear wiper/washer is op-
erated by rotating a switch, located at the
middle of the lever.Rotate the center portion of the lever
upward to the first detent for intermit-
tent operation and to the second de-
tent for continuous rear wiper operation. Rotating the center portion upward
once more will activate the washer
pump which will continue to operate as
long as the switch is held. Upon re-
lease of the switch, the wipers will resume the
continuous rear wiper operation. When this
rotary control is in the OFF position, rotating it
downward will activate the rear washer pump
which will continue to operate as long as the
switch is held. Once the switch is released it will
return to the OFF position and the wipers will
cycle several times before returning to the
parked position.
NOTE:
As a protective measure, the pump will stop
if the switch is held for more than 20 sec-
onds. Once the switch is released the pump
will resume normal operation.
If the rear wiper is operating when the ignition is
turned OFF, the wiper will automatically return
to the “park” position.
If the flipper glass is open, the rear window
wiper/washer functionality is interrupted and the
wiper stops at that “park” position. When the
flipper glass is closed, the rear wiper will resume
wiper/washer functionality after five seconds.
Rear Window Defroster
The rear window defroster button is
located on the climate control panel.
Press this button to turn on the rear
window defroster and the heated out-
side mirrors (if equipped). An indicator in the
button will illuminate when the rear window
defroster is on. The rear window defroster au-
tomatically turns off after approximately 10 min-
utes. For an additional five minutes of opera-
tion, press the button a second time.
NOTE:
To prevent excessive battery drain, use the
rear window defroster only when the engine
is operating.
Rear Wiper/Washer Control
154
Page 161 of 408
4
UNDERSTANDING YOUR INSTRUMENT
PANEL
•INSTRUMENT PANEL FEATURES ...................160
• INSTRUMENT CLUSTER .........................161
• INSTRUMENT CLUSTER DESCRIPTIONS ..............162
• ELECTRONIC VEHICLE INFORMATION CENTER (EVIC) .....168
•Electronic Vehicle Information Center (EVIC) Displays ......169
• EVIC White Telltale Lights ...................... .173
• EVIC Amber Telltale Lights ..................... .174
• EVIC Red Telltale Lights ........................175
• Engine Oil Change Indicator System ................177
• Fuel Economy ............................. .178
• Adaptive Cruise Control ........................179
• Vehicle Speed ............................. .179
• Trip Info ................................ .179
• Units .................................. .180
• Vehicle Info (Customer Information Features) ...........180
• TirePSIorTireKPA ......................... .180
• Messages # .............................. .181
• Turn Menu OFF ............................ .181
157