check engine JEEP GRAND CHEROKEE 2013 Owner handbook (in English)
[x] Cancel search | Manufacturer: JEEP, Model Year: 2013, Model line: GRAND CHEROKEE, Model: JEEP GRAND CHEROKEE 2013Pages: 408, PDF Size: 3.21 MB
Page 325 of 408
NOTE:
Intentional tampering with emissions con-
trol systems can result in civil penalties
being assessed against you.
In unusual situations involving grossly malfunc-
tioning engine operation, a scorching odor may
suggest severe and abnormal catalyst over-
heating. If this occurs, stop the vehicle, turn off
the engine and allow it to cool. Service, includ-
ing a tune-up to manufacturer’s specifications,
should be obtained immediately.
To minimize the possibility of catalytic converter
damage:
•Do not shut off the engine or interrupt the
ignition, when the transmission is in gear and
the vehicle is in motion.
• Do not try to start the engine by pushing or
towing the vehicle.
• Do not idle the engine with any spark plug
wires disconnected or removed, such as
when diagnostic testing, or for prolonged
periods during very rough idle or malfunction-
ing operating conditions.Cooling System
WARNING!
You or others can be badly burned by hot
engine coolant (antifreeze) or steam from
your radiator. If you see or hear steam com-
ing from under the hood, do not open the
hood until the radiator has had time to cool.
Never try to open a cooling system pressure
cap when the radiator or coolant bottle is hot.
Engine Coolant Checks
Check the engine coolant (antifreeze) protec-
tion every 12 months (before the onset of
freezing weather, where applicable). If the en-
gine coolant (antifreeze) is dirty, the system
should be drained, flushed, and refilled with
fresh OAT coolant (conforming to MS-12106) by
an authorized dealer. Check the front of the A/C
condenser for any accumulation of bugs,
leaves, etc. If dirty, clean by gently spraying
water from a garden hose vertically down the
face of the condenser. Check the engine cooling system hoses for
brittle rubber, cracking, tears, cuts, and tight-
ness of the connection at the coolant recovery
bottle and radiator. Inspect the entire system for
leaks.
With the engine at normal operating temperature
(but not running), check the cooling system pres-
sure cap for proper vacuum sealing by draining a
small amount of engine coolant (antifreeze) from
the radiator drain cock. If the cap is sealing
properly, the engine coolant (antifreeze) will begin
to drain from the coolant recovery bottle. DO NOT
REMOVE THE COOLANT PRESSURE CAP
WHEN THE COOLING SYSTEM IS HOT.
Cooling System – Drain, Flush, And Refill
If the engine coolant (antifreeze) is dirty or
contains visible sediment, clean and flush with
OAT coolant (antifreeze) that meets the require-
ments of Chrysler Material Standard MS-12106.
Refer to the “Maintenance Schedule” for the
proper maintenance intervals.
321
Page 327 of 408
Please note that it is the owner’s responsibility to
maintain the proper level of protection against
freezing according to the temperatures occurring
in the area where the vehicle is operated.
NOTE:
Mixing engine coolant (antifreeze) types is
not recommended and can result in cooling
system damage. Drain, flush, and refill as
soon as possible to avoid damage if coolant
types are mixed in an emergency.
Cooling System Pressure Cap
The cap must be fully tightened to prevent loss
of engine coolant (antifreeze), and to ensure
that engine coolant (antifreeze) will return to the
radiator from the coolant recovery tank.
The cap should be inspected and cleaned if
there is any accumulation of foreign material on
the sealing surfaces.
WARNING!
•The warning words “DO NOT OPEN HOT”
on the cooling system pressure cap are a
safety precaution. Never add engine cool-
ant (antifreeze) when the engine is over-
heated. Do not loosen or remove the cap
to cool an overheated engine. Heat causes
pressure to build up in the cooling system.
To prevent scalding or injury, do not re-
move the pressure cap while the system is
hot or under pressure.
• Do not use a pressure cap other than the
one specified for your vehicle. Personal
injury or engine damage may result.
Disposal Of Used Engine Coolant
Used ethylene glycol-based engine coolant (an-
tifreeze) is a regulated substance requiring
proper disposal. Check with your local authori-
ties to determine the disposal rules for your
community. To prevent ingestion by animals or
children, do not store ethylene glycol-based
engine coolant (antifreeze) in open containers or allow it to remain in puddles on the ground. If
ingested by a child or pet, seek emergency
assistance immediately. Clean up any ground
spills immediately.
Coolant Level
The coolant bottle provides a quick visual
method for determining that the coolant level is
adequate. With the engine OFF and cold, the
level of the engine coolant (antifreeze) in the
bottle should be between the ranges indicated
on the bottle.
The radiator normally remains completely full,
so there is no need to remove the radiator cap
unless checking for engine coolant (antifreeze)
freeze point or replacing coolant. Advise your
service attendant of this. As long as the engine
operating temperature is satisfactory, the cool-
ant bottle need only be checked once a month.
When additional engine coolant (antifreeze) is
needed to maintain the proper level, only OAT
coolant that meets the requirements of Chrysler
Material Standard MS-12106 should be added
to the coolant bottle. Do not overfill.
323
Page 328 of 408
Points To Remember
NOTE:
When the vehicle is stopped after a few
miles/kilometers of operation, you may ob-
serve vapor coming from the front of the
engine compartment. This is normally a re-
sult of moisture from rain, snow, or high
humidity accumulating on the radiator and
being vaporized when the thermostat opens,
allowing hot engine coolant (antifreeze) to
enter the radiator.
If an examination of your engine compartment
shows no evidence of radiator or hose leaks,
the vehicle may be safely driven. The vapor will
soon dissipate.
•Do not overfill the coolant expansion bottle.
• Check the coolant freeze point in the radiator
and in the coolant expansion bottle. If engine
coolant (antifreeze) needs to be added, the
contents of the coolant expansion bottle must
also be protected against freezing.
• If frequent engine coolant (antifreeze) addi-
tions are required, the cooling system should
be pressure tested for leaks. •
Maintain engine coolant (antifreeze) concen-
tration at a minimum of 50% OAT coolant
(conforming to MS-12106) and distilled water
for proper corrosion protection of your engine
which contains aluminum components.
• Make sure that the coolant expansion bottle
overflow hoses are not kinked or obstructed.
• Keep the front of the radiator clean. If your
vehicle is equipped with air conditioning,
keep the front of the condenser clean.
•
Do not change the thermostat for Summer or
Winter operation. If replacement is ever neces-
sary, install ONLY the correct type thermostat.
Other designs may result in unsatisfactory
engine coolant (antifreeze) performance, poor
gas mileage, and increased emissions.
Brake SystemIn order to assure brake system performance,
all brake system components should be in-
spected periodically. Refer to the “Maintenance
Schedule” for the proper maintenance intervals.
WARNING!
Riding the brakes can lead to brake failure
and possibly a collision. Driving with your
foot resting or riding on the brake pedal can
result in abnormally high brake tempera-
tures, excessive lining wear, and possible
brake damage. You would not have your full
braking capacity in an emergency.
Fluid Level Check – Brake Master Cylinder
The fluid level of the master cylinder should be
checked when performing under the hood ser-
vice, or immediately if the brake system warning
lamp indicates system failure.
The brake master cylinder has a plastic reser-
voir. On the outboard side of the reservoir, there
is a “MAX” dot and a “MIN” dot. The fluid level
must be kept within these two dots. Do not add
fluid above the MAX mark, because leakage
may occur at the cap.
324
Page 329 of 408
With disc brakes, the fluid level can be expected
to fall as the brake linings wear. However, an
unexpected drop in fluid level may be caused by
a leak and a system check should be con-
ducted.
Refer to “Fluids, Lubricants, and Genuine Parts”
in “Maintaining Your Vehicle” for further informa-
tion.
WARNING!
•Use only manufacturer’s recommended
brake fluid. Refer to “Fluids, Lubricants,
and Genuine Parts” in “Maintaining Your
Vehicle” for further information. Using the
wrong type of brake fluid can severely
damage your brake system and/or impair
its performance. The proper type of brake
fluid for your vehicle is also identified on
the original factory installed hydraulic mas-
ter cylinder reservoir.
(Continued)
WARNING!(Continued)
•To avoid contamination from foreign matter
or moisture, use only new brake fluid or fluid
that has been in a tightly closed container.
Keep the master cylinder reservoir cap se-
cured at all times. Brake fluid in a open
container absorbs moisture from the air re-
sulting in a lower boiling point. This may
cause it to boil unexpectedly during hard or
prolonged braking, resulting in sudden brake
failure. This could result in a collision.
•Overfilling the brake fluid reservoir can
result in spilling brake fluid on hot engine
parts, causing the brake fluid to catch fire.
Brake fluid can also damage painted and
vinyl surfaces, care should be taken to
avoid its contact with these surfaces.
• Do not allow petroleum based fluid to
contaminate the brake fluid. Brake seal
components could be damaged, causing
partial or complete brake failure. This
could result in a collision.
Front/Rear Axle FluidFor normal service, periodic fluid level checks
are not required. When the vehicle is serviced
for other reasons the exterior surfaces of the
axle assembly should be inspected. If gear oil
leakage is suspected inspect the fluid level.
Refer to “Fluids, Lubricants, and Genuine Parts”
in “Maintaining Your Vehicle” for further informa-
tion.
Front Axle Fluid Level Check
The front axle oil level needs to be between 1/8
in (3 mm) below the bottom of the fill hole and
the bottom of the fill hole.
The front axle fill and drain plugs should be
tightened to 22 to 29 ft lbs (30 to 40 N·m).
CAUTION!
Do not over tighten the plugs as it could
damage them and cause them to leak.
Rear Axle Fluid Level Check
The rear axle oil level needs to be between 1/8
in (3 mm) below the bottom of the fill hole and
the bottom of the fill hole. 325
Page 331 of 408
Special AdditivesThe manufacturer strongly recommends against
using any special additives in the transmission.
Automatic Transmission Fluid (ATF) is an engi-
neered product and its performance may be
impaired by supplemental additives. Therefore,
do not add any fluid additives to the transmis-
sion. The only exception to this policy is the use
of special dyes for diagnosing fluid leaks. Avoid
using transmission sealers as they may ad-
versely affect seals.
CAUTION!
Do not use chemical flushes in your trans-
mission as the chemicals can damage your
transmission components. Such damage is
not covered by the New Vehicle Limited
Warranty.Fluid Level Check – 3.6L And 3.0L Diesel
Engine
The fluid level is preset at the factory and does
not require adjustment under normal operating
conditions. Routine fluid level checks are not
required, therefore the transmission has no
dipstick. Your authorized dealer can check your
transmission fluid level using a special service
dipstick.
If you notice fluid leakage or transmission mal-
function, visit your authorized dealer immedi-
ately to have the transmission fluid level
checked. Operating the vehicle with an im-
proper fluid level can cause severe transmis-
sion damage.
CAUTION!
•
If a transmission fluid leak occurs, visit
your authorized dealer immediately. Se-
vere transmission damage may occur.
Your authorized dealer has the proper
tools to adjust the fluid level accurately. Fluid Level Check – 5.7L Engine
It is best to check the fluid level when the
transmission is at normal operating temperature
(approximately 180°F / 82°C). This occurs after
at least 15 miles (25 km) of driving. At normal
operating temperature the fluid cannot be held
comfortably between the fingertips.
Use the following procedure to check the fluid
level properly:
1. Park the vehicle on level ground.
2. Run the engine at idle speed and normal
operating temperature.
3. Fully apply the parking brake, and press the
brake pedal.
4. Place the shift lever momentarily into each
gear position (allowing time for the transmission
to fully engage in each position), ending with the
shift lever in PARK.
5. Remove the dipstick, wipe it clean and rein-
sert it until seated.
327
Page 332 of 408
6.Remove the dipstick again, and note the fluid
level on both sides. The fluid level reading is only
valid if there is a solid coating of oil on both sides of
the dipstick. The holes in the dipstick will be full of
fluid if the actual level is at or above the hole. The
fluid level should be between the "HOT"(upper)
reference holes on the dipstick at normal operating
temperature. If the fluid level is low, add fluid
through the dipstick tube to bring it to the proper
level. Do not overfill. Use ONLY the recom-
mended fluid (see "Fluids, Lubricants, and Genuine
Parts" for fluid specifications). After adding any
quantity of oil through the dipstick tube, wait a
minimum of two minutes for the oil to fully drain into
the transmission before rechecking the fluid level.
NOTE:If it is necessary to check the transmission
below the operating temperature, the fluid level
should be between the two “COLD” (lower)
holes on the dipstick with the fluid at approxi-
mately 70°F (21°C) (room temperature). If the
fluid level is correctly established at room tem-
perature, it should be between the “HOT” (up-
per) reference holes when the transmission
reaches 180°F (82°C). Remember it is best to
check the level at the normal operating tem-
perature.
CAUTION!
If the fluid temperature is below 50°F (10°C)
it may not register on the dipstick. Do not add
fluid until the temperature is elevated enough
to produce an accurate reading. Run the
engine at idle, in PARK, to warm the fluid.
7. Check for leaks. Release the parking brake.
NOTE:
To prevent dirt and water from entering the
transmission after checking or replenishing
fluid, make sure that the dipstick cap is
properly reseated. It is normal for the dip-
stick cap to spring back slightly from its
fully seated position, as long as its seal
remains engaged in the dipstick tube.
Fluid And Filter Changes
Refer to the “Maintenance Schedule” for the
proper maintenance intervals.
In addition, change the fluid and filter if the
transmission is disassembled for any reason.Appearance Care And Protection
From Corrosion
Protection Of Body And Paint From CorrosionVehicle body care requirements vary according
to geographic locations and usage. Chemicals
that make roads passable in snow and ice, and
those that are sprayed on trees and road sur-
faces during other seasons, are highly corrosive
to the metal in your vehicle.
The following maintenance recommendations
will enable you to obtain maximum benefit from
the corrosion resistance built into your vehicle.
What Causes Corrosion?
Corrosion is the result of deterioration or re-
moval of paint and protective coatings from your
vehicle.
The most common causes are:
• Road salt, dirt and moisture accumulation.
• Stone and gravel impact.
• Insects, tree sap and tar.
• Salt in the air near seacoast localities.
• Atmospheric fallout/industrial pollutants.
328
Page 349 of 408
At Each Stop for Fuel
•Check the engine oil level about 5 minutes
after a fully warmed engine is shut off.
Checking the oil level while the vehicle is on
level ground will improve the accuracy of the
oil level reading. Add oil only when the level
is at or below the ADD or MIN mark.
• Check the windshield washer solvent and
add if required.
Once a Month
• Check tire pressure and look for unusual
wear or damage.
• Inspect the battery and clean and tighten the
terminals as required. •
Check the fluid levels of the coolant reservoir,
brake master cylinder, power steering and
transmission (5.7L only) and add as needed.
• Check all lights and other electrical items for
correct operation.
At Each Oil Change
• Change the engine oil filter.
• Inspect the brake hoses and lines.
CAUTION!
Failure to perform the required maintenance
items may result in damage to the vehicle. 7,500 Miles (12,000 km) or 12 Months
Maintenance Service Schedule
❏
Change the engine oil and engine oil
filter.††
❏ Rotate tires.
Odometer Reading Date
Repair Order #Dealer Code
Signature, Authorized Service Center
345
Page 363 of 408
•Trailer towing.
• Taxi, police, or delivery service (commercial
service).
• Off-road or desert operation.
Maintenance Schedule – Diesel
Engine
To help you have the best driving experience
possible, the manufacturer has identified the
specific vehicle maintenance service intervals
that are required to keep your vehicle operating
properly and safely.
The manufacturer recommends that these main-
tenance intervals be performed at your selling
dealer. The technicians at your dealership know
your vehicle best, and have access to factory
trained information, genuine MOPAR® parts, and
specially designed electronic and mechanical
tools that can help prevent future costly repairs.
The maintenance intervals shown should be
performed as indicated in this section. NOTE:
•
Under no circumstances should oil change
intervals exceed 12,500 miles (20 000 km) or
12 months, whichever comes first.
•
Flush and replace the engine coolant at
120 months or 150,000 miles (240,000 km)
whichever comes first.
At Each Stop for Fuel
• Check the engine oil level about 15 minutes
after a fully warmed engine is shut off.
Checking the oil level while the vehicle is on
level ground will improve the accuracy of the
oil level reading. Add oil only when the level
is at or below the ADD or MIN mark.
• Check the windshield washer solvent and
add if required.
Once a Month
• Check tire pressure and look for unusual
wear or damage.
• Inspect the battery and clean and tighten the
terminals as required. •
Check the fluid levels of the coolant reservoir,
brake master cylinder, and power steering
and add as needed.
• Check all lights and other electrical items for
correct operation.
At Each Oil Change
• Change the engine oil filter.
• Inspect the brake hoses and lines.
• Inspect for the presence of water in the fuel
filter/water separator unit.
CAUTION!
Failure to perform the required maintenance
items may result in damage to the vehicle.
Required Maintenance Intervals
Refer to the Maintenance Schedules on the
following pages for the required maintenance
intervals.
359
Page 398 of 408
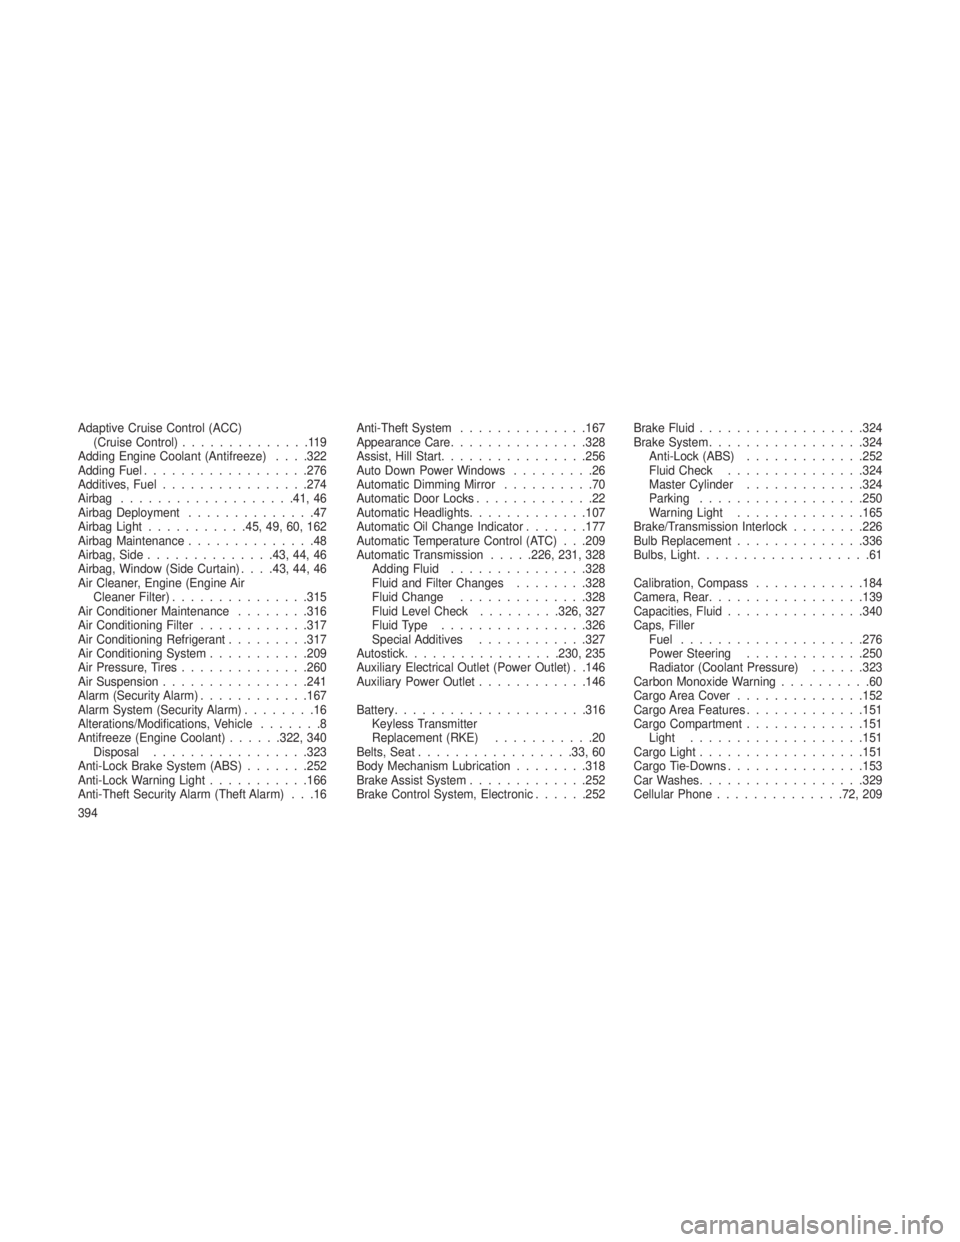
Adaptive Cruise Control (ACC)(Cruise Control) ..............119
Adding Engine Coolant (Antifreeze) . . . .322
Adding Fuel ................. .276
Additives, Fuel ................274
Airbag ...................41, 46
Airbag Deployment ..............47
Airbag Light ...........45, 49, 60, 162
Airbag Maintenance ..............48
Airbag, Side ..............43, 44, 46
Airbag, Window (Side Curtain) . . . .43, 44, 46
Air Cleaner, Engine (Engine Air Cleaner Filter) ...............315
Air Conditioner Maintenance ........316
Air Conditioning Filter ............317
Air Conditioning Refrigerant .........317
Air Conditioning System ...........209
Air Pressure, Tires ..............260
Air Suspension ................241
Alarm (Security Alarm) ............167
Alarm System (Security Alarm) ........16
Alterations/Modifications, Vehicle .......8
Antifreeze (Engine Coolant) ......322, 340
Disposal .................323
Anti-Lock Brake System (ABS) .......252
Anti-Lock Warning Light ...........166
Anti-Theft Security Alarm (Theft Alarm) . . .16 Anti-Theft System
..............167
Appearance Care ...............328
Assist, Hill Start ................256
Auto Down Power Windows .........26
Automatic Dimming Mirror ..........70
Automatic Door Locks .............22
Automatic Headlights .............107
Automatic Oil Change Indicator .......177
Automatic Temperature Control (ATC) . . .209
Automatic Transmission .....226, 231, 328
Adding Fluid ...............328
Fluid and Filter Changes ........328
Fluid Change ..............328
Fluid Level Check .........326, 327
Fluid T
ype................326
Special Additives ............327
Autostick ................ .230, 235
Auxiliary Electrical Outlet (Power Outlet) . .146
Auxiliary Power Outlet ............146
Battery .................... .316
Keyless Transmitter
Replacement (RKE) ...........20
Belts, Seat ................ .33, 60
Body Mechanism Lubrication ........318
Brake Assist System .............252
Brake Control System, Electronic ......252Brake Fluid
................. .324
Brake System .................324
Anti-Lock (ABS) .............252
Fluid Check ...............324
Master Cylinder .............324
Parking ................. .250
Warning Light ..............165
Brake/Transmission Interlock ........226
Bulb Replacement ..............336
Bulbs, Light ...................61
Calibration, Compass ............184
Camera, Rear .................139
Capacities, Fluid ...............340
Caps, Filler Fuel ....................276
Power Steering .............250
Radiator (Coolant Pressure) ......323
Carbon Monoxide Warning ..........60
Cargo Area Cover ..............152
Cargo Area Features .............151
Cargo Compartment .............151
Light ...................151
Cargo Light ................. .151
Cargo Tie-Downs ...............153
Car Washes ................. .329
Cellular Phone ............. .72,
209
394
Page 399 of 408
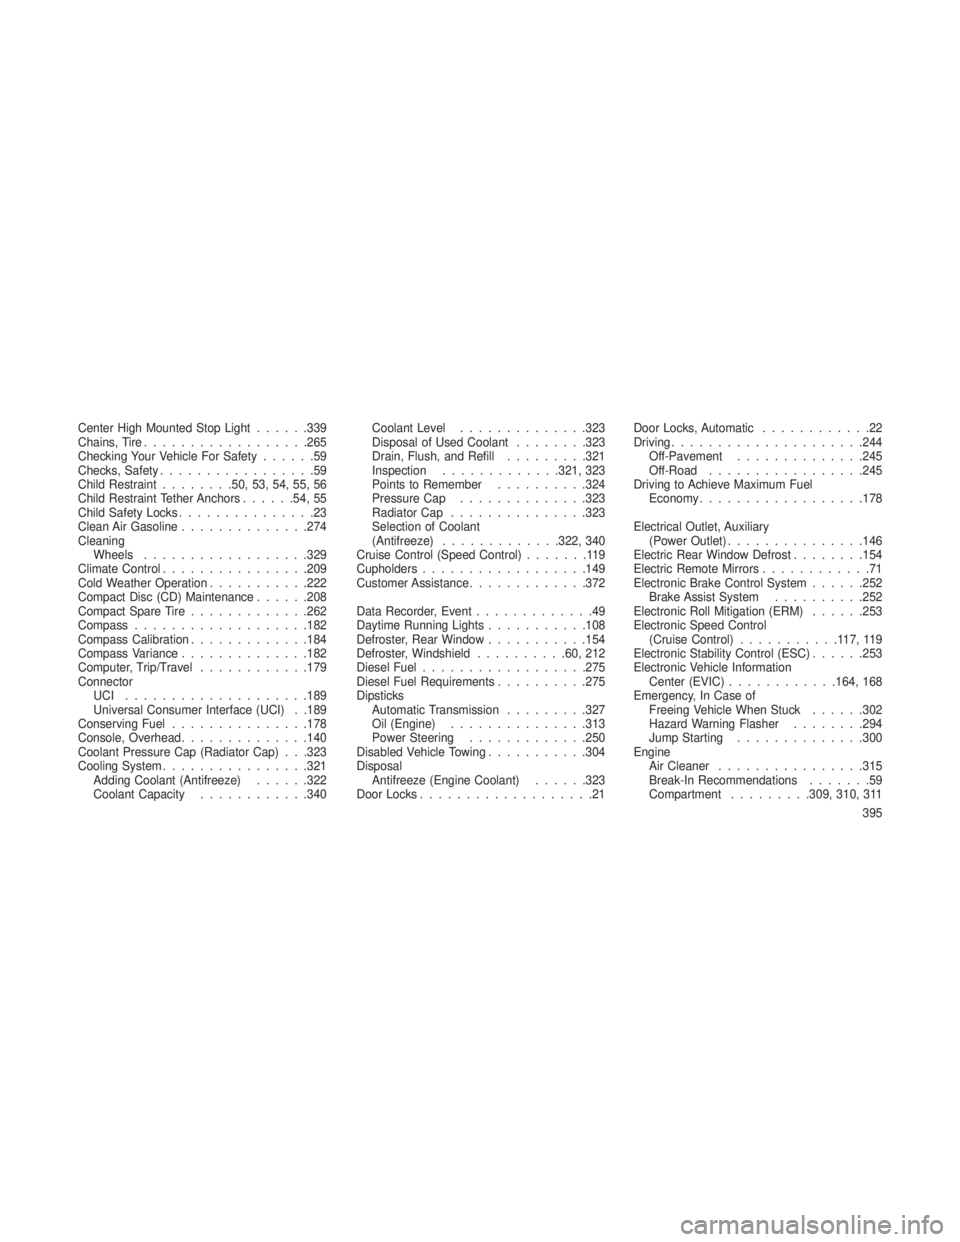
Center High Mounted Stop Light......339
Chains, Tire ................. .265
Checking Your Vehicle For Safety ......59
Checks, Safety .................59
Child Restraint ........50, 53, 54, 55, 56
Child Restraint Tether Anchors ......54, 55
Child Safety Locks ...............23
Clean Air Gasoline ..............274
Cleaning Wheels ................. .329
Climate Control ................209
Cold Weather Operation ...........222
Compact Disc (CD) Maintenance ......208
Compact Spare Tire .............262
Compass ...................182
Compass Calibration .............184
Compass Variance ..............182
Computer, Trip/Travel ............179
Connector UCI ................... .189
Universal Consumer Interface (UCI) . .189
Conserving Fuel ...............178
Console, Overhead ..............140
Coolant Pressure Cap (Radiator Cap) . . .323
Cooling System ................321
Adding Coolant (Antifreeze) ......322
Coolant Capacity ............340 Coolant Level
..............323
Disposal of Used Coolant ........323
Drain, Flush, and Refill .........321
Inspection .............321, 323
Points to Remember ..........324
Pressure Cap ..............323
Radiator Cap ...............323
Selection of Coolant
(Antifreeze) .............322, 340
Cruise Control (Speed Control) .......119
Cupholders ................. .149
Customer Assistance .............372
Data Recorder, Event .............49
Daytime Running Lights..........
.108
Defroster, Rear Window ...........154
Defroster, Windshield ..........60, 212
Diesel Fuel ................. .275
Diesel Fuel Requirements ..........275
Dipsticks Automatic Transmission .........327
Oil (Engine) ...............313
Power Steering .............250
Disabled Vehicle Towing ...........304
Disposal Antifreeze (Engine Coolant) ......323
Door Locks ...................21 Door Locks, Automatic
............22
Driving .................... .244
Off-Pavement ..............245
Off-Road .................245
Driving to Achieve Maximum Fuel Economy ................. .178
Electrical Outlet, Auxiliary (Power Outlet) ...............146
Electric Rear Window Defrost ........154
Electric Remote Mirrors ............71
Electronic Brake Control System ......252
Brake Assist System ..........252
Electronic Roll Mitigation (ERM) ......253
Electronic Speed Control (Cruise Control) ...........117,119
Electronic Stability Control (ESC) ......253
Electronic Vehicle Information Center (EVIC) ............164, 168
Emergency, In Case of Freeing Vehicle When Stuck ......302
Hazard Warning Flasher ........294
Jump Starting ..............300
Engine Air Cleaner ................315
Break-In Recommendations .......59
Compartment .........309, 310, 311
395