engine oil JEEP GRAND CHEROKEE 2013 Owner handbook (in English)
[x] Cancel search | Manufacturer: JEEP, Model Year: 2013, Model line: GRAND CHEROKEE, Model: JEEP GRAND CHEROKEE 2013Pages: 408, PDF Size: 3.21 MB
Page 63 of 408
ENGINE BREAK-IN
RECOMMENDATIONS
A long break-in period is not required for the
engine and drivetrain (transmission and axle) in
your vehicle.
Drive moderately during the first 300 miles
(500 km). After the initial 60 miles (100 km),
speeds up to 50 or 55 mph (80 or 90 km/h) are
desirable.
While cruising, brief full-throttle acceleration
within the limits of local traffic laws contributes
to a good break-in. Wide-open throttle accelera-
tion in low gear can be detrimental and should
be avoided.
The engine oil installed in the engine at the
factory is a high-quality energy conserving type
lubricant. Oil changes should be consistent with
anticipated climate conditions under which ve-
hicle operations will occur. For the recom-
mended viscosity and quality grades, refer to
“Maintenance Procedures” in “Maintaining Your
Vehicle”.
CAUTION!
Never use Non-Detergent Oil or Straight
Mineral Oil in the engine or damage may
result.
NOTE:
A new engine may consume some oil during
its first few thousand miles (kilometers) of
operation. This should be considered a nor-
mal part of the break-in and not interpreted
as an indication of difficulty.
Additional Requirements For Diesel
Engine — If Equipped
During the first 1500 km avoid heavy loads, e.g.
driving at full throttle. Do not exceed 2/3 of the
maximum permissible engine speed for each
gear. Change gear in good time. Do not shift
down a gear manually in order to brake.
SAFETY TIPS
Transporting PassengersNEVER TRANSPORT PASSENGERS IN THE
CARGO AREA.
WARNING!
• Do not leave children or animals inside
parked vehicles in hot weather. Interior
heat build-up may cause serious injury or
death.
• It is extremely dangerous to ride in a cargo
area, inside or outside of a vehicle. In a
collision, people riding in these areas are
more likely to be seriously injured or killed.
• Do not allow people to ride in any area of
your vehicle that is not equipped with seats
and seat belts.
• Be sure everyone in your vehicle is in a
seat and using a seat belt properly.
59
Page 64 of 408
Exhaust Gas
WARNING!
Exhaust gases can injure or kill. They contain
carbon monoxide (CO), which is colorless and
odorless. Breathing it can make you uncon-
scious and can eventually poison you. To avoid
breathing (CO), follow these safety tips:
•Do not run the engine in a closed garage
or in confined areas any longer than
needed to move your vehicle in or out of
the area.
•
If you are required to drive with the trunk/
liftgate open, make sure that all windows are
closed and the climate control BLOWER
switch is set at high speed. DO NOT use the
recirculation mode.
• If it is necessary to sit in a parked vehicle
with the engine running, adjust your heat-
ing or cooling controls to force outside air
into the vehicle. Set the blower at high
speed. The best protection against carbon monoxide
entry into the vehicle body is a properly main-
tained engine exhaust system.
Whenever a change is noticed in the sound of
the exhaust system, when exhaust fumes can
be detected inside the vehicle, or when the
underside or rear of the vehicle is damaged,
have a competent mechanic inspect the com-
plete exhaust system and adjacent body areas
for broken, damaged, deteriorated, or misposi-
tioned parts. Open seams or loose connections
could permit exhaust fumes to seep into the
passenger compartment. In addition, inspect
the exhaust system each time the vehicle is
raised for lubrication or oil change. Replace as
required.
Safety Checks You Should Make
Inside The Vehicle
Seat Belts
Inspect the belt system periodically, checking
for cuts, frays, and loose parts. Damaged parts
must be replaced immediately. Do not disas-
semble or modify the system. Front seat belt assemblies must be replaced
after a collision. Rear seat belt assemblies must
be replaced after a collision if they have been
damaged (i.e., bent retractor, torn webbing,
etc.). If there is any question regarding belt or
retractor condition, replace the belt.
Air Bag Warning Light
The light should come on and re-
main on for four to eight seconds
as a bulb check when the ignition
switch is first turned ON. If the light
is not lit during starting, see your
authorized dealer. If the light stays
on, flickers, or comes on while driving, have the
system checked by an authorized dealer.
Defroster
Check operation by selecting the defrost mode
and place the blower control on high speed. You
should be able to feel the air directed against
the windshield. See your authorized dealer for
service if your defroster is inoperable.
60
Page 65 of 408
Floor Mat Safety Information
Always use floor mats designed to fit the foot-
well of your vehicle. Use only floor mats that
leave the pedal area unobstructed and that are
firmly secured so that they cannot slip out of
position and interfere with the pedals or impair
safe operation of your vehicle in other ways.
WARNING!
Pedals that cannot move freely can cause
loss of vehicle control and increase the risk
of serious personal injury.
•
Always make sure that floor mats are prop-
erly attached to the floor mat fasteners.
•Never place or install floor mats or other
floor coverings in the vehicle that cannot
be properly secured to prevent them from
moving and interfering with the pedals or
the ability to control the vehicle.
(Continued)
WARNING!(Continued)
•Never put floor mats or other floor cover-
ings on top of already installed floor mats.
Additional floor mats and other coverings
will reduce the size of the pedal area and
interfere with the pedals.
• Check mounting of mats on a regular
basis. Always properly reinstall and secure
floor mats that have been removed for
cleaning.
• Always make sure that objects cannot fall
into the driver footwell while the vehicle is
moving. Objects can become trapped un-
der the brake pedal and accelerator pedal
causing a loss of vehicle control.
• If required, mounting posts must be prop-
erly installed, if not equipped from the
factory.
Failure to properly follow floor mat installa-
tion or mounting can cause interference with
the brake pedal and accelerator pedal opera-
tion causing loss of control of the vehicle.
Periodic Safety Checks You Should
Make Outside The Vehicle
Tires
Examine tires for excessive tread wear and
uneven wear patterns. Check for stones, nails,
glass, or other objects lodged in the tread or
sidewall. Inspect the tread for cuts and cracks.
Inspect sidewalls for cuts, cracks and bulges.
Check the wheel nuts for tightness. Check the
tires (including spare) for proper cold inflation
pressure.
Lights
Have someone observe the operation of brake
lights and exterior lights while you work the
controls. Check turn signal and high beam
indicator lights on the instrument panel.
Door Latches
Check for positive closing, latching, and locking.
Fluid Leaks
Check area under vehicle after overnight park-
ing for fuel, engine coolant, oil, or other fluid
leaks. Also, if gasoline fumes are detected or if
fuel, power steering fluid, or brake fluid leaks
are suspected, the cause should be located and
corrected immediately.
61
Page 161 of 408
4
UNDERSTANDING YOUR INSTRUMENT
PANEL
•INSTRUMENT PANEL FEATURES ...................160
• INSTRUMENT CLUSTER .........................161
• INSTRUMENT CLUSTER DESCRIPTIONS ..............162
• ELECTRONIC VEHICLE INFORMATION CENTER (EVIC) .....168
•Electronic Vehicle Information Center (EVIC) Displays ......169
• EVIC White Telltale Lights ...................... .173
• EVIC Amber Telltale Lights ..................... .174
• EVIC Red Telltale Lights ........................175
• Engine Oil Change Indicator System ................177
• Fuel Economy ............................. .178
• Adaptive Cruise Control ........................179
• Vehicle Speed ............................. .179
• Trip Info ................................ .179
• Units .................................. .180
• Vehicle Info (Customer Information Features) ...........180
• TirePSIorTireKPA ......................... .180
• Messages # .............................. .181
• Turn Menu OFF ............................ .181
157
Page 172 of 408
WARNING!
A hot engine cooling system is dangerous.
You or others could be badly burned by
steam or boiling coolant. You may want to
call an authorized dealer for service if your
vehicle overheats. If you decide to look un-
der the hood yourself, see “Maintaining Your
Vehicle”. Follow the warnings under the
Cooling System Pressure Cap paragraph.
26. Rear Fog Light Indicator — If Equipped This indicator will illuminate when the
rear fog lights are on.ELECTRONIC VEHICLE
INFORMATION CENTER (EVIC)
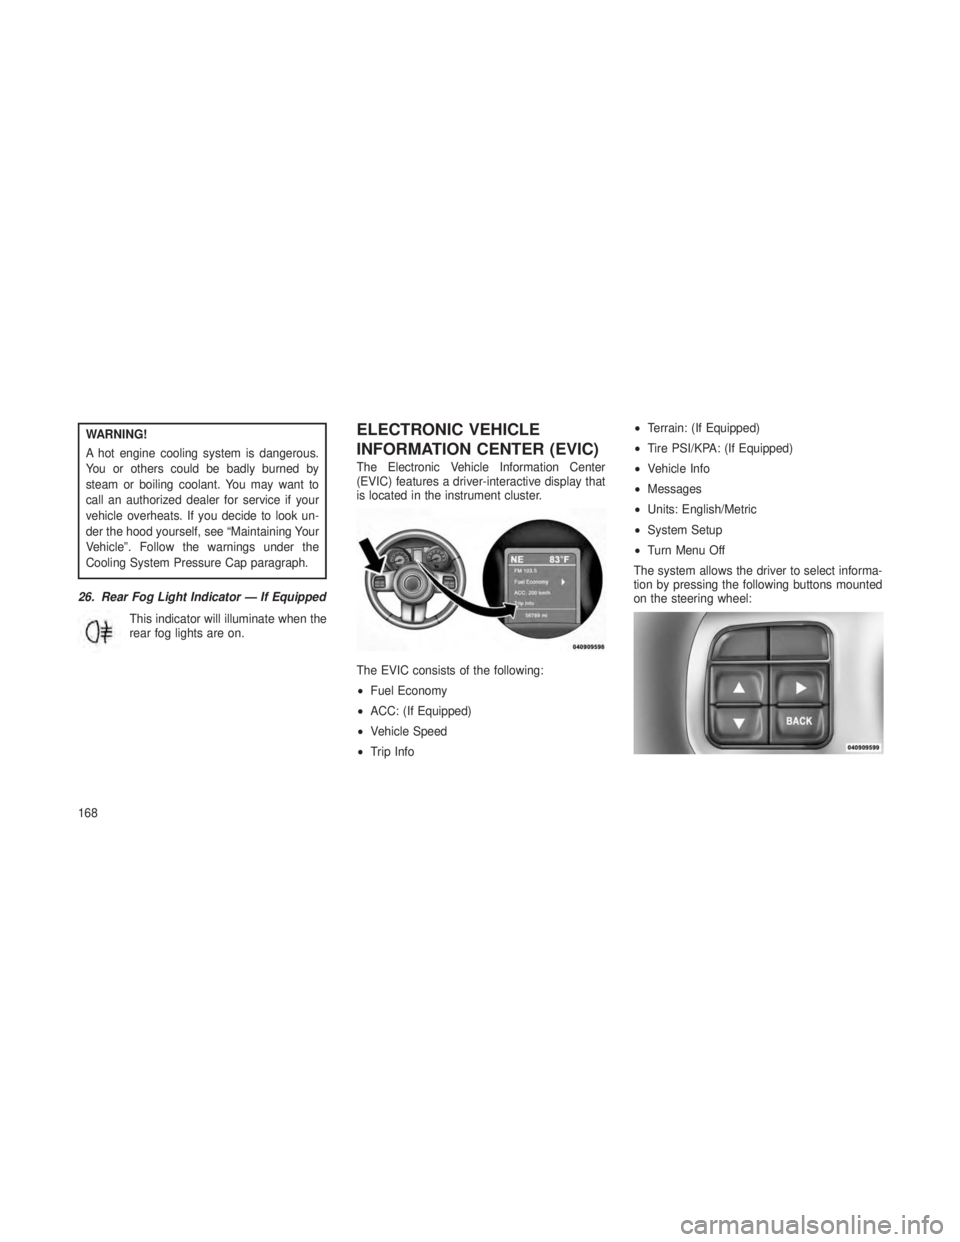
The Electronic Vehicle Information Center
(EVIC) features a driver-interactive display that
is located in the instrument cluster.
The EVIC consists of the following:
•Fuel Economy
• ACC: (If Equipped)
• Vehicle Speed
• Trip Info •
Terrain: (If Equipped)
• Tire PSI/KPA: (If Equipped)
• Vehicle Info
• Messages
• Units: English/Metric
• System Setup
• Turn Menu Off
The system allows the driver to select informa-
tion by pressing the following buttons mounted
on the steering wheel:
168
Page 179 of 408
Tighten the fuel filler cap properly and press the
SELECT button to turn off the message. If the
problem continues, the message will appear the
next time the vehicle is started.
•A loose, improperly installed, or damaged
fuel filler cap may also turn on the Malfunc-
tion Indicator Light (MIL).
• Windshield Washer Fluid Low Indicator
This light will turn on to indicate the
windshield washer fluid is low.
• SERV 4WD
The SERV 4WD light monitors the
electric shift 4WD system. If the
SERV 4WD light stays on or comes
on during driving, it means that the
4WD system is not functioning
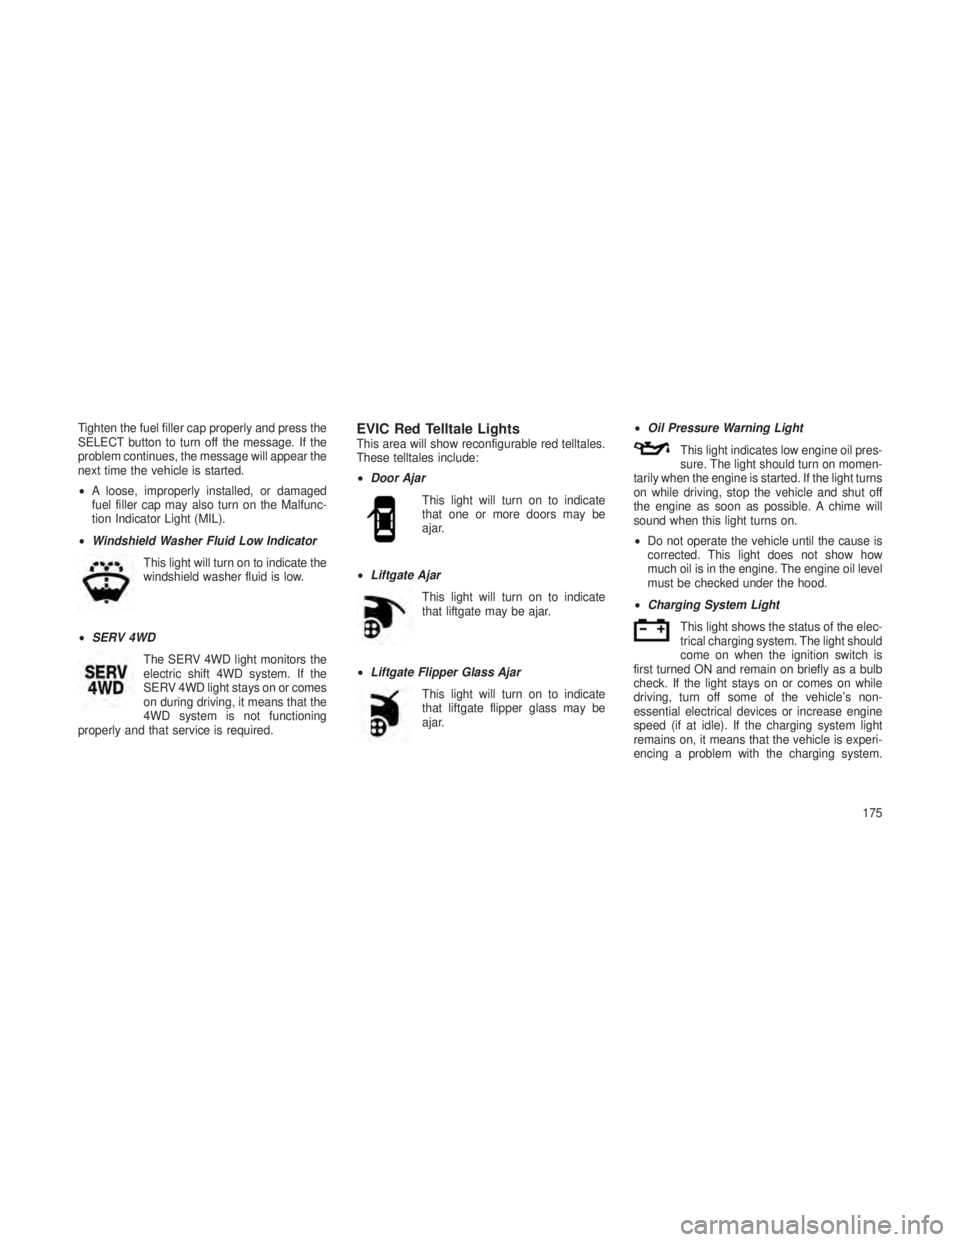
properly and that service is required.EVIC Red Telltale LightsThis area will show reconfigurable red telltales.
These telltales include:
• Door Ajar
This light will turn on to indicate
that one or more doors may be
ajar.
• Liftgate Ajar
This light will turn on to indicate
that liftgate may be ajar.
• Liftgate Flipper Glass Ajar
This light will turn on to indicate
that liftgate flipper glass may be
ajar. •
Oil Pressure Warning Light
This light indicates low engine oil pres-
sure. The light should turn on momen-
tarily when the engine is started. If the light turns
on while driving, stop the vehicle and shut off
the engine as soon as possible. A chime will
sound when this light turns on.
• Do not operate the vehicle until the cause is
corrected. This light does not show how
much oil is in the engine. The engine oil level
must be checked under the hood.
• Charging System Light
This light shows the status of the elec-
trical charging system. The light should
come on when the ignition switch is
first turned ON and remain on briefly as a bulb
check. If the light stays on or comes on while
driving, turn off some of the vehicle’s non-
essential electrical devices or increase engine
speed (if at idle). If the charging system light
remains on, it means that the vehicle is experi-
encing a problem with the charging system.
175
Page 181 of 408
WARNING!
If you continue operating the vehicle when
the Transmission Temperature Warning Light
is illuminated you could cause the fluid to boil
over, come in contact with hot engine or
exhaust components and cause a fire.
Engine Oil Change Indicator System
Oil Change Due — Gasoline Engine
Your vehicle is equipped with an engine oil
change indicator system. The “Oil Change Due”
message will flash in the EVIC display for
approximately 10 seconds after a single chime
has sounded, to indicate the next scheduled oil
change interval. The engine oil change indicator
system is duty cycle based, which means the
engine oil change interval may fluctuate, depen-
dent upon your personal driving style.
Unless reset, this message will continue to
display each time you turn the ignition switch to
the ON/RUN position or cycle the ignition to the
ON/RUN position if equipped with Keyless
Enter-N-Go. To turn off the message temporar-
ily, press and release the MENU button.To reset the oil change indicator system (after
performing the scheduled maintenance) refer to
the following procedure.
Vehicles Equipped With Keyless Enter-N-Go™
1. Without pressing the brake pedal, push the
ENGINE START/STOP button and cycle the
ignition to the ON/RUN position (Do not start the
engine.)
2. Fully depress the accelerator pedal, slowly,
three times within 10 seconds.
3. Without pressing the brake pedal, push the
ENGINE START/STOP button once to return
the ignition to the OFF/LOCK position.
Vehicles Not Equipped With Keyless
Enter-N-Go™
1. Turn the ignition switch to the ON/RUN po-
sition (Do not start the engine.)
2. Fully depress the accelerator pedal, slowly,
three times within 10 seconds.
3. Turn the ignition switch to the OFF/LOCK
position.
NOTE:
If the indicator message illuminates when
you start the vehicle, the oil change indica-
tor system did not reset. If necessary, repeat
this procedure.
Oil Change Due — Diesel Engine
Your vehicle is equipped with an engine oil
change indicator system. The
"Oil Change Due"
message will display in the EVIC for five sec-
onds after a single chime has sounded at the
start of each ignition that an oil change is due.
The engine oil change indicator system is duty
cycle based, which means the engine oil
change interval may fluctuate dependent upon
your personal driving style.
Unless reset, this message will continue to
display each time you cycle the ignition to the
ON/RUN position. To turn off the message
177
Page 182 of 408
temporarily, press and release the MENU but-
ton. To reset the oil change indicator system
(after performing the scheduled maintenance),
perform the following procedure:
1. Without pressing the brake pedal, push the
ENGINE START/STOP button and cycle the
ignition to the ON/RUN position (Do not start the
engine.)
2. Fully depress the accelerator pedal and
keep it fully pressed for at least 30 seconds.
3. Press and release the brake pedal six times
while holding the accelerator pedal pressed.
4. Perform one ignition OFF-ON cycle, start the
engine and verify that the reminder has been
reset.
NOTE:
If the indicator message illuminates when
you start the vehicle, the oil change indica-
tor system did not reset. If necessary, repeat
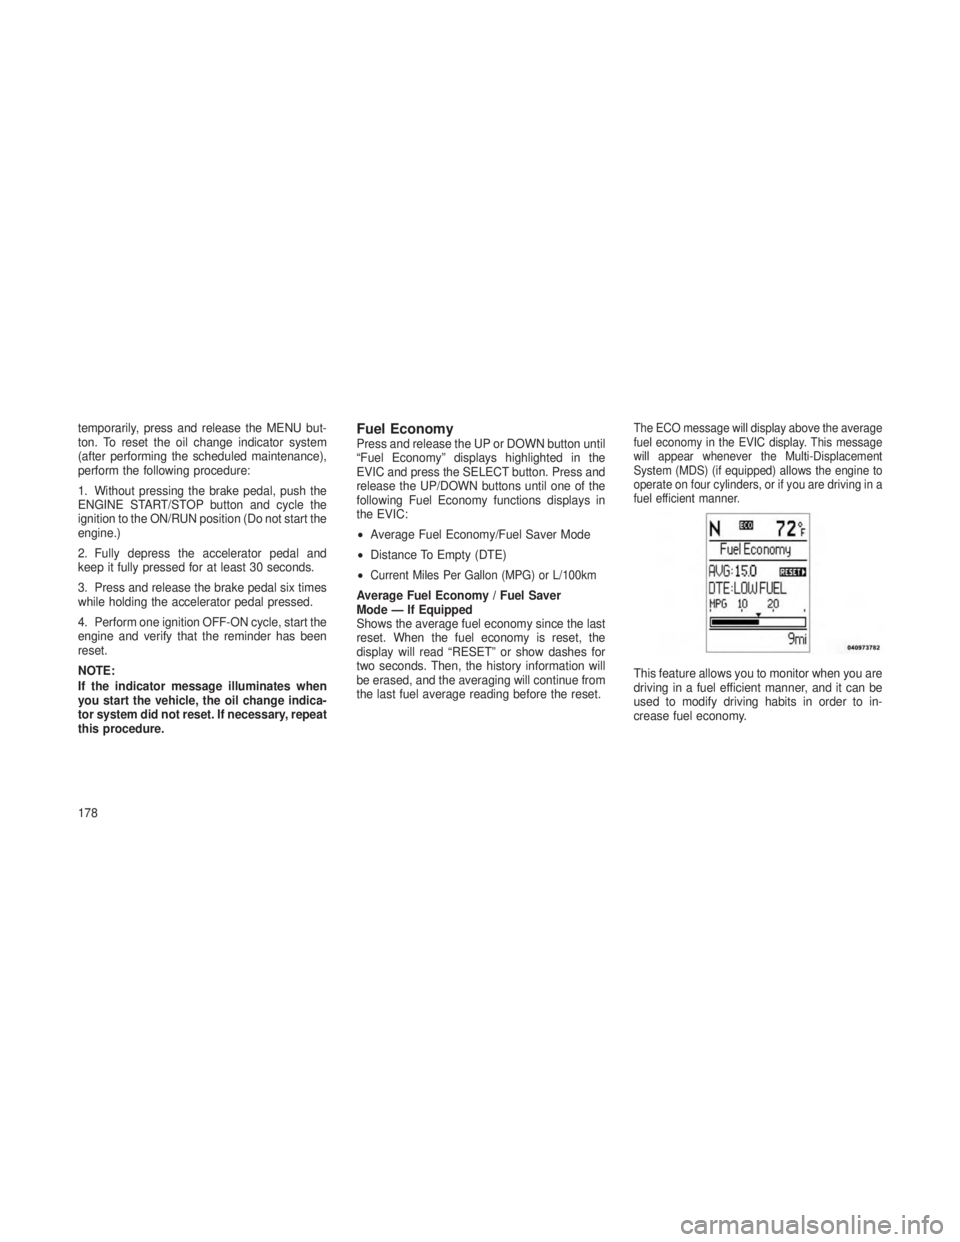
this procedure.Fuel EconomyPress and release the UP or DOWN button until
“Fuel Economy” displays highlighted in the
EVIC and press the SELECT button. Press and
release the UP/DOWN buttons until one of the
following Fuel Economy functions displays in
the EVIC:
•Average Fuel Economy/Fuel Saver Mode
• Distance To Empty (DTE)
•
Current Miles Per Gallon (MPG) or L/100km
Average Fuel Economy / Fuel Saver
Mode — If Equipped
Shows the average fuel economy since the last
reset. When the fuel economy is reset, the
display will read “RESET” or show dashes for
two seconds. Then, the history information will
be erased, and the averaging will continue from
the last fuel average reading before the reset.
The ECO message will display above the average
fuel economy in the EVIC display. This message
will appear whenever the Multi-Displacement
System (MDS) (if equipped) allows the engine to
operate on four cylinders, or if you are driving in a
fuel efficient manner.
This feature allows you to monitor when you are
driving in a fuel efficient manner, and it can be
used to modify driving habits in order to in-
crease fuel economy.
178
Page 184 of 408
Trip A
Shows the total distance traveled for Trip A
since the last reset.
Trip B
Shows the total distance traveled for Trip B
since the last reset.
Elapsed Time
Shows the total elapsed time of travel since the
last reset when the ignition switch is in the ACC
position. Elapsed time will increment when the
ignition switch is in the ON or START position.
To Reset The Display
Reset will only occur while a resettable function
is being displayed. Press and release the SE-
LECT button once to clear the resettable func-
tion being displayed.
UnitsPress and release the UP or DOWN button until
“Units” displays highlighted in the EVIC and
press the SELECT button. The EVIC, odometer,
and navigation system (if equipped) can be
changed between English and Metric units ofmeasure. To make your selection, scroll up or
down until the preferred setting is highlighted,
then press and release the SELECT button until
a check-mark appears next to the setting, show-
ing that the setting has been selected.
Vehicle Info (Customer Information
Features)
Press and release the UP or DOWN button until
“Vehicle Info” displays highlighted in the EVIC
and press the SELECT button. Press the UP
and DOWN button to scroll through the avail-
able information displays, then press SELECT
to display any one of the following choices.
•
Oil Temp (If Equipped)
Displays the actual oil temperature.
• Oil Pressure (If Equipped)
Displays the actual oil pressure.
• Coolant Temp
Displays the actual coolant temperature. •
Trans Temperature
Displays the actual transmission temperature
when the shift lever is in the Drive position.
• Engine Hours
Displays the number of hours of engine operation.
Tire PSI or Tire KPAPress and release the UP or DOWN button until
“Tire PSI” or “Tire KPA” displays highlighted in
the EVIC and press the SELECT button. Press
and release the UP/DOWN buttons until one of
the following System Status messages displays
in the EVIC:
•System OK
• System Warnings Displayed (will display all
currently active System Warnings)
• Tire Pressure Monitor System (shows the
current pressure of all four road tires). For
additional information, refer to “Tire Pressure
Monitor System” in “Starting And Operating”.
180
Page 227 of 408
Clearing A Flooded Engine (Using ENGINE
START/STOP Button)
If the engine fails to start after you have followed
the “Normal Starting” or “Extreme Cold Weather"
procedures, it may be flooded. To clear any
excess fuel:
1. Press and hold the brake pedal.
2. Press the accelerator pedal all the way to the
floor and hold it.
3. Press and release the ENGINE START/
STOP button once.
The starter motor will engage automatically, run
for 10 seconds, and then disengage. Once this
occurs, release the accelerator pedal and the
brake pedal, wait 10 to 15 seconds, then repeat
the “Normal Starting” procedure. Clearing A Flooded Engine
(Using Fob With Integrated Key)
If the engine fails to start after you have followed
the “Normal Starting” or “Extreme Cold Weather”
procedures, it may be flooded. To clear any
excess fuel:
1. Press the accelerator pedal all the way to the
floor and hold it.
2.
Turn the ignition switch to the START position
and release it as soon as the starter engages.
The starter motor will disengage automatically
in 10 seconds. Once this occurs, release the
accelerator pedal, turn the ignition switch to the
LOCK position, wait 10 to 15 seconds, then
repeat the “Normal Starting” procedure.
CAUTION!
To prevent damage to the starter, wait 10 to
15 seconds before trying again.
After StartingThe idle speed is controlled automatically and it
will decrease as the engine warms up.
Normal Starting – Diesel EngineObserve the following when the engine is oper-
ating.
• All message center lights are off.
• Malfunction Indicator Light (MIL) is off.
• Low Oil Pressure Light is off.
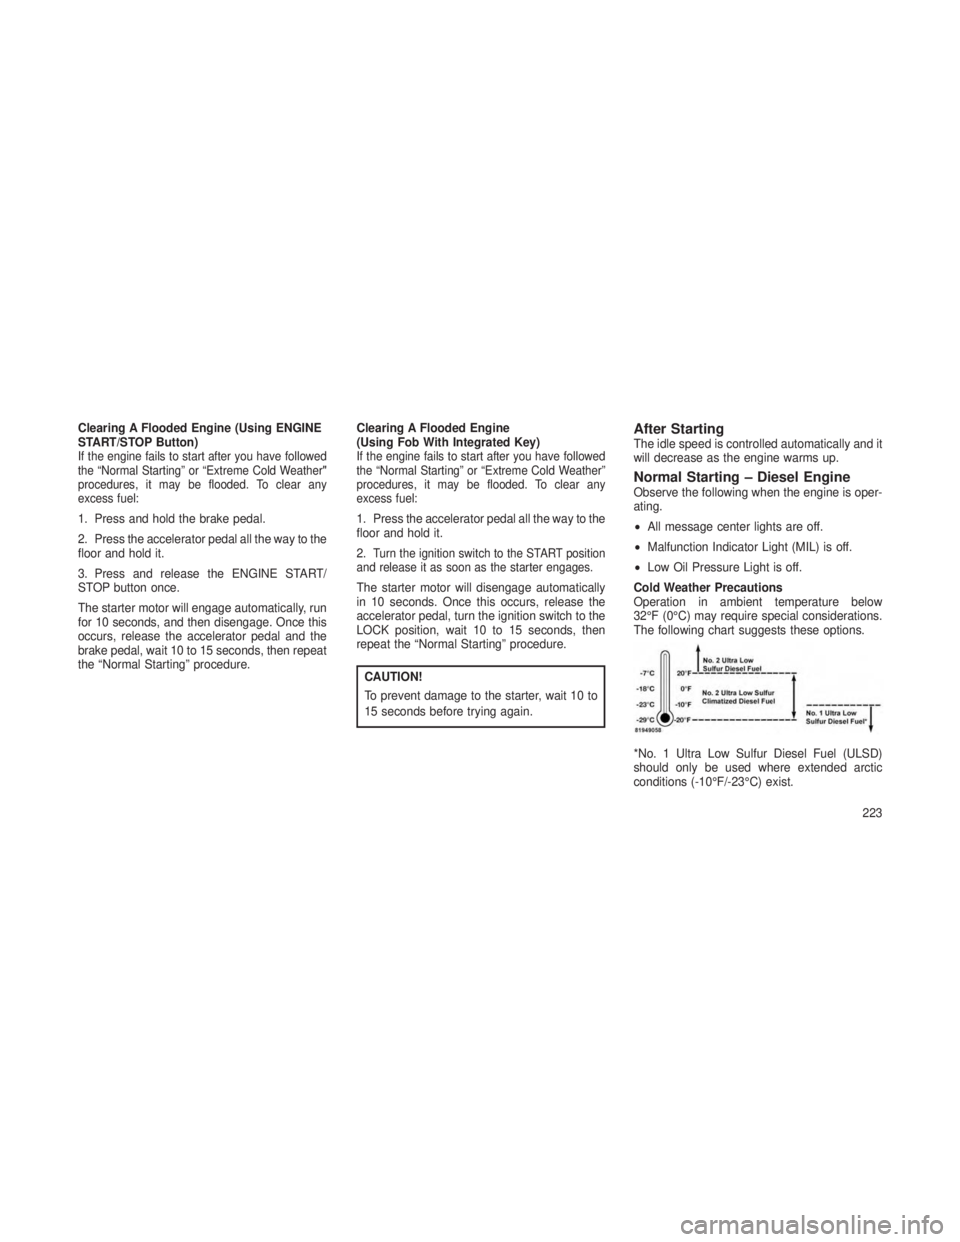
Cold Weather Precautions
Operation in ambient temperature below
32°F (0°C) may require special considerations.
The following chart suggests these options.
*No. 1 Ultra Low Sulfur Diesel Fuel (ULSD)
should only be used where extended arctic
conditions (-10°F/-23°C) exist.
223