audio JEEP GRAND CHEROKEE 2016 WK2 / 4.G Owner's Manual
[x] Cancel search | Manufacturer: JEEP, Model Year: 2016, Model line: GRAND CHEROKEE, Model: JEEP GRAND CHEROKEE 2016 WK2 / 4.GPages: 276, PDF Size: 10.84 MB
Page 105 of 276
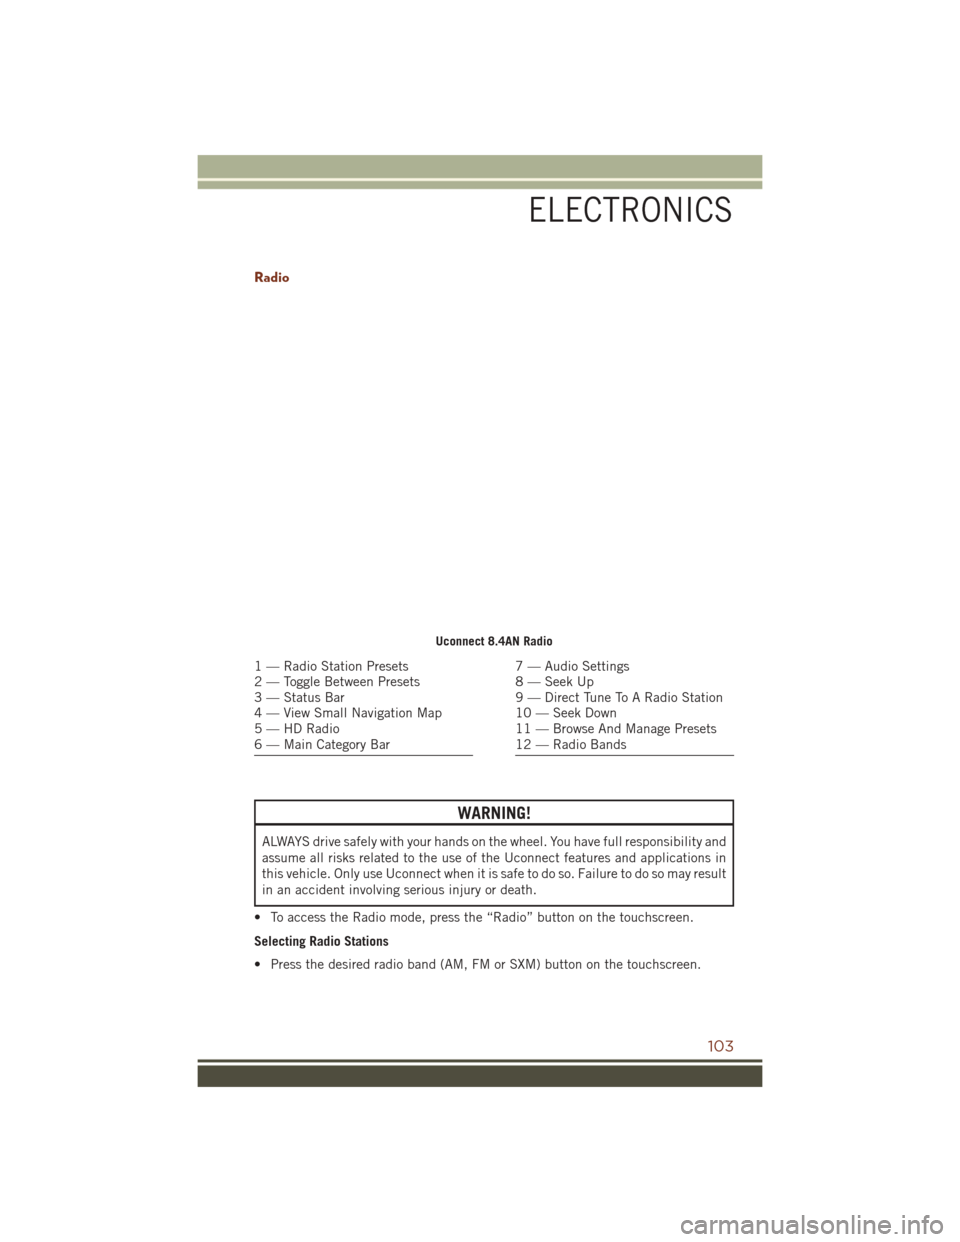
Radio
WARNING!
ALWAYS drive safely with your hands on the wheel. You have full responsibility and
assume all risks related to the use of the Uconnect features and applications in
this vehicle. Only use Uconnect when it is safe to do so. Failure to do so may result
in an accident involving serious injury or death.
• To access the Radio mode, press the “Radio” button on the touchscreen.
Selecting Radio Stations
• Press the desired radio band (AM, FM or SXM) button on the touchscreen.
Uconnect 8.4AN Radio
1 — Radio Station Presets
2 — Toggle Between Presets
3 — Status Bar
4 — View Small Navigation Map
5 — HD Radio
6 — Main Category Bar7 — Audio Settings
8 — Seek Up
9 — Direct Tune To A Radio Station
10 — Seek Down
11 — Browse And Manage Presets
12 — Radio Bands
ELECTRONICS
103
Page 109 of 276
Our Sirius satellite service is also available in PR (with coverage limitations). Our
Internet radio service is available throughout our satellite service area and in AK
and HI. ©2015 Sirius XM Radio Inc. Sirius, XM and all related marks and logos are
trademarks of Sirius XM Radio Inc.
Disc Operation (If Equipped)
• Your vehicle may have a remote CD player located in the lower center consolestorage bin, or in the lower center bench seat bin.
• CD/Disc Mode is entered by either inserting a CD/Disc or by pressing the MEDIA button. Once in Media Mode, select “Disc.”
• Gently insert one CD into the CD player with the CD label facing as indicated on the illustration located on the Disc player.
Seek Up/Down Buttons
• Press to seek through Disc tracks.
• Hold either button to bypass tracks without stopping.
Browse
• Press the “Browse” button on the touchscreen to scroll through and select a desired track on the Disc. Press the “Exit” button on the touchscreen if you wish
to cancel the browse function.
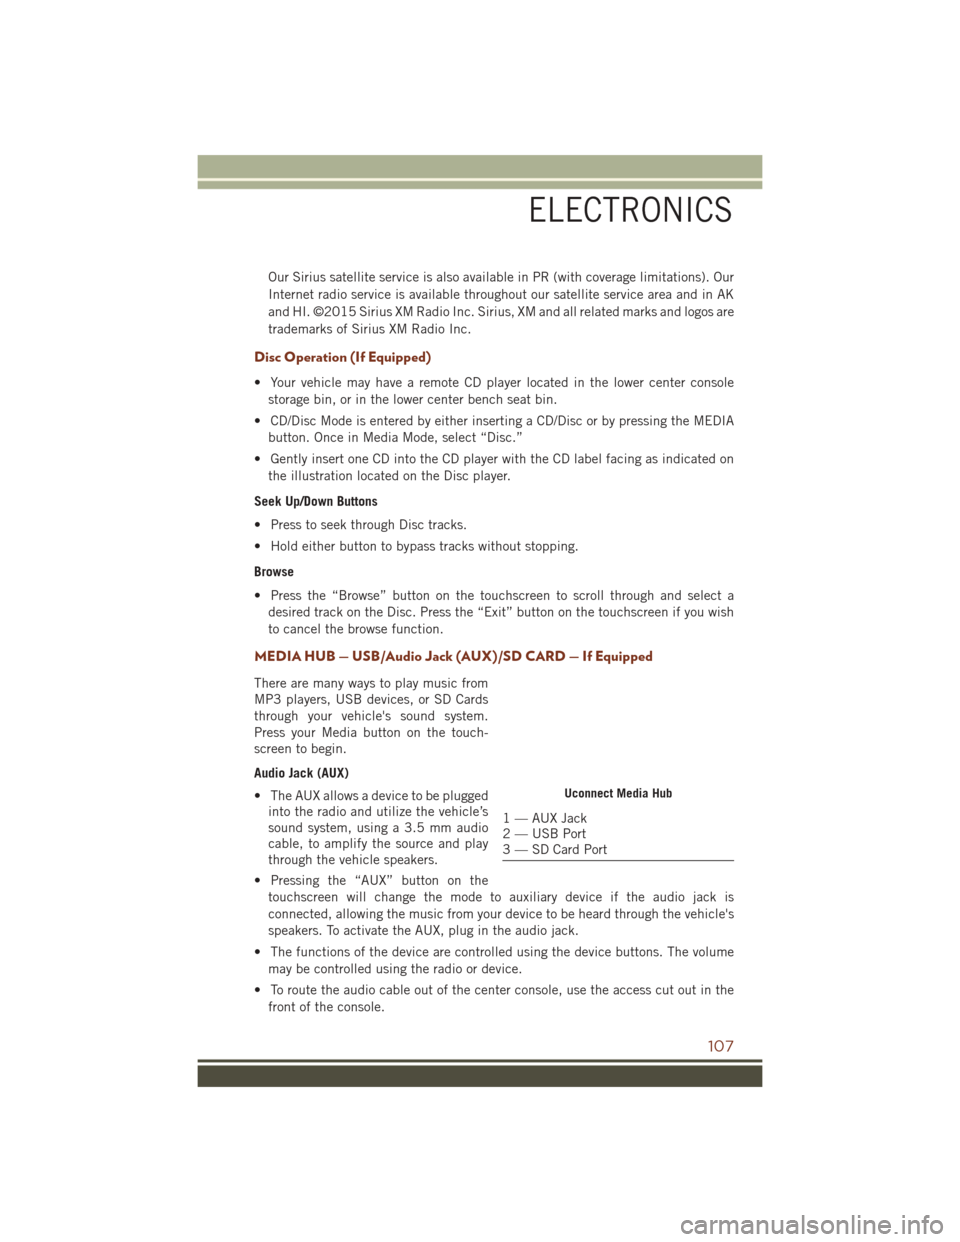
MEDIA HUB — USB/Audio Jack (AUX)/SD CARD — If Equipped
There are many ways to play music from
MP3 players, USB devices, or SD Cards
through your vehicle's sound system.
Press your Media button on the touch-
screen to begin.
Audio Jack (AUX)
• The AUX allows a device to be pluggedinto the radio and utilize the vehicle’s
sound system, using a 3.5 mm audio
cable, to amplify the source and play
through the vehicle speakers.
• Pressing the “AUX” button on the touchscreen will change the mode to auxiliary device if the audio jack is
connected, allowing the music from your device to be heard through the vehicle's
speakers. To activate the AUX, plug in the audio jack.
• The functions of the device are controlled using the device buttons. The volume may be controlled using the radio or device.
• To route the audio cable out of the center console, use the access cut out in the front of the console.
Uconnect Media Hub
1 — AUX Jack
2 — USB Port
3 — SD Card Port
ELECTRONICS
107
Page 110 of 276
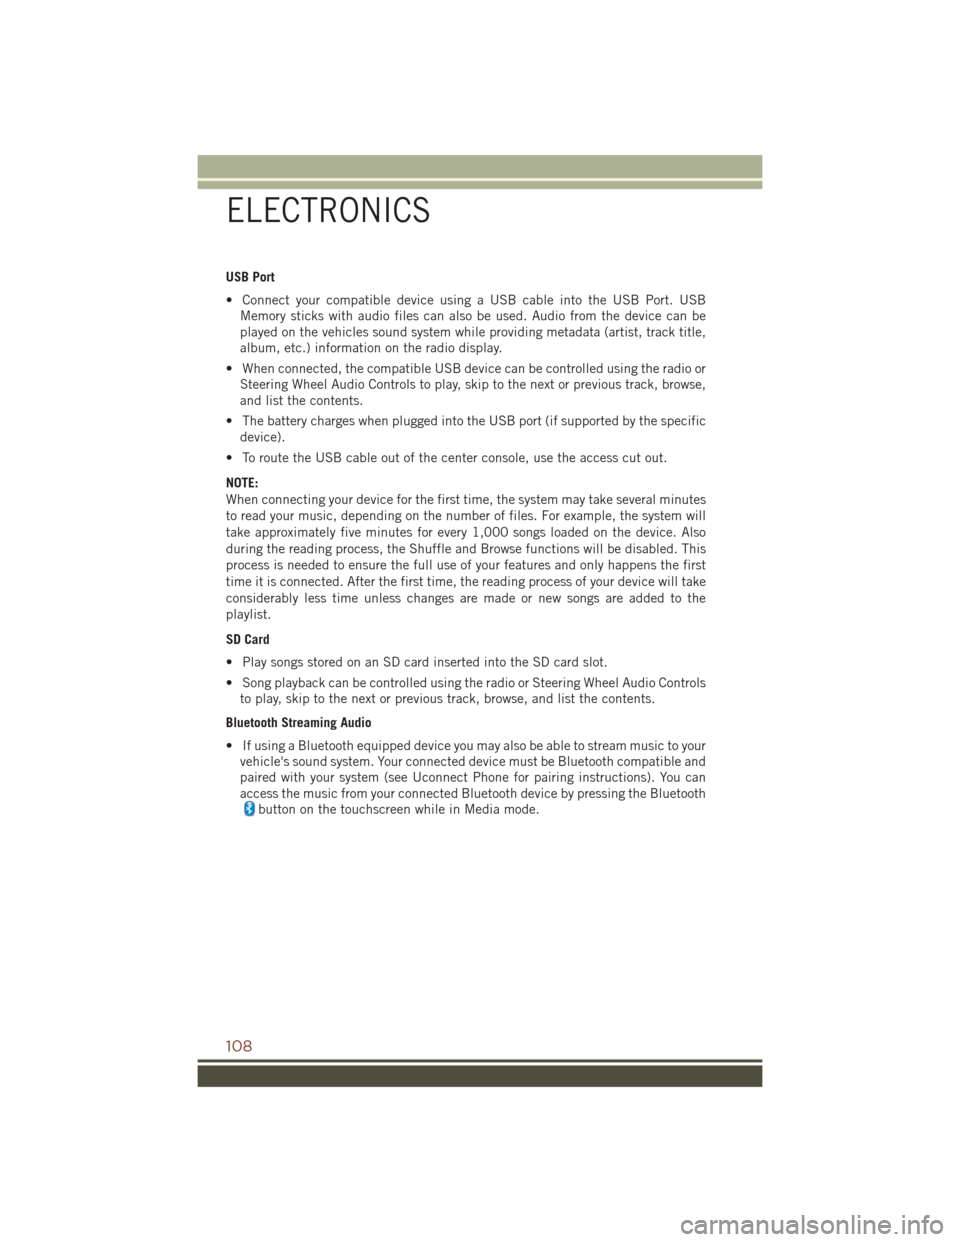
USB Port
• Connect your compatible device using a USB cable into the USB Port. USBMemory sticks with audio files can also be used. Audio from the device can be
played on the vehicles sound system while providing metadata (artist, track title,
album, etc.) information on the radio display.
• When connected, the compatible USB device can be controlled using the radio or Steering Wheel Audio Controls to play, skip to the next or previous track, browse,
and list the contents.
• The battery charges when plugged into the USB port (if supported by the specific device).
• To route the USB cable out of the center console, use the access cut out.
NOTE:
When connecting your device for the first time, the system may take several minutes
to read your music, depending on the number of files. For example, the system will
take approximately five minutes for every 1,000 songs loaded on the device. Also
during the reading process, the Shuffle and Browse functions will be disabled. This
process is needed to ensure the full use of your features and only happens the first
time it is connected. After the first time, the reading process of your device will take
considerably less time unless changes are made or new songs are added to the
playlist.
SD Card
• Play songs stored on an SD card inserted into the SD card slot.
• Song playback can be controlled using the radio or Steering Wheel Audio Controls to play, skip to the next or previous track, browse, and list the contents.
Bluetooth Streaming Audio
• If using a Bluetooth equipped device you may also be able to stream music to your vehicle's sound system. Your connected device must be Bluetooth compatible and
paired with your system (see Uconnect Phone for pairing instructions). You can
access the music from your connected Bluetooth device by pressing the Bluetooth
button on the touchscreen while in Media mode.
ELECTRONICS
108
Page 139 of 276
Select The iPhone's Priority Level
When the pairing process has successfully completed, the system will prompt you to
choose whether or not this is your favorite mobile phone. Selecting “Yes” will make
this mobile phone the highest priority. This mobile phone will take precedence over
other paired mobile phones within range and will connect to the Uconnect system
automatically when entering the vehicle. Only one mobile phone and/or one
Bluetooth audio device can be connected to the Uconnect system at a time. If “No”
is selected, simply select “Uconnect” from the mobile phone/audio device Bluetooth
screen, and the Uconnect system will reconnect to the Bluetooth device.
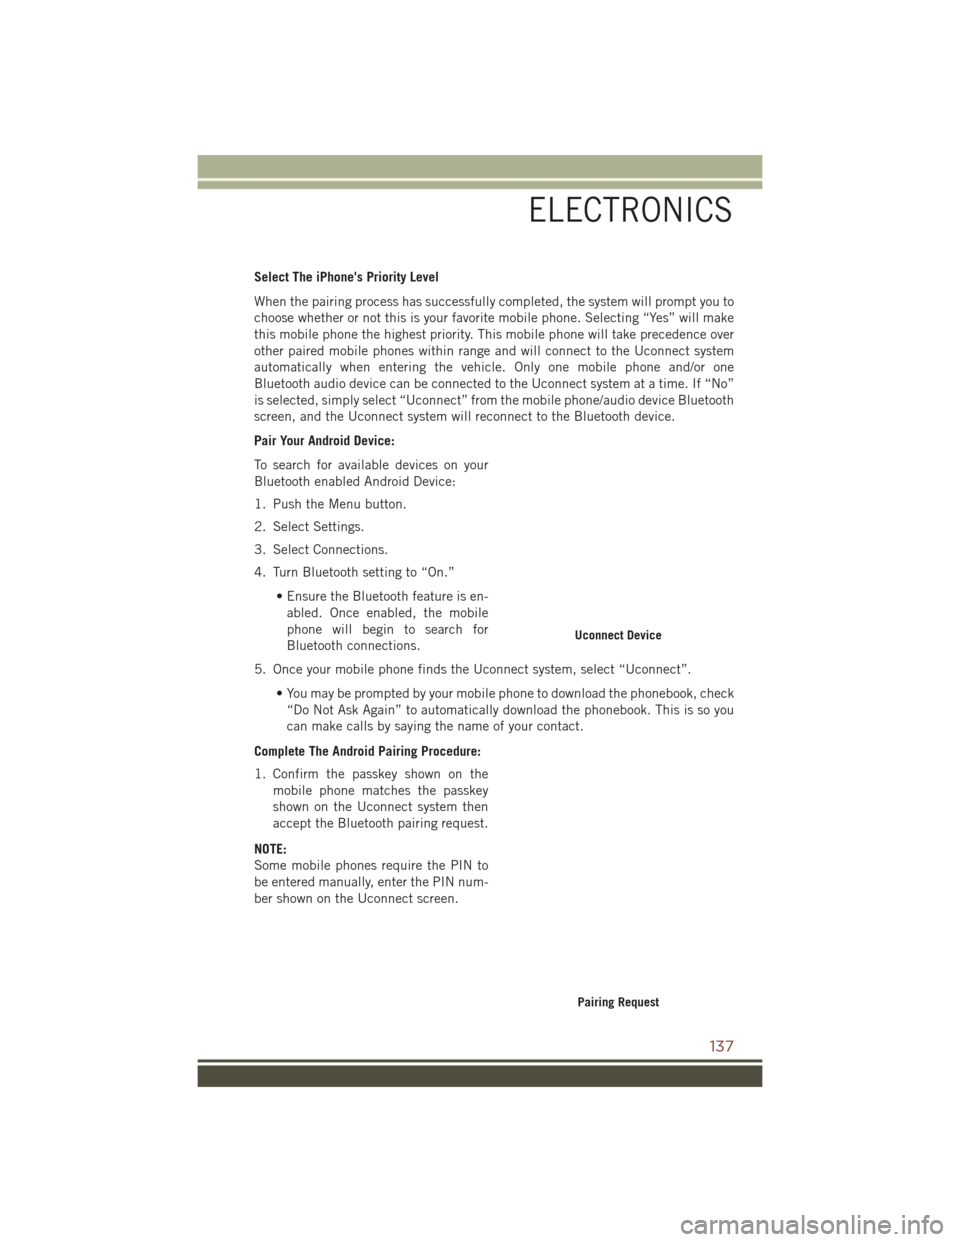
Pair Your Android Device:
To search for available devices on your
Bluetooth enabled Android Device:
1. Push the Menu button.
2. Select Settings.
3. Select Connections.
4. Turn Bluetooth setting to “On.”• Ensure the Bluetooth feature is en-abled. Once enabled, the mobile
phone will begin to search for
Bluetooth connections.
5. Once your mobile phone finds the Uconnect system, select “Uconnect”.
• You may be prompted by your mobile phone to download the phonebook, check“Do Not Ask Again” to automatically download the phonebook. This is so you
can make calls by saying the name of your contact.
Complete The Android Pairing Procedure:
1. Confirm the passkey shown on the mobile phone matches the passkey
shown on the Uconnect system then
accept the Bluetooth pairing request.
NOTE:
Some mobile phones require the PIN to
be entered manually, enter the PIN num-
ber shown on the Uconnect screen.
Uconnect Device
Pairing Request
ELECTRONICS
137
Page 140 of 276
Select The Android Mobile Phone's Priority Level
When the pairing process has successfully completed, the system will prompt you to
choose whether or not this is your favorite mobile phone. Selecting “Yes” will make
this mobile phone the highest priority. This mobile phone will take precedence over
other paired mobile phones within range and will connect to the Uconnect system
automatically when entering the vehicle. Only one mobile phone and/or one
Bluetooth audio device can be connected to the Uconnect system at a time. If “No”
is selected, simply select “Uconnect” from the mobile phone/audio device Bluetooth
screen, and the Uconnect system will reconnect to the Bluetooth device.
You are now ready to make hands-free calls. Press the Uconnect “Phone”
button
on your steering wheel to begin.
NOTE:
Refer to UconnectPhone.com website for additional information on mobile phone
pairing and for a list of compatible phones.
Common Phone Commands (Examples)
• “Call John Smith”
• “Call John Smith mobile”
• “Dial 1 248 555 1212”
• “Redial”
Mute (Or Unmute) Microphone During Call
• During a call, press the “Mute” button on the Phone main screen to mute and unmute the call.
Transfer Ongoing Call Between Handset And Vehicle
• During an on-going call, press the “Transfer” button on the Phone main screen totransfer an on-going call between handset and vehicle.
Phonebook
The Uconnect system will automatically sync your phonebook from your paired
phone, if this feature is supported by your phone. Phonebook contacts are updated
each time that the phone is connected. If your phone book entries do not appear,
check the settings on your phone. Some phones require you to enable this feature
manually.
• Your phonebook can be browsed on the Uconnect system touchscreen, but editingcan only be done on your phone. To browse, press the “Phone” button on the
touchscreen, then the “Phonebook” button on the touchscreen.
Favorite phonebook entries can be saved as Favorites for quicker access. Favorites
are shown at the top of the main phone screen.
ELECTRONICS
138
Page 141 of 276
Voice Command Tips
• Speaking complete names (i.e; Call John Doe vs. Call John) will result in greatersystem accuracy.
• You can “link” commands together for faster results. Say “Call John Doe, mobile,” for example.
• If you are listening to available voice command options, you do not have to listen to the entire list. When you hear the command that you need, push the
button on the steering wheel, wait for the beep and say your command.
Changing The Volume
• Start a dialogue by pushing the Phone button, then say a command for
example - "Help".
• Use the radio VOLUME/MUTE rotary knob to adjust the volume to a comfortable level while the Uconnect system is speaking.
NOTE:
The volume setting for Uconnect is different than the audio system.
NOTE:
To access help, push the Uconnect Phone button
on the steering wheel and say
"help." Push the Uconnect Phone Pickup button
or the VR buttonand say
"cancel" to cancel the help session.
Using Do Not Disturb
With Do Not Disturb, you can disable notifications from incoming calls and texts,
allowing you to keep your eyes on the road and hands on the wheel. For your
convenience there is a counter display to keep track of your missed calls and text
messages while you were using Do Not Disturb.
Do Not Disturb can automatically reply with a text message, a call or both, when
declining an incoming call and send it to voicemail.
Automatic reply messages can be:
• “I am driving right now, I will get back to you shortly.”
• Create a custom auto reply message up to 160 characters.
While in Do Not Disturb, Conference Call can be selected so you can still place a
second call without being interrupted by incoming calls.
NOTE:
• Only the beginning of your custom message will be seen on the touchscreen.
• Reply with text message is not compatible with iPhones.
• Auto reply with text message is only available on phones that supporting Bluetooth MAP.
ELECTRONICS
139
Page 142 of 276
Incoming Text Messages
After pairing your Uconnect system with a Bluetooth enabled mobile device with the
Message Access Profile (MAP), the Uconnect system can announce a new incoming
text message and read it to you over the vehicle’s audio system.
NOTE:
Only incoming text messages received during the current ignition cycle can be
viewed/read.
To enable incoming text messaging:
iPhone
1. Press the settings button on the mobile phone.
2. Select Bluetooth.• Ensure Bluetooth is enabled, and the mobile phone is paired to the Uconnectsystem.
3. Select
located under DEVICES next to Uconnect.
4. Turn “Show Notifications” to On.
Enable iPhone Incoming Text Messages
ELECTRONICS
140
Page 143 of 276
Android Devices
1. Push the Menu button on the mobile phone.
2. Select Settings.
3. Select Connections.
4. Turn “Show Notifications” to On.• A pop up will appear asking you to accept a request for permission to connectto your messages. Select “Don’t ask again” and press OK.
NOTE:
All incoming text messages received dur-
ing the current ignition cycle will be de-
leted from the Uconnect system when the
ignition is turned to the Off position.
Voice Text Reply (Not Compatible With iPhone)
NOTE:
Voice texting reply and voice texting features require a compatible mobile device
enabled with Bluetooth Message Access Profile (MAP). iPhone, and some other
smartphones, may not entirely support Bluetooth MAP. Visit UconnectPhone.com for
the latest system and device compatibility.
• Due to the extremely large number of mobile phone manufacturers, your mobile device may not be listed. For further assistance, contact Uconnect Customer Care
@ 1-877-855-8400 for U.S. residents or, 1-800-465-2001 (English) /
1-800-387-9983 (French) for Canadian residents.
Once your Uconnect system is paired with a compatible mobile device, the system
can announce a new incoming text message, and read it to your over the vehicle audio
system. You can reply to the message using Voice Recognition by selecting, or saying,
one of the 18 pre-defined messages.
Enable Android Device Incoming Text Messages
ELECTRONICS
141
Page 147 of 276
Play A Blu-ray Disc
The Blu-ray Disc player is located in the center console.
To view a Blu-ray insert the disc into the
Blu-ray Disc Player. Playback will begin
automatically after the Blu-ray Disc is
recognized by the disc drive. If playback
does not begin automatically after the
disc is inserted into Blu-ray Disc Player
follow these steps:
Operation Of The Touchscreen Radio
• Press the “Media” button on the touchscreen, then press the “Rear Media” buttonon the touchscreen.
• Press the “OK” button on the touchscreen to begin playing the Blu-ray Disc on the touchscreen radio.
Operation Of The Remote
The remote control operates similarly to any DVD remote you have used before and
allows the rear seat passengers to change stations, tracks, discs and audio/video
modes and is designed to control either channel by using the selector switch located
on the right side of the remote.
• Select an audio channel (Rear 1 for driver's side rear screen and Rear 2 forpassenger's side rear screen), then press the “source” button and using the up and
down arrows, highlight disc from the menu and press the “OK” button.
• Press the popup/menu button to navigate the disc menu and options.
Pressing the MODE button causes the Mode Selection menu to appear on the VES
screen. Use the remote control arrow buttons to scroll through the available modes,
then press ENTER to select the desired mode.
Pressing the power button will turn the VES system ON/OFF.
Blu-ray Disc Player Location
ELECTRONICS
145
Page 148 of 276
Auxiliary Audio/Video Input Jacks
Audio/Video RCA/HDMI Jacks (AUX/
HDMI Jacks) on the side of each front
seat enable the LCD monitor to display
video directly from a video camera, con-
nect video games for display on the
screen, or play music directly from an
MP3 player.
• Connect the video game or other exter-nal media devices to the AUX jacks
following the color coding for VES
jacks.
• Using either the touchscreen radio or remote control, select AUX from the
Rear VES Control or Mode Selection
screen.
• Refer to your vehicle's Owners Manual on the DVD for further details.
NOTE:
Certain high-end video games, such as
Playstation4 and XBox One will exceed
the power limit of the vehicle's Power
Inverter.
STEERING WHEEL AUDIO CONTROLS
The steering wheel audio controls are
located on the rear surface of the steering
wheel.
Right Switch
• Push the switch up or down to in- crease or decrease the volume.
• Push the button in the center to change modes AM/FM/CD/SXM.
Left Switch
• Push the switch up or down to search
for the next listenable station or select
the next or previous CD track.
• Push the button in the center to select the next preset station (radio) or to change CDs if equipped with a CD Player.
Audio/Video RCA/HDMI Input Jacks
1 — HDMI Input
2 — Right Audio In (Red)
3 — Left Audio In (White)
4 — Video In (Yellow)
Steering Wheel Audio Controls
ELECTRONICS
146