wheel JEEP GRAND CHEROKEE 2016 WK2 / 4.G Owner's Guide
[x] Cancel search | Manufacturer: JEEP, Model Year: 2016, Model line: GRAND CHEROKEE, Model: JEEP GRAND CHEROKEE 2016 WK2 / 4.GPages: 276, PDF Size: 10.84 MB
Page 123 of 276
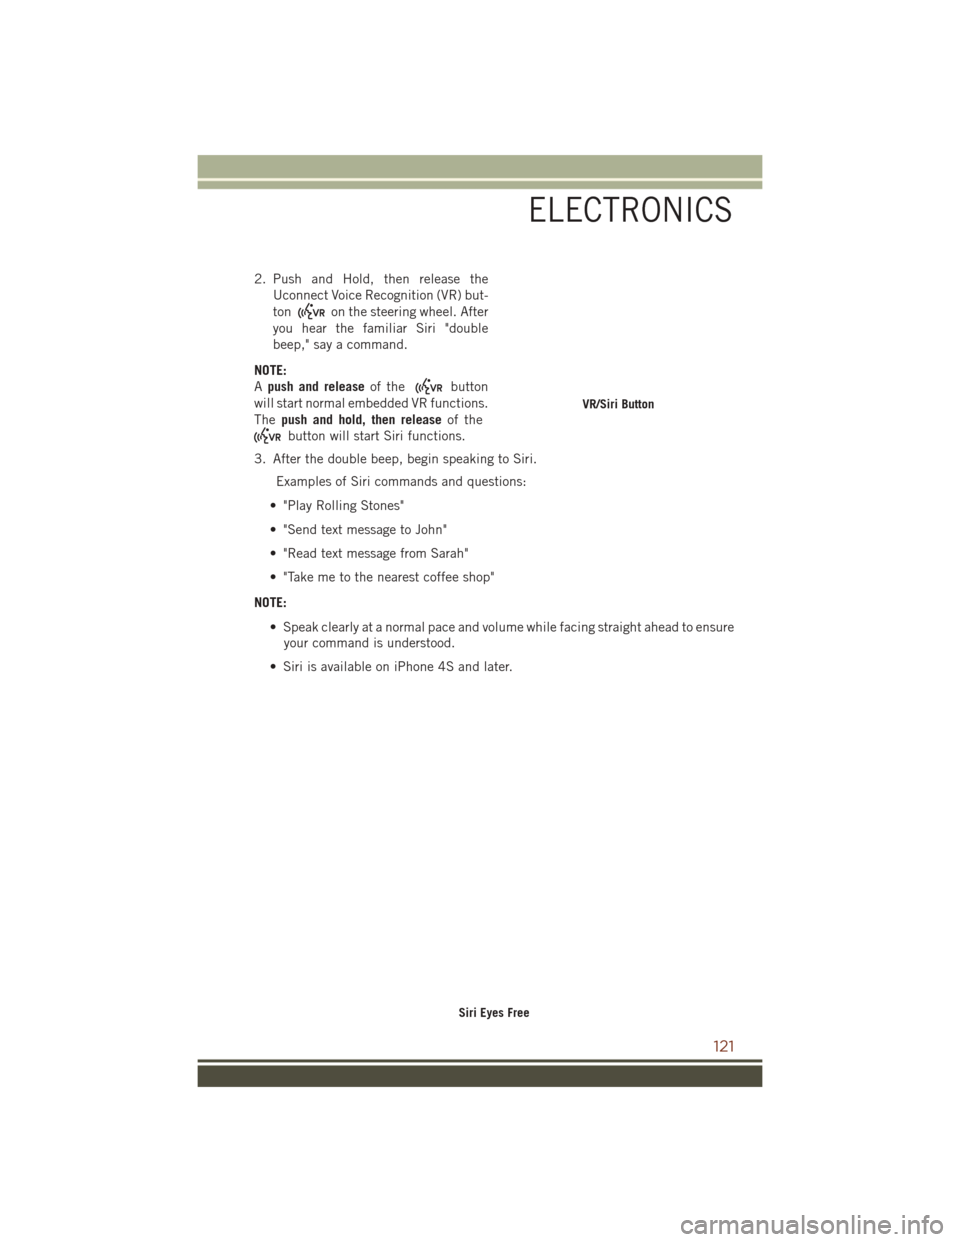
2. Push and Hold, then release theUconnect Voice Recognition (VR) but-
ton
on the steering wheel. After
you hear the familiar Siri "double
beep," say a command.
NOTE:
A push and release of the
button
will start normal embedded VR functions.
The push and hold, then release of the
button will start Siri functions.
3. After the double beep, begin speaking to Siri. Examples of Siri commands and questions:
• "Play Rolling Stones"
• "Send text message to John"
• "Read text message from Sarah"
• "Take me to the nearest coffee shop"
NOTE: • Speak clearly at a normal pace and volume while facing straight ahead to ensureyour command is understood.
• Siri is available on iPhone 4S and later.
VR/Siri Button
Siri Eyes Free
ELECTRONICS
121
Page 127 of 276
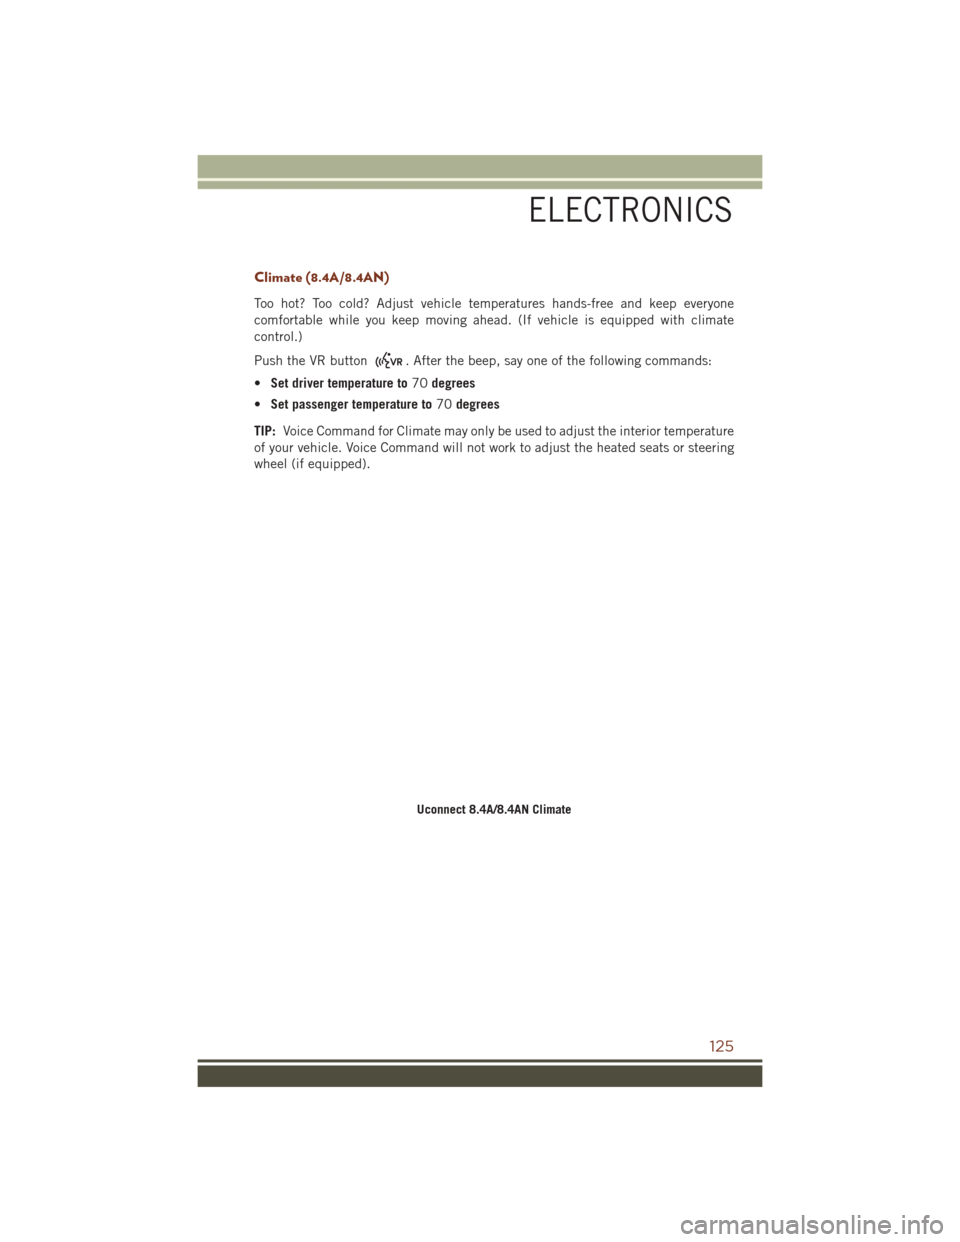
Climate (8.4A/8.4AN)
Too hot? Too cold? Adjust vehicle temperatures hands-free and keep everyone
comfortable while you keep moving ahead. (If vehicle is equipped with climate
control.)
Push the VR button
. After the beep, say one of the following commands:
• Set driver temperature to 70degrees
• Set passenger temperature to 70degrees
TIP: Voice Command for Climate may only be used to adjust the interior temperature
of your vehicle. Voice Command will not work to adjust the heated seats or steering
wheel (if equipped).
Uconnect 8.4A/8.4AN Climate
ELECTRONICS
125
Page 136 of 276
The Uconnect Phone feature enables you to place and receive hands-free mobile
phone calls. Drivers can also place mobile phone calls using their voice or by using
the buttons on the touchscreen (see Voice Command section).
The hands-free calling feature is made possible through Bluetooth technology — the
global standard that enables different electronic devices to connect to each other
wirelessly.
If the Uconnect Phone Button
exists on your steering wheel, you then have the
Uconnect Phone features.
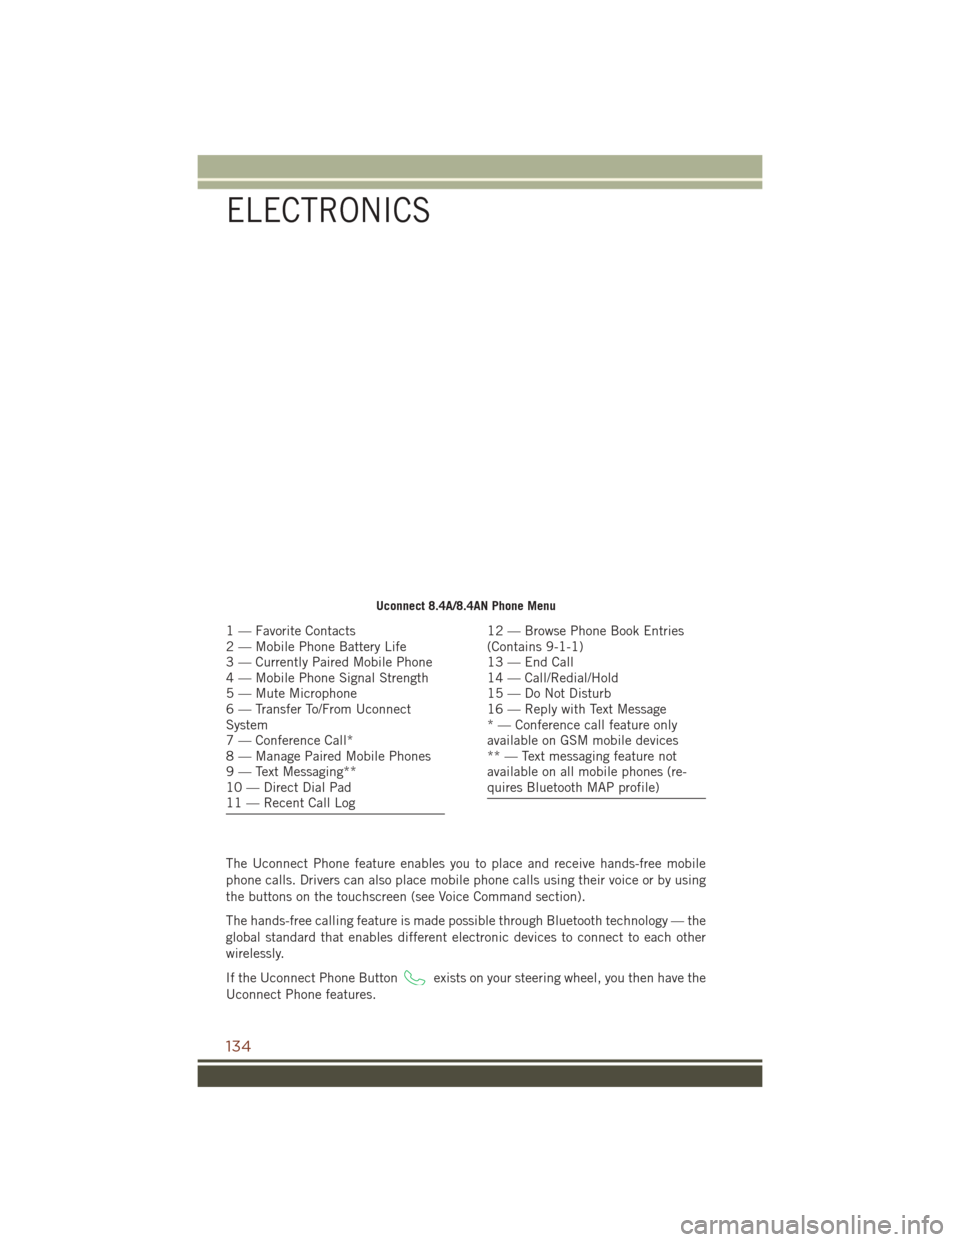
Uconnect 8.4A/8.4AN Phone Menu
1 — Favorite Contacts
2 — Mobile Phone Battery Life
3 — Currently Paired Mobile Phone
4 — Mobile Phone Signal Strength
5 — Mute Microphone
6 — Transfer To/From Uconnect
System
7 — Conference Call*
8 — Manage Paired Mobile Phones
9 — Text Messaging**
10 — Direct Dial Pad
11 — Recent Call Log12 — Browse Phone Book Entries
(Contains 9-1-1)
13 — End Call
14 — Call/Redial/Hold
15 — Do Not Disturb
16 — Reply with Text Message
* — Conference call feature only
available on GSM mobile devices
** — Text messaging feature not
available on all mobile phones (re-
quires Bluetooth MAP profile)
ELECTRONICS
134
Page 140 of 276
Select The Android Mobile Phone's Priority Level
When the pairing process has successfully completed, the system will prompt you to
choose whether or not this is your favorite mobile phone. Selecting “Yes” will make
this mobile phone the highest priority. This mobile phone will take precedence over
other paired mobile phones within range and will connect to the Uconnect system
automatically when entering the vehicle. Only one mobile phone and/or one
Bluetooth audio device can be connected to the Uconnect system at a time. If “No”
is selected, simply select “Uconnect” from the mobile phone/audio device Bluetooth
screen, and the Uconnect system will reconnect to the Bluetooth device.
You are now ready to make hands-free calls. Press the Uconnect “Phone”
button
on your steering wheel to begin.
NOTE:
Refer to UconnectPhone.com website for additional information on mobile phone
pairing and for a list of compatible phones.
Common Phone Commands (Examples)
• “Call John Smith”
• “Call John Smith mobile”
• “Dial 1 248 555 1212”
• “Redial”
Mute (Or Unmute) Microphone During Call
• During a call, press the “Mute” button on the Phone main screen to mute and unmute the call.
Transfer Ongoing Call Between Handset And Vehicle
• During an on-going call, press the “Transfer” button on the Phone main screen totransfer an on-going call between handset and vehicle.
Phonebook
The Uconnect system will automatically sync your phonebook from your paired
phone, if this feature is supported by your phone. Phonebook contacts are updated
each time that the phone is connected. If your phone book entries do not appear,
check the settings on your phone. Some phones require you to enable this feature
manually.
• Your phonebook can be browsed on the Uconnect system touchscreen, but editingcan only be done on your phone. To browse, press the “Phone” button on the
touchscreen, then the “Phonebook” button on the touchscreen.
Favorite phonebook entries can be saved as Favorites for quicker access. Favorites
are shown at the top of the main phone screen.
ELECTRONICS
138
Page 141 of 276
Voice Command Tips
• Speaking complete names (i.e; Call John Doe vs. Call John) will result in greatersystem accuracy.
• You can “link” commands together for faster results. Say “Call John Doe, mobile,” for example.
• If you are listening to available voice command options, you do not have to listen to the entire list. When you hear the command that you need, push the
button on the steering wheel, wait for the beep and say your command.
Changing The Volume
• Start a dialogue by pushing the Phone button, then say a command for
example - "Help".
• Use the radio VOLUME/MUTE rotary knob to adjust the volume to a comfortable level while the Uconnect system is speaking.
NOTE:
The volume setting for Uconnect is different than the audio system.
NOTE:
To access help, push the Uconnect Phone button
on the steering wheel and say
"help." Push the Uconnect Phone Pickup button
or the VR buttonand say
"cancel" to cancel the help session.
Using Do Not Disturb
With Do Not Disturb, you can disable notifications from incoming calls and texts,
allowing you to keep your eyes on the road and hands on the wheel. For your
convenience there is a counter display to keep track of your missed calls and text
messages while you were using Do Not Disturb.
Do Not Disturb can automatically reply with a text message, a call or both, when
declining an incoming call and send it to voicemail.
Automatic reply messages can be:
• “I am driving right now, I will get back to you shortly.”
• Create a custom auto reply message up to 160 characters.
While in Do Not Disturb, Conference Call can be selected so you can still place a
second call without being interrupted by incoming calls.
NOTE:
• Only the beginning of your custom message will be seen on the touchscreen.
• Reply with text message is not compatible with iPhones.
• Auto reply with text message is only available on phones that supporting Bluetooth MAP.
ELECTRONICS
139
Page 148 of 276
Auxiliary Audio/Video Input Jacks
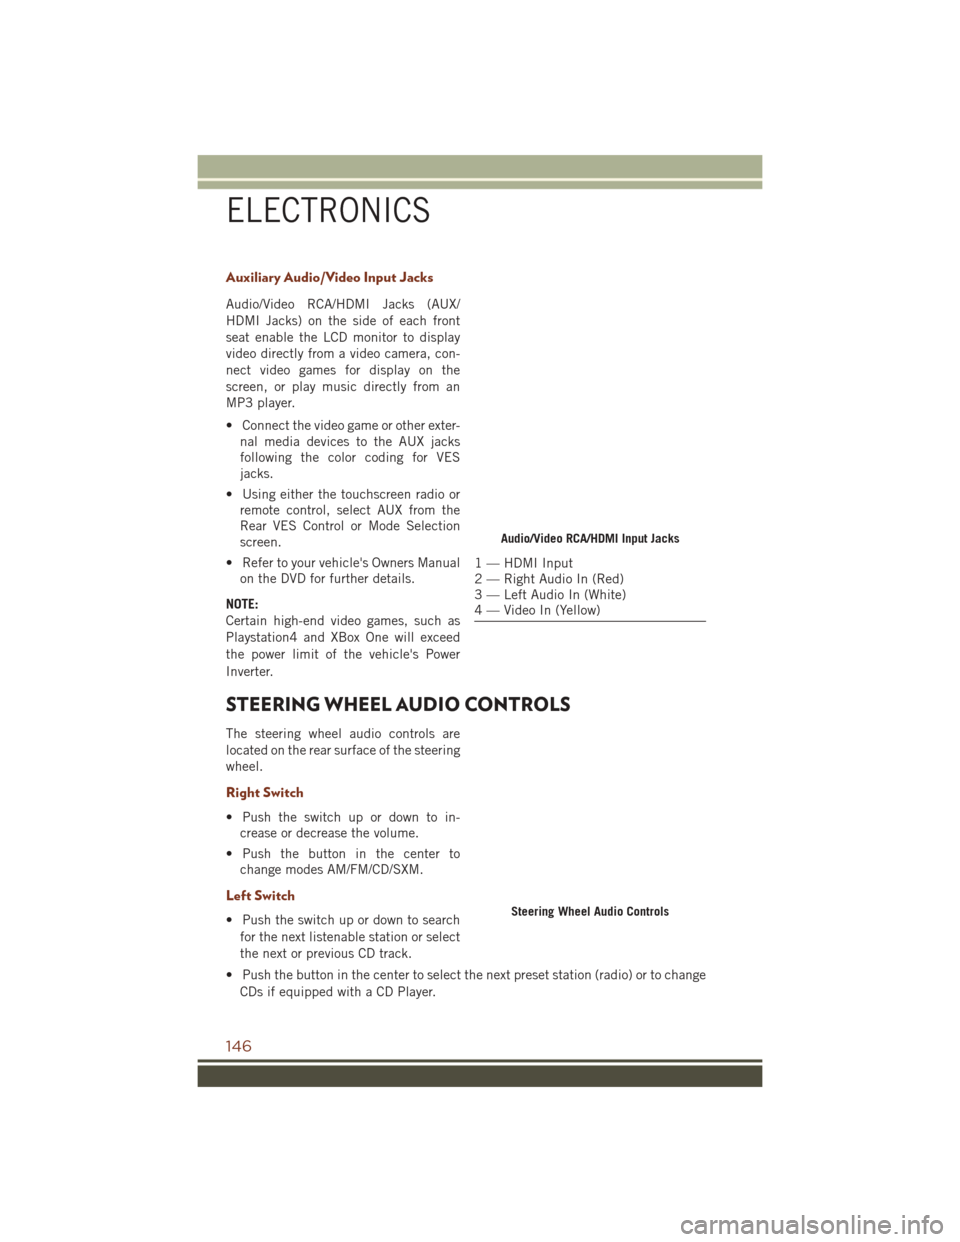
Audio/Video RCA/HDMI Jacks (AUX/
HDMI Jacks) on the side of each front
seat enable the LCD monitor to display
video directly from a video camera, con-
nect video games for display on the
screen, or play music directly from an
MP3 player.
• Connect the video game or other exter-nal media devices to the AUX jacks
following the color coding for VES
jacks.
• Using either the touchscreen radio or remote control, select AUX from the
Rear VES Control or Mode Selection
screen.
• Refer to your vehicle's Owners Manual on the DVD for further details.
NOTE:
Certain high-end video games, such as
Playstation4 and XBox One will exceed
the power limit of the vehicle's Power
Inverter.
STEERING WHEEL AUDIO CONTROLS
The steering wheel audio controls are
located on the rear surface of the steering
wheel.
Right Switch
• Push the switch up or down to in- crease or decrease the volume.
• Push the button in the center to change modes AM/FM/CD/SXM.
Left Switch
• Push the switch up or down to search
for the next listenable station or select
the next or previous CD track.
• Push the button in the center to select the next preset station (radio) or to change CDs if equipped with a CD Player.
Audio/Video RCA/HDMI Input Jacks
1 — HDMI Input
2 — Right Audio In (Red)
3 — Left Audio In (White)
4 — Video In (Yellow)
Steering Wheel Audio Controls
ELECTRONICS
146
Page 149 of 276
DRIVER INFORMATION DISPLAY (DID)
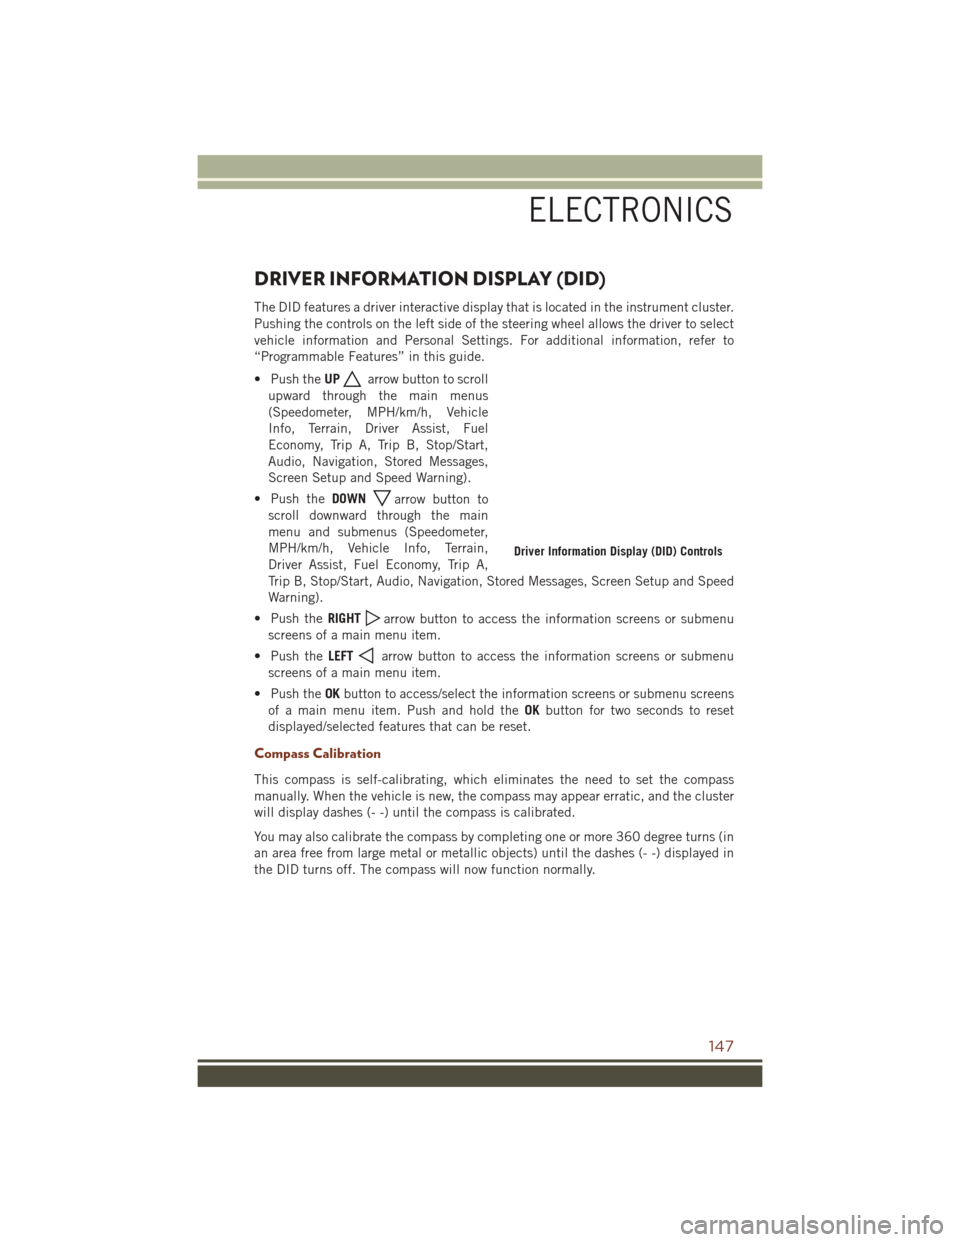
The DID features a driver interactive display that is located in the instrument cluster.
Pushing the controls on the left side of the steering wheel allows the driver to select
vehicle information and Personal Settings. For additional information, refer to
“Programmable Features” in this guide.
• Push theUP
arrow button to scroll
upward through the main menus
(Speedometer, MPH/km/h, Vehicle
Info, Terrain, Driver Assist, Fuel
Economy, Trip A, Trip B, Stop/Start,
Audio, Navigation, Stored Messages,
Screen Setup and Speed Warning).
• Push the DOWN
arrow button to
scroll downward through the main
menu and submenus (Speedometer,
MPH/km/h, Vehicle Info, Terrain,
Driver Assist, Fuel Economy, Trip A,
Trip B, Stop/Start, Audio, Navigation, Stored Messages, Screen Setup and Speed
Warning).
• Push the RIGHT
arrow button to access the information screens or submenu
screens of a main menu item.
• Push the LEFT
arrow button to access the information screens or submenu
screens of a main menu item.
• Push the OKbutton to access/select the information screens or submenu screens
of a main menu item. Push and hold the OKbutton for two seconds to reset
displayed/selected features that can be reset.
Compass Calibration
This compass is self-calibrating, which eliminates the need to set the compass
manually. When the vehicle is new, the compass may appear erratic, and the cluster
will display dashes (- -) until the compass is calibrated.
You may also calibrate the compass by completing one or more 360 degree turns (in
an area free from large metal or metallic objects) until the dashes (- -) displayed in
the DID turns off. The compass will now function normally.
Driver Information Display (DID) Controls
ELECTRONICS
147
Page 157 of 276
QUADRA-TRAC I FOUR-WHEEL DRIVE
Quadra-Trac I Operating Instructions/Precautions — 3.6L Only
The Quadra-Trac I is a single-speed (HI range only) transfer case, which provides
convenient full-time four-wheel drive. No driver interaction is required. The Brake
Traction Control (BTC) System, which combines standard ABS and Traction Control,
provides resistance to any wheel that is slipping to allow additional torque transfer to
wheels with traction.
QUADRA-TRAC II/QUADRA-DRIVE II FOUR-WHEEL
DRIVE
Quadra-Trac II/Quadra-Drive II Operating Instructions/Precautions
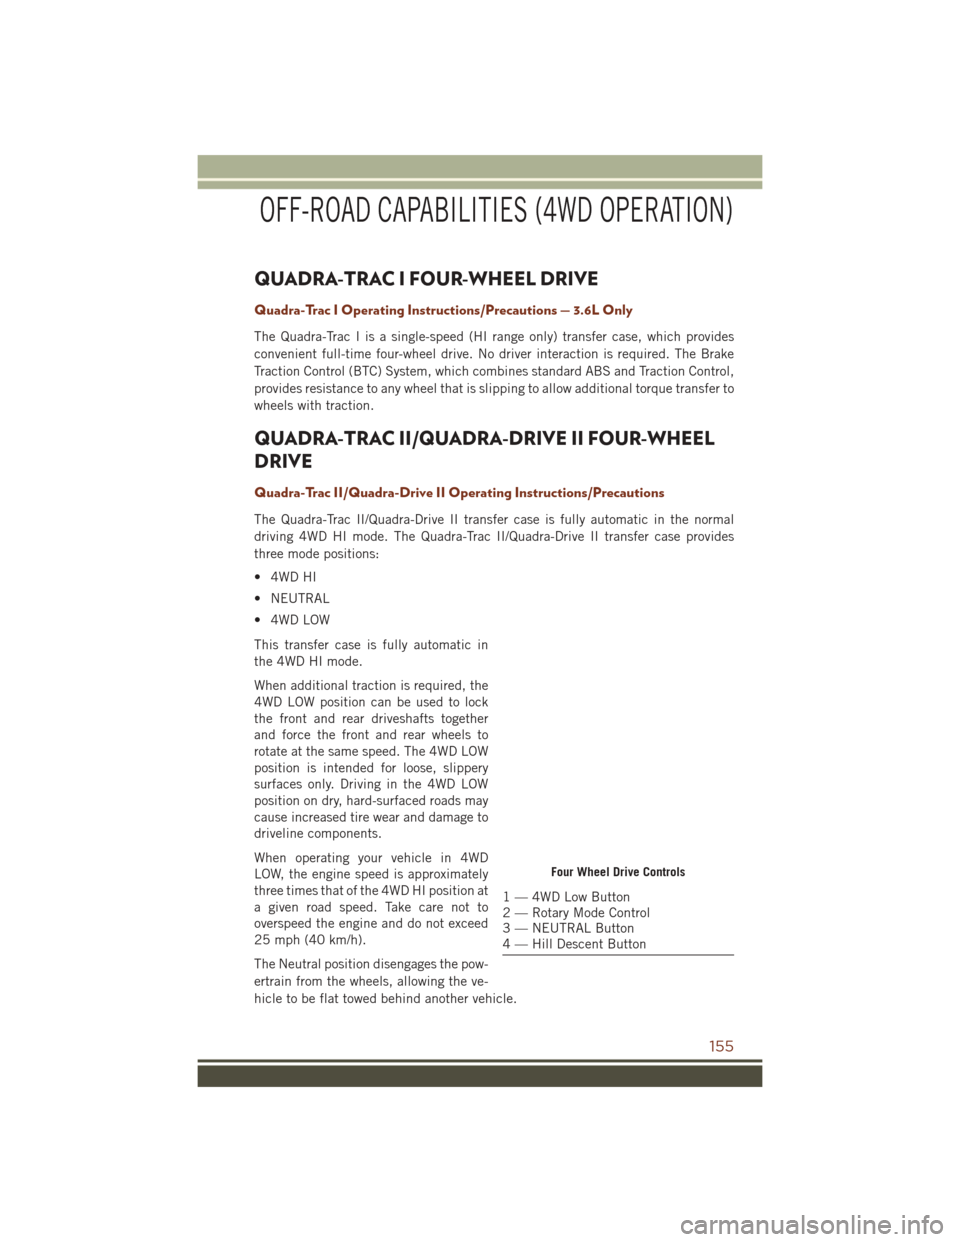
The Quadra-Trac II/Quadra-Drive II transfer case is fully automatic in the normal
driving 4WD HI mode. The Quadra-Trac II/Quadra-Drive II transfer case provides
three mode positions:
• 4WD HI
• NEUTRAL
• 4WD LOW
This transfer case is fully automatic in
the 4WD HI mode.
When additional traction is required, the
4WD LOW position can be used to lock
the front and rear driveshafts together
and force the front and rear wheels to
rotate at the same speed. The 4WD LOW
position is intended for loose, slippery
surfaces only. Driving in the 4WD LOW
position on dry, hard-surfaced roads may
cause increased tire wear and damage to
driveline components.
When operating your vehicle in 4WD
LOW, the engine speed is approximately
three times that of the 4WD HI position at
a given road speed. Take care not to
overspeed the engine and do not exceed
25 mph (40 km/h).
The Neutral position disengages the pow-
ertrain from the wheels, allowing the ve-
hicle to be flat towed behind another vehicle.
Four Wheel Drive Controls
1 — 4WD Low Button
2 — Rotary Mode Control
3 — NEUTRAL Button
4 — Hill Descent Button
OFF-ROAD CAPABILITIES (4WD OPERATION)
155
Page 159 of 276
5. Using a ballpoint pen or similar object, press and hold the recessed transfer caseNEUTRAL (N) button (located by the selector switch) for four seconds. The light
behind the N symbol will blink, indicating shift in progress. The light will stop
blinking (stay on solid) when the shift to NEUTRAL (N) is complete. A “FOUR
WHEEL DRIVE SYSTEM IN NEUTRAL” message will display on the Driver
Information Display (DID).
6. After the shift is completed and the NEUTRAL (N) light stays on, release the NEUTRAL (N) button.
7. Shift the transmission into REVERSE.
8. Release the brake pedal for five seconds and ensure that there is no vehicle movement.
9. Press and hold the brake pedal. Shift the transmission back into NEUTRAL
10. Firmly apply the parking brake.
11. With the transmission and transfer case in NEUTRAL, press and hold the ENGINE START/STOP button until the engine turns off.
12. Move the transmission gear selector to PARK. Release the brake pedal.
13. Push the ENGINE STOP/START button twice (without pressing the brake pedal), to turn the ignition switch to the OFF position
Repeat these Steps 1 through 5 to shift out of NEUTRAL.
SELEC-TERRAIN
Selec-Terrain combines the capabilities of the vehicle control systems, along with
driver input, to provide the best performance for all terrains.
Rotate the mode control knob to select the following Selec-Terrain positions:
Snow – Tuning set for additional stability in inclement weather. Use on and off road
on loose traction surfaces such as snow. When in Snow mode (depending on certain
operating conditions), the transmission may use second gear (rather than first gear)
during launches, to minimize wheel slippage. If equipped with air suspension, the
level will change to Normal Ride Height (NRH).
Auto – Fully automatic full time four-wheel drive operation can be used on and off
road. Balances traction with seamless steering feel to provide improved handling and
acceleration over two-wheel drive vehicles. If equipped with air suspension, the level
will change to NRH.
Sand – Off road calibration for use on low traction surfaces such as sand or wet grass.
Driveline is maximized for traction. Some binding may be felt on less forgiving
surfaces. The electronic brake controls are set to limit traction control management
of throttle and wheel spin. If equipped with air suspension, the level will change to
NRH.
OFF-ROAD CAPABILITIES (4WD OPERATION)
157
Page 160 of 276
Mud– Off road calibration for use on low traction surfaces such as mud. Driveline is
maximized for traction. Some binding may be felt on less forgiving surfaces. The
electronic brake controls are set to limit traction control management of throttle and
wheel spin. If equipped with air suspension, the level will change to Off-Road 1.
Rock – Off-road calibration only available in 4WD Low range. The vehicle is raised (if
equipped with Air Suspension) for improved ground clearance. Traction based tuning
with improved steer-ability for use on high traction off-road surfaces. Activate the Hill
Descent Control for steep downhill control. Use for low speed obstacles such as large
rocks, deep ruts, etc. If equipped with air suspension, the vehicle level will change
to Off-Road 2. If the Selec-Terrain switch is in ROCK mode, and the transfer case is
switched from 4WD Low to 4WD High, the Selec-Terrain system will return to AUTO.
QUADRA-LIFT
The Quadra-Lift air suspension system provides full time load leveling capability
along with the benefit of being able to adjust vehicle height by the push of a button.
Quadra-Lift is available with both Quadra-Trac II and Quadra-Drive II.
• The system requires that the engine be running for all changes. When lowering
the vehicle all of the doors, including
the liftgate, must be closed.
• The Quadra-Lift air suspension system uses a lifting and lowering pattern
which keeps the headlights from shin-
ing into oncoming traffic. When raising
the vehicle, the rear of the vehicle will
move up first and then the front. When
lowering the vehicle, the front will
move down first and then the rear.
• After the engine is turned off, you may notice that the air suspension system
operates briefly. This is normal. The
system is correcting the position of the
vehicle.
• To assist with changing a spare tire, the Quadra-Lift air suspension system
has a feature which allows the automatic leveling to be disabled. The feature
controls are located in the radio screen. Driving the vehicle over 5 mph (8 km/h)
will return the air suspension to normal operation.
• An audible chime will be heard whenever a system error has been detected.
Quadra-Lift Control
1 — UP Button
2 — DOWN Button
OFF-ROAD CAPABILITIES (4WD OPERATION)
158