radio JEEP GRAND CHEROKEE 2017 WK2 / 4.G Owner's Manual
[x] Cancel search | Manufacturer: JEEP, Model Year: 2017, Model line: GRAND CHEROKEE, Model: JEEP GRAND CHEROKEE 2017 WK2 / 4.GPages: 372
Page 292 of 372
alter the image on the screen. The vehicle
must be in the ON/RUN position to display
Selec-Terrain information.
The selectable modes are as follows:
• Snow
• Sand
• Auto — Default
• Mud
• Rock — Vehicle Must Be In 4 Wheel DriveLow
NOTE:
While in the Selec-Terrain pages, the Off
Road Pages Status Bar will also display the
current Selec-Terrain mode.TIPS CONTROLS AND
GENERAL INFORMATION
Steering Wheel Audio Controls
The steering wheel audio controls are located
on the rear surface of the steering wheel.
Right Switch
• Push the switch up or down to increase or decrease the volume.
• Push the button in the center to change modes AM/FM/CD/SXM. Left Switch
• Push the switch up or down to search for
the next listenable station or select the
next or previous CD track.
• Push the button in the center to select the next preset station (radio) or to change
CDs if equipped with a CD Player.
Reception Conditions
Reception conditions change constantly
while driving. Reception may be interfered
with by the presence of mountains, buildings
or bridges, especially when you are far away
from the broadcaster.
The volume may be increased when receiving
traffic alerts and news.
Care And Maintenance
Observe the following precautions to ensure
the system is fully operational:
• The display lens should not come intocontact with pointed or rigid objects which
could damage its surface; use a soft, dry
anti-static cloth to clean and do not press.
• Never use alcohol, petrols and derivatives to clean the display lens.
Current Selec-Terrain Mode
Steering Wheel Audio Controls
MULTIMEDIA
290
Page 293 of 372
• Prevent any liquid from entering the sys-tem: this could damage it beyond repair.
Anti-theft Protection
The system is equipped with an anti-theft
protection system based on the exchange of
information with the electronic control unit
(Body Computer) on the vehicle.
This guarantees maximum safety and pre-
vents the secret code from being entered
after the power supply has been discon-
nected.
If the check has a positive outcome, the
system will start to operate, whereas if the
comparison codes are not the same or if the
electronic control unit (Body Computer) is
replaced, the system will ask the user to enter
the secret code according to the procedure
described in the paragraph below.
Entering The Secret Code
When the system is switched on, if the code is
requested, the display will show "Please enter
Anti-Theft Code" followed by the screen
showing a keypad to enter the secret code. The secret code has four numbers from 0 to
9: to insert the code numbers, rotate the
BROWSE/ENTER dial and press to confirm.
After entering the fourth number the system
will start functioning.
If an incorrect code is entered, the system
displays "Incorrect Code" to notify the user of
the need to enter the correct code.
After the 3 available attempts to enter the
code, the system displays "Incorrect Code.
Radio locked. Wait for 30 minutes". After the
text has disappeared it is possible to start the
code entering procedure again.
Vehicle Radio Passport
This document certifies ownership of the sys-
tem. The vehicle radio passport shows the
system model, serial number and secret
code.
In case you lose the radio passport, please go
to Jeep Assistance Network with an ID and
the car papers.
Keep the vehicle radio passport in a safe place
so that you can give the information to the
relevant authorities if the system is stolen.
UCONNECT ACCESS
Uconnect Access — If Equipped (Available
On Uconnect 8.4/8.4 NAV — U.S.
Residents Only)
WARNING!
ALWAYS drive safely with your hands on
the wheel. You have full responsibility and
assume all risks related to the use of the
Uconnect features and applications in this
vehicle. Only use Uconnect when it is safe
to do so. Failure to do so may result in an
accident involving serious injury or death.
WARNING!
ALWAYS obey traffic laws and pay atten-
tion to the road. Some Uconnect Access
services, including 9-1-1 and Assist, will
NOT work without an operable 1X (voice/
data) or 3G (data) network connection.
NOTE:
Your vehicle may be transmitting data as
authorized by the subscriber.
291
Page 294 of 372
Uconnect Access enhances your ownership
and driving experience by connecting your
vehicle to an operable 1X (voice/data) or 3G
(data) network. When connected to an oper-
able 1X (voice/data) or 3G (data) network,
you can:
• Place a call to a local 9-1-1 Operator foremergency assistance.
• Remotely lock/unlock your doors and start your vehicle from virtually anywhere, using
the Uconnect Access App from your de-
vice. You can also do so by logging into
your owner site, or by calling Uconnect
Access Care when your vehicle has an
operable 1X (voice/data) or 3G (data) net-
work connection. Services can only be
used where coverage is available; see cov-
erage map for details.
• Turn your vehicle into a 3G Wi-Fi Hotspot and connect your devices to the internet.
• Receive text or email notifications if your vehicle's security alarm goes off.
• Receive stolen vehicle assistance, using GPS technology to help authorities locate
your vehicle if it is stolen. • Listen to your text messages or send free-
form text messages with your voice while
keeping your hands on the wheel, using
the Voice Texting feature. Requires a de-
vice that supports Bluetooth Message Ac-
cess Profile (MAP).
• Search for places to eat, shop, relax and play with Yelp, using your voice or on-
screen menu. Then navigate to them
(navigation standard on Uconnect
8.4 NAV, optional on Uconnect 8.4).
• Get operator assistance using the ASSIST button on your interior rearview mirror.
Before you drive, familiarize yourself with the
easy-to-use Uconnect Access services.
1. The ASSIST and 9-1-1 buttons are lo- cated on your rearview mirror. The ASSIST
button is used for contacting Roadside
Assistance, Vehicle Care and Uconnect
Access Care. The 9-1-1 button connects
you to emergency services. NOTE:
Vehicles sold in Canada and Mexico DO
NOT have 9-1-1 call system capabilities.
9-1-1 or other emergency line operators in
Canada and Mexico may not answer or
respond to 9-1-1 system calls.
2. The Uconnect “Apps
” button is lo-
cated in the center of the menu bar of the
radio touchscreen. This is where you can
manage your Apps and purchase 3G Wi-Fi
on demand.
3. The Uconnect Voice Command and Uconnect Phone buttons are located on
the left side of your steering wheel. These
buttons let you use your voice to give
commands, make phone calls, send and
receive text messages hands-free, enter
navigation destinations, and control your
radio and media devices.
Included Trial Period For New Vehicles
Your new vehicle may come with an included
trial period for use of the Uconnect Access
Services starting at the date of vehicle pur-
chase (date based on vehicle sales notifica-
tion from your dealer). To activate the trial, you
must first register with Uconnect Access. After
MULTIMEDIA
292
Page 296 of 372
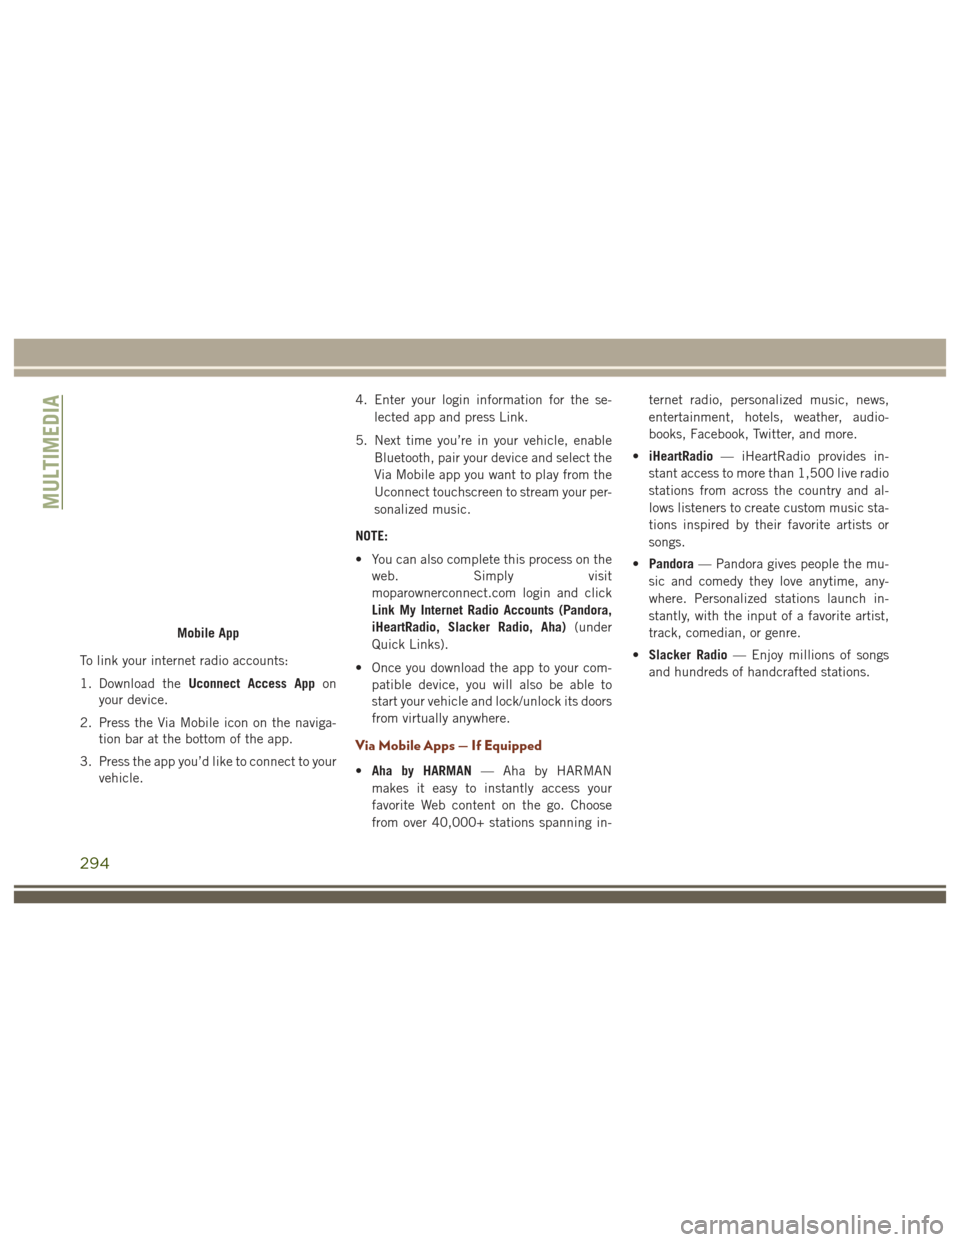
To link your internet radio accounts:
1. Download theUconnect Access App on
your device.
2. Press the Via Mobile icon on the naviga- tion bar at the bottom of the app.
3. Press the app you’d like to connect to your vehicle. 4. Enter your login information for the se-
lected app and press Link.
5. Next time you’re in your vehicle, enable Bluetooth, pair your device and select the
Via Mobile app you want to play from the
Uconnect touchscreen to stream your per-
sonalized music.
NOTE:
• You can also complete this process on the web. Simply visit
moparownerconnect.com login and click
Link My Internet Radio Accounts (Pandora,
iHeartRadio, Slacker Radio, Aha) (under
Quick Links).
• Once you download the app to your com- patible device, you will also be able to
start your vehicle and lock/unlock its doors
from virtually anywhere.
Via Mobile Apps — If Equipped
•Aha by HARMAN — Aha by HARMAN
makes it easy to instantly access your
favorite Web content on the go. Choose
from over 40,000+ stations spanning in- ternet radio, personalized music, news,
entertainment, hotels, weather, audio-
books, Facebook, Twitter, and more.
• iHeartRadio — iHeartRadio provides in-
stant access to more than 1,500 live radio
stations from across the country and al-
lows listeners to create custom music sta-
tions inspired by their favorite artists or
songs.
• Pandora — Pandora gives people the mu-
sic and comedy they love anytime, any-
where. Personalized stations launch in-
stantly, with the input of a favorite artist,
track, comedian, or genre.
• Slacker Radio — Enjoy millions of songs
and hundreds of handcrafted stations.
Mobile App
MULTIMEDIA
294
Page 299 of 372
Connect. If you need help push the ASSIST
button on the rearview mirror, then select
Uconnect Care (or dial 1-855-792-4241 ).
NOTE:
You must set up a Uconnect Access Payment
Account online (login to
moparownerconnect.com, go to Edit Profile,
then Uconnect Payment Account, to set up
and manage your Payment Account).
Getting Started With Apps
Applications (Apps for short) in your
Uconnect Access system are designed to de-
liver the features and services that you want.
There are two basic categories:
1.Built-In Features — use the 1X (voice/data)
or 3G (data) network on your Uconnect
8.4 or 8.4 NAV radio.
2. Uconnect Access Via Mobile — use the
Uconnect Access App and your device's
data plan to access your personal
Pandora, iHeartRadio, Aha and Slacker
accounts from the vehicle and control them using the touchscreen. Customer's
data plan charges will apply. Available on
Uconnect 8.4 and 8.4 NAV Radios (if
equipped).
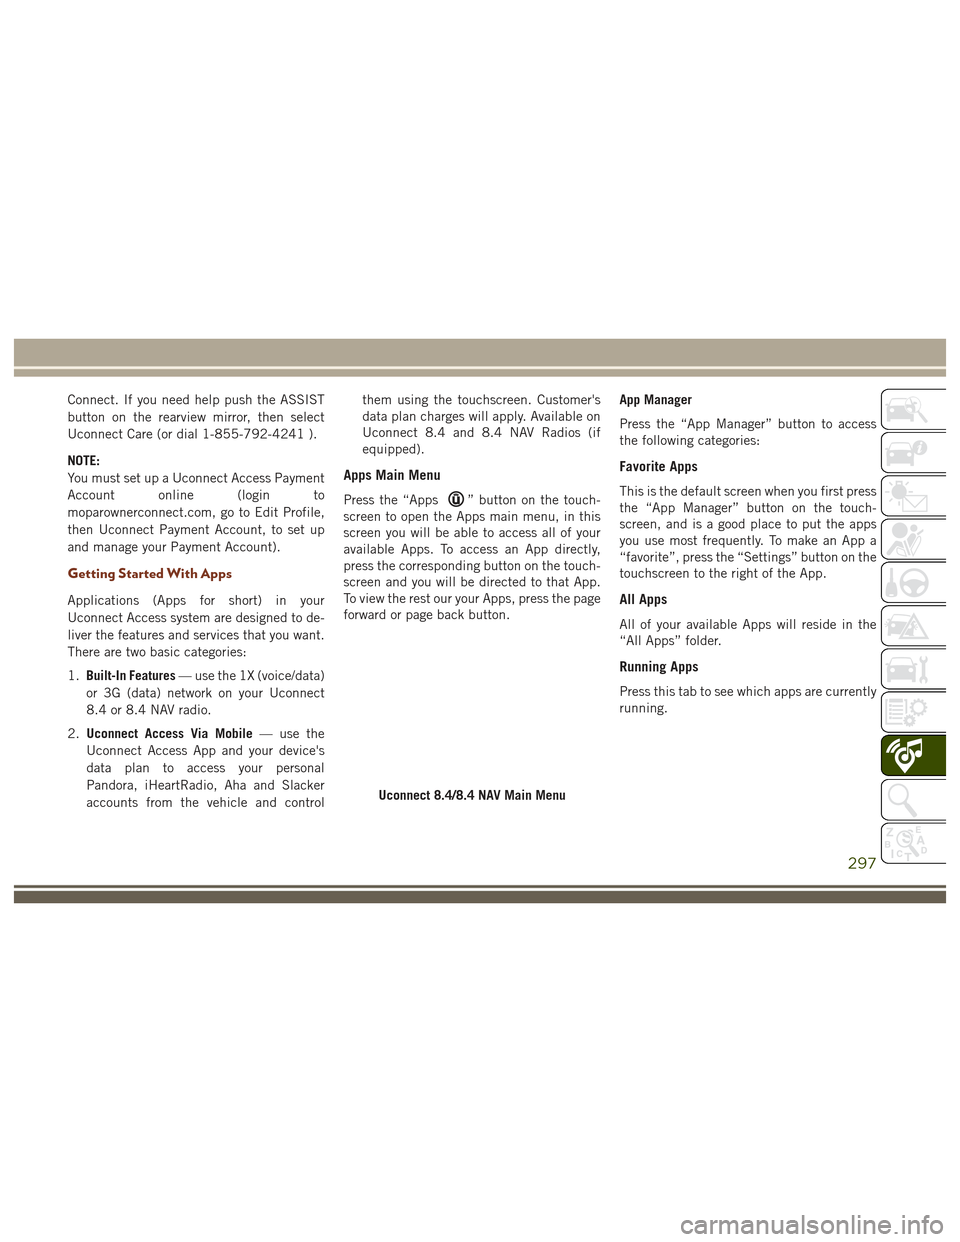
Apps Main Menu
Press the “Apps” button on the touch-
screen to open the Apps main menu, in this
screen you will be able to access all of your
available Apps. To access an App directly,
press the corresponding button on the touch-
screen and you will be directed to that App.
To view the rest our your Apps, press the page
forward or page back button. App Manager
Press the “App Manager” button to access
the following categories:
Favorite Apps
This is the default screen when you first press
the “App Manager” button on the touch-
screen, and is a good place to put the apps
you use most frequently. To make an App a
“favorite”, press the “Settings” button on the
touchscreen to the right of the App.
All Apps
All of your available Apps will reside in the
“All Apps” folder.
Running Apps
Press this tab to see which apps are currently
running.
Uconnect 8.4/8.4 NAV Main Menu
297
Page 300 of 372
Maintaining Your Uconnect Access
Account
Selling Your Vehicle
When you sell your vehicle, we recommend
that you remove your Uconnect Access Ac-
count information from the vehicle. You can
do this on the Mopar Owner Connect website
moparownerconnect.com. Removing your ac-
count information cancels your subscription
and makes your vehicle factory-ready for a
new owner/subscriber.
For additional information on Uconnect, visit
DriveUconnect.com or call 1-877-855-8400
Built-In Features
WARNING!
ALWAYS drive safely with your hands on
the wheel. You have full responsibility and
assume all risks related to the use of the
Uconnect features and applications in this
vehicle. Only use Uconnect when it is safe
to do so. Failure to do so may result in an
accident involving serious injury or death.
WARNING!
• ALWAYS obey traffic laws and pay atten-tion to the road. Some Uconnect Access
services, including 9-1-1 and Assist,
will NOT work without an operable 1X
(voice/data) or 3G (data) network con-
nection.
• Ignoring the rearview mirror light could
mean you may not have 9-1-1 Call ser-
vice if needed. If the rearview mirror
light is illuminated, have an authorized
dealer service the 9-1-1 Call system
immediately.
• The Occupant Restraint Controller
(ORC) turns on the Air Bag Warning
Light on the instrument panel if a mal-
function is detected in any part of the
airbag system. If the Air Bag Warning
Light is illuminated, the air bag system
may not be working properly and the
9-1-1 system may not send a signal to a
9-1-1 operator if an air bag is deployed.
If the Air Bag Warning Light is illumi-
nated, have an authorized dealer service
your vehicle immediately.
WARNING!
• If anyone in the vehicle could be indanger (e.g., fire or smoke is visible,
dangerous road conditions or location),
do not wait for voice contact from a
9-1-1 operator. All occupants should
exit the vehicle immediately and move
to a safe location.
• The 9-1-1 Call system is embedded into
the vehicle’s electrical system. Do not
add aftermarket electrical equipment to
the vehicle’s electrical system. This may
prevent your vehicle from sending a sig-
nal to initiate an emergency call. To
avoid interference that can cause the
9-1-1 Call system to fail, never add
aftermarket equipment (e.g., two-way
mobile radio, CB radio, data recorder,
etc.) to your vehicle’s electrical system
or modify the antennas on your vehicle.
• IF YOUR VEHICLE LOSES BATTERY
POWER FOR ANY REASON (INCLUD-
ING DURING OR AFTER AN ACCI-
DENT), the Uconnect features, apps and
services, among others, will not operate.
MULTIMEDIA
298
Page 302 of 372
understand and agree that 9-1-1 operators may,
like any other 9-1-1 call, record conversations
and sounds in and near your vehicle upon con-
nection.
Roadside Assistance (If Equipped)
If your vehicle is equipped with this feature
and has an operable 1X (voice/data) or 3G
(data) network connection, you may be able
to connect with Roadside Assistance by
pushing the "ASSIST" button on the rearview
mirror. You will be presented with Assist Care
options. Make a selection by pressing the
prompts displayed on the radio. If Roadside
Assistance is provided to your vehicle, you
agree to be responsible for any additional
roadside assistance service costs that you
may incur. In order to provide Uconnect Ser-
vices to you, we may record and monitor your
conversations with Roadside Assistance,
Uconnect Care or Vehicle Care, whether such
conversations are initiated through the
Uconnect Services in your vehicle, your de-
vice or via a landline device, and may share
information obtained through such recording
and monitoring in accordance with regulatoryrequirements. You acknowledge, agree and
consent to any recording, monitoring or shar-
ing of information obtained through any such
call recordings.
Yelp
Customers have the ability to search for
nearby destinations or a Point Of Interest
(POI) either by category or custom search by
using keywords (for example, “Italian restau-
rant”). Searching can be done by either voice
or by using the touchscreen keypad. Using
the touchscreen, launch Yelp by selecting the
“Apps
” icon, then press “Yelp.” To use
voice recognition, push the VR button on the
steering wheel and say “launch Yelp,” then
follow the instructions on the Teleprompter.
Security Alarm Notification
The Theft Alarm Notification feature notifies
you via email or text (SMS) message when the
vehicle’s factory-installed security alarm sys-
tem has been set-off. There are a number of
reasons why your alarm may have been trig-
gered, one of which could be that your ve-
hicle was stolen. If so, please see the details
of the Stolen Vehicle Assistance service be- low. When you register, Theft Alarm Notifica-
tion is automatically set to send you an email
at the email address you provide should the
alarm go off. You may also opt to have a text
message sent to your device.
Stolen Vehicle Assistance
If your vehicle is stolen, contact local law
enforcement immediately to file a stolen ve-
hicle report. Once this report has been filed,
Uconnect care can help locate your vehicle.
The Uconnect Care agent will ask for the
stolen vehicle report number issued by local
law enforcement. As long as your vehicle has
an operable 1X (voice/data) or 3G (data)
network connection, the Uconnect Care
Agent may be able to locate the stolen vehicle
and work with law enforcement to help re-
cover it. Your vehicle must have an operable
1X (voice/data) or 3G (data) network connec-
tion and must be registered with Uconnect
Access with an active subscription that in-
cludes the applicable feature.
MULTIMEDIA
300
Page 307 of 372
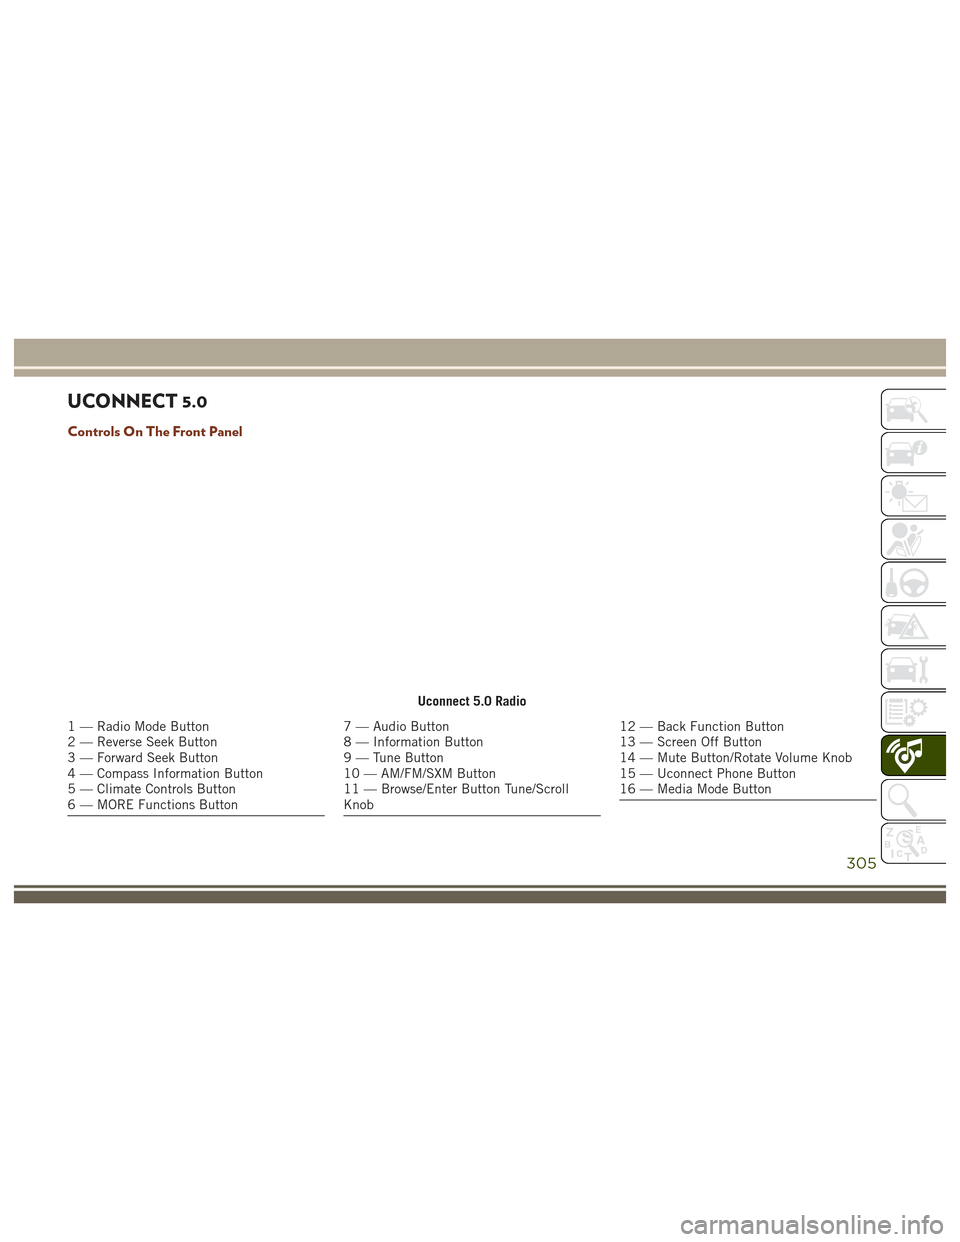
UCONNECT 5.0
Controls On The Front Panel
Uconnect 5.0 Radio
1 — Radio Mode Button
2 — Reverse Seek Button
3 — Forward Seek Button
4 — Compass Information Button
5 — Climate Controls Button
6 — MORE Functions Button7 — Audio Button
8 — Information Button
9 — Tune Button
10 — AM/FM/SXM Button
11 — Browse/Enter Button Tune/Scroll
Knob12 — Back Function Button
13 — Screen Off Button
14 — Mute Button/Rotate Volume Knob
15 — Uconnect Phone Button
16 — Media Mode Button
305
Page 308 of 372
Clock Setting
To start the clock setting procedure:
1. Push the MORE button on the faceplate.Next press the “Settings” button on the
touchscreen and then press the “Clock
and Date” button on the touchscreen.
2. Press the “Set Time” button on the touchscreen.
3. Press the “Up” or “Down” arrows to ad- just the hours or minutes, next select the
“AM” or “PM” button on the touchscreen.
You can also select 12hr or 24hr format
by pressing the desired button on the
touchscreen.
4. Once the time is set press the “Done” button on the touchscreen to exit the time
screen.
NOTE:
In the Clock Setting Menu you can also select
the “Show Time Status” button on the touch-
screen, then select from “On” or “Off” to
display the time in the status bar.
Equalizer, Balance And Fade
1. Push the MORE button on the faceplate. Next press the “Settings” button on the
touchscreen.
2. Then scroll down and press the “Audio” button on the touchscreen to get to the
Audio menu.
3. The Audio Menu shows the following op- tions for you to customize your audio
settings.
Equalizer
Press the “Equalizer” button on the touch-
screen to adjust the Bass, Mid and Treble.
Use the “+” or “–” button on the touchscreen
to adjust the equalizer to your desired set-
tings. Press the “Back Arrow” button on the
touchscreen when done.
Balance/Fade
Press the “Balance/Fade” button on the
touchscreen to adjust the sound from the
speakers. Use the arrow button on the touch-
screen to adjust the sound level from the
front and rear or right and left side speakers.
Press the Center “C” button on the touch- screen to reset the balance and fade to the
factory setting. Press the “Back Arrow” but-
ton on the touchscreen when done.
Speed Adjusted Volume
Press the “Speed Adjusted Volume” button
on the touchscreen to select between OFF, 1,
2 or 3. This will decrease the radio volume
relative to a decrease in vehicle speed. Press
the “Back Arrow” button on the touchscreen
when done.
Loudness
Press the “Loudness” button on the touch-
screen to select the Loudness feature. When
this feature is activated it improves sound
quality at lower volumes.
Surround Sound
Press the “Surround Sound” button on the
touchscreen, select “On” or “Off” followed
by pressing the “Back Arrow” button on the
touchscreen. When this feature is activated,
it provides simulated surround sound mode.
MULTIMEDIA
306
Page 309 of 372
Radio Mode
Seek Previous/Next Buttons
Seek Up
Press and release the “Seek Up”button
on the touchscreen to tune the radio to the
next listenable station or channel.
During a Seek Up function, if the radio
reaches the starting station after passing
through the entire band two times, the radio
will stop at the station where it began.
Fast Seek Up
Press and hold the “Seek Up”button on
the touchscreen to advance the radio through
the available stations or channels at a faster
rate, the radio stops at the next available
station or channel when the button on the
touchscreen is released.
Seek Down
Press and release the “Seek Down”but-
ton on the touchscreen to tune the radio to
the next listenable station or channel. During a Seek Down function, if the radio
reaches the starting station after passing
through the entire band two times, the radio
will stop at the station where it began.
Fast Seek Down
Press and hold the “Seek Down”button
on the touchscreen to advance the radio
through the available stations or channel at a
faster rate, the radio stops at the next avail-
able station or channel when the button on
the touchscreen is released.
Store Radio Presets
The Radio stores up to 12 presets in each of
the Radio modes. There are four visible pre-
sets at the top of the radio screen. Pressing
the “All” button on the touchscreen on the
radio home screen will display all of the
preset stations for that mode. To store a radio preset manually, follow the
steps below:
1. Tune to the desired station.
2.
Press and hold the desired numbered button
on the touchscreen for more that two sec-
onds or until you hear a confirmation beep.
Media Mode
Audio Source Selection
1 — SEEK
Down
2 — SEEK Up
3 — Additional
Functions4 — Info
5 — Pause/Play
6 — Source
7 — Browse
307