remote start JEEP GRAND CHEROKEE 2017 WK2 / 4.G Owner's Manual
[x] Cancel search | Manufacturer: JEEP, Model Year: 2017, Model line: GRAND CHEROKEE, Model: JEEP GRAND CHEROKEE 2017 WK2 / 4.GPages: 372
Page 310 of 372
Media Mode is entered by pushing the ME-
DIA button located on the faceplate. Once in
Media Mode, press the “Source” button on
the touchscreen and the desired mode button
on the touchscreen. Disc (if equipped), USB,
SD Card (if equipped), AUX and Bluetooth (if
equipped), are the Media sources available.
When available, you can select the “Browse”
button on the touchscreen to be given these
options:
• Now Playing
• Artists
• Albums
• Genres
• Songs
• Playlists
• Folders
Source
Press the “Source” button on the touch-
screen to select the desired audio source:
Disc (if equipped), USB, SD (if equipped),
AUX and Bluetooth (if equipped). This screen
will time out after a few seconds and return to
the main radio screen if no selection is made.You can press the “Source,” “Pause/Play” or
the “Info” button on the touchscreen for
artist information on the current song play-
ing.
Disc Mode — If Equipped
Your vehicle may have a remote Disc player
located in the center console storage bin.
Disc Mode is entered by either inserting a
CD/Disc or by pushing the MEDIA button on
the faceplate. Once in Media Mode, press the
“Source” button on the touchscreen and se-
lect “Disc.”
Inserting Compact Disc
Gently insert one disc into the disc player
with the disc label following the illustration
indicated on the player. The disc will auto-
matically be pulled into the disc player and
the disc icon will illuminate on the radio
display. If a disc does not go into the slot
more than 1.0 inch (2.5 cm), a disc may
already be loaded and must be ejected before
a new disc can be loaded.
If you insert a disc with the ignition ON and
the radio ON, the unit will switch to disc
mode and begin to play when you insert the
disc. The display will show the track number
and index time in minutes and seconds. Play
will begin at the start of track 1.
Browse
Press the “Browse” button on the touch-
screen to scroll through and select a desired
track on the Disc. Press the “Exit” button on
the touchscreen if you wish to cancel the
browse function.
Eject Button — Ejecting a Disc
Push the eject button to eject the disc. If you
have ejected a disc and have not removed it
within 10 seconds, it will be reloaded. If the
Disc is not removed, the radio will reinsert
the disc but will not play it.
A disc can be ejected with the radio and
ignition OFF.
MULTIMEDIA
308
Page 324 of 372
our satellite service area and in AK and HI.
©2016 Sirius XM Radio Inc. Sirius, XM
and all related marks and logos are trade-
marks of Sirius XM Radio Inc.
UCONNECT TOUCH
SETTINGS
The Uconnect system allows you to access
Customer Programmable feature settings
such as Display, Voice, Clock, Safety & Driv-
ing Assistance, Lights, Doors & Locks,
Auto-On Comfort & Remote Start, Engine Off
Options, Compass Settings, Audio, Phone/
Bluetooth, Suspension, SiriusXM Setup, Re-
store Settings, Clear Personal Data, and Sys-
tem Information through buttons on the
touchscreen.
Push the SETTINGS button (Uconnect 5.0),
or press the “Apps” button (Uconnect 8.4)
located near the bottom of the touchscreen,
then press the “Settings” button on the
touchscreen to access the Settings screen.
When making a selection, scroll up or down
until the preferred setting is highlighted,
then press the preferred setting until a check-mark appears next to the setting, showing
that setting has been selected. The following
feature settings are available:
• Display
• Engine Off Op-
tions
• Voice • Suspension
• Clock • Audio
• Safety & Driving Assistance • Phone/Bluetooth
• Lights • SiriusXM Setup
• Doors & Locks • Restore Settings
• Auto-On Comfort & Remote Start • Clear Personal
Data
• Compass (Uconnect 5.0) • System Informa-
tion
NOTE:
Depending on the vehicles options, feature
settings may vary.
Refer to “Uconnect Settings/Customer Pro-
grammable Features” in the “Multimedia”
Chapter on
www.jeep.com/en/owners/manuals/ for fur-
ther information.
IPOD/USB/SD CARD/MEDIA
PLAYER CONTROL
There are many ways to play music from
MP3 players, USB devices, or SD Cards
through your vehicle's sound system. Press
your Media button on the touchscreen to
begin.
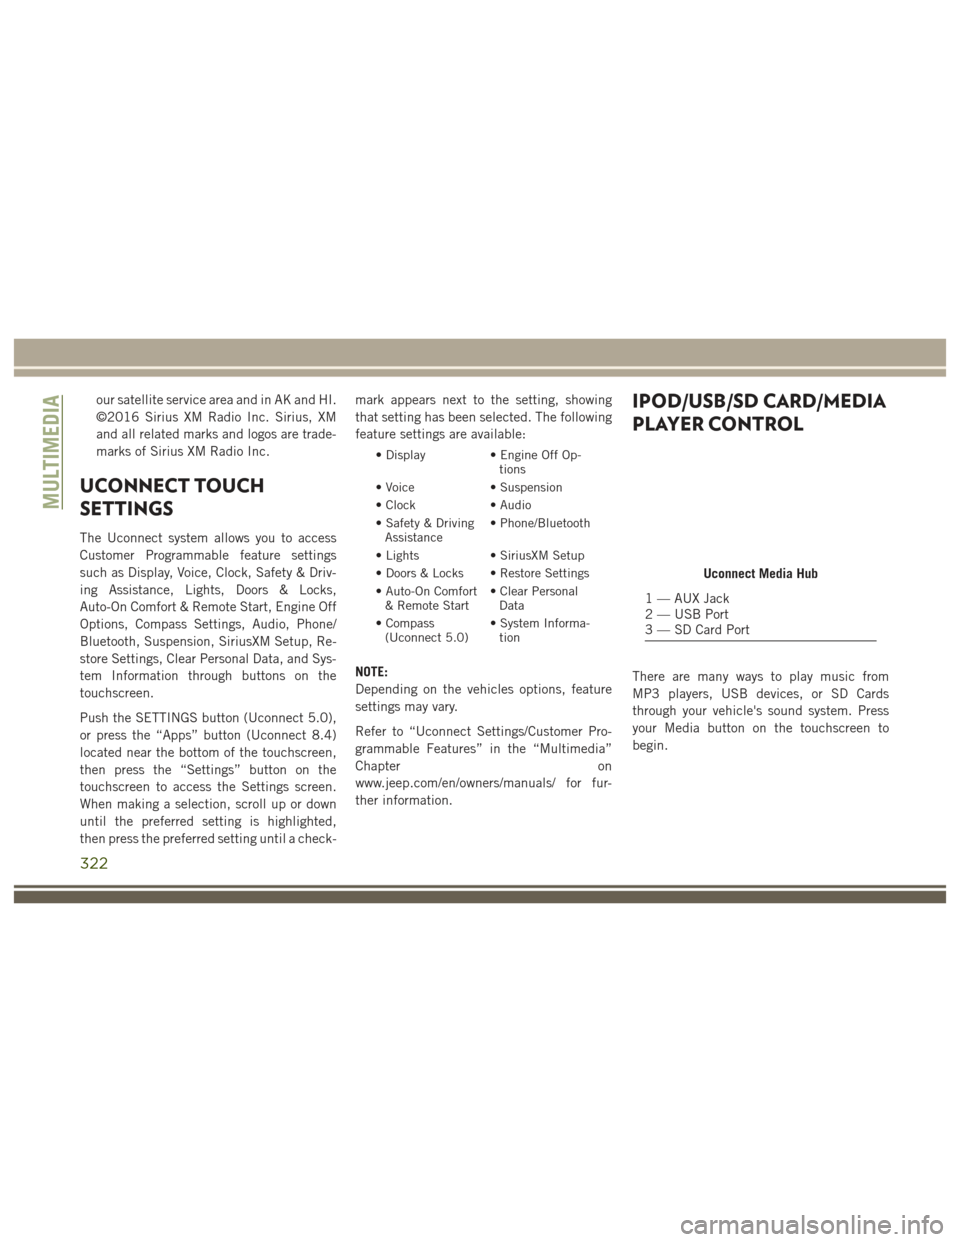
Uconnect Media Hub
1 — AUX Jack
2 — USB Port
3 — SD Card Port
MULTIMEDIA
322
Page 326 of 372
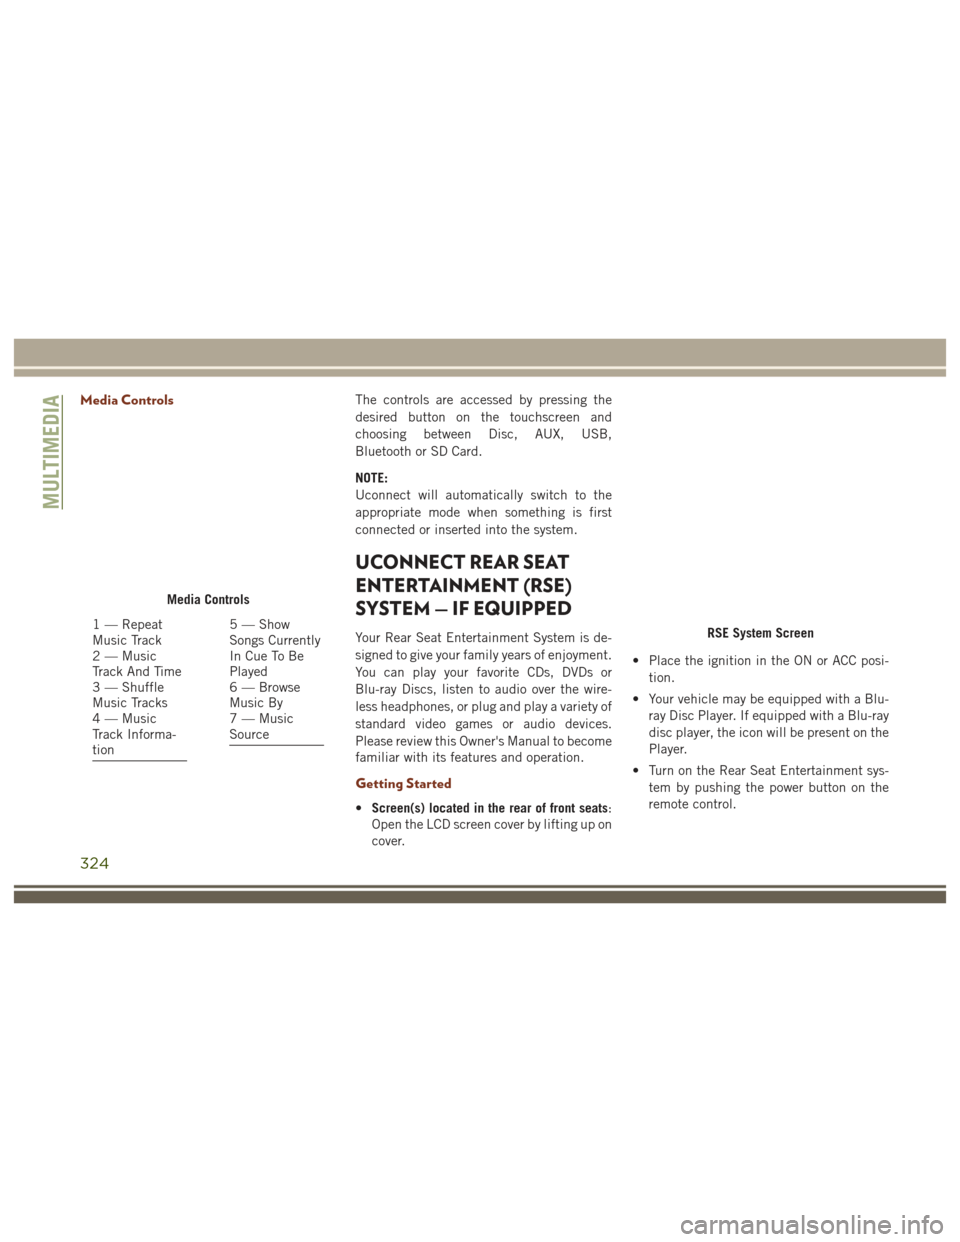
Media ControlsThe controls are accessed by pressing the
desired button on the touchscreen and
choosing between Disc, AUX, USB,
Bluetooth or SD Card.
NOTE:
Uconnect will automatically switch to the
appropriate mode when something is first
connected or inserted into the system.
UCONNECT REAR SEAT
ENTERTAINMENT (RSE)
SYSTEM — IF EQUIPPED
Your Rear Seat Entertainment System is de-
signed to give your family years of enjoyment.
You can play your favorite CDs, DVDs or
Blu-ray Discs, listen to audio over the wire-
less headphones, or plug and play a variety of
standard video games or audio devices.
Please review this Owner's Manual to become
familiar with its features and operation.
Getting Started
•Screen(s) located in the rear of front seats:
Open the LCD screen cover by lifting up on
cover. • Place the ignition in the ON or ACC posi-
tion.
• Your vehicle may be equipped with a Blu- ray Disc Player. If equipped with a Blu-ray
disc player, the icon will be present on the
Player.
• Turn on the Rear Seat Entertainment sys- tem by pushing the power button on the
remote control.
Media Controls
1 — Repeat
Music Track
2 — Music
Track And Time
3 — Shuffle
Music Tracks
4 — Music
Track Informa-
tion5 — Show
Songs Currently
In Cue To Be
Played
6 — Browse
Music By
7 — Music
SourceRSE System Screen
MULTIMEDIA
324
Page 328 of 372
Dual Video Screen
NOTE:
Typically there are two different ways to op-
erate the features of the Rear Seat Entertain-
ment System.
• The Remote Control
• The Touchscreen Radio (If Equipped)
Blu-ray Disc Player
Play A Blu-ray Disc
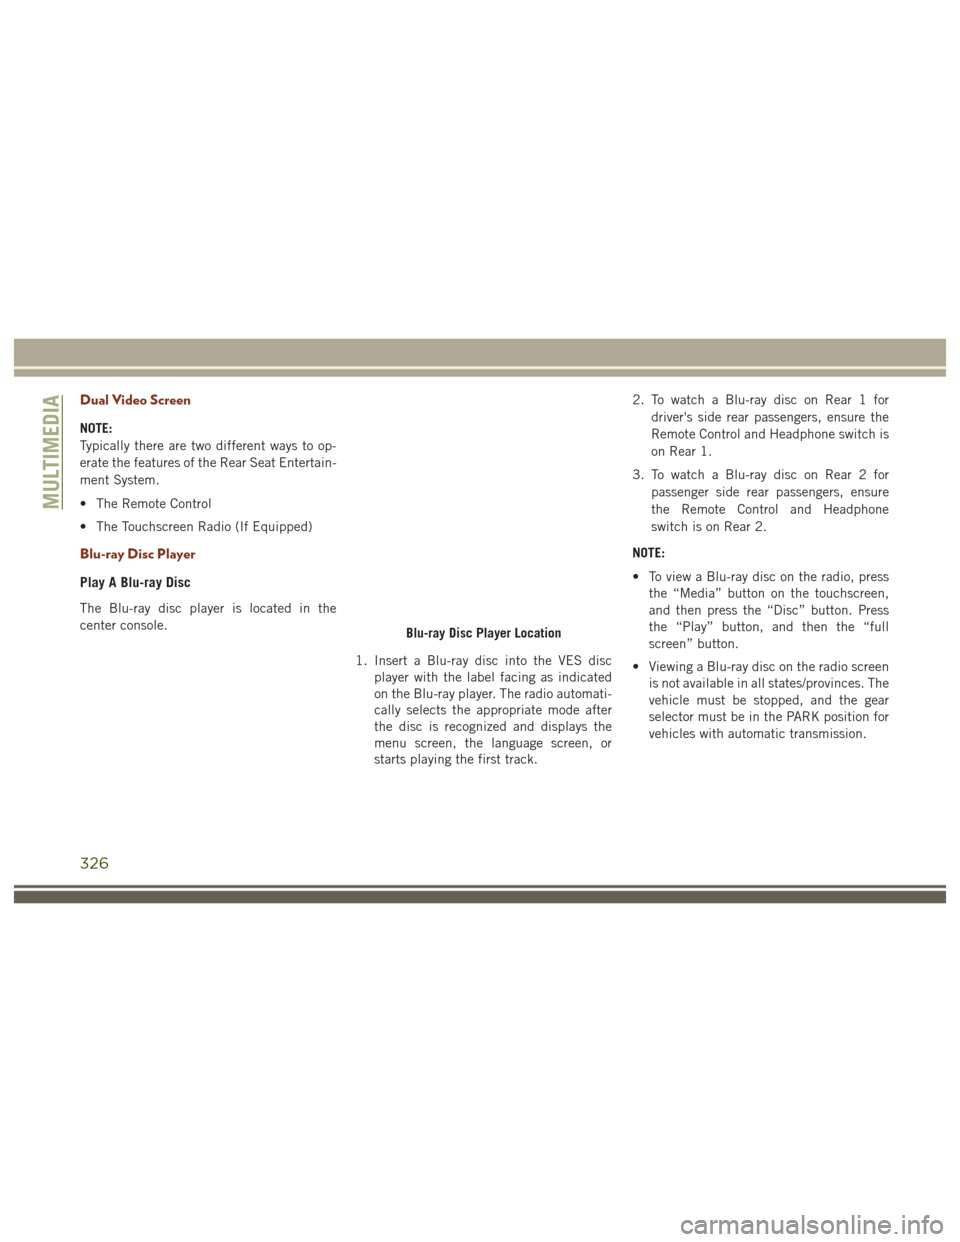
The Blu-ray disc player is located in the
center console.1. Insert a Blu-ray disc into the VES discplayer with the label facing as indicated
on the Blu-ray player. The radio automati-
cally selects the appropriate mode after
the disc is recognized and displays the
menu screen, the language screen, or
starts playing the first track. 2. To watch a Blu-ray disc on Rear 1 for
driver's side rear passengers, ensure the
Remote Control and Headphone switch is
on Rear 1.
3. To watch a Blu-ray disc on Rear 2 for passenger side rear passengers, ensure
the Remote Control and Headphone
switch is on Rear 2.
NOTE:
• To view a Blu-ray disc on the radio, press the “Media” button on the touchscreen,
and then press the “Disc” button. Press
the “Play” button, and then the “full
screen” button.
• Viewing a Blu-ray disc on the radio screen is not available in all states/provinces. The
vehicle must be stopped, and the gear
selector must be in the PARK position for
vehicles with automatic transmission.
Blu-ray Disc Player Location
MULTIMEDIA
326
Page 347 of 372
Uconnect Access — If Equipped
(8.4/8.4 NAV)
WARNING!
ALWAYS obey traffic laws and pay atten-
tion to the road. Some Uconnect Access
services, including 9-1-1 and Assist, will
NOT work without an operable 1X(voice/
data) or 3G(data) network connection.
NOTE:
Your vehicle may be transmitting data as
authorized by the subscriber.
An included trial and/or subscription is re-
quired to take advantage of the Uconnect
Access services in the next section of this
guide. To register with Uconnect Access,
press the “Apps” button on the 8.4-inch
touchscreen to get started. Detailed registra-
tion instructions can be found on the next
page. NOTE:
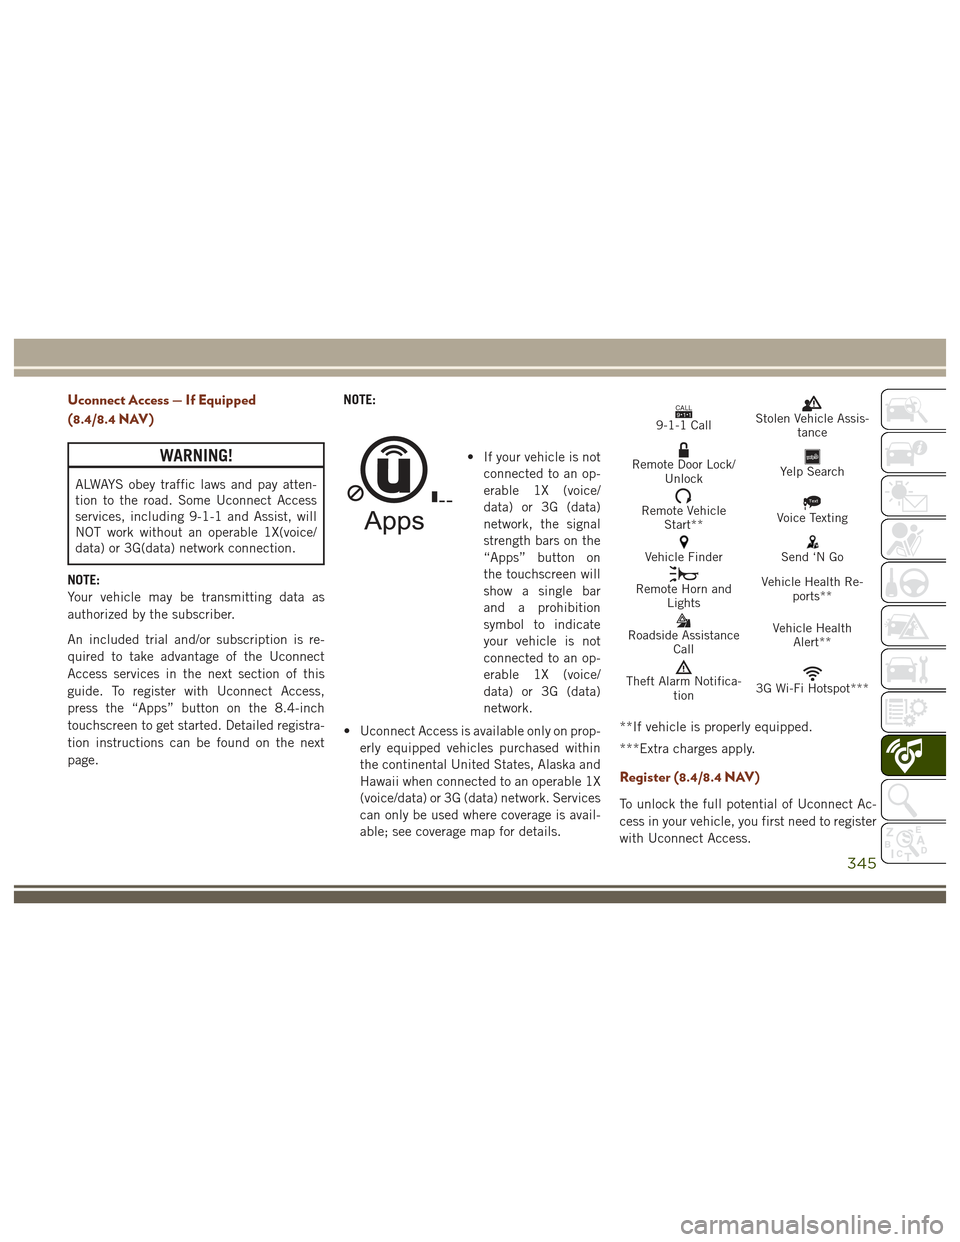
• If your vehicle is not
connected to an op-
erable 1X (voice/
data) or 3G (data)
network, the signal
strength bars on the
“Apps” button on
the touchscreen will
show a single bar
and a prohibition
symbol to indicate
your vehicle is not
connected to an op-
erable 1X (voice/
data) or 3G (data)
network.
• Uconnect Access is available only on prop- erly equipped vehicles purchased within
the continental United States, Alaska and
Hawaii when connected to an operable 1X
(voice/data) or 3G (data) network. Services
can only be used where coverage is avail-
able; see coverage map for details.
CALL9119-1-1 CallStolen Vehicle Assis- tance
Remote Door Lock/UnlockYelp Search
Remote VehicleStart**Text
Voice Texting
Vehicle FinderSend ‘N Go
Remote Horn and Lights Vehicle Health Re-
ports**
Roadside Assistance Call Vehicle Health
Alert**
Theft Alarm Notifica- tion3G Wi-Fi Hotspot***
**If vehicle is properly equipped.
***Extra charges apply.
Register (8.4/8.4 NAV)
To unlock the full potential of Uconnect Ac-
cess in your vehicle, you first need to register
with Uconnect Access.
345
Page 366 of 372
Rear Wiper/Washer..............42
Reclining Front Seats ............24
Recreational Towing ............198
Reminder, Seat Belt ............112
Remote Control Starting System .............16
Remote Keyless Entry Arm The Alarm ..............18
Disarm The Alarm ............18
Remote Starting System ...........16
Replacement Bulbs .............204
Replacement Keys ..............13
Reporting Safety Defects .........356
Restraint, Head ................29
Restraints, Child ..............130
Retractable Cargo Area Cover ........61
Roll Over Warning ...............2
Rotation, Tires ................265
Safety Checks Inside Vehicle .......143
Safety Checks Outside Vehicle ......145
Safety Defects, Reporting .........356
Safety, Exhaust Gas .............143
Safety Information, Tire ..........258
Safety Tips ..................143
Schedule, Maintenance . . .232, 235, 239
SD Card Port .................322 Seat Belt
Adjustable Upper Shoulder Belt Anchor-
age ....................116
Automatic Locking Retractor (ALR) .118
Energy Management Feature .....118
Lap/Shoulder Belt Operation .....115
Lap/Shoulder Belts ...........113
Lap/Shoulder Belt Untwisting .....116
Pregnant Women ............117
Seat Belt Extender ...........117
Seat Belt Pretensioner ........117
Seat Belt Reminder ...........112
Seat Belt Maintenance ...........269
Seat Belt Reminder .............112
Seat Belts ...............112, 143
Adjustable Shoulder Belt .......116
Adjustable Upper Shoulder
Anchorage ................116
Child
Restraint .............130
Extender .................117
Front Seat .........112, 113, 115
Inspection ................143
Operating Instructions .........115
Pregnant Women ............117
Pretensioners ..............117
Rear Seat ................113
Reminder .................80 Untwisting Procedure
.........116
Seats ...............24, 25, 27, 28
Adjustment ................24
Heated ................27, 28
Manual ...................24
Memory ..................27
Rear Folding ...............25
Reclining .................24
Vented ...................29
Ventilated .................29
Security Alarm ..............17, 81
Arm The System .............18
Disarm The System ............18
Selec-Terrain .................170
Selection Of Coolant (Antifreeze) .........277, 280, 281
Sentry Key Replacement ..........13
Service Assistance .............354
Service Contract ...............355
Service Manuals ...............357
Shifting ....................157
Automatic Transmission . . . .157, 159
Shoulder Belts ................113
Signals, Turn ...........87, 145, 206
Siri ...................348, 349
Sirius Satellite Radio ............319
Snow Chains (Tire Chains) .........265
INDEX
364
Page 367 of 372
Sound Systems (Radio).......322, 328
Spare Tire ...................215
Spark Plugs ..............277, 280
Specifications Fuel (Gasoline) ..........277, 280
Oil .................277, 280
Speed Control Accel/Decel ............173, 174
Accel/Decel (ACC Only) ........175
Cancel ..................174
Distance Setting (ACC Only) .....177
Mode Setting (ACC Only) .......177
Resume .................174
Set ....................173
Speed Control (Cruise Control) . . .172, 173
Starting ..............16, 149, 150
Automatic Transmission ........151
Cold Weather ..............150
Engine Block Heater ..........152
Engine Fails To Start ..........150
Remote ..................16
Starting And Operating ...........149
Starting Procedures .........149, 150
Starting Procedures (Diesel Engines) . .150
Steering Tilt Column ................32
Wheel, Heated ..............33 Wheel, Tilt
.................32
Steering Wheel Mounted Sound System Controls ..................290
Storage, Vehicle ................51
Sunroof Closing ...................56
Opening ...................55
Venting ...................55
Sun Roof ....................55
Supplemental Restraint System - Air Bag.....................122
Sway Control, Trailer .............99
System, Remote Starting ..........16
Telescoping Steering Column ........32
Temperature Control, Automatic (ATC) . .50
Text Messaging .....337, 338, 343, 347
Tie Down Hooks, Cargo ............61
Tilt Steering Column .............32
Tire And Loading Information Placard . .261
Tire Markings .................258
Tires ...................145,
266
Chains ..................265
Changing .............221, 258
Flat Changing ..............221
Jacking ..................258
Load Capacity ..............261 Pressure Monitor System (TPMS) . .107
Pressure Warning Light
.........84
Quality Grading .............266
Replacement ..............221
Rotation .................265
Safety ..................258
Spare Tire ................215
Wheel Mounting ............221
Tire Safety Information ...........258
Towing .................193, 227
Disabled Vehicle ............227
Guide ............193, 194, 195
Recreational ...............198
Weight ...........193, 194, 195
Towing Vehicle Behind A Motorhome . .198
Traction Control ................95
Trailer Sway Control (TSC) ..........99
Trailer Towing ................193
Trailer Towing Guide .....193, 194, 195
Trailer Weight ..........193, 194, 195
Transfer Case Fluid ...................283
Transmission .................159
Automatic .............159, 250
Fluid ...................283
Maintenance ..............250
Shifting .................157
365