navigation system JEEP GRAND CHEROKEE 2020 Owner handbook (in English)
[x] Cancel search | Manufacturer: JEEP, Model Year: 2020, Model line: GRAND CHEROKEE, Model: JEEP GRAND CHEROKEE 2020Pages: 378, PDF Size: 6.88 MB
Page 12 of 378
TIPS CONTROLS AND GENERAL INFORMATION . . . 320Steering Wheel Audio Controls......... 320
Reception Conditions.............. 321
Care And Maintenance............. 321
Anti-Theft Protection.............. 321
IPOD/USB/MEDIA PLAYER CONTROL......... 321Audio Jack (AUX)................ 322
USB Port..................... 322
Bluetooth Streaming Audio........... 322
UCONNECT REAR SEAT ENTERTAINMENT (RSE) SYSTEM
— IF EQUIPPED.................... 322
Getting Started................. 322
Dual Video Screen................ 324
Blu-ray Disc Player................ 324
Play Video Games................ 327
NAVIGATION — IF EQUIPPED............. 328Changing The Navigation Voice Prompt
Volume....................... 328
Finding Points Of Interest........... 330
Finding A Place By Spelling The Name . . . 330
One-Step Voice Destination Entry....... 330
Setting Your Home Location.......... 330
Home........................ 330
Adding A Stop.................. 332
Taking A Detour................. 332
Map Update.................... 332
UCONNECT PHONE................... 333Uconnect Phone (Bluetooth Hands Free
Calling)...................... 333
Pairing (Wirelessly Connecting) Your Mobile
Phone To The Uconnect System........ 335
Common Phone Commands (Examples) . . . 338
Mute (Or Unmute) Microphone During Call . 338
Transfer Ongoing Call Between Handset And
Vehicle...................... 338Phonebook.................... 338
Voice Command Tips.............. 339
Changing The Volume.............. 339
Using Do Not Disturb.............. 339
Incoming Text Messages............ 339
Helpful Tips And Common Questions To
Improve Bluetooth Performance With Your
Uconnect System................ 341
UCONNECT VOICE RECOGNITION QUICK TIPS.... 341Introducing Uconnect.............. 341
Get Started.................... 342
Basic Voice Commands............. 343
Radio........................ 343
Media....................... 343
Phone....................... 344
Voice Text Reply — If Equipped........ 345
Climate...................... 346
Navigation (4C NAV) — If Equipped..... 346
Siri Eyes Free — If Equipped......... 347
Do Not Disturb.................. 347
Android Auto — If Equipped.......... 348
Apple CarPlay — If Equipped......... 348
Additional Information............. 349
CUSTOMER ASSISTANCE
IF YOU NEED ASSISTANCE.............. 350ARGENTINA................... 351
AUSTRALIA.................... 351
AUSTRIA..................... 351
BALANCE OF THE CARIBBEAN........ 351
BELGIUM..................... 352
BOLIVIA...................... 352
BRAZIL...................... 352
BULGARIA.................... 352
CHILE....................... 352
CHINA....................... 353COLOMBIA.................... 353
COSTA RICA................... 353
CROATIA...................... 353
CZECH REPUBLIC................ 353
DENMARK.................... 354
DOMINICAN REPUBLIC............ 354
ECUADOR..................... 354
EL SALVADOR.................. 354
ESTONIA..................... 354
FINLAND..................... 355
FRANCE...................... 355
GERMANY..................... 355
GREECE...................... 356
GUATEMALA................... 356
HONDURAS.................... 356
HUNGARY..................... 356
INDIA....................... 356
IRELAND..................... 357
ITALY ........................ 357
LATVIA....................... 357
LITHUANIA.................... 358
LUXEMBURG................... 358
NETHERLANDS................. 358
NEW ZEALAND.................. 359
NORWAY ...................... 359
PANAMA...................... 359
PARAGUAY.................... 359
PERU....................... 359
POLAND...................... 360
PORTUGAL.................... 360
P
UERTO RICO AND U.S. VIRGIN ISLANDS . . 360REUNION..................... 360
ROMANIA..................... 360
RUSSIA...................... 361
SERBIA...................... 361
SLOVAKIA..................... 361
TABLE OF CONTENTS
10
Page 68 of 378
INSTRUMENT CLUSTER
DISPLAY
Your vehicle will be equipped with an instru-
ment cluster display, which offers useful in-
formation to the driver. With the ignition in
the STOP/OFF mode, opening/closing of a
door will activate the display for viewing, and
display the total miles, or kilometers, in the
odometer. Your instrument cluster display is
designed to display important information
about your vehicle’s systems and features.
Using a driver interactive display located on
the instrument panel, your instrument clus-
ter display can show you how systems are
working and give you warnings when they are
not. The steering wheel mounted controls
allow you to scroll through the main menus
and submenus. You can access the specific
information you want and make selections
and adjustments.
Instrument Cluster Display Location And
Controls
The instrument cluster display is located in
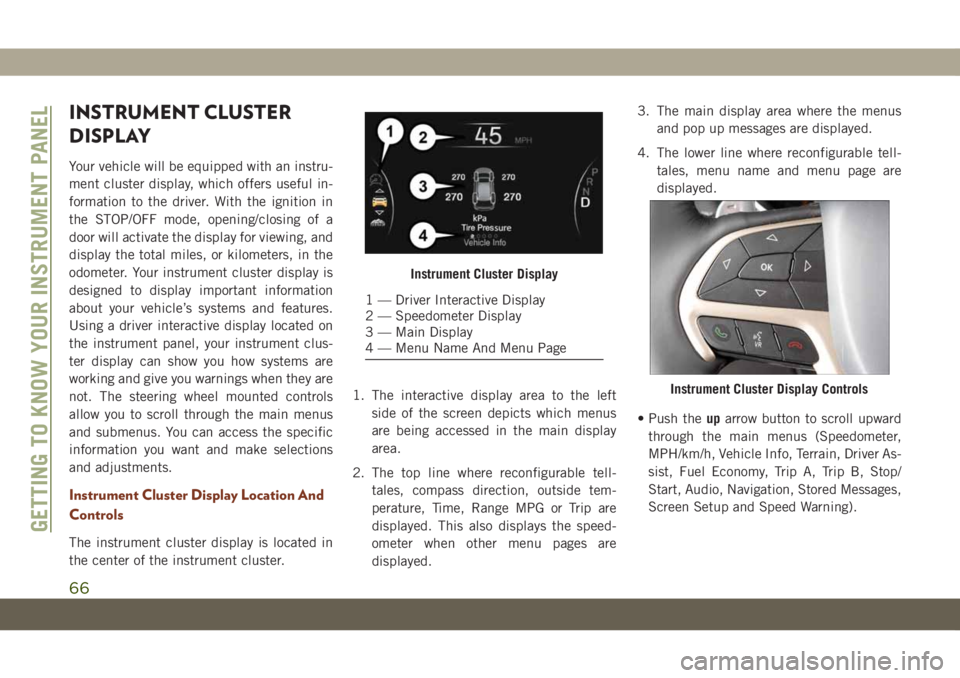
the center of the instrument cluster.1. The interactive display area to the left
side of the screen depicts which menus
are being accessed in the main display
area.
2. The top line where reconfigurable tell-
tales, compass direction, outside tem-
perature, Time, Range MPG or Trip are
displayed. This also displays the speed-
ometer when other menu pages are
displayed.3. The main display area where the menus
and pop up messages are displayed.
4. The lower line where reconfigurable tell-
tales, menu name and menu page are
displayed.
• Push theuparrow button to scroll upward
through the main menus (Speedometer,
MPH/km/h, Vehicle Info, Terrain, Driver As-
sist, Fuel Economy, Trip A, Trip B, Stop/
Start, Audio, Navigation, Stored Messages,
Screen Setup and Speed Warning).
Instrument Cluster Display
1 — Driver Interactive Display
2 — Speedometer Display
3 — Main Display
4 — Menu Name And Menu Page
Instrument Cluster Display Controls
GETTING TO KNOW YOUR INSTRUMENT PANEL
66
Page 186 of 378
PARKVIEW REAR BACK UP
CAMERA — IF EQUIPPED
The ParkView Rear Back Up Camera allows
you to see an on-screen image of the rear
surroundings of your vehicle whenever the
gear selector is put into REVERSE. The im-
age will be displayed on the Navigation/
Multimedia radio display screen along with a
caution note to “check entire surroundings”
across the top of the screen. After five sec-
onds this note will disappear. The ParkView
camera is located on the rear of the vehicle
above the rear license plate.
When the vehicle is shifted out of REVERSE
(with camera delay turned off), the rear cam-
era mode is exited and the navigation or
audio screen appears again.Manual Activation Of The Rear View Camera
1. Press the “Controls” button located on
the bottom of the Uconnect display.
2. Press the “Backup Camera” button to
turn the Rear View Camera system on.
NOTE:
The ParkView Rear Back Up Camera has
programmable modes of operation that may
be selected through the Uconnect System.
Refer to “Uconnect Settings” in “Multime-
dia” in your Owner’s Manual for further infor-
mation.
When the vehicle is shifted out of REVERSE
(with camera delay turned off), the rear cam-
era mode is exited and the previous screen
appears again. When the vehicle is shifted
out of REVERSE (with camera delay turnedon), the camera image will continue to be
displayed for up to ten seconds after shifting
out of REVERSE unless the vehicle speed
exceeds 8 mph (13 km/h), the vehicle is
shifted into PARK, the vehicle’s ignition is
cycled to the OFF position, or the user
presses image defeat [X] to exit out of the
camera video display.
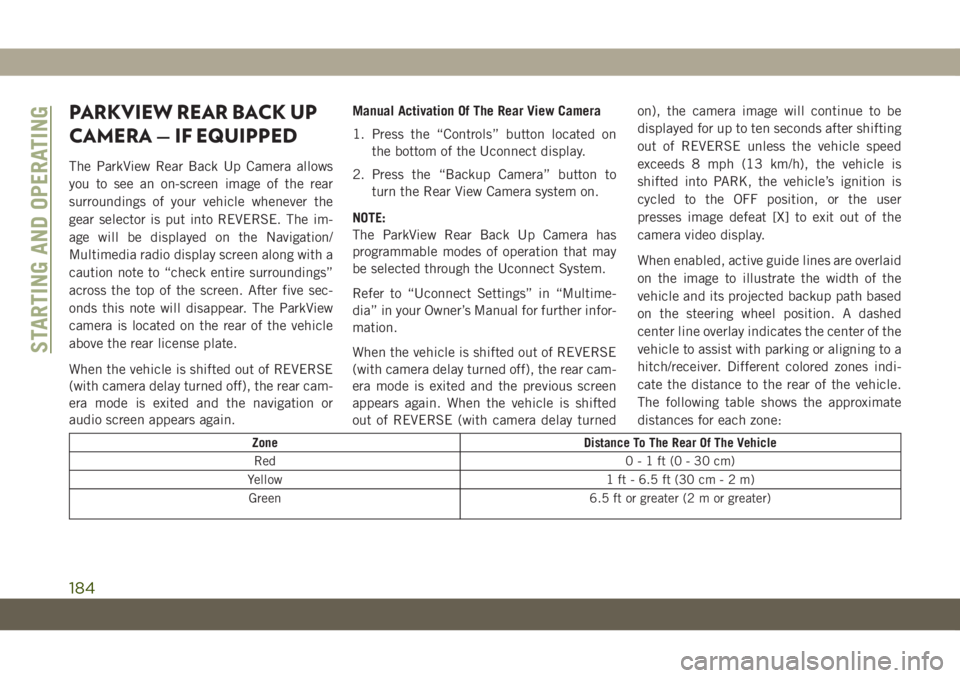
When enabled, active guide lines are overlaid
on the image to illustrate the width of the
vehicle and its projected backup path based
on the steering wheel position. A dashed
center line overlay indicates the center of the
vehicle to assist with parking or aligning to a
hitch/receiver. Different colored zones indi-
cate the distance to the rear of the vehicle.
The following table shows the approximate
distances for each zone:
Zone Distance To The Rear Of The Vehicle
Red 0-1ft(0-30cm)
Yellow 1 ft - 6.5 ft (30 cm-2m)
Green 6.5 ft or greater (2 m or greater)
STARTING AND OPERATING
184
Page 307 of 378
2. Connect your Android-powered smart-
phone to one of the media USB ports in
your vehicle. If you have not downloaded
the Android Auto app to your smartphone
before plugging in the device for the first
time, the app begins to download.
NOTE:
Be sure to use the factory-provided USB
cable that came with your phone, as af-
termarket cables may not work.
Your phone may ask you to approve the
use of the Android Auto app before use.3. Once the device is connected and recog-
nized, Android Auto should automatically
launch, but you can also launch it by
touching the Android Auto icon on the
touchscreen, located under Apps.
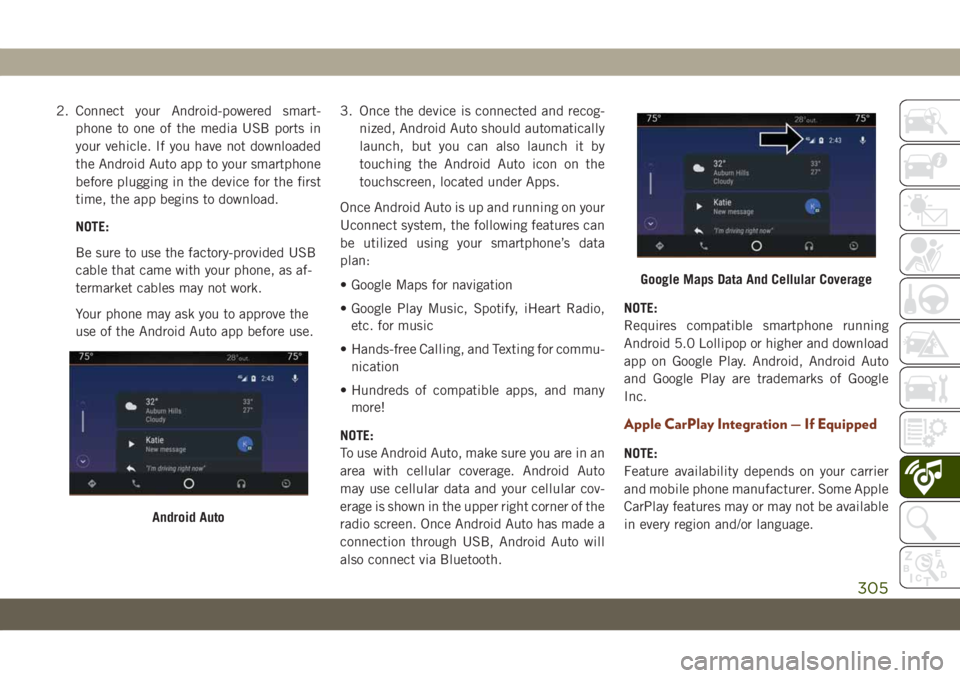
Once Android Auto is up and running on your
Uconnect system, the following features can
be utilized using your smartphone’s data
plan:
• Google Maps for navigation
• Google Play Music, Spotify, iHeart Radio,
etc. for music
• Hands-free Calling, and Texting for commu-
nication
• Hundreds of compatible apps, and many
more!
NOTE:
To use Android Auto, make sure you are in an
area with cellular coverage. Android Auto
may use cellular data and your cellular cov-
erage is shown in the upper right corner of the
radio screen. Once Android Auto has made a
connection through USB, Android Auto will
also connect via Bluetooth.NOTE:
Requires compatible smartphone running
Android 5.0 Lollipop or higher and download
app on Google Play. Android, Android Auto
and Google Play are trademarks of Google
Inc.
Apple CarPlay Integration — If Equipped
NOTE:
Feature availability depends on your carrier
and mobile phone manufacturer. Some Apple
CarPlay features may or may not be available
in every region and/or language.
Android Auto
Google Maps Data And Cellular Coverage
305
Page 313 of 378
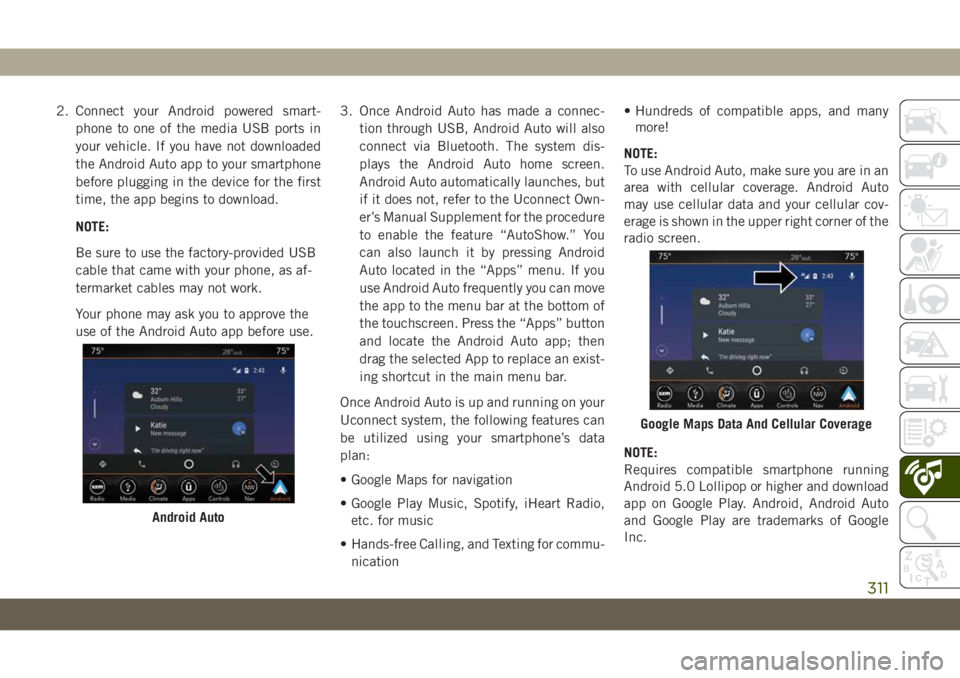
2. Connect your Android powered smart-
phone to one of the media USB ports in
your vehicle. If you have not downloaded
the Android Auto app to your smartphone
before plugging in the device for the first
time, the app begins to download.
NOTE:
Be sure to use the factory-provided USB
cable that came with your phone, as af-
termarket cables may not work.
Your phone may ask you to approve the
use of the Android Auto app before use.3. Once Android Auto has made a connec-
tion through USB, Android Auto will also
connect via Bluetooth. The system dis-
plays the Android Auto home screen.
Android Auto automatically launches, but
if it does not, refer to the Uconnect Own-
er’s Manual Supplement for the procedure
to enable the feature “AutoShow.” You
can also launch it by pressing Android
Auto located in the “Apps” menu. If you
use Android Auto frequently you can move
the app to the menu bar at the bottom of
the touchscreen. Press the “Apps” button
and locate the Android Auto app; then
drag the selected App to replace an exist-
ing shortcut in the main menu bar.
Once Android Auto is up and running on your
Uconnect system, the following features can
be utilized using your smartphone’s data
plan:
• Google Maps for navigation
• Google Play Music, Spotify, iHeart Radio,
etc. for music
• Hands-free Calling, and Texting for commu-
nication• Hundreds of compatible apps, and many
more!
NOTE:
To use Android Auto, make sure you are in an
area with cellular coverage. Android Auto
may use cellular data and your cellular cov-
erage is shown in the upper right corner of the
radio screen.
NOTE:
Requires compatible smartphone running
Android 5.0 Lollipop or higher and download
app on Google Play. Android, Android Auto
and Google Play are trademarks of Google
Inc.
Android Auto
Google Maps Data And Cellular Coverage
311
Page 314 of 378
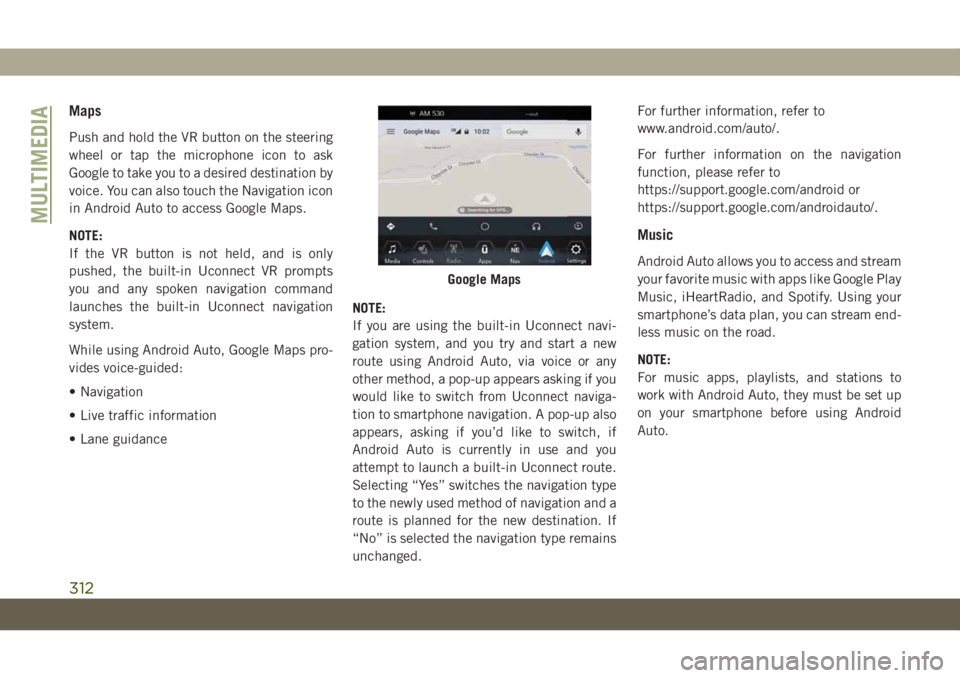
Maps
Push and hold the VR button on the steering
wheel or tap the microphone icon to ask
Google to take you to a desired destination by
voice. You can also touch the Navigation icon
in Android Auto to access Google Maps.
NOTE:
If the VR button is not held, and is only
pushed, the built-in Uconnect VR prompts
you and any spoken navigation command
launches the built-in Uconnect navigation
system.
While using Android Auto, Google Maps pro-
vides voice-guided:
• Navigation
• Live traffic information
• Lane guidanceNOTE:
If you are using the built-in Uconnect navi-
gation system, and you try and start a new
route using Android Auto, via voice or any
other method, a pop-up appears asking if you
would like to switch from Uconnect naviga-
tion to smartphone navigation. A pop-up also
appears, asking if you’d like to switch, if
Android Auto is currently in use and you
attempt to launch a built-in Uconnect route.
Selecting “Yes” switches the navigation type
to the newly used method of navigation and a
route is planned for the new destination. If
“No” is selected the navigation type remains
unchanged.For further information, refer to
www.android.com/auto/.
For further information on the navigation
function, please refer to
https://support.google.com/android or
https://support.google.com/androidauto/.
Music
Android Auto allows you to access and stream
your favorite music with apps like Google Play
Music, iHeartRadio, and Spotify. Using your
smartphone’s data plan, you can stream end-
less music on the road.
NOTE:
For music apps, playlists, and stations to
work with Android Auto, they must be set up
on your smartphone before using Android
Auto.
Google Maps
MULTIMEDIA
312
Page 317 of 378
NOTE:
Requires compatible iPhone. See dealer for
phone compatibility. Data plan rates apply.
Vehicle user interface is a product of Apple.
Apple CarPlay is a trademark of Apple Inc.
iPhone is a trademark of Apple Inc., regis-
tered in the US and other countries. Apple
terms of use and privacy statements apply.
Phone
With CarPlay, press and hold the VR button
on the steering wheel to activate a Siri voice
recognition session. You can also press and
hold the Home button within CarPlay to start
talking to Siri. This allows you to make calls
or listen to voice mail as you normally would
using Siri on your iPhone.
NOTE:
Only temporarily pushing the VR button on
the steering wheel launches a built-in VR
session, not a Siri session, and it will not
function with CarPlay.
Music
CarPlay allows you to access all your artists,
playlists, and music from iTunes. Using your
iPhone’s data plan, you can also use select
third party audio apps including music, news,
sports, podcasts and more.
Messages
Just like your iPhone, CarPlay allows you to
use Siri to send or reply to text messages.
Since everything is done by voice, Siri can
also read incoming text messages so you
don’t have to.
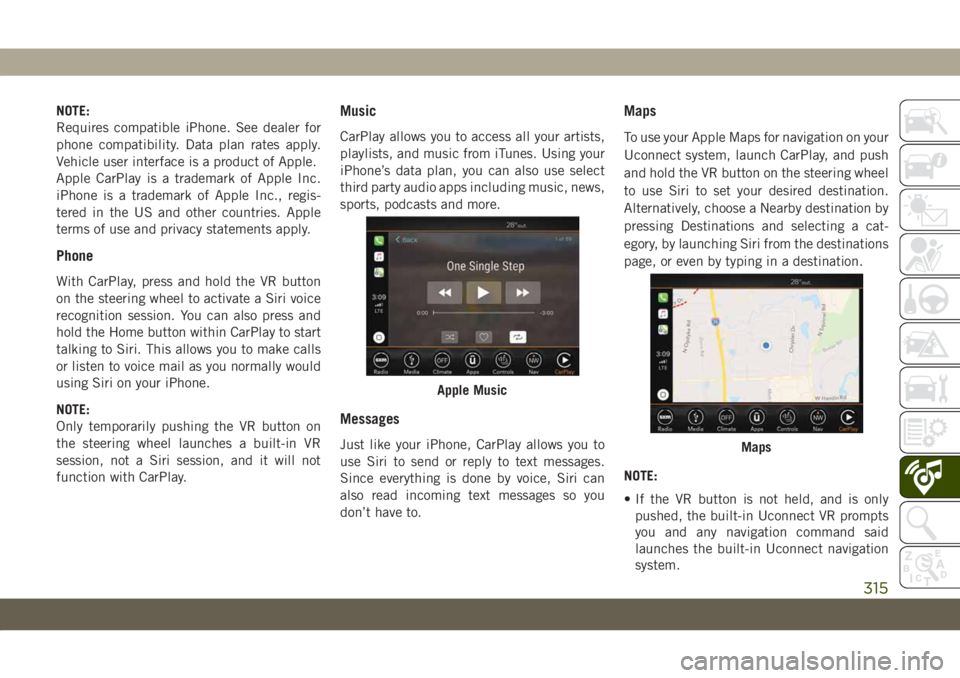
Maps
To use your Apple Maps for navigation on your
Uconnect system, launch CarPlay, and push
and hold the VR button on the steering wheel
to use Siri to set your desired destination.
Alternatively, choose a Nearby destination by
pressing Destinations and selecting a cat-
egory, by launching Siri from the destinations
page, or even by typing in a destination.
NOTE:
• If the VR button is not held, and is only
pushed, the built-in Uconnect VR prompts
you and any navigation command said
launches the built-in Uconnect navigation
system.
Apple Music
Maps
315
Page 318 of 378
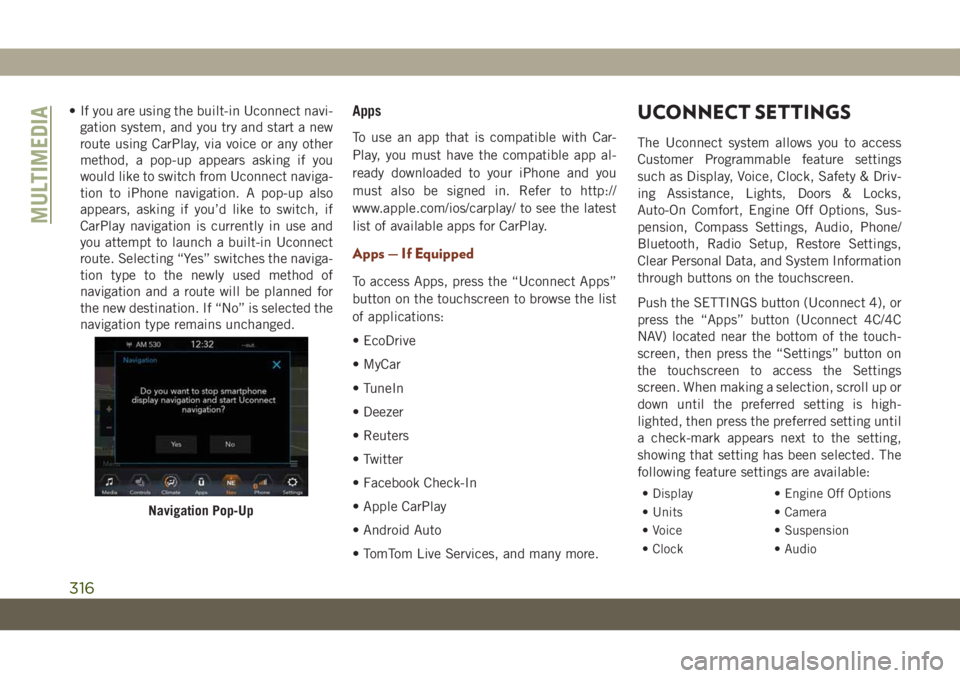
• If you are using the built-in Uconnect navi-
gation system, and you try and start a new
route using CarPlay, via voice or any other
method, a pop-up appears asking if you
would like to switch from Uconnect naviga-
tion to iPhone navigation. A pop-up also
appears, asking if you’d like to switch, if
CarPlay navigation is currently in use and
you attempt to launch a built-in Uconnect
route. Selecting “Yes” switches the naviga-
tion type to the newly used method of
navigation and a route will be planned for
the new destination. If “No” is selected the
navigation type remains unchanged.Apps
To use an app that is compatible with Car-
Play, you must have the compatible app al-
ready downloaded to your iPhone and you
must also be signed in. Refer to http://
www.apple.com/ios/carplay/ to see the latest
list of available apps for CarPlay.
Apps — If Equipped
To access Apps, press the “Uconnect Apps”
button on the touchscreen to browse the list
of applications:
• EcoDrive
• MyCar
• TuneIn
• Deezer
• Reuters
• Twitter
• Facebook Check-In
• Apple CarPlay
• Android Auto
• TomTom Live Services, and many more.
UCONNECT SETTINGS
The Uconnect system allows you to access
Customer Programmable feature settings
such as Display, Voice, Clock, Safety & Driv-
ing Assistance, Lights, Doors & Locks,
Auto-On Comfort, Engine Off Options, Sus-
pension, Compass Settings, Audio, Phone/
Bluetooth, Radio Setup, Restore Settings,
Clear Personal Data, and System Information
through buttons on the touchscreen.
Push the SETTINGS button (Uconnect 4), or
press the “Apps” button (Uconnect 4C/4C
NAV) located near the bottom of the touch-
screen, then press the “Settings” button on
the touchscreen to access the Settings
screen. When making a selection, scroll up or
down until the preferred setting is high-
lighted, then press the preferred setting until
a check-mark appears next to the setting,
showing that setting has been selected. The
following feature settings are available:
• Display • Engine Off Options
• Units • Camera
• Voice • Suspension
• Clock • Audio
Navigation Pop-Up
MULTIMEDIA
316
Page 330 of 378
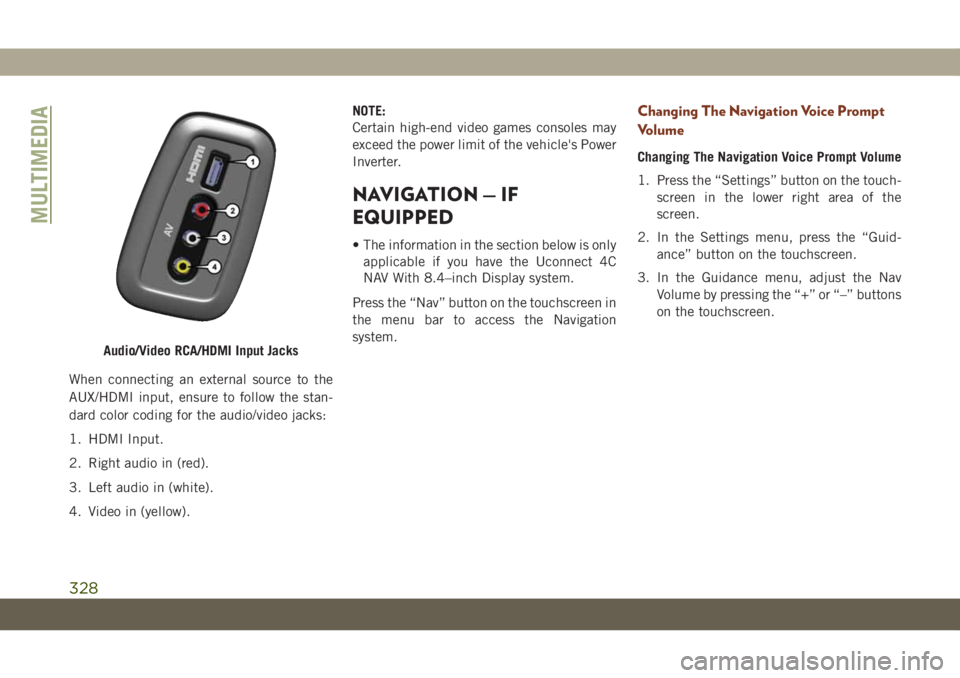
When connecting an external source to the
AUX/HDMI input, ensure to follow the stan-
dard color coding for the audio/video jacks:
1. HDMI Input.
2. Right audio in (red).
3. Left audio in (white).
4. Video in (yellow).NOTE:
Certain high-end video games consoles may
exceed the power limit of the vehicle's Power
Inverter.
NAVIGATION — IF
EQUIPPED
• The information in the section below is only
applicable if you have the Uconnect 4C
NAV With 8.4–inch Display system.
Press the “Nav” button on the touchscreen in
the menu bar to access the Navigation
system.
Changing The Navigation Voice Prompt
Volume
Changing The Navigation Voice Prompt Volume
1. Press the “Settings” button on the touch-
screen in the lower right area of the
screen.
2. In the Settings menu, press the “Guid-
ance” button on the touchscreen.
3. In the Guidance menu, adjust the Nav
Volume by pressing the “+” or “–” buttons
on the touchscreen.
Audio/Video RCA/HDMI Input Jacks
MULTIMEDIA
328
Page 332 of 378
Finding Points Of Interest
• From the main Navigation menu, press the
“Where To?” button on the touchscreen,
then press the “Points of Interest” button
on the touchscreen.
• Select a category and then a subcategory, if
necessary.
• Select your destination and press the
“GO!” button on the touchscreen.
Finding A Place By Spelling The Name
• From the Main Navigation Menu press the
“Where to?” button on the touchscreen,
press the “Points of Interest” button on the
touchscreen, then press the “Spell Name”
or “Search All” button on the touchscreen.
• Enter the name of your destination.
• Press the “List” or “OK” button on the
touchscreen.
• Select your destination and press the
“GO!” button on the touchscreen.
One-Step Voice Destination Entry
• Enter a navigation destination without tak-
ing your hands off the wheel.
• Just push the Uconnect Voice Command
button on the steering wheel, wait for
the beep and say something like, "Find
Address“ followed by the address.
NOTE:
Using your touchscreen’s keyboard is not
available while your vehicle is in motion.
However, you can also use Voice Commands
to enter an address while moving. Refer to
“Uconnect Voice Recognition Quick Tips” in
this section for further information.
Setting Your Home Location
• To add a Home location, press the “Nav”
button on the touchscreen in the menu bar
to access the Navigation system and the
Main Navigation menu.
• Press the “Home” button on the touch-
screen. You can add a Home location by
either selecting “Spell City,” “Spell
Street,” or “Select Country.” Select County
is automatically filled out based on your
state.• Once you have entered your Home location,
select the “Save Home” button located on
the lower left-hand side of your touch-
screen.
• To delete a saved Home location (or other
saved locations), so you can save a new
Home location, press the “Nav” button on
the touchscreen, and in the “Where To”
screen, press “Edit Where To” and then
press the “Home” button on the touch-
screen. Under the Manage screen press the
“Reset Location” button. A confirmation
screen will appear asking if you “Are you
sure you want to reset this location?” Press
“Reset” to confirm the deletion. Set a new
Home location by following the previous
instructions.Home
• A Home location must be saved in the
system. From the Main Navigation menu,
press the “Home” button on the
touchscreen.
MULTIMEDIA
330