check engine JEEP GRAND CHEROKEE 2023 User Guide
[x] Cancel search | Manufacturer: JEEP, Model Year: 2023, Model line: GRAND CHEROKEE, Model: JEEP GRAND CHEROKEE 2023Pages: 424, PDF Size: 15.48 MB
Page 114 of 424
112GETTING TO KNOW YOUR INSTRUMENT PANEL
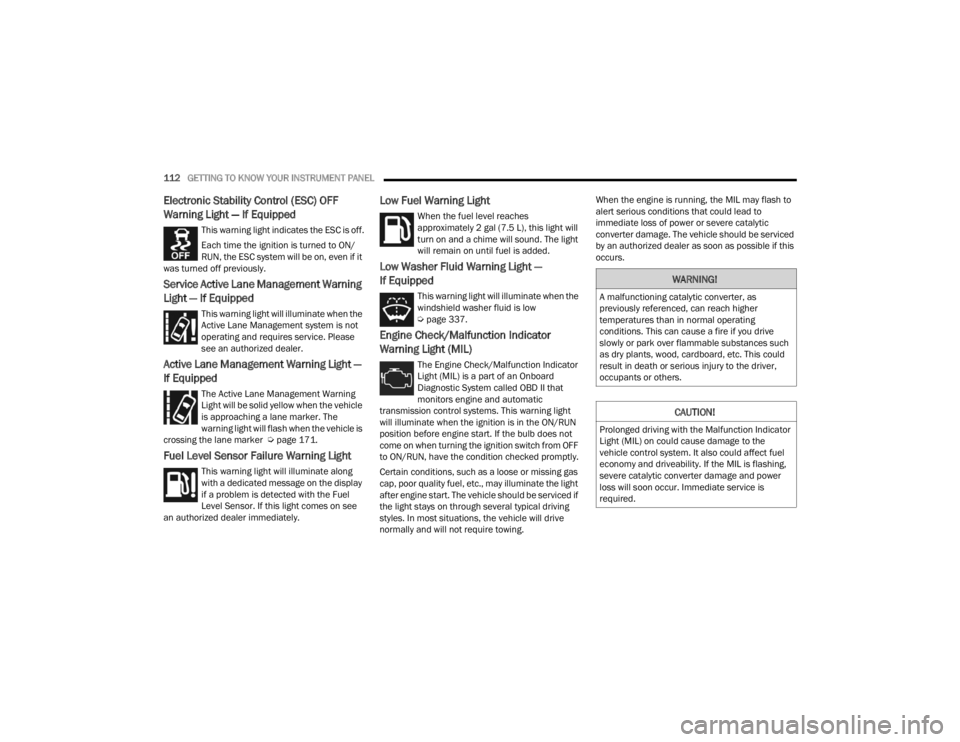
Electronic Stability Control (ESC) OFF
Warning Light — If Equipped
This warning light indicates the ESC is off.
Each time the ignition is turned to ON/
RUN, the ESC system will be on, even if it
was turned off previously.
Service Active Lane Management Warning
Light — If Equipped
This warning light will illuminate when the
Active Lane Management system is not
operating and requires service. Please
see an authorized dealer.
Active Lane Management Warning Light —
If Equipped
The Active Lane Management Warning
Light will be solid yellow when the vehicle
is approaching a lane marker. The
warning light will flash when the vehicle is
crossing the lane marker Ú page 171.
Fuel Level Sensor Failure Warning Light
This warning light will illuminate along
with a dedicated message on the display
if a problem is detected with the Fuel
Level Sensor. If this light comes on see
an authorized dealer immediately.
Low Fuel Warning Light
When the fuel level reaches
approximately 2 gal (7.5 L), this light will
turn on and a chime will sound. The light
will remain on until fuel is added.
Low Washer Fluid Warning Light —
If Equipped
This warning light will illuminate when the
windshield washer fluid is low
Ú page 337.
Engine Check/Malfunction Indicator
Warning Light (MIL)
The Engine Check/Malfunction Indicator
Light (MIL) is a part of an Onboard
Diagnostic System called OBD II that
monitors engine and automatic
transmission control systems. This warning light
will illuminate when the ignition is in the ON/RUN
position before engine start. If the bulb does not
come on when turning the ignition switch from OFF
to ON/RUN, have the condition checked promptly.
Certain conditions, such as a loose or missing gas
cap, poor quality fuel, etc., may illuminate the light
after engine start. The vehicle should be serviced if
the light stays on through several typical driving
styles. In most situations, the vehicle will drive
normally and will not require towing. When the engine is running, the MIL may flash to
alert serious conditions that could lead to
immediate loss of power or severe catalytic
converter damage. The vehicle should be serviced
by an authorized dealer as soon as possible if this
occurs.
WARNING!
A malfunctioning catalytic converter, as
previously referenced, can reach higher
temperatures than in normal operating
conditions. This can cause a fire if you drive
slowly or park over flammable substances such
as dry plants, wood, cardboard, etc. This could
result in death or serious injury to the driver,
occupants or others.
CAUTION!
Prolonged driving with the Malfunction Indicator
Light (MIL) on could cause damage to the
vehicle control system. It also could affect fuel
economy and driveability. If the MIL is flashing,
severe catalytic converter damage and power
loss will soon occur. Immediate service is
required.
23_WL_OM_EN_USC_t.book Page 112
Page 120 of 424
118GETTING TO KNOW YOUR INSTRUMENT PANEL
EMISSIONS INSPECTION AND
MAINTENANCE PROGRAMS
In some localities, it may be a legal requirement to
pass an inspection of your vehicle's emissions
control system. Failure to pass could prevent
vehicle registration. For states that require an Inspection and
Maintenance (I/M), this check verifies
the Malfunction Indicator Light (MIL) is
functioning and is not on when the
engine is running, and that the OBD II system is
ready for testing.
Normally, the OBD II system will be ready. The
OBD II system may not be ready if your vehicle was
recently serviced, recently had a depleted battery
or a battery replacement. If the OBD II system
should be determined not ready for the I/M test,
your vehicle may fail the test.
Your vehicle has a simple ignition actuated test,
which you can use prior to going to the test station.
To check if your vehicle's OBD II system is ready,
you must do the following:
1. Cycle the ignition switch to the ON position, but do not crank or start the engine.
NOTE:If you crank or start the engine, you will have to
start this test over.
2. As soon as you cycle the ignition switch to the ON position, you will see the Malfunction
Indicator Light (MIL) symbol come on as part of
a normal bulb check.
3. Approximately 15 seconds later, one of two things will happen:
The MIL will flash for about 10 seconds and
then return to being fully illuminated until
you turn OFF the ignition or start the engine.
This means that your vehicle's OBD II
system is not ready and you should not
proceed to the I/M station.
The MIL will not flash at all and will remain
fully illuminated until you place the ignition
in the off position or start the engine. This
means that your vehicle's OBD II system is
ready and you can proceed to the I/M
station.
If your OBD II system is not ready, you should see
an authorized dealer or repair facility. If your
vehicle was recently serviced or had a battery
failure or replacement, you may need to do nothing
more than drive your vehicle as you normally would
in order for your OBD II system to update. A
recheck with the previously mentioned test routine
may then indicate that the system is now ready.
Regardless of whether your vehicle's OBD II system
is ready or not, if the MIL is illuminated during
normal vehicle operation you should have your
vehicle serviced before going to the I/M station.
The I/M station can fail your vehicle because the
MIL is on with the engine running.
WARNING!
ONLY an authorized service technician should
connect equipment to the OBD II connection
port in order to read the VIN, diagnose, or
service your vehicle.
If unauthorized equipment is connected to the
OBD II connection port, such as a
driver-behavior tracking device, it may:
Be possible that vehicle systems,
including safety related systems, could be
impaired or a loss of vehicle control could
occur that may result in an accident
involving serious injury or death.
Access, or allow others to access, infor -
mation stored in your vehicle systems,
including personal information.
23_WL_OM_EN_USC_t.book Page 118
Page 122 of 424
120STARTING AND OPERATING
3. The system takes over and attempts to start the vehicle. If the vehicle fails to start, the
starter will disengage automatically after 10
seconds.
4. If you wish to stop the cranking of the engine prior to the engine starting, push the ENGINE
START/STOP button again.
To Turn Off The Engine Using The ENGINE START/
STOP Button
1. Place the gear selector in PARK, then push and release the ENGINE START/STOP button.
2. The ignition will return to the OFF position.
3. If the gear selector is not in PARK, the ENGINE START/STOP button must be held for two
seconds or three short pushes in a row with
the vehicle speed above 5 mph (8 km/h) before the engine will shut off. The ignition will
remain in the ON/RUN position until the gear
selector is in PARK and the button is pushed
twice to the OFF position.
4. If the gear selector is not in PARK and the ENGINE START/STOP button is pushed once
with the vehicle speed above 5 mph (8 km/h), the instrument cluster will display a “ Vehicle
Not In Park ” message and the engine will
remain running. Never leave a vehicle out of
the PARK position, or it could roll.
NOTE:If the gear selector is not in PARK, and the ENGINE
START/STOP button is pushed once with the
vehicle speed below 5 mph (8 km/h), the engine
will shut off and the ignition will remain in the ON/
RUN position. If vehicle speed drops below
1.2 mph (1.9 km/h), the vehicle may AutoPark
Ú page 120.
ENGINE START/STOP Button Functions — With
Driver’s Foot Off The Brake Pedal (In PARK Or
NEUTRAL Position)
The ENGINE START/STOP button operates similar
to an ignition switch. It has three positions: OFF,
ON/RUN, and START. To change the ignition
positions without starting the vehicle and use the
accessories, follow these directions:
1. Start with the ignition in the OFF position.
2. Push the ENGINE START/STOP button once to place the ignition in the ON/RUN position.
3. Push the ENGINE START/STOP button a second time to return the ignition to the OFF
position.
NOTE:Only press one pedal at a time while driving the
vehicle. Torque performance of the vehicle could
be reduced if both pedals are pressed at the same
time. If pressure is detected on both pedals simul -
taneously, a warning message will display in the
instrument cluster Ú page 95.
AUTOPARK
AutoPark is a supplemental feature to assist with
placing the vehicle in PARK (P) should the
situations on the following pages occur. It is a
back-up system and should not be relied upon as
the primary method by which the driver shifts the
vehicle into PARK.
The conditions under which AutoPark will engage
are outlined on the following pages.
WARNING!
Driver inattention could lead to failure to place
the vehicle in PARK. ALWAYS DO A VISUAL
CHECK that your vehicle is in PARK by verifying
that a solid (not blinking) “P” is indicated in
the instrument cluster display and on the gear
selector. If the "P" indicator is blinking, your
vehicle is not in PARK. As an added precau -
tion, always apply the parking brake when
exiting the vehicle.
AutoPark is a supplemental feature. It is not
designed to replace the need to shift your
vehicle into PARK. It is a back-up system and
should not be relied upon as the primary
method by which the driver shifts the vehicle
into PARK.
23_WL_OM_EN_USC_t.book Page 120
Page 123 of 424
STARTING AND OPERATING121
If the vehicle is not in PARK and the driver turns off
the engine, the vehicle may AutoPark.
AutoPark will engage when all of these conditions
are met:
Vehicle is equipped with an 8-speed transmis -
sion
Vehicle is not in PARK
Vehicle speed is 1.2 mph (1.9 km/h) or less
NOTE:For Keyless Enter ‘n Go™ equipped vehicles, the
engine will turn off and the ignition switch will
change to the ON/RUN position. After 30 minutes
the ignition switches to OFF automatically, unless
the driver turns the ignition switch OFF.
If the vehicle is not in PARK and the driver exits the
vehicle with the engine running, the vehicle may
AutoPark.
AutoPark will engage when all of these conditions
are met:
Vehicle is equipped with an 8-speed transmis -
sion
Vehicle is not in PARK
Vehicle speed is 1.2 mph (1.9 km/h) or less
Driver’s seat belt is unbuckled
Driver’s door is ajar
Brake pedal is not pressed The message “
AutoPark Engaged Shift To P Then
Shift To Gear ” will display in the instrument cluster.
NOTE:In some cases the ParkSense graphic will be
displayed in the instrument cluster. In these cases,
the gear selector must be returned to “P” to select
desired gear.
If the driver shifts into PARK while moving, the
vehicle may AutoPark.
AutoPark will engage ONLY when vehicle speed is
1.2 mph (1.9 km/h) or less.
The message “ Vehicle Speed Is Too High To Shift
To P ” will be displayed in the instrument cluster if
vehicle speed is above 1.2 mph (1.9 km/h).
4WD LOW — If Equipped
AutoPark will be disabled when operating the
vehicle in 4WD LOW.
The message “ AutoPark Disabled ” will be
displayed in the instrument cluster. Additional customer warnings will be given when
both of these conditions are met:Vehicle is not in PARK
Driver’s door is ajar
The message “ AutoPark Not Engaged” will be
displayed in the instrument cluster. A warning
chime will continue until you shift the vehicle into
PARK or the driver’s door is closed.
ALWAYS DO A VISUAL CHECK
that your vehicle is in
PARK by looking for the "P" in the instrument
cluster display and on the gear selector. As an
added precaution, always apply the parking brake
when exiting the vehicle.
EXTENDED PARK STARTING
NOTE:Extended Park condition occurs when the vehicle
has not been started or driven for at least 30 days.
1. Install a battery charger or jumper cables to the battery to ensure a full battery charge
during the crank cycle.
2. Press and hold the brake pedal while pushing the ENGINE START/STOP button once.
3. If the engine fails to start within 10 seconds, wait 10 to 15 seconds to allow the starter to
cool, then repeat the Extended Park Starting
procedure.
WARNING!
If vehicle speed is above 1.2 mph (1.9 km/h),
the transmission will default to NEUTRAL until
the vehicle speed drops below 1.2 mph
(1.9 km/h). A vehicle left in the NEUTRAL
position can roll. As an added precaution, always
apply the parking brake when exiting the vehicle.
4
23_WL_OM_EN_USC_t.book Page 121
Page 125 of 424
STARTING AND OPERATING123
NOTE:A new engine may consume some oil during its first
few thousand miles (kilometers) of operation. This
should be considered a normal part of the break-in
and not interpreted as a problem. Please check
your oil level with the engine oil indicator often
during the break-in period. Add oil as required.
PARKING BRAKE
ELECTRIC PARK BRAKE (EPB)
Your vehicle is equipped with an EPB that offers
simple operation, and some additional features that
make the parking brake more convenient and useful.
The parking brake is primarily intended to prevent
the vehicle from rolling while parked. Before
leaving the vehicle, make sure the parking brake is
applied. Also, be certain to leave the transmission
in PARK.
You can engage the parking brake in two ways:
Manually, by applying the parking brake switch.
Automatically, by enabling the Auto Park Brake
feature in the Customer Programmable
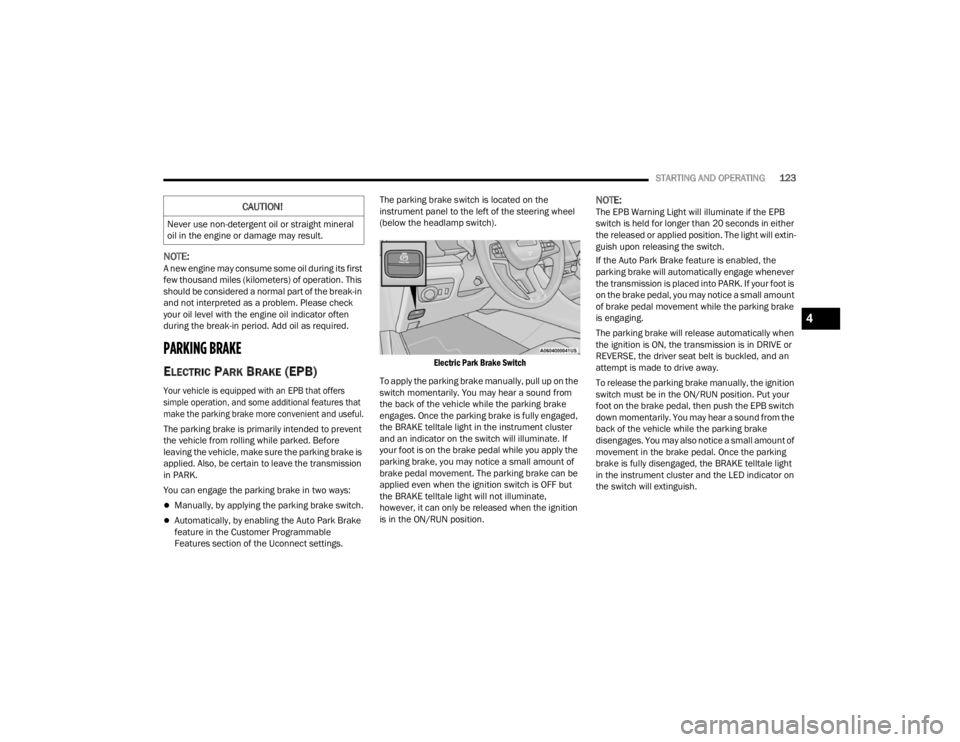
Features section of the Uconnect settings. The parking brake switch is located on the
instrument panel to the left of the steering wheel
(below the headlamp switch).
Electric Park Brake Switch
To apply the parking brake manually, pull up on the
switch momentarily. You may hear a sound from
the back of the vehicle while the parking brake
engages. Once the parking brake is fully engaged,
the BRAKE telltale light in the instrument cluster
and an indicator on the switch will illuminate. If
your foot is on the brake pedal while you apply the
parking brake, you may notice a small amount of
brake pedal movement. The parking brake can be
applied even when the ignition switch is OFF but
the BRAKE telltale light will not illuminate,
however, it can only be released when the ignition
is in the ON/RUN position.
NOTE:The EPB Warning Light will illuminate if the EPB
switch is held for longer than 20 seconds in either
the released or applied position. The light will extin -
guish upon releasing the switch.
If the Auto Park Brake feature is enabled, the
parking brake will automatically engage whenever
the transmission is placed into PARK. If your foot is
on the brake pedal, you may notice a small amount
of brake pedal movement while the parking brake
is engaging.
The parking brake will release automatically when
the ignition is ON, the transmission is in DRIVE or
REVERSE, the driver seat belt is buckled, and an
attempt is made to drive away.
To release the parking brake manually, the ignition
switch must be in the ON/RUN position. Put your
foot on the brake pedal, then push the EPB switch
down momentarily. You may hear a sound from the
back of the vehicle while the parking brake
disengages. You may also notice a small amount of
movement in the brake pedal. Once the parking
brake is fully disengaged, the BRAKE telltale light
in the instrument cluster and the LED indicator on
the switch will extinguish.CAUTION!
Never use non-detergent oil or straight mineral
oil in the engine or damage may result.
4
23_WL_OM_EN_USC_t.book Page 123
Page 128 of 424
126STARTING AND OPERATING
(Continued)
(Continued)
Maintenance Mode has requirements that must be
met in order to be activated:
The vehicle must be at a standstill.
The parking brake must be unapplied.
The transmission must be in PARK or NEUTRAL.
While in Maintenance Mode, the EPB Warning
Light will flash continuously while the ignition is
ON.
When brake maintenance work is complete, the
following steps must be followed to reset the
parking brake system to normal operation:
Ensure the vehicle is at a standstill.
Press the brake pedal with moderate force.
Apply the EPB Switch.
AUTOMATIC TRANSMISSION
You must press and hold the brake pedal while
shifting out of PARK.
WARNING!
You can be badly injured working on or around a
motor vehicle. Do only that service work for
which you have the knowledge and the right
equipment. If you have any doubt about your
ability to perform a service job, take your vehicle
to a competent mechanic.
WARNING!
Never use the PARK (P) position as a substi -
tute for the parking brake. Always apply the
parking brake fully when exiting the vehicle to
guard against vehicle movement and possible
injury or damage.
Your vehicle could move and injure you and
others if it is not in PARK. Check by trying to
move the transmission gear selector out of
PARK with the brake pedal released. Make
sure the transmission is in PARK before
exiting the vehicle.
The transmission may not engage PARK if the
vehicle is moving. Always bring the vehicle to a
complete stop before shifting to PARK, and
verify that the transmission gear position indi -
cator solidly indicates PARK without blinking.
Ensure that the vehicle is completely stopped,
and the PARK position is properly indicated,
before exiting the vehicle.
It is dangerous to shift out of PARK or
NEUTRAL (N) if the engine speed is higher
than idle speed. If your foot is not firmly
pressing the brake pedal, the vehicle could
accelerate quickly forward or in reverse. You
could lose control of the vehicle and hit
someone or something. Only shift into gear
when the engine is idling normally and your
foot is firmly pressing the brake pedal.
Unintended movement of a vehicle could
injure those in or near the vehicle. As with all
vehicles, you should never exit a vehicle while
the engine is running. Before exiting a vehicle,
always come to a complete stop, then apply
the parking brake, shift the transmission into
PARK, and turn the ignition OFF. When the
ignition is in the OFF position, the transmis -
sion is locked in PARK, securing the vehicle
against unwanted movement.
When exiting the vehicle, always make sure
the ignition is in the OFF position, remove the
key fob from the vehicle, and lock the vehicle.
WARNING!
23_WL_OM_EN_USC_t.book Page 126
Page 142 of 424
140STARTING AND OPERATING
If the Steering icon is displayed and the “Power
Steering System Over Temp” message is displayed
on the instrument cluster screen, they indicate
that extreme steering maneuvers may have
occurred which caused an over temperature
condition in the electric power steering system.
Once driving conditions are safe, pull over and let
the vehicle idle for a few moments until the icon
and message turn off.
STOP/START SYSTEM — IF EQUIPPED
The Stop/Start function is designed to reduce fuel
consumption. The system will stop the engine
automatically during a vehicle stop if the required
conditions are met. Releasing the brake pedal or
pressing the accelerator pedal will automatically
re-start the engine.
This vehicle has been upgraded with a heavy-duty
starter, enhanced battery, and other upgraded
engine parts, to handle the additional engine
starts.
AUTOSTOP MODE
The Stop/Start feature is enabled after every
normal customer engine start. At that time, the
system will go into STOP/START READY and if all
other conditions are met, can go into a STOP/
START AUTOSTOP ACTIVE Autostop mode. To Activate The Autostop Mode, The Following
Must Occur:
The system must be in STOP/START READY
state. A STOP/START READY message will be
displayed in the instrument cluster display
within the Stop/Start section Ú
page 98.
The vehicle must be completely stopped.
The gear selector must be in a forward gear and
the brake pedal pressed.
The engine will shut down, the tachometer will
move to the zero position and the Stop/Start
telltale will illuminate indicating you are in
Autostop. Customer settings will be maintained
upon return to an engine running condition.
POSSIBLE REASONS THE ENGINE DOES
N
OT AUTOSTOP
Prior to engine shut down, the system will check
many safety and comfort conditions to see if they
are fulfilled. Detailed information about the
operation of the Stop/Start system may be viewed
in the instrument cluster display Stop/Start
screen. In the following situations, the engine will
not stop:
Driver’s seat belt is not buckled.
Driver’s door is not closed.
Battery temperature is too warm or cold.
Battery charge is low.
The vehicle is on a steep grade.
Cabin heating or cooling is in process and an
acceptable cabin temperature has not been
achieved.
HVAC is set to full defrost mode at a high blower
speed.
HVAC is set to MAX A/C.
Engine has not reached normal operating
temperature.
The transmission is not in a forward gear.
Hood is open.
Brake pedal is not pressed with sufficient pres -
sure.
Accelerator pedal input.
Engine temperature is too high.
5 mph (8 km/h) threshold has not been
achieved from previous Autostop.
Steering angle is beyond threshold.
It may be possible for the vehicle to be driven
several times without the Stop/Start system going
into a STOP/START READY state under more
extreme conditions of the previously listed items.
23_WL_OM_EN_USC_t.book Page 140
Page 143 of 424
STARTING AND OPERATING141
TO START THE ENGINE WHILE IN
A
UTOSTOP MODE
While in a forward gear, the engine will start when
the brake pedal is released or the throttle pedal is
pressed. The transmission will automatically
re-engage upon engine restart.
Conditions That Will Cause The Engine To Start
Automatically While In Autostop Mode:
The transmission selector is moved out of
DRIVE.
To maintain cabin temperature comfort.
HVAC is set to full defrost mode.
HVAC system temperature or fan speed is
manually adjusted.
Battery voltage drops too low.
Stop/Start OFF switch is pushed.
A Stop/Start system error occurs.
Steering angle is beyond threshold.
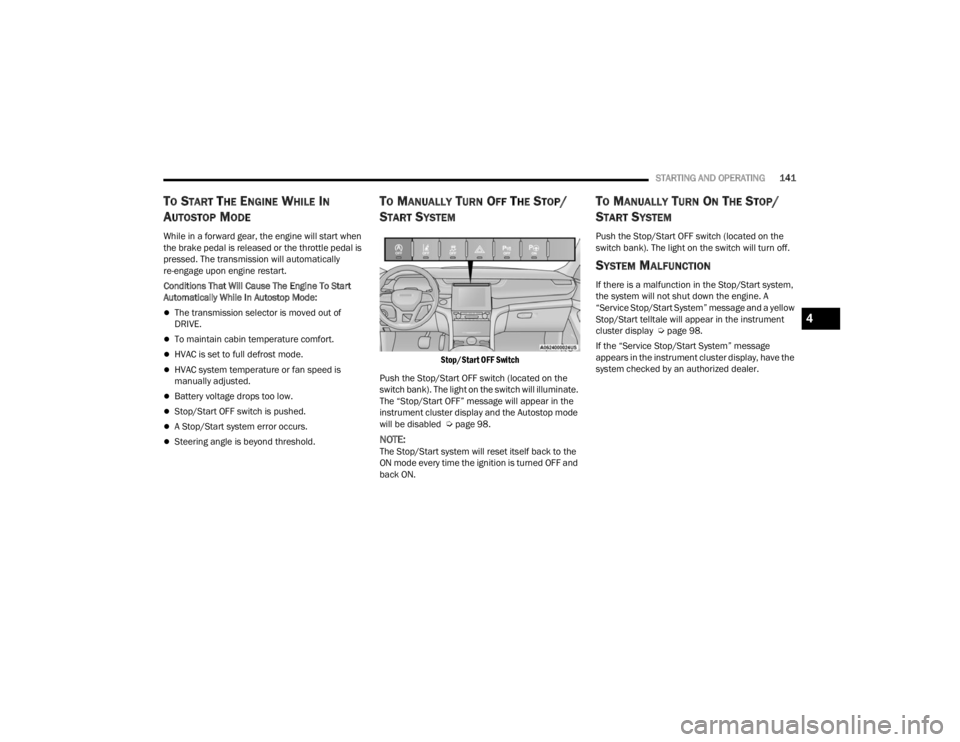
TO MANUALLY TURN OFF THE STOP/
S
TART SYSTEM
Stop/Start OFF Switch
Push the Stop/Start OFF switch (located on the
switch bank). The light on the switch will illuminate.
The “Stop/Start OFF” message will appear in the
instrument cluster display and the Autostop mode
will be disabled Ú page 98.
NOTE:The Stop/Start system will reset itself back to the
ON mode every time the ignition is turned OFF and
back ON.
TO MANUALLY TURN ON THE STOP/
S
TART SYSTEM
Push the Stop/Start OFF switch (located on the
switch bank). The light on the switch will turn off.
SYSTEM MALFUNCTION
If there is a malfunction in the Stop/Start system,
the system will not shut down the engine. A
“Service Stop/Start System” message and a yellow
Stop/Start telltale will appear in the instrument
cluster display Ú page 98.
If the “Service Stop/Start System” message
appears in the instrument cluster display, have the
system checked by an authorized dealer.
4
23_WL_OM_EN_USC_t.book Page 141
Page 194 of 424
192STARTING AND OPERATING
(Continued)
(Continued)
TOWING REQUIREMENTS
To promote proper break-in of the new vehicle
drivetrain components, the following guidelines
are recommended.
Perform the maintenance listed in the Scheduled
Servicing Ú
page 330. When towing a trailer,
never exceed the GAWR or GCWR ratings.
Towing Requirements — Tires
Do not attempt to tow a trailer while using a
compact spare tire.
Do not drive more than 50 mph (80 km/h) when
towing while using a full size spare tire.
Proper tire inflation pressures are essential to
the safe and satisfactory operation of your
vehicle.
Check the trailer tires for proper tire inflation
pressures before trailer usage.
Check for signs of tire wear or visible tire
damage before towing a trailer.
Replacing tires with a higher load carrying
capacity will not increase the vehicle's GVWR
and GAWR limits.
For further information Ú page 374.
CAUTION!
Do not tow a trailer at all during the first
500 miles (805 km) the new vehicle is driven.
The engine, axle or other parts could be
damaged.
Then, during the first 500 miles (805 km) that
a trailer is towed, do not drive over 50 mph
(80 km/h) and do not make starts at full
throttle. This helps the engine and other parts
of the vehicle wear in at the heavier loads.
WARNING!
Make certain that the load is secured in the
trailer and will not shift during travel. When
trailering cargo that is not fully secured,
dynamic load shifts can occur that may be
difficult for the driver to control. You could lose
control of your vehicle and have a collision.
When hauling cargo or towing a trailer, do not
overload your vehicle or trailer. Overloading can
cause a loss of control, poor performance or
damage to brakes, axle, engine, transmission,
steering, suspension, chassis structure or tires.
Safety chains must always be used between
your vehicle and trailer. Always connect the
chains to the hook retainers of the vehicle
hitch. Cross the chains under the trailer
tongue and allow enough slack for turning
corners.
Vehicles with trailers should not be parked on
a grade. When parking, apply the parking
brake on the tow vehicle. Put the tow vehicle
transmission in PARK (P). For four-wheel drive
vehicles, make sure the transfer case is not in
NEUTRAL (N). Always, block or "chock" the
trailer wheels.
GCWR must not be exceeded.
Total weight must be distributed between the
tow vehicle and the trailer such that the
following four ratings are not exceeded :
GVWR
GTW
WARNING!
GAWR
Tongue weight rating for the trailer hitch
utilized
WARNING!
23_WL_OM_EN_USC_t.book Page 192
Page 201 of 424
STARTING AND OPERATING199
NOTE:
Steps 1 through 5 are requirements that
must be met before pushing the N
(NEUTRAL) button, and must continue to be
met until the shift has been completed. If
any of these requirements are not met
before pushing the N (NEUTRAL) button or
are no longer met during the shift, the N
(NEUTRAL) indicator light will flash continu -
ously until all requirements are met or until
the N (NEUTRAL) button is released.
The ignition must be in the ON/RUN position
for a shift to take place and for the position
indicator lights to be operable. If the ignition
is not in the ON/RUN position, the shift will
not take place and no position indicator
lights will be on or flashing.
A flashing N (NEUTRAL) position indicator
light indicates that shift requirements have
not been met.
4. Press and hold the brake pedal.
5. Shift the transmission into NEUTRAL.
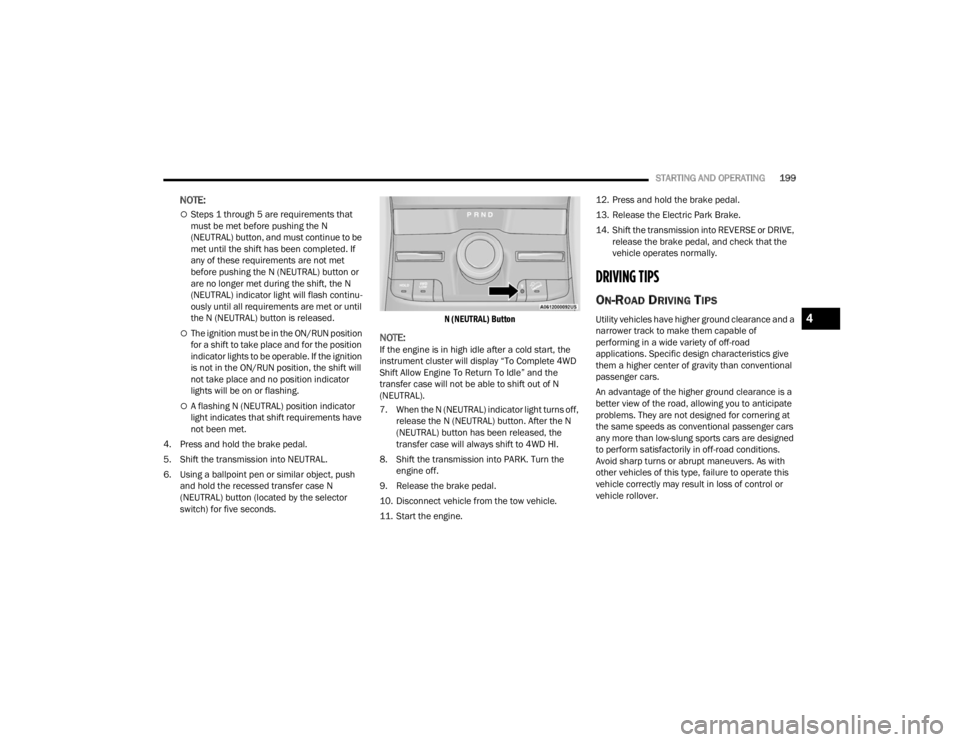
6. Using a ballpoint pen or similar object, push and hold the recessed transfer case N
(NEUTRAL) button (located by the selector
switch) for five seconds.
N (NEUTRAL) Button
NOTE:If the engine is in high idle after a cold start, the
instrument cluster will display “To Complete 4WD
Shift Allow Engine To Return To Idle” and the
transfer case will not be able to shift out of N
(NEUTRAL).
7. When the N (NEUTRAL) indicator light turns off,
release the N (NEUTRAL) button. After the N
(NEUTRAL) button has been released, the
transfer case will always shift to 4WD HI.
8. Shift the transmission into PARK. Turn the engine off.
9. Release the brake pedal.
10. Disconnect vehicle from the tow vehicle.
11. Start the engine. 12. Press and hold the brake pedal.
13. Release the Electric Park Brake.
14. Shift the transmission into REVERSE or DRIVE,
release the brake pedal, and check that the
vehicle operates normally.
DRIVING TIPS
ON-ROAD DRIVING TIPS
Utility vehicles have higher ground clearance and a
narrower track to make them capable of
performing in a wide variety of off-road
applications. Specific design characteristics give
them a higher center of gravity than conventional
passenger cars.
An advantage of the higher ground clearance is a
better view of the road, allowing you to anticipate
problems. They are not designed for cornering at
the same speeds as conventional passenger cars
any more than low-slung sports cars are designed
to perform satisfactorily in off-road conditions.
Avoid sharp turns or abrupt maneuvers. As with
other vehicles of this type, failure to operate this
vehicle correctly may result in loss of control or
vehicle rollover.4
23_WL_OM_EN_USC_t.book Page 199