wheel JEEP GRAND CHEROKEE 2023 Owner's Manual
[x] Cancel search | Manufacturer: JEEP, Model Year: 2023, Model line: GRAND CHEROKEE, Model: JEEP GRAND CHEROKEE 2023Pages: 424, PDF Size: 15.48 MB
Page 109 of 424

GETTING TO KNOW YOUR INSTRUMENT PANEL107
When load reduction is activated, the message
“Battery Saver On” or “Battery Saver Mode” will
appear in the instrument cluster.
These messages indicate the vehicle battery has a
low state of charge and continues to lose electrical
charge at a rate that the charging system cannot
sustain.
NOTE:
The charging system is independent from load
reduction. The charging system performs a diag -
nostic on the charging system continuously.
If the Battery Charge Warning Light is on it may
indicate a problem with the charging system
Ú page 109.
The electrical loads that may be switched off (if
equipped), and vehicle functions which can be
affected by load reduction:
Heated Seat/Vented Seats/Heated Wheel
Rear Defroster And Heated Mirrors
HVAC System
115 Volt AC Power Inverter System
Audio and Telematics System Loss of the battery charge may indicate one or
more of the following conditions:
The charging system cannot deliver enough
electrical power to the vehicle system because
the electrical loads are larger than the capability
of the charging system. The charging system is
still functioning properly.
Turning on all possible vehicle electrical loads
(e.g. HVAC to max settings, exterior and interior
lights, overloaded power outlets +12 Volt, 115
Volt AC, USB ports) during certain driving condi
-
tions (city driving, towing, frequent stopping,
etc.).
Installing options like additional lights, upfitter
electrical accessories, audio systems, alarms
and similar devices.
Unusual driving cycles (short trips separated by
long parking periods).
The vehicle was parked for an extended period
of time (weeks, months).
The battery was recently replaced and was not
charged completely.
The battery was discharged by an electrical load
left on when the vehicle was parked.
The battery was used for an extended period
with the engine not running to supply radio,
lights, chargers, +12 Volt portable appliances
like vacuum cleaners, game consoles and
similar devices. What to do when an electrical load reduction
action message is present (“Battery Saver On” or
“Battery Saver Mode”)
During a trip:
Reduce power to unnecessary loads if possible:
Turn off redundant lights (interior or exte
-
rior)
Check what may be plugged in to power
outlets +12 Volt, 115 Volt AC, USB ports
Check HVAC settings (blower, temperature)
Check the audio settings (volume)
After a trip:
Check if any aftermarket equipment was
installed (additional lights, upfitter electrical
accessories, audio systems, alarms) and review
specifications if any (load and Ignition Off Draw
currents).
Evaluate the latest driving cycles (distance,
driving time and parking time).
The vehicle should have service performed if
the message is still present during consecutive
trips, and if the evaluation and driving pattern of
the vehicle did not help to identify the cause.
3
23_WL_OM_EN_USC_t.book Page 107
Page 110 of 424
108GETTING TO KNOW YOUR INSTRUMENT PANEL
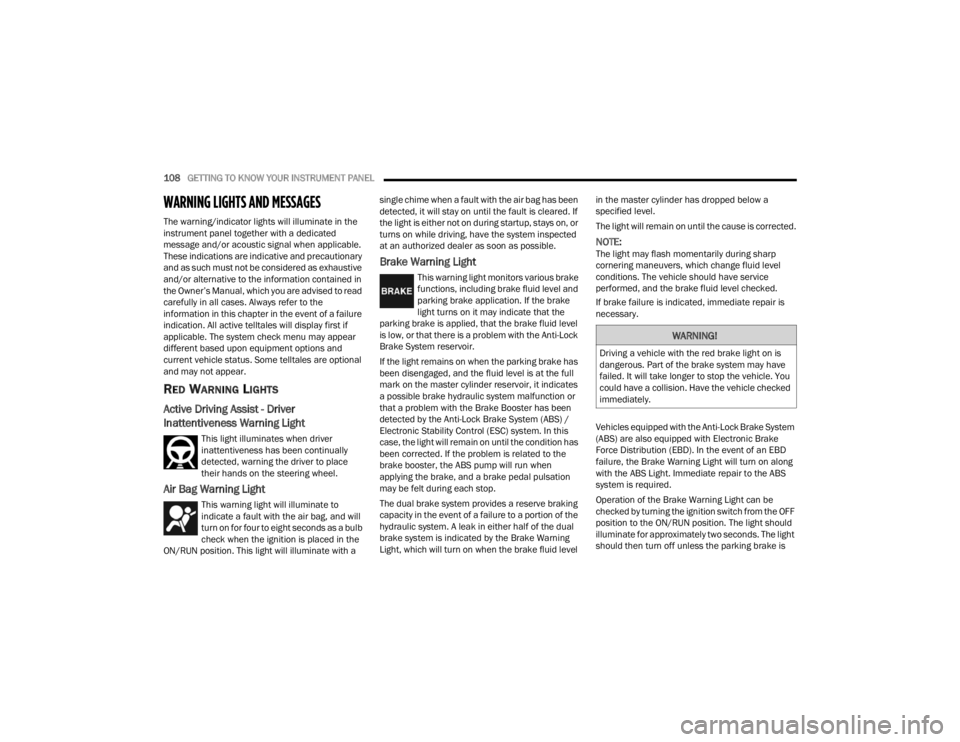
WARNING LIGHTS AND MESSAGES
The warning/indicator lights will illuminate in the
instrument panel together with a dedicated
message and/or acoustic signal when applicable.
These indications are indicative and precautionary
and as such must not be considered as exhaustive
and/or alternative to the information contained in
the Owner’s Manual, which you are advised to read
carefully in all cases. Always refer to the
information in this chapter in the event of a failure
indication. All active telltales will display first if
applicable. The system check menu may appear
different based upon equipment options and
current vehicle status. Some telltales are optional
and may not appear.
RED WARNING LIGHTS
Active Driving Assist - Driver
Inattentiveness Warning Light
This light illuminates when driver
inattentiveness has been continually
detected, warning the driver to place
their hands on the steering wheel.
Air Bag Warning Light
This warning light will illuminate to
indicate a fault with the air bag, and will
turn on for four to eight seconds as a bulb
check when the ignition is placed in the
ON/RUN position. This light will illuminate with a single chime when a fault with the air bag has been
detected, it will stay on until the fault is cleared. If
the light is either not on during startup, stays on, or
turns on while driving, have the system inspected
at an authorized dealer as soon as possible.
Brake Warning Light
This warning light monitors various brake
functions, including brake fluid level and
parking brake application. If the brake
light turns on it may indicate that the
parking brake is applied, that the brake fluid level
is low, or that there is a problem with the Anti-Lock
Brake System reservoir.
If the light remains on when the parking brake has
been disengaged, and the fluid level is at the full
mark on the master cylinder reservoir, it indicates
a possible brake hydraulic system malfunction or
that a problem with the Brake Booster has been
detected by the Anti-Lock Brake System (ABS) /
Electronic Stability Control (ESC) system. In this
case, the light will remain on until the condition has
been corrected. If the problem is related to the
brake booster, the ABS pump will run when
applying the brake, and a brake pedal pulsation
may be felt during each stop.
The dual brake system provides a reserve braking
capacity in the event of a failure to a portion of the
hydraulic system. A leak in either half of the dual
brake system is indicated by the Brake Warning
Light, which will turn on when the brake fluid level in the master cylinder has dropped below a
specified level.
The light will remain on until the cause is corrected.
NOTE:The light may flash momentarily during sharp
cornering maneuvers, which change fluid level
conditions. The vehicle should have service
performed, and the brake fluid level checked.
If brake failure is indicated, immediate repair is
necessary.
Vehicles equipped with the Anti-Lock Brake System
(ABS) are also equipped with Electronic Brake
Force Distribution (EBD). In the event of an EBD
failure, the Brake Warning Light will turn on along
with the ABS Light. Immediate repair to the ABS
system is required.
Operation of the Brake Warning Light can be
checked by turning the ignition switch from the OFF
position to the ON/RUN position. The light should
illuminate for approximately two seconds. The light
should then turn off unless the parking brake is
WARNING!
Driving a vehicle with the red brake light on is
dangerous. Part of the brake system may have
failed. It will take longer to stop the vehicle. You
could have a collision. Have the vehicle checked
immediately.
23_WL_OM_EN_USC_t.book Page 108
Page 113 of 424
GETTING TO KNOW YOUR INSTRUMENT PANEL111
Vehicle Security Warning Light —
If Equipped
This light will flash at a fast rate for
approximately 15 seconds when the vehicle
security system is arming, and then will flash
slowly until the vehicle is disarmed.
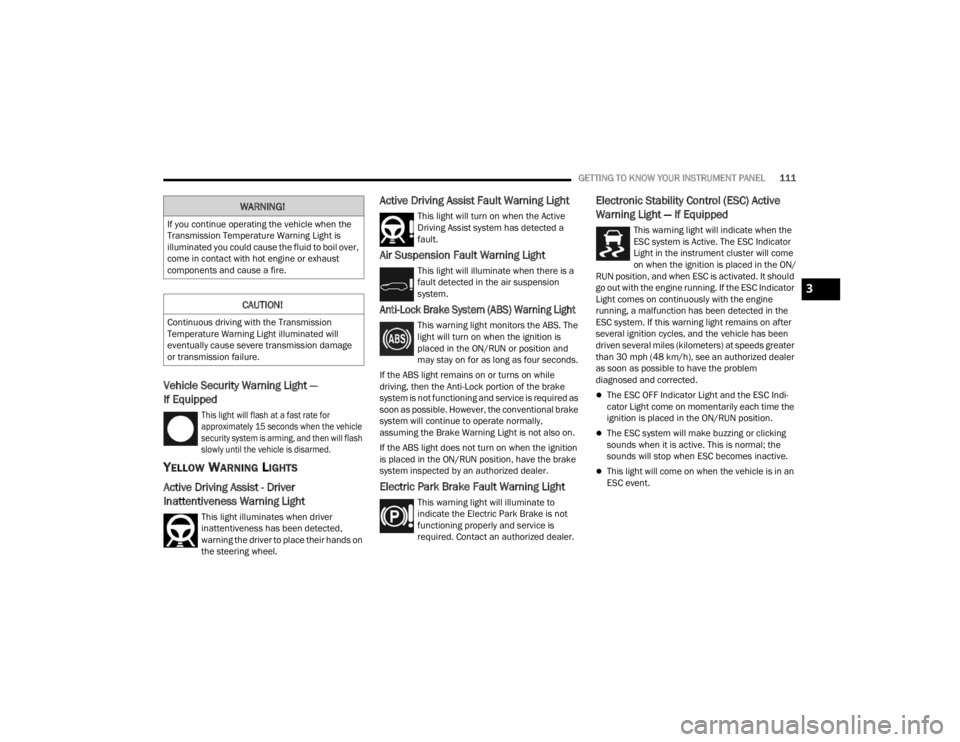
YELLOW WARNING LIGHTS
Active Driving Assist - Driver
Inattentiveness Warning Light
This light illuminates when driver
inattentiveness has been detected,
warning the driver to place their hands on
the steering wheel.
Active Driving Assist Fault Warning Light
This light will turn on when the Active
Driving Assist system has detected a
fault.
Air Suspension Fault Warning Light
This light will illuminate when there is a
fault detected in the air suspension
system.
Anti-Lock Brake System (ABS) Warning Light
This warning light monitors the ABS. The
light will turn on when the ignition is
placed in the ON/RUN or position and
may stay on for as long as four seconds.
If the ABS light remains on or turns on while
driving, then the Anti-Lock portion of the brake
system is not functioning and service is required as
soon as possible. However, the conventional brake
system will continue to operate normally,
assuming the Brake Warning Light is not also on.
If the ABS light does not turn on when the ignition
is placed in the ON/RUN position, have the brake
system inspected by an authorized dealer.
Electric Park Brake Fault Warning Light
This warning light will illuminate to
indicate the Electric Park Brake is not
functioning properly and service is
required. Contact an authorized dealer.
Electronic Stability Control (ESC) Active
Warning Light — If Equipped
This warning light will indicate when the
ESC system is Active. The ESC Indicator
Light in the instrument cluster will come
on when the ignition is placed in the ON/
RUN position, and when ESC is activated. It should
go out with the engine running. If the ESC Indicator
Light comes on continuously with the engine
running, a malfunction has been detected in the
ESC system. If this warning light remains on after
several ignition cycles, and the vehicle has been
driven several miles (kilometers) at speeds greater
than 30 mph (48 km/h), see an authorized dealer
as soon as possible to have the problem
diagnosed and corrected.
The ESC OFF Indicator Light and the ESC Indi -
cator Light come on momentarily each time the
ignition is placed in the ON/RUN position.
The ESC system will make buzzing or clicking
sounds when it is active. This is normal; the
sounds will stop when ESC becomes inactive.
This light will come on when the vehicle is in an
ESC event.
WARNING!
If you continue operating the vehicle when the
Transmission Temperature Warning Light is
illuminated you could cause the fluid to boil over,
come in contact with hot engine or exhaust
components and cause a fire.
CAUTION!
Continuous driving with the Transmission
Temperature Warning Light illuminated will
eventually cause severe transmission damage
or transmission failure.
3
23_WL_OM_EN_USC_t.book Page 111
Page 116 of 424
114GETTING TO KNOW YOUR INSTRUMENT PANEL
also reduces fuel efficiency and tire tread life, and
may affect the vehicle’s handling and stopping
ability.
Please note that the TPMS is not a substitute for
proper tire maintenance, and it is the driver’s
responsibility to maintain correct tire pressure,
even if underinflation has not reached the level to
trigger illumination of the TPMS low tire pressure
telltale.
Your vehicle has also been equipped with a TPMS
malfunction indicator to indicate when the system
is not operating properly. The TPMS malfunction
indicator is combined with the low tire pressure
telltale. When the system detects a malfunction,
the telltale will flash for approximately one minute
and then remain continuously illuminated. This
sequence will continue upon subsequent vehicle
start-ups as long as the malfunction exists. When
the malfunction indicator is illuminated, the
system may not be able to detect or signal low tire
pressure as intended. TPMS malfunctions may
occur for a variety of reasons, including the
installation of replacement or alternate tires or
wheels on the vehicle that prevent the TPMS from
functioning properly. Always check the TPMS
malfunction telltale after replacing one or more
tires or wheels on your vehicle to ensure that the
replacement or alternate tires and wheels allow
the TPMS to continue to function properly.
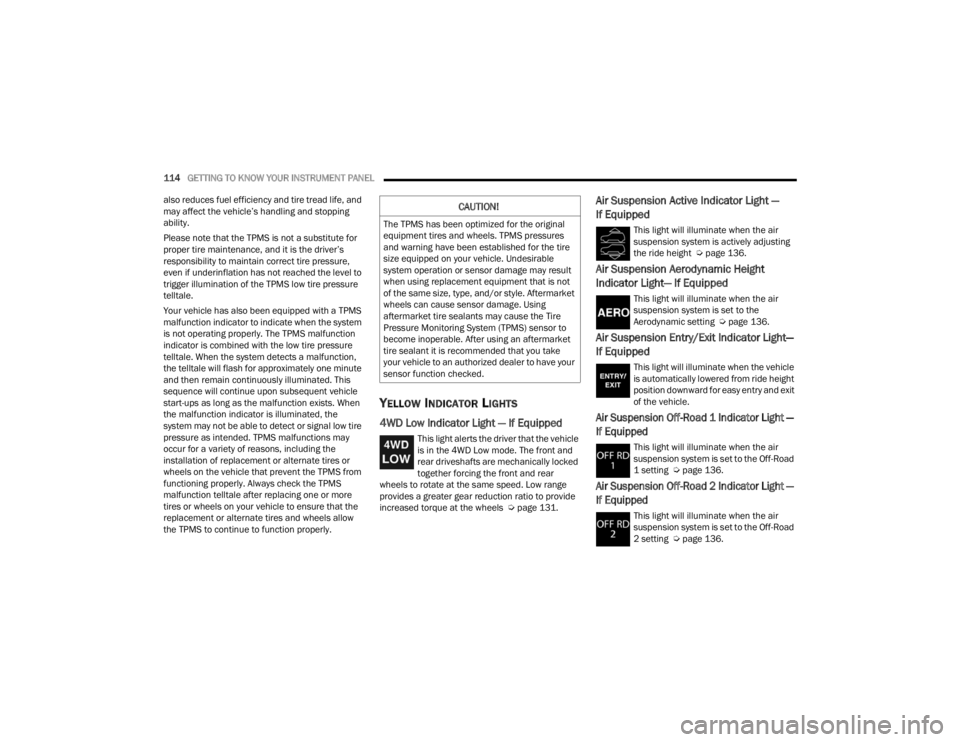
YELLOW INDICATOR LIGHTS
4WD Low Indicator Light — If Equipped
This light alerts the driver that the vehicle
is in the 4WD Low mode. The front and
rear driveshafts are mechanically locked
together forcing the front and rear
wheels to rotate at the same speed. Low range
provides a greater gear reduction ratio to provide
increased torque at the wheels Ú page 131.
Air Suspension Active Indicator Light —
If Equipped
This light will illuminate when the air
suspension system is actively adjusting
the ride height Úpage 136.
Air Suspension Aerodynamic Height
Indicator Light— If Equipped
This light will illuminate when the air
suspension system is set to the
Aerodynamic setting Ú page 136.
Air Suspension Entry/Exit Indicator Light—
If Equipped
This light will illuminate when the vehicle
is automatically lowered from ride height
position downward for easy entry and exit
of the vehicle.
Air Suspension Off-Road 1 Indicator Light —
If Equipped
This light will illuminate when the air
suspension system is set to the Off-Road
1 setting Úpage 136.
Air Suspension Off-Road 2 Indicator Light —
If Equipped
This light will illuminate when the air
suspension system is set to the Off-Road
2 setting Úpage 136.
CAUTION!
The TPMS has been optimized for the original
equipment tires and wheels. TPMS pressures
and warning have been established for the tire
size equipped on your vehicle. Undesirable
system operation or sensor damage may result
when using replacement equipment that is not
of the same size, type, and/or style. Aftermarket
wheels can cause sensor damage. Using
aftermarket tire sealants may cause the Tire
Pressure Monitoring System (TPMS) sensor to
become inoperable. After using an aftermarket
tire sealant it is recommended that you take
your vehicle to an authorized dealer to have your
sensor function checked.
23_WL_OM_EN_USC_t.book Page 114
Page 125 of 424
STARTING AND OPERATING123
NOTE:A new engine may consume some oil during its first
few thousand miles (kilometers) of operation. This
should be considered a normal part of the break-in
and not interpreted as a problem. Please check
your oil level with the engine oil indicator often
during the break-in period. Add oil as required.
PARKING BRAKE
ELECTRIC PARK BRAKE (EPB)
Your vehicle is equipped with an EPB that offers
simple operation, and some additional features that
make the parking brake more convenient and useful.
The parking brake is primarily intended to prevent
the vehicle from rolling while parked. Before
leaving the vehicle, make sure the parking brake is
applied. Also, be certain to leave the transmission
in PARK.
You can engage the parking brake in two ways:
Manually, by applying the parking brake switch.
Automatically, by enabling the Auto Park Brake
feature in the Customer Programmable
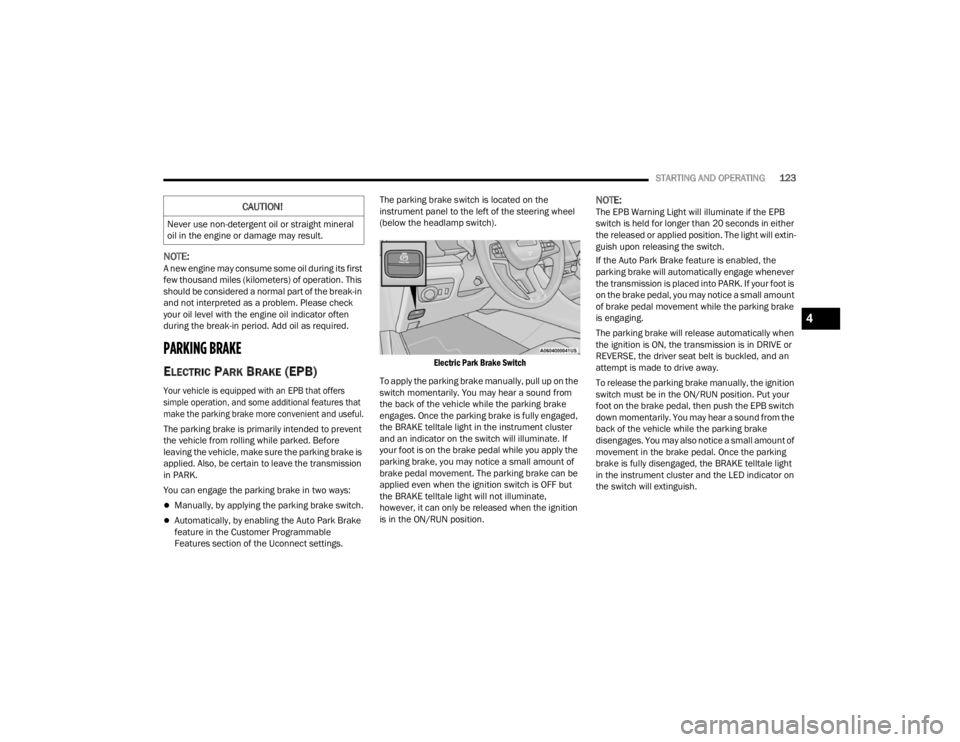
Features section of the Uconnect settings. The parking brake switch is located on the
instrument panel to the left of the steering wheel
(below the headlamp switch).
Electric Park Brake Switch
To apply the parking brake manually, pull up on the
switch momentarily. You may hear a sound from
the back of the vehicle while the parking brake
engages. Once the parking brake is fully engaged,
the BRAKE telltale light in the instrument cluster
and an indicator on the switch will illuminate. If
your foot is on the brake pedal while you apply the
parking brake, you may notice a small amount of
brake pedal movement. The parking brake can be
applied even when the ignition switch is OFF but
the BRAKE telltale light will not illuminate,
however, it can only be released when the ignition
is in the ON/RUN position.
NOTE:The EPB Warning Light will illuminate if the EPB
switch is held for longer than 20 seconds in either
the released or applied position. The light will extin -
guish upon releasing the switch.
If the Auto Park Brake feature is enabled, the
parking brake will automatically engage whenever
the transmission is placed into PARK. If your foot is
on the brake pedal, you may notice a small amount
of brake pedal movement while the parking brake
is engaging.
The parking brake will release automatically when
the ignition is ON, the transmission is in DRIVE or
REVERSE, the driver seat belt is buckled, and an
attempt is made to drive away.
To release the parking brake manually, the ignition
switch must be in the ON/RUN position. Put your
foot on the brake pedal, then push the EPB switch
down momentarily. You may hear a sound from the
back of the vehicle while the parking brake
disengages. You may also notice a small amount of
movement in the brake pedal. Once the parking
brake is fully disengaged, the BRAKE telltale light
in the instrument cluster and the LED indicator on
the switch will extinguish.CAUTION!
Never use non-detergent oil or straight mineral
oil in the engine or damage may result.
4
23_WL_OM_EN_USC_t.book Page 123
Page 126 of 424

124STARTING AND OPERATING
(Continued)
NOTE:When parking on a hill, it is important to turn the
front wheels toward the curb on a downhill grade
and away from the curb on an uphill grade. Apply
the parking brake before placing the gear selector
in PARK, otherwise the load on the transmission
locking mechanism may make it difficult to move
the gear selector out of PARK. If exceptional circumstances should make it
necessary to engage the parking brake while the
vehicle is in motion, maintain upward pressure on
the EPB switch for as long as engagement is
desired. The BRAKE telltale light will illuminate,
and a continuous chime will sound. The rear stop
lamps will also be illuminated automatically while
the vehicle remains in motion.
To disengage the parking brake while the vehicle is
in motion, release the switch. If the vehicle is
brought to a complete stop using the parking
brake, when the vehicle reaches approximately
3 mph, (5 km/h) the parking brake will remain
engaged.
In the unlikely event of a malfunction of the EPB
system, a yellow EPB Warning Light will illuminate.
This may be accompanied by the BRAKE telltale
light flashing. In this event, urgent service of the
EPB system is required. Do not rely on the parking
brake to hold the vehicle stationary.
WARNING!
Never use the PARK position as a substitute
for the parking brake. Always apply the
parking brake fully when parked to guard
against vehicle movement and possible injury
or damage.
When exiting the vehicle, always turn the igni
-
tion OFF, secure the key fob, and lock your
vehicle.
Never leave children alone in a vehicle, or with
access to an unlocked vehicle. Allowing chil -
dren to be in a vehicle unattended is
dangerous for a number of reasons. A child or
others could be seriously or fatally injured.
Children should be warned not to touch the
parking brake, brake pedal or the gear
selector.
Do not leave the key fob in or near the vehicle,
or in a location accessible to children, and do
not leave a vehicle equipped with Keyless
Enter ‘n Go™ in the ON/RUN position. A child
could operate power windows, other controls,
or move the vehicle.
Be sure the parking brake is fully disengaged
before driving; failure to do so can lead to
brake failure and a collision.
Always fully apply the parking brake when
leaving your vehicle, or it may roll and cause
damage or injury. Also be certain to leave the
transmission in PARK. Failure to do so may
allow the vehicle to roll and cause damage or
injury.
CAUTION!
If the Brake System Warning Light remains on
with the parking brake released, a brake system
malfunction is indicated. Have the brake system
serviced by an authorized dealer immediately.
WARNING!
WARNING!
Driving the vehicle with the parking brake
engaged, or repeated use of the parking brake
to slow the vehicle may cause serious damage to
the brake system. Be sure the parking brake is
fully disengaged before driving; failure to do so
can lead to brake failure and a collision.
23_WL_OM_EN_USC_t.book Page 124
Page 130 of 424
128STARTING AND OPERATING
Only shift from DRIVE to PARK or REVERSE when
the accelerator pedal is released and the vehicle is
stopped. Be sure to keep your foot on the brake
pedal when shifting between these gears.
The transmission gear selector has only PARK,
REVERSE, NEUTRAL, and DRIVE positions. Manual
downshifts can be made using the steering wheel
mounted paddle shifters. Pulling the -/+ switches
(on the steering wheel) while in the DRIVE position
will select the highest available transmission gear,
and will display that gear limit in the instrument
cluster as 1, 2, 3, etc. Some models will display
both the selected gear limit, and the actual current
gear, while in AutoStick mode.
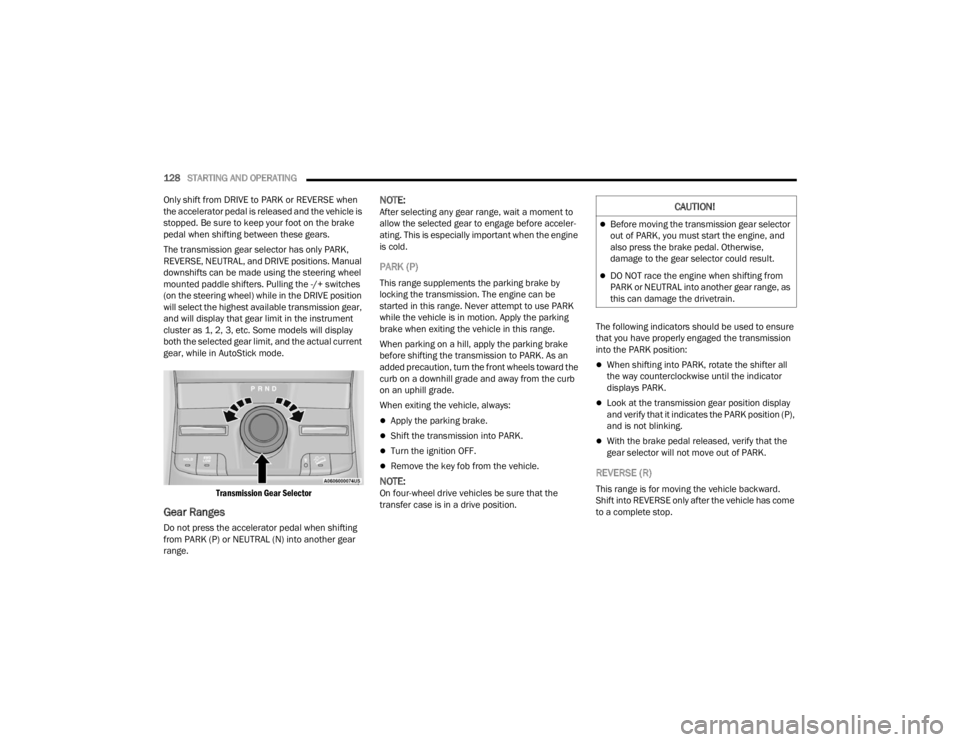
Transmission Gear Selector
Gear Ranges
Do not press the accelerator pedal when shifting
from PARK (P) or NEUTRAL (N) into another gear
range.
NOTE:After selecting any gear range, wait a moment to
allow the selected gear to engage before acceler -
ating. This is especially important when the engine
is cold.
PARK (P)
This range supplements the parking brake by
locking the transmission. The engine can be
started in this range. Never attempt to use PARK
while the vehicle is in motion. Apply the parking
brake when exiting the vehicle in this range.
When parking on a hill, apply the parking brake
before shifting the transmission to PARK. As an
added precaution, turn the front wheels toward the
curb on a downhill grade and away from the curb
on an uphill grade.
When exiting the vehicle, always:
Apply the parking brake.
Shift the transmission into PARK.
Turn the ignition OFF.
Remove the key fob from the vehicle.
NOTE:On four-wheel drive vehicles be sure that the
transfer case is in a drive position. The following indicators should be used to ensure
that you have properly engaged the transmission
into the PARK position:
When shifting into PARK, rotate the shifter all
the way counterclockwise until the indicator
displays PARK.
Look at the transmission gear position display
and verify that it indicates the PARK position (P),
and is not blinking.
With the brake pedal released, verify that the
gear selector will not move out of PARK.
REVERSE (R)
This range is for moving the vehicle backward.
Shift into REVERSE only after the vehicle has come
to a complete stop.
CAUTION!
Before moving the transmission gear selector
out of PARK, you must start the engine, and
also press the brake pedal. Otherwise,
damage to the gear selector could result.
DO NOT race the engine when shifting from
PARK or NEUTRAL into another gear range, as
this can damage the drivetrain.
23_WL_OM_EN_USC_t.book Page 128
Page 132 of 424
130STARTING AND OPERATING
NOTE:Even if the transmission can be reset, we
recommend that you visit an authorized dealer at
your earliest possible convenience. An authorized
dealer has diagnostic equipment to assess the
condition of your transmission.
If the transmission cannot be reset, authorized
dealer service is required.
AutoStick — If Equipped
AutoStick is a driver-interactive transmission
feature providing manual shift control, giving you
more control of the vehicle. AutoStick allows you to
maximize engine braking, eliminate undesirable
upshifts and downshifts, and improve overall
vehicle performance. This feature can also provide
you with more control during passing, city driving,
cold slippery conditions, mountain driving, trailer
towing, and many other situations.
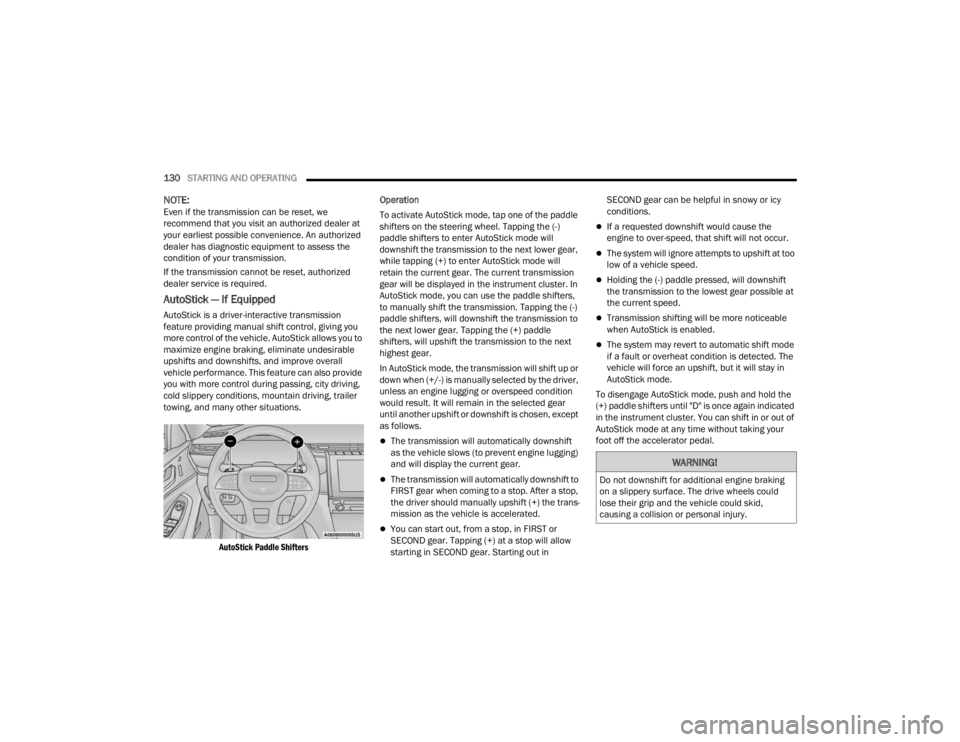
AutoStick Paddle Shifters
Operation
To activate AutoStick mode, tap one of the paddle
shifters on the steering wheel. Tapping the (-)
paddle shifters to enter AutoStick mode will
downshift the transmission to the next lower gear,
while tapping (+) to enter AutoStick mode will
retain the current gear. The current transmission
gear will be displayed in the instrument cluster. In
AutoStick mode, you can use the paddle shifters,
to manually shift the transmission. Tapping the (-)
paddle shifters, will downshift the transmission to
the next lower gear. Tapping the (+) paddle
shifters, will upshift the transmission to the next
highest gear.
In AutoStick mode, the transmission will shift up or
down when (+/-) is manually selected by the driver,
unless an engine lugging or overspeed condition
would result. It will remain in the selected gear
until another upshift or downshift is chosen, except
as follows.
The transmission will automatically downshift
as the vehicle slows (to prevent engine lugging)
and will display the current gear.
The transmission will automatically downshift to
FIRST gear when coming to a stop. After a stop,
the driver should manually upshift (+) the trans
-
mission as the vehicle is accelerated.
You can start out, from a stop, in FIRST or
SECOND gear. Tapping (+) at a stop will allow
starting in SECOND gear. Starting out in SECOND gear can be helpful in snowy or icy
conditions.
If a requested downshift would cause the
engine to over-speed, that shift will not occur.
The system will ignore attempts to upshift at too
low of a vehicle speed.
Holding the (-) paddle pressed, will downshift
the transmission to the lowest gear possible at
the current speed.
Transmission shifting will be more noticeable
when AutoStick is enabled.
The system may revert to automatic shift mode
if a fault or overheat condition is detected. The
vehicle will force an upshift, but it will stay in
AutoStick mode.
To disengage AutoStick mode, push and hold the
(+) paddle shifters until "D" is once again indicated
in the instrument cluster. You can shift in or out of
AutoStick mode at any time without taking your
foot off the accelerator pedal.
WARNING!
Do not downshift for additional engine braking
on a slippery surface. The drive wheels could
lose their grip and the vehicle could skid,
causing a collision or personal injury.
23_WL_OM_EN_USC_t.book Page 130
Page 133 of 424
STARTING AND OPERATING131
SPORT MODE — IF EQUIPPED
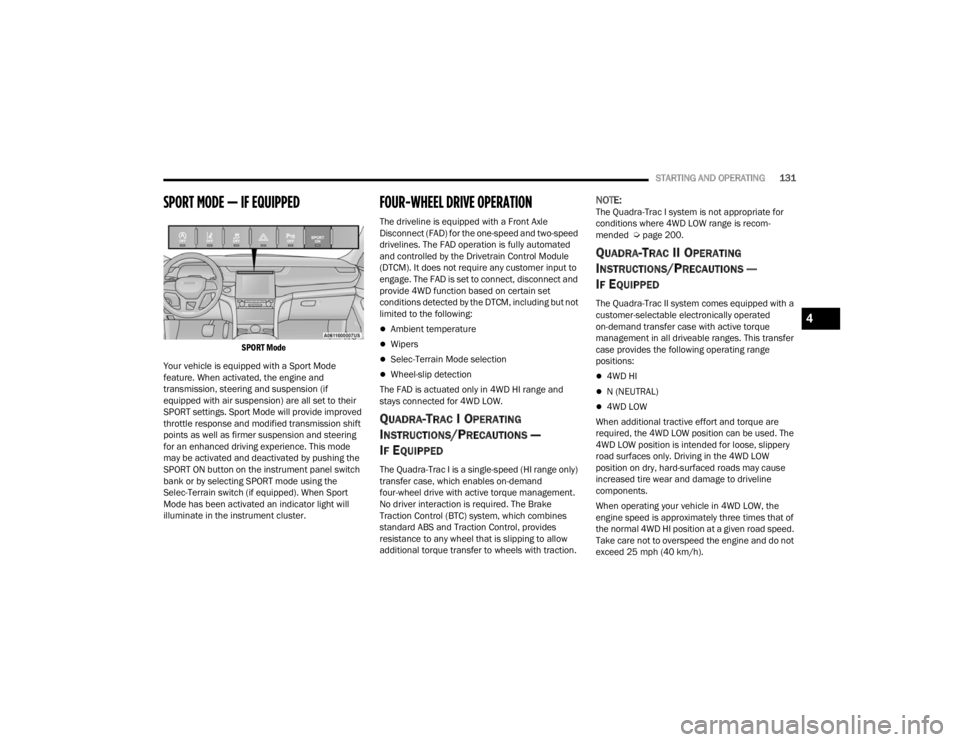
SPORT Mode
Your vehicle is equipped with a Sport Mode
feature. When activated, the engine and
transmission, steering and suspension (if
equipped with air suspension) are all set to their
SPORT settings. Sport Mode will provide improved
throttle response and modified transmission shift
points as well as firmer suspension and steering
for an enhanced driving experience. This mode
may be activated and deactivated by pushing the
SPORT ON button on the instrument panel switch
bank or by selecting SPORT mode using the
Selec-Terrain switch (if equipped). When Sport
Mode has been activated an indicator light will
illuminate in the instrument cluster.
FOUR-WHEEL DRIVE OPERATION
The driveline is equipped with a Front Axle
Disconnect (FAD) for the one-speed and two-speed
drivelines. The FAD operation is fully automated
and controlled by the Drivetrain Control Module
(DTCM). It does not require any customer input to
engage. The FAD is set to connect, disconnect and
provide 4WD function based on certain set
conditions detected by the DTCM, including but not
limited to the following:
Ambient temperature
Wipers
Selec-Terrain Mode selection
Wheel-slip detection
The FAD is actuated only in 4WD HI range and
stays connected for 4WD LOW.
QUADRA-TRAC I OPERATING
I
NSTRUCTIONS/PRECAUTIONS —
I
F EQUIPPED
The Quadra-Trac I is a single-speed (HI range only)
transfer case, which enables on-demand
four-wheel drive with active torque management.
No driver interaction is required. The Brake
Traction Control (BTC) system, which combines
standard ABS and Traction Control, provides
resistance to any wheel that is slipping to allow
additional torque transfer to wheels with traction.
NOTE:The Quadra-Trac I system is not appropriate for
conditions where 4WD LOW range is recom -
mended Ú page 200.
QUADRA-TRAC II OPERATING
I
NSTRUCTIONS/PRECAUTIONS —
I
F EQUIPPED
The Quadra-Trac II system comes equipped with a
customer-selectable electronically operated
on-demand transfer case with active torque
management in all driveable ranges. This transfer
case provides the following operating range
positions:
4WD HI
N (NEUTRAL)
4WD LOW
When additional tractive effort and torque are
required, the 4WD LOW position can be used. The
4WD LOW position is intended for loose, slippery
road surfaces only. Driving in the 4WD LOW
position on dry, hard-surfaced roads may cause
increased tire wear and damage to driveline
components.
When operating your vehicle in 4WD LOW, the
engine speed is approximately three times that of
the normal 4WD HI position at a given road speed.
Take care not to overspeed the engine and do not
exceed 25 mph (40 km/h).
4
23_WL_OM_EN_USC_t.book Page 131
Page 134 of 424
132STARTING AND OPERATING
Proper operation of four-wheel drive vehicles
depends on tires of equal size, type, and
circumference on each wheel. Any difference will
adversely affect performance and function of the
transfer case.
Because four-wheel drive provides improved
traction, there is a tendency to exceed safe turning
and stopping speeds. Do not go faster than road
conditions permit.
SHIFT POSITIONS
For additional information on the appropriate use
of each four-wheel drive system mode position,
see the following:
4WD HI
This is the default operating range for daily use.
N (NEUTRAL)
This range disengages the driveline from the
powertrain. It is used for towing your vehicle
behind another vehicle Ú page 195.
4WD LOW
This range is for low speed four-wheel drive. It
provides an additional gear reduction which allows
for increased torque to be delivered to both the
front and rear wheels while providing maximum
pulling power for loose, slippery road surfaces only.
Do not exceed 25 mph (40 km/h).
SHIFTING PROCEDURES
4WD HI To 4WD LOW
With the vehicle at speeds of 0 to 3 mph (0 to
5 km/h), the ignition switch in the ON/RUN
position and the engine running, shift the
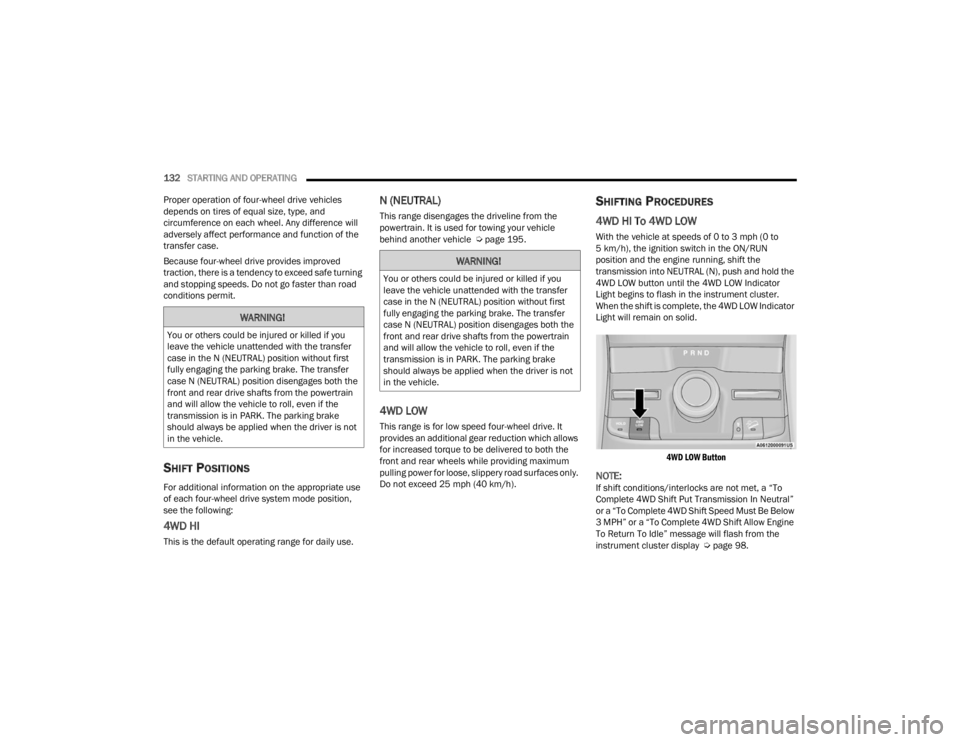
transmission into NEUTRAL (N), push and hold the
4WD LOW button until the 4WD LOW Indicator
Light begins to flash in the instrument cluster.
When the shift is complete, the 4WD LOW Indicator
Light will remain on solid.
4WD LOW Button
NOTE:If shift conditions/interlocks are not met, a “To
Complete 4WD Shift Put Transmission In Neutral”
or a “To Complete 4WD Shift Speed Must Be Below
3 MPH” or a “To Complete 4WD Shift Allow Engine
To Return To Idle” message will flash from the
instrument cluster display Ú page 98.
WARNING!
You or others could be injured or killed if you
leave the vehicle unattended with the transfer
case in the N (NEUTRAL) position without first
fully engaging the parking brake. The transfer
case N (NEUTRAL) position disengages both the
front and rear drive shafts from the powertrain
and will allow the vehicle to roll, even if the
transmission is in PARK. The parking brake
should always be applied when the driver is not
in the vehicle.
WARNING!
You or others could be injured or killed if you
leave the vehicle unattended with the transfer
case in the N (NEUTRAL) position without first
fully engaging the parking brake. The transfer
case N (NEUTRAL) position disengages both the
front and rear drive shafts from the powertrain
and will allow the vehicle to roll, even if the
transmission is in PARK. The parking brake
should always be applied when the driver is not
in the vehicle.
23_WL_OM_EN_USC_t.book Page 132