key battery JEEP PATRIOT 2007 1.G Owners Manual
[x] Cancel search | Manufacturer: JEEP, Model Year: 2007, Model line: PATRIOT, Model: JEEP PATRIOT 2007 1.GPages: 440, PDF Size: 7.26 MB
Page 11 of 440
NªChild-Protectionº Door Lock System (Rear Doors)
Ð If Equipped........................23
mRemote Keyless Entry Ð If Equipped.........24
NTo Unlock The Doors And Liftgate..........25
NTo Lock The Doors And Liftgate............26
NUsing The Panic Alarm:..................26
NTo Turn Off ªFlash Lights With Lockº........27
NProgramming Additional Transmitters........27
NGeneral Information....................29
NBattery Replacement....................29
mSecurity Alarm System Ð If Equipped.........30
NTo Set The Alarm......................31
NTo Disarm The System...................31NSecurity System Manual Override...........32
mLiftgate...............................32
mPower Windows........................34
NPower Window Switches.................34
NAuto Down..........................35
NWindow Lockout Switch.................36
mOccupant Restraints......................36
NLap/Shoulder Belts.....................37
NAdjustable Upper Shoulder Belt Anchorage....42
NSecond Row Center Lap/Shoulder Belt Operating
Instructions..........................43
NSeat Belt Pretensioners...................46
NEnhanced Driver Seat Belt Reminder System
(BeltAlert)...........................47
10 THINGS TO KNOW BEFORE STARTING YOUR VEHICLE
Page 31 of 440
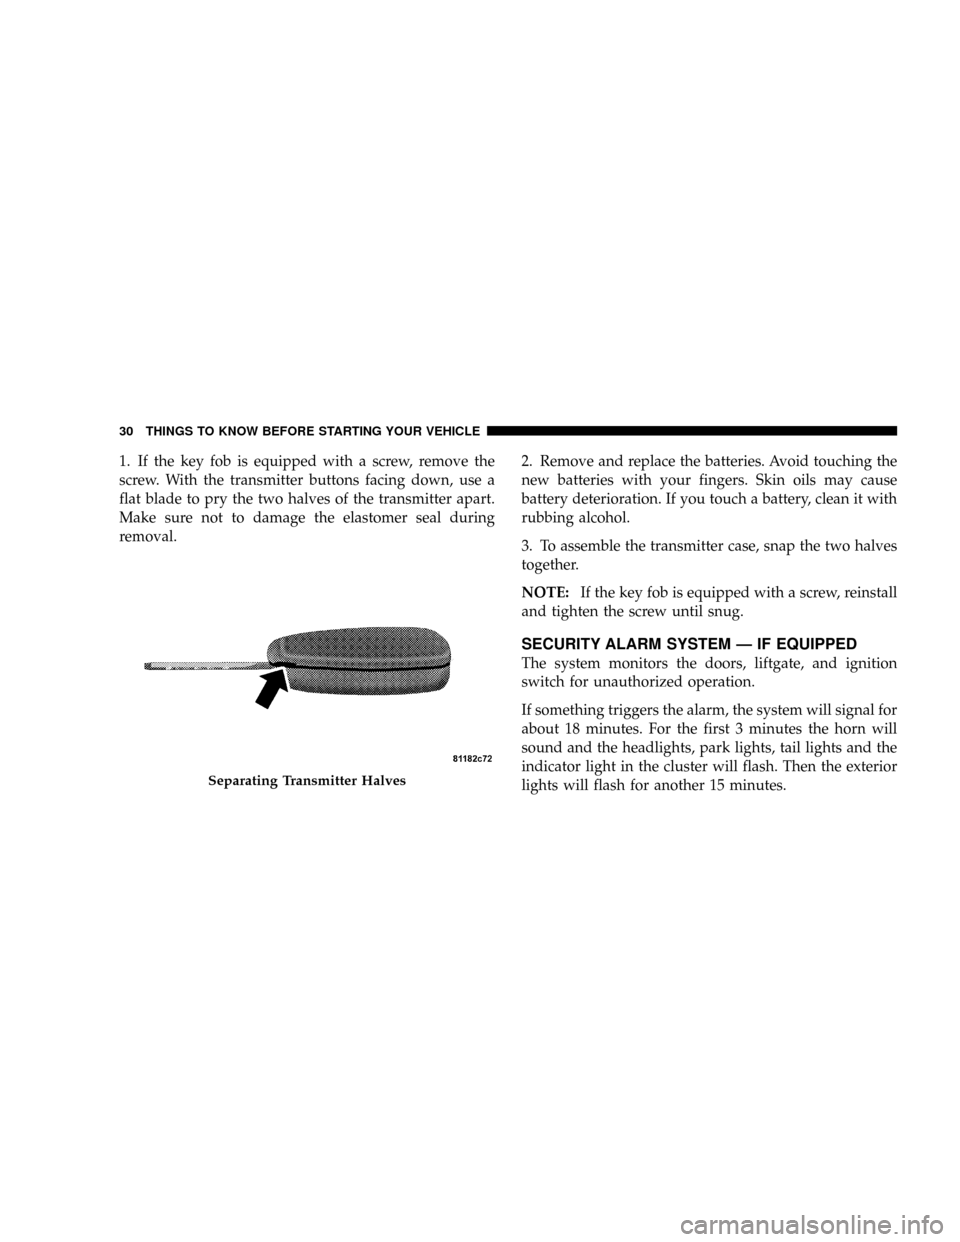
1. If the key fob is equipped with a screw, remove the
screw. With the transmitter buttons facing down, use a
flat blade to pry the two halves of the transmitter apart.
Make sure not to damage the elastomer seal during
removal.2. Remove and replace the batteries. Avoid touching the
new batteries with your fingers. Skin oils may cause
battery deterioration. If you touch a battery, clean it with
rubbing alcohol.
3. To assemble the transmitter case, snap the two halves
together.
NOTE:If the key fob is equipped with a screw, reinstall
and tighten the screw until snug.
SECURITY ALARM SYSTEM Ð IF EQUIPPED
The system monitors the doors, liftgate, and ignition
switch for unauthorized operation.
If something triggers the alarm, the system will signal for
about 18 minutes. For the first 3 minutes the horn will
sound and the headlights, park lights, tail lights and the
indicator light in the cluster will flash. Then the exterior
lights will flash for another 15 minutes.
Separating Transmitter Halves
30 THINGS TO KNOW BEFORE STARTING YOUR VEHICLE
Page 58 of 440
WARNING!
Deployed airbags can't protect you in another colli-
sion. Have the airbags replaced by an authorized
dealer as soon as possible.
Enhanced Accident Response System
In the event of an impact that causes airbag deployment,
with the vehicle stopped, and the vehicle communication
network intact, and the power intact, the Enhanced Acci-
dent Response System performs the following functions:
²Cuts off fuel to the engine.
²Flashes hazard lights.
²Turns on the interior lamps which remain on as long as
the battery has power or until the ignition key is
removed.
²Unlocks the doors automatically
Maintaining Your Airbag System
WARNING!
²Modifications to any part of the airbag system
could cause it to fail when you need it. You could
be injured because the airbags are not there to
protect you. Do not modify the components or
wiring, including adding any kind of badges or
stickers to the steering wheel hub trim cover or the
upper passenger side of the instrument panel. Do
not modify the front bumper, vehicle body struc-
ture, or frame.
²You need proper knee impact protection in a
collision. Do not mount or locate any aftermarket
equipment on or behind the knee impact bolster.
²It is dangerous to try to repair any part of the
airbag system yourself. Be sure to tell anyone who
works on your vehicle that it has airbags.
THINGS TO KNOW BEFORE STARTING YOUR VEHICLE 57
2
Page 94 of 440
hold may not become active automatically. This is cell
phone dependent. To bring the call back from hold, press
and hold the `Phone' button until you hear a single beep.
Redial
²
Press the 'Phone' button to begin.
²After the9Ready9prompt and the following beep, say
9Redial.9
²The UConnectŸ system will call the last number that
was dialed on your cellular phone. Note: this may not
be the last number dialed from the UConnectŸ sys-
tem.
Call Continuation
Call continuation is progression of a phone call on
UConnectŸ system after the vehicle ignition key has
been switched to off. Call continuation functionality
available on the vehicle can be any one of three types:
²After ignition key is switched off, a call can continue
on the UConnectŸ system either until the call ends or
until the vehicle battery condition dictates cessation of
the call on the UConnectŸ system and transfer of the
call to the mobile phone.
²After ignition key is switched to off, a call can continue
on the UConnectŸ system for certain duration, after
which the call is automatically transferred from the
UConnectŸ system to the mobile phone.
²An active call is automatically transferred to the
mobile phone after ignition key is switched to off.
UConnectŸ System Features
Language Selection
To change the language that the UConnectŸ system is
using,
²Press the 'Phone' button to begin.
UNDERSTANDING THE FEATURES OF YOUR VEHICLE 93
3
Page 97 of 440
When calling a number with your UConnectŸ system
that normally requires you to enter in a touch-tone
sequence on your cellular phone keypad, you can push
the 'Voice Recognition' button and say the sequence you
wish to enter followed by the word9Send.9For example,
if required to enter your pin number followed with a
pound3746#,youcanpressthe'Voice Recognition'
button and say93746#Send.9Saying a number, or
sequence of numbers, followed by9Send9is also to be
used to navigate through an automated customer service
center menu structure and to leave a number on a pager.
Barge In - Overriding Prompts
The 'Voice Recognition' button can be used when you
wish to skip part of a prompt and issue your voice
recognition command immediately. For example, if a
prompt is playing9Would you like to pair a phone, clear
a{,9you could press the 'Voice Recognition' button and
say9Pair a Phone9to select that option without having to
listen to the rest of the voice prompt.
Turning Confirmation Prompts On/Off
Turning confirmation prompts off will stop the system
from confirming your choices (e.g., the UConnectŸ
system will not repeat a phone number before you dial
it).
²Press the 'Phone' button to begin.
²After the9Ready9prompt and the following beep, say
9Setup Confirmations.9The UConnectŸ system will
play the current confirmation prompt status and you
will be given the choice to change it.
Phone and Network Status Indicators
If available on the radio and/or on a premium display
such as the instrument panel cluster, and supported by
your cell phone, the UConnectŸ system will provide
notification to inform you of your phone and network
status when you are attempting to make a phone call
using UConnectŸ. The status is given for roaming net-
work signal strength, phone battery strength, etc.
96 UNDERSTANDING THE FEATURES OF YOUR VEHICLE
Page 239 of 440
Manual Transaxle
Before starting the engine fully apply the parking brake,
press the clutch pedal to the floor and place the gear
selector in NEUTRAL.
NOTE:The engine will not start unless the clutch pedal
is pressed to the floor.
NOTE:If key won't turn and steering wheel is locked,
rotate the wheel in either direction to relieve pressure on
the locking mechanism and then turn the key.
Normal Starting
Normal Starting of either a cold or a warm engine does
not require pumping or depressing the accelerator pedal.
Simply turn the ignition switch to the ªSTART'º position
and release when the engine starts. If the engine fails to
start within 15 seconds, turn the ignition switch to the
ªOFFº position, wait 10 to 15 seconds, then repeat the
normal starting procedure.
WARNING!
Do not attempt to push or tow your vehicle to get it
started. Vehicles equipped with an automatic trans-
axle cannot be started this way. Unburned fuel could
enter the catalytic converter and once the engine has
started, ignite and damage the converter and vehicle.
If the vehicle has a discharged battery, booster cables
may be used to obtain a start from another vehicle.
This type of start can be dangerous if done improp-
erly, so follow the procedure carefully. See section 6
of this manual for jump starting instructions.
Extremely Cold Weather (below220ÉF or229ÉC)
To insure reliable starting at these temperatures, use of an
externally powered electric engine block heater (available
from your dealer) is recommended.
238 STARTING AND OPERATING
Page 242 of 440
WARNING!
It is dangerous to shift the selector lever out of ªPº or
ªNº if the engine speed is higher than idle speed. If
your foot is not firmly on the brake pedal, the vehicle
could accelerate quickly forward or in reverse. You
could lose control of the vehicle and hit someone or
something. Only shift into gear when the engine is
idling normally and when your right foot is firmly on
the brake pedal.
Brake/Transmission Interlock System
This system prevents you from moving the gear shift out
of Park and into any gear unless the brake pedal is
pressed. This system is active only while the ignition
switch is in the ON or ACC positions. Always depress the
brake pedal first,before moving the gear selector out of
PARK.NOTE:If a malfunction occurs, the transaxle will not
shift out of park. Battery power is required to release the
brake/transmission interlock system. There is a remov-
able plug in the right side of the shifter housing that
allows you to insert your finger to override the system.
The key must be in the ignition and in the on position to
use the override lever. If this occurs obtain service as
soon as possible.
Automatic Transaxle Ignition Interlock System
This system prevents the key from being removed unless
the shift lever is in PARK. It also prevents shifting out of
PARK unless the key is in the ACC or ON positions, and
the brake pedal is depressed.
NOTE:If a malfunction occurs, the system will trap the
key in the ignition cylinder to warn you that this safety
feature is inoperable. The engine can be started and
stopped but the key cannot be removed until you obtain
service.
STARTING AND OPERATING 241
5
Page 324 of 440
WHAT TO DO IN EMERGENCIES
CONTENTS
mHazard Warning Flasher..................324
mIf Your Engine Overheats.................324
mAutomatic Transaxle Overheating...........326
mJacking And Tire Changing................326
NJack Location........................327
NSpare Tire Stowage....................327
NPreparations For Jacking................327
NJacking Instructions....................328mJump-Starting Procedures Due To A Low
Battery..............................331
mDriving On Slippery Surfaces..............334
NAcceleration.........................334
NTraction............................334
mFreeing A Stuck Vehicle..................335
mTowing A Disabled Vehicle................336
NWith Ignition Key.....................336
NWithout The Ignition Key...............337
6
Page 325 of 440
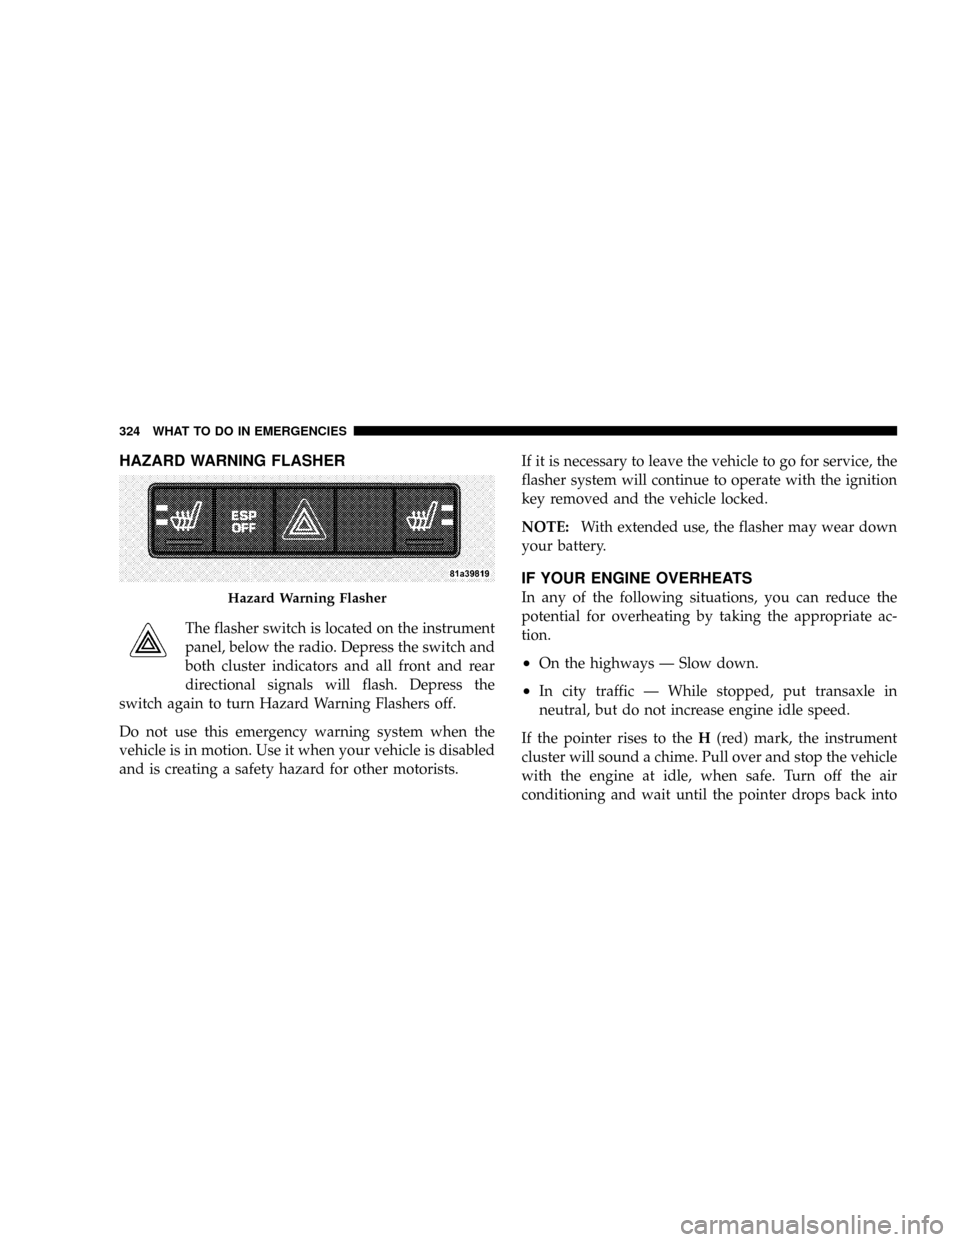
HAZARD WARNING FLASHER
The flasher switch is located on the instrument
panel, below the radio. Depress the switch and
both cluster indicators and all front and rear
directional signals will flash. Depress the
switch again to turn Hazard Warning Flashers off.
Do not use this emergency warning system when the
vehicle is in motion. Use it when your vehicle is disabled
and is creating a safety hazard for other motorists.If it is necessary to leave the vehicle to go for service, the
flasher system will continue to operate with the ignition
key removed and the vehicle locked.
NOTE:With extended use, the flasher may wear down
your battery.
IF YOUR ENGINE OVERHEATS
In any of the following situations, you can reduce the
potential for overheating by taking the appropriate ac-
tion.
²On the highways Ð Slow down.
²In city traffic Ð While stopped, put transaxle in
neutral, but do not increase engine idle speed.
If the pointer rises to theH(red) mark, the instrument
cluster will sound a chime. Pull over and stop the vehicle
with the engine at idle, when safe. Turn off the air
conditioning and wait until the pointer drops back into
Hazard Warning Flasher
324 WHAT TO DO IN EMERGENCIES
Page 334 of 440
5. Connect one end of a jumper cable to the positive
terminal of the booster battery. Connect the other end of
the jumper cable to the positive terminal of the dis-
charged battery.
WARNING!
Battery fluid is a corrosive acid solution; do not allow
battery fluid to contact eyes, skin or clothing. Don't
lean over battery when attaching clamps or allow the
clamps to touch each other. If acid splashes in eyes or
on skin, flush the contaminated area immediately
with large quantities of water.
A battery generates hydrogen gas which is flam-
mable and explosive. Keep flame or spark away from
the vent holes. Do not use a booster battery or any
other booster source with an output that exceeds 12
volts.6. Connect the other cable, first to the negative terminal
of the booster battery and then to the negative terminal of
the discharged battery. Make sure you have a good
contact.
7. If the vehicle is equipped with Sentry Key Immobi-
lizer, turn the ignition switch to the ON position for 3
seconds before moving the ignition switch to the START
position.
8. Start the engine in the vehicle that has the booster
battery, let the engine idle a few minutes, then start the
engine in the vehicle with the discharged battery.
9. When removing the jumper cables, reverse the se-
quence exactly. Be careful of the moving belts and fan.
WHAT TO DO IN EMERGENCIES 333
6