steering JEEP RENEGADE 2014 1.G Owners Manual
[x] Cancel search | Manufacturer: JEEP, Model Year: 2014, Model line: RENEGADE, Model: JEEP RENEGADE 2014 1.GPages: 212, PDF Size: 17.48 MB
Page 3 of 212
Dear Customer,
We would like to congratulate and thank you for choosing a Jeep.
We have written this handbook to help you get to know all the features of your vehicle and use it in the best possible way. This vehicle
is intended for daily use as well as for specific uses, so even routes and uses not suitable for traditional vehicles on the market can
be tackled. Ride and handling capabilities are different from most other vehicles, both on and off road; we thus recommend you to
spend all the time necessary to know the vehicle dynamics.
Here you will find information, advice and important warnings regarding use of your vehicle and how to achieve the best performance
from the technical features of your Jeep.
You are advised to read it right through before taking to the road for the first time, to become familiar with the controls and above all
with those concerning brakes, steering and gearbox; at the same time, you can understand the vehicle behaviour on different road
surfaces.
This document also provides a description of special features and tips, as well as essential information for the safe driving, care and
maintenance of your Jeep over time.
After reading it, you are advised to keep the handbook inside the vehicle, for an easy reference and for making sure it remains onboard
the vehicle should it be sold.
In the attached Warranty Booklet you will also find a description of the Services that Jeep offers to its customers, the Warranty
Certificate and the detail of the terms and conditions for maintaining its validity.
We are sure that these will help you to get in touch with and appreciate your new vehicle and the service provided by the people at
Jeep.
Enjoy reading. Happy motoring!
WARNING
This Owner Handbook describes all Jeep Renegade versions. Options, equipment dedicated to specific Markets or
versions are not explicitly indicated in the text: as a consequence, you should only consider the information which is
related to the trim level, engine and version that you have purchased. Any content introduced throughout the production
of the model, outside the specific request of options at the time of purchase, will be identified with the wording(where
provided).
All data contained in this publication are intended to help you use your vehicle in the best possible way. Chrysler Group
LLC effort aims at a constant improvement of the vehicles produced. For this reason it reserves the right to make
changes at the model described for technical and/or commercial reasons.
For further information, contact a Jeep Dealership.
Page 6 of 212
USE OF THE OWNER HANDBOOK
OPERATING INSTRUCTIONS
Each time direction instructions (left/right or forwards/backwards) about the vehicle are given, these must be intended as
regarding an occupant in the driver's seat. Special cases not complying with this rule will be properly specified in the text.
The figures in the Owner Handbook are provided by way of example only: this might imply that some details of the image do
not correspond to the actual arrangement of your vehicle. In addition, the Handbook has been conceived considering vehicles
with steering wheel on the left side; it is therefore possible that on vehicles with steering wheel on the right side, some controls
position or construction is not exactly mirror-like with respect to the figure.
To identify the chapter with the information needed you can consult the index at the end of this Owner Handbook.
Chapters can be rapidly identified with dedicated graphic tabs, at the side of each odd page. A few pages further there is a key
for getting to know the chapter order and the relevant symbols in the tabs. There is anyway a textual indication of the current
chapter at the side of each even page.
WARNINGS AND PRECAUTIONS
While reading this Owner Handbook you will find a series ofWARNINGSto prevent procedures that could damage your
vehicle.
There are alsoPRECAUTIONSthat must be carefully followed to prevent incorrect use of the components of the vehicle,
which could cause accidents or injuries.
Therefore allWARNINGSandPRECAUTIONSmust always be carefully followed.
WARNINGSandPRECAUTIONSare recalled in the text with the following symbols:
personal safety;
vehicle safety;
environmental protection.
NOTE These symbols, when necessary, are indicated besides the title or at the end of the line and are followed by a number.
That number recalls the corresponding warning at the end of the relevant section.
Page 8 of 212
GETTING TO KNOW YOUR CAR
In-depth knowledge of your new vehicle
starts here.
The booklet that you are reading simply
and directly explains how it is made
and how it works.
That’s why we advise you to read it
seated comfortably on board, so that
you can see immediately what is
described here for yourself.THE KEYS....................................... 7
IGNITION DEVICE ........................... 8
SENTRY KEY® ............................... 10
ALARM ........................................... 11
DOORS ........................................... 11
SEATS ............................................ 14
HEAD RESTRAINTS ........................ 16
STEERING WHEEL ......................... 17
REAR VIEW MIRRORS .................... 18
EXTERIOR LIGHTS ......................... 19
INTERIOR LIGHTS .......................... 21
WINDSCREEN/REAR WINDOW
WIPER ............................................ 22
CLIMATE CONTROL ...................... 24
ELECTRIC WINDOWS .................... 28
ELECTRIC SUN ROOF .................... 29
MYSKY SUN ROOF ........................ 31
BONNET ......................................... 33
LUGGAGE COMPARTMENT ........... 34
6
GETTING TO KNOW YOUR CAR
Page 10 of 212
WARNING
1)The electronic components inside the
key may be damaged if the key is
subjected to strong shocks. In order to
ensure complete efficiency of the
electronic devices inside the key, it should
never be exposed to direct sunlight.
WARNING
1)Remote control used batteries may be
harmful to the environment if not disposed
of correctly. They must be disposed of
as specified by law in the special
containers or taken to a Jeep Dealership,
which will take care of their disposal.
IGNITION DEVICE
2) 3) 6) 7)
VERSIONS WITH
MECHANICAL KEY
The key can be turned to three different
positions fig. 3:
❒STOP: engine off, key can be
removed, steering column locked (with
key removed). Some electrical devices
(e.g. central door locking system,
alarm, etc.) are still available;
❒MAR: driving position. All electrical
devices are available;
❒AVV: engine start-up.
NOTE On versions with automatic
transmission the ignition key can only
be removed when the gear lever is at P
(Park).
VERSIONS WITH
ELECTRONIC KEY
(Keyless Enter-N-Go system)
To activate the ignition device the
electronic key must be inside the
passenger compartment. The ignition
device fig. 4 activates also if the
electronic key is inside the luggage
compartment or on the parcel shelf.
The ignition device can enter the
following states:
❒STOP: engine off, steering column
locked. Some electrical devices (e.g.
central door locking system, alarm,
etc.) are still available;
❒MAR: driving position. All electrical
devices are available. This state can be
entered by pressing the ignition device
button once, without pressing the brake
pedal (versions with automatic
transmission) or the clutch pedal
(versions with manual gearbox);
3J0A0021C
4J0A0022C
8
GETTING TO KNOW YOUR CAR
❒AVV: engine start-up.
Page 11 of 212
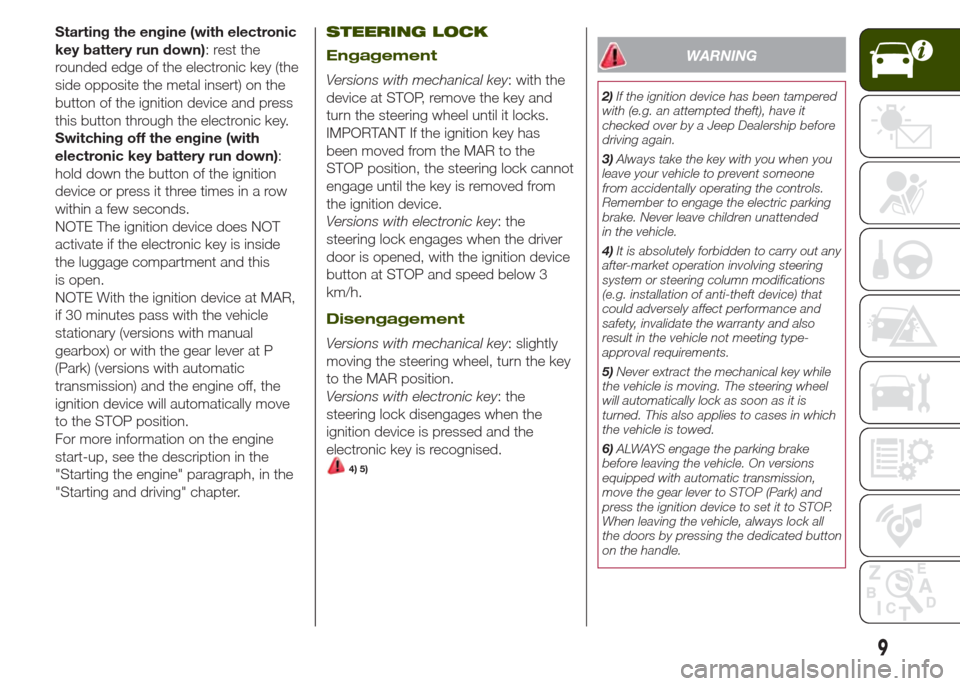
Starting the engine (with electronic
key battery run down): rest the
rounded edge of the electronic key (the
side opposite the metal insert) on the
button of the ignition device and press
this button through the electronic key.
Switching off the engine (with
electronic key battery run down):
hold down the button of the ignition
device or press it three times in a row
within a few seconds.
NOTE The ignition device does NOT
activate if the electronic key is inside
the luggage compartment and this
is open.
NOTE With the ignition device at MAR,
if 30 minutes pass with the vehicle
stationary (versions with manual
gearbox) or with the gear lever at P
(Park) (versions with automatic
transmission) and the engine off, the
ignition device will automatically move
to the STOP position.
For more information on the engine
start-up, see the description in the
"Starting the engine" paragraph, in the
"Starting and driving" chapter.STEERING LOCK
Engagement
Versions with mechanical key: with the
device at STOP, remove the key and
turn the steering wheel until it locks.
IMPORTANT If the ignition key has
been moved from the MAR to the
STOP position, the steering lock cannot
engage until the key is removed from
the ignition device.
Versions with electronic key: the
steering lock engages when the driver
door is opened, with the ignition device
button at STOP and speed below 3
km/h.
Disengagement
Versions with mechanical key: slightly
moving the steering wheel, turn the key
to the MAR position.
Versions with electronic key: the
steering lock disengages when the
ignition device is pressed and the
electronic key is recognised.
4) 5)
WARNING
2)If the ignition device has been tampered
with (e.g. an attempted theft), have it
checked over by a Jeep Dealership before
driving again.
3)Always take the key with you when you
leave your vehicle to prevent someone
from accidentally operating the controls.
Remember to engage the electric parking
brake. Never leave children unattended
in the vehicle.
4)It is absolutely forbidden to carry out any
after-market operation involving steering
system or steering column modifications
(e.g. installation of anti-theft device) that
could adversely affect performance and
safety, invalidate the warranty and also
result in the vehicle not meeting type-
approval requirements.
5)Never extract the mechanical key while
the vehicle is moving. The steering wheel
will automatically lock as soon as it is
turned. This also applies to cases in which
the vehicle is towed.
6)ALWAYS engage the parking brake
before leaving the vehicle. On versions
equipped with automatic transmission,
move the gear lever to STOP (Park) and
press the ignition device to set it to STOP.
When leaving the vehicle, always lock all
the doors by pressing the dedicated button
on the handle.
9
Page 19 of 212
REAR HEAD RESTRAINTS
(removal)
Proceed as follows to remove the head
restraints:
❒raise the head restraints to their
maximum height;
❒press buttons A and B fig. 19 at the
side of the two supports, then remove
the head restraints by pulling them
upwards.
WARNING
14)The head restraints must be adjusted
so that the head, rather than the neck,
rests on them. Only in this case can they
protect your head correctly.
STEERING WHEEL
15) 16)
ADJUSTMENTS
The steering wheel can be adjusted
both in height and in depth.
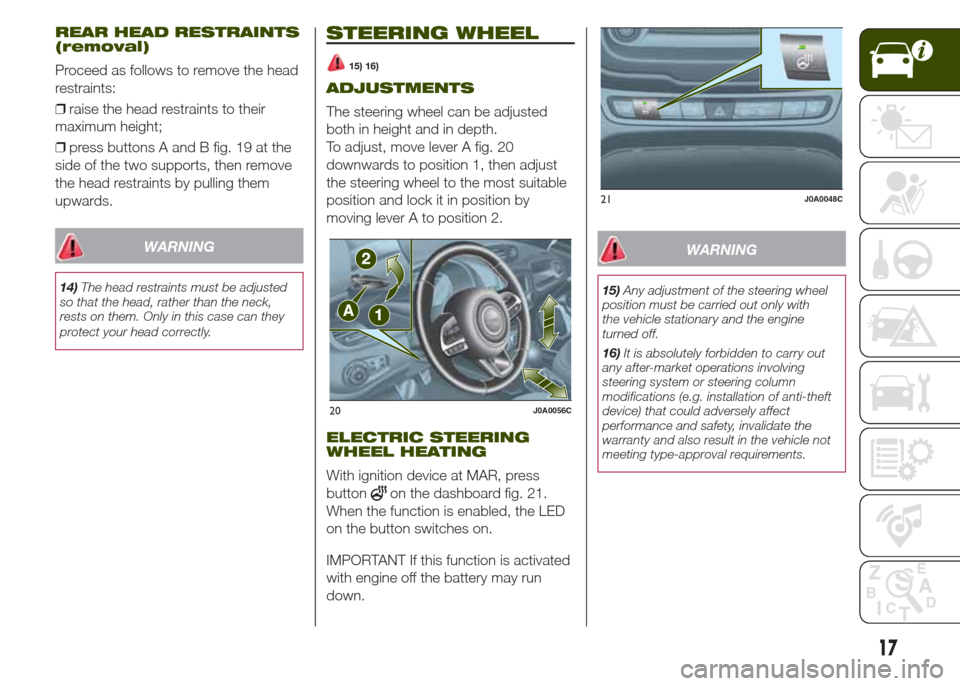
To adjust, move lever A fig. 20
downwards to position 1, then adjust
the steering wheel to the most suitable
position and lock it in position by
moving lever A to position 2.
ELECTRIC STEERING
WHEEL HEATING
With ignition device at MAR, press
button
on the dashboard fig. 21.
When the function is enabled, the LED
on the button switches on.
IMPORTANT If this function is activated
with engine off the battery may run
down.
WARNING
15)Any adjustment of the steering wheel
position must be carried out only with
the vehicle stationary and the engine
turned off.
16)It is absolutely forbidden to carry out
any after-market operations involving
steering system or steering column
modifications (e.g. installation of anti-theft
device) that could adversely affect
performance and safety, invalidate the
warranty and also result in the vehicle not
meeting type-approval requirements.
20J0A0056C
21J0A0048C
17
Page 24 of 212
WINDSCREEN/REAR
WINDOW WIPER
WINDSCREEN
WIPER/WASHER
20)7) 8)
This operates only with the ignition
device at MAR.
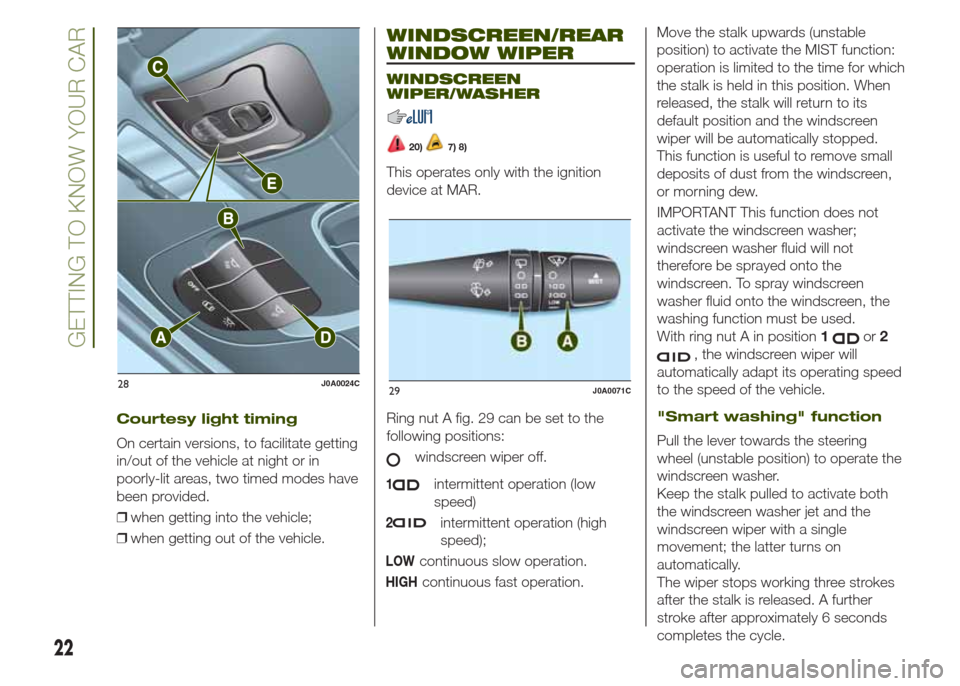
Ring nut A fig. 29 can be set to the
following positions:
windscreen wiper off.
1intermittent operation (low
speed)
2intermittent operation (high
speed);
LOWcontinuous slow operation.
HIGHcontinuous fast operation.Move the stalk upwards (unstable
position) to activate the MIST function:
operation is limited to the time for which
the stalk is held in this position. When
released, the stalk will return to its
default position and the windscreen
wiper will be automatically stopped.
This function is useful to remove small
deposits of dust from the windscreen,
or morning dew.
IMPORTANT This function does not
activate the windscreen washer;
windscreen washer fluid will not
therefore be sprayed onto the
windscreen. To spray windscreen
washer fluid onto the windscreen, the
washing function must be used.
With ring nut A in position1
or2
, the windscreen wiper will
automatically adapt its operating speed
to the speed of the vehicle.
"Smart washing" function
Pull the lever towards the steering
wheel (unstable position) to operate the
windscreen washer.
Keep the stalk pulled to activate both
the windscreen washer jet and the
windscreen wiper with a single
movement; the latter turns on
automatically.
The wiper stops working three strokes
after the stalk is released. A further
stroke after approximately 6 seconds
completes the cycle.
28J0A0024C29J0A0071C
22
GETTING TO KNOW YOUR CAR
Courtesy light timing
On certain versions, to facilitate getting
in/out of the vehicle at night or in
poorly-lit areas, two timed modes have
been provided.
❒when getting into the vehicle;
❒when getting out of the vehicle.
Page 43 of 212
CONTROL BUTTONS
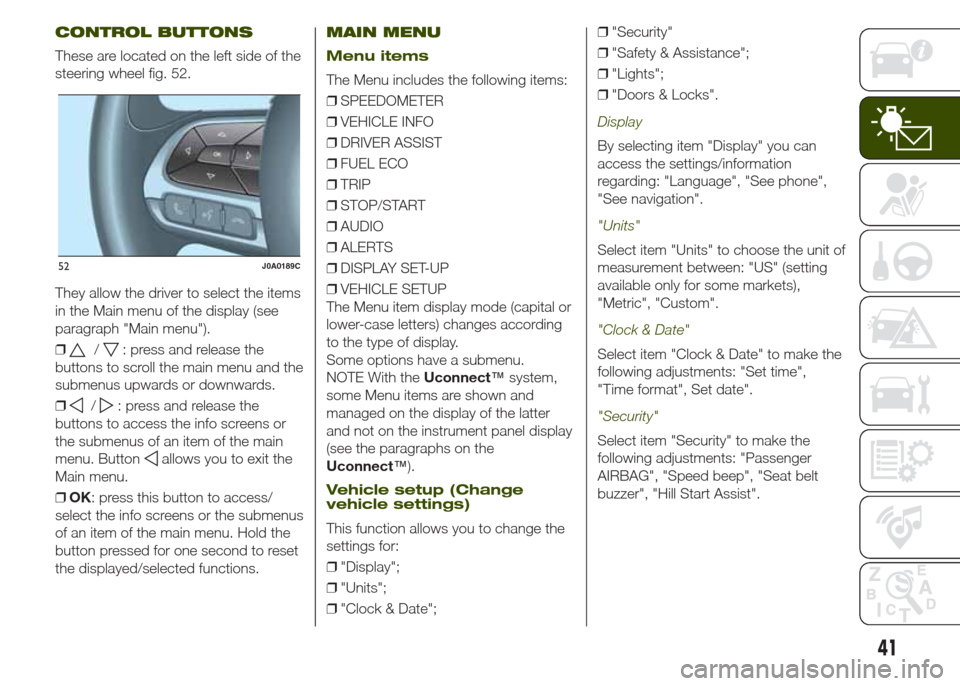
These are located on the left side of the
steering wheel fig. 52.
They allow the driver to select the items
in the Main menu of the display (see
paragraph "Main menu").
❒
/: press and release the
buttons to scroll the main menu and the
submenus upwards or downwards.
❒
/: press and release the
buttons to access the info screens or
the submenus of an item of the main
menu. Button
allows you to exit the
Main menu.
❒OK: press this button to access/
select the info screens or the submenus
of an item of the main menu. Hold the
button pressed for one second to reset
the displayed/selected functions.
MAIN MENU
Menu items
The Menu includes the following items:
❒SPEEDOMETER
❒VEHICLE INFO
❒DRIVER ASSIST
❒FUEL ECO
❒TRIP
❒STOP/START
❒AUDIO
❒ALERTS
❒DISPLAY SET-UP
❒VEHICLE SETUP
The Menu item display mode (capital or
lower-case letters) changes according
to the type of display.
Some options have a submenu.
NOTE With theUconnect™system,
some Menu items are shown and
managed on the display of the latter
and not on the instrument panel display
(see the paragraphs on the
Uconnect™).
Vehicle setup (Change
vehicle settings)
This function allows you to change the
settings for:
❒"Display";
❒"Units";
❒"Clock & Date";❒"Security"
❒"Safety & Assistance";
❒"Lights";
❒"Doors & Locks".
Display
By selecting item "Display" you can
access the settings/information
regarding: "Language", "See phone",
"See navigation".
"Units"
Select item "Units" to choose the unit of
measurement between: "US" (setting
available only for some markets),
"Metric", "Custom".
"Clock & Date"
Select item "Clock & Date" to make the
following adjustments: "Set time",
"Time format", Set date".
"Security"
Select item "Security" to make the
following adjustments: "Passenger
AIRBAG", "Speed beep", "Seat belt
buzzer", "Hill Start Assist".
52J0A0189C
41
Page 44 of 212
The "Passenger AIRBAG" function is
used to activate/deactivate the front
passenger side airbag.Passenger's
protection active: the LED
ON
comes on constantly on the dashboard
located in the instrument panel.
Passenger's protection not active:
the LED
OFFon the dashboard
comes on constantly in the control
panel.
"Safety & Assistance"
For possible adjustments see
paragraphUconnect™in chapter
"Multimedia".
"Lights"
Select item "Lights" to make the
following adjustments: "Ambient
lighting", "Follow me", "Headlights while
opening", "Headlight sensor", "High
Beams Auto Dim", "Daytime Lights",
"Cornering lights".
"Doors & Locks"
Select item "Doors & Locks" to make
the following adjustments: "Autoclose",
"Auto unlock on exit", "Flash Lights
w/Lock", "Horn with Lock", "Horn
w/Remote Start", "Remote Unlock"
(versions without Passive Entry), "Door
Unlock" (versions with Passive Entry),
"Passive Entry".
Versions with
reconfigurable multifunction
display
On versions equipped with
reconfigurable multifunction display only
the following items are available:
"Display" (only items "See phone" and
"See navigation" can be selected),
"Security" and "Safety & Assistance"
(only item "Buzzer volume" can be
selected). All other items will be shown
and managed on theUconnect™
system display.
TRIP COMPUTER
The “Trip computer” is used to display
information on vehicle operation when
the ignition device is at MAR.
This function is characterised by two
separate memories, called "Trip A" and
"Trip B", where the vehicle's "complete
missions" (journeys) are recorded in a
reciprocally independent manner.
“Trip A”allows the following values to
be displayed: "Distance travelled A",
"Average consumption A", "Journey
time (driving time) A".
“Trip B”allows the following values to
be displayed: "Distance travelled B",
"Average consumption B", "Journey
time (driving time) B". The “Trip B”
function may be excluded.
Both memories can be reset: (reset -
start of a new journey).
To reset the values of "Trip A" and "Trip
B" press and hold theOKbutton on
the steering wheel controls.
NOTE “Range” and “Instantaneous fuel
consumption" parameters cannot be
reset.
42
KNOWING THE INSTRUMENT PANEL
Page 46 of 212
Warning light What it means
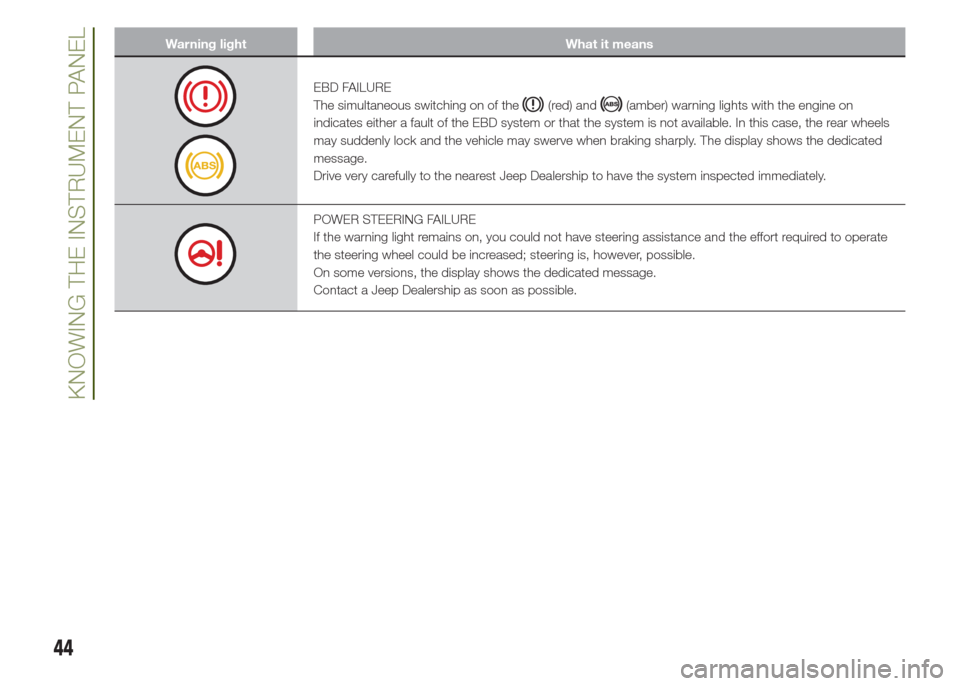
EBD FAILURE
The simultaneous switching on of the
(red) and(amber) warning lights with the engine on
indicates either a fault of the EBD system or that the system is not available. In this case, the rear wheels
may suddenly lock and the vehicle may swerve when braking sharply. The display shows the dedicated
message.
Drive very carefully to the nearest Jeep Dealership to have the system inspected immediately.
POWER STEERING FAILURE
If the warning light remains on, you could not have steering assistance and the effort required to operate
the steering wheel could be increased; steering is, however, possible.
On some versions, the display shows the dedicated message.
Contact a Jeep Dealership as soon as possible.
44
KNOWING THE INSTRUMENT PANEL