JEEP RENEGADE 2017 1.G Workshop Manual
Manufacturer: JEEP, Model Year: 2017, Model line: RENEGADE, Model: JEEP RENEGADE 2017 1.GPages: 516, PDF Size: 5.73 MB
Page 51 of 516
Auto Comfort Systems — If Equipped
In vehicles equipped with Auto On Comfort, when turning
on the vehicle the heated steering wheel will automatically
turn on when temperatures are below 40° F (4.4° C).
WARNING!
•Persons who are unable to feel pain to the skin
because of advanced age, chronic illness, diabetes,
spinal cord injury, medication, alcohol use, exhaus-
tion, or other physical conditions must exercise care
when using the steering wheel heater. It may cause
burns even at low temperatures, especially if used
for long periods.
• Do not place anything on the steering wheel that
insulates against heat, such as a blanket or steering
wheel covers of any type and material. This may
cause the steering wheel heater to overheat.
MIRRORS
Inside Day/Night Mirror
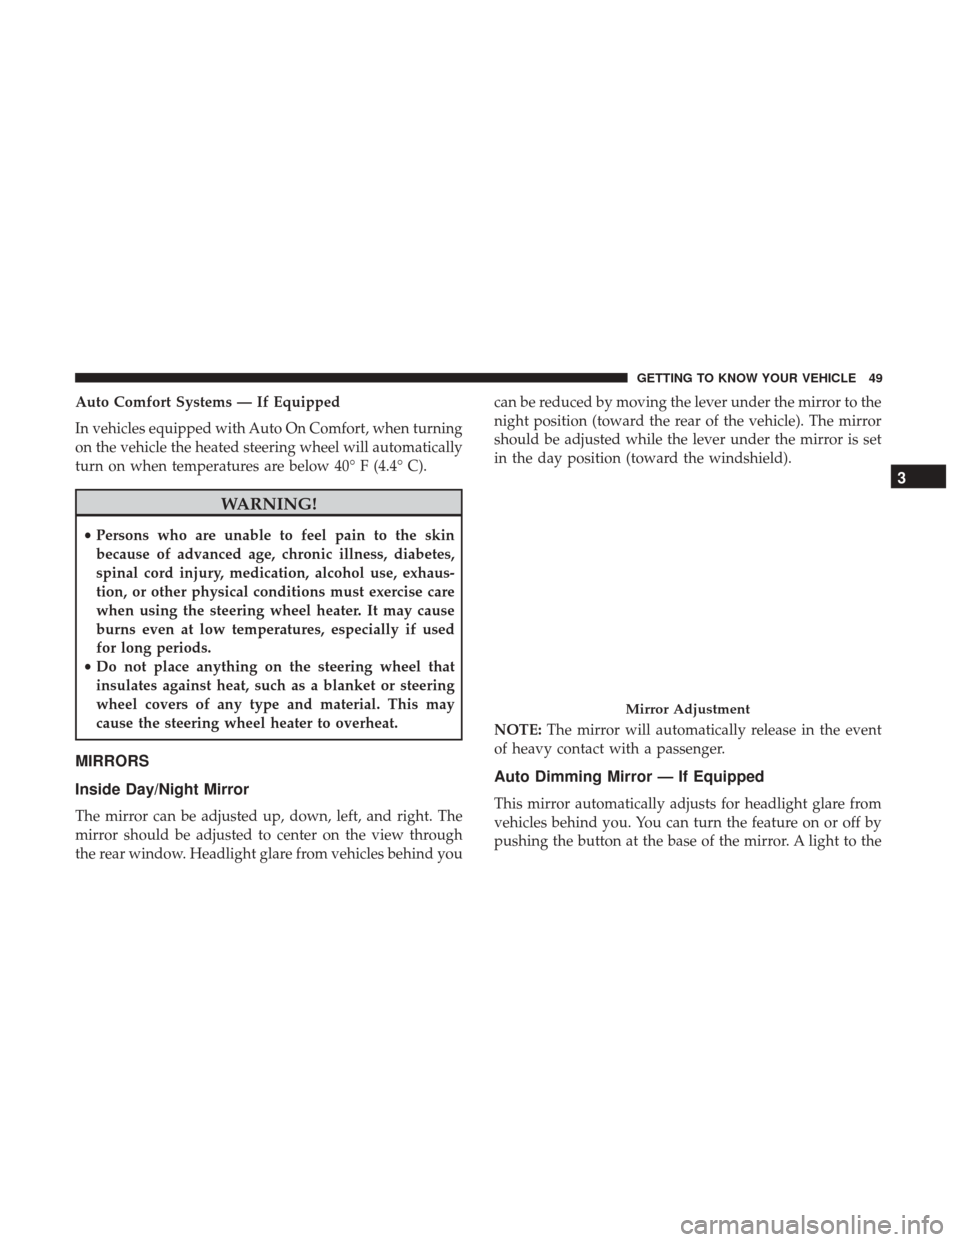
The mirror can be adjusted up, down, left, and right. The
mirror should be adjusted to center on the view through
the rear window. Headlight glare from vehicles behind you can be reduced by moving the lever under the mirror to the
night position (toward the rear of the vehicle). The mirror
should be adjusted while the lever under the mirror is set
in the day position (toward the windshield).
NOTE:
The mirror will automatically release in the event
of heavy contact with a passenger.
Auto Dimming Mirror — If Equipped
This mirror automatically adjusts for headlight glare from
vehicles behind you. You can turn the feature on or off by
pushing the button at the base of the mirror. A light to the
Mirror Adjustment
3
GETTING TO KNOW YOUR VEHICLE 49
Page 52 of 516
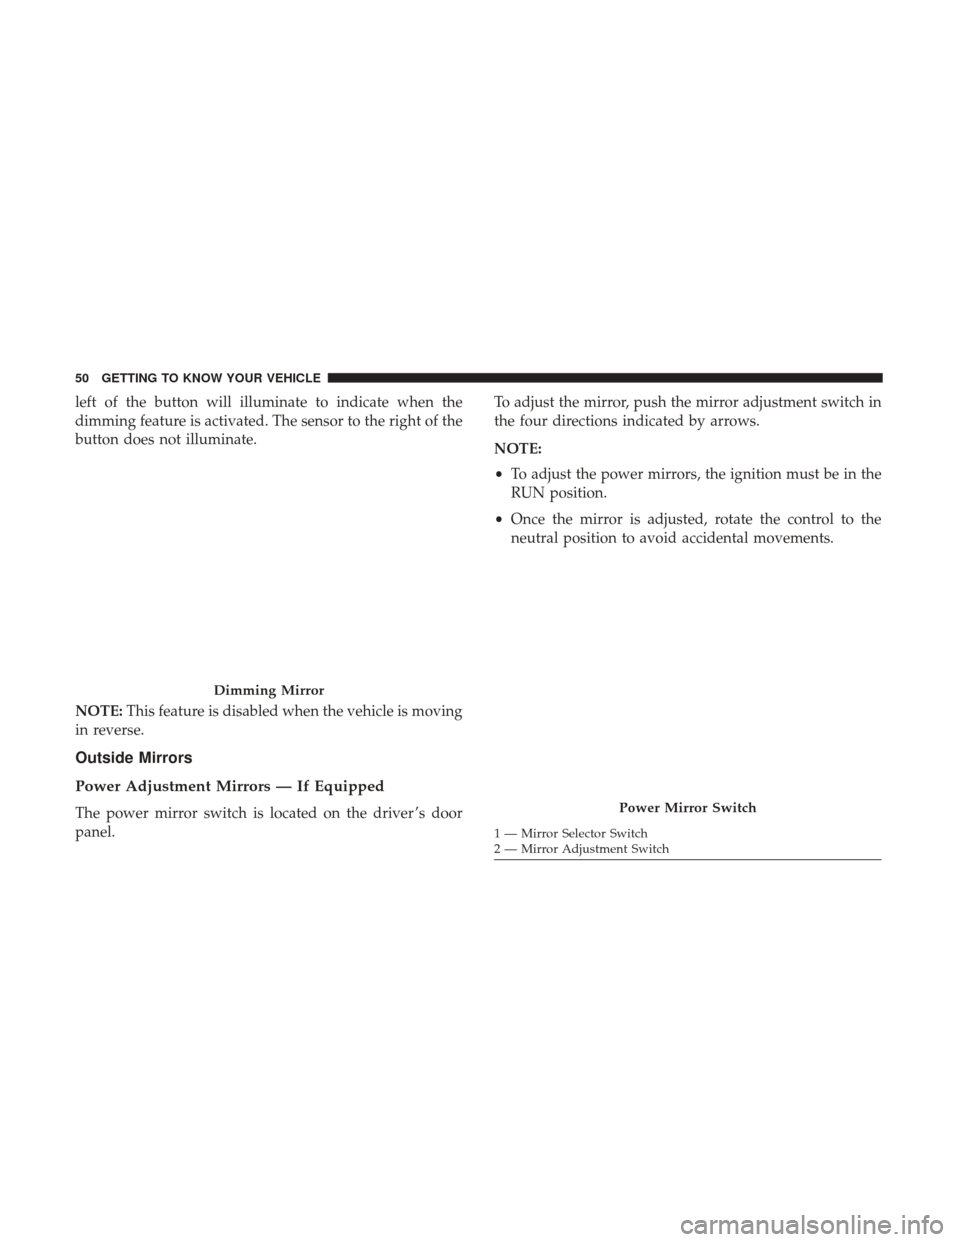
left of the button will illuminate to indicate when the
dimming feature is activated. The sensor to the right of the
button does not illuminate.
NOTE:This feature is disabled when the vehicle is moving
in reverse.
Outside Mirrors
Power Adjustment Mirrors — If Equipped
The power mirror switch is located on the driver ’s door
panel. To adjust the mirror, push the mirror adjustment switch in
the four directions indicated by arrows.
NOTE:
•
To adjust the power mirrors, the ignition must be in the
RUN position.
• Once the mirror is adjusted, rotate the control to the
neutral position to avoid accidental movements.
Dimming Mirror
Power Mirror Switch
1 — Mirror Selector Switch
2 — Mirror Adjustment Switch
50 GETTING TO KNOW YOUR VEHICLE
Page 53 of 516
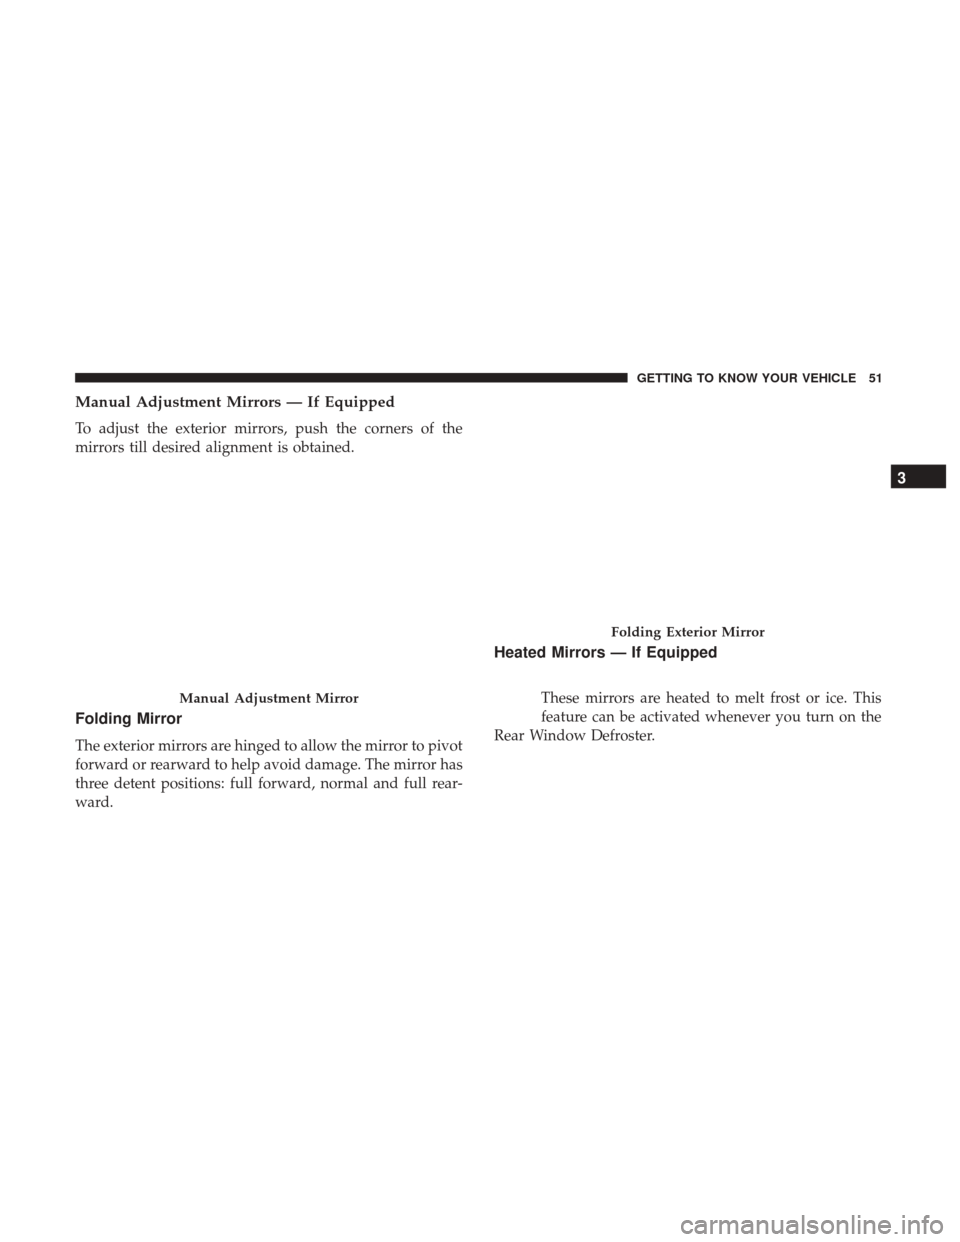
Manual Adjustment Mirrors — If Equipped
To adjust the exterior mirrors, push the corners of the
mirrors till desired alignment is obtained.
Folding Mirror
The exterior mirrors are hinged to allow the mirror to pivot
forward or rearward to help avoid damage. The mirror has
three detent positions: full forward, normal and full rear-
ward.
Heated Mirrors — If Equipped
These mirrors are heated to melt frost or ice. This
feature can be activated whenever you turn on the
Rear Window Defroster.Manual Adjustment Mirror
Folding Exterior Mirror
3
GETTING TO KNOW YOUR VEHICLE 51
Page 54 of 516
EXTERIOR LIGHTS
Headlights
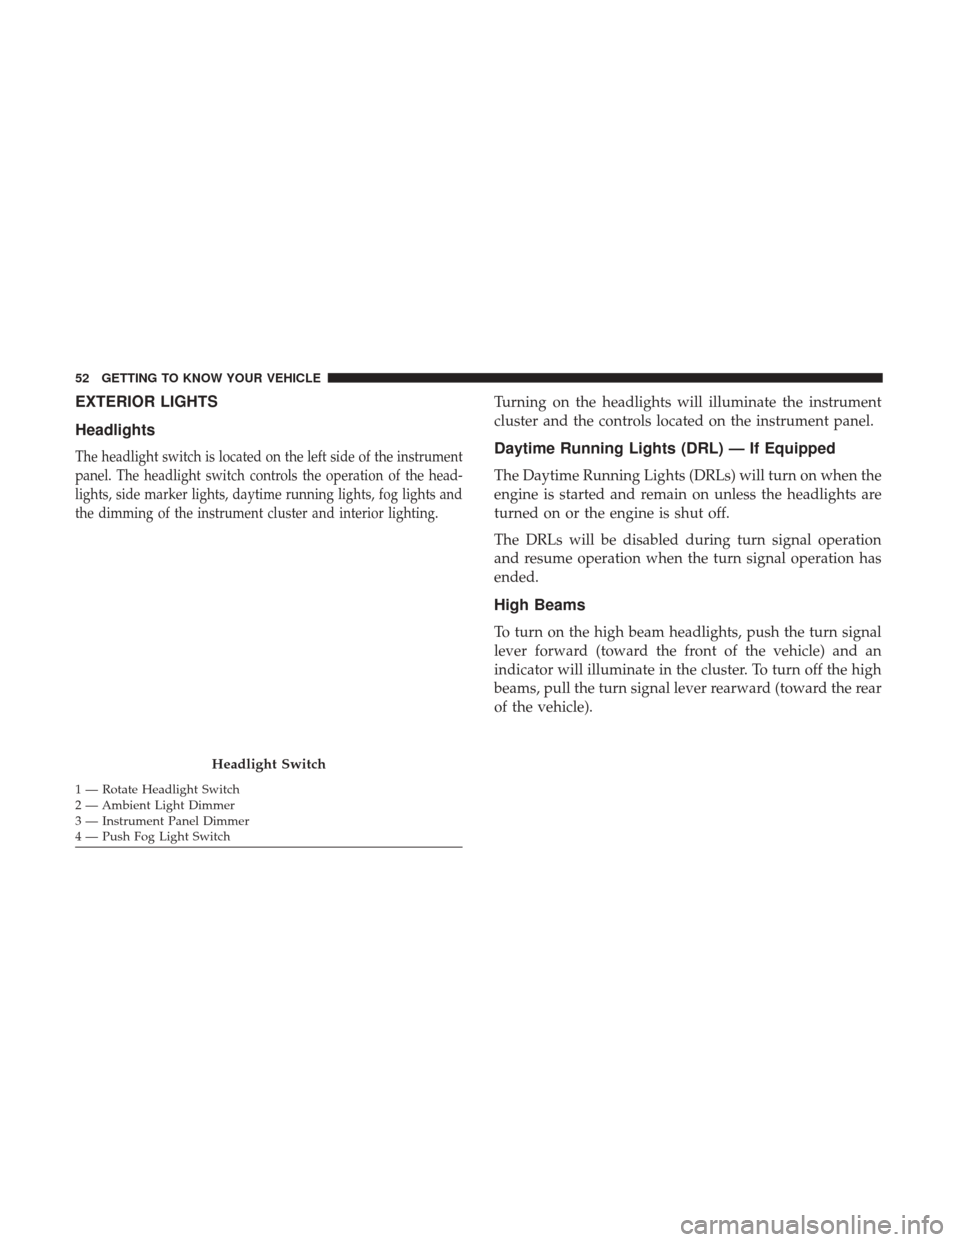
The headlight switch is located on the left side of the instrument
panel. The headlight switch controls the operation of the head-
lights, side marker lights, daytime running lights, fog lights and
the dimming of the instrument cluster and interior lighting.
Turning on the headlights will illuminate the instrument
cluster and the controls located on the instrument panel.
Daytime Running Lights (DRL) — If Equipped
The Daytime Running Lights (DRLs) will turn on when the
engine is started and remain on unless the headlights are
turned on or the engine is shut off.
The DRLs will be disabled during turn signal operation
and resume operation when the turn signal operation has
ended.
High Beams
To turn on the high beam headlights, push the turn signal
lever forward (toward the front of the vehicle) and an
indicator will illuminate in the cluster. To turn off the high
beams, pull the turn signal lever rearward (toward the rear
of the vehicle).
Headlight Switch
1 — Rotate Headlight Switch
2 — Ambient Light Dimmer
3 — Instrument Panel Dimmer
4 — Push Fog Light Switch 52 GETTING TO KNOW YOUR VEHICLE
Page 55 of 516
NOTE:The headlights must be on for the high beams to
activate.
Flash-To-Pass
You can signal another vehicle with your headlights by
lightly pulling the multifunction lever toward you. This
will cause the headlights to turn on at high beam and
remain on until the lever is released.
Automatic Lighting — If Equipped
Turn the headlight switch to the AUTO position.
When the automatic headlights are enabled, the headlight
time delay is active. After the ignition is placed in the OFF
position, the headlights will automatically turn off after the
time is set by Uconnect Settings.
Refer to “Headlight Delay” in this section for more infor-
mation.
NOTE: The engine must be running before the headlights
will come on in the automatic mode.
Light Sensor
The light sensor is equipped with an infrared LED, located
on the windshield. It detects changes in light intensity
outside the vehicle, based on the sensitivity of light set by
using the menu on the display or on the Uconnect system.
The higher the sensitivity, the lesser the amount of external
light required for controlling the lighting.
High Beam And Turn Signal Controls
3
GETTING TO KNOW YOUR VEHICLE 53
Page 56 of 516
Automatic High Beam Headlamp Control — If
Equipped
The Automatic High Beam Headlamp Control system
provides increased forward lighting at night by automat-
ing high beam control through the use of a digital camera
mounted on the inside rearview mirror. This camera de-
tects vehicle specific light and automatically switches from
high beams to low beams until the approaching vehicle is
out of view.
NOTE:
•The Automatic High Beam Headlamp Control can be
turned on or off using the Uconnect System. Refer to
“Uconnect Settings” in “Multimedia” for further infor-
mation.
• Broken, muddy, or obstructed headlights and taillights
of vehicles in the field of view will cause headlights to
remain on longer (closer to the vehicle). Also, dirt, film,
and other obstructions on the windshield or camera lens
will cause the system to function improperly.
Parking Lights
From the O (off) position, rotate the headlight switch to the
first detent (parking position) to turn on the parking lights.
The parking light indicator in the instrument cluster will
illuminate.
Headlight Delay
This feature provides the safety of headlight illumination
for up to 90 seconds when leaving your vehicle in an unlit
area.
The time delay of the headlights is programmable between
0, 30, 60 and 90 seconds. Refer to “Uconnect Settings” in
“Multimedia” for further information.
Headlight Delay Activation
To activate the delay feature, place the ignition in the OFF
position while the headlights are still on. Then, turn off the
headlights within two minutes. The delay interval begins
when the headlight switch is turned off from the “Low-
beam” position.
If the headlight switch is in AUTO position and headlights
were on before the ignition is OFF, the delay interval begins
automatically.
54 GETTING TO KNOW YOUR VEHICLE
Page 57 of 516
Headlight Delay Disable
The feature is disabled by turning on the headlights, the
parking lights or by placing the ignition in the RUN
position.
If you shut off the lights before the ignition is turned on,
they will turn off in the normal manner.
NOTE:The lights must be turned off within two minutes
of placing the ignition in the OFF position to activate this
feature.
Front Fog Lights — If Equipped
The front fog light switch is built into the headlight switch.
To activate the front fog lights, turn on the parking
lights or the low beam headlights and push the fog
light button on the headlight switch. To turn off the front
fog lights, push the fog light button on the headlight switch
a second time or turn off the headlight switch.
An indicator light in the instrument cluster illuminates
when the fog lights are turned on.
NOTE: The fog lights will operate with the low beam
headlights or parking lights on. Selecting the high beam
headlights will turn off the fog lights. Cornering Lights
The cornering lights are a feature to improve visibility at
night while turning the vehicle. When activated, a light
incorporated in the front fog light will illuminate on the
side of the vehicle the steering wheel is rotated or the turn
signal indicator is on. It can be activated through the
Uconnect System.
Refer to “Uconnect Settings” in “Multimedia” for further
information.
Turn Signals
Move the multifunction lever up or down and the arrows
on each side of the instrument cluster flash to show proper
operation of the front and rear turn signal lights.
NOTE:
When the Daytime Running Lights are on and a
turn signal is activated, the Daytime Running Lamp will
turn off on the side of the vehicle in which the turn signal
is flashing. The Daytime Running Lamp will turn back on
when the turn signal is turned off.
3
GETTING TO KNOW YOUR VEHICLE 55
Page 58 of 516
INTERIOR LIGHTS
Courtesy Lights
Interior Lights Dimmer Switch
Rotate the ambient dimmer control upward or downward
to increase or decrease the brightness of the ambient light
located in the overhead console, door handle lights, lower
instrument panel lights, door map pocket lights, and cubby
bin lights.
With the parking lights or headlights on, rotate the instru-
ment panel dimmer control upward or downward to
increase or decrease the brightness of the instrument panel.
At the top detent of the instrument panel dimmer, all the
interior lights will also illuminate. At the bottom detent
position of the thumb wheel will turn the internal back-
lights to their lowest dimmable setting.
Headlight Switch
1 — Ambient Light Control
2 — Instrument Panel Dimmer
56 GETTING TO KNOW YOUR VEHICLE
Page 59 of 516
Front Lights
The courtesy lights are mounted between the sun visors
above the rear view mirror. The light switches are used to
turn the lights on or off.
Courtesy Lights
1 — Driver ’s Courtesy Lights
Courtesy Light Switches
1— Left Switch
2— Right Switch
3
GETTING TO KNOW YOUR VEHICLE 57
Page 60 of 516
To operate the courtesy lights, push either the driver or
passenger light switch.
NOTE:
•Before exiting the vehicle, make sure that the interior
lights are turned off. This will prevent the battery from
discharging once the doors are closed.
• If a light is left on, it will automatically be turned off
after approximately 15 minutes after the ignition is in the
OFF position.
Rear Lights
Push the button on the rear dome light once to turn the
light on, the light will remain on at all times. Push the
button a second time to turn the light off, the lights will
remain off at all times.Rear Dome Light
58 GETTING TO KNOW YOUR VEHICLE