Windshield JEEP RENEGADE 2023 Owners Manual
[x] Cancel search | Manufacturer: JEEP, Model Year: 2023, Model line: RENEGADE, Model: JEEP RENEGADE 2023Pages: 364, PDF Size: 18.65 MB
Page 4 of 364
2
INTRODUCTION
SYMBOLS KEY ...........................................................9
ROLLOVER WARNING ...... ....................................... 9
VEHICLE MODIFICATIONS/ALTERATIONS ...... .... 10
SYMBOL GLOSSARY...... ........................................ 10
GETTING TO KNOW YOUR VEHICLE
KEYS ....................................................................... 14
Key Fob .............................................................14
SENTRY KEY ..... . ..................................................... 16
IGNITION SWITCH ...... ............................................ 17
Keyless Enter ‘n Go™ Ignition ...... ...................17
REMOTE START — IF EQUIPPED ..... . .................... 18
How To Use Remote Start ...... ..........................18
To Exit Remote Start Mode ..... . ........................19
Remote Start Front Defrost Activation —
If Equipped. .....
..................................................19
Remote Start Comfort Systems —
If Equipped . .....
.................................................19
Remote Start Windshield Wiper
De–Icer Activation — If Equipped . .....
..............20
Remote Start Cancel Message —
If Equipped. .....
..................................................20
VEHICLE SECURITY SYSTEM — IF EQUIPPED ..... 2 0
To Arm The System ...... ...................................20
To Disarm The System . ..
..
. ..............................21DOORS .....................................................................21
Manu a
l Door Locks ...... ....................................21
Power Door Locks ..... . .....................................22
Keyless Enter ‘n Go™ — Passive Entry
(If Equipped) . .....
...............................................22
Automatic Unlock On Exit Feature —
If Equipped. .....
..................................................24
Dead Lock Device — If Equipped. ..
..
. ...............25
Child Locks ..... . ................................................25
STEERING WHEEL ..... . ............................................26
Tilt/Telescoping Steering Column ...... .............26
Heated Steering Wheel — If Equipped ..... . .....26
SEATS . ....................................................................26
M a
n u
a
l Front Seats...... ....................................27
Manual Rear Seat Adjustment ..... . ..................27
Power Adjustment (Front) — If Equipped . ..
..
. ..29
Heated Seats — If Equipped . ..
..
. .....................30
Unfolding The Rear Armrest
40/20/40 . ........................................................31
Head R
estraints . ..
..
. .........................................31
UCONNECT VOICE RECOGNITION ..... . ..................33
Introducing Voice Recognition...... ...................33
Basic Voice Commands . ..
..
. .............................33
Get Started ..... . .................................................33
Additional Information . ..
..
. ...............................33MIRRORS ................................................................ 34
Insi d
e Rearview Mirror...... ............................... 34
Illuminated Vanity Mirrors — If Equipped ..... . 34
Outside Mirrors . ..
..
. .......................................... 35
Heated Mirrors — If Equipped ..... . ................... 36
EXTERIOR LIGHTS. ..
..
. ............................................ 36
Headlight Switch ...... ....................................... 36
Daytime Running Lights (DRLs) —
If Equipped . .....
................................................ 37
High Beams ..... . ............................................... 37
Automatic High Beam Headlamp Control —
If Equipped . .....
................................................ 37
Flash-To-Pass . ..
..
. ............................................. 37
Automatic Headlights — If Equipped ..... . ........ 38
Parking Lights ..... . ............................................. 38
Headlight Time Delay . ..
..
. ................................ 38
Front Fog Lights — If Equipped ..... . .................38
Turn Signals. ..
..
. ................................................ 39
Lane Change Assist..... . ....................................39
Courtesy Lights. ..
..
. ...........................................39
INTERIOR LIGHTS ..... . ........................................... 39
Front Map/Reading Lights ...... ........................ 39
Dimmer Controls ..... . ....................................... 40
Rear Lights . ..
..
. .................................................40
Dome Light Timing ..... . ..................................... 41
Page 5 of 364
3
WINDSHIELD WIPERS AND WASHERS ............. 41
Windshield Wiper Operation ...... ......................42
Rain Sensing Wipers — If Equipped ..... . .........42
Rear Window Wiper/Washer . ..
..
. .....................43
Windshield Wiper De-Icer — If Equipped ..... . ...43
CLIMATE CONTROLS . ..
. .
. ...................................... 44
Automatic Climate Control Descriptions And
Functions ..........................................................44
Autom a
tic Temperature Control (ATC) ..... . .....47
Climate Voice Commands..... . ..........................47
Operating Tips . ..
..
. ...........................................47
INTERIOR STORAGE AND EQUIPMENT ..... . ......... 48
Storage..............................................................48
USB/A UX Control ..... . ........................................50
Power Outlets ..... . .............................................50
Power Inverter — If Equipped. ..
..
. .....................51
Cigar Lighter — If Equipped. ..
..
. ........................52
Ashtray — If Equipped ..... . ................................52
WINDOWS............................................................... 52
Power
Window Controls ...... .............................52
Automatic Window Features ..... . .....................53
Reset Auto-Up ..... . .............................................53
Window Lockout Switch . ..
..
. .............................54
Wind Buffeting ..... . ...........................................54
DUAL PANE PANORAMIC POWER SUNROOF
WITH POWER SHADE — IF EQUIPPED ..... .
.......... 54
Opening And Closing The Sunroof...... .............55
Venting Sunroof . ..
..
. ..........................................55
Opening And Closing The Power Sunshade....5 5
P inch Protect Feature . ..
. .
. ................................55
Sunroof Maintenance ..... . ................................56 HOOD ......................................................................56
To Op e
n The Hood...... ......................................56
To Close The Hood ..... . .....................................57
LIFTGATE . ................................................................ 57
U n
loc
k
/Open The Liftgate...... ..........................57
Lock/Close The Liftgate . ..
..
. .............................58
Cargo Area Features ..... . ..................................58
ROOF LUGGAGE RACK — IF EQUIPPED . ..
..
. ........61
GETTING TO KNOW YOUR
INSTRUMENT PANEL
INSTRUMENT CLUSTER .........................................62
Instrument Cluster Descriptions ...... ...............64
INSTRUMENT CLUSTER DISPLAY ..... . .................64
Instrument Cluster Display Location And
Controls.............................................................64
Oil C
hange Reset..... . ........................................65
Instrument Cluster Display Menu Items . ..
..
. ..66
TRIP COMPUTER ..... . ..............................................69
WARNING/INDICATOR LIGHTS AND
MESSAGES ......
........................................................69
Red Warning Lights ...... ....................................70
Yellow Warning Lights ..... . ................................72
Yellow Indicator Lights . ..
..
. ...............................75
Green Indicator Lights . ..
..
. ...............................76
White Indicator Lights ..... . ................................77
Blue Indicator Lights ..... . ..................................77
Gray Indicator Lights . ..
..
. ..................................77 ONBOARD DIAGNOSTIC SYSTEM (OBD II) .....
.
... 77
Onboard Diagnostic System
(OBD II) Cybersecurity ..... .
................................ 78
EMISSIONS INSPECTION AND MAINTENANCE
PROGRAMS ..... .
...................................................... 78
STARTING AND OPERATING
STARTING THE ENGINE ......................................... 80
Tip Start Feature ...... ....................................... 80
If Engine Fails To Start ..... . ..............................80
Cold Weather Operation ..... . ............................ 81
Extended Park Starting . ..
..
. ..............................81
After Starting — Warming Up The Engine ..... . . 81
Stopping The Engine . ..
..
. .................................. 81
Turbocharger “Cool Down” — If Equipped ..... . 82
ENGINE BREAK-IN RECOMMENDATIONS . ..
..
. .... 82
ELECTRIC PARK BRAKE (EPB) ...... ....................... 82
Auto Park Brake ...... ......................................... 84
SafeHold . .......................................................... 84
B r
a k
e
Service Mode..... . ................................... 84
9-SPEED AUTOMATIC TRANSMISSION . ..
..
. ........ 85
Gear Selector...... .............................................. 86
Gear Ranges ..... . ............................................... 87
Transmission Limp Home Mode . ..
..
. ............... 90
Ignition Park Interlock
(Keyless Vehicle) . .....
........................................ 90
Brake Transmission Shift Interlock (BTSI)
System . .............................................................90
Page 8 of 364
6
REFUELING IN EMERGENCY – IF EQUIPPED .. 280
IF YOUR ENGINE OVERHEATS ...... ...................... 281
GEAR SELECTOR OVERRIDE ...... ....................... 281
FREEING A STUCK VEHICLE ...... ........................ 282
TOWING A DISABLED VEHICLE ...... ...................283
Front–Wheel Drive (FWD) ...... ....................... 284
Four–Wheel Drive (4WD) ..... . ........................ 284
Emergency Tow Hooks — If Equipped . ..
..
. .... 284
ENHANCED ACCIDENT RESPONSE SYSTEM
(EARS) .................................................................. 285
EVEN T
DATA RECORDER (EDR) ...... ...................285
SERVICING AND MAINTENANCE
SCHEDULED SERVICING .................................... 286
Maintenance Plan ...... ................................... 287
ENGINE COMPARTMENT ..... . .............................. 293
1.3L Turbo Engine ...... ................................... 293
Checking Oil Level ..... . ................................... 294
Adding Washer Fluid . ..
..
. ............................... 294
Maintenance-Free Battery ..... . ..................... 294
Pressure Washing . ..
..
. ................................... 295
VEHICLE MAINTENANCE ..... . .............................. 295
Engine Oil ...................................................... 295
Engin e Oil Filter . ..
..
. ....................................... 296
Engine Air Cleaner Filter ..... . ........................ 296
Air Conditioner Maintenance . ..
..
. .................. 296Body Lubrication .....
.
..................................... 297
Windshield Wiper Blades ..... . ....................... 297
Exhaust System ..... . ...................................... 298
Cooling System . ..
..
. ........................................ 299
Brake System ..... . .......................................... 302
Automatic Transmission . ..
..
. ........................ 303
Fuses.............................................................. 303
Bulb
Replacement. ..
..
. ................................... 311
TIRES..................................................................... 322
Tire
Safety Information ...... ........................... 322
Tires — General Information . ..
..
. .................. 329
Tire Types....................................................... 332
Spar e
Tires — If Equipped . ..
. .
. ....................... 333
Wheel And Wheel Trim Care ..... . ................... 334
Snow Traction Devices . ..
..
. ........................... 335
Tire Rotation Recommendations ..... . .......... 336
DEPARTMENT OF TRANSPORTATION
UNIFORM TIRE QUALITY GRADES ..... .
............. 337
Treadwear ...................................................... 337
Tract ion Grades . ..
..
. ....................................... 337
Temperature Grades ..... . ............................... 337
STORING THE VEHICLE . ..
..
. ................................. 338
BODYWORK ...... ................................................... 338
Protection From Atmospheric Agents ...... .... 338
Body And Underbody Maintenance. ..
..
. ........ 338
Preserving The Bodywork ..... . ....................... 338INTERIORS .....
.
..................................................... 339
Seats And Fabric Parts ...... ........................... 339
Plastic And Coated Parts ..... . ........................ 339
Leather Surfaces. ..
..
. ..................................... 340
Glass Surfaces ..... . ....................................... 340
TECHNICAL SPECIFICATIONS
VEHICLE IDENTIFICATION NUMBER (VIN) ........ 341
BRAKE SYSTEM ...... ............................................. 341
WHEEL AND TIRE TORQUE SPECIFICATIONS .. 341 Tor que Specifications ...... ............................. 341
FUEL REQUIREMENTS . ..
..
. ................................... 342
1.3L Turbo Engine ...... ................................... 342
Reformulated Gasoline..... . ........................... 342
Gasoline/Oxygenate Blends . ..
..
. .................. 342
E-85 Usage In Non-Flex Fuel Vehicles ..... . ... 343
CNG And LP Fuel System Modifications . ..
..
. 343
Methylcyclopentadienyl Manganese
Tricarbonyl (MMT) In Gasoline . .....
............... 343
Materials Added To Fuel ..... . ......................... 343
Fuel System Cautions ..... . ............................. 344
FLUID CAPACITIES . ..
..
. ......................................... 344
ENGINE FLUIDS AND LUBRICANTS ...... ............ 345
CHASSIS FLUIDS AND LUBRICANTS ...... .......... 345
Page 22 of 364

20 GETTING TO KNOW YOUR VEHICLE
Manual Temperature Control (MTC) — If Equipped
In ambient temperatures at 40°F (4.4°C) or
below, the climate settings will default to
maximum heat, with fresh air entering the
cabin. If the front defrost timer expires, the
vehicle will enter Mix Mode.
In ambient temperatures from 40°F (4.4°C) to
78°F (26°C), the climate settings will be based
on the last settings selected by the driver.
In ambient temperatures at 78°F (26°C) or
above, the climate settings will default to MAX
A/C, Bi-Level Mode, with Recirculation on.
For more information on ATC, MTC, and climate
control
settings, see Ú page 44.
NOTE:
These features will stay on through the duration of
Remote
Start until the ignition is placed in the ON/
RUN position. The climate control settings will
change if manually adjusted by the driver while the
vehicle is in Remote Start mode, and exit auto -
matic override. This includes the OFF button on the
clima t
e controls, which will turn the system off.
REMOTE START WINDSHIELD WIPER
D
E–ICER ACTIVATION — IF EQUIPPED
When Remote Start Is active and the outside
ambient temperature is less than 40°F (4.4°C),
the Windshield Wiper De-Icer will activate. Exiting
Remote Start will resume its previous operation. If the Windshield Wiper De-Icer was active, the timer
and operation will continue
Ú page 349.
REMOTE START CANCEL MESSAGE —
I
F EQUIPPED
The following messages will display in the
instrument cluster display if the vehicle fails to
remote start or exits Remote Start prematurely:
Remote Start Cancelled — Door Open
Remote Start Cancelled — Hood Open
Remote Start Cancelled — Fuel Low
Remote Start Cancelled — Liftgate Open
Remote Start Cancelled — Too Cold
Remote Start Cancelled — Time Expired
Remote Start Disabled — Start Vehicle To Reset
The message will stay active until the ignition is
p la
ce
d
in the ON/RUN position.
VEHICLE SECURITY SYSTEM — IF EQUIPPED
The Vehicle Security system monitors the vehicle
doors, hood, liftgate, and the Keyless Enter ‘n Go™
Ignition for unauthorized operation. While the
Vehicle Security system is armed, interior switches
for door locks and liftgate release are disabled. If
something triggers the system, the Vehicle Security
system will provide the following audible and
visible signals:
The horn will pulse
The turn signals will flash
The Vehicle Security Light in the instrument
cluster will flash
NOTE:
The Vehicle Security system is factory adjusted
to standards from different countries.
The Vehicle Security system is a complementary
security system developed to hinder the occur -
rence of vehicle theft and prevent vandalism. It
does not
prevent the theft of your vehicle; the
system is a deterrent.
The Vehicle Security system does not monitor
glass breakage or the movement of objects or
people inside the vehicle. The alarm does not
intervene in the case of vehicle tilt variations
when it is parked.
TO ARM THE SYSTEM
Follow these steps to arm the Vehicle Security
system:
1. Make sure the vehicle’s ignition is placed in the OF
F position.
2. Perform one of the following methods to lock the v
ehicle:
Push the lock button on the interior power
door lock switch with the driver and/or
passenger door open.
Page 36 of 364
34 GETTING TO KNOW YOUR VEHICLE
MIRRORS
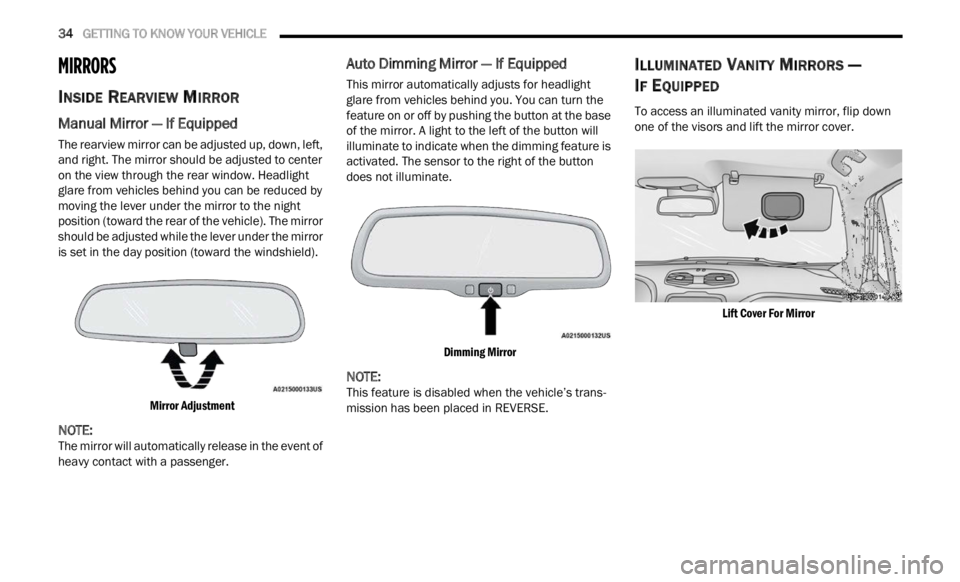
INSIDE REARVIEW MIRROR
Manual Mirror — If Equipped
The rearview mirror can be adjusted up, down, left,
and right. The mirror should be adjusted to center
on the view through the rear window. Headlight
glare from vehicles behind you can be reduced by
moving the lever under the mirror to the night
position (toward the rear of the vehicle). The mirror
should be adjusted while the lever under the mirror
is set in the day position (toward the windshield).
Mirror Adjustment
NOTE:
The mirror will automatically release in the event of
heavy
contact with a passenger.
Auto Dimming Mirror — If Equipped
This mirror automatically adjusts for headlight
glare from vehicles behind you. You can turn the
feature on or off by pushing the button at the base
of the mirror. A light to the left of the button will
illuminate to indicate when the dimming feature is
activated. The sensor to the right of the button
does not illuminate.
Dimming Mirror
NOTE:
This feature is disabled when the vehicle’s trans -
mission has been placed in REVERSE.
ILLUMINATED VANITY MIRRORS —
I
F EQUIPPED
To access an illuminated vanity mirror, flip down
one of the visors and lift the mirror cover.
Lift Cover For Mirror
Page 39 of 364
GETTING TO KNOW YOUR VEHICLE 37
Turning on the headlights will illuminate the
instrument cluster and the controls located on the
instrument panel.
NOTE:
On vehicles sold in Canada, both the rear position
light s
and Daytime Running Lights (DRLs) will turn
on when the headlight switch is rotated to the O
(off) position.
DAYTIME RUNNING LIGHTS (DRLS) —
I
F EQUIPPED
The Daytime Running Lights (DRLs), if enabled
through Uconnect Settings, will turn on when the
instrument cluster is on and remain on unless the
headlights are turned on or the instrument cluster
is switched off.
NOTE:
For vehicles sold in Canada, the Daytime
Running Lights will automatically deactivate
when the front fog lights are turned on.
On some vehicles, the Daytime Running Lights
may deactivate, or reduce intensity, on one side
of the vehicle (when a turn signal is activated on
that side), or on both sides of the vehicle (when
the hazard warning lights are activated).
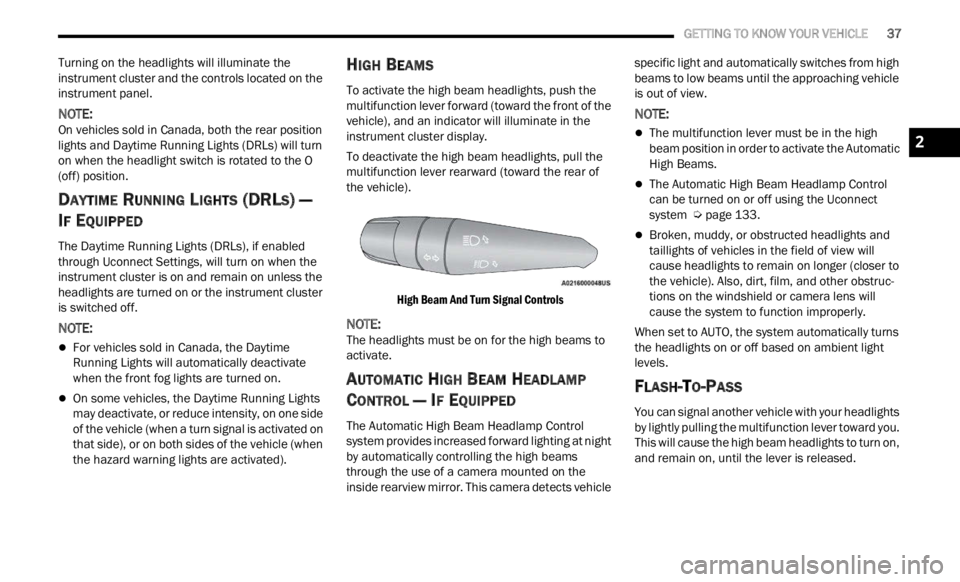
HIGH BEAMS
To activate the high beam headlights, push the
multifunction lever forward (toward the front of the
vehicle), and an indicator will illuminate in the
instrument cluster display.
To deactivate the high beam headlights, pull the
multif
unction lever rearward (toward the rear of
the vehicle).
High Beam And Turn Signal Controls
NOTE:
The headlights must be on for the high beams to
activ a
te.
AUTOMATIC HIGH BEAM HEADLAMP
C
ONTROL — IF EQUIPPED
The Automatic High Beam Headlamp Control
system provides increased forward lighting at night
by automatically controlling the high beams
through the use of a camera mounted on the
inside rearview mirror. This camera detects vehicle specific light and automatically switches from high
beams to low beams until the approaching vehicle
is out of view.
NOTE:
The multifunction lever must be in the high
beam position in order to activate the Automatic
High Beams.
The Automatic High Beam Headlamp Control
can be turned on or off using the Uconnect
system
Ú page 133.
Broken, muddy, or obstructed headlights and
taillights of vehicles in the field of view will
cause headlights to remain on longer (closer to
the vehicle). Also, dirt, film, and other obstruc
-
tions on the windshield or camera lens will
c ause
the system to function improperly.
When set to AUTO, the system automatically turns
the he
adlights on or off based on ambient light
levels.
FLASH-TO-PASS
You can signal another vehicle with your headlights
by lightly pulling the multifunction lever toward you.
This will cause the high beam headlights to turn on,
and remain on, until the lever is released.
2
Page 40 of 364
38 GETTING TO KNOW YOUR VEHICLE
AUTOMATIC HEADLIGHTS — IF EQUIPPED
This system automatically turns the headlights on
or off according to ambient light levels. To turn the
system on, rotate the headlight switch clockwise to
the last detent (AUTO position) for automatic
headlight operation. To turn the automatic system
off, move the headlight switch out of the AUTO
position.
NOTE:
The ignition must be in the ON/RUN or START
positi on
before the headlights will come on in the
automatic mode.
Dusk Sensor
There is an infrared LED sensor that works with the
rain sensor, located on the windshield. It detects
changes in light intensity outside the vehicle,
based on the sensitivity of light set by using the
menu on the display or on the Uconnect system.
The higher the sensitivity, the lesser the amount of
exter n
al light required for controlling the lighting.
To turn the dusk sensor on, rotate the headlight
switch
to the AUTO position. To turn it off, rotate the
headlight switch to a position other than AUTO.
NOTE:
The dusk sensor can only be activated with the
ignit i
on in the ON/RUN position.
PARKING LIGHTS
Rotate the headlight switch to the first detent to
turn on the parking lights. The parking light
indicator in the instrument cluster display will
illuminate.
HEADLIGHT TIME DELAY
This feature provides the safety of headlight
illumination for up to 90 seconds when leaving
your vehicle in an unlit area.
The time delay of the headlights is programmable
betwe e
n 0, 30, 60 and 90 seconds within
Uconnect Settings Ú page 133.
Headlight Delay Activation
To activate the delay feature, place the ignition in
t he OF
F position while the headlights are still on.
The delay interval begins when the headlight
switch is turned off from the low beam position.
If the headlight switch is in AUTO and the
headli
ghts were on before the ignition was turned
off, the delay interval begins automatically.
Headlight Delay Deactivation
The feature is disabled by turning on the
h eadli
ghts, the parking lights or by placing the
ignition in the RUN position.
If you shut off the lights before the ignition is
turne d
on, they will turn off in the normal manner.
NOTE:
The lights must be turned off within two minutes of
placi n
g the ignition in the OFF position to activate
this feature.
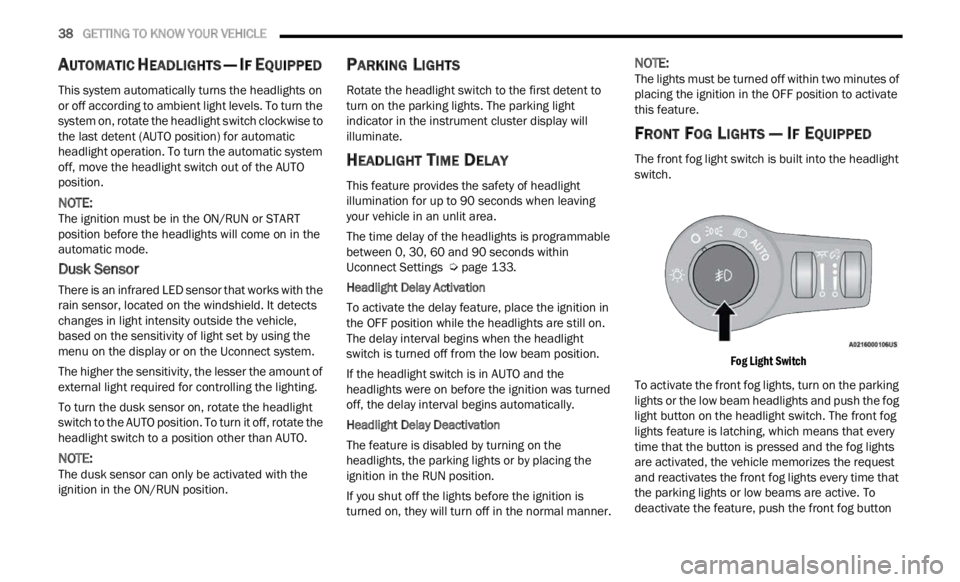
FRONT FOG LIGHTS — IF EQUIPPED
The front fog light switch is built into the headlight
switch.
Fog Light Switch
To activate the front fog lights, turn on the parking
light s
or the low beam headlights and push the fog
light button on the headlight switch. The front fog
lights feature is latching, which means that every
time that the button is pressed and the fog lights
are activated, the vehicle memorizes the request
and reactivates the front fog lights every time that
the parking lights or low beams are active. To
deactivate the feature, push the front fog button
Page 43 of 364
GETTING TO KNOW YOUR VEHICLE 41
To operate the rear dome light, proceed as follows:
Push the switch to the on/right position from its
center position and the lights are always on.
Push the switch to the off/left position from its
center position and the lights are always off.
Leave the switch in the center position, and the
lights are turned on and off when the doors are
opened or closed.
DOME LIGHT TIMING
The dome light will automatically illuminate when
the doors are unlocked, the doors are opened or
after the doors are closed.
Timing Entering The Vehicle
The dome lights illuminate in the following ways:
When the doors are unlocked, the dome light
will illuminate for approximately 27 seconds.
When one of the doors is opened, the dome light
will illuminate for approximately three minutes.
When the doors are closed, the dome light will
automatically shut off after approximately 27
seconds.
The timing stops once the ignition is placed in the
ON/RU N
position. The dome light will turn off under any of the
follow
i
ng conditions:
The dome light is disabled when the ignition is
placed in the ON/RUN position.
The dome lights will turn off automatically when
the doors are locked.
The dome lights will automatically turn off after
approximately 15 minutes of inactivity to
prese r
ve the battery.
Timing Exiting The Vehicle
The dome light will illuminate under the following
condit i
ons when the ignition is placed to the OFF
position and the key is removed:
The dome light will illuminate for 27 seconds
after the ignition is placed in the OFF position.
The opening of one of the doors (approximately
three minutes).
After closing a door (approximately 27 seconds).
The dome light timing is disabled when the doors
a re
l
oc
ked.
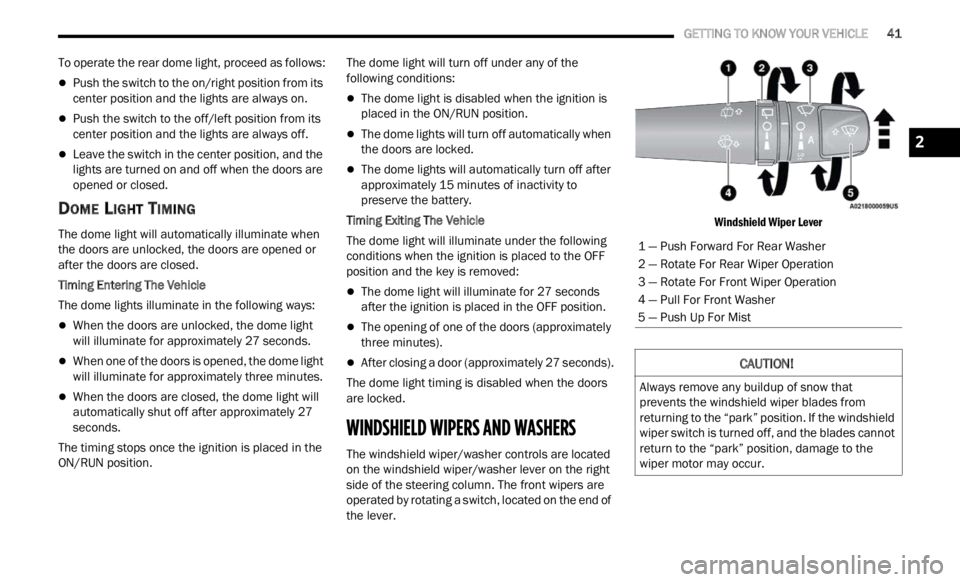
WINDSHIELD WIPERS AND WASHERS
The windshield wiper/washer controls are located
on the windshield wiper/washer lever on the right
side of the steering column. The front wipers are
operated by rotating a switch, located on the end of
the lever.
Windshield Wiper Lever
1 — Push Forward For Rear Washer
2 — Rotate For Rear Wiper Operation
3 — Rotate For Front Wiper Operation
4 — Pull For Front Washer
5 — Push Up For Mist
CAUTION!
Always remove any buildup of snow that
prevents the windshield wiper blades from
returning to the “park” position. If the windshield
wiper switch is turned off, and the blades cannot
return to the “park” position, damage to the
wiper motor may occur.
2
Page 44 of 364
42 GETTING TO KNOW YOUR VEHICLE
WINDSHIELD WIPER OPERATION
Rotate the windshield wiper knob to one of the two
detent positions for intermittent settings, the third
detent for low wiper operation and the fourth for
high wiper operation.
Windshield Washer Operation
To use the washer, pull the lever toward you and
hold w h
ile spray is desired. If the lever is pulled
while in the intermittent setting, the wipers will turn
on and operate for several wipe cycles after the
lever is released, and then resume the intermittent
interval previously selected.
If the lever is pulled while the wipers are in the off
positi on
, the wipers will operate for several wipe
cycles, then turn off. Mist
Use this feature when weather conditions make
occasi
on
al usage of the wipers necessary. Push
the lever upward to the MIST position and release
for a single wiping cycle.
NOTE:
The Mist feature does not activate the washer
pump;
therefore, no washer fluid will be sprayed on
the windshield. The wash function must be used in
order to spray the windshield with washer fluid.
For information on wiper care and replacement,
see Ú p
age 297 .
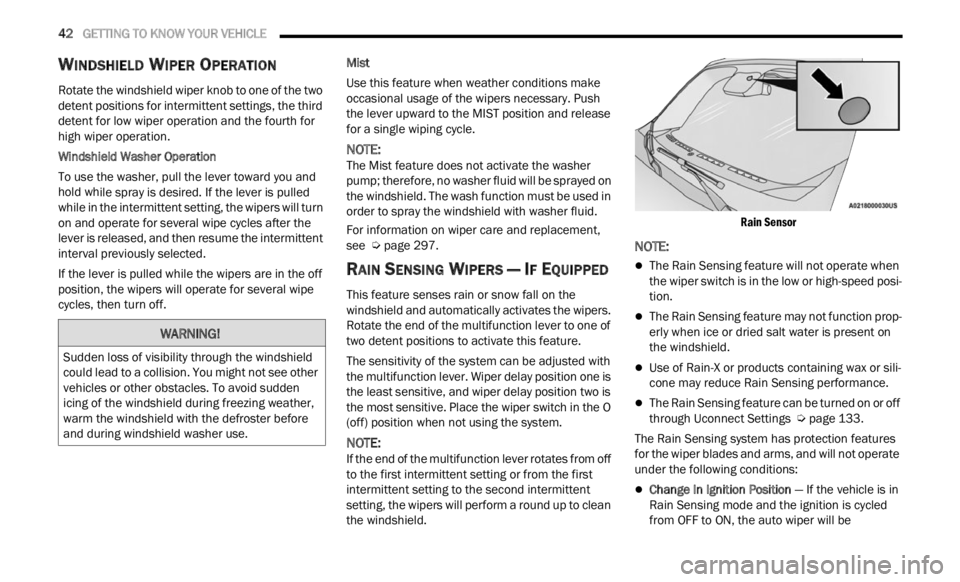
RAIN SENSING WIPERS — IF EQUIPPED
This feature senses rain or snow fall on the
windshield and automatically activates the wipers.
Rotate the end of the multifunction lever to one of
two detent positions to activate this feature.
The sensitivity of the system can be adjusted with
the mu
ltifunction lever. Wiper delay position one is
the least sensitive, and wiper delay position two is
the most sensitive. Place the wiper switch in the O
(off) position when not using the system.
NOTE:
If the end of the multifunction lever rotates from off
to the
first intermittent setting or from the first
intermittent setting to the second intermittent
setting, the wipers will perform a round up to clean
the windshield.
Rain Sensor
NOTE:
The Rain Sensing feature will not operate when
the wiper switch is in the low or high-speed posi
-
tion.
The Rain Sensing feature may not function prop -
erly when ice or dried salt water is present on
t h e
w
i
ndshield.
Use of Rain-X or products containing wax or sili-
cone may reduce Rain Sensing performance.
The Rain Sensing feature can be turned on or off
through Uconnect Settings Ú page 133.
The Rain Sensing system has protection features
f or the
wiper blades and arms, and will not operate
under the following conditions:
Change In Ignition Position — If the vehicle is in
Rain Sensing mode and the ignition is cycled
from OFF to ON, the auto wiper will be
WARNING!
Sudden loss of visibility through the windshield
could lead to a collision. You might not see other
vehicles or other obstacles. To avoid sudden
icing of the windshield during freezing weather,
warm the windshield with the defroster before
and during windshield washer use.
Page 45 of 364

GETTING TO KNOW YOUR VEHICLE 43
suppressed until vehicle speed is greater than
3 mph (5 km/h), or the wiper switch is moved
out of a
nd back into the Intermittent wipe posi -
tion.
Transmission In NEUTRAL Position — The Rain
Sensing system will not operate if the NEUTRAL
gear is selected at speeds of 3 mph (5 km/h) or
less u
nless the wiper switch is moved or the
gear selector is moved out of NEUTRAL.
Remote Start Mode Inhibit — On vehicles
equipped with the Remote Start system, Rain
Sensing wipers are not operational when the
vehicle is in the Remote Start mode. Once the
operator is in the vehicle and has placed the
ignition switch in the ON/RUN position, Rain
Sensing wiper operation can resume, if it has
been selected, and no other inhibit conditions
(mentioned previously) exist.
REAR WINDOW WIPER/WASHER
The rear wiper/washer controls are located on the
windshield wiper/washer lever on the right side of
the steering column. The rear wiper/washer is
operated by rotating a switch, located at the
middle of the lever.
NOTE:
If the front wiper is moving and the vehicle is
shift e
d in REVERSE, the rear wiper will perform one
round up to clean the rear window. Rotate the center portion of the lever
upward to the first detent for intermittent
operat
i
on and to the second detent for
continuous rear wiper operation. If the
front wiper is set to Automatic mode (on the wiper
lever as well as enabled through Uconnect
Settings), placing the rear wiper in an intermittent
position will cause the front and rear wipers to sync
up. Turning the front wipers off will cause the rear
wipers to also stop.
To use the washer, push the lever
forward and hold while spray is desired. If
the l e
ver is pushed while the wiper is in
the off position, the wiper will operate for
several wipe cycles, then turn off.
If the lever is pushed while in the intermittent
settin
g, the wiper will turn on and operate for
several wipe cycles after the end of the lever is
released, and then resume the intermittent
interval previously selected.
NOTE:
As a protective measure, the pump will stop if the
switc h
is held for more than 30 seconds. Once the
lever is released, the pump will resume normal
operation.
WINDSHIELD WIPER DE-ICER —
I
F EQUIPPED
Your vehicle may be equipped with a Windshield
Wiper De-Icer feature that may be activated under
the following conditions:
Activation By Front Defrost — The Windshield
Wiper De-Icer will be activated automatically in
the case of a cold weather manual start with full
front defrost, and the ambient temperature is
below 40°F (4.4°C).
CAUTION!
Failure to follow these cautions can cause
damage to the heating elements:
Use care when washing the inside of the rear
window. Do not use abrasive window cleaners
on the interior surface of the window. Use a
soft cloth and a mild washing solution, wiping
parallel to the heating elements. Labels can
be peeled off after soaking with warm water.
Do not use scrapers, sharp instruments, or
abrasive window cleaners on the interior
surface of the window.
Keep all objects a safe distance from the
window.
2