driver settings JEEP WAGONEER 2023 Service Manual
[x] Cancel search | Manufacturer: JEEP, Model Year: 2023, Model line: WAGONEER, Model: JEEP WAGONEER 2023Pages: 396, PDF Size: 15.17 MB
Page 224 of 396
222MULTIMEDIA
PASSENGER SCREEN PERMISSIONS
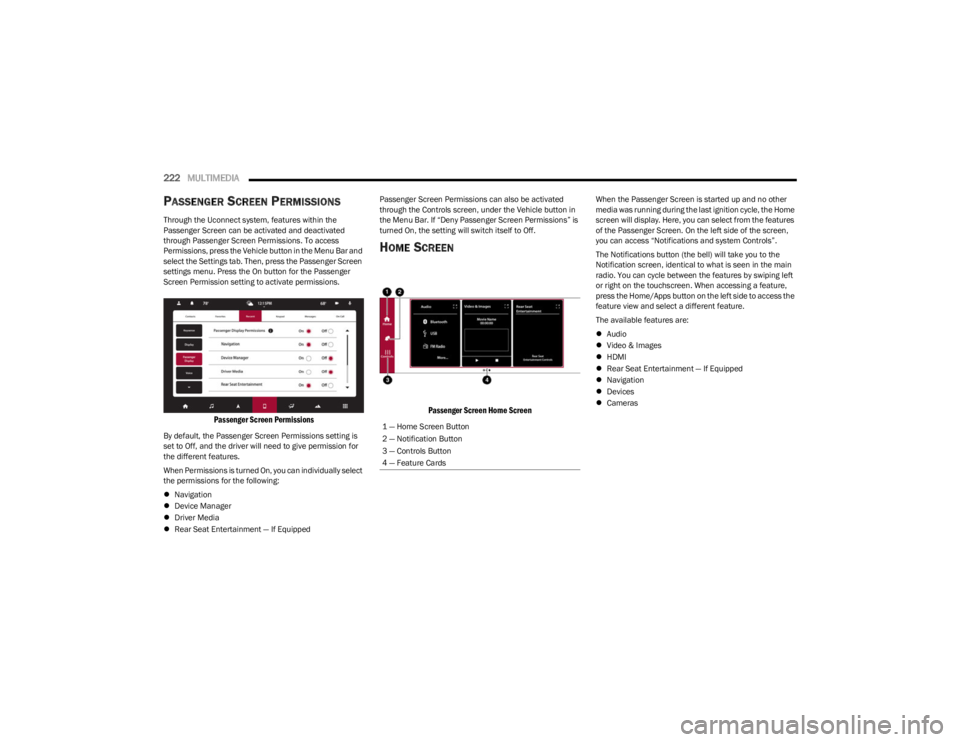
Through the Uconnect system, features within the
Passenger Screen can be activated and deactivated
through Passenger Screen Permissions. To access
Permissions, press the Vehicle button in the Menu Bar and
select the Settings tab. Then, press the Passenger Screen
settings menu. Press the On button for the Passenger
Screen Permission setting to activate permissions.
Passenger Screen Permissions
By default, the Passenger Screen Permissions setting is
set to Off, and the driver will need to give permission for
the different features.
When Permissions is turned On, you can individually select
the permissions for the following:
Navigation
Device Manager
Driver Media
Rear Seat Entertainment — If Equipped Passenger Screen Permissions can also be activated
through the Controls screen, under the Vehicle button in
the Menu Bar. If “Deny Passenger Screen Permissions” is
turned On, the setting will switch itself to Off.
HOME SCREEN
Passenger Screen Home Screen
When the Passenger Screen is started up and no other
media was running during the last ignition cycle, the Home
screen will display. Here, you can select from the features
of the Passenger Screen. On the left side of the screen,
you can access “Notifications and system Controls”.
The Notifications button (the bell) will take you to the
Notification screen, identical to what is seen in the main
radio. You can cycle between the features by swiping left
or right on the touchscreen. When accessing a feature,
press the Home/Apps button on the left side to access the
feature view and select a different feature.
The available features are:
Audio
Video & Images
HDMI
Rear Seat Entertainment — If Equipped
Navigation
Devices
Cameras
1 — Home Screen Button
2 — Notification Button
3 — Controls Button
4 — Feature Cards
23_WS_OM_EN_USC_t.book Page 222
Page 227 of 396
MULTIMEDIA225
HDMI PROJECTING
HDMI lets you connect a device to the provided HDMI port,
using an HDMI cable, and project the device directly to the
Passenger Screen. To begin, plug a a device into the HDMI
port. Then, press the HDMI button on the touchscreen.
HDMI will continue to show the menu bar and Headphone
Paring button.
NOTE:
The HDMI Card will not automatically launch when a
new device is connected. The HDMI Card will show a
device connected, and the Card will need to be
pressed.
If the user disconnects a device from the HDMI port
while the HDMI Card is in full screen, the system will
close HDMI and reload the Home screen.
DEVICE MANAGER
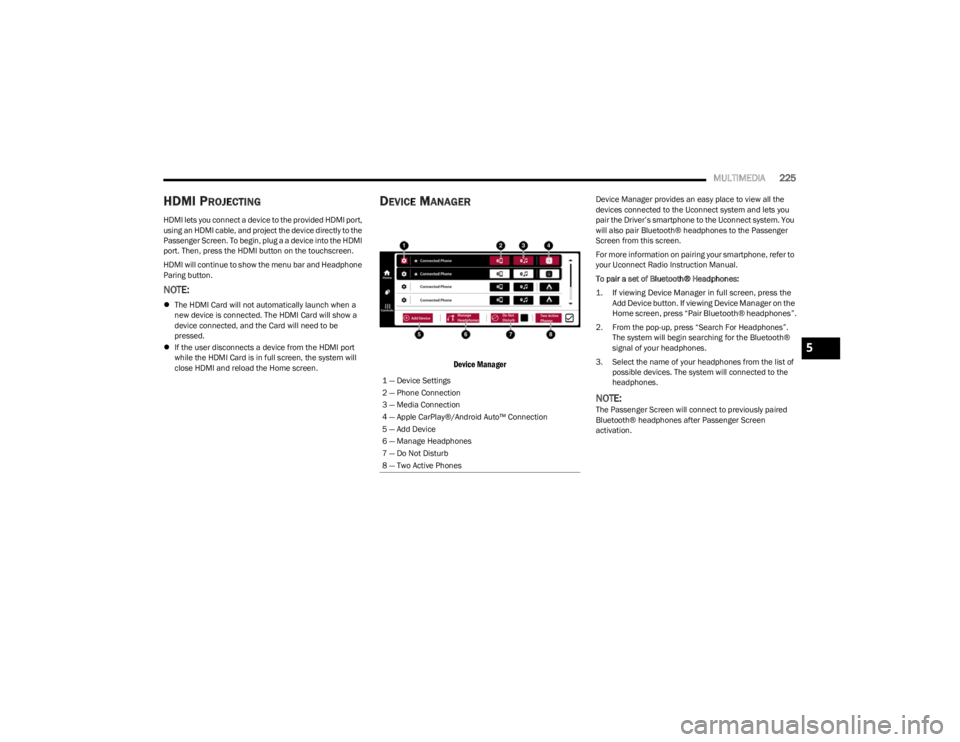
Device Manager
Device Manager provides an easy place to view all the
devices connected to the Uconnect system and lets you
pair the Driver’s smartphone to the Uconnect system. You
will also pair Bluetooth® headphones to the Passenger
Screen from this screen.
For more information on pairing your smartphone, refer to
your Uconnect Radio Instruction Manual.
To pair a set of Bluetooth® Headphones:
1. If viewing Device Manager in full screen, press the
Add Device button. If viewing Device Manager on the
Home screen, press “Pair Bluetooth® headphones”.
2. From the pop-up, press “Search For Headphones”. The system will begin searching for the Bluetooth®
signal of your headphones.
3. Select the name of your headphones from the list of possible devices. The system will connected to the
headphones.
NOTE:The Passenger Screen will connect to previously paired
Bluetooth® headphones after Passenger Screen
activation.
1 — Device Settings
2 — Phone Connection
3 — Media Connection
4 — Apple CarPlay®/Android Auto™ Connection
5 — Add Device
6 — Manage Headphones
7 — Do Not Disturb
8 — Two Active Phones
5
23_WS_OM_EN_USC_t.book Page 225
Page 228 of 396
226MULTIMEDIA
Removing Bluetooth® Headphones
1. From the Controls screen, press the Manage
Headphones button.
2. Press the Settings button (gear icon) next to the set of headphones you wish to remove.
3. Press “Delete Device”; the Bluetooth® headphones will be removed from the system.
NAVIGATION
Navigation allows you to assist the driver in searching for
destinations using Uconnect’s built-in Navigation system.
For information on the full functionality of Navigation, refer
to your Uconnect Radio Instruction Manual.
When a new route is selected from the Passenger Screen,
a confirmation will be sent to the driver. The driver will be
able to confirm or deny the route.
NOTE:Using Navigation on the Passenger Screen will not affect
the Navigation screen in the Uconnect system. The Driver
can continue to use Navigation while the Passenger
Screen can “suggest” new routes or stops.
CAMERA
Camera will display the equipped vehicle camera feed.
When selected, press the desired Camera button. The
feed from that camera will display in the center of the
touchscreen. Press the X button or Back Arrow button to
return to the Home screen.
NOTE:The Passenger Screen will lose access to a camera if the
driver chooses to view it on the Uconnect system or if a
condition would activate the camera on the Uconnect
system (the rearview camera being activated when the
vehicle is shifted into REVERSE).
3RD PARTY APPS — IF EQUIPPED
If equipped, your vehicle may contain some 3rd party
apps, which will further enhance your Uconnect system.
McIntosh
McIntosh is a 3rd party app that can enhance your
Uconnect system’s media player. For the app to be
effective, there must be audio playback in the Uconnect
media player. McIntosh can control the playback of audio
as well as display the output level decibel meters. To launch the app, begin playing audio and follow these
steps:
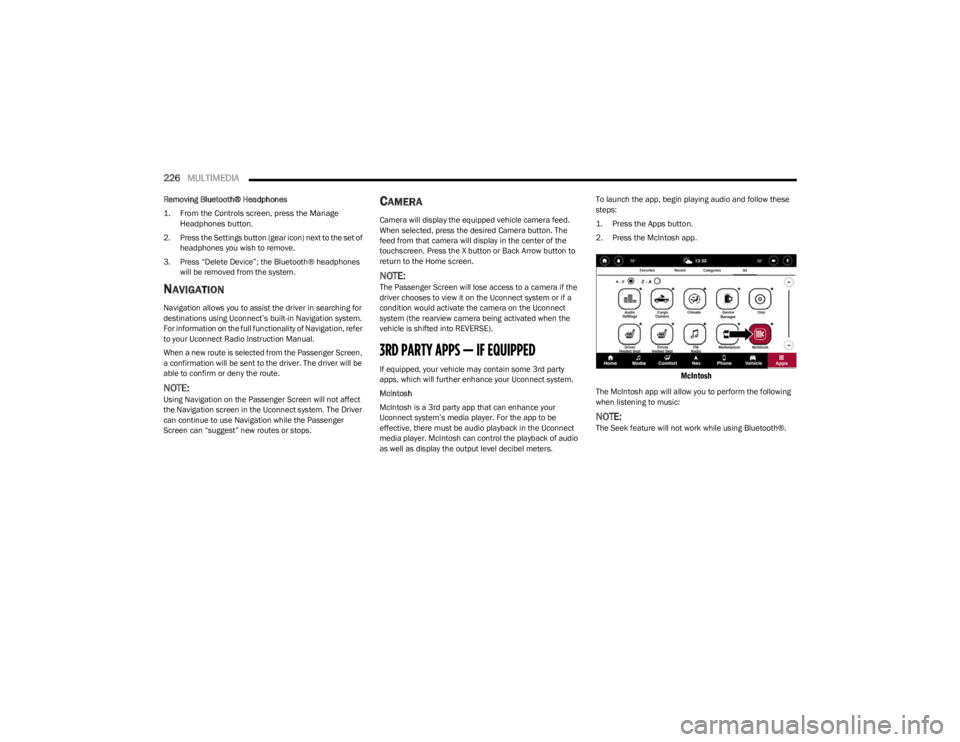
1. Press the Apps button.
2. Press the McIntosh app.
McIntosh
The McIntosh app will allow you to perform the following
when listening to music:
NOTE:The Seek feature will not work while using Bluetooth®.
23_WS_OM_EN_USC_t.book Page 226
Page 247 of 396
SAFETY245
Disabling And Enabling HSA
This feature can be turned on or turned off. To change the
current setting, proceed as follows:
If disabling HSA using your instrument cluster display,
see
Úpage 99 for further information.
If disabling HSA using Uconnect Settings, see
Úpage 197 for further information.
Towing With HSA
HSA will also provide assistance to mitigate roll back while
towing a trailer.
Rain Brake Support (RBS)
RBS may improve braking performance in wet conditions.
It will periodically apply a small amount of brake pressure
to remove any water buildup on the front brake rotors. It
functions when the windshield wipers are in LO or HI
speed. When RBS is active, there is no notification to the
driver and no driver interaction is required.
Ready Alert Braking (RAB)
RAB may reduce the time required to reach full braking
during emergency braking situations. It anticipates when
an emergency braking situation may occur by monitoring
how fast the throttle is released by the driver. The
Electronic Brake Controller (EBC) will prepare the brake
system for a panic stop.
Selec-Speed Control (SSC) — If Equipped
Selec-Speed Control (SSC) is intended for
off-road driving in 4WD Low only. SSC
maintains vehicle speed by actively controlling
engine torque and brakes.
SSC has three states:
1. Off (feature is not enabled and will not activate)
2. Enabled (feature is enabled and ready but activation conditions are not met, or driver is actively overriding
with brake or throttle application)
3. Active (feature is enabled and actively controlling vehicle speed)
Enabling SSC
SSC is enabled by pushing the SSC switch, but the
following conditions must also be met to enable SSC:
The driveline is in 4WD Low.
The vehicle speed is below 5 mph (8 km/h).
The parking brake is released.
The driver door is closed.
The driver is not applying throttle.
Activating SSC
Once SSC is enabled it will activate automatically once the
following conditions are met:
Driver releases throttle.
Driver releases brake.
Transmission is in any selection other than PARK.
Vehicle speed is below 20 mph (32 km/h).WARNING!
There may be situations where the Hill Start Assist
(HSA) will not activate and slight rolling may occur, such
as on minor hills or with a loaded vehicle, or while
pulling a trailer. HSA is not a substitute for active driving
involvement. It is always the driver’s responsibility to be
attentive to distance to other vehicles, people, and
objects, and most importantly brake operation to
ensure safe operation of the vehicle under all road
conditions. Your complete attention is always required
while driving to maintain safe control of your vehicle.
Failure to follow these warnings can result in a collision
or serious personal injury.
WARNING!
If you use a trailer brake controller with your trailer,
the trailer brakes may be activated and deactivated
with the brake switch. If so, there may not be enough
brake pressure to hold both the vehicle and the
trailer on a hill when the brake pedal is released. In
order to avoid rolling down an incline while resuming
acceleration, manually activate the trailer brake or
apply more vehicle brake pressure prior to releasing
the brake pedal.
HSA is not a parking brake. Always apply the parking
brake fully when exiting your vehicle. Also, be certain
to place the transmission in PARK.
Failure to follow these warnings can result in a colli -
sion or serious personal injury.
6
23_WS_OM_EN_USC_t.book Page 245
Page 253 of 396
SAFETY251
FCW Braking Status And Sensitivity
The FCW Sensitivity and Active Braking status are
programmable through the Uconnect system
Úpage 197.
The default sensitivity of FCW is the “Medium” setting and
the system status is “Warning & Braking”. This allows the
system to warn the driver of a possible collision with the
vehicle in front using audible/visual warnings and it
applies autonomous braking.
Changing the FCW status to the “Far” setting allows the
system to warn the driver of a possible collision with the
vehicle in front using an audible/visual warning when the
latter is at a farther distance than “Medium” setting. This
provides the most reaction time to avoid a possible
collision.
NOTE:The “Far” setting may result in a greater number of FCW
possible collision warnings experienced. Changing the FCW status to the “Near” setting allows the
system to warn the driver of a possible collision with the
vehicle in front when the distance between the vehicle in
the front is much closer. This setting provides less reaction
time than the “Far” and “Medium” settings, which allows
for a more dynamic driving experience.
NOTE:The “Near” setting may result in a lesser number of
FCW possible collision warnings experienced.
NOTE:
Changing the FCW status to “Only Warning” prevents
the system from providing limited active braking, or
additional brake support if the driver is not braking
adequately in the event of a potential frontal collision,
but maintains the audible and visual warnings.
Changing the FCW status to “Off” prevents the system
from providing autonomous braking, or additional
brake support if the driver is not braking adequately in
the event of a potential frontal collision.
The system will retain the last setting selected by the
driver after ignition shut down.
FCW may not react to irrelevant objects such as over -
head objects, ground reflections, objects not in the
path of the vehicle, stationary objects that are far away,
oncoming traffic, or leading vehicles with the same or
higher rate of speed.
FCW will be disabled like ACC, with the unavailable
screens.
FCW Limited Warning
If the instrument cluster displays “ACC/FCW Limited
Functionality” or “ACC/FCW Limited Functionality Clean
Front Windshield” momentarily, there may be a condition
that limits FCW functionality. Although the vehicle is still
drivable under normal conditions, the active braking may
not be fully available. Once the condition that limited the
system performance is no longer present, the system will
return to its full performance state. If the problem persists,
see an authorized dealer.
Service FCW Warning
If the system turns off, and the instrument cluster
displays:
ACC/FCW Unavailable Service Required
Cruise/FCW Unavailable Service Required
This indicates there is an internal system fault. Although
the vehicle is still drivable under normal conditions, have
the system checked by an authorized dealer.
WARNING!
Forward Collision Warning (FCW) is not intended to
avoid a collision on its own, nor can FCW detect every
type of potential collision. The driver has the
responsibility to avoid a collision by controlling the
vehicle via braking and steering. Failure to follow this
warning could lead to serious injury or death.
6
23_WS_OM_EN_USC_t.book Page 251
Page 254 of 396
252SAFETY
Pedestrian Emergency Braking (PEB)
PEB is a subsystem of the Forward Collision Warning
(FCW) system which provides the driver with audible
warnings and visual warnings, in the instrument cluster
display. It may apply limited automatic braking when it
detects a potential frontal collision with a pedestrian/
cyclist.
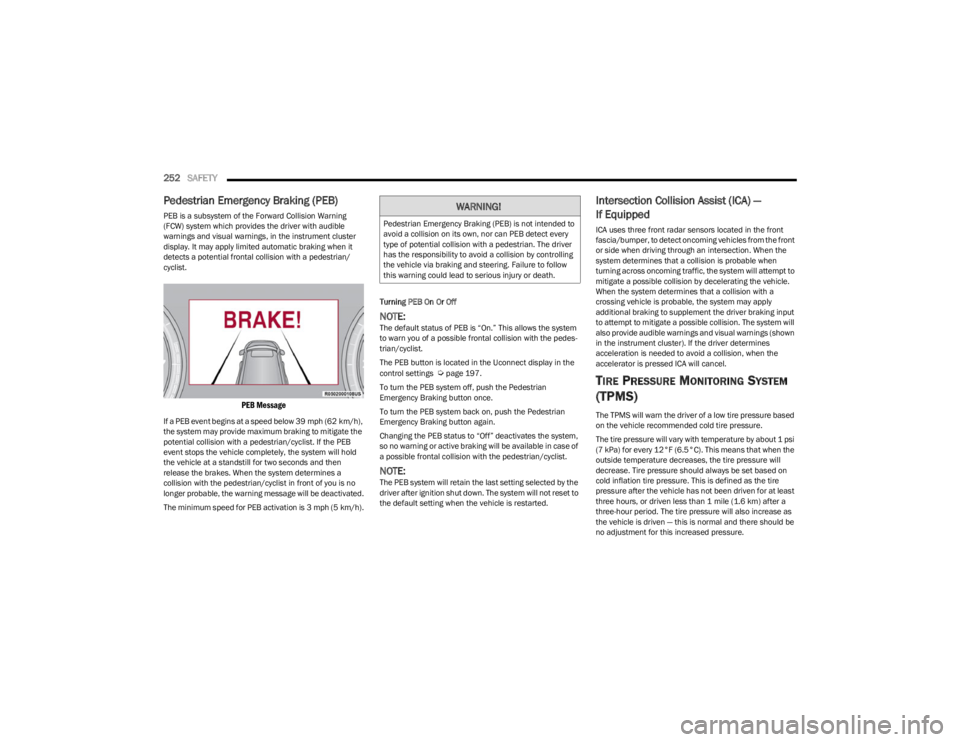
PEB Message
If a PEB event begins at a speed below 39 mph (62 km/h),
the system may provide maximum braking to mitigate the
potential collision with a pedestrian/cyclist. If the PEB
event stops the vehicle completely, the system will hold
the vehicle at a standstill for two seconds and then
release the brakes. When the system determines a
collision with the pedestrian/cyclist in front of you is no
longer probable, the warning message will be deactivated.
The minimum speed for PEB activation is 3 mph (5 km/h). Turning PEB On Or Off
NOTE:The default status of PEB is “On.” This allows the system
to warn you of a possible frontal collision with the pedes
-
trian/cyclist.
The PEB button is located in the Uconnect display in the
control settings
Úpage 197.
To turn the PEB system off, push the Pedestrian
Emergency Braking button once.
To turn the PEB system back on, push the Pedestrian
Emergency Braking button again.
Changing the PEB status to “Off” deactivates the system,
so no warning or active braking will be available in case of
a possible frontal collision with the pedestrian/cyclist.
NOTE:The PEB system will retain the last setting selected by the
driver after ignition shut down. The system will not reset to
the default setting when the vehicle is restarted.
Intersection Collision Assist (ICA) —
If Equipped
ICA uses three front radar sensors located in the front
fascia/bumper, to detect oncoming vehicles from the front
or side when driving through an intersection. When the
system determines that a collision is probable when
turning across oncoming traffic, the system will attempt to
mitigate a possible collision by decelerating the vehicle.
When the system determines that a collision with a
crossing vehicle is probable, the system may apply
additional braking to supplement the driver braking input
to attempt to mitigate a possible collision. The system will
also provide audible warnings and visual warnings (shown
in the instrument cluster). If the driver determines
acceleration is needed to avoid a collision, when the
accelerator is pressed ICA will cancel.
TIRE PRESSURE MONITORING SYSTEM
(TPMS)
The TPMS will warn the driver of a low tire pressure based
on the vehicle recommended cold tire pressure.
The tire pressure will vary with temperature by about 1 psi
(7 kPa) for every 12°F (6.5°C). This means that when the
outside temperature decreases, the tire pressure will
decrease. Tire pressure should always be set based on
cold inflation tire pressure. This is defined as the tire
pressure after the vehicle has not been driven for at least
three hours, or driven less than 1 mile (1.6 km) after a
three-hour period. The tire pressure will also increase as
the vehicle is driven — this is normal and there should be
no adjustment for this increased pressure.
WARNING!
Pedestrian Emergency Braking (PEB) is not intended to
avoid a collision on its own, nor can PEB detect every
type of potential collision with a pedestrian. The driver
has the responsibility to avoid a collision by controlling
the vehicle via braking and steering. Failure to follow
this warning could lead to serious injury or death.
23_WS_OM_EN_USC_t.book Page 252