steering JEEP WRANGLER 2015 JK / 3.G User Guide
[x] Cancel search | Manufacturer: JEEP, Model Year: 2015, Model line: WRANGLER, Model: JEEP WRANGLER 2015 JK / 3.GPages: 695, PDF Size: 20.64 MB
Page 119 of 695
Voice Command Button
Actual button location may vary with the ra-
dio. The individual buttons are described in the
“Operation” section.
The Uconnect® Phone can be used with any Hands-Free
Profile certified Bluetooth® mobile phone. See the
Uconnect® website for supported phones. Refer to your
mobile service provider or the phone manufacturer for
details.
The Uconnect® Phone is fully integrated with the vehi-
cle’s audio system. The volume of the Uconnect® Phone
can be adjusted either from the radio volume control
knob or from the steering wheel radio control (right
switch), if so equipped.
The radio display will be used for visual prompts from
the Uconnect® Phone such as “CELL” or caller ID on
certain radios.
Operation
Voice commands can be used to operate the Uconnect®
Phone and to navigate through the Uconnect® Phone
menu structure. Voice commands are required after most
Uconnect® Phone prompts. You will be prompted for a
specific command and then guided through the available
options.
•Prior to giving a voice command, one must wait for the
beep, which follows the “Ready” prompt or another
prompt.
•For certain operations, compound commands can be
used. For example, instead of saying “Setup” and then
“Phone Pairing,” the following compound command
can be said: “Setup Phone Pairing.”
•For each feature explanation in this section, only the
compound form of the voice command is given. You
can also break the commands into parts and say each
3
UNDERSTANDING THE FEATURES OF YOUR VEHICLE 117
Page 168 of 695
to push down slightly on the hood before pushing the
safety latch. Insert the support rod into the slot on the
hood.
To close the hood, remove the support rod from the hood
panel and place it in the retaining clip. Lower the hood
slowly. Secure both of the hood latches.
WARNING!
Be sure the hood is fully latched before driving your
vehicle. If the hood is not fully latched, it could open
when the vehicle is in motion and block your vision.
Failure to follow this warning could result in serious
injury or death.
LIGHTS
Multifunction Lever
The multifunction lever controls the operation of the
parking lights, headlights, headlight beam selection,
passing light, fog lights, instrument panel light dimming
and turn signals. The multifunction lever is located on
the left side of the steering column.
166 UNDERSTANDING THE FEATURES OF YOUR VEHICLE
Page 176 of 695
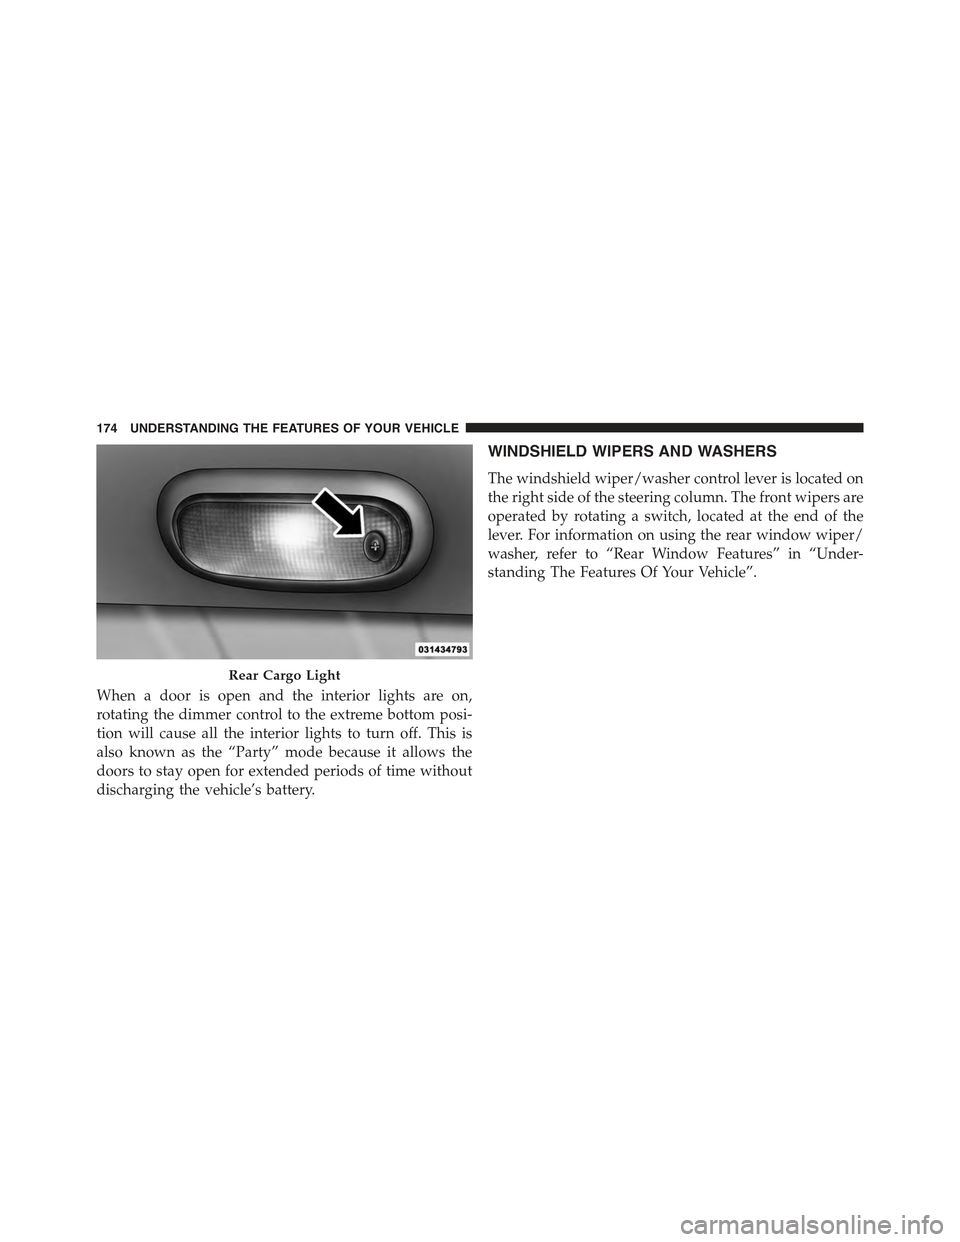
When a door is open and the interior lights are on,
rotating the dimmer control to the extreme bottom posi-
tion will cause all the interior lights to turn off. This is
also known as the “Party” mode because it allows the
doors to stay open for extended periods of time without
discharging the vehicle’s battery.
WINDSHIELD WIPERS AND WASHERS
The windshield wiper/washer control lever is located on
the right side of the steering column. The front wipers are
operated by rotating a switch, located at the end of the
lever. For information on using the rear window wiper/
washer, refer to “Rear Window Features” in “Under-
standing The Features Of Your Vehicle”.
Rear Cargo Light
174 UNDERSTANDING THE FEATURES OF YOUR VEHICLE
Page 180 of 695
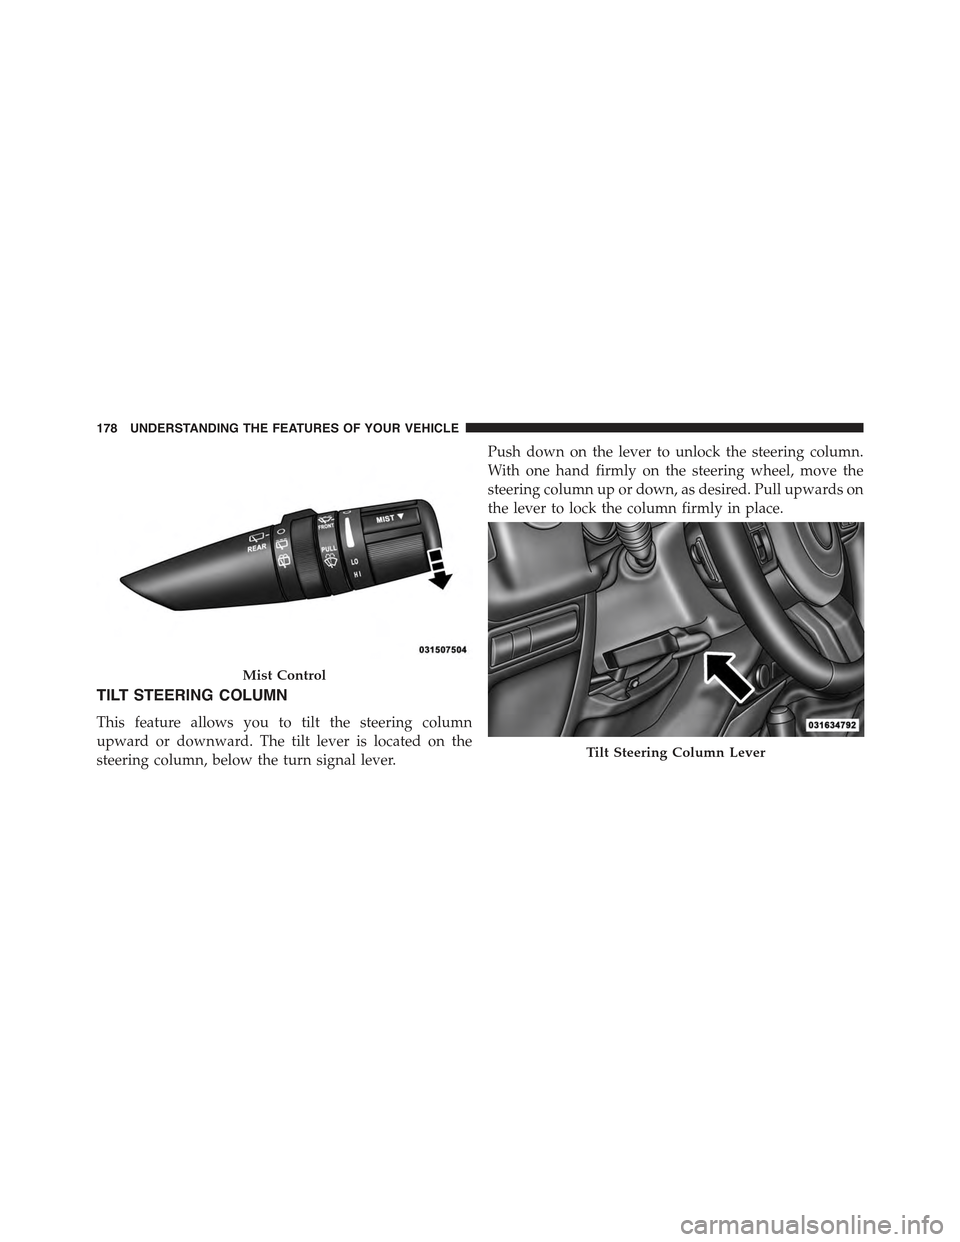
TILT STEERING COLUMN
This feature allows you to tilt the steering column
upward or downward. The tilt lever is located on the
steering column, below the turn signal lever.
Push down on the lever to unlock the steering column.
With one hand firmly on the steering wheel, move the
steering column up or down, as desired. Pull upwards on
the lever to lock the column firmly in place.
Mist Control
Tilt Steering Column Lever
178 UNDERSTANDING THE FEATURES OF YOUR VEHICLE
Page 181 of 695
WARNING!
Do not adjust the steering column while driving.
Adjusting the steering column while driving or driv-
ing with the steering column unlocked, could cause
the driver to lose control of the vehicle. Failure to
follow this warning may result in serious injury or
death.
ELECTRONIC SPEED CONTROL — IF EQUIPPED
When engaged, the Electronic Speed Control takes over
accelerator operations at speeds greater than 25 mph
(40 km/h).
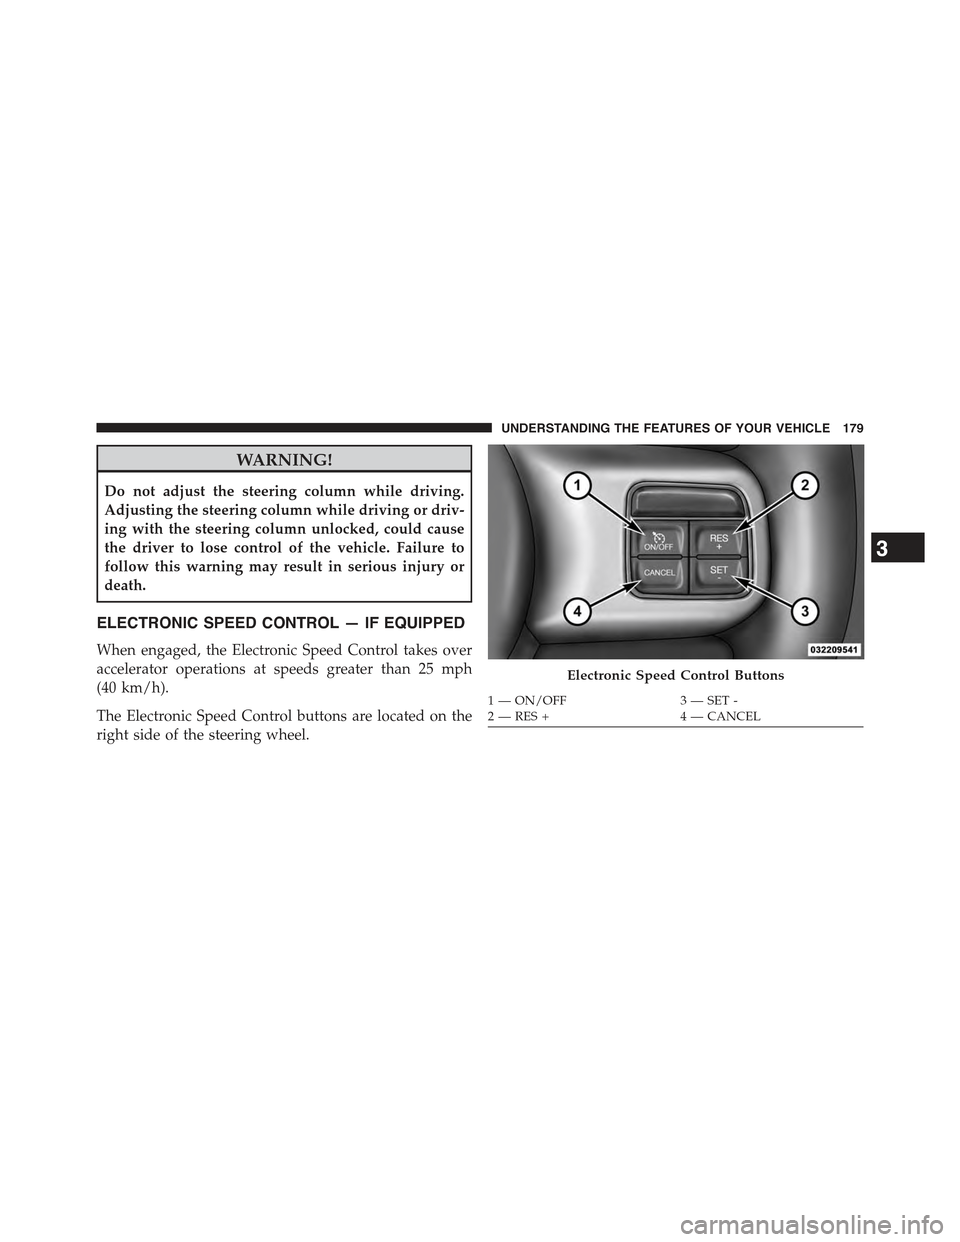
The Electronic Speed Control buttons are located on the
right side of the steering wheel.
Electronic Speed Control Buttons
1—ON/OFF3—SET-2—RES+4—CANCEL
3
UNDERSTANDING THE FEATURES OF YOUR VEHICLE 179
Page 299 of 695
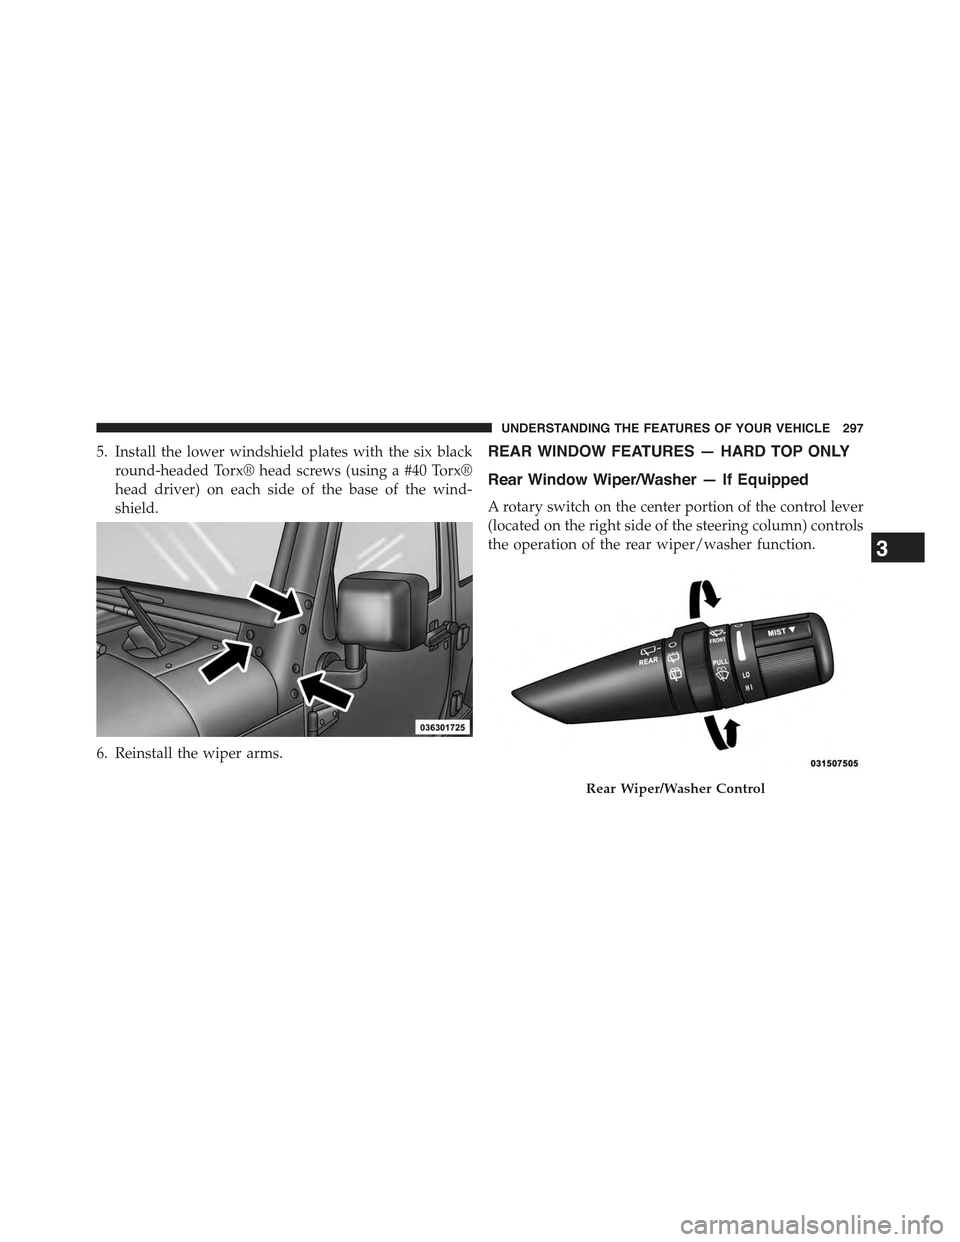
5. Install the lower windshield plates with the six black
round-headed Torx® head screws (using a #40 Torx®
head driver) on each side of the base of the wind-
shield.
6. Reinstall the wiper arms.
REAR WINDOW FEATURES — HARD TOP ONLY
Rear Window Wiper/Washer — If Equipped
A rotary switch on the center portion of the control lever
(located on the right side of the steering column) controls
the operation of the rear wiper/washer function.
Rear Wiper/Washer Control
3
UNDERSTANDING THE FEATURES OF YOUR VEHICLE 297
Page 305 of 695
!Uconnect® 130 WITH SATELLITE RADIO.....372
▫Operating Instructions — Radio Mode......372
▫Operation Instructions — CD MODE For CD And
MP3 Audio Play......................378
▫Notes On Playing MP3 Files.............380
▫LIST Button — CD Mode For MP3 Play......383
▫INFO Button — CD Mode For MP3 Play.....384
▫Uconnect® (Satellite Radio) — If Equipped . . .384
!iPod®/USB/MP3 CONTROL — IF EQUIPPED . .389
▫Connecting The iPod® Or External USB
Device.............................389
▫Using This Feature.....................390
▫Controlling The iPod® Or External USB Device
Using Radio Buttons...................390
▫Play Mode..........................390
▫List Or Browse Mode...................392
▫Bluetooth® Streaming Audio (BTSA).......394
!STEERING WHEEL AUDIO CONTROLS......396
▫Radio Operation......................397
▫CD Player...........................397
!CD/DVD DISC MAINTENANCE...........397
!RADIO OPERATION AND MOBILE PHONES . . .398
▫Regulatory And Safety Information.........398
!CLIMATE CONTROLS...................400
▫Manual Heating And Air Conditioning......400
▫Automatic Temperature Control (ATC) — If
Equipped...........................404
▫Operating Tips.......................412
4
UNDERSTANDING YOUR INSTRUMENT PANEL 303
Page 325 of 695
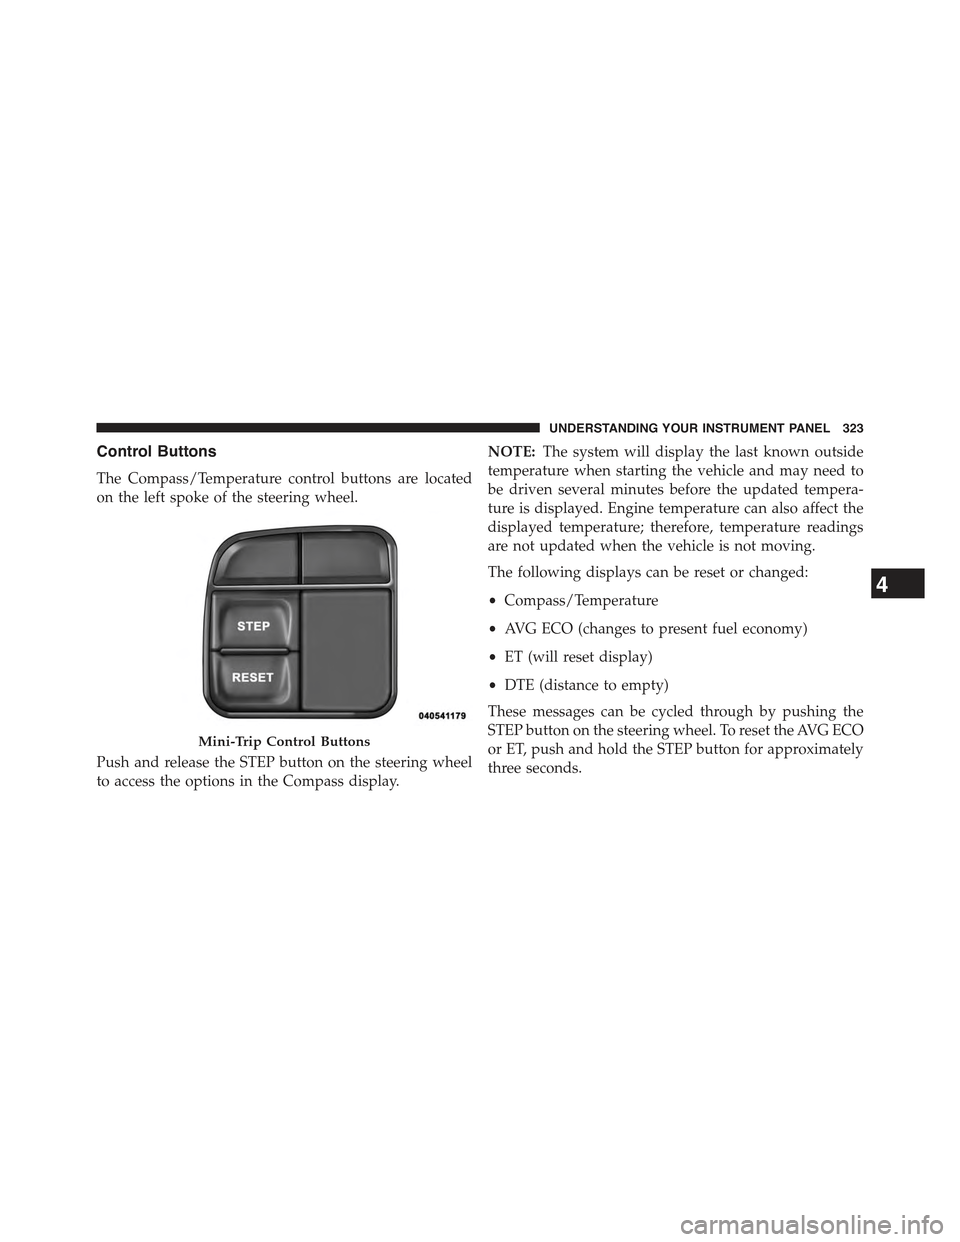
Control Buttons
The Compass/Temperature control buttons are located
on the left spoke of the steering wheel.
Push and release the STEP button on the steering wheel
to access the options in the Compass display.
NOTE:The system will display the last known outside
temperature when starting the vehicle and may need to
be driven several minutes before the updated tempera-
ture is displayed. Engine temperature can also affect the
displayed temperature; therefore, temperature readings
are not updated when the vehicle is not moving.
The following displays can be reset or changed:
•Compass/Temperature
•AVG ECO (changes to present fuel economy)
•ET (will reset display)
•DTE (distance to empty)
These messages can be cycled through by pushing the
STEP button on the steering wheel. To reset the AVG ECO
or ET, push and hold the STEP button for approximately
three seconds.
Mini-Trip Control Buttons
4
UNDERSTANDING YOUR INSTRUMENT PANEL 323
Page 327 of 695
To Set The Variance
Start the engine and leave the transmission gear selector
lever in the PARK position. Press and hold the RESET
button on the steering wheel (for approximately ten
seconds) until the current variance zone number is dis-
played. To change the zone, press and release the STEP
button to increase the variance one step. Repeat as
necessary until the desired variance is achieved.
NOTE:The factory default zone is 8. During program-
ming, the zone value will wrap around from zone 15 to
zone 1.
Manual Compass Calibration
If the compass appears erratic, inaccurate or abnormal,
you may wish to calibrate the compass. Prior to calibrat-
ing the compass, make sure the proper zone is selected.
1. Start the engine and leave the transmission in the
PARK position.
2. Press and hold the RESET button (for approximately
10 seconds) until the current variance zone number is
displayed.
3. Release the RESET button, then press and hold again
for approximately 10 seconds, until the direction is
displayed, with the CAL indicator on continuously in
the display.
4. To complete the compass calibration, drive the vehicle
in one or more complete 360–degree circles, under
5 mph (8 km/h) in an area free from power lines and
large metallic objects, until the CAL indicator turns
off. The compass will now function normally.
NOTE:
•A good calibration requires a level surface and an
environment free from large metallic objects such as
buildings, bridges, underground cables, railroad
tracks, etc.
4
UNDERSTANDING YOUR INSTRUMENT PANEL 325
Page 330 of 695
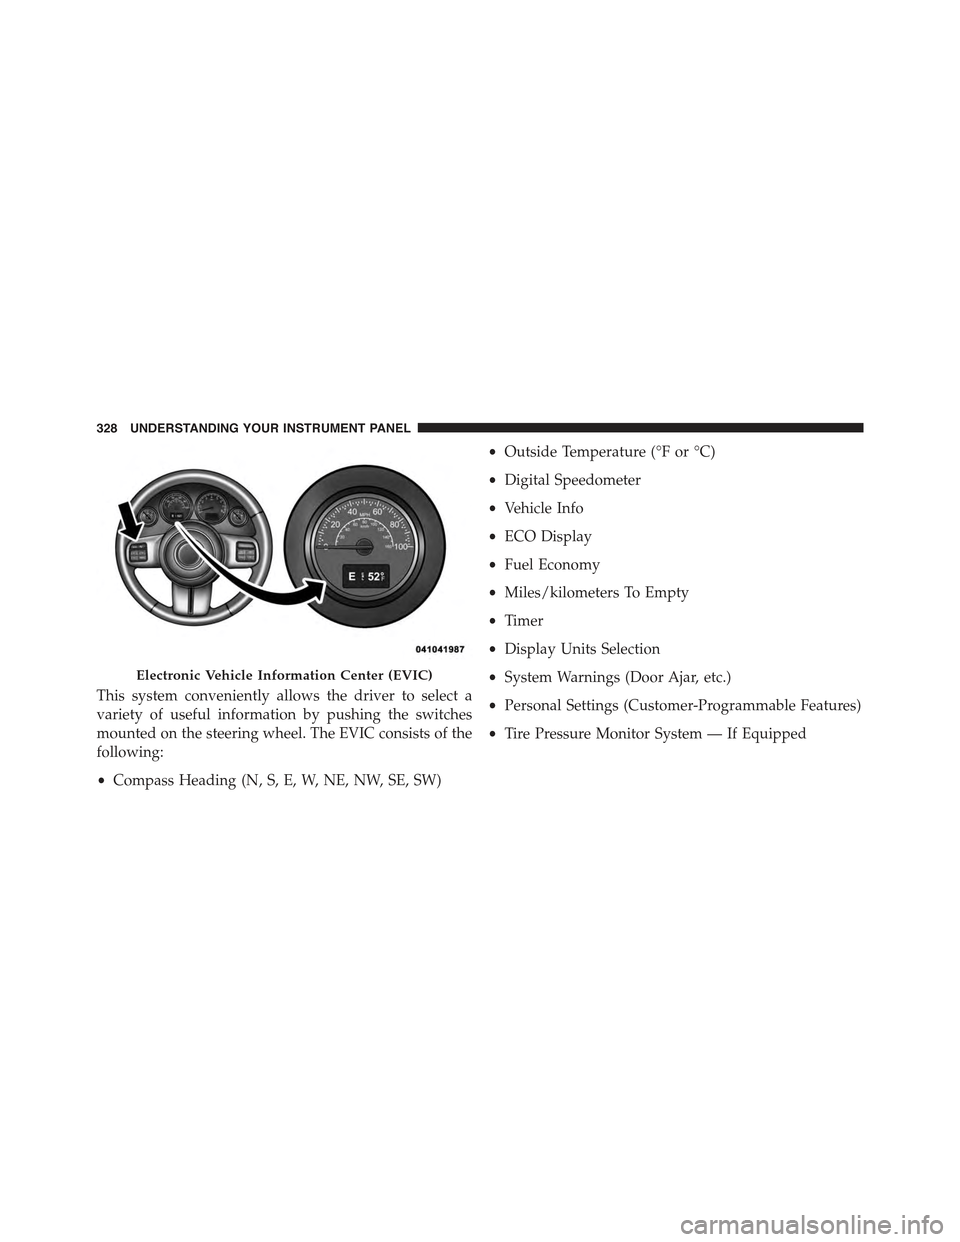
This system conveniently allows the driver to select a
variety of useful information by pushing the switches
mounted on the steering wheel. The EVIC consists of the
following:
•Compass Heading (N, S, E, W, NE, NW, SE, SW)
•Outside Temperature (°F or °C)
•Digital Speedometer
•Vehicle Info
•ECO Display
•Fuel Economy
•Miles/kilometers To Empty
•Timer
•Display Units Selection
•System Warnings (Door Ajar, etc.)
•Personal Settings (Customer-Programmable Features)
•Tire Pressure Monitor System — If Equipped
Electronic Vehicle Information Center (EVIC)
328 UNDERSTANDING YOUR INSTRUMENT PANEL