steering JEEP WRANGLER 2015 JK / 3.G Owner's Manual
[x] Cancel search | Manufacturer: JEEP, Model Year: 2015, Model line: WRANGLER, Model: JEEP WRANGLER 2015 JK / 3.GPages: 695, PDF Size: 20.64 MB
Page 331 of 695
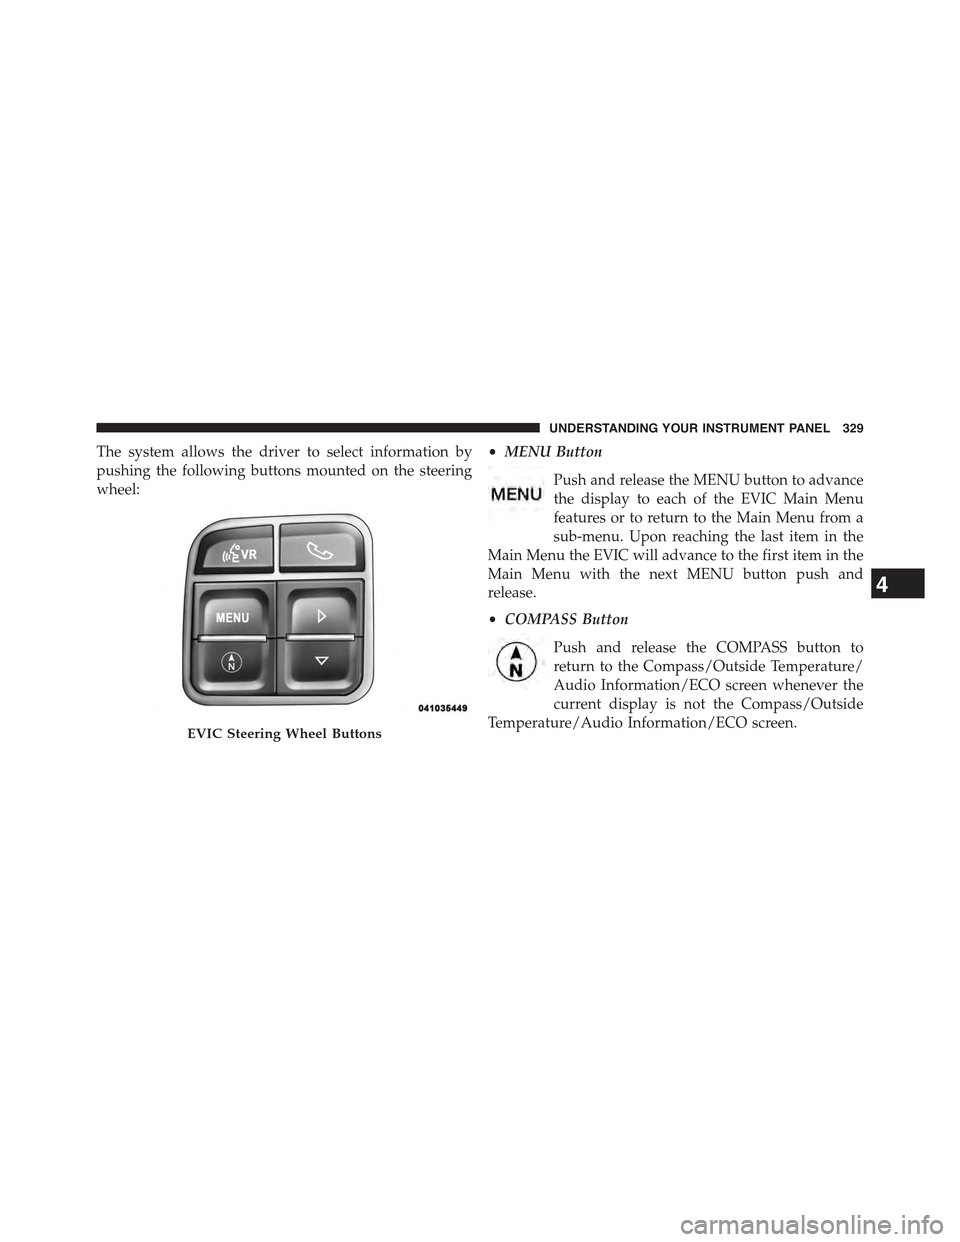
The system allows the driver to select information by
pushing the following buttons mounted on the steering
wheel:
•MENU Button
Push and release the MENU button to advance
the display to each of the EVIC Main Menu
features or to return to the Main Menu from a
sub-menu. Upon reaching the last item in the
Main Menu the EVIC will advance to the first item in the
Main Menu with the next MENU button push and
release.
•COMPASS Button
Push and release the COMPASS button to
return to the Compass/Outside Temperature/
Audio Information/ECO screen whenever the
current display is not the Compass/Outside
Temperature/Audio Information/ECO screen.EVIC Steering Wheel Buttons
4
UNDERSTANDING YOUR INSTRUMENT PANEL 329
Page 398 of 695
STEERING WHEEL AUDIO CONTROLS
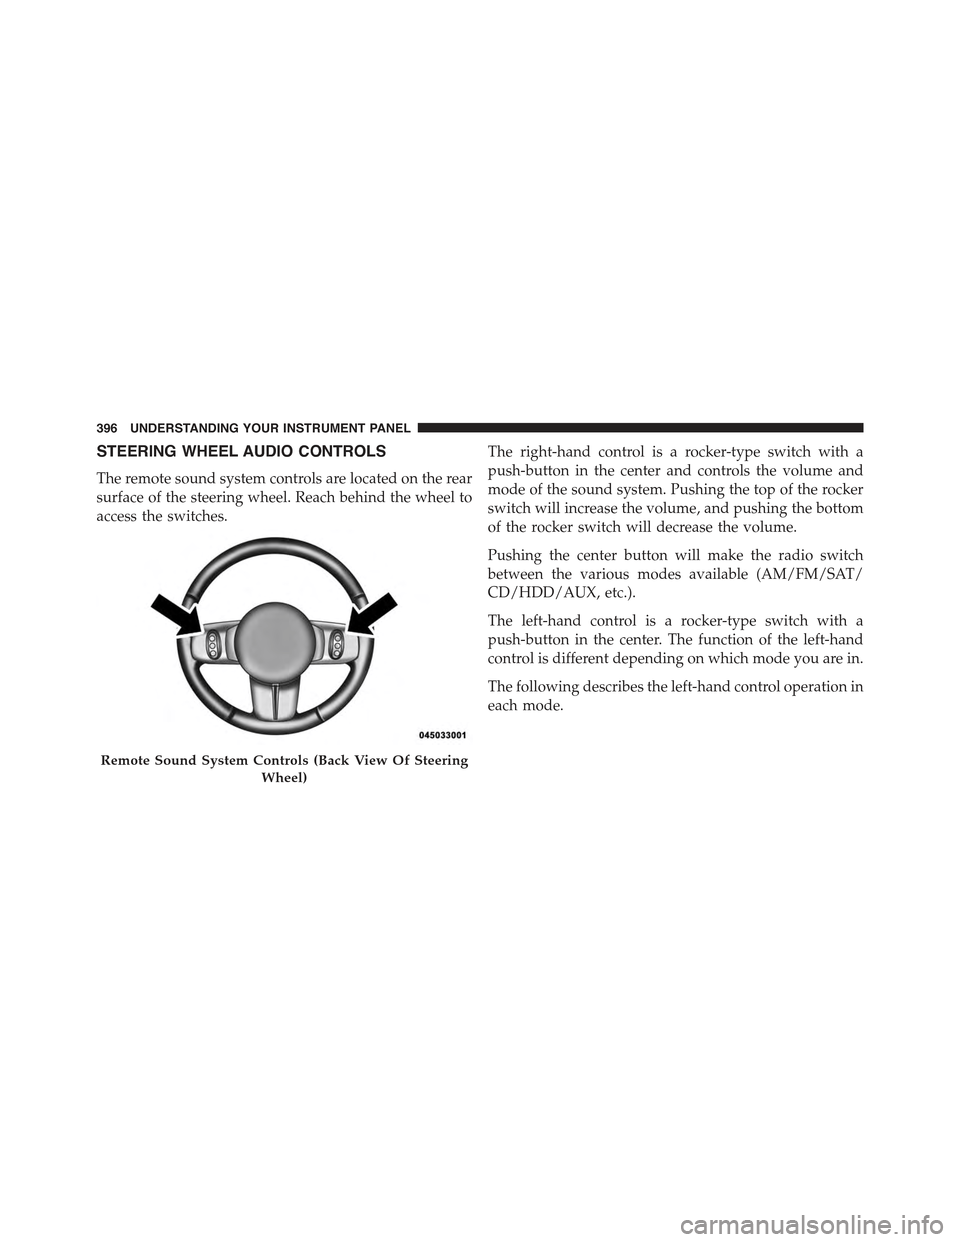
The remote sound system controls are located on the rear
surface of the steering wheel. Reach behind the wheel to
access the switches.
The right-hand control is a rocker-type switch with a
push-button in the center and controls the volume and
mode of the sound system. Pushing the top of the rocker
switch will increase the volume, and pushing the bottom
of the rocker switch will decrease the volume.
Pushing the center button will make the radio switch
between the various modes available (AM/FM/SAT/
CD/HDD/AUX, etc.).
The left-hand control is a rocker-type switch with a
push-button in the center. The function of the left-hand
control is different depending on which mode you are in.
The following describes the left-hand control operation in
each mode.
Remote Sound System Controls (Back View Of Steering
Wheel)
396 UNDERSTANDING YOUR INSTRUMENT PANEL
Page 418 of 695
!AUTOSTICK..........................439
▫Operation...........................439
!FOUR–WHEEL DRIVE OPERATION (COMMAND-
TRAC I® OR ROCK-TRAC®)..............441
▫Operating Instructions/Precautions........441
▫Shift Positions........................443
▫Shifting Procedure.....................445
!TRAC-LOK® REAR AXLE — IF EQUIPPED . . .446
!AXLE LOCK (TRU–LOK®) — RUBICON
MODELS............................446
!ELECTRONIC SWAY BAR DISCONNECT —
IF EQUIPPED.........................447
!ON-ROAD DRIVING TIPS................449
!OFF-ROAD DRIVING TIPS................450
▫Side Step Removal — If Equipped..........450
▫The Basics Of Off-Road Driving...........451
▫When To Use 4L (Low) Range.............452
▫Simultaneous Brake And Throttle Operation. . .452
▫Driving In Snow, Mud And Sand..........453
▫Crossing Obstacles (Rocks And Other
High Points).........................454
▫Hill Climbing........................457
▫Driving Through Water.................460
▫After Driving Off-Road.................462
!POWER STEERING.....................464
▫Power Steering Fluid Check..............465
!PARKING BRAKE......................466
416 STARTING AND OPERATING
Page 448 of 695
TRAC-LOK® REAR AXLE — IF EQUIPPED
The Trac-Lok® rear axle provides a constant driving force
to both rear wheels and reduces wheel spin caused by the
loss of traction at one driving wheel. If traction differs
between the two rear wheels, the differential automati-
cally proportions the usable torque by providing more
torque to the wheel that has traction.
Trac-Lok® is especially helpful during slippery driving
conditions. With both rear wheels on a slippery surface, a
slight application of the accelerator will supply maxi-
mum traction.
WARNING!
On vehicles equipped with a limited-slip differen-
tial, never run the engine with one rear wheel off the
ground. The vehicle may drive through the rear
wheel remaining on the ground and cause you to lose
control of your vehicle.
AXLE LOCK (TRU–LOK®) — RUBICON MODELS
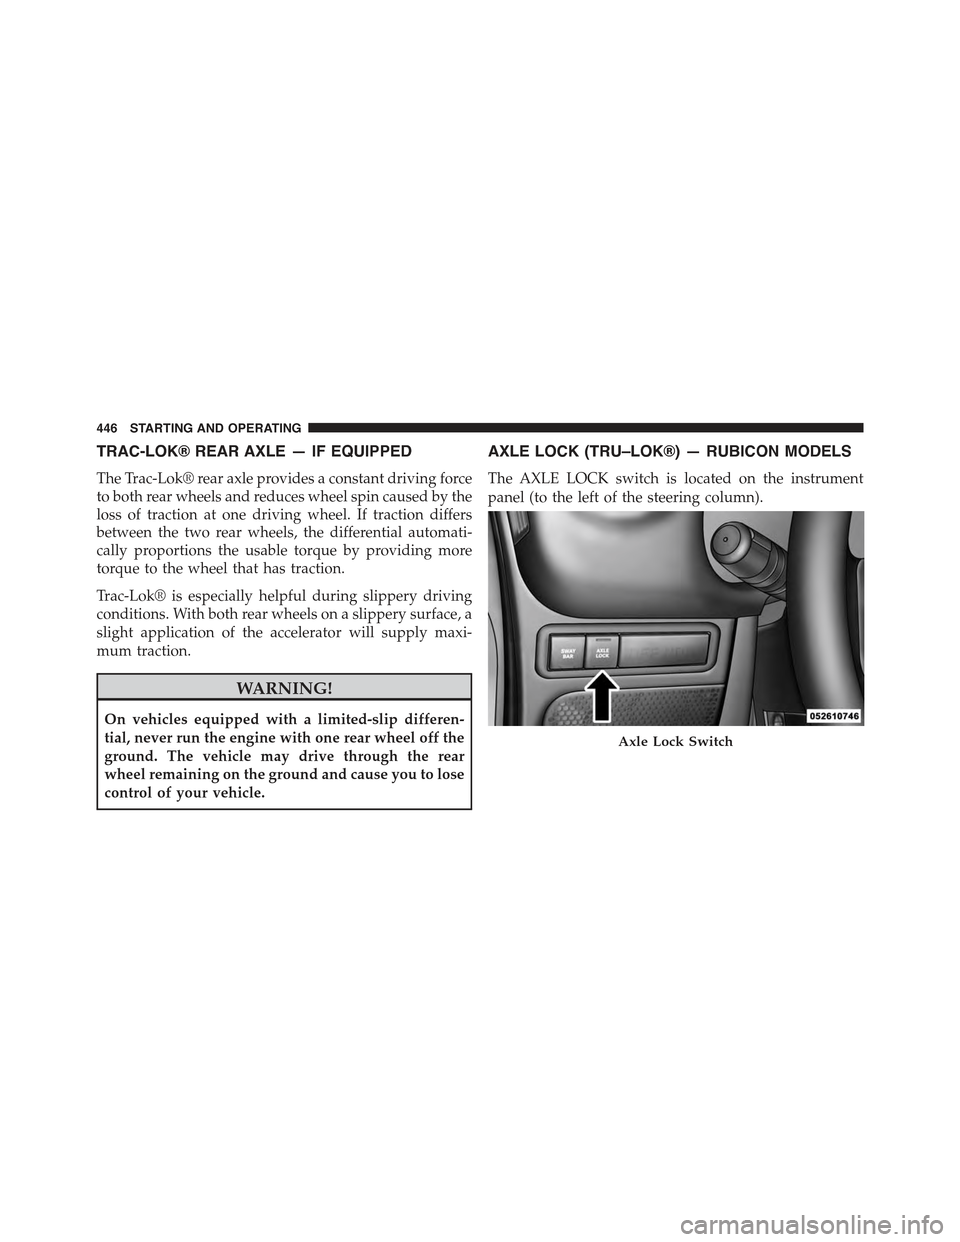
The AXLE LOCK switch is located on the instrument
panel (to the left of the steering column).
Axle Lock Switch
446 STARTING AND OPERATING
Page 449 of 695
This feature will only activate when the following con-
ditions are met:
•Key in ignition, vehicle in 4L (Low) range.
•Vehicle speed should be 10 mph (16 km/h) or less.
To activate the system, press the bottom of the AXLE
LOCK switch once to lock the rear axle only (the “Rear
Axle Lock Indicator Light” will illuminate), press the
bottom of the switch again to lock the front axle (the
“Front Axle Lock Indicator Light” will illuminate). When
the rear axle is locked, pressing the switch again will lock
or unlock the front axle.
NOTE:The indicator lights will flash until the axles are
fully locked or unlocked.
To unlock the axles, press the top of the AXLE LOCK
switch.
Axle lock will disengage if the vehicle is taken out of 4L
(Low) range, or the ignition switch is turned to the OFF
position.
ELECTRONIC SWAY BAR DISCONNECT — IF
EQUIPPED
Your vehicle may be equipped with an electronic discon-
necting stabilizer/sway bar. This system allows greater
front suspension travel in off-road situations.
This system is controlled by the SWAY BAR switch
located on the instrument panel (to the left of the steering
column).
5
STARTING AND OPERATING 447
Page 453 of 695
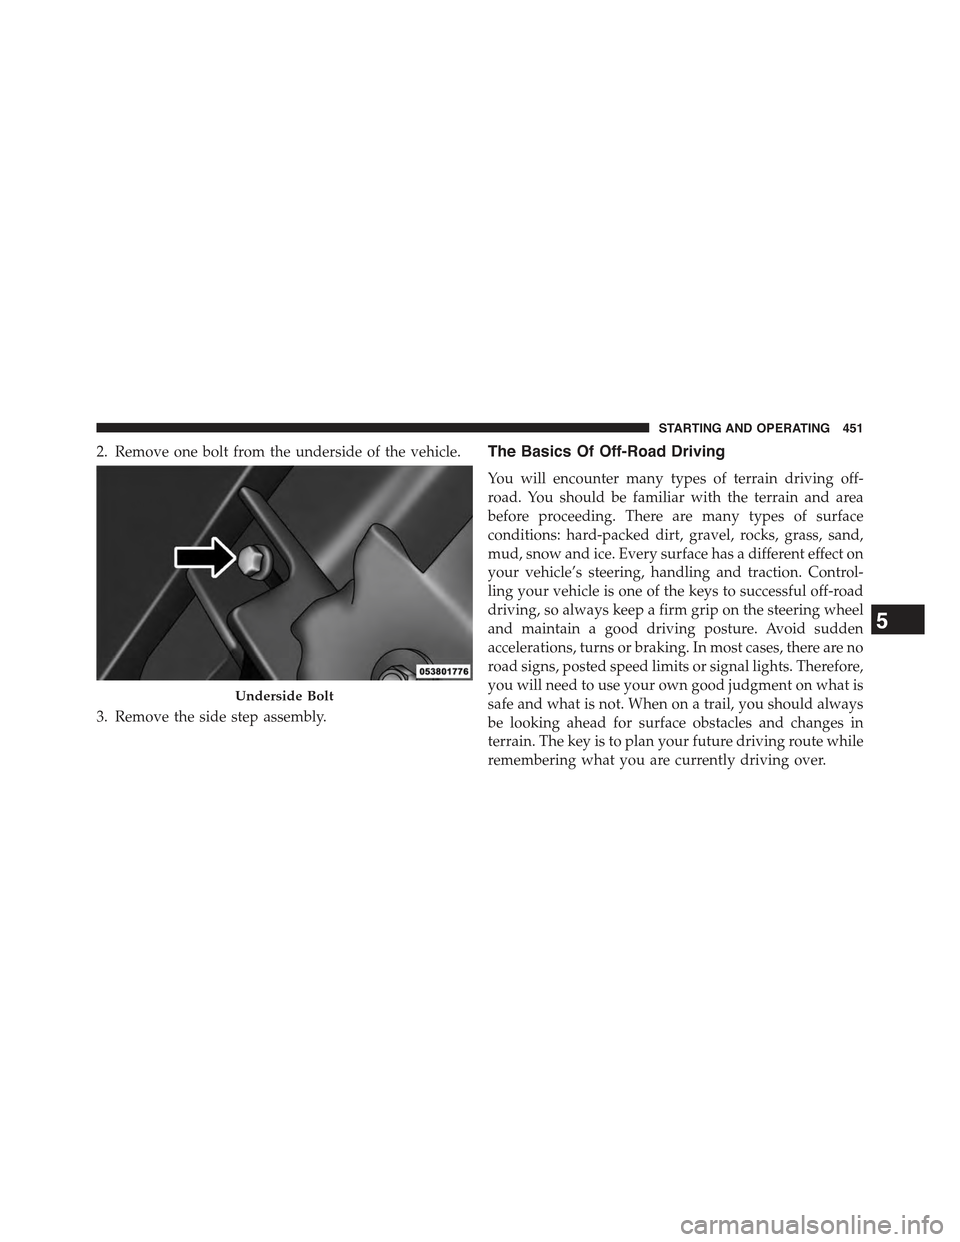
2. Remove one bolt from the underside of the vehicle.
3. Remove the side step assembly.
The Basics Of Off-Road Driving
You will encounter many types of terrain driving off-
road. You should be familiar with the terrain and area
before proceeding. There are many types of surface
conditions: hard-packed dirt, gravel, rocks, grass, sand,
mud, snow and ice. Every surface has a different effect on
your vehicle’s steering, handling and traction. Control-
ling your vehicle is one of the keys to successful off-road
driving, so always keep a firm grip on the steering wheel
and maintain a good driving posture. Avoid sudden
accelerations, turns or braking. In most cases, there are no
road signs, posted speed limits or signal lights. Therefore,
you will need to use your own good judgment on what is
safe and what is not. When on a trail, you should always
be looking ahead for surface obstacles and changes in
terrain. The key is to plan your future driving route while
remembering what you are currently driving over.
Underside Bolt
5
STARTING AND OPERATING 451
Page 455 of 695
Driving In Snow, Mud And Sand
Snow
In heavy snow or for additional control and traction at
slower speeds, shift the transmission into a low gear and
the transfer case into 4L (Low) if necessary. Do not shift to
a lower gear than necessary to maintain headway. Over-
revving the engine can spin the wheels and traction will
be lost. If you start to slow to a stop, try turning your
steering wheel no more than a 1/4 turn quickly back and
forth, while still applying throttle. This will allow the
tires to get a fresh#bite#and help maintain your momen-
tum.
CAUTION!
On icy or slippery roads, do not downshift at high
engine RPM or vehicle speeds, because engine brak-
ing may cause skidding and loss of control.
Mud
Deep mud creates a great deal of suction around the tires
and is very difficult to get through. You should use
second gear (manual transmission), or DRIVE (automatic
transmission), with the transfer case in the 4L (Low)
position to maintain your momentum. If you start to slow
to a stop, try turning your steering wheel no more than a
1/4 turn quickly back and forth for additional traction.
Mud holes pose an increased threat of vehicle damage
and getting stuck. They are normally full of debris from
previous vehicles getting stuck. As a good practice before
entering any mud hole, get out and determine how deep
it is, if there are any hidden obstacles and if the vehicle
can be safely recovered if stuck.
Sand
Soft sand is very difficult to travel through with full tire
pressure. When crossing soft, sandy spots in a trail,
maintain your vehicle’s momentum and do not stop. The
5
STARTING AND OPERATING 453
Page 456 of 695
key to driving in soft sand is using the appropriate tire
pressure, accelerating slowly, avoiding abrupt maneu-
vers and maintaining the vehicle’s momentum. If you are
going to be driving on large soft sandy areas or dunes,
reduce your tire pressure to a minimum of 15 psi (103
kPa) to allow for a greater tire surface area. Reduced tire
pressure will drastically improve your traction and han-
dling while driving on the soft sand, but you must return
the tires to normal air pressure before driving on pave-
ment or other hard surfaces. Be sure you have a way to
reinflate the tires prior to reducing the pressure.
CAUTION!
Reduced tire pressures may cause tire unseating and
total loss of air pressure. To reduce the risk of tire
unseating, while at a reduced tire pressure, reduce
your speed and avoid sharp turns or abrupt maneu-
vers.
Crossing Obstacles (Rocks And Other High
Points)
While driving off-road, you will encounter many types of
terrain. These varying types of terrain bring different
types of obstacles. Before proceeding, review the path
ahead to determine the correct approach and your ability
to safely recover the vehicle if something goes wrong.
Keeping a firm grip on the steering wheel, bring the
vehicle to a complete stop and then inch the vehicle
forward until it makes contact with the object. Apply the
throttle lightly while holding a light brake pressure and
ease the vehicle up and over the object.
WARNING!
Crossing obstacles can cause abrupt steering system
loading which could cause you to loose control of
your vehicle.
454 STARTING AND OPERATING
Page 460 of 695
and maintain headway by turning the steering wheel no
more than a 1/4 turn quickly back and forth. This will
provide a fresh#bite#into the surface and will usually
provide enough traction to complete the climb. If you do
not make it to the top, place the vehicle in REVERSE and
back straight down the grade using engine resistance
along with the vehicle brakes.
WARNING!
Never attempt to climb a hill at an angle or turn
around on a steep grade. Driving across an incline
increases the risk of a rollover, which may result in
severe injury.
Driving Downhill
Before driving down a steep hill, you need to determine
if it is too steep for a safe descent. What is the surface
traction? Is the grade too steep to maintain a slow,
controlled descent? Are there obstacles? Is it a straight
descent? Is there plenty of distance at the base of the hill
to regain control if the vehicle descends to fast? If you feel
confident in your ability to proceed, then make sure you
are in 4L (Low) and proceed with caution. Allow engine
braking to control the descent and apply your brakes, if
necessary, but do not allow the tires to lock.
WARNING!
Do not descend a steep grade in NEUTRAL. Use
vehicle brakes in conjunction with engine braking.
Descending a grade too fast could cause you to lose
control and be seriously injured or killed.
458 STARTING AND OPERATING
Page 464 of 695
Crossing Ditches, Streams, Shallow Rivers Or
Other Flowing Water
Flowing water can be extremely dangerous. Never at-
tempt to cross a fast running stream or river even in
shallow water. Fast moving water can easily push your
vehicle downstream, sweeping it out of control. Even in
very shallow water, a high current can still wash the dirt
out from around your tires putting you and your vehicle
in jeopardy. There is still a high risk of personal injury
and vehicle damage with slower water currents in depths
greater than the vehicle’s running ground clearance. You
should never attempt to cross flowing water which is
deeper than the vehicle’s running ground clearance. Even
the slowest current can push the heaviest vehicle down-
stream and out of control if the water is deep enough to
push on the large surface area of the vehicle’s body.
Before you proceed, determine the speed of the current,
the water’s depth, approach angle, bottom condition and
if there are any obstacles. Then cross at an angle heading
slightly upstream using the low and slow technique.
WARNING!
Never drive through fast moving deep water. It can
push your vehicle downstream, sweeping it out of
control. This could put you and your passengers at
risk of injury or drowning.
After Driving Off-Road
Off-road operation puts more stress on your vehicle than
does most on-road driving. After going off-road, it is
always a good idea to check for damage. That way you
can get any problems taken care of right away and have
your vehicle ready when you need it.
•Completely inspect the underbody of your vehicle.
Check tires, body structure, steering, suspension, and
exhaust system for damage.
462 STARTING AND OPERATING