USB JEEP WRANGLER 2021 Owner handbook (in English)
[x] Cancel search | Manufacturer: JEEP, Model Year: 2021, Model line: WRANGLER, Model: JEEP WRANGLER 2021Pages: 276, PDF Size: 4.47 MB
Page 217 of 276
MULTIMEDIA
CYBERSECURITY............216
RADIO 130.................217
Clock Setting.................218
Equalizer, Balance And Fade.......218
Radio Operation...............218
CD/DISC Operation.............218
Audio Jack Operation............219
UCONNECT 430/430N.......220
Clock Setting.................221
Menu.....................221
Equalizer, Balance And Fade.......222
Radio Operation...............223
CD/DVD Disc Operation..........225
Audio Jack Operation............226Hard Disk Drive (HDD) Operation. . . .226
Cleaning Your Touchscreen Radio. . . .229
Garmin Navigation.............229
Main Navigation Menu...........229
Following Your Route............231
TIPS CONTROLS AND GENERAL
INFORMATION.............232
Steering Wheel Audio Controls......232
Reception Conditions............232
Care And Maintenance...........232
Anti-Theft Protection............232
AUX/USB/MP3 CONTROL — IF
EQUIPPED.................233
UCONNECT PHONE..........234
Phone Pairing................234
Phonebook..................235
Making A Phone Call............236
Receiving A Call — Accept (And End). .236
Mute (Or Unmute) Microphone During
Call......................236
Transfer Ongoing Call Between Handset
And Vehicle..................236
Changing The Volume...........236
UCONNECT VOICE COMMAND. .236
Voice Command Operation.........236
Voice Text Reply..............239
BLUETOOTH STREAMING
AUDIO...................239
MULTIMEDIA
215
Page 218 of 276
CYBERSECURITY
Your vehicle may be a connected vehicle and
may be equipped with both wired and wire-
less networks. These networks allow your
vehicle to send and receive information. This
information allows systems and features in
your vehicle to function properly.
Your vehicle may be equipped with certain
security features to reduce the risk of unau-
thorized and unlawful access to vehicle sys-
tems and wireless communications. Vehicle
software technology continues to evolve over
time and FCA US LLC, working with its sup-
pliers, evaluates and takes appropriate steps
as needed. Similar to a computer or other
devices, your vehicle may require software
updates to improve the usability and perfor-
mance of your systems or to reduce the po-
tential risk of unauthorized and unlawful ac-
cess to your vehicle systems.
The risk of unauthorized and unlawful access
to your vehicle systems may still exist, even if
the most recent version of vehicle software
(such as Uconnect software) is installed.
WARNING!
• It is not possible to know or to predict all
of the possible outcomes if your vehi-
cle’s systems are breached. It may be
possible that vehicle systems, including
safety related systems, could be im-
paired or a loss of vehicle control could
occur that may result in an accident
involving serious injury or death.
• ONLY insert media (e.g., USB, SD card,
or CD) into your vehicle if it came from a
trusted source. Media of unknown origin
could possibly contain malicious soft-
ware, and if installed in your vehicle, it
may increase the possibility for vehicle
systems to be breached.
• As always, if you experience unusual
vehicle behavior, take your vehicle to
your nearest authorized dealer immedi-
ately.
NOTE:
• FCA or your dealer may contact you directly
regarding software updates.• To help further improve vehicle security
and minimize the potential risk of a secu-
rity breach, vehicle owners should:
–Routinely checkwww.driveuconnect.eu
to learn about available Uconnect soft-
ware updates.
– Only connect and use trusted media
devices (e.g. personal mobile phones,
USBs, CDs).
Privacy of any wireless and wired communi-
cations cannot be assured. Third parties may
unlawfully intercept information and private
communications without your consent. For
further information, refer to “Onboard Diag-
nostic System (OBD II) Cybersecurity” in
“Getting To Know Your Instrument Panel” in
your Owner’s Manual.
MULTIMEDIA
216
Page 222 of 276
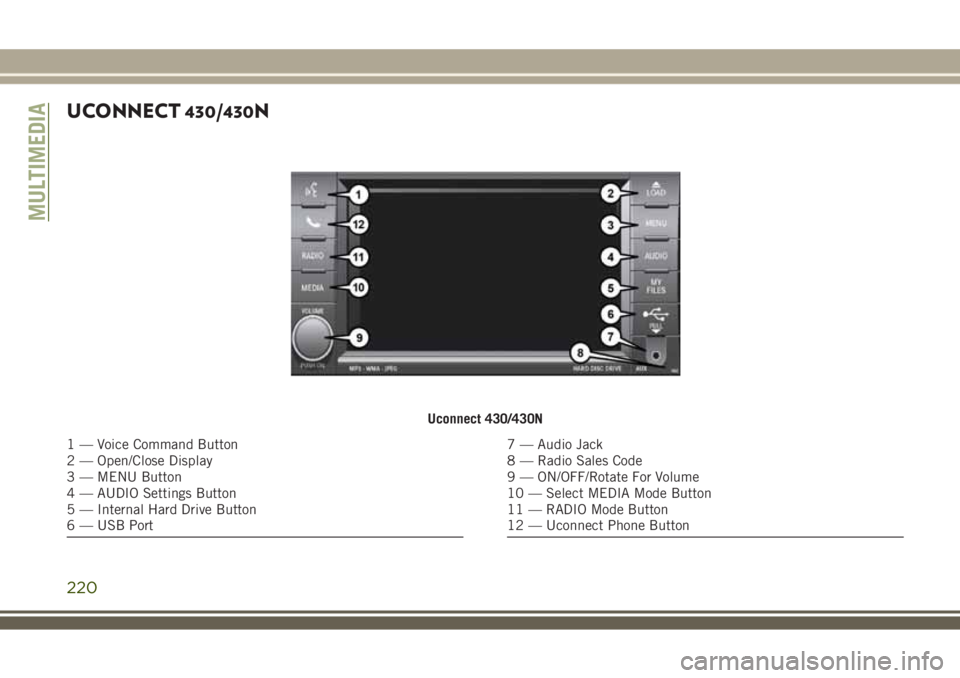
UCONNECT 430/430N
Uconnect 430/430N
1 — Voice Command Button
2 — Open/Close Display
3 — MENU Button
4 — AUDIO Settings Button
5 — Internal Hard Drive Button
6 — USB Port7 — Audio Jack
8 — Radio Sales Code
9 — ON/OFF/Rotate For Volume
10 — Select MEDIA Mode Button
11 — RADIO Mode Button
12 — Uconnect Phone Button
MULTIMEDIA
220
Page 229 of 276
• Before using the HDD mode, you will need
to copy songs and pictures to the internal
hard drive. Songs and pictures can be
added to the hard drive by using a CD or
USB device (e.g. thumb drive or memory
stick).
NOTE:
• HDD supports only .jpg/JPEG formats for
photos.
• WMA/MP3 Files and selective songs from a
CD can also be added to the HDD. See the
Uconnect Owner’s Manual Supplement for
more information.
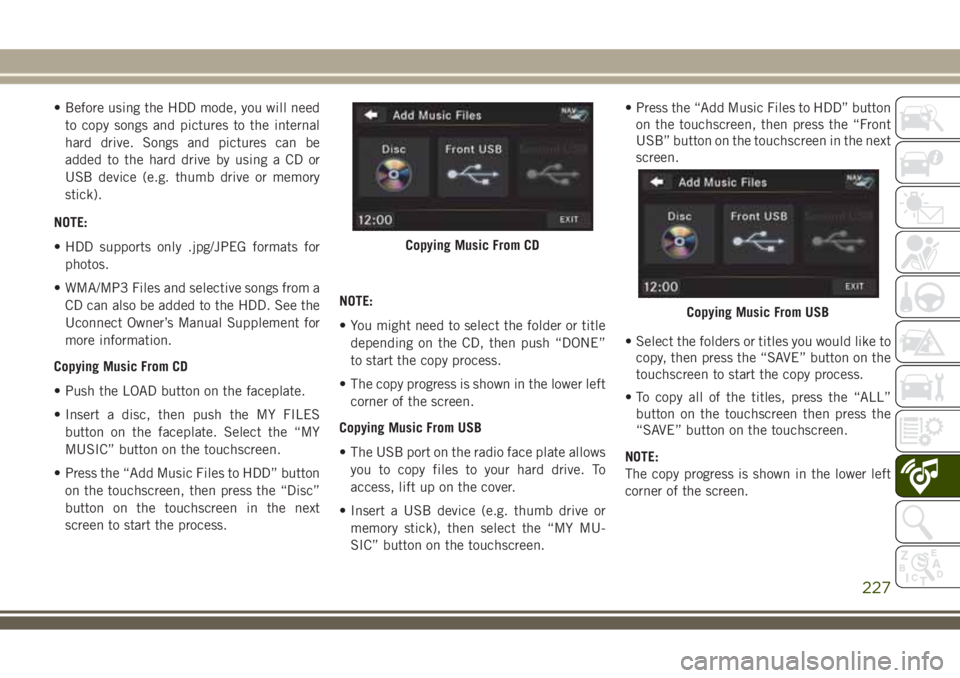
Copying Music From CD
• Push the LOAD button on the faceplate.
• Insert a disc, then push the MY FILES
button on the faceplate. Select the “MY
MUSIC” button on the touchscreen.
• Press the “Add Music Files to HDD” button
on the touchscreen, then press the “Disc”
button on the touchscreen in the next
screen to start the process.NOTE:
• You might need to select the folder or title
depending on the CD, then push “DONE”
to start the copy process.
• The copy progress is shown in the lower left
corner of the screen.
Copying Music From USB
• The USB port on the radio face plate allows
you to copy files to your hard drive. To
access, lift up on the cover.
• Insert a USB device (e.g. thumb drive or
memory stick), then select the “MY MU-
SIC” button on the touchscreen.• Press the “Add Music Files to HDD” button
on the touchscreen, then press the “Front
USB” button on the touchscreen in the next
screen.
• Select the folders or titles you would like to
copy, then press the “SAVE” button on the
touchscreen to start the copy process.
• To copy all of the titles, press the “ALL”
button on the touchscreen then press the
“SAVE” button on the touchscreen.
NOTE:
The copy progress is shown in the lower left
corner of the screen.
Copying Music From CD
Copying Music From USB
227
Page 230 of 276
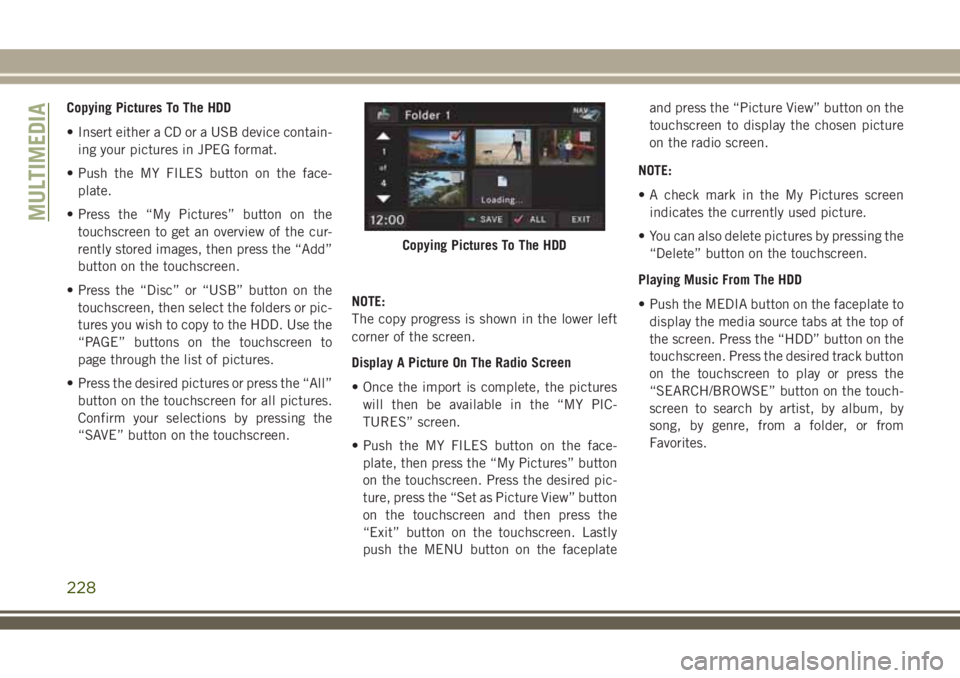
Copying Pictures To The HDD
• Insert either a CD or a USB device contain-
ing your pictures in JPEG format.
• Push the MY FILES button on the face-
plate.
• Press the “My Pictures” button on the
touchscreen to get an overview of the cur-
rently stored images, then press the “Add”
button on the touchscreen.
• Press the “Disc” or “USB” button on the
touchscreen, then select the folders or pic-
tures you wish to copy to the HDD. Use the
“PAGE” buttons on the touchscreen to
page through the list of pictures.
• Press the desired pictures or press the “All”
button on the touchscreen for all pictures.
Confirm your selections by pressing the
“SAVE” button on the touchscreen.NOTE:
The copy progress is shown in the lower left
corner of the screen.
Display A Picture On The Radio Screen
• Once the import is complete, the pictures
will then be available in the “MY PIC-
TURES” screen.
• Push the MY FILES button on the face-
plate, then press the “My Pictures” button
on the touchscreen. Press the desired pic-
ture, press the “Set as Picture View” button
on the touchscreen and then press the
“Exit” button on the touchscreen. Lastly
push the MENU button on the faceplateand press the “Picture View” button on the
touchscreen to display the chosen picture
on the radio screen.
NOTE:
• A check mark in the My Pictures screen
indicates the currently used picture.
• You can also delete pictures by pressing the
“Delete” button on the touchscreen.
Playing Music From The HDD
• Push the MEDIA button on the faceplate to
display the media source tabs at the top of
the screen. Press the “HDD” button on the
touchscreen. Press the desired track button
on the touchscreen to play or press the
“SEARCH/BROWSE” button on the touch-
screen to search by artist, by album, by
song, by genre, from a folder, or from
Favorites.
Copying Pictures To The HDD
MULTIMEDIA
228
Page 235 of 276
If the check has a positive outcome, the
system will start to operate, whereas if the
comparison codes are not the same or if the
electronic control unit (Body Computer) is
replaced, the system will ask the user to enter
the secret code. See an authorized dealer for
further information.
AUX/USB/MP3 CONTROL —
IF EQUIPPED
There are many ways to play music from
iPod/MP3 players or USB devices through
your vehicle's sound system.
The remote USB port, located within the
center console, allows you to plug an iPod
into the vehicle's sound system.•Non-Touchscreen Radios:To hear audio from
devices connected to the USB port, push
the AUX button on the faceplate.
•Touchscreen Radios:To hear audio from de-
vices connected to the USB port, push the
MEDIA button on the faceplate, then press
the “AUX” or “iPod” button on the
touchscreen.When connected to this feature:
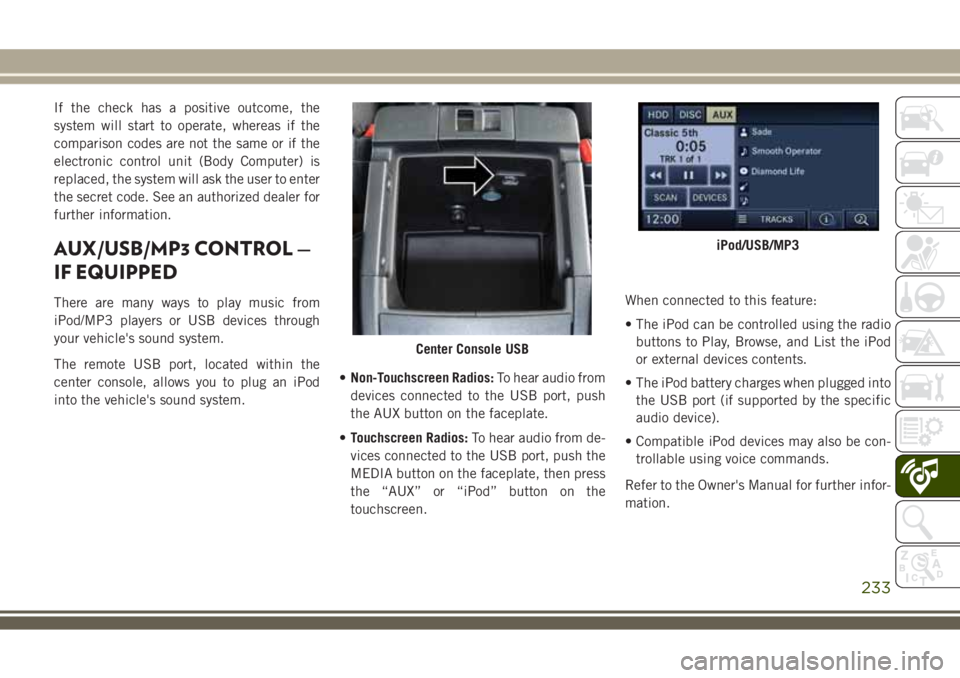
• The iPod can be controlled using the radio
buttons to Play, Browse, and List the iPod
or external devices contents.
• The iPod battery charges when plugged into
the USB port (if supported by the specific
audio device).
• Compatible iPod devices may also be con-
trollable using voice commands.
Refer to the Owner's Manual for further infor-
mation.
Center Console USB
iPod/USB/MP3
233
Page 236 of 276
NOTE:
The USB port supports certain Mini, Classic,
Nano, Touch, and iPhone devices. The USB
port also supports playing music from com-
patible external USB Mass Storage Class
memory devices. Refer to
UconnectPhone.com for a list of tested
iPod’s. Some iPod software versions may not
fully support the USB port features. Please
visit Apple’s website for iPod software
updates.
WARNING!
Do not plug in or remove the iPod or
external device while driving. Failure to
follow this warning could result in a colli-
sion.
UCONNECT PHONE
The Uconnect Phone is a voice-activated,
hands-free, in-vehicle communications sys-
tem with Voice Command Capability that al-
lows you to dial a phone number with your
mobile phone using simple voice commands
(see Voice Command section).• To determine if your vehicle is equipped
with Uconnect Phone, push the “Uconnect
Phone” button
located on the radio
faceplate. If your vehicle has this feature,
you will hear a voice prompt. If not, you will
see a message on the radio “Uconnect
Phone not available.”
NOTE:
To access the tutorial, push the “Uconnect
Phone” button
. After the BEEP, say
“tutorial.” Push any button on the faceplate,
or press any button on the touchscreen, to
cancel the tutorial.
• Refer to “Uconnect Phone” in “Multime-
dia” in your Owner's Manual for further
details.
Phone Pairing
NOTE:
Pairing is a one - time initial setup before
using the phone. Prior to starting the pairing
procedure ensure all additional phones
within the vehicle have their Bluetooth dis-
abled.
1. Activate Bluetooth on the mobile phone
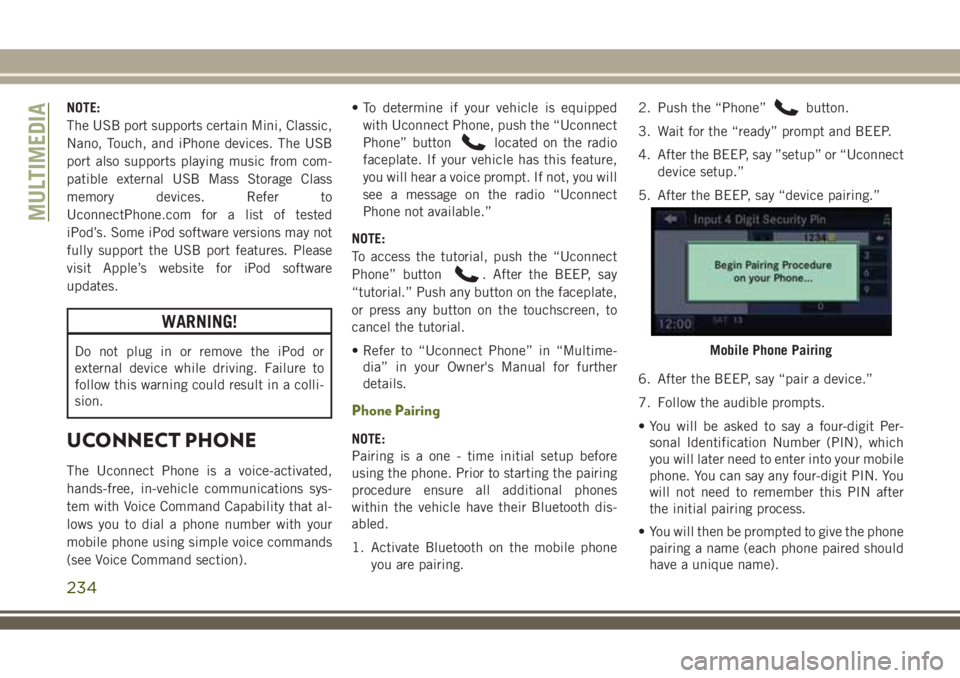
you are pairing.2. Push the “Phone”
button.
3. Wait for the “ready” prompt and BEEP.
4. After the BEEP, say ”setup” or “Uconnect
device setup.”
5. After the BEEP, say “device pairing.”
6. After the BEEP, say “pair a device.”
7. Follow the audible prompts.
• You will be asked to say a four-digit Per-
sonal Identification Number (PIN), which
you will later need to enter into your mobile
phone. You can say any four-digit PIN. You
will not need to remember this PIN after
the initial pairing process.
• You will then be prompted to give the phone
pairing a name (each phone paired should
have a unique name).
Mobile Phone Pairing
MULTIMEDIA
234
Page 239 of 276
• Start a dialogue by pushing the
“Voice Command” button
, you will
hear a beep. The beep is your signal to give
a command. Below are a list of voice com-
mands for each of the different modes:
While In: Voice Command Example:
Main Menu“Radio AM” (to switch to the AM radio mode)
“Radio FM” (to switch to the FM radio mode)
“Disc” (to switch to the disc mode)
“USB” (to switch to the USB mode)
“Bluetooth Streaming” (to switch to the Bluetooth Streaming mode)
“Memo” (to switch to the memo recorder)
“System Setup” (to switch to system setup)
Radio Mode“Frequency” (to change the frequency)
“Next Station” (to select the next station)
“Previous Station” (to select the previous station)
“Radio Menu” (to switch to the radio menu)
“Main Menu” (to switch to the main menu)
Disc Mode“Track” (#) (to change the track)
“Next Track” (to play the next track)
“Previous Track” (to play the previous track)
“Main Menu” (to switch to the main menu)
237
Page 263 of 276
Fog Lights................29, 148
Fog Light Service..............148
Fog Lights, Rear...............148
Fold And Tumble Rear Seat.........24
Folding Rear Seat............21, 22
Four-Way Hazard Flasher..........146
Four Wheel Drive..............129
Operation................129
Shifting.................129
Systems.................129
Four Wheel Drive Operation........129
Freeing A Stuck Vehicle..........164
Fuel......................209
Adding..................139
Diesel...................209
Filler Cap (Gas Cap)..........139
Gasoline.................209
Octane Rating..............209
Requirements..............210
Tank Capacity..............210
Fueling....................139
Fuses.....................149
Gas Cap (Fuel Filler Cap) . . .65, 139, 140
Gasoline (Fuel)................209
Gear Ranges.................124
Gear Select Lever Override........164Glass Cleaning................206
GPS Navigation (Uconnect GPS).....231
Hazard Warning Flasher..........146
Headlights
Automatic.................29
Bulb Replacement...........147
Cleaning.................202
High Beam/Low Beam Select
Switch...................29
Leveling..................30
Passing..................29
Replacing
...............
.147
Switch...................28
Head Restraints................25
Heated Mirrors.................28
Heated Seats..................21
High Beam/Low Beam Select (Dimmer)
Switch....................29
Hill Descent Control.............76
Hill Descent Control Indicator.......76
Hill Start Assist................70
Hood Prop...................51
Hood Release.................51
Immobilizer (Sentry Key)..........16
Information Center, Vehicle.........56Instrument Cluster..............64
Instrument Panel Lens Cleaning.....205
Integrated Power Module (Fuses).....150
Interior Appearance Care..........204
Intermittent Wipers (Delay Wipers)....31
Introduction...................3
iPod/USB/MP3 Control
Bluetooth Streaming Audio......239
Jacking Instructions............155
Jack Operation.....154, 155, 156, 192
Jump Starting................160
Key, Programming..............17
Key, Replacement...............17
Keys.......................13
Key, Sentry (Immobilizer)..........16
Lane Change Assist..............30
Lap/Shoulder Belts..............86
Latches....................114
Hood....................51
Leaks, Fluid.................114
Leveling, Headlight..............30
Life Of Tires.................196
Light Bulbs..................114
Lights.....................114
261