ESP JEEP WRANGLER 2023 Workshop Manual
[x] Cancel search | Manufacturer: JEEP, Model Year: 2023, Model line: WRANGLER, Model: JEEP WRANGLER 2023Pages: 396, PDF Size: 25.15 MB
Page 277 of 396
SAFETY275
(Continued)
Side Impacts
The Side Air Bags are designed to activate in certain side
impacts. The Occupant Restraint Controller (ORC)
determines whether the deployment of the Side Air Bags
in a particular impact event is appropriate, based on the
severity and type of collision. The side impact sensors aid
the ORC in determining the appropriate response to
impact events. The system is calibrated to deploy the Side
Air Bags on the impact side of the vehicle during impacts
that require Side Air Bag occupant protection. In side
impacts, the Side Air Bags deploy independently; a left
side impact deploys the left Side Air Bags only and a
right-side impact deploys the right Side Air Bags only.
Vehicle damage by itself is not a good indicator of whether
or not Side Air Bags should have deployed.
The Side Air Bags will not deploy in all side collisions,
including some collisions at certain angles, or some side
collisions that do not impact the area of the passenger
compartment. The Side Air Bags may deploy during angled
or offset frontal collisions where the front air bags deploy.
Side Air Bags are a supplement to the seat belt restraint
system. Side Air Bags deploy in less time than it takes to
blink your eyes.
NOTE:Air bag covers may not be obvious in the interior trim, but
they will open during air bag deployment.
Air Bag System Components
NOTE:The Occupant Restraint Controller (ORC) monitors the
internal circuits and interconnecting wiring associated
with electrical Air Bag System Components listed below:
Occupant Restraint Controller (ORC)
Air Bag Warning Light
Steering Wheel and Column
Instrument Panel
Knee Impact Bolsters
Driver and Front Passenger Air Bags
Seat Belt Buckle Switch
Supplemental Side Air Bags
Front and Side Impact Sensors
Seat Belt Pretensioners
Seat Track Position Sensors
Occupant Classification System
If A Deployment Occurs
The front air bags are designed to deflate immediately
after deployment.
NOTE:Front and/or side air bags will not deploy in all collisions.
This does not mean something is wrong with the air bag
system.
WARNING!
Occupants, including children, who are up against or
very close to Side Air Bags can be seriously injured or
killed. Occupants, including children, should never
lean on or sleep against the door, side windows, or
area where the side air bags inflate, even if they are
in an infant or child restraint.
Seat belts (and child restraints where appropriate)
are necessary for your protection in all collisions.
They also help keep you in position, away from an
inflating Side Air Bag. To get the best protection from
the Side Air Bags, occupants must wear their seat
belts properly and sit upright with their backs against
the seats. Children must be properly restrained in a
child restraint or booster seat that is appropriate for
the size of the child.
WARNING!
Side Air Bags need room to inflate. Do not lean
against the door or window. Sit upright in the center
of the seat.
Being too close to the Side Air Bags during deploy -
ment could cause you to be severely injured or killed.
Relying on the Side Air Bags alone could lead to more
severe injuries in a collision. The Side Air Bags work
with your seat belt to restrain you properly. In some
collisions, Side Air Bags won’t deploy at all. Always
wear your seat belt even though you have Side Air
Bags.
WARNING!
6
23_JL_OM_EN_USC_t.book Page 275
Page 278 of 396
276SAFETY
If you do have a collision which deploys the air bags, any
or all of the following may occur:
The air bag material may sometimes cause abrasions
and/or skin reddening to the occupants as the air bags
deploy and unfold. The abrasions are similar to friction
rope burns or those you might get sliding along a carpet
or gymnasium floor. They are not caused by contact
with chemicals. They are not permanent and normally
heal quickly. However, if you haven’t healed signifi -
cantly within a few days, or if you have any blistering,
see your doctor immediately.
As the air bags deflate, you may see some smoke-like
particles. The particles are a normal by-product of the
process that generates the non-toxic gas used for air
bag inflation. These airborne particles may irritate the
skin, eyes, nose, or throat. If you have skin or eye irrita -
tion, rinse the area with cool water. For nose or throat
irritation, move to fresh air. If the irritation continues,
see your doctor. If these particles settle on your
clothing, follow the garment manufacturer’s instruc -
tions for cleaning.
Do not drive your vehicle after the air bags have deployed.
If you are involved in another collision, the air bags will not
be in place to protect you.NOTE:
Air bag covers may not be obvious in the interior trim,
but they will open during air bag deployment.
After any collision, the vehicle should be taken to an
authorized dealer immediately.
Enhanced Accident Response System
In the event of an impact, if the communication network
remains intact, and the power remains intact, depending
on the nature of the event, the Occupant Restraint
Controller (ORC) will determine whether to have the
Enhanced Accident Response System perform the
following functions:
Cut off fuel to the engine (if equipped).
Cut off battery power to the electric motor (if equipped).
Flash hazard lights as long as the battery has power.
Turn on the interior lights, which remain on as long as
the battery has power or for 15 minutes from the inter -
vention of the Enhanced Accident Response System.
Unlock the power door locks.
Your vehicle may also be designed to perform any of these
other functions in response to the Enhanced Accident
Response System:
Turn off the Fuel Filter Heater, Turn off the HVAC Blower
Motor, Close the HVAC Circulation Door
Cut off battery power to the:
Engine
Electric Motor (if equipped)
Electric power steering
Brake booster
Electric park brake
Automatic transmission gear selector
Horn
Front wiper
NOTE:After an accident, remember to cycle the ignition to the
START or ON/OFF position and remove the key from the
ignition switch to avoid draining the battery. Carefully
check the vehicle for fuel leaks in the engine compartment
and on the ground near the engine compartment and fuel
tank before resetting the system and starting the engine.
If there are no fuel leaks or damage to the vehicle elec -
trical devices (e.g. headlights) after an accident, reset the
system by following the procedure described below. If you
have any doubt, contact an authorized dealer.
Enhanced Accident Response System
Reset Procedure
If applicable, refer to the “Hybrid Supplement” for
additional information.
In order to reset the Enhanced Accident Response System
functions after an event, the ignition switch must be
changed from ignition START or ON/RUN to ignition OFF.
Carefully check the vehicle for fuel leaks in the engine
compartment and on the ground near the engine
compartment and fuel tank before resetting the system
and starting the engine.
After an accident, if the vehicle will not start after
performing the reset procedure, the vehicle must be
towed to an authorized dealer to be inspected and to have
the Enhanced Accident Response System reset.
WARNING!
Deployed air bags and seat belt pretensioners cannot
protect you in another collision. Have the air bags, seat
belt pretensioners, and the seat belt retractor
assemblies replaced by an authorized dealer
immediately. Also, have the Occupant Restraint
Controller System serviced as well.
23_JL_OM_EN_USC_t.book Page 276
Page 293 of 396
291
IN CASE OF EMERGENCY
HAZARD WARNING FLASHERS
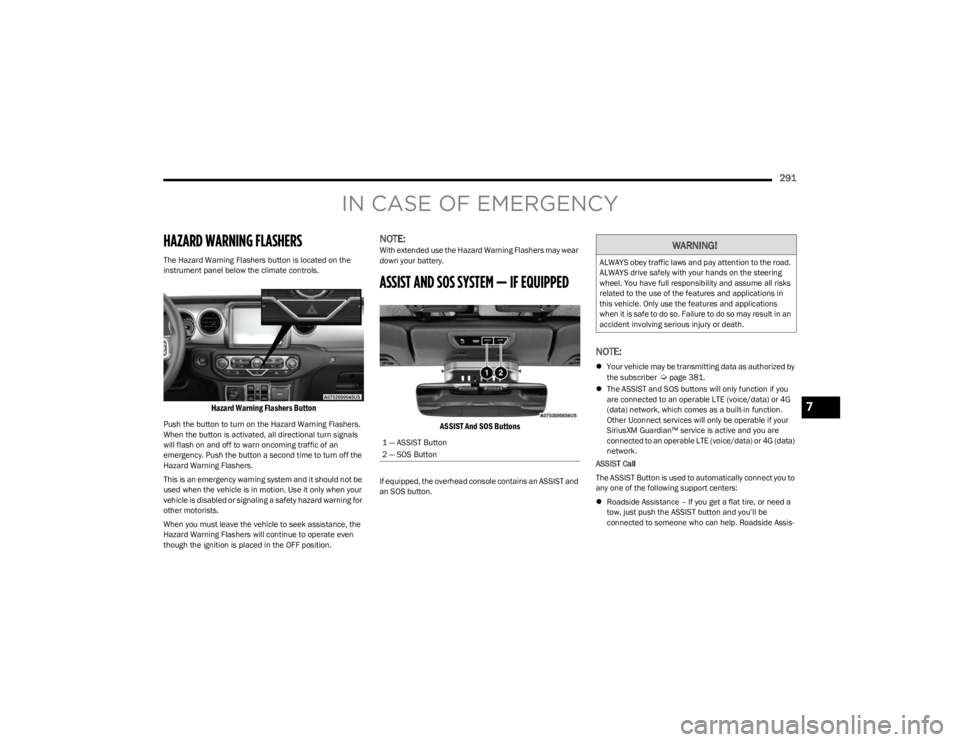
The Hazard Warning Flashers button is located on the
instrument panel below the climate controls.
Hazard Warning Flashers Button
Push the button to turn on the Hazard Warning Flashers.
When the button is activated, all directional turn signals
will flash on and off to warn oncoming traffic of an
emergency. Push the button a second time to turn off the
Hazard Warning Flashers.
This is an emergency warning system and it should not be
used when the vehicle is in motion. Use it only when your
vehicle is disabled or signaling a safety hazard warning for
other motorists.
When you must leave the vehicle to seek assistance, the
Hazard Warning Flashers will continue to operate even
though the ignition is placed in the OFF position.
NOTE:With extended use the Hazard Warning Flashers may wear
down your battery.
ASSIST AND SOS SYSTEM — IF EQUIPPED
ASSIST And SOS Buttons
If equipped, the overhead console contains an ASSIST and
an SOS button.
NOTE:
Your vehicle may be transmitting data as authorized by
the subscriber Úpage 381.
The ASSIST and SOS buttons will only function if you
are connected to an operable LTE (voice/data) or 4G
(data) network, which comes as a built-in function.
Other Uconnect services will only be operable if your
SiriusXM Guardian™ service is active and you are
connected to an operable LTE (voice/data) or 4G (data)
network.
ASSIST Call
The ASSIST Button is used to automatically connect you to
any one of the following support centers:
Roadside Assistance – If you get a flat tire, or need a
tow, just push the ASSIST button and you’ll be
connected to someone who can help. Roadside Assis -
1 — ASSIST Button
2 — SOS Button
WARNING!
ALWAYS obey traffic laws and pay attention to the road.
ALWAYS drive safely with your hands on the steering
wheel. You have full responsibility and assume all risks
related to the use of the features and applications in
this vehicle. Only use the features and applications
when it is safe to do so. Failure to do so may result in an
accident involving serious injury or death.
7
23_JL_OM_EN_USC_t.book Page 291
Page 294 of 396

292IN CASE OF EMERGENCY
tance will know what vehicle you’re driving and its loca -
tion. Additional fees may apply for roadside assistance.
SiriusXM Guardian™ Customer Care – In-vehicle
support for SiriusXM Guardian™.
Vehicle Customer Care – Total support for all other
vehicle issues.
Uconnect Customer Care - Total support for Radio,
Phone and NAV issues.
SOS Call
1. Push the SOS Call button on the overhead console.
NOTE:In case the SOS Call button is pushed in error, there will be
a 10 second delay before the SOS Call system initiates a
call to an SOS operator. To cancel the SOS Call
connection, push the SOS call button on the overhead
console or press the cancellation button on the Device
Screen. Termination of the SOS Call will turn off the green
LED light on the overhead console.
2. The LED light located within the ASSIST and SOS buttons on the overhead console will turn green once
a connection to an SOS operator has been made.
3. Once a connection between the vehicle and an SOS operator is made, the SOS Call system may transmit
the following important vehicle information to an SOS
operator:
Indication that the occupant placed an SOS Call
The vehicle brand
The last known GPS coordinates of the vehicle
4. You should be able to speak with the SOS operator through the vehicle audio system to determine if
additional help is needed.
NOTE:
Your vehicle may be transmitting data as autho -
rized by the subscriber.
Once a connection is made between the vehicle’s
SOS Call system and the SOS operator, the SOS
operator may be able to open a voice connection
with the vehicle to determine if additional help is
needed. Once the SOS operator opens a voice
connection with the vehicle’s SOS Call system, the
operator should be able to speak with you or other
vehicle occupants and hear sounds occurring in
the vehicle. The vehicle’s SOS Call system will
attempt to remain connected with the SOS oper -
ator until the SOS operator terminates the connec -
tion.
5. The SOS operator may attempt to contact appropriate emergency responders and provide them with
important vehicle information and GPS coordinates.
WARNING!
ALWAYS obey traffic laws and pay attention to the road.
ALWAYS drive safely with your hands on the steering
wheel. You have full responsibility and assume all risks
related to the use of the features and applications in
this vehicle. Only use the features and applications
when it is safe to do so. Failure to do so may result in an
accident involving serious injury or death.
WARNING!
If anyone in the vehicle could be in danger (e.g., fire
or smoke is visible, dangerous road conditions or
location), do not wait for voice contact from an Emer -
gency Services Agent. All occupants should exit the
vehicle immediately and move to a safe location.
Never place anything on or near the vehicle’s oper -
able network and GPS antennas. You could prevent
operable network and GPS signal reception, which
can prevent your vehicle from placing an emergency
call. An operable network and GPS signal reception is
required for the SOS Call system to function properly.
The SOS Call system is embedded into the vehicle’s
electrical system. Do not add aftermarket electrical
equipment to the vehicle’s electrical system. This
may prevent your vehicle from sending a signal to
initiate an emergency call. To avoid interference that
can cause the SOS Call system to fail, never add
aftermarket equipment (e.g., two-way mobile radio,
CB radio, data recorder, etc.) to your vehicle’s elec -
trical system or modify the antennas on your vehicle.
IF YOUR VEHICLE LOSES BATTERY POWER FOR ANY
REASON (INCLUDING DURING OR AFTER AN ACCI -
DENT), THE UCONNECT FEATURES, APPS AND
SERVICES, AMONG OTHERS, WILL NOT OPERATE.
Modifications to any part of the SOS Call system
could cause the air bag system to fail when you need
it. You could be injured if the air bag system is not
there to help protect you.
23_JL_OM_EN_USC_t.book Page 292
Page 295 of 396

IN CASE OF EMERGENCY293
SOS Call System Limitations
Vehicles sold in Mexico DO NOT have SOS Call system
capabilities.
SOS or other emergency line operators in Mexico may not
answer or respond to SOS system calls.
If the SOS Call system detects a malfunction, any of the
following may occur at the time the malfunction is
detected, and at the beginning of each ignition cycle:
The light located within the ASSIST and SOS buttons
will continuously illuminate red.
The Device Screen will display the following message
“Vehicle device requires service. Please contact an
authorized dealer.”
An In-Vehicle Audio message will state “Vehicle device
requires service. Please contact an authorized dealer.”
Even if the SOS Call system is fully functional, factors
beyond FCA US LLC’s control may prevent or stop the SOS Call system operation. These include, but are not limited
to, the following factors:
The ignition is in the OFF position
The vehicle’s electrical systems are not intact
The SOS Call system software and/or hardware are
damaged during a crash
The vehicle battery loses power or becomes discon -
nected during a vehicle crash
LTE (voice/data) or 4G (data) network and/or Global
Positioning Satellite signals are unavailable or
obstructed
Equipment malfunction at the SOS operator facility
Operator error by the SOS operator
LTE (voice/data) or 4G (data) network congestion
Weather
Buildings, structures, geographic terrain, or tunnelsNOTE:
Your vehicle may be transmitting data as authorized by
the subscriber.
Never place anything on or near the vehicle’s LTE
(voice/data) or 4G (data) and GPS antennas. You could
prevent LTE (voice/data) or 4G (data) and GPS signal
reception, which can prevent your vehicle from placing
an emergency call. An operable LTE (voice/data) or 4G
(data) network connection and a GPS signal is required
for the SOS Call system to function properly.
NOTE:Changes or modifications not expressly approved by the
party responsible for compliance could void the user's
authority to operate the equipment.
Automatic SOS — If Equipped
Automatic SOS is a hands-free safety service that can
immediately connect you with help in the event that your
vehicle’s airbags deploy. Please refer to your provided
radio supplement for complete information.
JACKING AND TIRE CHANGING
Use this QR code to access your digital
experience.
WARNING!
Ignoring the Rearview Mirror light could mean you
will not have SOS Call services. If the Rearview Mirror
light is illuminated, have an authorized dealer
service the SOS Call system immediately.
The Occupant Restraint Control module turns on the
air bag Warning Light on the instrument panel if a
malfunction in any part of the system is detected. If
the Air Bag Warning Light is illuminated, have an
authorized dealer service the Occupant Restraint
Control system immediately.WARNING!
ALWAYS obey traffic laws and pay attention to the road.
ALWAYS drive safely with your hands on the steering
wheel. You have full responsibility and assume all risks
related to the use of the features and applications in
this vehicle. Only use the features and applications
when it is safe to do so. Failure to do so may result in an
accident involving serious injury or death.
CAUTION!
To avoid damage to the mirror during cleaning, never
spray any cleaning solution directly onto the mirror.
Apply the solution onto a clean cloth and wipe the
mirror clean.
7
23_JL_OM_EN_USC_t.book Page 293
Page 307 of 396

IN CASE OF EMERGENCY305
ENHANCED ACCIDENT RESPONSE SYSTEM
(EARS)
This vehicle is equipped with an Enhanced Accident
Response System.
This feature is a communication network that takes effect
in the event of an impact
Úpage 276.
EVENT DATA RECORDER (EDR)
This vehicle is equipped with an event data recorder
(EDR). The main purpose of an EDR is to record data that
will assist in understanding how a vehicle’s systems
performed under certain crash or near crash-like
situations, such as an air bag deployment or hitting a road
obstacle
Úpage 277.
7
23_JL_OM_EN_USC_t.book Page 305
Page 315 of 396
SERVICING AND MAINTENANCE313
ADDITIONAL MAINTENANCE — B6 TO B20 BIODIESEL
NOTE:
Under no circumstances should oil change intervals exceed 8,000 miles (12,875 km) or six months, whichever comes first when using biodiesel blends greater than 5% (B5).
The owner is required to monitor mileage for B6-B20 biodiesel, the automatic oil change indicator system does not reflect the use of biofuels.
Fuel filter change interval is maintained at every second oil change. This is especially important with biodiesel usage.
For more information on using biodiesel
Úpage 371.
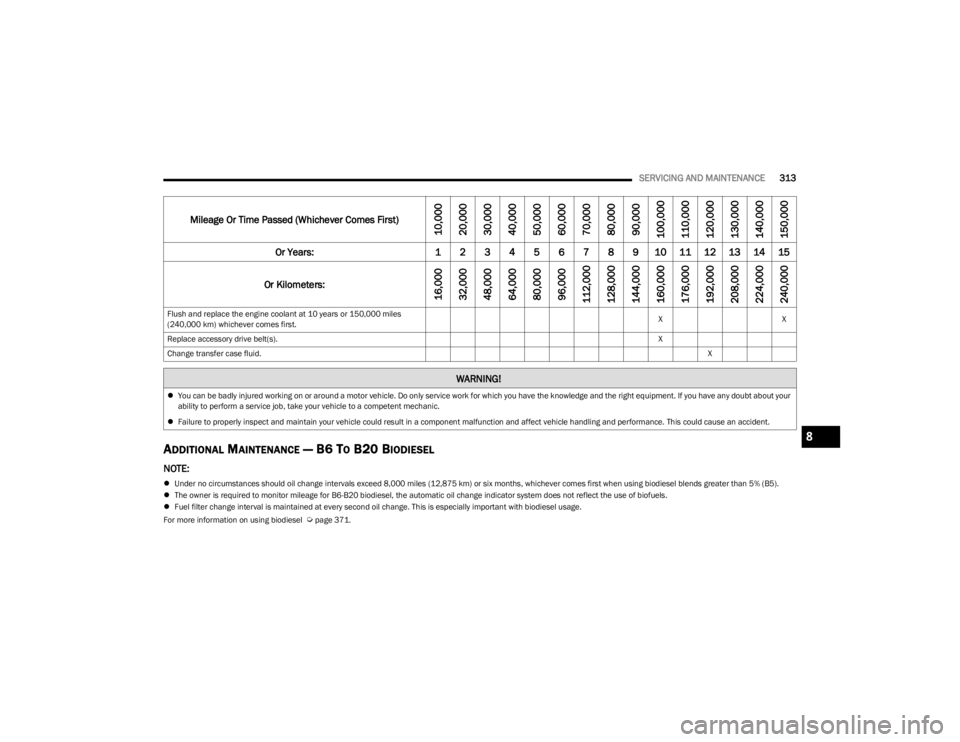
Flush and replace the engine coolant at 10 years or 150,000 miles
(240,000 km) whichever comes first.
X
X
Replace accessory drive belt(s). X
Change transfer case fluid. X
Mileage Or Time Passed (Whichever Comes First)
10,000
20,000
30,000
40,000
50,000
60,000
70,000
80,000
90,000
100,000
110,000
120,000
130,000
140,000
150,000
Or Years: 1 2 3 4 5 6 7 8 9 10 11 12 13 14 15
Or Kilometers:
16,000
32,000
48,000
64,000
80,000
96,000
112,000
128,000
144,000
160,000
176,000
192,000
208,000
224,000
240,000
WARNING!
You can be badly injured working on or around a motor vehicle. Do only service work for which you have the knowledge and the right equipment. If you have any doubt about your
ability to perform a service job, take your vehicle to a competent mechanic.
Failure to properly inspect and maintain your vehicle could result in a component malfunction and affect vehicle handling and performance. This could cause an accident.
8
23_JL_OM_EN_USC_t.book Page 313
Page 332 of 396
330SERVICING AND MAINTENANCE
NOTE:
It is the owner's responsibility to maintain the proper
level of protection against freezing according to the
temperatures occurring in the area where the vehicle is
operated.
Use care when filling under hood fluids such as engine
oil, washer fluid, antifreeze, etc., to minimize spillage
onto the top of the engine. Any excess fluid that is
spilled onto the top of the engine should be removed
using compressed air or an absorbent cloth.
Some vehicles require special tools to add coolant
properly. Failure to fill these systems properly could
lead to severe internal engine damage. If any coolant is
needed to be added to the system, please contact an
authorized dealer.
Mixing engine coolant types is not recommended and
can result in cooling system damage. If HOAT and OAT
coolant are mixed in an emergency, have an authorized
dealer drain, flush, and refill with OAT coolant
(conforming to MS.90032) as soon as possible.
Cooling System Pressure Cap
The cap must be fully tightened to prevent loss of engine
coolant (antifreeze), and to ensure that engine coolant will
return to the radiator from the coolant expansion bottle/
recovery tank if so equipped.
The cap should be inspected and cleaned if there is any
accumulation of foreign material on the sealing surfaces.
Disposal Of Used Coolant
Used ethylene glycol-based coolant (antifreeze) OAT or
HOAT, is a regulated substance requiring proper disposal.
Check with your local authorities to determine the disposal
rules for your community. To prevent ingestion by animals
or children, do not store ethylene glycol-based coolant in
open containers or allow it to remain in puddles on the
ground, clean up any ground spills immediately. If
ingested, seek emergency assistance immediately.
Coolant Level
The coolant bottle provides a quick visual method for
determining that the coolant level is adequate. With the
engine OFF and cold, the level of the engine coolant
(antifreeze) in the bottle should be between the ranges
indicated on the bottle. The radiator normally remains completely full, so there is
no need to remove the radiator/coolant pressure cap
unless checking for engine coolant freeze point or
replacing coolant. Advise your service attendant of this. As
long as the engine operating temperature is satisfactory,
the coolant bottle need only be checked once a month.
When additional engine coolant is needed to maintain the
proper level, only OAT coolant that meets the
requirements of the manufacturer Material Standard
MS.90032 should be added to the coolant bottle. Do not
overfill.
Engine Coolant Level — 2.0L
WARNING!
Do not open hot engine cooling system. Never add
engine coolant (antifreeze) when the engine is over -
heated. Do not loosen or remove the cap to cool an
overheated engine. Heat causes pressure to build up
in the cooling system. To prevent scalding or injury,
do not remove the pressure cap while the system is
hot or under pressure.
Do not use a pressure cap other than the one speci -
fied for your vehicle. Personal injury or engine
damage may result.
23_JL_OM_EN_USC_t.book Page 330
Page 349 of 396
SERVICING AND MAINTENANCE347
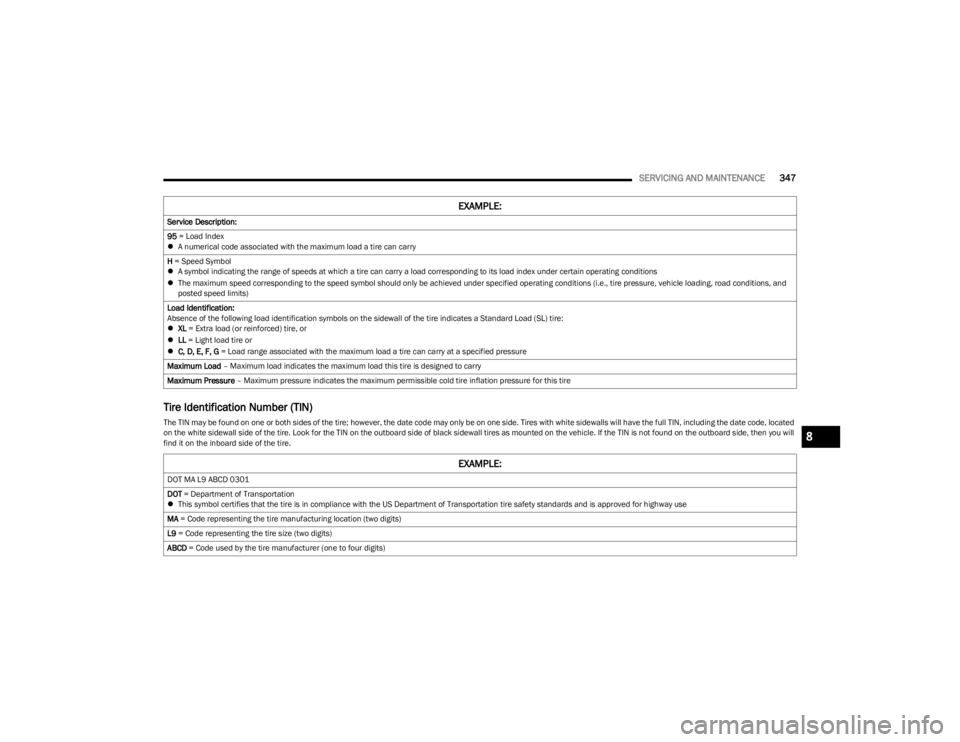
Tire Identification Number (TIN)
The TIN may be found on one or both sides of the tire; however, the date code may only be on one side. Tires with white sidewalls will have the full TIN, including the date code, located
on the white sidewall side of the tire. Look for the TIN on the outboard side of black sidewall tires as mounted on the vehicle. If the TIN is not found on the outboard side, then you will
find it on the inboard side of the tire.Service Description:
95
= Load Index
A numerical code associated with the maximum load a tire can carry
H = Speed Symbol
A symbol indicating the range of speeds at which a tire can carry a load corresponding to its load index under certain operating conditions
The maximum speed corresponding to the speed symbol should only be achieved under specified operating conditions (i.e., tire pressure, vehicle loading, road conditions, and
posted speed limits)
Load Identification:
Absence of the following load identification symbols on the sidewall of the tire indicates a Standard Load (SL) tire:
XL = Extra load (or reinforced) tire, or
LL = Light load tire or
C, D, E, F, G = Load range associated with the maximum load a tire can carry at a specified pressure
Maximum Load – Maximum load indicates the maximum load this tire is designed to carry
Maximum Pressure – Maximum pressure indicates the maximum permissible cold tire inflation pressure for this tire
EXAMPLE:
EXAMPLE:
DOT MA L9 ABCD 0301
DOT = Department of Transportation
This symbol certifies that the tire is in compliance with the US Department of Transportation tire safety standards and is approved for highway use
MA = Code representing the tire manufacturing location (two digits)
L9 = Code representing the tire size (two digits)
ABCD = Code used by the tire manufacturer (one to four digits)
8
23_JL_OM_EN_USC_t.book Page 347
Page 354 of 396
352SERVICING AND MAINTENANCE
(Continued)
TIRES — GENERAL INFORMATION
Tire Pressure
Proper tire inflation pressure is essential to the safe and
satisfactory operation of your vehicle. Four primary areas
are affected by improper tire pressure:
Safety
Fuel Economy
Tread Wear
Ride Comfort and Vehicle Stability
Safety Both underinflation and overinflation affect the stability of
the vehicle and can produce a feeling of sluggish response
or over responsiveness in the steering.
NOTE:
Unequal tire pressures from side to side may cause
erratic and unpredictable steering response.
Unequal tire pressure from side to side may cause the
vehicle to drift left or right.
Fuel Economy
Underinflated tires will increase tire rolling resistance
resulting in higher fuel consumption.
Tread Wear
Improper cold tire inflation pressures can cause abnormal
wear patterns and reduced tread life, resulting in the need
for earlier tire replacement.
Ride Comfort And Vehicle Stability
Proper tire inflation contributes to a comfortable ride.
Overinflation produces a jarring and uncomfortable ride.
Tire Inflation Pressures
The proper cold tire inflation pressure is listed on the
driver's side B-pillar or rear edge of the driver's side door. At least once a month:
Check and adjust tire pressure with a good quality
pocket-type pressure gauge. Do not make a visual
judgement when determining proper inflation. Tires
may look properly inflated even when they are
under-inflated.
Inspect tires for signs of tire wear or visible damage.
Inflation pressures specified on the placard are always
“cold tire inflation pressure”. Cold tire inflation pressure is
defined as the tire pressure after the vehicle has not been
driven for at least three hours, or driven less than 1 mile
(1.6 km) after sitting for a minimum of three hours. The
cold tire inflation pressure must not exceed the maximum
inflation pressure molded into the tire sidewall.
Check tire pressures more often if subject to a wide range
of outdoor temperatures, as tire pressures vary with
temperature changes.
Tire pressures change by approximately 1 psi (7 kPa) per
12°F (7°C) of air temperature change. Keep this in mind
when checking tire pressure inside a garage, especially in
the Winter.
WARNING!
Improperly inflated tires are dangerous and can
cause collisions.
Underinflation increases tire flexing and can result in
overheating and tire failure.
Overinflation reduces a tire's ability to cushion shock.
Objects on the road and chuckholes can cause
damage that result in tire failure.
Overinflated or underinflated tires can affect vehicle
handling and can fail suddenly, resulting in loss of
vehicle control.
Unequal tire pressures can cause steering problems.
You could lose control of your vehicle.
Unequal tire pressures from one side of the vehicle
to the other can cause the vehicle to drift to the right
or left.
Always drive with each tire inflated to the recom -
mended cold tire inflation pressure.
WARNING!
CAUTION!
After inspecting or adjusting the tire pressure, always
reinstall the valve stem cap. This will prevent moisture
and dirt from entering the valve stem, which could
damage the valve stem.
23_JL_OM_EN_USC_t.book Page 352