clutch JEEP WRANGLER 2023 Owners Manual
[x] Cancel search | Manufacturer: JEEP, Model Year: 2023, Model line: WRANGLER, Model: JEEP WRANGLER 2023Pages: 396, PDF Size: 25.15 MB
Page 121 of 396
GETTING TO KNOW YOUR INSTRUMENT PANEL119
Swing Gate Open Warning Light
This warning light will illuminate when the
swing gate is open.
NOTE:If the vehicle is moving, there will also be a single chime.
Transmission Temperature Warning Light —
If Equipped
This warning light will illuminate to warn of a
high transmission fluid temperature. This may
occur with strenuous usage such as trailer
towing. If this light turns on, stop the vehicle
and run the engine at idle or slightly faster, with the
transmission in PARK (P) or NEUTRAL (N), until the light
turns off. Once the light turns off, you may continue to
drive normally.
Vehicle Security Warning Light —
If Equipped
This light will flash at a fast rate for
approximately 15 seconds when the Vehicle
Security system is arming, and then will flash
slowly until the vehicle is disarmed.
YELLOW WARNING LIGHTS
Anti-Lock Brake System (ABS) Warning
Light
This warning light monitors the ABS. The light
will turn on when the ignition is placed in the
ON/RUN or ACC/ON/RUN position and may
stay on for as long as four seconds.
If the ABS light remains on or turns on while driving, then
the Anti-Lock portion of the brake system is not
functioning and service is required as soon as possible.
However, the conventional brake system will continue to
operate normally, assuming the Brake Warning Light is not
also on. If the ABS light does not turn on when the ignition is placed
in the ON/RUN or ACC/ON/RUN position, have the brake
system inspected by an authorized dealer.
Electronic Stability Control (ESC) Active
Warning Light — If Equipped
This warning light will indicate when the
Electronic Stability Control system is Active.
The ESC Indicator Light in the instrument
cluster will come on when the ignition is placed
in the ON/RUN or ACC/ON/RUN position, and when ESC is
activated. It should go out with the engine running. If the
ESC Indicator Light comes on continuously with the engine
running, a malfunction has been detected in the ESC
system. If this warning light remains on after several
ignition cycles, and the vehicle has been driven several
miles (kilometers) at speeds greater than 30 mph
(48 km/h), see an authorized dealer as soon as possible
to have the problem diagnosed and corrected.
The ESC OFF Indicator Light and the ESC Indicator Light
come on momentarily each time the ignition is placed
in the ON/RUN or ACC/ON/RUN position.
The ESC system will make buzzing or clicking sounds
when it is active. This is normal; the sounds will stop
when ESC becomes inactive.
This light will come on when the vehicle is in an ESC
event.
WARNING!
If you continue operating the vehicle when the
Transmission Temperature Warning Light is illuminated
you could cause the fluid to boil over, come in contact
with hot engine or exhaust components and cause a
fire. If you continue to operate the vehicle when the
“CLUTCH HOT” message is displayed, or the
Transmission Temperature Warning Light is illuminated,
you could cause the clutch to overheat and cause a fire.
CAUTION!
Continuous driving with the Transmission Temperature
Warning Light illuminated will eventually cause severe
transmission damage or transmission failure. If you
continue to operate the vehicle when the “CLUTCH
HOT” message is displayed, or the Transmission
Temperate Warning Light is illuminated, you could
cause the clutch to overheat and cause severe clutch
damage, transmission damage, or failure.
3
23_JL_OM_EN_USC_t.book Page 119
Page 128 of 396
126
STARTING AND OPERATING
STARTING THE ENGINE — GASOLINE
ENGINE (IF EQUIPPED)
Before starting your vehicle, adjust your seat, adjust both
inside and outside mirrors, and fasten your seat belts.
MANUAL TRANSMISSION — IF EQUIPPED
Apply the parking brake, place the gear selector in
NEUTRAL, and press the clutch pedal before starting the
vehicle. This vehicle is equipped with a clutch interlocking
ignition system. It will not start unless the clutch pedal is
pressed to the floor.
Four-Wheel Drive Models Only
In 4L mode, if the vehicle is stalled, the engine will start
regardless of whether or not the clutch pedal is pressed to
the floor. This feature enhances off-road performance by
allowing the vehicle to start when in 4L without having to
press the clutch pedal. The 4L Indicator Light will
illuminate when the transfer case has been shifted into
this mode.
AUTOMATIC TRANSMISSION —
I
F EQUIPPED
Start the vehicle with the gear selector in the PARK
position (vehicle can also be started in NEUTRAL). Apply
the brake before shifting to any driving range.
NORMAL STARTING
To Turn On The Engine Using The ENGINE START/STOP
Button
1. The transmission must be in PARK or NEUTRAL.
2. Press and hold the brake pedal while pushing the
ENGINE START/STOP button once. 3. The system takes over and attempts to start the
vehicle. If the vehicle fails to start, the starter will
disengage automatically after 10 seconds.
4. If you wish to stop the cranking of the engine prior to the engine starting, push the button again.
NOTE:Normal starting of either a cold or a warm engine is
obtained without pumping or pressing the accelerator
pedal.
To Turn Off The Engine Using The ENGINE START/STOP
Button
1. Place the gear selector in PARK, then push and release the ENGINE START/STOP button.
2. The ignition will return to the OFF position.
3. If the gear selector is not in PARK (with vehicle stopped) and the ENGINE START/STOP button is
pushed once, the transmission will automatically
select PARK and the engine will turn off while the
ignition will remain in the ACC position (NOT the OFF
position). Never leave a vehicle out of the PARK
position, or it could roll.
4. If the gear selector is in NEUTRAL, and the vehicle speed is below 5 mph (8 km/h), pushing the START/
STOP button once will turn the engine off. The ignition
will remain in the ACC position.
5. If the vehicle speed is above 5 mph (8 km/h), the ENGINE START/STOP button must be held for two WARNING!
When exiting the vehicle, always remove the key fob
from the ignition and lock your vehicle.
Never leave children alone in a vehicle, or with
access to an unlocked vehicle.
Allowing children to be in a vehicle unattended is
dangerous for a number of reasons. A child or others
could be seriously or fatally injured. Children should
be warned not to touch the parking brake, brake
pedal or the gear selector.
Do not leave the key fob in or near the vehicle, or in
a location accessible to children. A child could
operate power windows, other controls, or move the
vehicle.
Do not leave children or animals inside parked vehi -
cles in hot weather. Interior heat buildup may cause
serious injury or death.
23_JL_OM_EN_USC_t.book Page 126
Page 136 of 396
134STARTING AND OPERATING
(Continued)
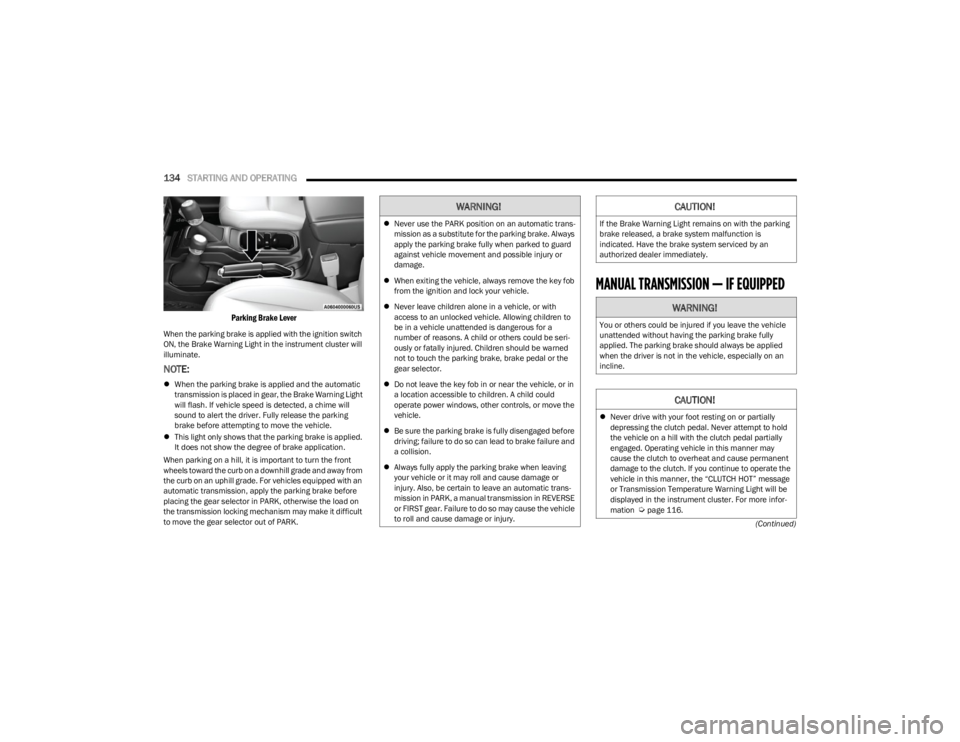
Parking Brake Lever
When the parking brake is applied with the ignition switch
ON, the Brake Warning Light in the instrument cluster will
illuminate.
NOTE:
When the parking brake is applied and the automatic
transmission is placed in gear, the Brake Warning Light
will flash. If vehicle speed is detected, a chime will
sound to alert the driver. Fully release the parking
brake before attempting to move the vehicle.
This light only shows that the parking brake is applied.
It does not show the degree of brake application.
When parking on a hill, it is important to turn the front
wheels toward the curb on a downhill grade and away from
the curb on an uphill grade. For vehicles equipped with an
automatic transmission, apply the parking brake before
placing the gear selector in PARK, otherwise the load on
the transmission locking mechanism may make it difficult
to move the gear selector out of PARK.
MANUAL TRANSMISSION — IF EQUIPPED
WARNING!
Never use the PARK position on an automatic trans -
mission as a substitute for the parking brake. Always
apply the parking brake fully when parked to guard
against vehicle movement and possible injury or
damage.
When exiting the vehicle, always remove the key fob
from the ignition and lock your vehicle.
Never leave children alone in a vehicle, or with
access to an unlocked vehicle. Allowing children to
be in a vehicle unattended is dangerous for a
number of reasons. A child or others could be seri -
ously or fatally injured. Children should be warned
not to touch the parking brake, brake pedal or the
gear selector.
Do not leave the key fob in or near the vehicle, or in
a location accessible to children. A child could
operate power windows, other controls, or move the
vehicle.
Be sure the parking brake is fully disengaged before
driving; failure to do so can lead to brake failure and
a collision.
Always fully apply the parking brake when leaving
your vehicle or it may roll and cause damage or
injury. Also, be certain to leave an automatic trans -
mission in PARK, a manual transmission in REVERSE
or FIRST gear. Failure to do so may cause the vehicle
to roll and cause damage or injury.
CAUTION!
If the Brake Warning Light remains on with the parking
brake released, a brake system malfunction is
indicated. Have the brake system serviced by an
authorized dealer immediately.
WARNING!
You or others could be injured if you leave the vehicle
unattended without having the parking brake fully
applied. The parking brake should always be applied
when the driver is not in the vehicle, especially on an
incline.
CAUTION!
Never drive with your foot resting on or partially
depressing the clutch pedal. Never attempt to hold
the vehicle on a hill with the clutch pedal partially
engaged. Operating vehicle in this manner may
cause the clutch to overheat and cause permanent
damage to the clutch. If you continue to operate the
vehicle in this manner, the “CLUTCH HOT” message
or Transmission Temperature Warning Light will be
displayed in the instrument cluster. For more infor -
mation
Úpage 116.
23_JL_OM_EN_USC_t.book Page 134
Page 137 of 396
STARTING AND OPERATING135
NOTE:During cold weather, you may experience increased effort
in shifting until the transmission fluid warms up. This is
normal.
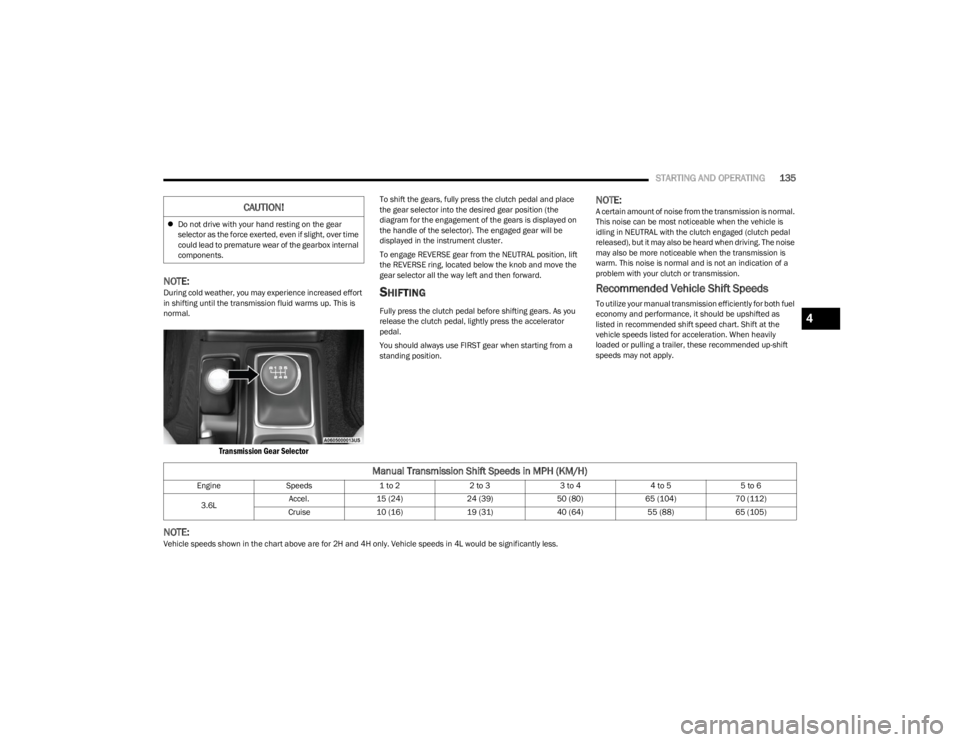
Transmission Gear Selector
To shift the gears, fully press the clutch pedal and place
the gear selector into the desired gear position (the
diagram for the engagement of the gears is displayed on
the handle of the selector). The engaged gear will be
displayed in the instrument cluster.
To engage REVERSE gear from the NEUTRAL position, lift
the REVERSE ring, located below the knob and move the
gear selector all the way left and then forward.
SHIFTING
Fully press the clutch pedal before shifting gears. As you
release the clutch pedal, lightly press the accelerator
pedal.
You should always use FIRST gear when starting from a
standing position.
NOTE:A certain amount of noise from the transmission is normal.
This noise can be most noticeable when the vehicle is
idling in NEUTRAL with the clutch engaged (clutch pedal
released), but it may also be heard when driving. The noise
may also be more noticeable when the transmission is
warm. This noise is normal and is not an indication of a
problem with your clutch or transmission.
Recommended Vehicle Shift Speeds
To utilize your manual transmission efficiently for both fuel
economy and performance, it should be upshifted as
listed in recommended shift speed chart. Shift at the
vehicle speeds listed for acceleration. When heavily
loaded or pulling a trailer, these recommended up-shift
speeds may not apply.
NOTE:Vehicle speeds shown in the chart above are for 2H and 4H only. Vehicle speeds in 4L would be significantly less.
Do not drive with your hand resting on the gear
selector as the force exerted, even if slight, over time
could lead to premature wear of the gearbox internal
components.
CAUTION!
Manual Transmission Shift Speeds in MPH (KM/H)
Engine Speeds 1 to 22 to 33 to 44 to 55 to 6
3.6L Accel.
15 (24) 24 (39)50 (80)65 (104) 70 (112)
Cruise 10 (16) 19 (31)40 (64)55 (88)65 (105)
4
23_JL_OM_EN_USC_t.book Page 135
Page 138 of 396
136STARTING AND OPERATING
(Continued)
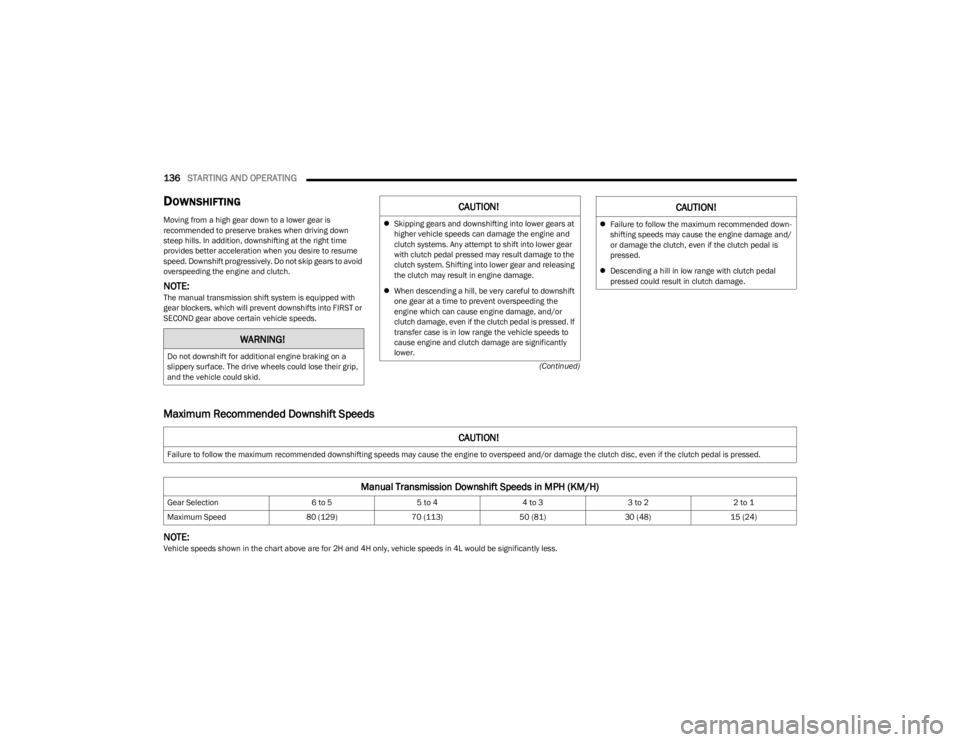
DOWNSHIFTING
Moving from a high gear down to a lower gear is
recommended to preserve brakes when driving down
steep hills. In addition, downshifting at the right time
provides better acceleration when you desire to resume
speed. Downshift progressively. Do not skip gears to avoid
overspeeding the engine and clutch.
NOTE:The manual transmission shift system is equipped with
gear blockers, which will prevent downshifts into FIRST or
SECOND gear above certain vehicle speeds.
Maximum Recommended Downshift Speeds
NOTE:Vehicle speeds shown in the chart above are for 2H and 4H only, vehicle speeds in 4L would be significantly less.
WARNING!
Do not downshift for additional engine braking on a
slippery surface. The drive wheels could lose their grip,
and the vehicle could skid.
CAUTION!
Skipping gears and downshifting into lower gears at
higher vehicle speeds can damage the engine and
clutch systems. Any attempt to shift into lower gear
with clutch pedal pressed may result damage to the
clutch system. Shifting into lower gear and releasing
the clutch may result in engine damage.
When descending a hill, be very careful to downshift
one gear at a time to prevent overspeeding the
engine which can cause engine damage, and/or
clutch damage, even if the clutch pedal is pressed. If
transfer case is in low range the vehicle speeds to
cause engine and clutch damage are significantly
lower.Failure to follow the maximum recommended down-
shifting speeds may cause the engine damage and/
or damage the clutch, even if the clutch pedal is
pressed.
Descending a hill in low range with clutch pedal
pressed could result in clutch damage.
CAUTION!
CAUTION!
Failure to follow the maximum recommended downshifting speeds may cause the engine to overspeed and/or damage the clutch disc, even if the clutch pedal is pressed.
Manual Transmission Downshift Speeds in MPH (KM/H)
Gear Selection 6 to 55 to 44 to 33 to 22 to 1
Maximum Speed 80 (129)70 (113) 50 (81)30 (48)15 (24)
23_JL_OM_EN_USC_t.book Page 136
Page 144 of 396
142STARTING AND OPERATING
NOTE:
Do not attempt to make a shift while only the front or
rear wheels are spinning. The front and rear driveshaft
speeds must be equal for the shift to take place.
Shifting while only the front or rear wheels are spinning
can cause damage to the transfer case.
Delayed shifts out of four-wheel drive may be experi -
enced due to uneven tire wear, low or uneven tire pres -
sures, excessive vehicle loading, or cold temperatures.
Shifting effort will increase with speed, this is normal.
During cold weather, you may experience increased effort
in shifting until the transfer case fluid warms up. This is
normal.
4H TO 4L OR 4L TO 4H
With the vehicle rolling at 1 to 3 mph (2 to 5 km/h), shift an automatic transmission into NEUTRAL (N), or press the
clutch pedal on a manual transmission. While the vehicle
is coasting at 1 to 3 mph (2 to 5 km/h), shift the transfer case lever firmly to the desired position. Do not pause with
the transfer case in N (Neutral). Once the shift is
completed, place the automatic transmission into DRIVE
or release the clutch pedal on a manual transmission.
NOTE:Shifting into or out of 4L is possible with the vehicle
completely stopped; however, difficulty may occur due to
the mating teeth not being properly aligned. Several
attempts may be required for clutch teeth alignment and
shift completion to occur. The preferred method is with the vehicle rolling at 1 to 3 mph (2 to 5 km/h). Avoid
attempting to engage or disengage 4L with the vehicle
moving faster than 1 to 3 mph (2 to 5 km/h).
During cold weather, you may experience increased effort
in shifting until the transfer case fluid warms up. This is
normal.
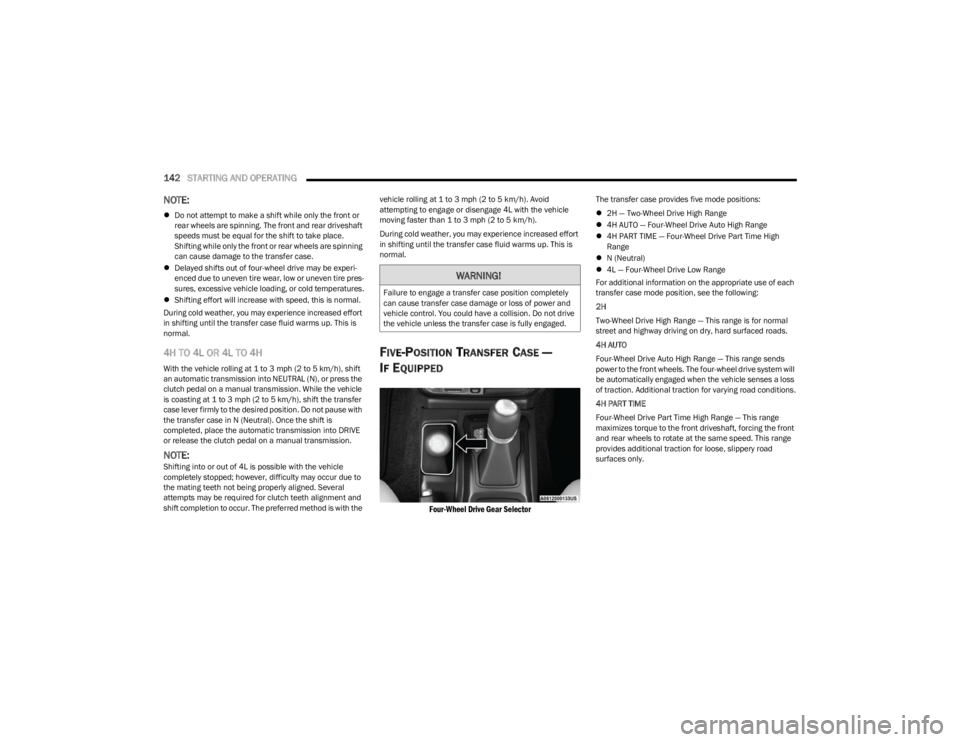
FIVE-POSITION TRANSFER CASE —
I
F EQUIPPED
Four-Wheel Drive Gear Selector
The transfer case provides five mode positions:
2H — Two-Wheel Drive High Range
4H AUTO — Four-Wheel Drive Auto High Range
4H PART TIME — Four-Wheel Drive Part Time High
Range
N (Neutral)
4L — Four-Wheel Drive Low Range
For additional information on the appropriate use of each
transfer case mode position, see the following:
2H
Two-Wheel Drive High Range — This range is for normal
street and highway driving on dry, hard surfaced roads.
4H AUTO
Four-Wheel Drive Auto High Range — This range sends
power to the front wheels. The four-wheel drive system will
be automatically engaged when the vehicle senses a loss
of traction. Additional traction for varying road conditions.
4H PART TIME
Four-Wheel Drive Part Time High Range — This range
maximizes torque to the front driveshaft, forcing the front
and rear wheels to rotate at the same speed. This range
provides additional traction for loose, slippery road
surfaces only.
WARNING!
Failure to engage a transfer case position completely
can cause transfer case damage or loss of power and
vehicle control. You could have a collision. Do not drive
the vehicle unless the transfer case is fully engaged.
23_JL_OM_EN_USC_t.book Page 142
Page 146 of 396
144STARTING AND OPERATING
4H PART TIME/4H AUTO TO 4L OR 4L TO 4H
PART TIME/4H AUTO
With the vehicle rolling at 1 to 3 mph (2 to 5 km/h), shift
an automatic transmission into NEUTRAL (N), or press the
clutch pedal on a manual transmission. While the vehicle
is coasting at 1 to 3 mph (2 to 5 km/h), shift the transfer case lever firmly to the desired position. Do not pause with
the transfer case in N (Neutral). Once the shift is
completed, place the automatic transmission into DRIVE
or release the clutch pedal on a manual transmission.
NOTE:Shifting into or out of 4L is possible with the vehicle
completely stopped; however, difficulty may occur due to
the mating teeth not being properly aligned. Several
attempts may be required for clutch teeth alignment and
shift completion to occur. The preferred method is with the
vehicle rolling at 1 to 3 mph (2 to 5 km/h). Avoid attempting to engage or disengage 4L with the vehicle
moving faster than 1 to 3 mph (2 to 5 km/h).
TRAC-LOK REAR AXLE — IF EQUIPPED
The Trac-Lok rear axle provides a constant driving force to
both rear wheels and reduces wheel spin caused by the
loss of traction at one driving wheel. If traction differs
between the two rear wheels, the differential automatically proportions the usable torque by providing
more torque to the wheel that has traction.
Trac-Lok is especially helpful during slippery driving
conditions. With both rear wheels on a slippery surface, a
slight application of the accelerator will supply maximum
traction.
AXLE LOCK (TRU-LOK) FRONT AND
R
EAR — IF EQUIPPED
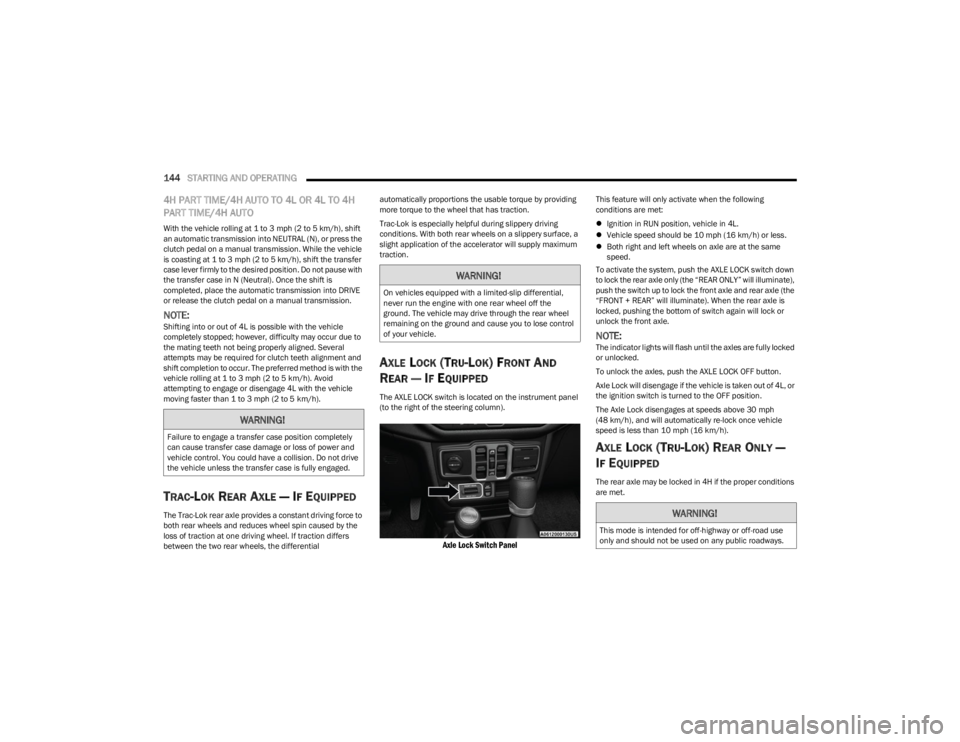
The AXLE LOCK switch is located on the instrument panel
(to the right of the steering column).
Axle Lock Switch Panel
This feature will only activate when the following
conditions are met:
Ignition in RUN position, vehicle in 4L.
Vehicle speed should be 10 mph (16 km/h) or less.
Both right and left wheels on axle are at the same
speed.
To activate the system, push the AXLE LOCK switch down
to lock the rear axle only (the “REAR ONLY” will illuminate),
push the switch up to lock the front axle and rear axle (the
“FRONT + REAR” will illuminate). When the rear axle is
locked, pushing the bottom of switch again will lock or
unlock the front axle.
NOTE:The indicator lights will flash until the axles are fully locked
or unlocked.
To unlock the axles, push the AXLE LOCK OFF button.
Axle Lock will disengage if the vehicle is taken out of 4L, or
the ignition switch is turned to the OFF position.
The Axle Lock disengages at speeds above 30 mph
(48 km/h), and will automatically re-lock once vehicle
speed is less than 10 mph (16 km/h).
AXLE LOCK (TRU-LOK) REAR ONLY —
I
F EQUIPPED
The rear axle may be locked in 4H if the proper conditions
are met.
WARNING!
Failure to engage a transfer case position completely
can cause transfer case damage or loss of power and
vehicle control. You could have a collision. Do not drive
the vehicle unless the transfer case is fully engaged.
WARNING!
On vehicles equipped with a limited-slip differential,
never run the engine with one rear wheel off the
ground. The vehicle may drive through the rear wheel
remaining on the ground and cause you to lose control
of your vehicle.
WARNING!
This mode is intended for off-highway or off-road use
only and should not be used on any public roadways.
23_JL_OM_EN_USC_t.book Page 144
Page 151 of 396
STARTING AND OPERATING149
TO MANUALLY TURN ON THE STOP/
S
TART SYSTEM
Push the Stop/Start OFF switch (located on the switch
bank). The light on the switch will turn off.
SYSTEM MALFUNCTION
If there is a malfunction in the Stop/Start system, the
system will not shut down the engine. A “SERVICE STOP/
START SYSTEM” message and a yellow Stop/Start telltale
will appear in the Instrument Cluster Display
Úpage 108.
If the “SERVICE STOP/START SYSTEM” message appears
in the instrument cluster display, have the system
checked by an authorized dealer.
If a malfunction occurs during an autostop, the vehicle
may not auto start and will need a key start.
STOP/START SYSTEM — MANUAL
TRANSMISSION (IF EQUIPPED)
The Engine Stop/Start (ESS) function is designed to
reduce fuel consumption. The system will stop the engine
automatically during a vehicle stop if the required
conditions are met. Pressing the clutch pedal will
automatically restart the vehicle.
ESS vehicles have been upgraded with a heavy-duty
starter, enhanced battery, and other upgraded engine
parts, to handle the additional engine starts. Vehicles
equipped with eTorque contain a heavy duty motor generator and an additional hybrid electric battery to store
energy from vehicle deceleration for use on engine startup
after a stop as well as providing launch torque assist.
NOTE:It is recommended that Stop/Start be disabled during
off-road use.
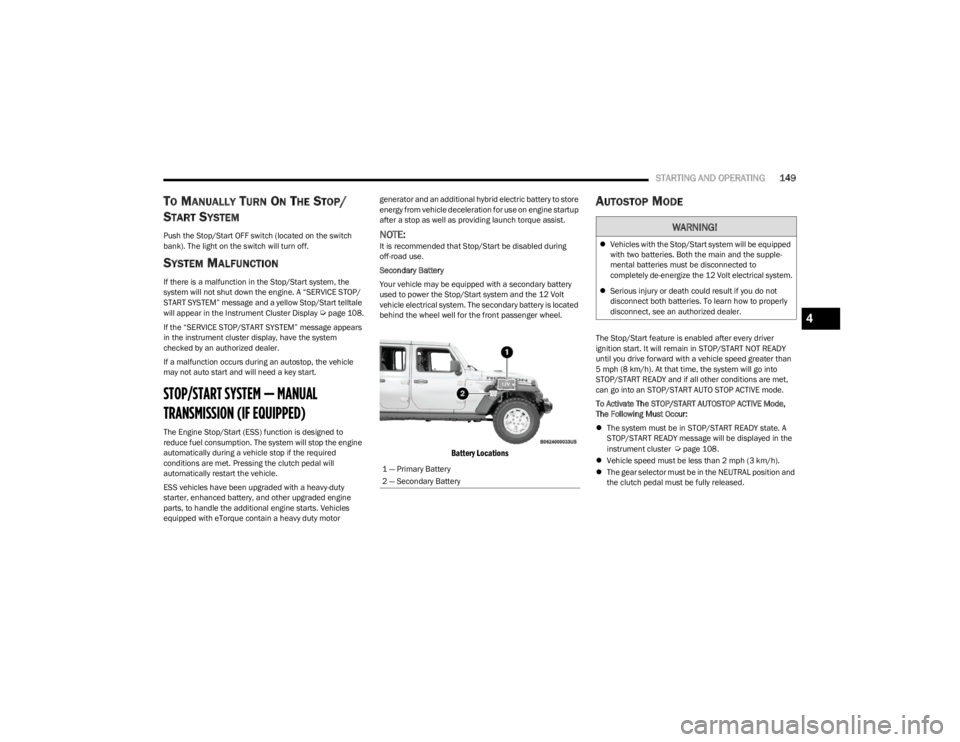
Secondary Battery
Your vehicle may be equipped with a secondary battery
used to power the Stop/Start system and the 12 Volt
vehicle electrical system. The secondary battery is located
behind the wheel well for the front passenger wheel.
Battery Locations
AUTOSTOP MODE
The Stop/Start feature is enabled after every driver
ignition start. It will remain in STOP/START NOT READY
until you drive forward with a vehicle speed greater than
5 mph (8 km/h). At that time, the system will go into
STOP/START READY and if all other conditions are met,
can go into an STOP/START AUTO STOP ACTIVE mode.
To Activate The STOP/START AUTOSTOP ACTIVE Mode,
The Following Must Occur:
The system must be in STOP/START READY state. A
STOP/START READY message will be displayed in the
instrument cluster
Úpage 108.
Vehicle speed must be less than 2 mph (3 km/h).
The gear selector must be in the NEUTRAL position and
the clutch pedal must be fully released.
1 — Primary Battery
2 — Secondary Battery
WARNING!
Vehicles with the Stop/Start system will be equipped
with two batteries. Both the main and the supple -
mental batteries must be disconnected to
completely de-energize the 12 Volt electrical system.
Serious injury or death could result if you do not
disconnect both batteries. To learn how to properly
disconnect, see an authorized dealer.
4
23_JL_OM_EN_USC_t.book Page 149
Page 152 of 396
150STARTING AND OPERATING
POSSIBLE REASONS THE ENGINE DOES
N
OT AUTOSTOP
Prior to engine shut down, the system will check many
safety and comfort conditions to see if they are fulfilled.
Situations when the engine will not stop include (but not
limited to):
Driver’s seat belt is not buckled.
Outside temperature is less than 10°F (–12°C) or
greater than 109°F (43°C).
Actual cabin temperature is significantly different than
temperature set on Auto HVAC.
HVAC is set to full defrost mode.
Engine has not reached normal operating temperature.
Battery is discharged.
When driving in REVERSE.
Hood is open.
Transfer case is in 4L or N (Neutral).
Driver's seat is not occupied or driver’s door is open.
Vehicle is at high altitude.
The vehicle is on a steep grade.
Forward Gear is engaged.
Steering angle is beyond threshold (ESS Models Only).
System fault is present.
HVAC is set to MAX A/C.
It may be possible for the vehicle to be driven several
times without the Stop/Start system going into a STOP/
START READY state under more extreme conditions of the
previously listed items.
TO START THE ENGINE WHILE IN
A
UTOSTOP MODE
When the gear selector is in NEUTRAL, the engine will start
when the clutch pedal is pressed (does not require
complete/full pedal press). The vehicle will go into STOP/
START SYSTEM NOT READY mode until the vehicle speed
is greater than 5 mph (8 km/h).
Conditions that will cause the engine to start
automatically while in STOP/START AUTOSTOP ACTIVE
mode
The Engine Will Start Automatically When:
Actual cabin temperature is significantly different than
temperature set on Auto HVAC.
HVAC is set to full defrost mode.
HVAC system temperature or fan speed is manually
adjusted higher.
Stop/Start Autostop Active time exceeds five minutes.
Battery voltage drops too low.
Vehicle is moving faster than 5 mph (8 km/h).
STOP/START OFF switch is pressed.
Transfer case is in 4L or N (Neutral).
Steering wheel is turned beyond threshold (ESS
Models Only).
TO MANUALLY TURN OFF THE STOP/
S
TART SYSTEM
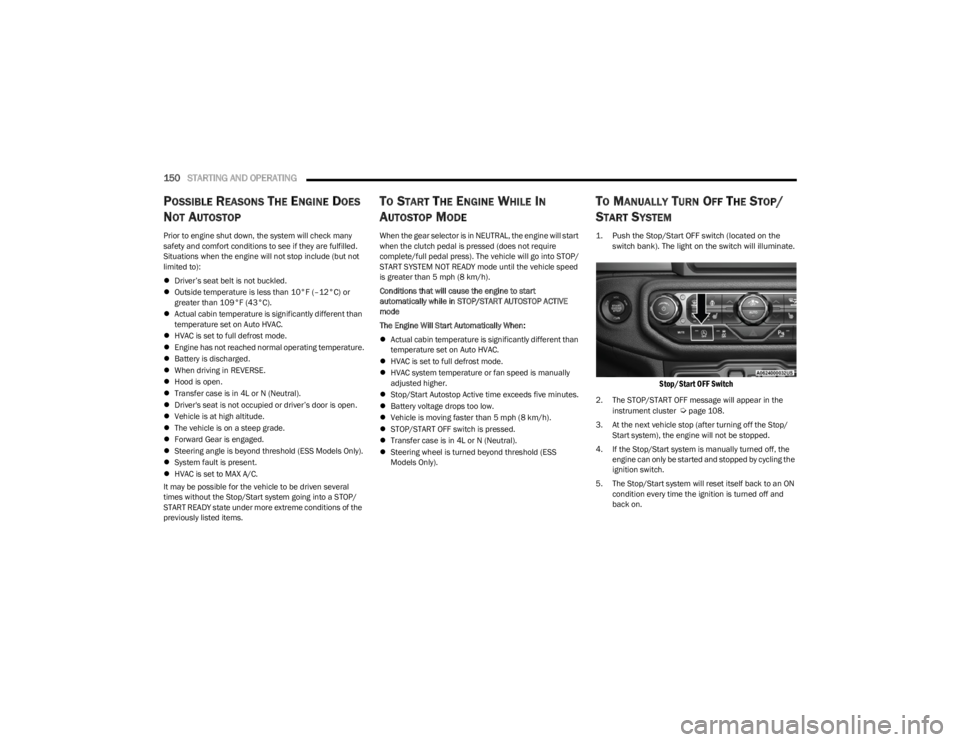
1. Push the Stop/Start OFF switch (located on the
switch bank). The light on the switch will illuminate.
Stop/Start OFF Switch
2. The STOP/START OFF message will appear in the
instrument cluster Úpage 108.
3. At the next vehicle stop (after turning off the Stop/ Start system), the engine will not be stopped.
4. If the Stop/Start system is manually turned off, the engine can only be started and stopped by cycling the
ignition switch.
5. The Stop/Start system will reset itself back to an ON condition every time the ignition is turned off and
back on.
23_JL_OM_EN_USC_t.book Page 150
Page 154 of 396
152STARTING AND OPERATING
To Set A Desired Speed
Turn the Cruise Control on.
NOTE:The vehicle should be traveling at a steady speed and on
level ground before pushing the SET (+) or SET (-) button.
When the vehicle has reached the desired speed, push
the SET (+) or SET (-) button and release. Release the
accelerator and the vehicle will operate at the selected
speed.
To Vary The Speed Setting
To Increase Or Decrease The Set Speed
When the Cruise Control is set, you can increase speed by
pushing the SET (+) button, or decrease speed by pushing
the SET (-) button.
U.S. Speed (mph)
Pushing the SET (+), or SET (-) button once will result in
a 1 mph speed adjustment. Each subsequent tap of
the button results in an adjustment of 1 mph.
If the button is continually pushed, the set speed will
continue to adjust in 5 mph increments until the button
is released, then the new set speed will be established.
Metric Speed (km/h)
Pushing the SET (+), or SET (-) button once will result in
a 1 km/h speed adjustment. Each subsequent tap of
the button results in an adjustment of 1 km/h.
If the button is continually pushed, the set speed will
continue to adjust in 10 km/h increments until the
button is released, then the new set speed will be
established.
To Accelerate For Passing
While the Cruise Control is set, press the accelerator to
pass as you would normally. When the pedal is released,
the vehicle will return to the set speed.
USING CRUISE CONTROL ON HILLS
The transmission may downshift on hills to maintain the
vehicle set speed.
The Cruise Control system maintains speed up and down
hills. A slight speed change on moderate hills is normal.
On steep hills, a greater speed loss or gain may occur so it
may be preferable to drive without Cruise Control.
To Resume Speed
To resume a previously set speed, push the RES button
and release. Resume can be used at any speed above
20 mph (32 km/h).
To Deactivate
A tap on the brake pedal, pushing the CANC (cancel)
button, or normal brake pressure while slowing the vehicle
will deactivate the Cruise Control without erasing the set
speed from memory. The following conditions will also deactivate the Cruise
Control without erasing the set speed from memory:
Vehicle parking brake is applied
Stability event occurs
Gear selector is moved out of DRIVE
Engine overspeed occurs
Clutch pedal is pressed (manual transmission only)
Vehicle is operating at a low RPM (manual transmis -
sion only)
Pushing the on/off button or placing the ignition in the OFF
position erases the set speed from memory.
ADAPTIVE CRUISE CONTROL (ACC)
Adaptive Cruise Control (ACC) increases the driving
convenience provided by Cruise Control while traveling on
highways and major roadways. However, it is not a safety
system and not designed to prevent collisions. The Cruise
Control function performs differently if your vehicle is not
equipped with ACC
Úpage 151.
NOTE:
If the ACC sensor detects a vehicle ahead, ACC will
apply limited braking or accelerate (not to exceed the
original set speed) automatically to maintain a preset
following distance, while matching the speed of the
vehicle ahead.
Any chassis/suspension or tire size modifications to
the vehicle will affect the performance of the Adaptive
Cruise Control and Forward Collision Warning system.
Fixed Speed Cruise Control (ACC not enabled) will not
detect vehicles directly ahead of you. Always be aware
of the feature selected
Úpage 381.
WARNING!
Cruise Control can be dangerous where the system
cannot maintain a constant speed. Your vehicle could
go too fast for the conditions, and you could lose control
and have an accident. Do not use Cruise Control in
heavy traffic or on roads that are winding, icy,
snow-covered or slippery.
23_JL_OM_EN_USC_t.book Page 152