KIA CADENZA 2011 Owners Manual
Manufacturer: KIA, Model Year: 2011, Model line: CADENZA, Model: KIA CADENZA 2011Pages: 352, PDF Size: 28.17 MB
Page 171 of 352
Features of your vehicle
110
4
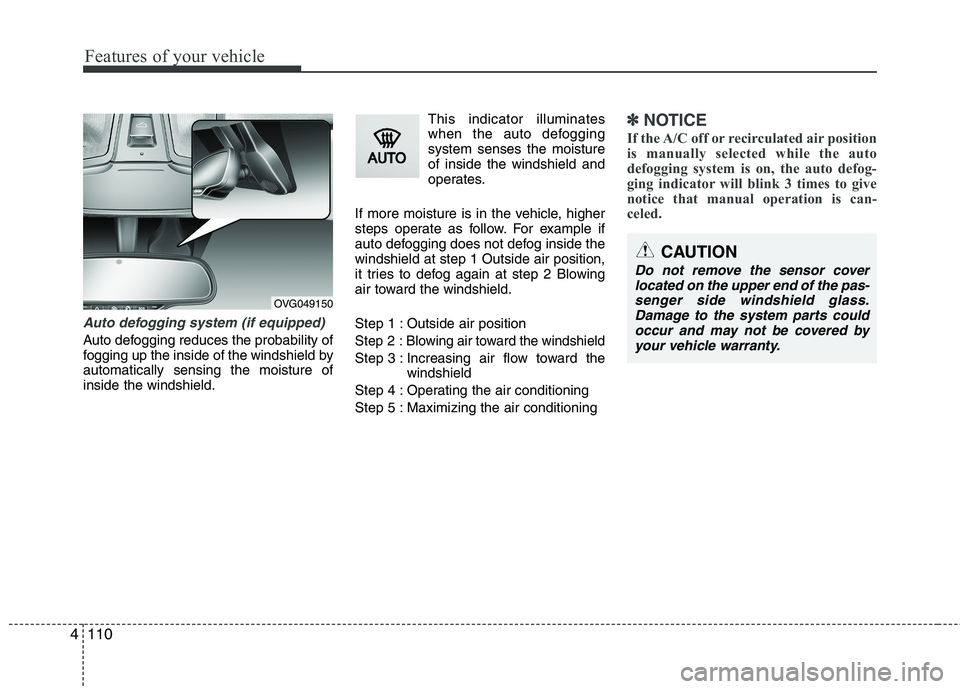
Auto defogging system (if equipped)
Auto defogging reduces the probability of
fogging up the inside of the windshield byautomatically sensing the moisture ofinside the windshield. This indicator illuminates
when the auto defoggingsystem senses the moistureof inside the windshield and
operates.
If more moisture is in the vehicle, higher
steps operate as follow. For example if
auto defogging does not defog inside thewindshield at step 1 Outside air position,
it tries to defog again at step 2 Blowing
air toward the windshield.
Step 1 : Outside air positionStep 2 :Blowing air toward the windshield
Step 3 : Increasing air flow toward the windshield
Step 4 : Operating the air conditioning
Step 5 : Maximizing the air conditioning
✽✽ NOTICE
If the A/C off or recirculated air position
is manually selected while the auto
defogging system is on, the auto defog-
ging indicator will blink 3 times to give
notice that manual operation is can-
celed.
OVG049150
CAUTION
Do not remove the sensor cover located on the upper end of the pas-senger side windshield glass.
Damage to the system parts couldoccur and may not be covered by your vehicle warranty.
Page 172 of 352
4111
Features of your vehicle
These compartments can be used to
store small items required by the driver
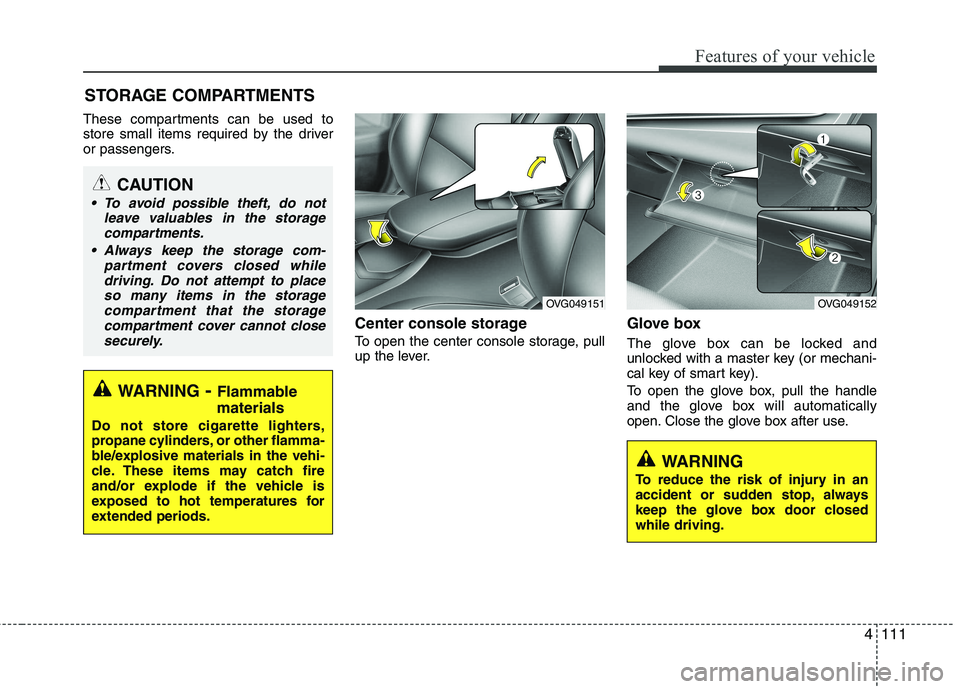
or passengers.Center console storage
To open the center console storage, pull
up the lever.Glove box
The glove box can be locked and
unlocked with a master key (or mechani-
cal key of smart key).
To open the glove box, pull the handle
and the glove box will automatically
open. Close the glove box after use.
STORAGE COMPARTMENTS
WARNING
- Flammable
materials
Do not store cigarette lighters,
propane cylinders, or other flamma-
ble/explosive materials in the vehi-
cle. These items may catch fire
and/or explode if the vehicle is
exposed to hot temperatures for
extended periods.
CAUTION
To avoid possible theft, do not leave valuables in the storagecompartments.
Always keep the storage com- partment covers closed whiledriving. Do not attempt to placeso many items in the storagecompartment that the storage
compartment cover cannot close securely.
OVG049152OVG049151
WARNING
To reduce the risk of injury in an
accident or sudden stop, always
keep the glove box door closedwhile driving.
Page 173 of 352
Features of your vehicle
112
4
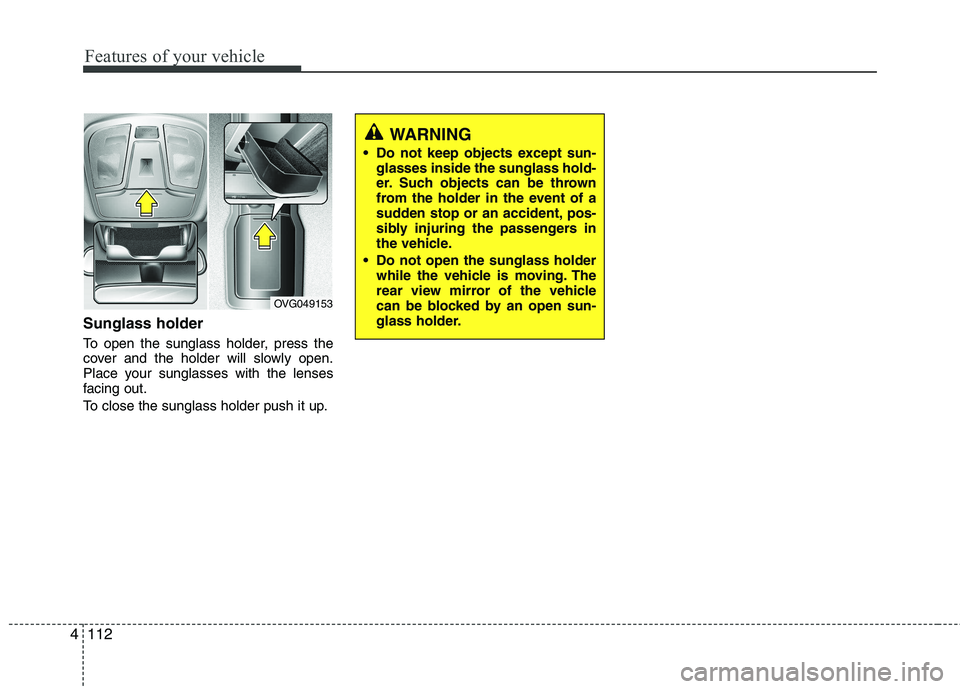
Sunglass holder
To open the sunglass holder, press the
cover and the holder will slowly open.
Place your sunglasses with the lenses
facing out.
To close the sunglass holder push it up.
OVG049153
WARNING
Do not keep objects except sun- glasses inside the sunglass hold-
er. Such objects can be thrown
from the holder in the event of a
sudden stop or an accident, pos-
sibly injuring the passengers in
the vehicle.
Do not open the sunglass holder while the vehicle is moving. The
rear view mirror of the vehicle
can be blocked by an open sun-
glass holder.
Page 174 of 352
4113
Features of your vehicle
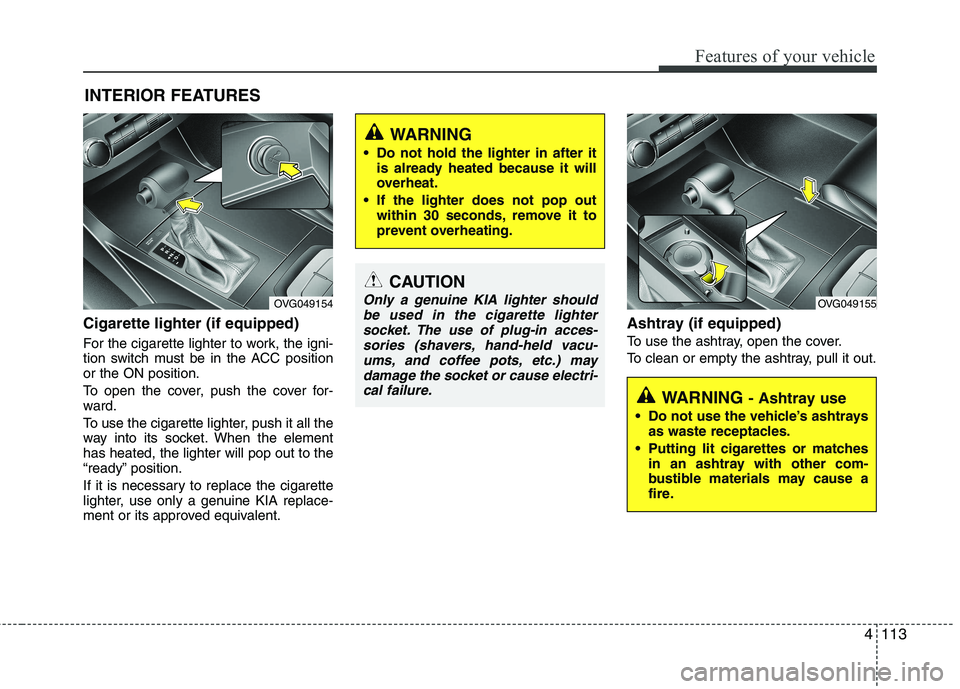
Cigarette lighter (if equipped)
For the cigarette lighter to work, the igni-
tion switch must be in the ACC positionor the ON position.
To open the cover, push the cover for-
ward.
To use the cigarette lighter, push it all the
way into its socket. When the elementhas heated, the lighter will pop out to the
“ready” position.
If it is necessary to replace the cigarette
lighter, use only a genuine KIA replace-
ment or its approved equivalent.Ashtray (if equipped)
To use the ashtray, open the cover.
To clean or empty the ashtray, pull it out.
INTERIOR FEATURES
CAUTION
Only a genuine KIA lighter should
be used in the cigarette lightersocket. The use of plug-in acces-sories (shavers, hand-held vacu- ums, and coffee pots, etc.) may
damage the socket or cause electri- cal failure.
WARNING
Do not hold the lighter in after it is already heated because it will
overheat.
If the lighter does not pop out within 30 seconds, remove it to
prevent overheating.
OVG049154
WARNING - Ashtray use
Do not use the vehicle’s ashtrays as waste receptacles.
Putting lit cigarettes or matches in an ashtray with other com-
bustible materials may cause a
fire.
OVG049155
Page 175 of 352
Features of your vehicle
114
4
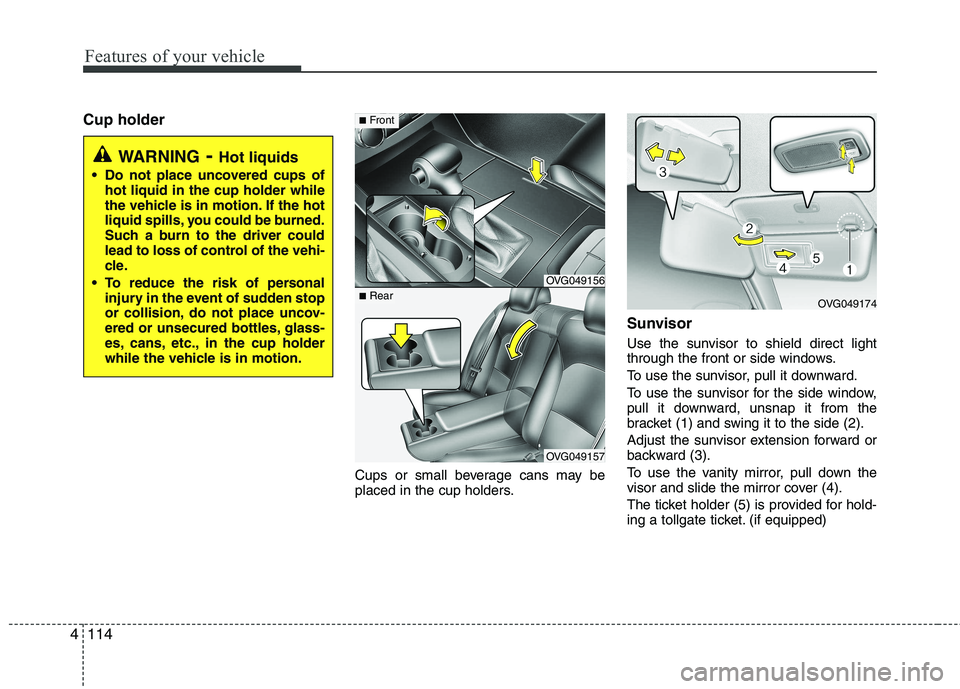
Cup holder
Cups or small beverage cans may be
placed in the cup holders.Sunvisor
Use the sunvisor to shield direct light
through the front or side windows.
To use the sunvisor, pull it downward.
To use the sunvisor for the side window,
pull it downward, unsnap it from the
bracket (1) and swing it to the side (2).
Adjust the sunvisor extension forward or
backward (3).
To use the vanity mirror, pull down the
visor and slide the mirror cover (4).
The ticket holder (5) is provided for hold-
ing a tollgate ticket. (if equipped)
WARNING
- Hot liquids
Do not place uncovered cups of hot liquid in the cup holder while
the vehicle is in motion. If the hot
liquid spills, you could be burned.
Such a burn to the driver could
lead to loss of control of the vehi-
cle.
To reduce the risk of personal injury in the event of sudden stop
or collision, do not place uncov-
ered or unsecured bottles, glass-
es, cans, etc., in the cup holder
while the vehicle is in motion.
OVG049156
OVG049157
■Front
■RearOVG049174
Page 176 of 352
4115
Features of your vehicle
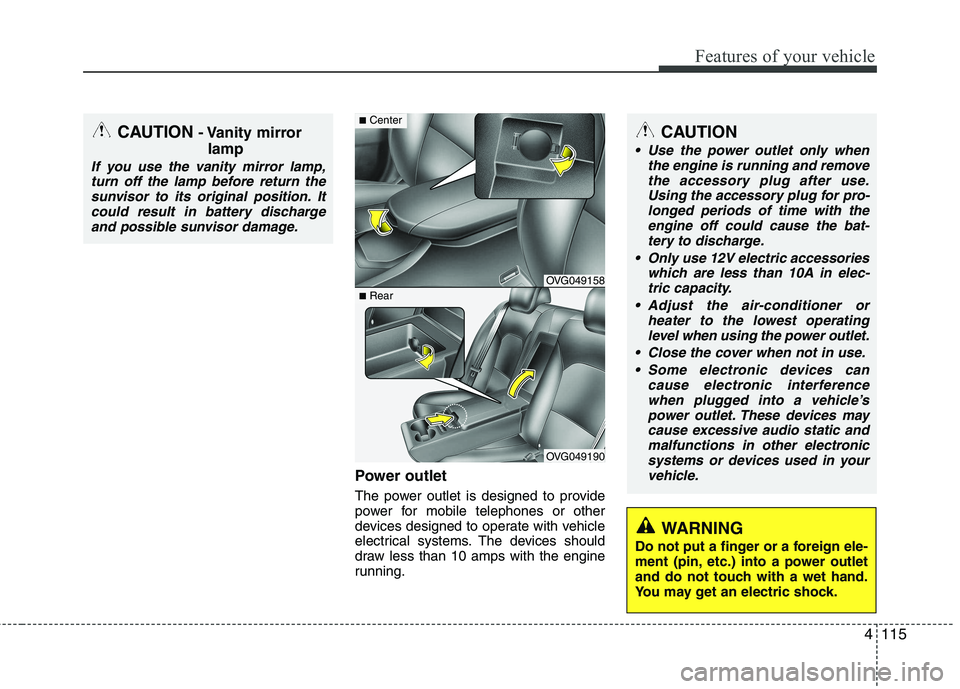
Power outlet
The power outlet is designed to provide
power for mobile telephones or other
devices designed to operate with vehicle
electrical systems. The devices should
draw less than 10 amps with the engine
running.
CAUTION
Use the power outlet only whenthe engine is running and remove
the accessory plug after use. Using the accessory plug for pro-longed periods of time with theengine off could cause the bat-
tery to discharge.
Only use 12V electric accessories which are less than 10A in elec-tric capacity.
Adjust the air-conditioner or heater to the lowest operatinglevel when using the power outlet.
Close the cover when not in use. Some electronic devices can cause electronic interference
when plugged into a vehicle’s power outlet. These devices maycause excessive audio static and malfunctions in other electronic
systems or devices used in yourvehicle.
WARNING
Do not put a finger or a foreign ele-
ment (pin, etc.) into a power outlet
and do not touch with a wet hand.
You may get an electric shock.
CAUTION - Vanity mirror
lamp
If you use the vanity mirror lamp,turn off the lamp before return the
sunvisor to its original position. Itcould result in battery dischargeand possible sunvisor damage.
OVG049158
OVG049190
■ Center
■Rear
Page 177 of 352
Features of your vehicle
116
4
Digital clock
Whenever the battery terminals or relat-
ed fuses are disconnected, you must
reset the time.
When the ignition switch is in the ACC or
ON position, the clock buttons operate as
follows:
■
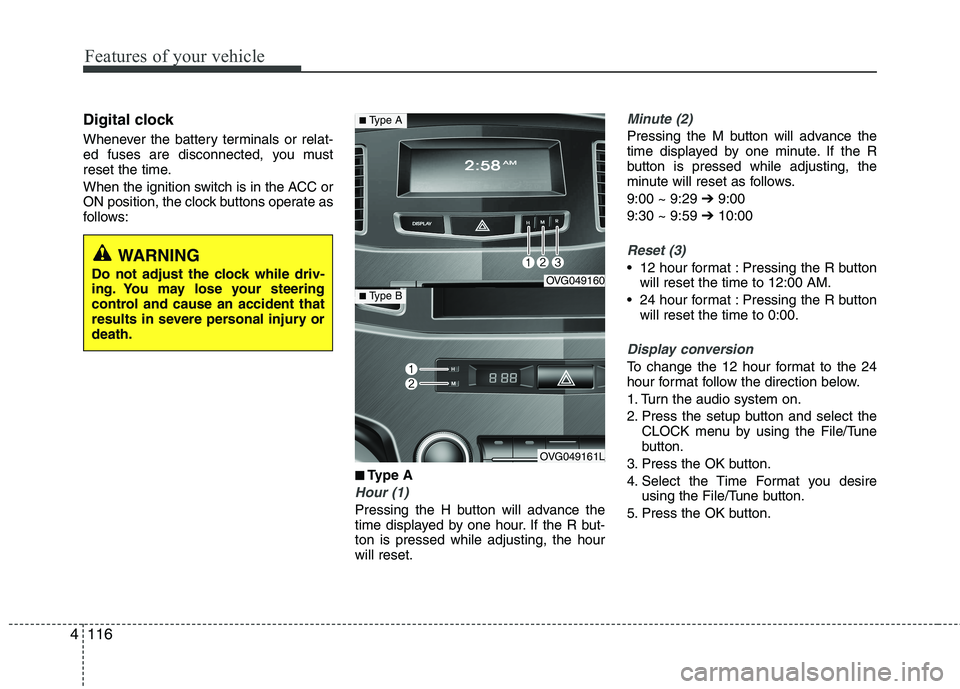
■Type A
Hour (1)
Pressing the H button will advance the
time displayed by one hour. If the R but-ton is pressed while adjusting, the hourwill reset.
Minute (2)
Pressing the M button will advance the
time displayed by one minute. If the R
button is pressed while adjusting, the
minute will reset as follows. 9:00 ~ 9:29 ➔9:00
9:30 ~ 9:59 ➔10:00
Reset (3)
12 hour format : Pressing the R button
will reset the time to 12:00 AM.
24 hour format : Pressing the R button will reset the time to 0:00.
Display conversion
To change the 12 hour format to the 24
hour format follow the direction below.
1. Turn the audio system on.
2. Press the setup button and select the CLOCK menu by using the File/Tune
button.
3. Press the OK button.
4. Select the Time Format you desire using the File/Tune button.
5. Press the OK button.
WARNING
Do not adjust the clock while driv-
ing. You may lose your steering
control and cause an accident that
results in severe personal injury ordeath.
OVG049160
OVG049161L
■ Type A
■Type B
Page 178 of 352
4117
Features of your vehicle
■■
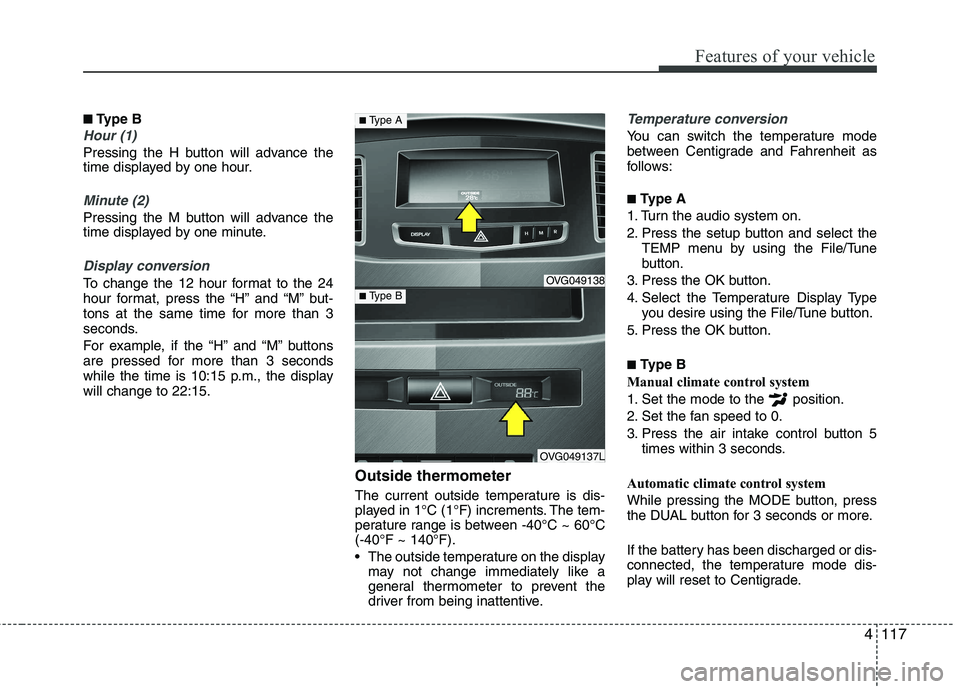
Type B
Hour (1)
Pressing the H button will advance the
time displayed by one hour.
Minute (2)
Pressing the M button will advance the
time displayed by one minute.
Display conversion
To change the 12 hour format to the 24
hour format, press the “H” and “M” but-
tons at the same time for more than 3
seconds.
For example, if the “H” and “M” buttons
are pressed for more than 3 seconds
while the time is 10:15 p.m., the displaywill change to 22:15.
Outside thermometer
The current outside temperature is dis-
played in 1°C (1°F) increments. The tem-
perature range is between -40°C ~ 60°C(-40°F ~ 140°F).
The outside temperature on the displaymay not change immediately like a
general thermometer to prevent the
driver from being inattentive.
Temperature conversion
You can switch the temperature mode
between Centigrade and Fahrenheit as
follows: ■ Type A
1. Turn the audio system on.
2. Press the setup button and select the TEMP menu by using the File/Tune
button.
3. Press the OK button.
4. Select the Temperature Display Type you desire using the File/Tune button.
5. Press the OK button. ■ Type B
Manual climate control system
1. Set the mode to the position.
2. Set the fan speed to 0.
3. Press the air intake control button 5 times within 3 seconds.
Automatic climate control system
While pressing the MODE button, press
the DUAL button for 3 seconds or more.
If the battery has been discharged or dis-
connected, the temperature mode dis-
play will reset to Centigrade.
OVG049138
OVG049137L
■ Type A
■Type B
Page 179 of 352
Features of your vehicle
118
4
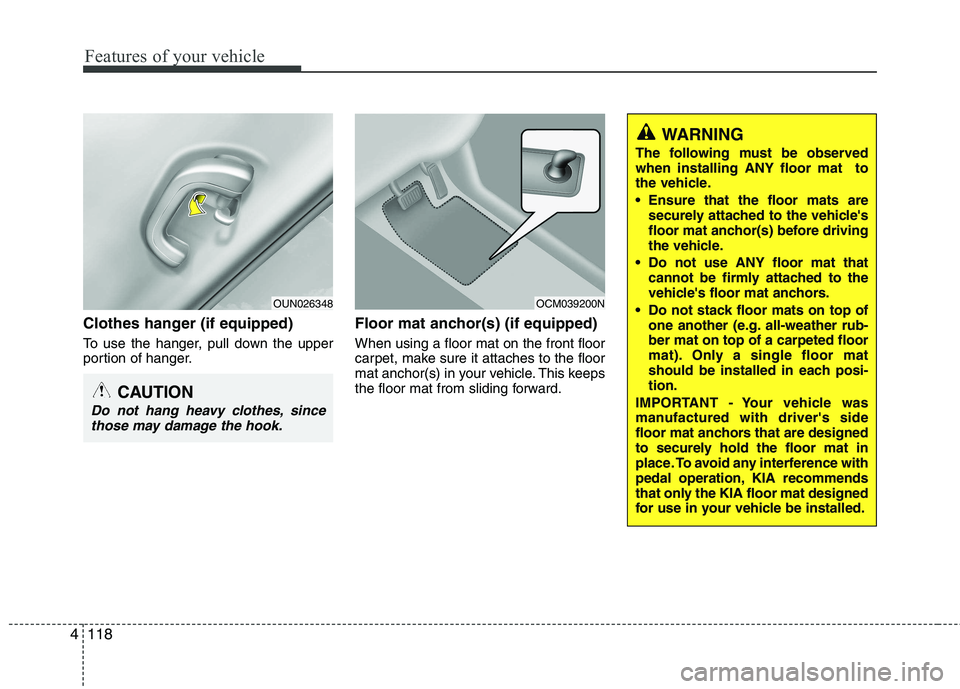
Clothes hanger (if equipped)
To use the hanger, pull down the upper
portion of hanger. Floor mat anchor(s) (if equipped) When using a floor mat on the front floor
carpet, make sure it attaches to the floor
mat anchor(s) in your vehicle. This keeps
the floor mat from sliding forward.
CAUTION
Do not hang heavy clothes, since
those may damage the hook.
OUN026348OCM039200N
WARNING
The following must be observed when installing ANY floor mat to
the vehicle.
Ensure that the floor mats are securely attached to the vehicle's
floor mat anchor(s) before driving
the vehicle.
Do not use ANY floor mat that cannot be firmly attached to the
vehicle's floor mat anchors.
Do not stack floor mats on top of one another (e.g. all-weather rub-ber mat on top of a carpeted floor
mat). Only a single floor mat
should be installed in each posi-tion.
IMPORTANT - Your vehicle was
manufactured with driver's side
floor mat anchors that are designed
to securely hold the floor mat in
place. To avoid any interference with
pedal operation, KIA recommends
that only the KIA floor mat designed
for use in your vehicle be installed.
Page 180 of 352
4119
Features of your vehicle
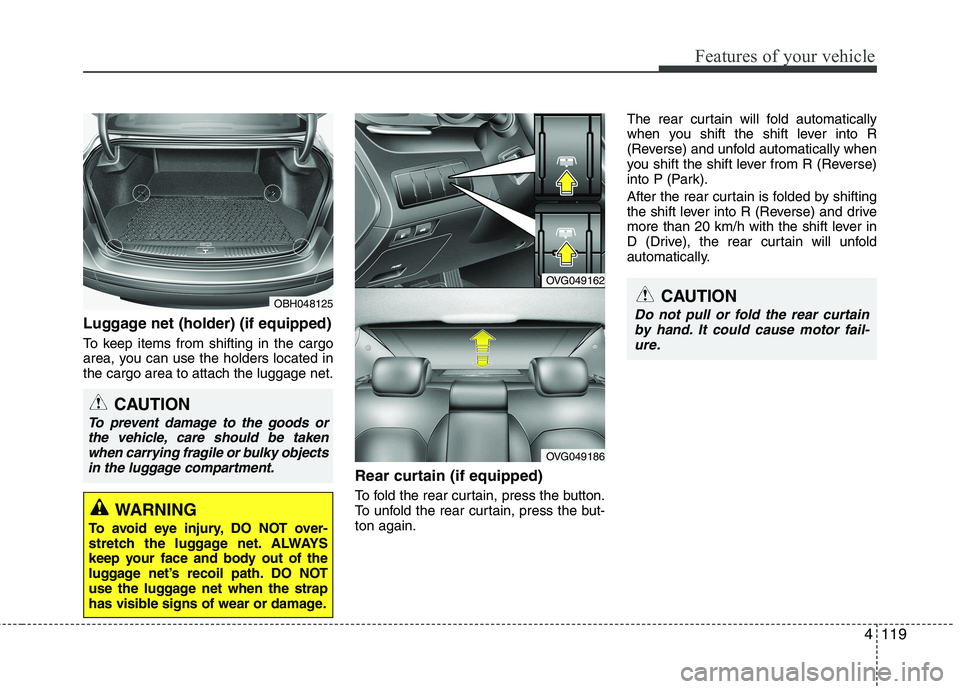
Luggage net (holder) (if equipped)
To keep items from shifting in the cargo
area, you can use the holders located inthe cargo area to attach the luggage net.Rear curtain (if equipped)
To fold the rear curtain, press the button.
To unfold the rear curtain, press the but-ton again.The rear curtain will fold automatically
when you shift the shift lever into R
(Reverse) and unfold automatically when
you shift the shift lever from R (Reverse)
into P (Park).
After the rear curtain is folded by shifting
the shift lever into R (Reverse) and drive
more than 20 km/h with the shift lever in
D (Drive), the rear curtain will unfold
automatically.
CAUTION
To prevent damage to the goods or
the vehicle, care should be takenwhen carrying fragile or bulky objectsin the luggage compartment.
WARNING
To avoid eye injury, DO NOT over-
stretch the luggage net. ALWAYS
keep your face and body out of the
luggage net’s recoil path. DO NOT
use the luggage net when the strap
has visible signs of wear or damage.
CAUTION
Do not pull or fold the rear curtain by hand. It could cause motor fail- ure.
OVG049162
OVG049186
OBH048125