KIA CADENZA 2020 Owners Manual
Manufacturer: KIA, Model Year: 2020, Model line: CADENZA, Model: KIA CADENZA 2020Pages: 560, PDF Size: 11.37 MB
Page 141 of 560
459
Features of your vehicle
NVS®is a registered trademark and
Z-Nav™ is a trademark of the
Gentex Corporation, Zeeland,
Michigan.
HomeLink
®is a registered trademark
owned by Johnson Controls,
Incorporated, Milwaukee, Wisconsin.
FCC ID: NZLZTVHL3
IC: 4112A-ZTVHL3This device complies with Part 15
of the FCC Rules.
Operation is subject to the following
three conditions:
1. This device may not cause harmful
interference.
2. This device must accept any inter-
ference received, including inter-
ference that may cause undesired
operation.
3. The transceiver has been tested
and complies with FCC and
Industry Canada rules. Changes
or modifications not expressly
approved by the party responsible
for compliance could void the
user’s authority to operate the
device.Two Way Communication Progra-
ming
1. Complete the HomeLink
"Programming" first.
2. Before the first 10 times HomeLink
button is pressed after the pro-
gramming, the following steps
MUST occur to program two way
communication. (only for some
older garage doors)
Page 142 of 560
Features of your vehicle
60 4
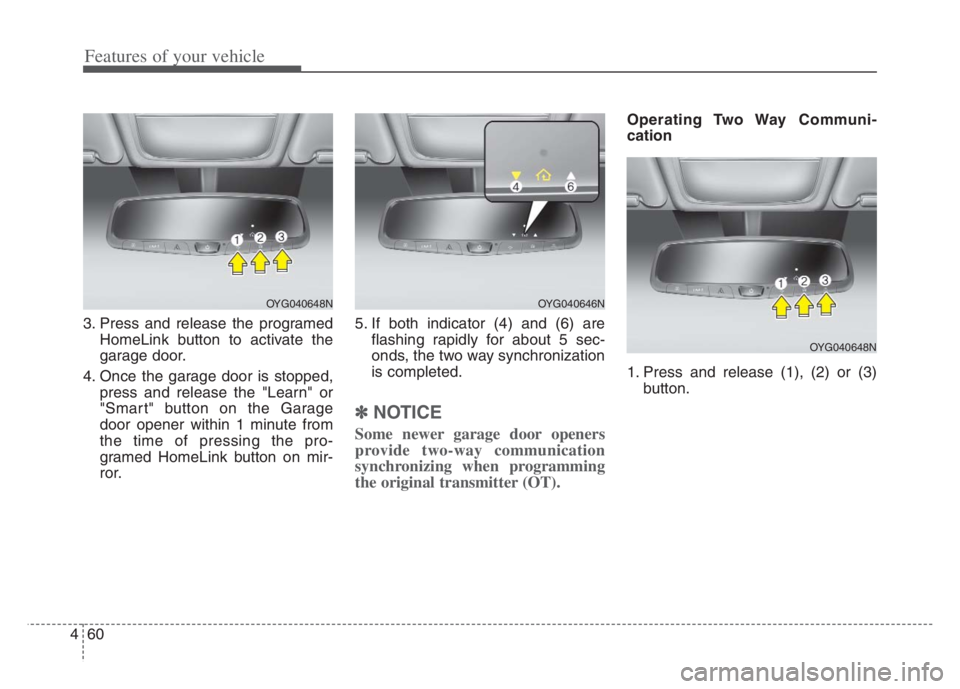
3. Press and release the programed
HomeLink button to activate the
garage door.
4. Once the garage door is stopped,
press and release the "Learn" or
"Smart" button on the Garage
door opener within 1 minute from
the time of pressing the pro-
gramed HomeLink button on mir-
ror.5. If both indicator (4) and (6) are
flashing rapidly for about 5 sec-
onds, the two way synchronization
is completed.
✽ ✽
NOTICE
Some newer garage door openers
provide two-way communication
synchronizing when programming
the original transmitter (OT).
Operating Two Way Communi-
cation
1. Press and release (1), (2) or (3)
button.
OYG040648NOYG040646N
OYG040648N
Page 143 of 560
461
Features of your vehicle
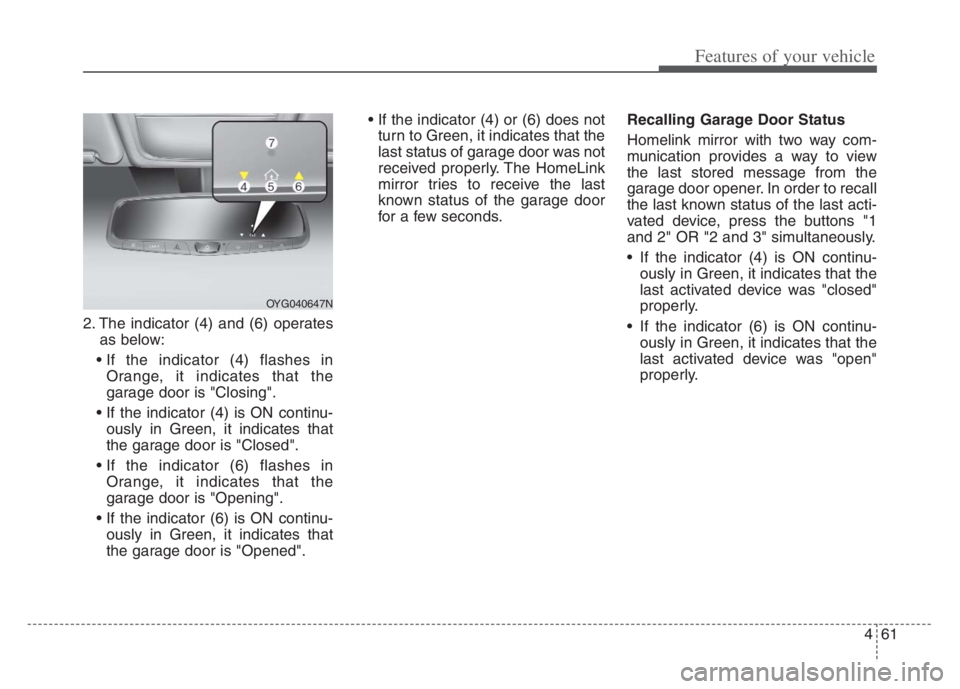
2. The indicator (4) and (6) operates
as below:
Orange, it indicates that the
garage door is "Closing".
ously in Green, it indicates that
the garage door is "Closed".
Orange, it indicates that the
garage door is "Opening".
ously in Green, it indicates that
the garage door is "Opened".
turn to Green, it indicates that the
last status of garage door was not
received properly. The HomeLink
mirror tries to receive the last
known status of the garage door
for a few seconds.Recalling Garage Door Status
Homelink mirror with two way com-
munication provides a way to view
the last stored message from the
garage door opener. In order to recall
the last known status of the last acti-
vated device, press the buttons "1
and 2" OR "2 and 3" simultaneously.
If the indicator (4) is ON continu-
ously in Green, it indicates that the
last activated device was "closed"
properly.
If the indicator (6) is ON continu-
ously in Green, it indicates that the
last activated device was "open"
properly.
OYG040647N
Page 144 of 560
Features of your vehicle
62 4
✽
✽
NOTICE
Two way communication range dis-
tance between "vehicle" and
"garage door opener" is 3,937 in
(100 m).
The range may be reduced or
increased a little due to obstacle con-
ditions around the garage door
opener, such as houses or trees.
Outside rearview mirror
Be sure to adjust the mirror angles
before driving.
Your vehicle is equipped with both
left-hand and right-hand outside
rearview mirrors. The mirrors can be
adjusted remotely with the remote
switch. The mirror heads can be fold-
ed back to prevent damage during an
automatic vehicle wash or when
passing through a narrow street.
The right outside rearview mirror is
convex. Objects seen in the mirror
are closer than they appear.
Use your interior rearview mirror or
direct observation to determine the
actual distance of following vehicles
when changing lanes.If the mirror is jammed with ice, do
not adjust the mirror by force. Use an
approved spray de-icer (not radiator
antifreeze) to release the frozen
mechanism or move the vehicle to a
warm place and allow the ice to melt.
WARNING- Mirror
adjustment
Do not adjust or fold the outside
rearview mirrors while the vehi-
cle is moving. This could result
in loss of control.
CAUTION - Rearview
mirror
Do not scrape ice off the mirror
face; this may damage the sur-
face of the glass. If ice should
restrict the movement of the mir-
ror, do not force the mirror for
adjustment. To remove ice, use a
deicer spray, a sponge or soft
cloth with very warm water.
Page 145 of 560
463
Features of your vehicle
Adjusting outside rearview mirror
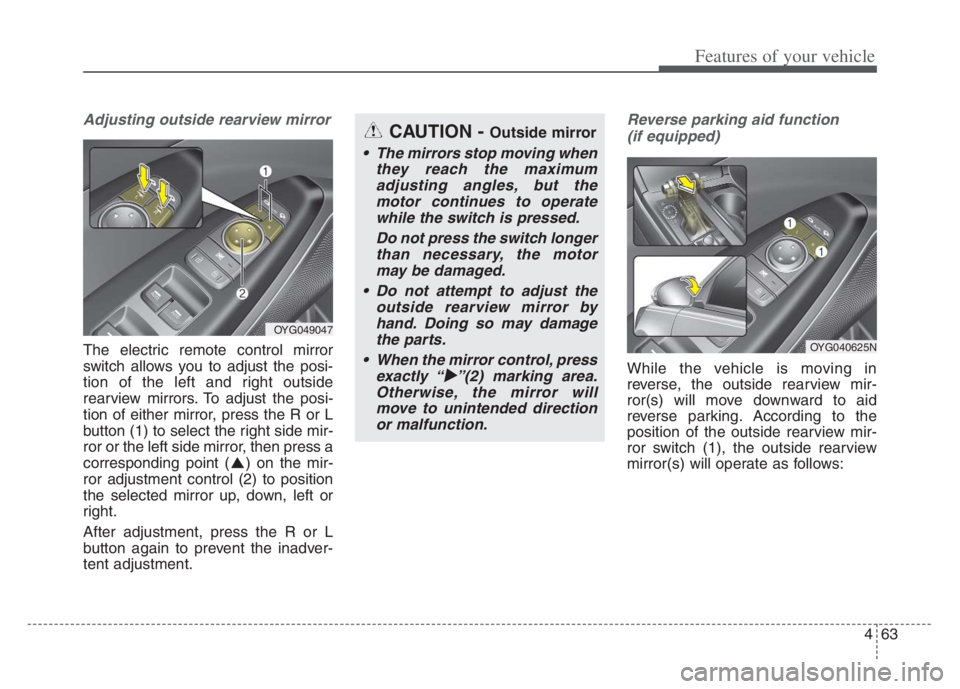
The electric remote control mirror
switch allows you to adjust the posi-
tion of the left and right outside
rearview mirrors. To adjust the posi-
tion of either mirror, press the R or L
button (1) to select the right side mir-
ror or the left side mirror, then press a
corresponding point ( ) on the mir-
ror adjustment control (2) to position
the selected mirror up, down, left or
right.
After adjustment, press the R or L
button again to prevent the inadver-
tent adjustment.
Reverse parking aid function
(if equipped)
While the vehicle is moving in
reverse, the outside rearview mir-
ror(s) will move downward to aid
reverse parking. According to the
position of the outside rearview mir-
ror switch (1), the outside rearview
mirror(s) will operate as follows:
OYG049047
CAUTION - Outside mirror
The mirrors stop moving when
they reach the maximum
adjusting angles, but the
motor continues to operate
while the switch is pressed.
Do not press the switch longer
than necessary, the motor
may be damaged.
Do not attempt to adjust the
outside rearview mirror by
hand. Doing so may damage
the parts.
When the mirror control, press
exactly “
”(2) marking area.
Otherwise, the mirror will
move to unintended direction
or malfunction.
OYG040625N
Page 146 of 560
Features of your vehicle
64 4
L/R: When the remote control outside
rearview mirror switch (1) is
selected to the L (left) or R (right)
position, both outside rearview
mirrors will move downward.
Neutral: When neither switch is
selected, the outside
rearview mirror will not
move.
The outside rearview mirrors will auto-
matically revert to their original posi-
tions under the following conditions:
1. The ENGINE START/STOP button
is in the OFF position.
2. Shift lever is moved to any position
except R (Reverse).
3. Remote control outside rearview
mirror switch is placed in the middle
position.Folding the outside rearview mirror
Electric type
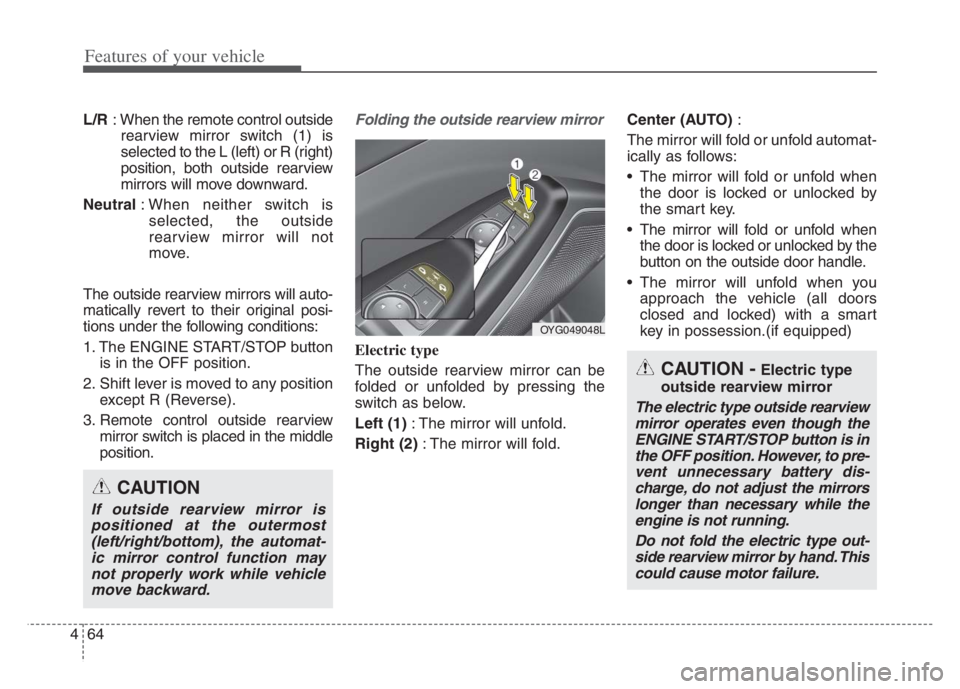
The outside rearview mirror can be
folded or unfolded by pressing the
switch as below.
Left (1): The mirror will unfold.
Right (2): The mirror will fold.Center (AUTO):
The mirror will fold or unfold automat-
ically as follows:
The mirror will fold or unfold when
the door is locked or unlocked by
the smart key.
The mirror will fold or unfold when
the door is locked or unlocked by the
button on the outside door handle.
The mirror will unfold when you
approach the vehicle (all doors
closed and locked) with a smart
key in possession.(if equipped)
OYG049048L
CAUTION -Electric type
outside rearview mirror
The electric type outside rearview
mirror operates even though the
ENGINE START/STOP button is in
the OFF position. However, to pre-
vent unnecessary battery dis-
charge, do not adjust the mirrors
longer than necessary while the
engine is not running.
Do not fold the electric type out-
side rearview mirror by hand. This
could cause motor failure.
CAUTION
If outside rearview mirror is
positioned at the outermost
(left/right/bottom), the automat-
ic mirror control function may
not properly work while vehicle
move backward.
Page 147 of 560
465
Features of your vehicle
INSTRUMENT CLUSTER
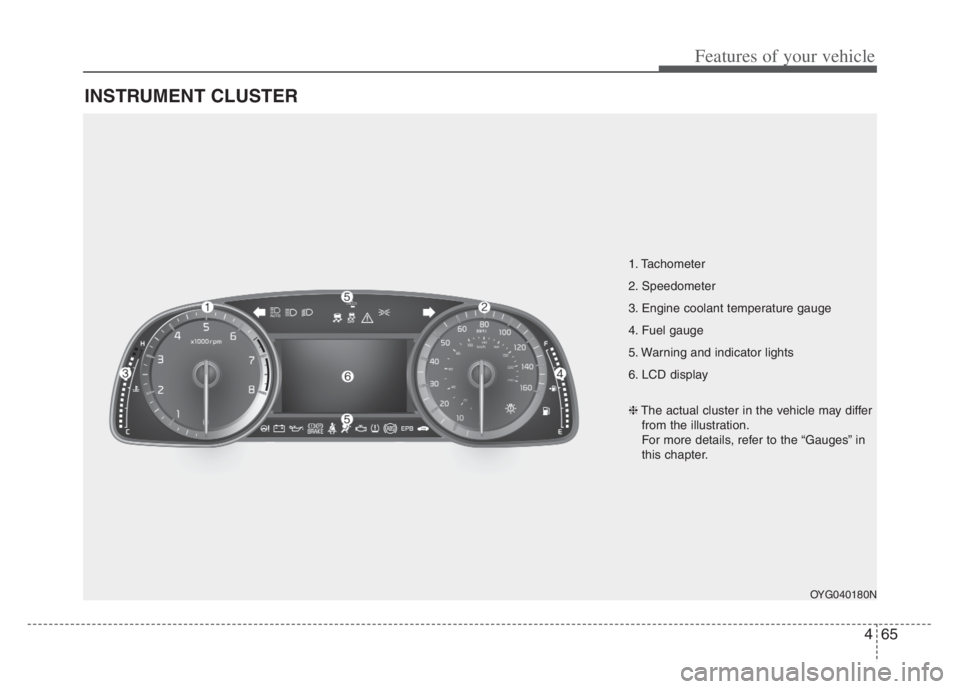
1. Tachometer
2. Speedometer
3. Engine coolant temperature gauge
4. Fuel gauge
5. Warning and indicator lights
6. LCD display
OYG040180N
❈The actual cluster in the vehicle may differ
from the illustration.
For more details, refer to the “Gauges” in
this chapter.
Page 148 of 560
Features of your vehicle
66 4
Instrument Cluster Control
Adjusting Instrument Cluster
Illumination
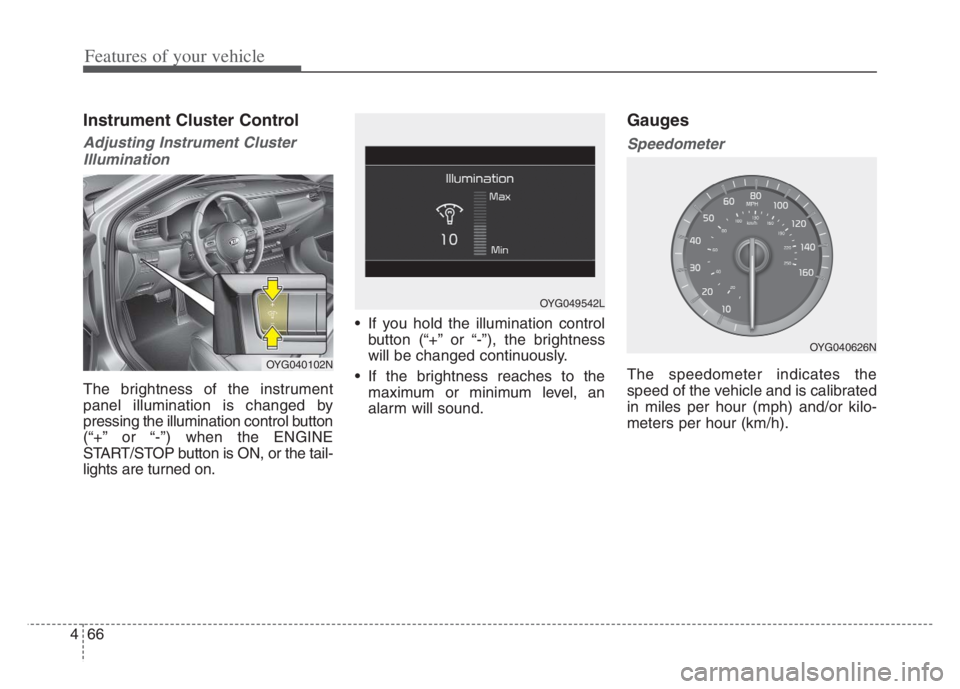
The brightness of the instrument
panel illumination is changed by
pressing the illumination control button
(“+” or “-”) when the ENGINE
START/STOP button is ON, or the tail-
lights are turned on. If you hold the illumination control
button (“+” or “-”), the brightness
will be changed continuously.
If the brightness reaches to the
maximum or minimum level, an
alarm will sound.
Gauges
Speedometer
The speedometer indicates the
speed of the vehicle and is calibrated
in miles per hour (mph) and/or kilo-
meters per hour (km/h).OYG040102N
OYG049542L
OYG040626N
Page 149 of 560
467
Features of your vehicle
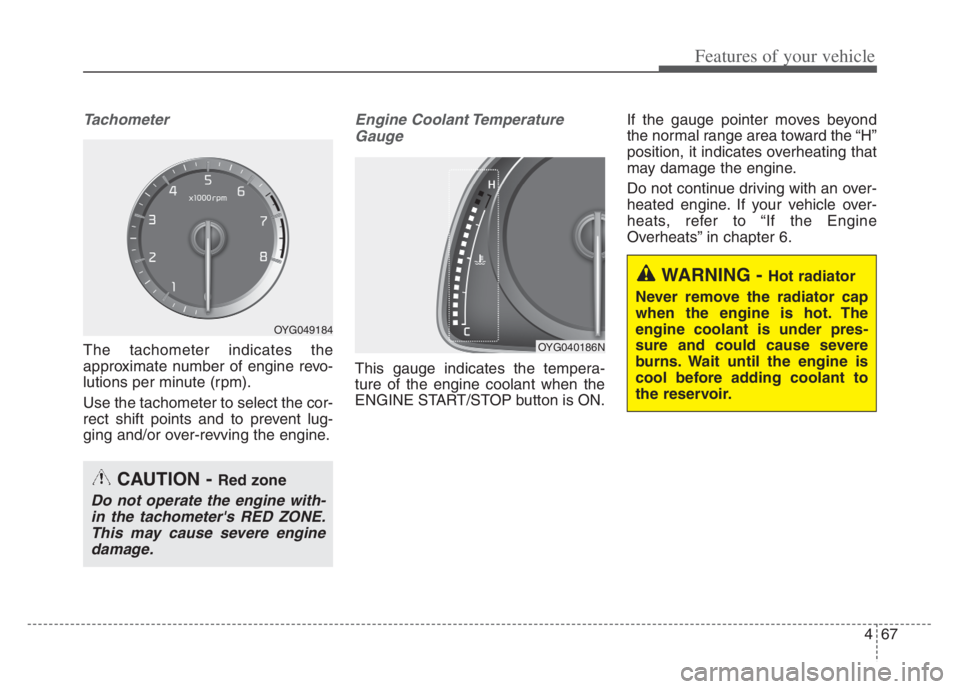
Tachometer
The tachometer indicates the
approximate number of engine revo-
lutions per minute (rpm).
Use the tachometer to select the cor-
rect shift points and to prevent lug-
ging and/or over-revving the engine.
Engine Coolant Temperature
Gauge
This gauge indicates the tempera-
ture of the engine coolant when the
ENGINE START/STOP button is ON.If the gauge pointer moves beyond
the normal range area toward the “H”
position, it indicates overheating that
may damage the engine.
Do not continue driving with an over-
heated engine. If your vehicle over-
heats, refer to “If the Engine
Overheats” in chapter 6.
CAUTION - Red zone
Do not operate the engine with-
in the tachometer's RED ZONE.
This may cause severe engine
damage.
OYG049184
OYG040186N
WARNING - Hot radiator
Never remove the radiator cap
when the engine is hot. The
engine coolant is under pres-
sure and could cause severe
burns. Wait until the engine is
cool before adding coolant to
the reservoir.
Page 150 of 560
Features of your vehicle
68 4
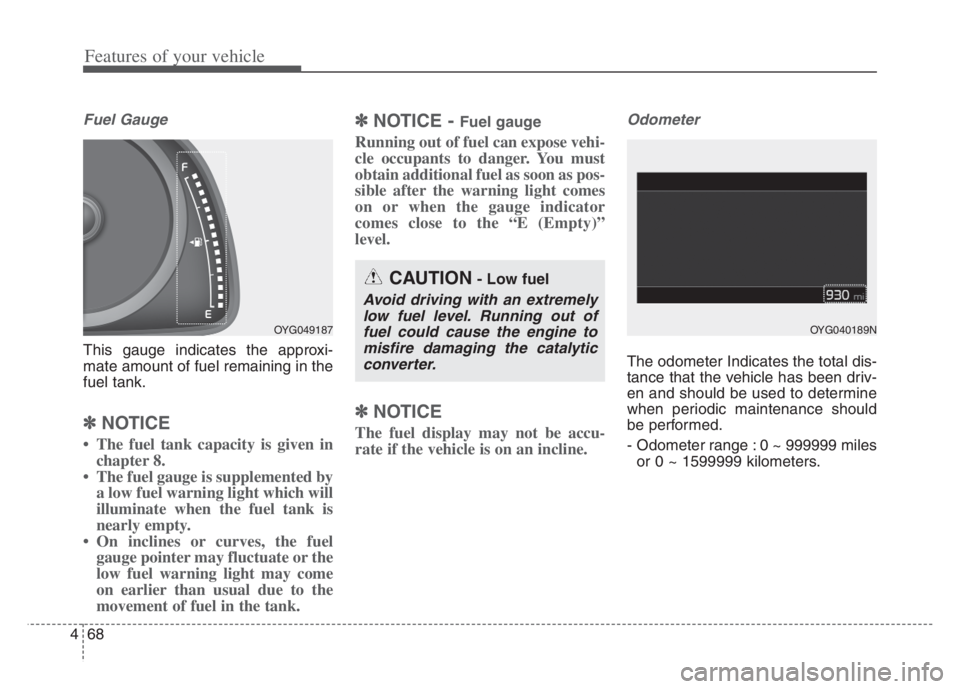
Fuel Gauge
This gauge indicates the approxi-
mate amount of fuel remaining in the
fuel tank.
✽ ✽
NOTICE
• The fuel tank capacity is given in
chapter 8.
• The fuel gauge is supplemented by
a low fuel warning light which will
illuminate when the fuel tank is
nearly empty.
• On inclines or curves, the fuel
gauge pointer may fluctuate or the
low fuel warning light may come
on earlier than usual due to the
movement of fuel in the tank.
✽ ✽
NOTICE - Fuel gauge
Running out of fuel can expose vehi-
cle occupants to danger. You must
obtain additional fuel as soon as pos-
sible after the warning light comes
on or when the gauge indicator
comes close to the “E (Empty)”
level.
✽ ✽
NOTICE
The fuel display may not be accu-
rate if the vehicle is on an incline.
Odometer
The odometer Indicates the total dis-
tance that the vehicle has been driv-
en and should be used to determine
when periodic maintenance should
be performed.
- Odometer range : 0 ~ 999999 miles
or 0 ~ 1599999 kilometers.
OYG049187
CAUTION- Low fuel
Avoid driving with an extremely
low fuel level. Running out of
fuel could cause the engine to
misfire damaging the catalytic
converter.
OYG040189N