display KIA NIRO EV 2020 Navigation System Quick Reference Guide
[x] Cancel search | Manufacturer: KIA, Model Year: 2020, Model line: NIRO EV, Model: KIA NIRO EV 2020Pages: 244, PDF Size: 5.65 MB
Page 192 of 244
9-10
Split Screen (if equipped)
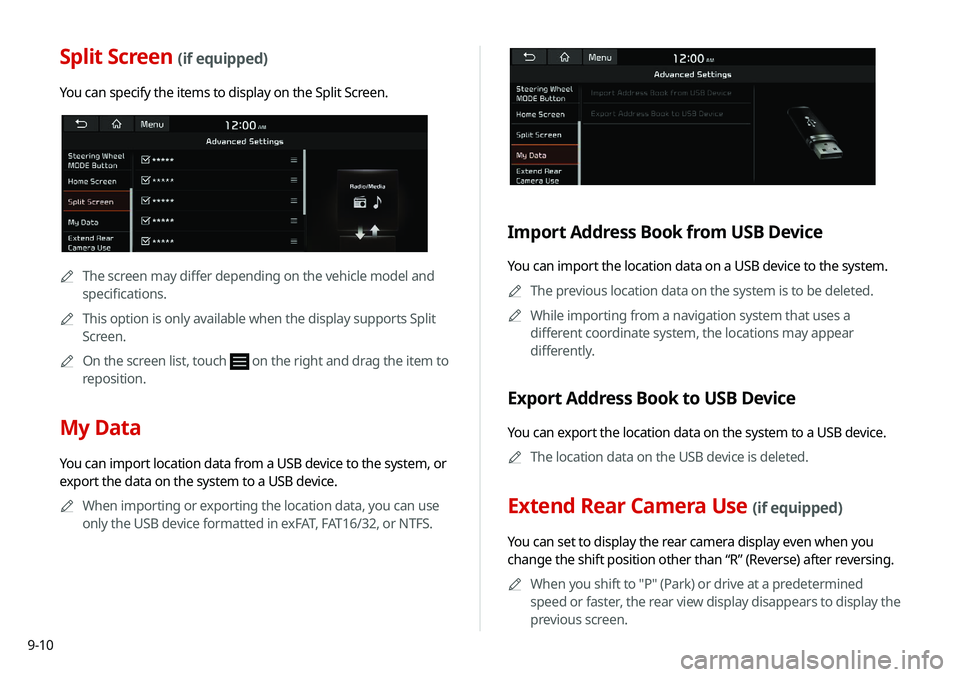
You can specify the items to display on the Split Screen.
0000AThe screen may differ depending on the vehicle model and
specifications.
0000
A
This option is only available when the display supports Split
Screen.
0000
A
On the screen list, touch
on the right and drag the item to
reposition.
My Data
You can import location data from a USB device to the system, or
export the data on the system to a USB device.
0000
A
When importing or exporting the location data, you can use
only the USB device formatted in exFAT, FAT16/32, or NTFS.
Import Address Book from USB Device
You can import the location data on a USB device to the system.
0000
A
The previous location data on the system is to be deleted.
0000
A
While importing from a navigation system that uses a
different coordinate system, the locations may appear
differently.
Export Address Book to USB Device
You can export the location data on the system to a USB device.
0000
A
The location data on the USB device is deleted.
Extend Rear Camera Use (if equipped)
You can set to display the rear camera display even when you
change the shift position other than “R” (Reverse) after reversing.
0000
A
When you shift to "P" (Park) or drive at a predetermined
speed or faster, the rear view display disappears to display the
previous screen.
Page 199 of 244

9-17
Display
You can specify the information to display on the navigation map
screen.
0000
A
The screen may differ depending on the vehicle model and
specifications.
Map
You can specify the items to display on the map.
000EMap Font Size: You can set the size of the screen font on the
navigation map.
000EMap Color
: You can set the navigation map background color.
000EMap Display
: You can specify the items to display on the map.
000DMap View: Set the navigation map display mode. To
automatically rotate the map screen based on the driving
direction, select 2D Heading Up. To fix the top of the map
screen to north, select 2D North Up. If you select 3D Map,
the map screen is displayed in 3D mode and automatically
rotates based on the driving direction.
Configuring the navigation
settings
You can configure the navigation settings for navigation
operations, screen display, voice guidance, etc. You can also
export or import the location data.
0000
A
For details on how to use navigation functions, see the
“Navigation” chapter.
> See “Navigation.”
1 On the All Menus screen, touch Setup >
Navigation.
The navigation settings screen appears.
2 Configure the settings required:
Page 200 of 244
9-18
000EDetailed Guidance View: You can set to display detailed
information on the Map screen, such as moving directions
and lane change.
000ESpeed Limits: Sets whether or not to display the speed limits
on the screen.
Map Auto-scale Settings
You can set the scales for each vehicle speed zone.
0000
A
For example, when you select “100 m” for the “21–50 km/h”
zone and “200 m” for the “51–80 km/h” zone, the unit interval
for the map scale on the navigation screen becomes 100
m when the vehicle speed is 50 km/h and 200 m when the
vehicle speed is 51 km/h.
Return to Map: Set Time
You can set the system to automatically display the map screen
after a specified period of time when switched to the Radio/Media
mode screen while using the navigation.
> See “Return to Map: Set
Time.”
0000
A
This function works while driving once a destination has been
set.
0000
A
This feature is not available on the phone projection screen.
Auto Re-center Map
You can set the system to automatically display the current
position when the specified period of time elapses after changing
to another position on the map.
000DDisplay Traffic: Displays nearby traffic information on the
map.
000D3D Buildings: Displays major buildings on the map in
three dimensions.
000DAuto-scale: Automatically changes the scale of the map.
000E POI Display: You can specify the icon type to display nearby
places on the map.
0000
A
Touch
on the right side of Gas/LPG Station to select display
options for fuel prices.
000DGas and LPG stations on the Map screen will also show their
fuel prices if they are lower than the set price.
000DSelect Display Fuel Price Info on Map to view
recommended fuel prices based on the prices offered in
the area.
000DFuel prices on the map may differ from actual ones.
Information
You can specify the information to display on the navigation map
screen while driving.
000E Route Guide Line: Used to display the route guide line in
different colors depending on the traffic conditions. To display
the route color with a fixed one, uncheck Show Traffic Colors
on Route and select a color.
000EVehicle Symbol: You can specify the icon type to display your
current location on the map.
000EUnit: You can set the distance unit of the navigation map to
Kilometers (km) or Miles (mi) (if equipped).
000EShow Vehicle Speed: Displays the vehicle speed on the map.
Page 201 of 244

9-19
Show Route Overview While Stopped.
You can set to display the route overview from the start point to
the destination when the vehicle is stationary.
Others
You can configure navigation options, e.g., turning on or off fuel
prices, exporting or importing places from and to Address Book.
0000
A
The screen may differ depending on the vehicle model and
specifications.
Previous Destinations Settings
You can set to automatically save the previous destination and
display the previous destinations when the navigation system
starts.
000ESave Previous Destinations: The previous destination is
automatically saved.
000EShow Previous Destinations after Navigation Start-
Up: When the navigation system starts, the list of recent
destinations appear on a pop-up window.
Guidance
You can configure the navigation guidance settings.
0000A
The screen may differ depending on the vehicle model and
specifications.
Show Guidance Distance
You can configure settings for displaying the distance to the
destination during guidance.
000EInterval Distance: Displays the distance as the one between
different zones.
000ECumulative Distance: Displays the distance as the one
between the current position and target position.
Border Crossing Info.
You can set whether or not to display the border crossing
information on the screen.
Page 202 of 244
9-20
GPS Information
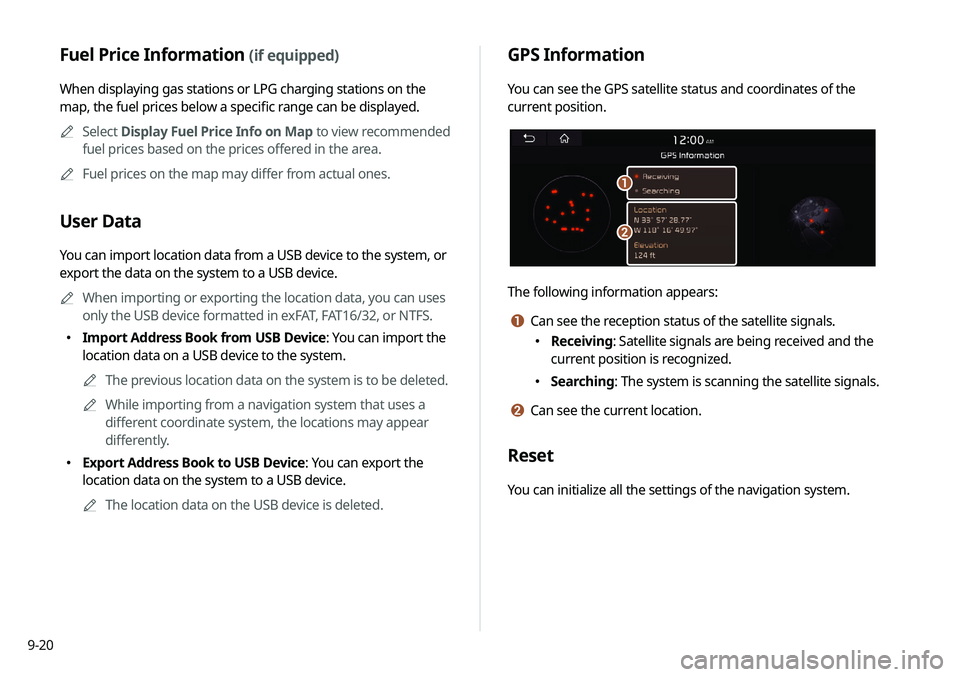
You can see the GPS satellite status and coordinates of the
current position.
\037
\036
The following information appears:
a Can see the reception status of the satellite signals.
000EReceiving: Satellite signals are being received and the
current position is recognized.
000ESearching: The system is scanning the satellite signals.
b Can see the current location.
Reset
You can initialize all the settings of the navigation system.
Fuel Price Information (if equipped)
When displaying gas stations or LPG charging stations on the
map, the fuel prices below a specific range can be displayed.
0000
A
Select Display Fuel Price Info on Map to view recommended
fuel prices based on the prices offered in the area.
0000
A
Fuel prices on the map may differ from actual ones.
User Data
You can import location data from a USB device to the system, or
export the data on the system to a USB device.
0000
A
When importing or exporting the location data, you can uses
only the USB device formatted in exFAT, FAT16/32, or NTFS.
000EImport Address Book from USB Device: You can import the
location data on a USB device to the system.
0000
A
The previous location data on the system is to be deleted.
0000
A
While importing from a navigation system that uses a
different coordinate system, the locations may appear
differently.
000EExport Address Book to USB Device: You can export the
location data on the system to a USB device.
0000
A
The location data on the USB device is deleted.
Page 205 of 244
9-23
Name
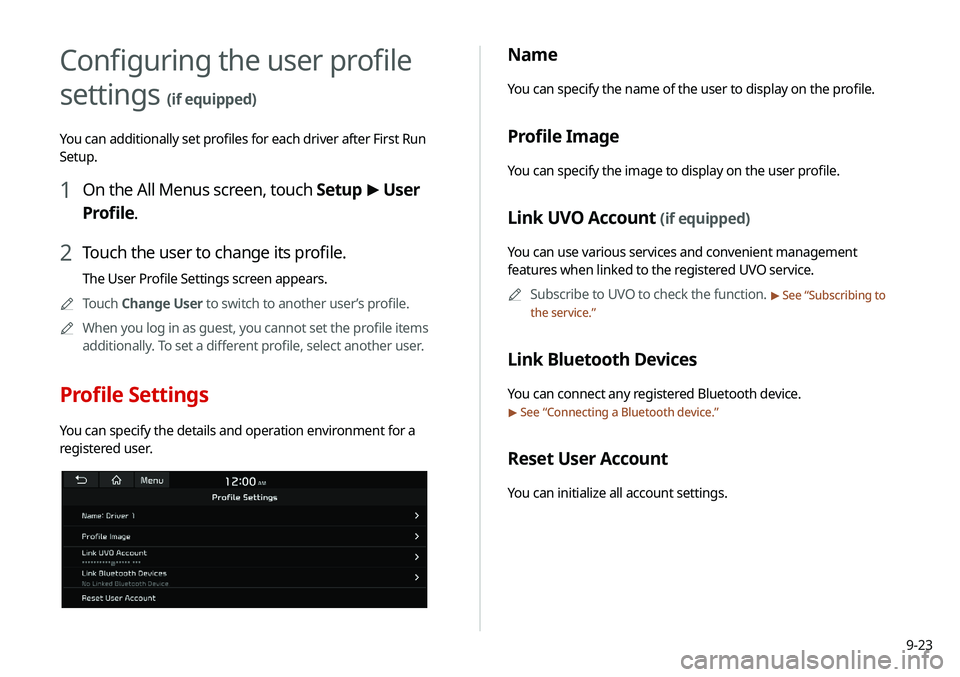
You can specify the name of the user to display on the profile.
Profile Image
You can specify the image to display on the user profile.
Link UVO Account (if equipped)
You can use various services and convenient management
features when linked to the registered UVO service.0000
A
Subscribe to UVO to check the function.
> See “Subscribing to
the service.”
Link Bluetooth Devices
You can connect any registered Bluetooth device.
> See “ Connecting a Bluetooth device.”
Reset User Account
You can initialize all account settings.
Configuring the user profile
settings
(if equipped)
You can additionally set profiles for each driver after First Run
Setup.
1 On the All Menus screen, touch Setup >
User
Profile.
2 Touch the user to change its profile.
The User Profile Settings screen appears.
0000
A
Touch Change User to switch to another user’s profile.
0000
A
When you log in as guest, you cannot set the profile items
additionally. To set a different profile, select another user.
Profile Settings
You can specify the details and operation environment for a
registered user.
Page 206 of 244
9-24
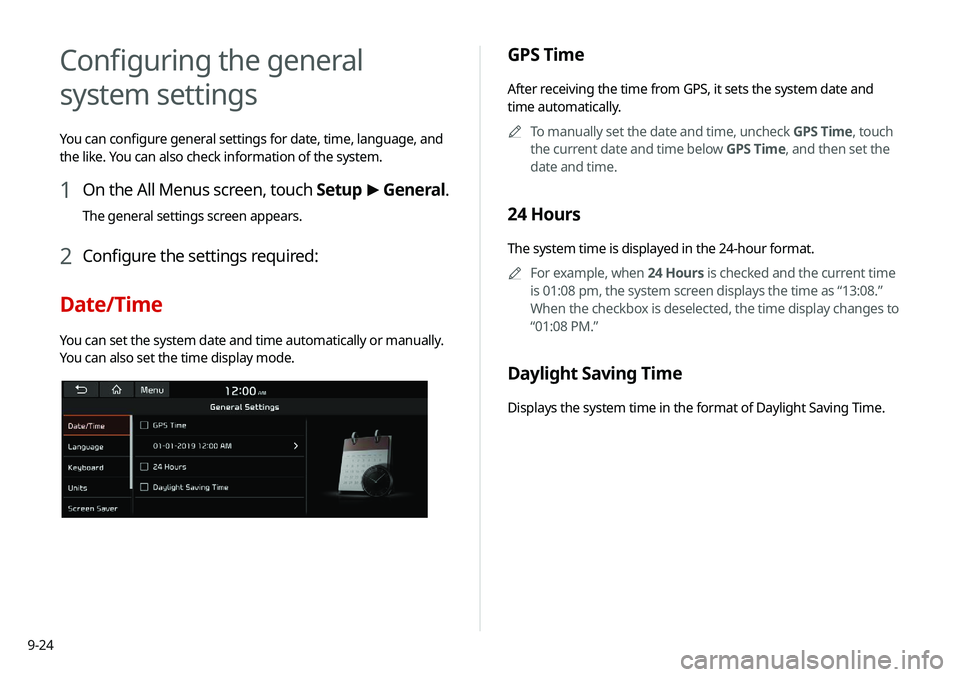
GPS Time
After receiving the time from GPS, it sets the system date and
time automatically.0000
A
To manually set the date and time, uncheck GPS Time, touch
the current date and time below GPS Time, and then set the
date and time.
24 Hours
The system time is displayed in the 24-hour format.
0000
A
For example, when 24 Hours is checked and the current time
is 01:08 pm, the system screen displays the time as “13:08.”
When the checkbox is deselected, the time display changes to
“01:08 PM.”
Daylight Saving Time
Displays the system time in the format of Daylight Saving Time.
Configuring the general
system settings
You can configure general settings for date, time, language, and
the like. You can also check information of the system.
1 On the All Menus screen, touch Setup >
General.
The general settings screen appears.
2 Configure the settings required:
Date/Time
You can set the system date and time automatically or manually.
You can also set the time display mode.
Page 207 of 244
9-25
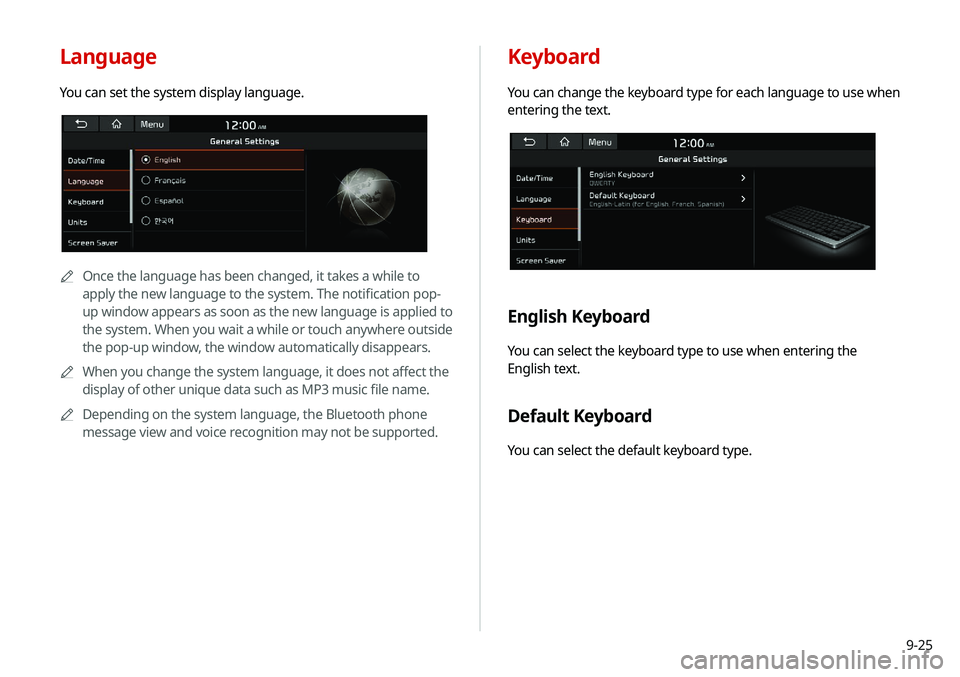
Keyboard
You can change the keyboard type for each language to use when
entering the text.
English Keyboard
You can select the keyboard type to use when entering the
English text.
Default Keyboard
You can select the default keyboard type.
Language
You can set the system display language.
0000AOnce the language has been changed, it takes a while to
apply the new language to the system. The notification pop-
up window appears as soon as the new language is applied to
the system. When you wait a while or touch anywhere outside
the pop-up window, the window automatically disappears.
0000
A
When you change the system language, it does not affect the
display of other unique data such as MP3 music file name.
0000
A
Depending on the system language, the Bluetooth phone
message view and voice recognition may not be supported.
Page 208 of 244

9-26
Units (if equipped)
You can specify the units to display on the system screen.
Distance and Speed
You can select the units for distance and vehicle speed to display
on the screen.
Temperature
You can select the temperature unit to display on the screen.
Fuel Efficiency
You can select the unit for fuel economy to display on the screen.
Tire Pressure
You can select the unit for tire pressure to display on the screen.
Screen Saver
You can select the items to display on the screen saver in standby
mode.
Digital Clock
Displays the digital clock on the system screen saver.
Analog Clock
Displays the analog clock on the system screen saver.
None
Displays nothing on the system screen saver.
Page 211 of 244
9-29
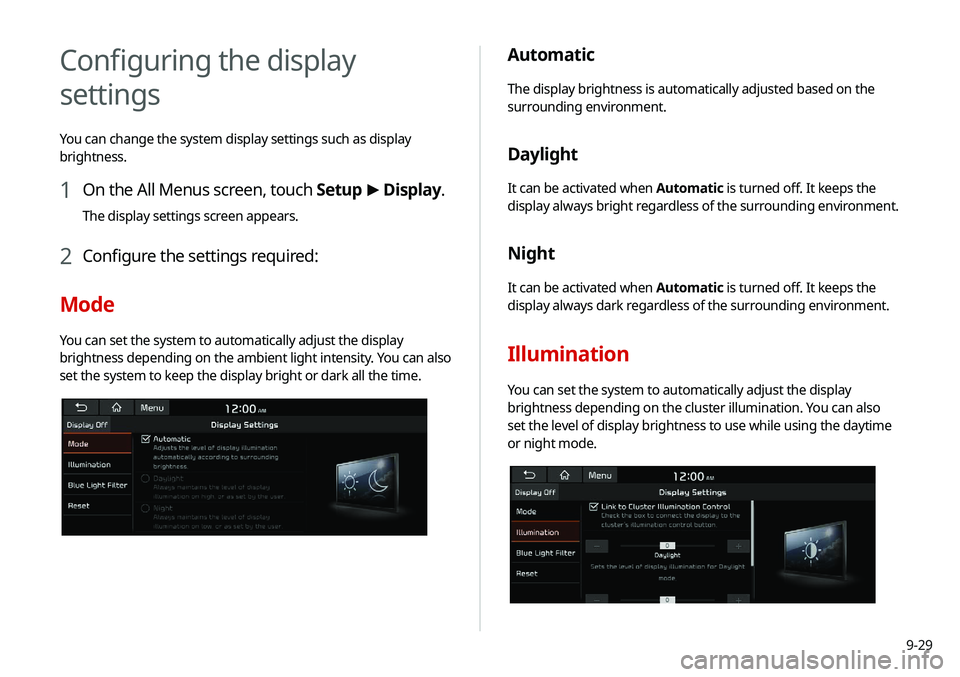
Automatic
The display brightness is automatically adjusted based on the
surrounding environment.
Daylight
It can be activated when Automatic is turned off. It keeps the
display always bright regardless of the surrounding environment.
Night
It can be activated when Automatic is turned off. It keeps the
display always dark regardless of the surrounding environment.
Illumination
You can set the system to automatically adjust the display
brightness depending on the cluster illumination. You can also
set the level of display brightness to use while using the daytime
or night mode.
Configuring the display
settings
You can change the system display settings such as display
brightness.
1 On the All Menus screen, touch Setup >
Display.
The display settings screen appears.
2 Configure the settings required:
Mode
You can set the system to automatically adjust the display
brightness depending on the ambient light intensity. You can also
set the system to keep the display bright or dark all the time.