low KIA OPTIMA 2020 Features and Functions Guide
[x] Cancel search | Manufacturer: KIA, Model Year: 2020, Model line: OPTIMA, Model: KIA OPTIMA 2020Pages: 591, PDF Size: 14.1 MB
Page 115 of 591
425
Features of your vehicle
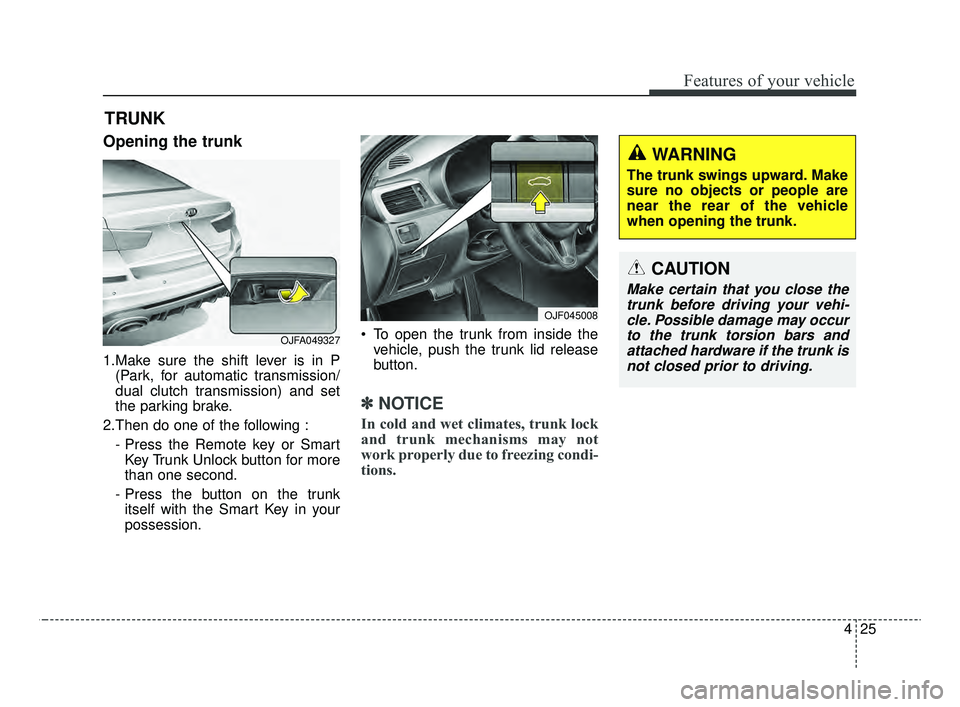
Opening the trunk
1.Make sure the shift lever is in P(Park, for automatic transmission/
dual clutch transmission) and set
the parking brake.
2.Then do one of the following : - Press the Remote key or SmartKey Trunk Unlock button for more
than one second.
- Press the button on the trunk itself with the Smart Key in your
possession. To open the trunk from inside the
vehicle, push the trunk lid release
button.
✽ ✽ NOTICE
In cold and wet climates, trunk lock
and trunk mechanisms may not
work properly due to freezing condi-
tions.
TRUNK
CAUTION
Make certain that you close the
trunk before driving your vehi-cle. Possible damage may occurto the trunk torsion bars andattached hardware if the trunk isnot closed prior to driving.
WARNING
The trunk swings upward. Make
sure no objects or people are
near the rear of the vehicle
when opening the trunk.
OJF045008
OJFA049327
JFa PE USA 4.qxp 5/15/2019 3:17 PM Page 25
Page 116 of 591
Features of your vehicle
26
4
Closing the trunk
To close, lower the trunk lid, then
press down on it until it locks. To be
sure the trunk lid is securely fas-
tened, always check by trying to pull
it up again.
Emergency trunk safety
release
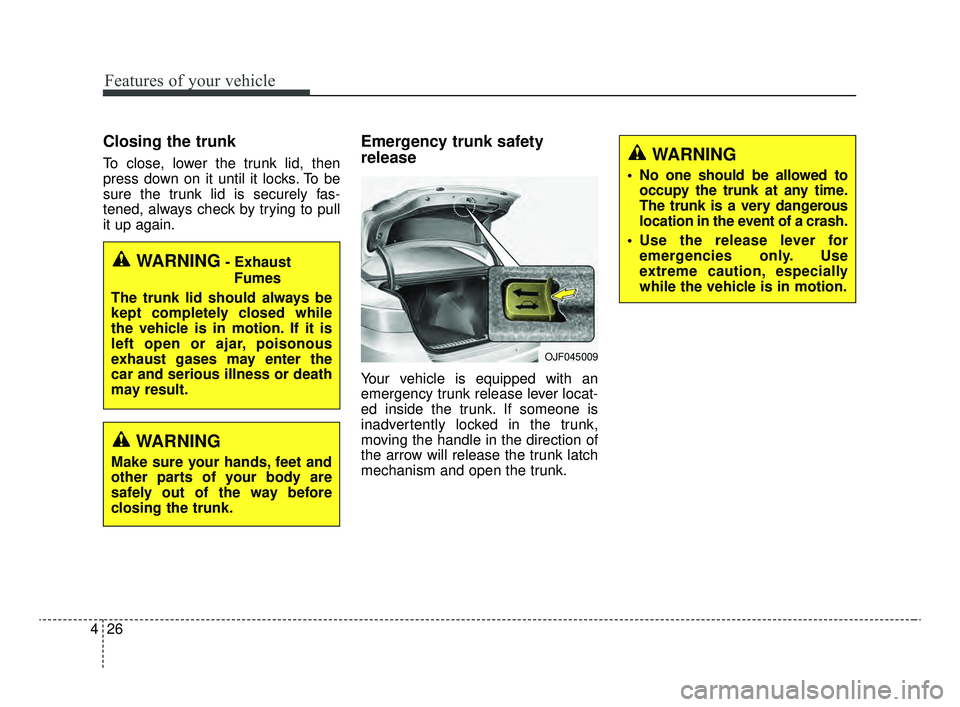
Your vehicle is equipped with an
emergency trunk release lever locat-
ed inside the trunk. If someone is
inadvertently locked in the trunk,
moving the handle in the direction of
the arrow will release the trunk latch
mechanism and open the trunk.
WARNING- Exhaust
Fumes
The trunk lid should always be
kept completely closed while
the vehicle is in motion. If it is
left open or ajar, poisonous
exhaust gases may enter the
car and serious illness or death
may result.
OJF045009
WARNING
No one should be allowed to occupy the trunk at any time.
The trunk is a very dangerous
location in the event of a crash.
Use the release lever for emergencies only. Use
extreme caution, especially
while the vehicle is in motion.
WARNING
Make sure your hands, feet and
other parts of your body are
safely out of the way before
closing the trunk.
JFa PE USA 4.qxp 5/15/2019 3:17 PM Page 26
Page 117 of 591
427
Features of your vehicle
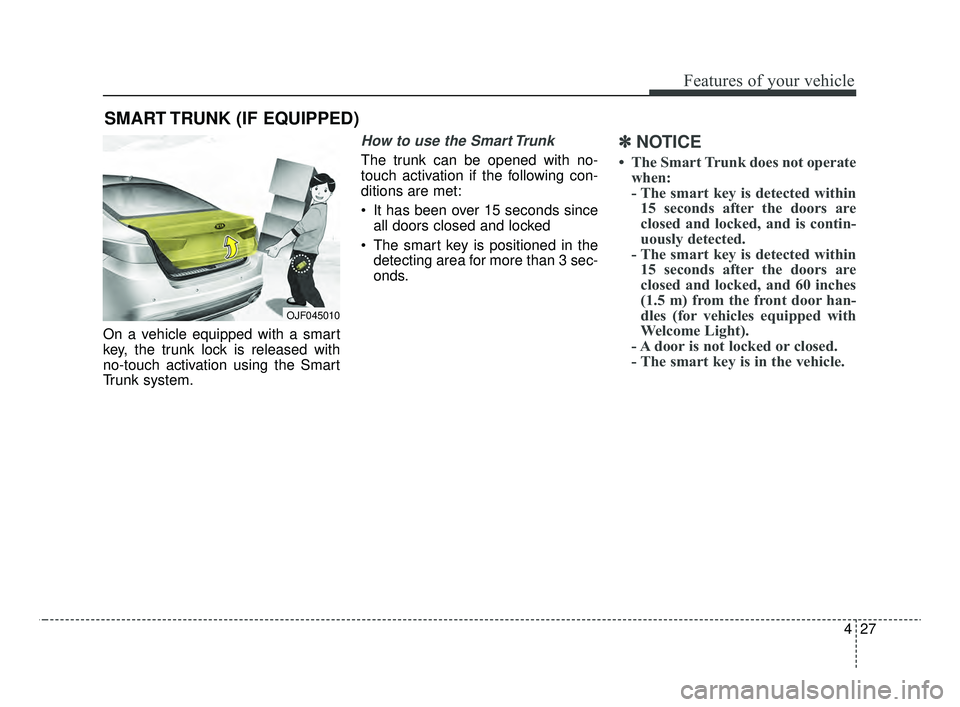
On a vehicle equipped with a smart
key, the trunk lock is released with
no-touch activation using the Smart
Trunk system.
How to use the Smart Trunk
The trunk can be opened with no-
touch activation if the following con-
ditions are met:
It has been over 15 seconds sinceall doors closed and locked
The smart key is positioned in the detecting area for more than 3 sec-
onds.
✽ ✽ NOTICE
• The Smart Trunk does not operate
when:
- The smart key is detected within15 seconds after the doors are
closed and locked, and is contin-
uously detected.
- The smart key is detected within 15 seconds after the doors are
closed and locked, and 60 inches
(1.5 m) from the front door han-
dles (for vehicles equipped with
Welcome Light).
- A door is not locked or closed.
- The smart key is in the vehicle.
SMART TRUNK (IF EQUIPPED)
OJF045010
JFa PE USA 4.qxp 5/15/2019 3:17 PM Page 27
Page 120 of 591
Features of your vehicle
30
4
✽ ✽
NOTICE
• If you press the door unlock but-
ton (2), the Smart Trunk function
will be deactivated temporarily.
But, if you do not open any door
for 30 seconds, the smart trunk
function will be activated again.
• If you press the trunk open button (3) for more than 1 second, the
trunk opens.
• If you press the door lock button (1) or trunk open button (3) when
the Smart Trunk function is not in
the Detect and Alert stage, the
smart trunk function will not be
deactivated.
• If you have deactivated the Smart Trunk function by pressing the
smart key button and opened a
door, the smart trunk function can
be activated again by closing and
locking all doors.
Detecting area
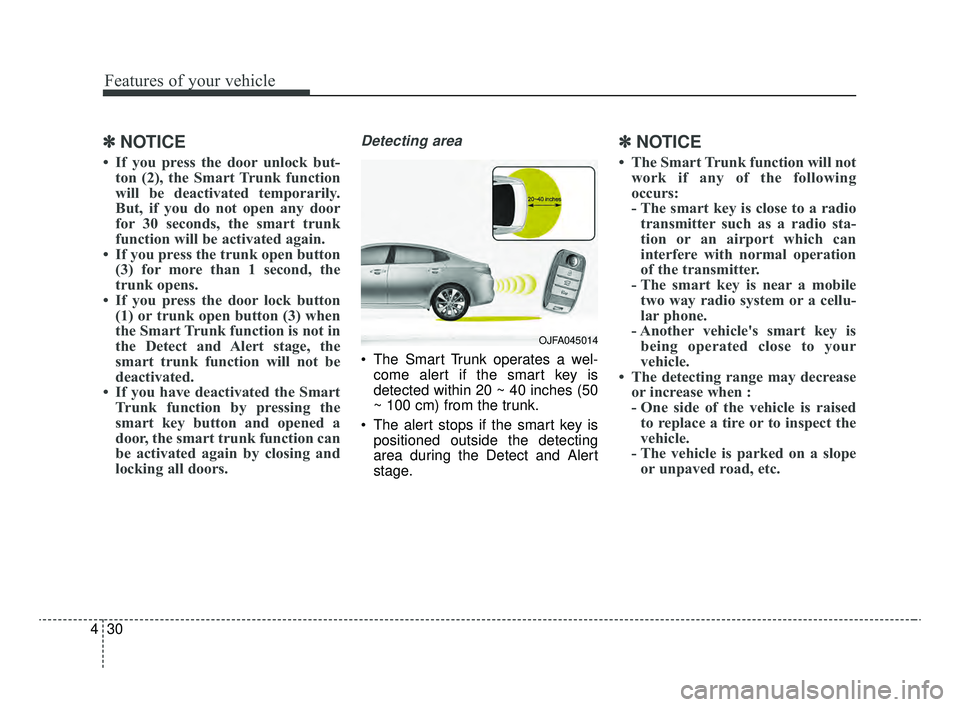
The Smart Trunk operates a wel-
come alert if the smart key is
detected within 20 ~ 40 inches (50
~ 100 cm) from the trunk.
The alert stops if the smart key is positioned outside the detecting
area during the Detect and Alert
stage.
✽ ✽ NOTICE
• The Smart Trunk function will not
work if any of the following
occurs:
- The smart key is close to a radiotransmitter such as a radio sta-
tion or an airport which can
interfere with normal operation
of the transmitter.
- The smart key is near a mobile two way radio system or a cellu-
lar phone.
- Another vehicle's smart key is being operated close to your
vehicle.
• The detecting range may decrease or increase when :
- One side of the vehicle is raisedto replace a tire or to inspect the
vehicle.
- The vehicle is parked on a slope or unpaved road, etc.
OJFA045014
JFa PE USA 4.qxp 5/15/2019 3:17 PM Page 30
Page 122 of 591
Features of your vehicle
32
4
Power windows
The ignition switch must be in the ON
position for power windows to operate.
Each door has a power window
switch that controls the door's win-
dow. The driver has a power window
lock button which can block the oper-
ation of passenger windows. The
power windows can be operated for
approximately 30 seconds after the
ignition key is removed or is set to
the ACC or LOCK (or OFF) position.
If the front doors are opened; howev-
er, the power windows cannot be
operated even within the 30 second
period.
If the window cannot be closed
because it is blocked by objects,
remove the objects and close the
window.
✽ ✽
NOTICE
While driving with the rear windows
down or with the sunroof (if
equipped) in an open (or partially
open) position, your vehicle may
demonstrate a wind buffeting or
pulsation noise. This noise is a nor-
mal occurrence and can be reduced
or eliminated by taking the follow-
ing actions. If the noise occurs with
one or both of the rear windows
down, partially lower both front
windows approximately one inch. If
you experience the noise with the
sunroof open, slightly reduce the
size of the sunroof opening.
CAUTION
Do not install any accessories
in the area of windows. It mayimpact jam protection.
WARNING- Power
Windows
Do not extend your face or arms
outside of the window opening
while the vehicle is in motion.
Doing so could result in serious
injuries.
JFa PE USA 4.qxp 5/15/2019 3:17 PM Page 32
Page 123 of 591
433
Features of your vehicle
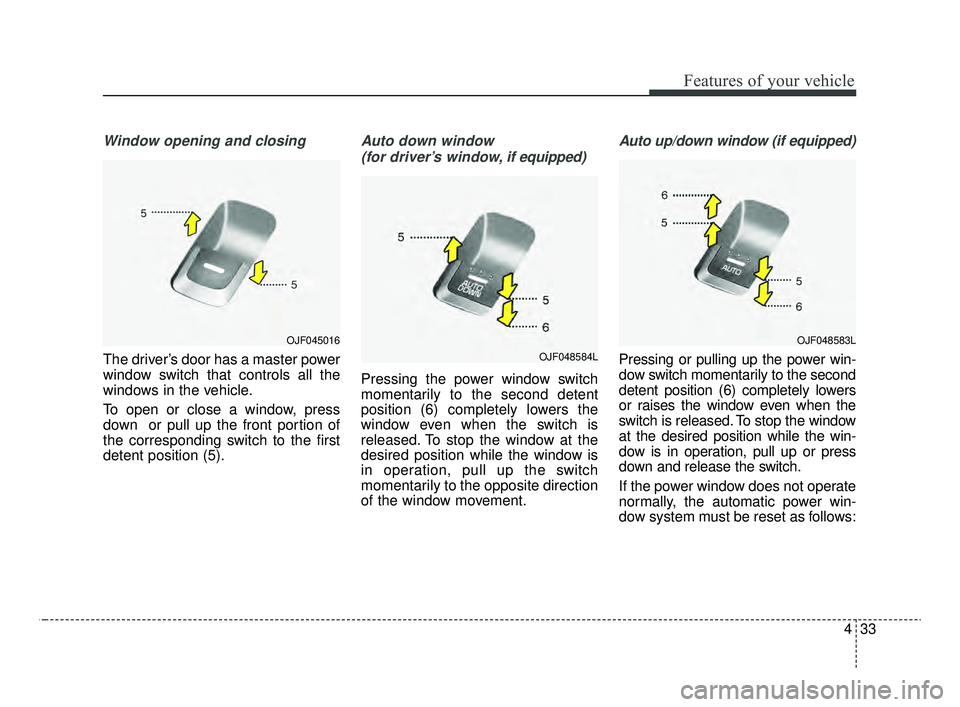
Window opening and closing
The driver’s door has a master power
window switch that controls all the
windows in the vehicle.
To open or close a window, press
down or pull up the front portion of
the corresponding switch to the first
detent position (5).
Auto down window (for driver’s window, if equipped)
Pressing the power window switch
momentarily to the second detent
position (6) completely lowers the
window even when the switch is
released. To stop the window at the
desired position while the window is
in operation, pull up the switch
momentarily to the opposite direction
of the window movement.
Auto up/down window (if equipped)
Pressing or pulling up the power win-
dow switch momentarily to the second
detent position (6) completely lowers
or raises the window even when the
switch is released. To stop the window
at the desired position while the win-
dow is in operation, pull up or press
down and release the switch.
If the power window does not operate
normally, the automatic power win-
dow system must be reset as follows:
OJF048583LOJF045016
OJF048584L
JFa PE USA 4.qxp 5/15/2019 3:18 PM Page 33
Page 124 of 591
Features of your vehicle
34
4
1. Turn the ignition switch to the ON
position.
2. Close the driver's and passenger's window and continue pulling up
the driver’s power window switch
for at least 1 second after the win-
dow is completely closed.
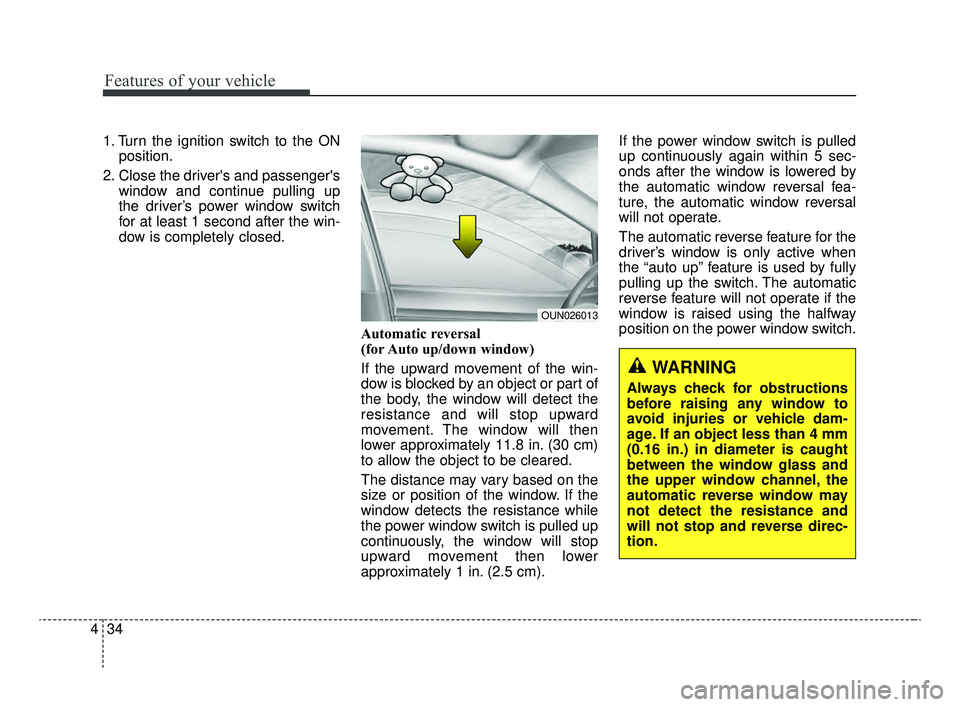
Automatic reversal
(for Auto up/down window)
If the upward movement of the win-
dow is blocked by an object or part of
the body, the window will detect the
resistance and will stop upward
movement. The window will then
lower approximately 11.8 in. (30 cm)
to allow the object to be cleared.
The distance may vary based on the
size or position of the window. If the
window detects the resistance while
the power window switch is pulled up
continuously, the window will stop
upward movement then lower
approximately 1 in. (2.5 cm). If the power window switch is pulled
up continuously again within 5 sec-
onds after the window is lowered by
the automatic window reversal fea-
ture, the automatic window reversal
will not operate.
The automatic reverse feature for the
driver’s window is only active when
the “auto up” feature is used by fully
pulling up the switch. The automatic
reverse feature will not operate if the
window is raised using the halfway
position on the power window switch.
WARNING
Always check for obstructions
before raising any window to
avoid injuries or vehicle dam-
age. If an object less than 4 mm
(0.16 in.) in diameter is caught
between the window glass and
the upper window channel, the
automatic reverse window may
not detect the resistance and
will not stop and reverse direc-
tion.
OUN026013
JFa PE USA 4.qxp 5/15/2019 3:18 PM Page 34
Page 125 of 591
435
Features of your vehicle
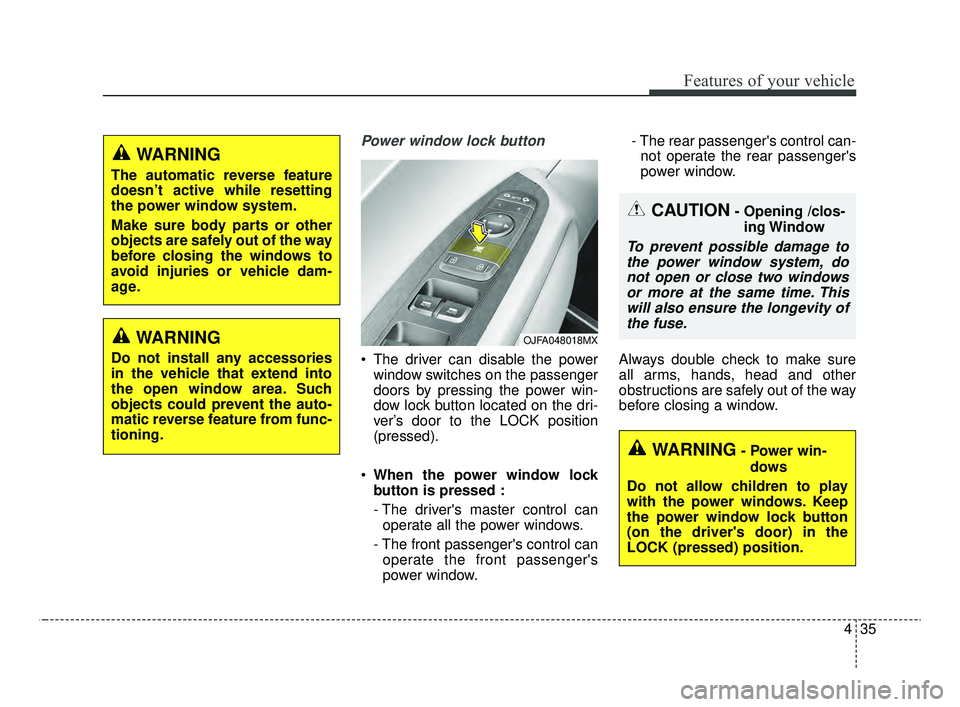
Power window lock button
The driver can disable the powerwindow switches on the passenger
doors by pressing the power win-
dow lock button located on the dri-
ver’s door to the LOCK position
(pressed).
When the power window lock
button is pressed :
- The driver's master control can
operate all the power windows.
- The front passenger's control can operate the front passenger's
power window. - The rear passenger's control can-
not operate the rear passenger's
power window.
Always double check to make sure
all arms, hands, head and other
obstructions are safely out of the way
before closing a window.
OJFA048018MX
WARNING
The automatic reverse feature
doesn’t active while resetting
the power window system.
Make sure body parts or other
objects are safely out of the way
before closing the windows to
avoid injuries or vehicle dam-
age.
CAUTION- Opening /clos- ing Window
To prevent possible damage tothe power window system, donot open or close two windowsor more at the same time. Thiswill also ensure the longevity ofthe fuse.
WARNING- Power win-
dows
Do not allow children to play
with the power windows. Keep
the power window lock button
(on the driver's door) in the
LOCK (pressed) position.
WARNING
Do not install any accessories
in the vehicle that extend into
the open window area. Such
objects could prevent the auto-
matic reverse feature from func-
tioning.
JFa PE USA 4.qxp 5/15/2019 3:18 PM Page 35
Page 127 of 591
437
Features of your vehicle
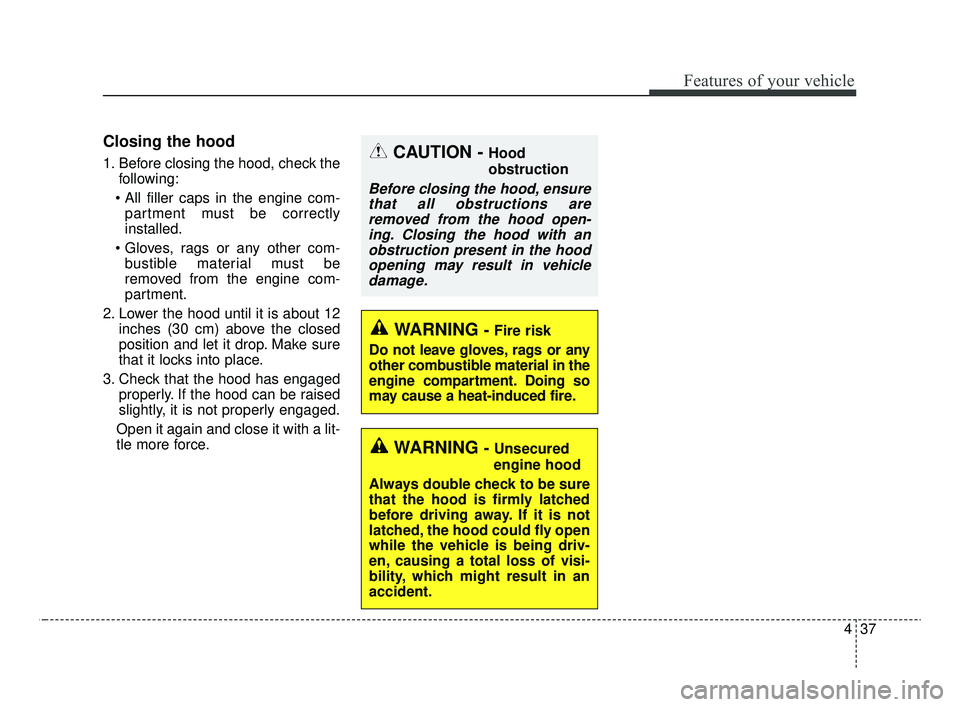
Closing the hood
1. Before closing the hood, check thefollowing:
partment must be correctly
installed.
bustible material must be
removed from the engine com-
partment.
2. Lower the hood until it is about 12 inches (30 cm) above the closed
position and let it drop. Make sure
that it locks into place.
3. Check that the hood has engaged properly. If the hood can be raised
slightly, it is not properly engaged.
Open it again and close it with a lit-
tle more force.
WARNING - Fire risk
Do not leave gloves, rags or any
other combustible material in the
engine compartment. Doing so
may cause a heat-induced fire.
WARNING - Unsecured
engine hood
Always double check to be sure
that the hood is firmly latched
before driving away. If it is not
latched, the hood could fly open
while the vehicle is being driv-
en, causing a total loss of visi-
bility, which might result in an
accident.
CAUTION - Hood
obstruction
Before closing the hood, ensure that all obstructions areremoved from the hood open-ing. Closing the hood with anobstruction present in the hoodopening may result in vehicledamage.
JFa PE USA 4.qxp 5/15/2019 3:18 PM Page 37
Page 128 of 591
Features of your vehicle
38
4
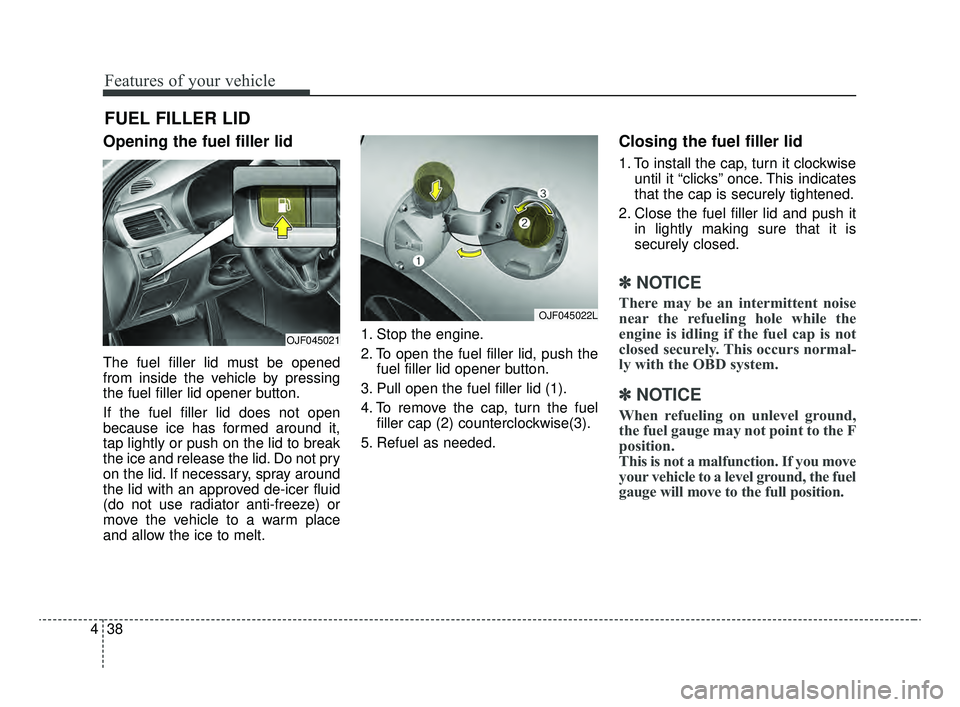
Opening the fuel filler lid
The fuel filler lid must be opened
from inside the vehicle by pressing
the fuel filler lid opener button.
If the fuel filler lid does not open
because ice has formed around it,
tap lightly or push on the lid to break
the ice and release the lid. Do not pry
on the lid. If necessary, spray around
the lid with an approved de-icer fluid
(do not use radiator anti-freeze) or
move the vehicle to a warm place
and allow the ice to melt. 1. Stop the engine.
2. To open the fuel filler lid, push the
fuel filler lid opener button.
3. Pull open the fuel filler lid (1).
4. To remove the cap, turn the fuel filler cap (2) counterclockwise(3).
5. Refuel as needed.
Closing the fuel filler lid
1. To install the cap, turn it clockwise until it “clicks” once. This indicates
that the cap is securely tightened.
2. Close the fuel filler lid and push it in lightly making sure that it is
securely closed.
✽ ✽NOTICE
There may be an intermittent noise
near the refueling hole while the
engine is idling if the fuel cap is not
closed securely. This occurs normal-
ly with the OBD system.
✽ ✽NOTICE
When refueling on unlevel ground,
the fuel gauge may not point to the F
position.
This is not a malfunction. If you move
your vehicle to a level ground, the fuel
gauge will move to the full position.
FUEL FILLER LID
OJF045021
OJF045022L
JFa PE USA 4.qxp 5/15/2019 3:18 PM Page 38