display KIA SORENTO 2014 Navigation System Quick Reference Guide
[x] Cancel search | Manufacturer: KIA, Model Year: 2014, Model line: SORENTO, Model: KIA SORENTO 2014Pages: 236, PDF Size: 7.61 MB
Page 174 of 236
6-14
UVO eServices(Optional)
Crash Notification Assist
Crash Notification Assist
If airbags are deployed due to a collision,
your vehicle automatically places a call to
9-1-1 and sends your vehicle’s location
information to the 9-1-1 Operator.
The Crash Notification Assist feature is
available only when the mobile phone is
connected via Bluetooth.
By default, this feature is turned off. To turn
it on, you must turn it on in the eServices
Settings menu. By enabling this feature,
you are agreeing the Crash Notification
Assist terms of use.
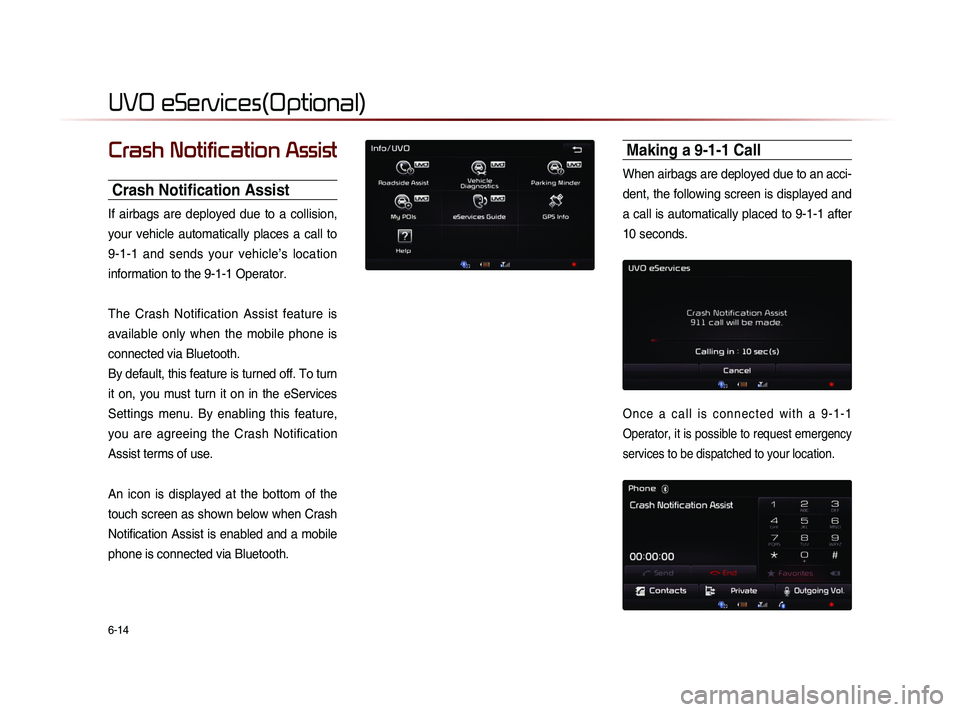
An icon is displayed at the bottom of the
touch screen as shown below when Crash
Notification Assist is enabled and a mobile
phone is connected via Bluetooth.
Making a 9-1-1 Call
When airbags are deployed due to an acci-
dent, the following screen is displayed and
a call is automatically placed to 9-1-1 after
10 seconds.
O n c e a c a l l i s c o n n e c t e d w i t h a 9 - 1 - 1
Operator, it is possible to request emergency
services to be dispatched to your location.
Page 175 of 236
UVO eServices
Information l
6-15
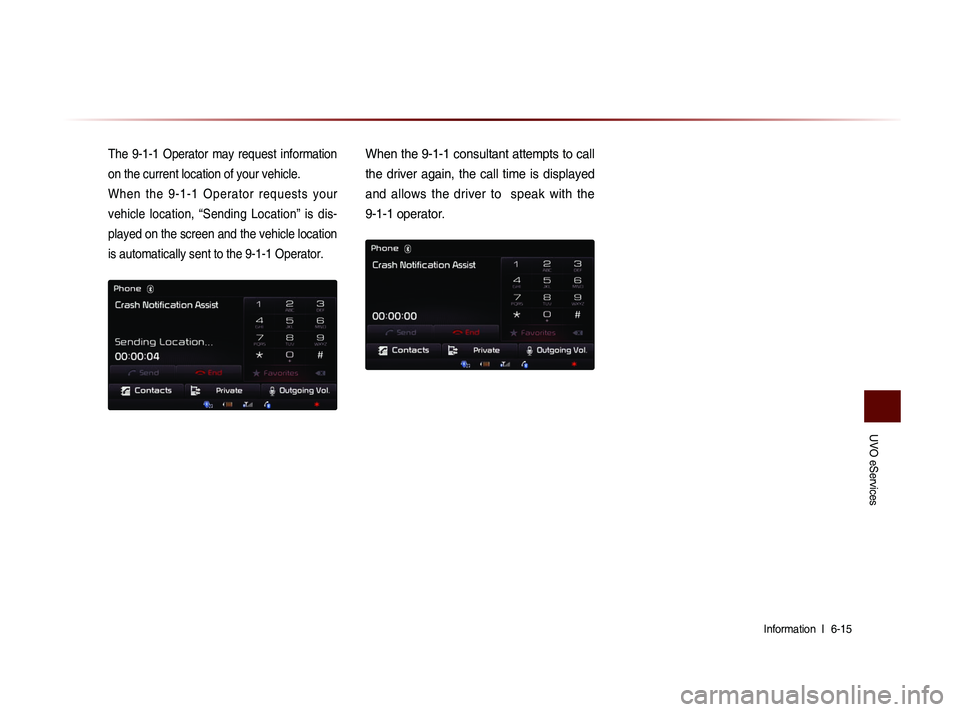
The 9-1-1 Operator may request information
on the current location of your vehicle.
When the 9-1-1 Operator requests your
vehicle location, “Sending Location” is dis-
played on the screen and the vehicle location
is automatically sent to the 9-1-1 Operator.When the 9-1-1 consultant attempts to call
the driver again, the call time is displayed
and allows the driver to speak with the
9-1-1 operator.
Page 176 of 236
6-16
About GPS (Global Po-
sitioning System)
GPS (Global Position System) :
GPS is a system developed and operated
by the United States that determines the
user’s current position (longitude, latitude,
etc.) by using 4 or more satellites.
This system is used with related GPS infor-
mation, various sensors, road map data,
and other related information to provide
navigation services.
i Information
• For continued map updates, information-
gathering and surveys are conducted con-
tinuously to monitor road changes or new
road constructions. Nonetheless, roads,
facilities, and fares are under constant
change and it is impossible to completely
remove all errors, including road updates,
names, facilities, and fares. Please keep
this in mind when using GPS.
• In principle, roads with widths less than
3 yards are not included within the map
data. Roads with sections with widths less
than 3 yards may be deleted in future map
data updates.
When GPS Info Cannot Be Used
GPS info may not operate under the fol-
lowing conditions :
• W h e n b u i l d i n g s , t u n n e l s , o r o t h e r
obstructions block satellite signals.
• When materials are placed above the
GPS antenna and block satellite signals.
• When the satellite is not transmitting.
• When a digital cellular phone (1.5GHz)
is placed near the GPS antenna.
Errors Unavoidable Due to Sys-
tem Characteristics
• The navigation system uses GPS infor-
mation, various sensors, road map data,
and other related information to display
the current position.
• Errors may occur if the satellite is trans-
mitting inaccurate signals or only two or
less satellite signals can be received.
• Errors that occur in such conditions can-
not be corrected.
GPS Information
Page 177 of 236

GPS Information
Information l
6-17
Viewing GPS Info
Press the key
▶ Press
Info/UVO ▶ Press GPS Info
i Information
• UVO eServices are an optional feature
equipped in select vehicles
The GPS reception and vehicle speed
information are displayed.
Page 180 of 236
7-2
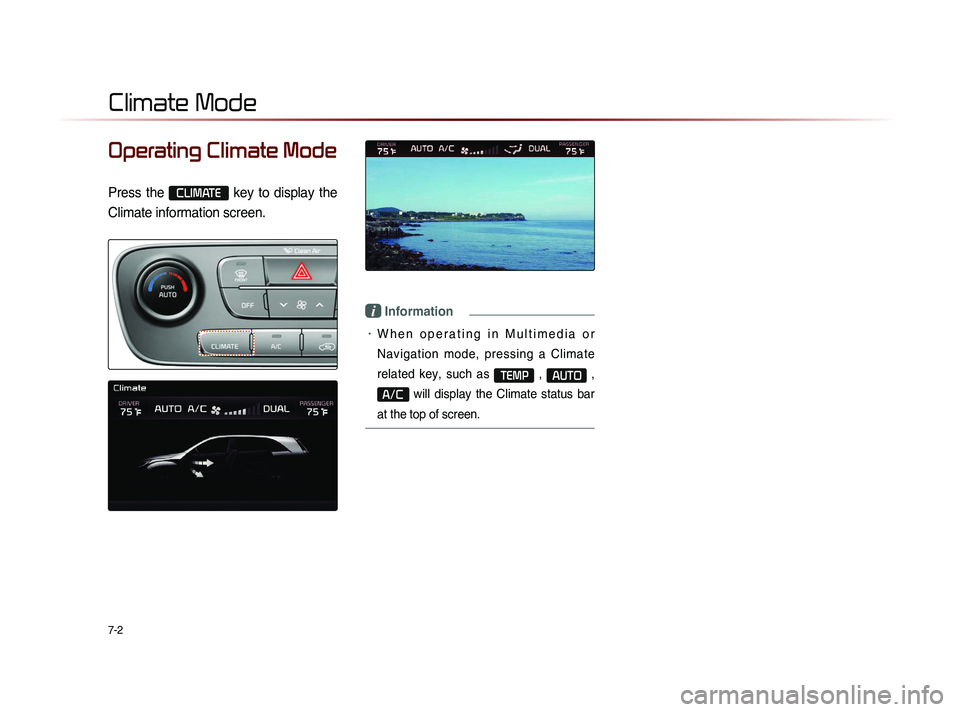
Operating Climate Mode
Press the CLIMATE
key to display the
Climate information screen.
i Information
• W h e n o p e r a t i n g i n M u l t i m e d i a o r
Navigation mode, pressing a Climate
related key, such as
TEMP , AUTO ,
A/C will display the Climate status bar
at the top of screen.
Climate Mode
Page 181 of 236

Climate Mode
Other Features l
7-3
Basic Mode Screen
Name Description
1 Driver-side
Temperature Displays the driver-side temperature
2 AUTO Display Displays whether the heating/cooling auto function
is on/off
3 A/C Display Displays whether the Air-conditioner is on/off
4 Fan Level Display Displays the current fan level
5 Fan Direction
Display Displays the set fan direction
6 DUAL Display Enables the driver/passenger temperature to be set
independently
7 Passenger-side
Temperature Displays the passenger-side temperature
1
1
3
3
2
2
4
45
67
67
5
Page 182 of 236
7-4
Basic Operation
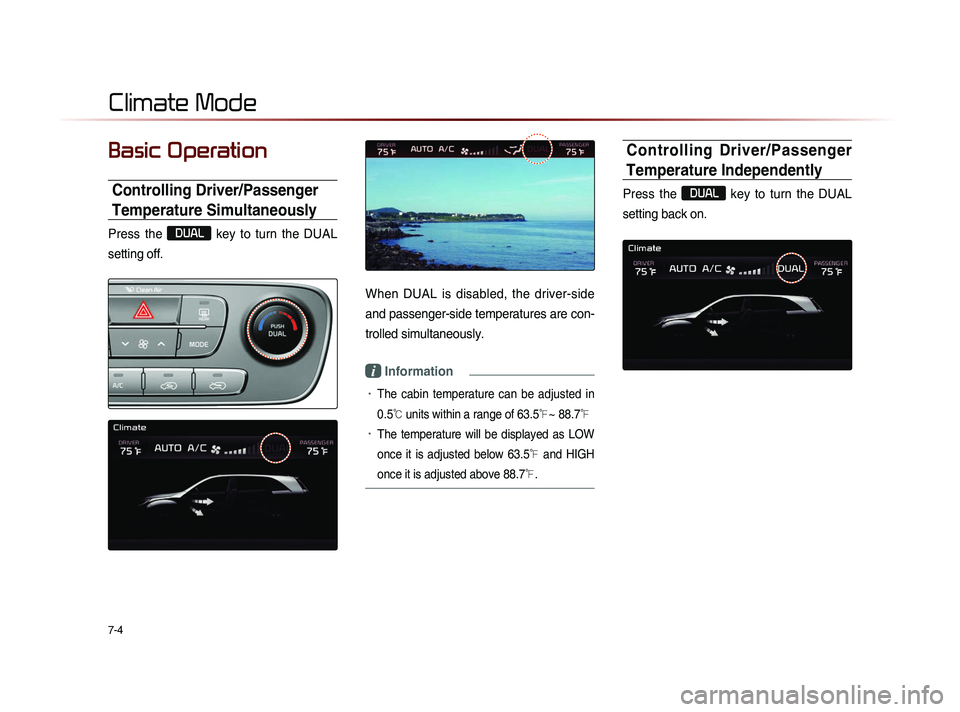
Controlling Driver/Passenger
Temperature Simultaneously
Press the
DUAL
key to turn the DUAL
setting off.
When DUAL is disabled, the driver-side
and passenger-side temperatures are con-
trolled simultaneously.
i Information
• The cabin temperature can be adjusted in
0.5
℃ units within a range of 63.5℉~ 88.7℉
• The temperature will be displayed as LOW
once it is adjusted below 63.5
℉ and HIGH
once it is adjusted above 88.7
℉.
Controlling Driver/Passenger
Temperature Independently
Press the
DUAL
key to turn the DUAL
setting back on.
Climate Mode
Page 185 of 236
Rear Camera
Other Features l
7-7
About Rear Detection
Camera
• This system has been equipped with a
rear camera for user safety by allowing a
wider rear range of vision.
• The rear camera will operate automati-
cally when the ignition KEY is turned ON
and the transmission lever is set to R.
The rear camera will automatically stop
operating when set to a different lever.
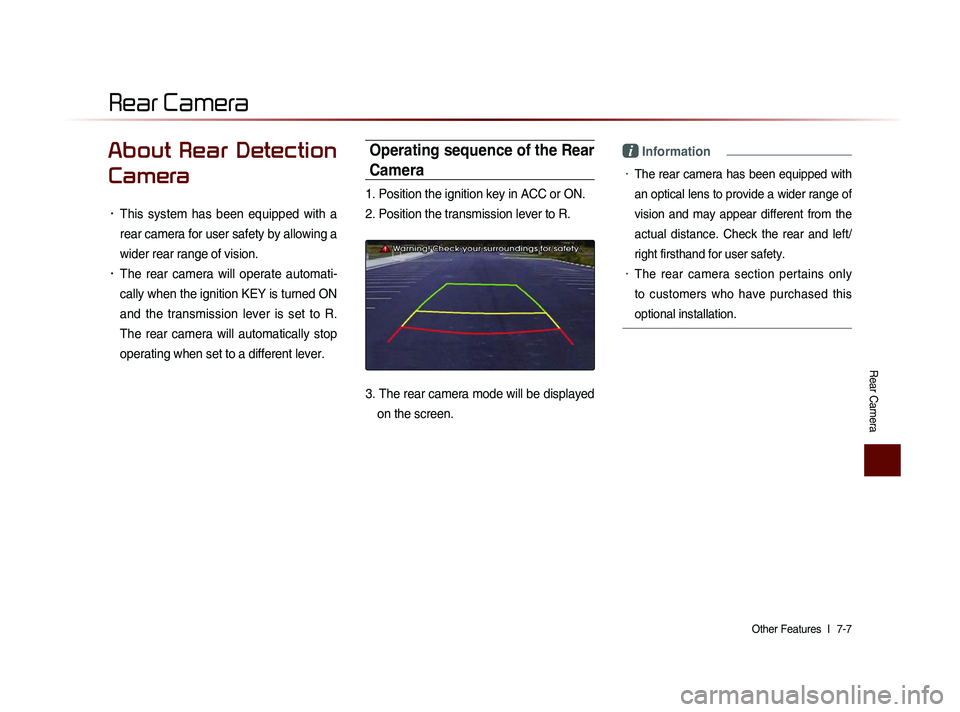
Operating sequence of the Rear
Camera
1. Position the ignition key in ACC or ON.
2. Position the transmission lever to R.
3. The rear camera mode will be displayed
on the screen.
i Information
• The rear camera has been equipped with
an optical lens to provide a wider range of
vision and may appear different from the
actual distance. Check the rear and left/
right firsthand for user safety.
• The rear camera section pertains only
to customers who have purchased this
optional installation.
Rear Camera
Page 188 of 236
8-2
Using Setup
Basic Mode Screen
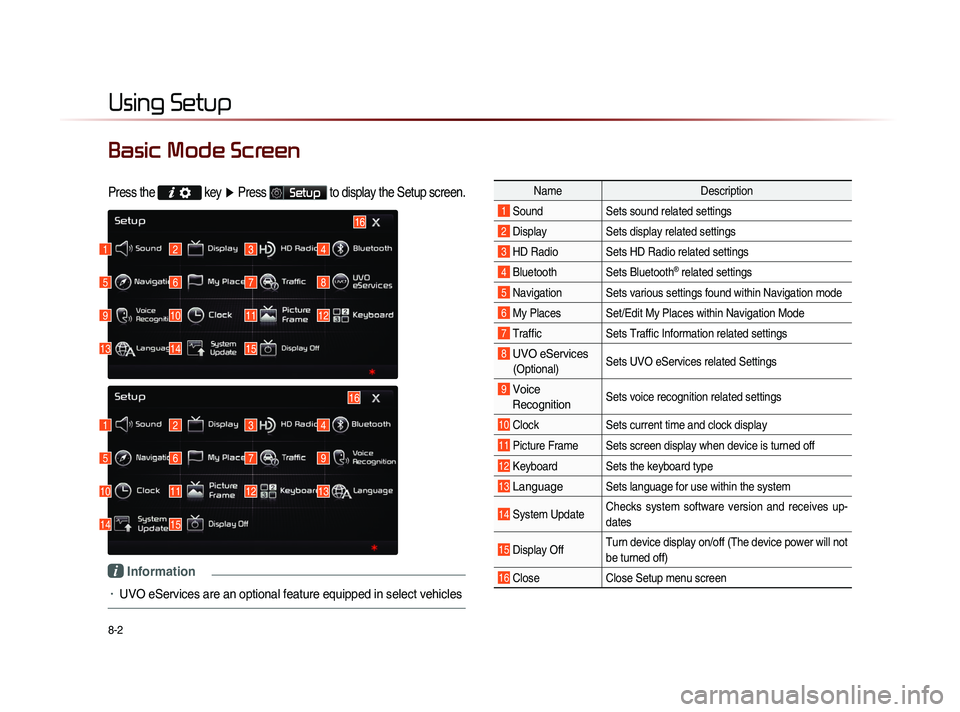
Press the key
▶ Press Setup to display the Setup screen.
Name Description
1 Sound Sets sound related settings
2 Display Sets display related settings
3 HD Radio Sets HD Radio related settings
4 Bluetooth Sets Bluetooth® related settings
5 Navigation Sets various settings found within Navigation mode
6 My Places Set/Edit My Places within Navigation Mode
7 Traffic Sets Traffic Information related settings
8 UVO eServices
(Optional)Sets UVO eServices related Settings
9 Voice
Recognition Sets voice recognition related settings
10 Clock Sets current time and clock display
11 Picture Frame Sets screen display when device is turned off
12 Keyboard Sets the keyboard type
13 Language Sets language for use within the system
14 System Update Checks system software version and receives up-
dates
15 Display Off Turn device display on/off (The device power will not
be turned off)
16 Close
Close Setup menu screen
1
1
5
5
9
10
13
14
2
2
6
6
10
11
14
15
3
3
7
7
11
12
4
4
8
9
12
13
16
15
16
i Information
• UVO eServices are an optional feature equipped in select vehicles
Page 189 of 236
Using Setup
Setup l
8-3
Starting Mode
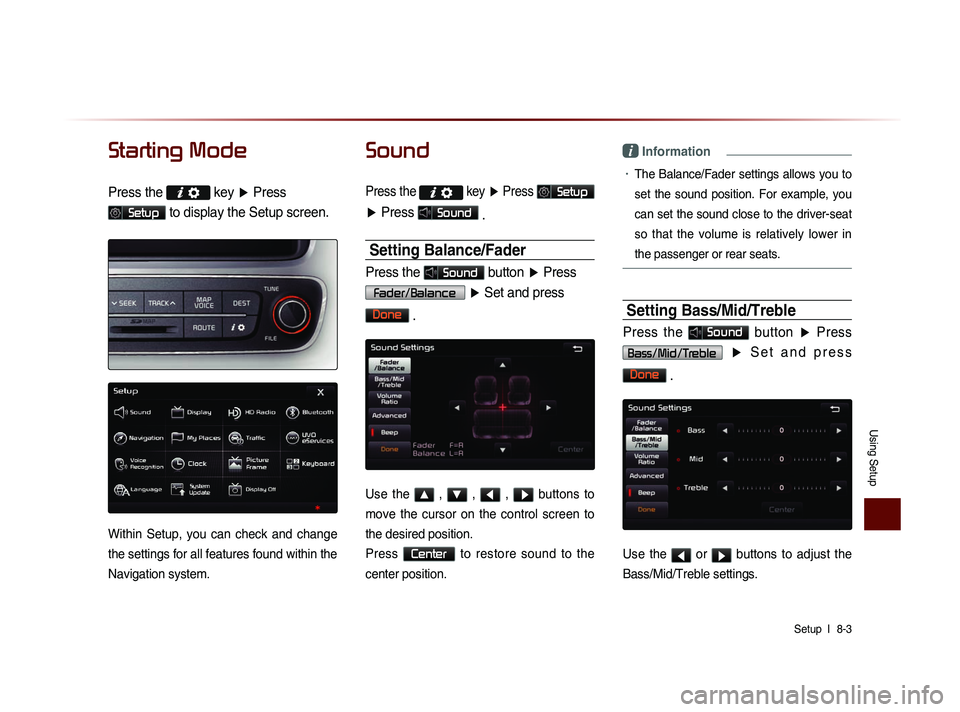
Press the key
▶ Press
Setup to display the Setup screen.
Within Setup, you can check and change
the settings for all features found within the
Navigation system.
Sound
Press the
key ▶ Press Setup
▶ Press Sound
.
Setting Balance/Fader
Press the Sound button ▶ Press
Fader/Balance
▶ Set and press
Done
.
Use the ▲ , ▼ , ◀ , ▶ buttons to
move the cursor on the control screen to
the desired position.
Press
Center to restore sound to the
center position.
i Information
• The Balance/Fader settings allows you to
set the sound position. For example, you
can set the sound close to the driver-seat
so that the volume is relatively lower in
the passenger or rear seats.
Setting Bass/Mid/Treble
Press the Sound button ▶ Press
Bass/Mid/Treble ▶ S e t a n d p r e s s
Done
.
Use the ◀ or ▶ buttons to adjust the
Bass/Mid/Treble settings.