KIA SORENTO 2015 Navigation System Quick Reference Guide
Manufacturer: KIA, Model Year: 2015, Model line: SORENTO, Model: KIA SORENTO 2015Pages: 77, PDF Size: 6.92 MB
Page 41 of 77
38
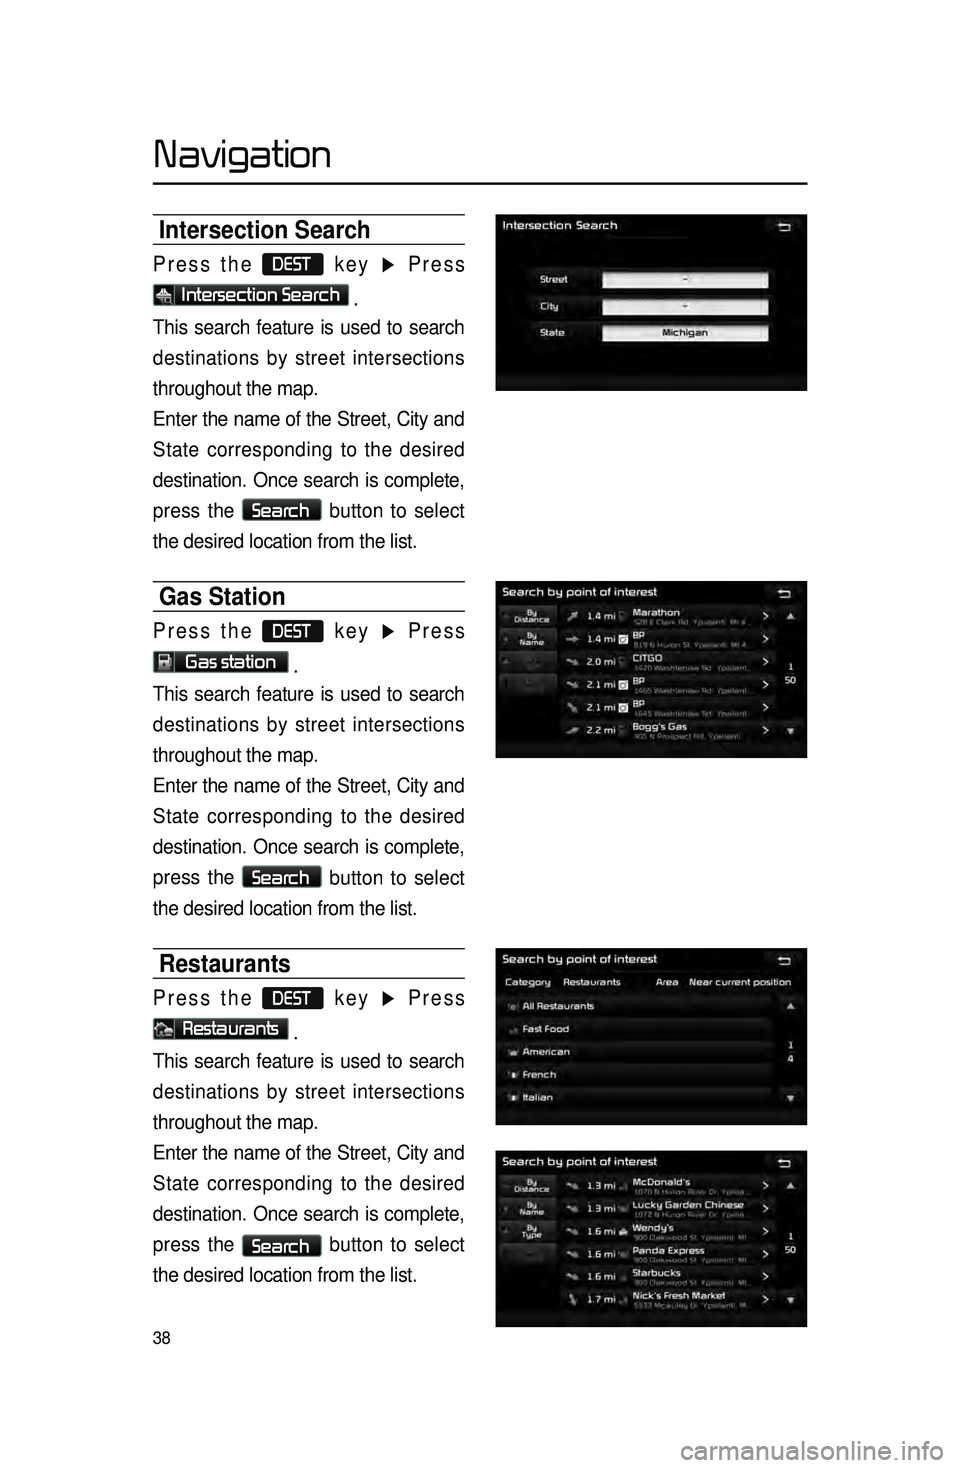
Intersection Search
Press the DEST key ▶ Press
Intersection Search .
This search feature is used to search
destinations by street intersections
throughout the map.
Enter the name of the Street, City and
State corresponding to the desired
destination. Once search is complete,
press the
Search
button to select
the desired location from the list.
Gas Station
Press the DEST key ▶ Press
Gas station .
This search feature is used to search
destinations by street intersections
throughout the map.
Enter the name of the Street, City and
State corresponding to the desired
destination. Once search is complete,
press the
Search
button to select
the desired location from the list.
Restaurants
Press the DEST key ▶ Press
Restaurants .
This search feature is used to search
destinations by street intersections
throughout the map.
Enter the name of the Street, City and
State corresponding to the desired
destination. Once search is complete,
press the
Search button to select
the desired location from the list.
Navigation
Page 42 of 77
39
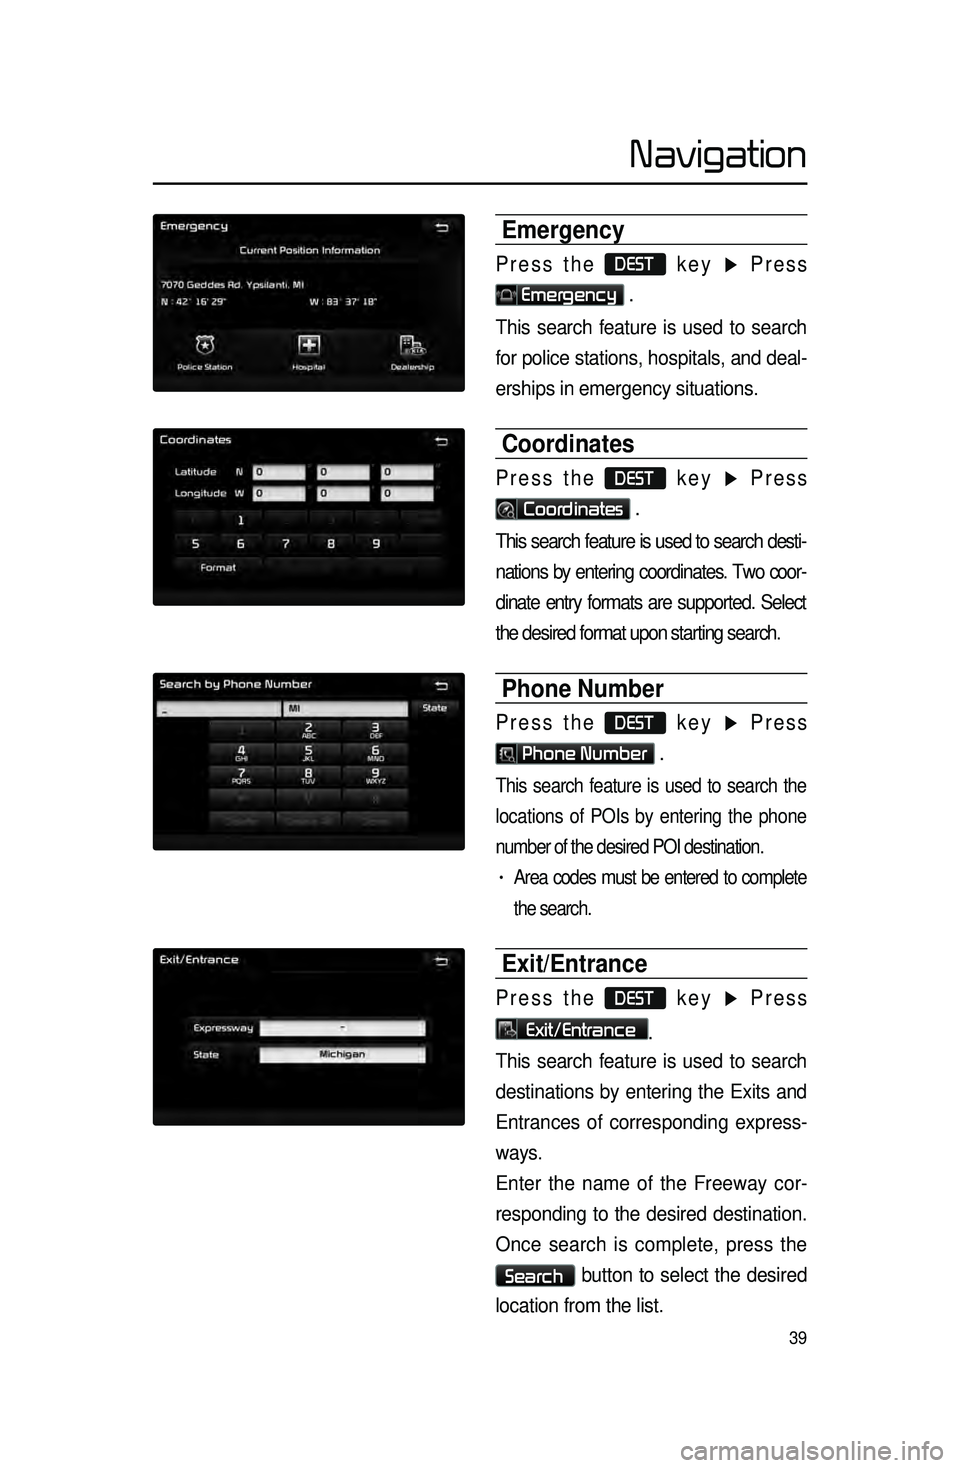
Emergency
Press the DEST key ▶ Press
Emergency .
This search feature is used to search
for police stations, hospitals, and deal -
erships in emergency situations.
Coordinates
Press the DEST key ▶ Press
Coordinates .
This search feature is used to search desti -
nations by entering coordinates. Two coor -
dinate entry formats are supported. Select
the desired format upon starting search.
Phone Number
Press the DEST key ▶ Press
Phone Number .
This search feature is used to search the
locations of POIs by entering the phone
number of the desired POI destination.
• Area codes must be entered to complete
the search.
Exit/Entrance
Press the DEST key ▶ Press
Exit/Entrance.
This search feature is used to search
destinations by entering the Exits and
Entrances of corresponding express -
ways.
E
nter the name of the Freeway cor -
responding to the desired destination.
Once
search is complete, press the
Search button to select the desired
location from the list.
Navigation
Page 43 of 77
40
Setting a Destination
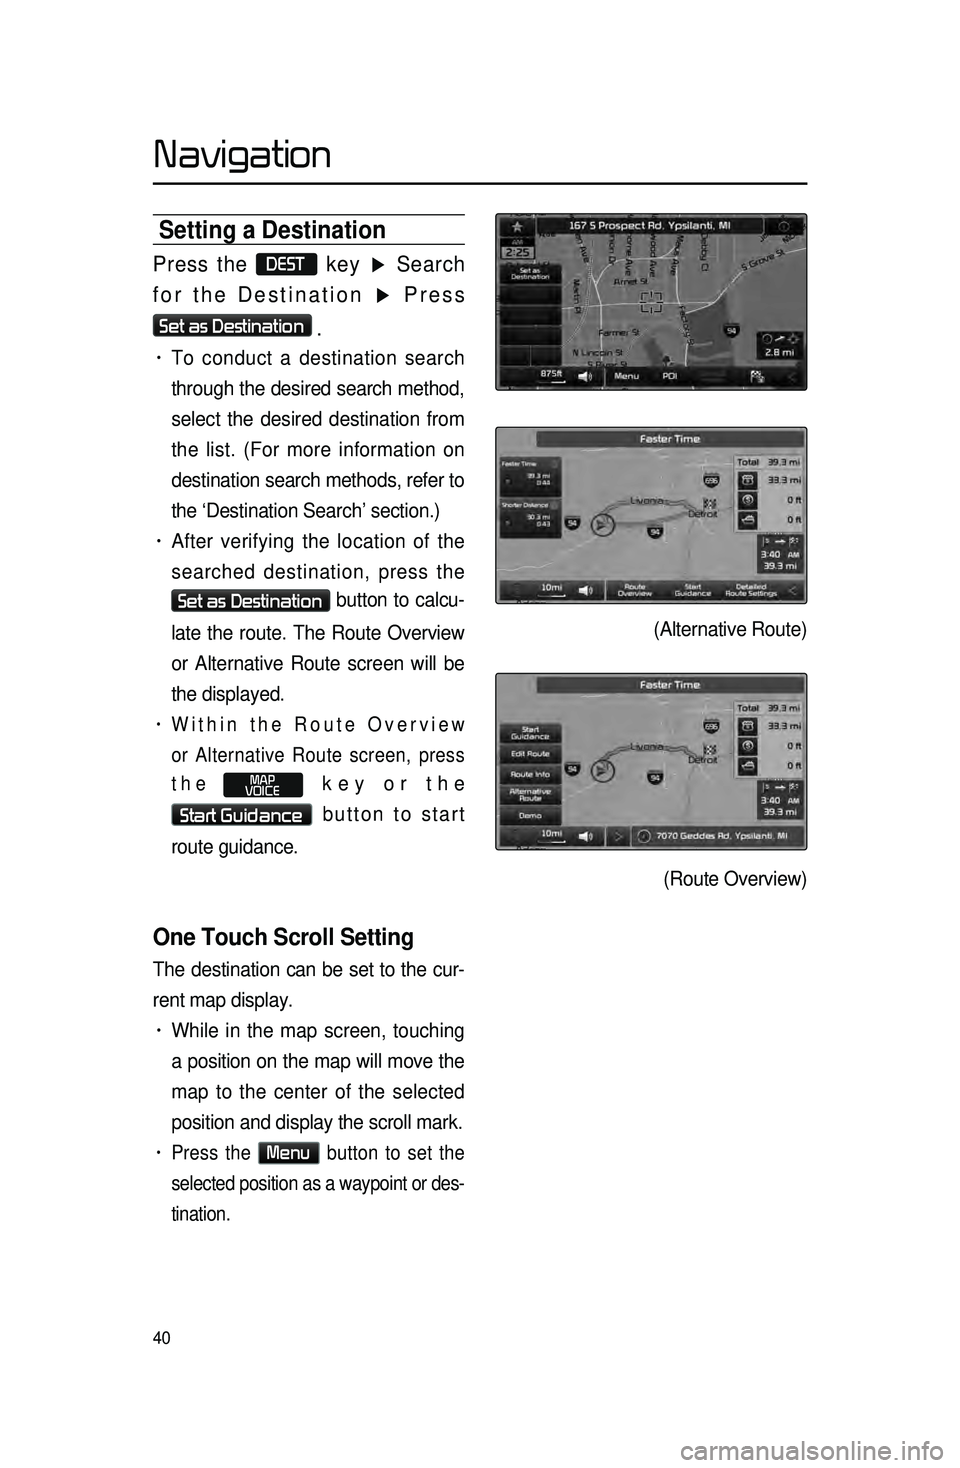
Press the DEST key ▶ Search
for the Destination ▶ Press
Set as Destination
.
• To conduct a destination search
through the desired search method,
select the desired destination from
the list. (For more information on
destination search methods, refer to
the ‘Destination Search’ section.)
• After verifying the location of the
searched destination, press the
Set as Destination button to calcu-
late the route. The Route Overview
or Alternative Route screen will be
the displayed.
• Within the Route Overview
or Alternative Route screen, press
the
MAP
VOICE key or the
Start Guidance button to start
route guidance.
One Touch Scroll Setting
The destination can be set to the cur -
rent map display.
• While in the map screen, touching
a position on the map will move the
map to the center of the selected
position and display the scroll mark.
• Press the Menu button to set the
selected position as a waypoint or des -
tination.
(Alternative Route)
(Route Overview)
Navigation
Page 44 of 77
41
Route Calculation
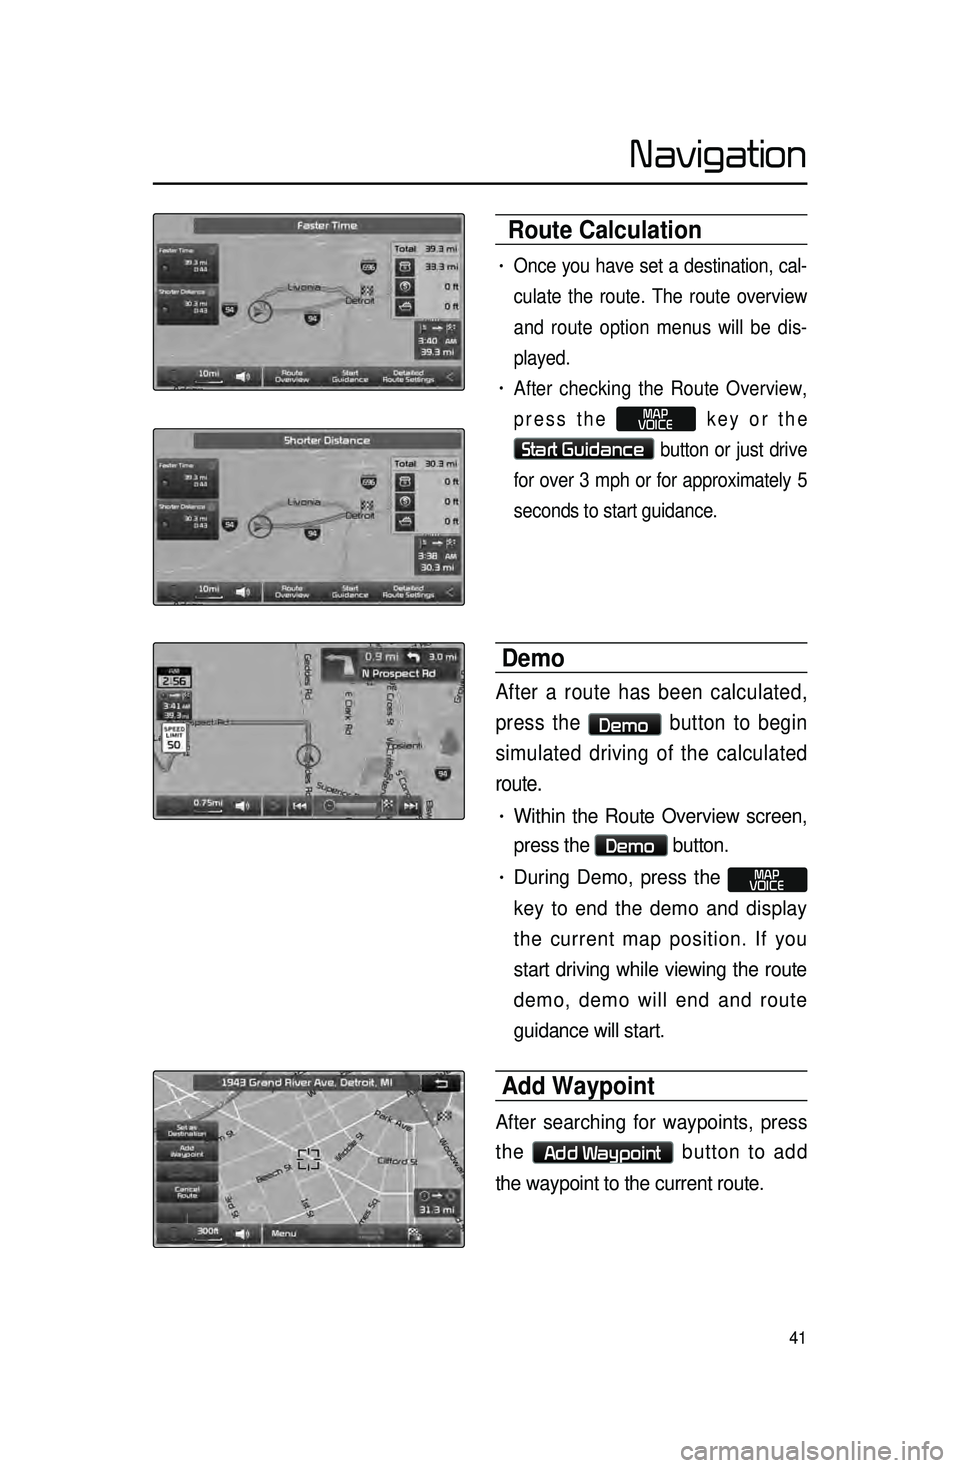
• Once you have set a destination, cal-
culate the route. The route overview
a
nd route option menus will be dis -
played.
• After checking the Route Overview,
press the
MAP
VOICE key or the
Start Guidance button or just drive
for over 3 mph or for approximately 5
seconds to start guidance.
Demo
After a route has been calculated,
press the
Demo button to begin
simulated driving of the calculated
route.
• Within the Route Overview screen,
press the
Demo button.
• During Demo, press the MAP
VOICE
key to end the demo and display
the current map position. If you
start driving while viewing the route
demo, demo will end and route
guidance will start.
Add Waypoint
After searching for waypoints, press
the
Add Waypoint button to add
the waypoint to the current route.
Navigation
Page 45 of 77
42
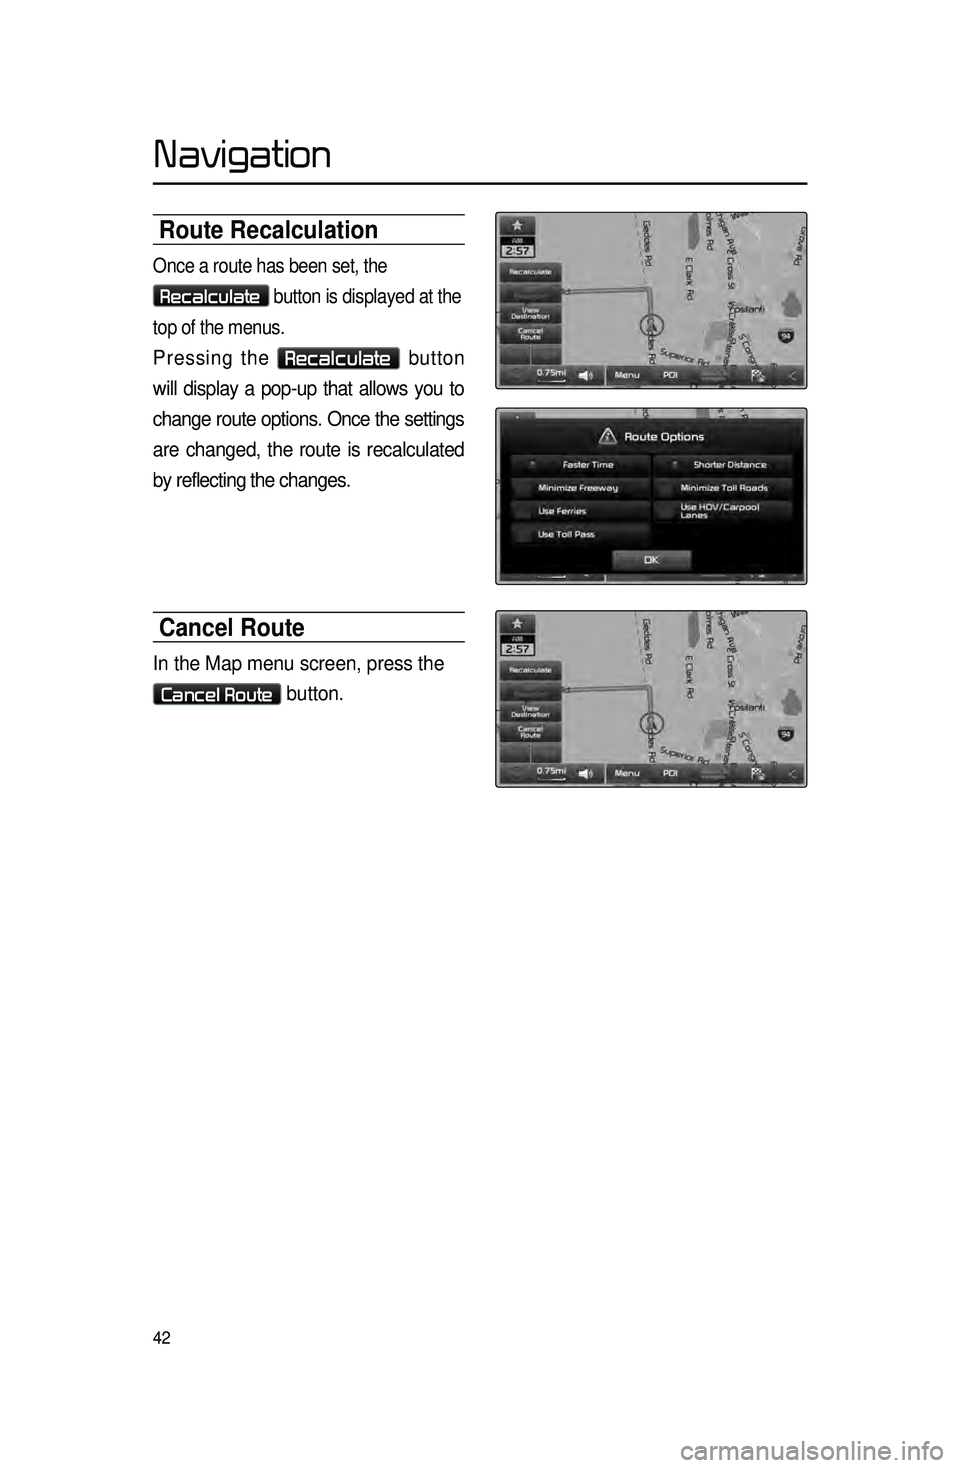
Route Recalculation
Once a route has been set, the
Recalculate button is displayed at the
top of the menus.
Pressing the Recalculate button
will display a pop-up that allows you to
change route options. Once the settings
are changed, the route is recalculated
by reflecting the changes.
Cancel Route
In the Map menu screen, press the
Cancel Route button.
Navigation
Page 46 of 77
43
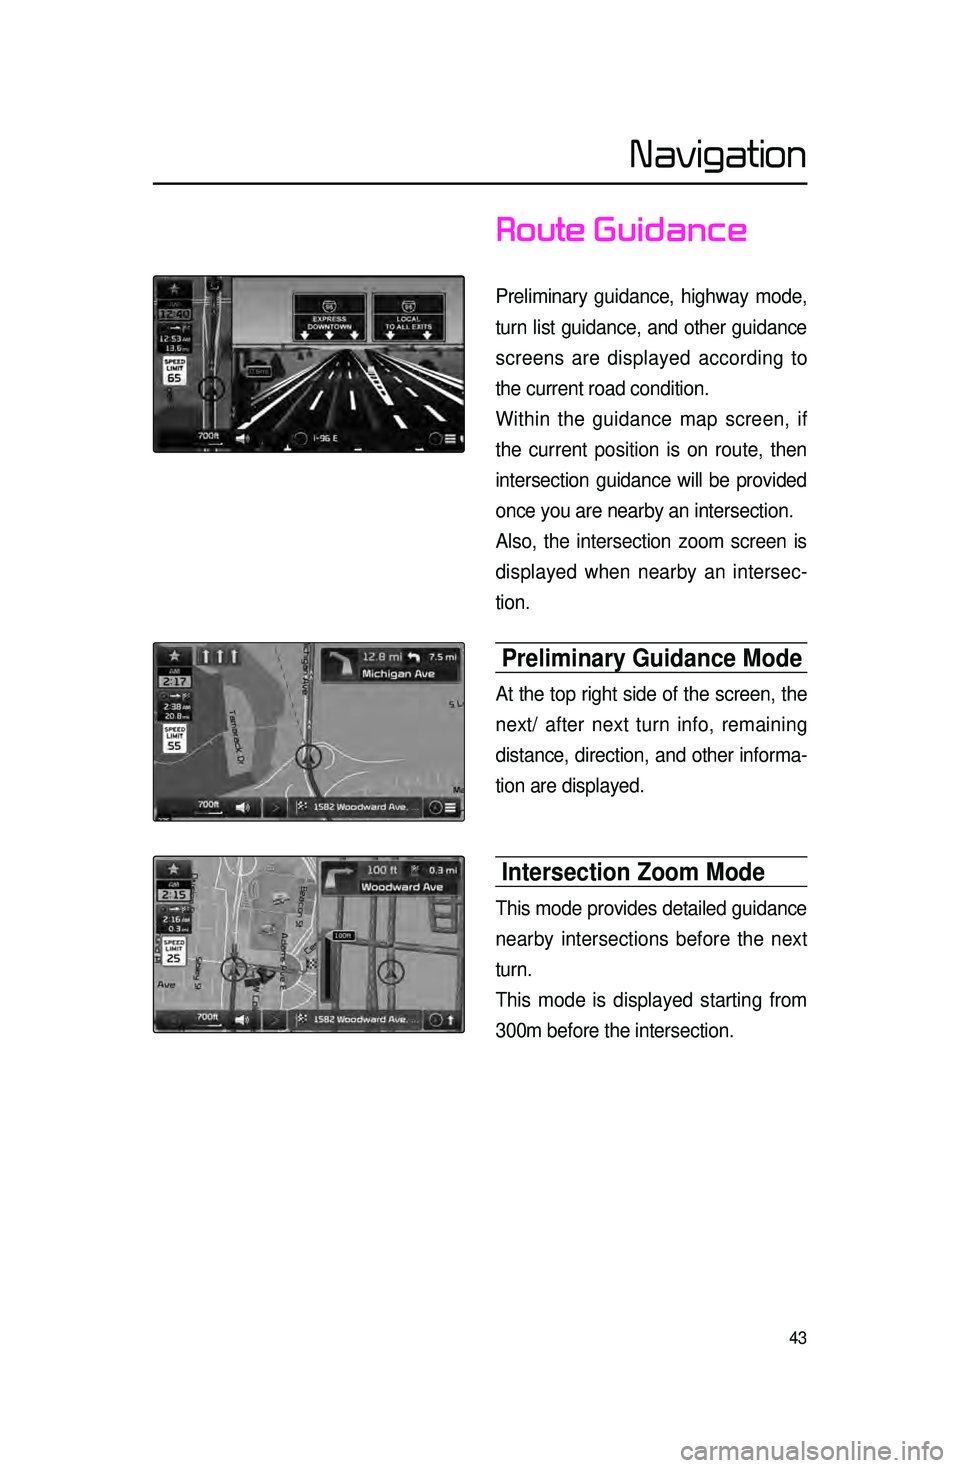
Route Guidance
Preliminary guidance, highway mode,
turn list guidance, and other guidance
screens are displayed according to
the current road condition.
Within the guidance map screen, if
the current position is on route, then
intersection guidance will be provided
once you are nearby an intersection.
Also, the intersection zoom screen is
displayed when nearby an intersec-
tion.
Preliminary Guidance Mode
At the top right side of the screen, the
next/ after next turn info, remaining
distance, direction, and other informa -
tion are displayed.
Intersection Zoom Mode
This mode provides detailed guidance
nearby intersections before the next
turn.
This mode is displayed starting from
300m before the intersection.
Navigation
Page 47 of 77
44
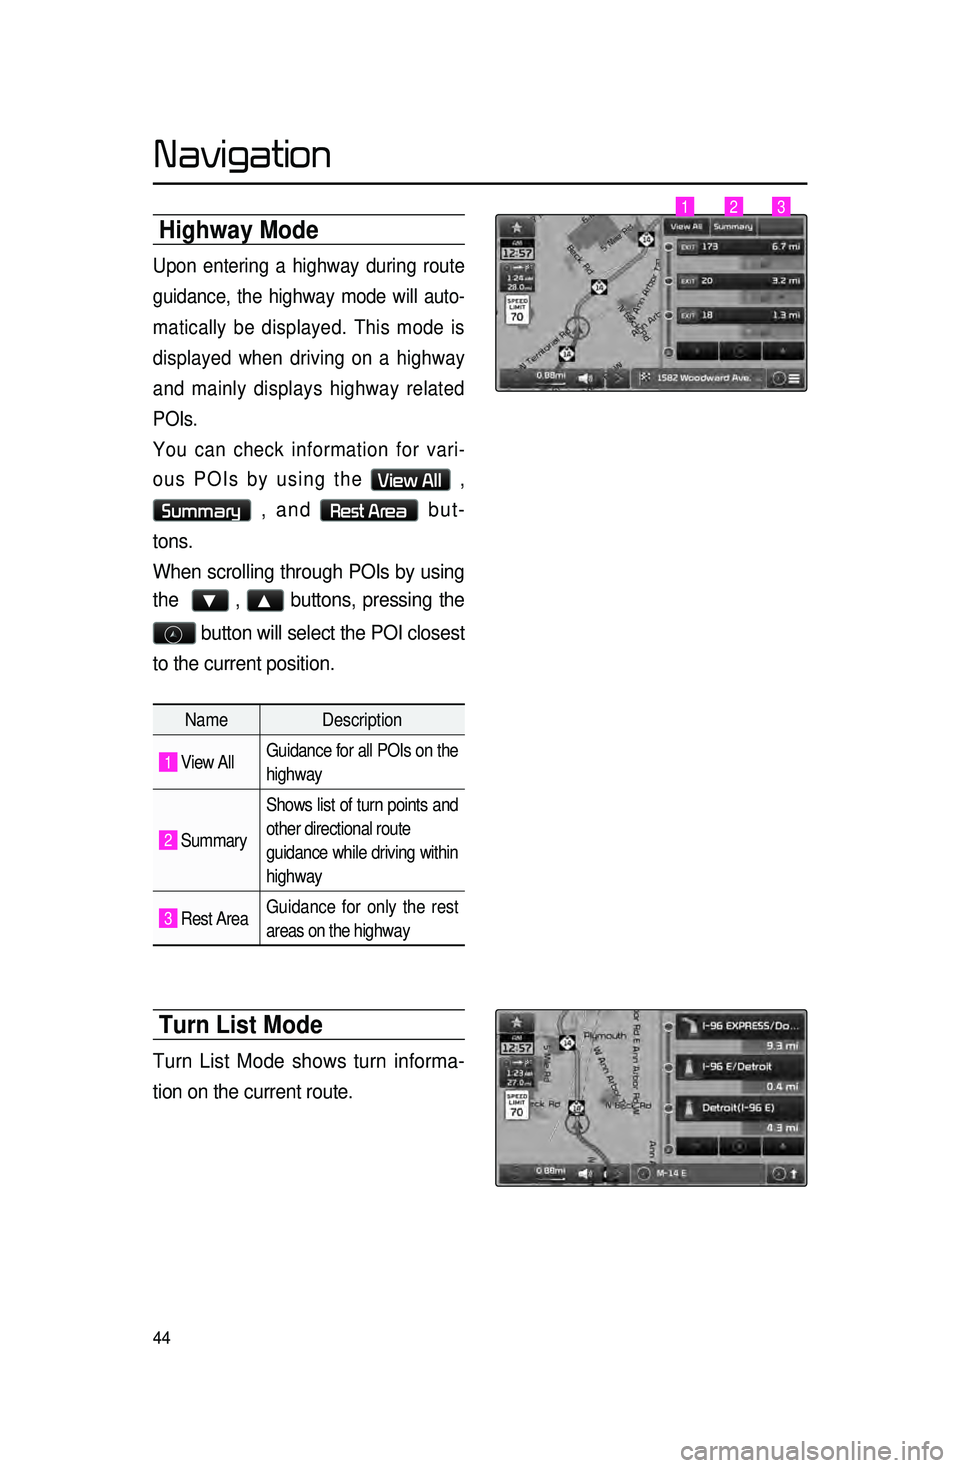
highway Mode
Upon entering a highway during route
guidance, the highway mode will auto-
matically be displayed. This mode is
d
isplayed when driving on a highway
and mainly displays highway related
POIs.
You can check information for vari -
ous POIs by using the
View All ,
Summary , and Rest Area but -
tons.
When
scrolling through POIs by using
the
▼ , ▲ buttons, pressing the
button will select the POI closest
to the current position.
Turn List Mode
Turn List Mode shows turn informa -
tion on the current route.
Name Description
1 View AllGuidance for all POIs on the
highway
2 SummaryShows list of turn points and
other directional route
guidance while driving within
highway
3 Rest Area
Guidance for only the rest
areas on the highway
123
Navigation
Page 48 of 77
45
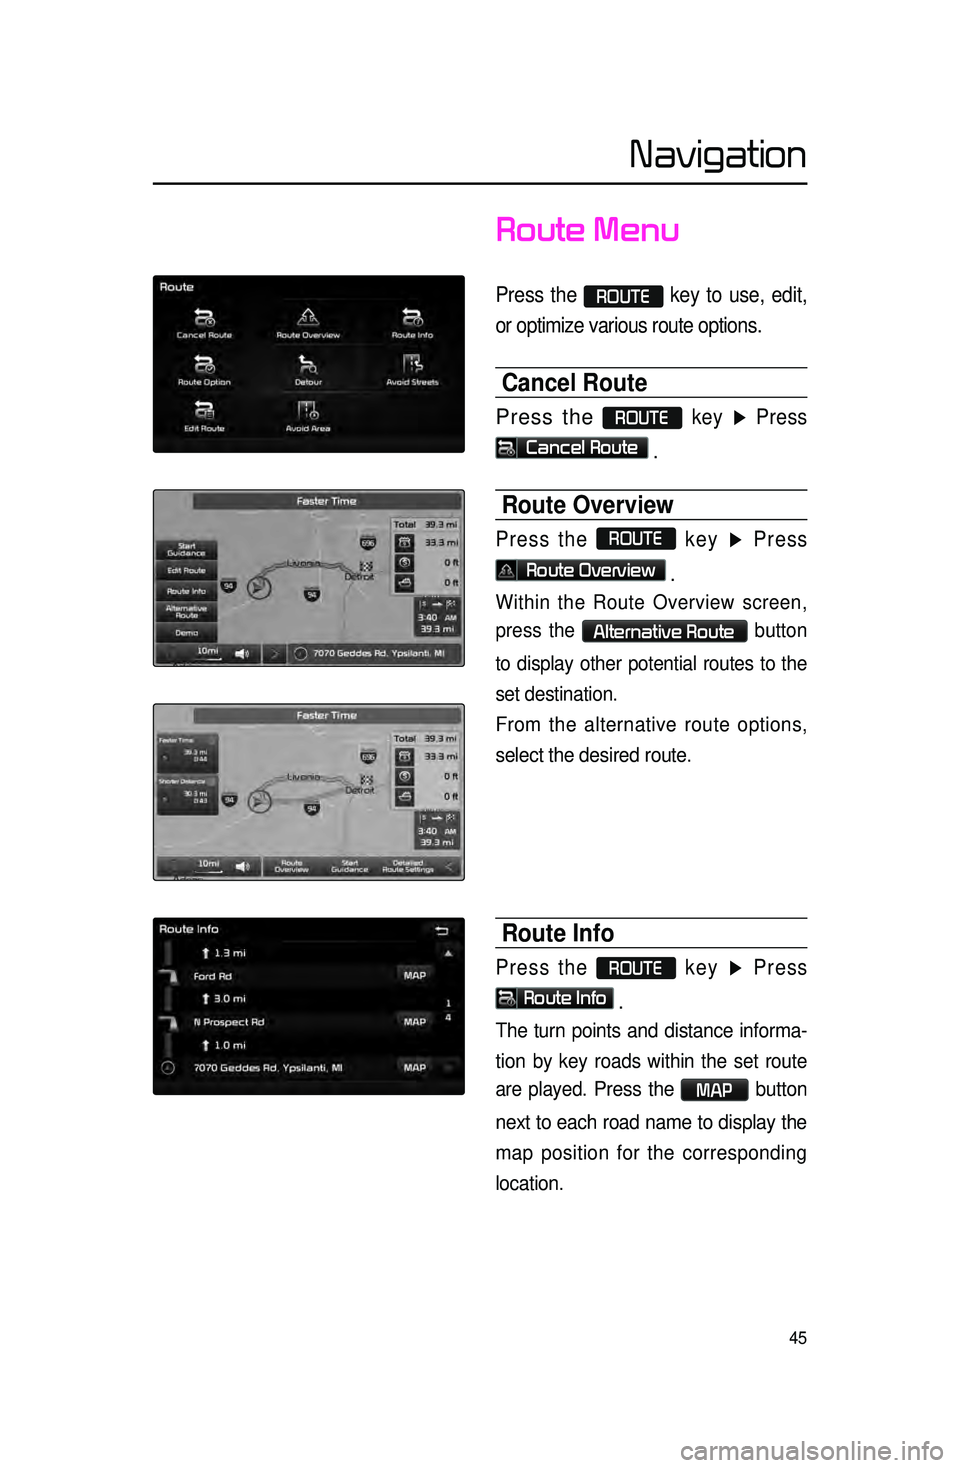
Route Menu
Press the ROUTE key to use, edit,
or optimize various route options.
Cancel Route
Press the ROUTE key ▶ Press
Cancel Route .
Route Overview
Press the ROUTE
key ▶ Press
Route Overview .
Within the Route Overview screen,
press the
Alternative Route button
to display other potential routes to the
set destination.
From the alternative route options,
select the desired route.
Route Info
Press the ROUTE key ▶ Press
Route Info
.
The turn points and distance informa-
tion
by key roads within the set route
are played.
Press the MAP button
next to each road name to display the
map position for the corresponding
location.
Navigation
Page 49 of 77
46
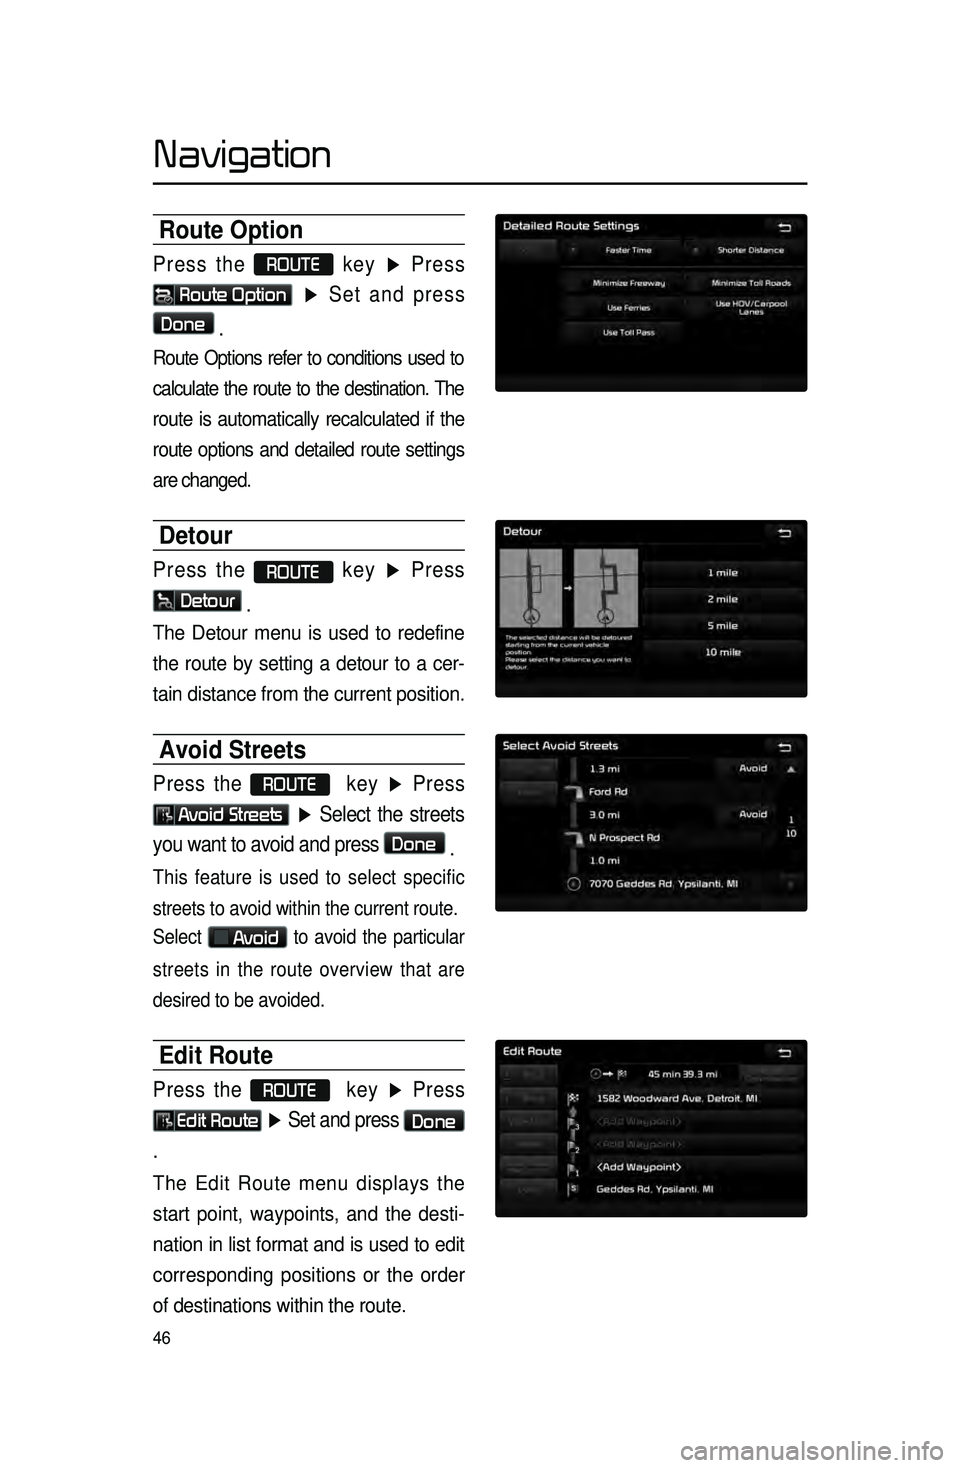
Route Option
Press the ROUTE
key ▶ Press
Route Option
▶ Set and press
Done
.
Route Options refer to conditions used to
calculate the route to the destination. The
route is automatically recalculated if the
route options and detailed route settings
are changed.
Detour
Press the ROUTE key ▶ Press
Detour
.
The Detour menu is used to redefine
the route by setting a detour to a cer -
tain distance from the current position.
Avoid Streets
Press the ROUTE key ▶ Press
Avoid Streets ▶ Select the streets
you want to avoid and press
Done .
This feature is used to select specific
streets to avoid within the current route.
Select
Avoid to avoid the particular
streets in the route overview that are
desired to be avoided.
Edit Route
Press the ROUTE key ▶ Press
Edit Route ▶ Set and press Done
.
The Edit Route menu displays the
start point, waypoints, and the desti -
nation in list format and is used to edit
corresponding posit
ions or the order
of destinations within the route.
Navigation
Page 50 of 77
47
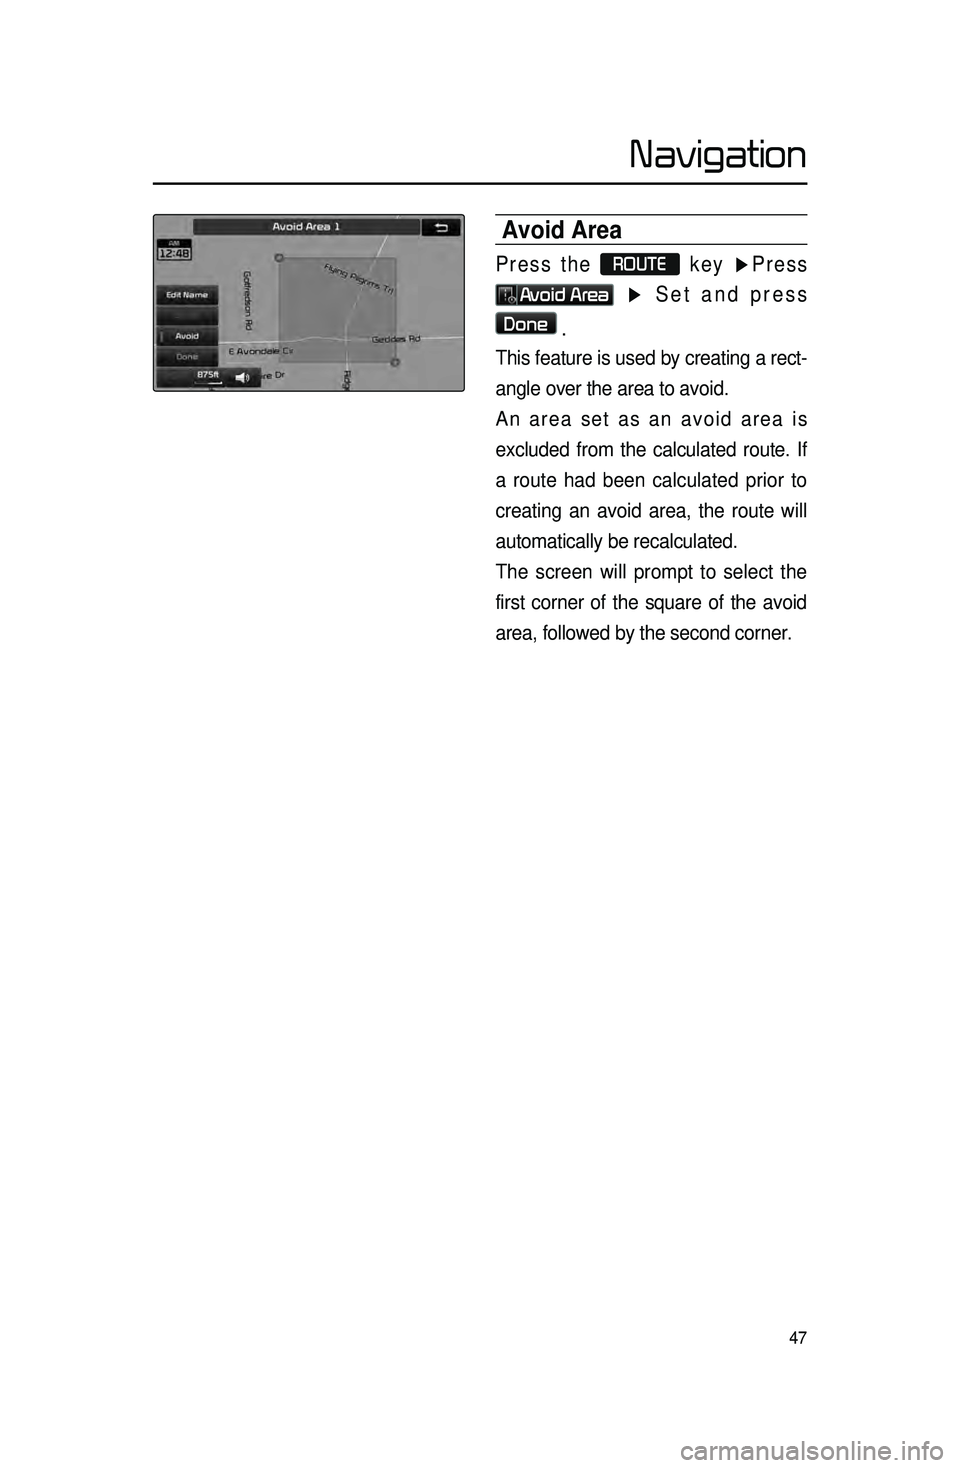
Avoid Area
Press the ROUTE
key ▶Press
Avoid Area ▶ Set and press
Done
.
This feature is used by creating a rect -
angle over the area to avoid.
A
n area set as an avoid area is
excluded from the calculated route. If
a route had been calculated prior to
creating an avoid area, the route will
automatically be recalculated.
The screen will prompt to select the
first corner of the square of the avoid
area, followed by the second corner.
Navigation