light KIA SOUL 2020 Navigation System Quick Reference Guide
[x] Cancel search | Manufacturer: KIA, Model Year: 2020, Model line: SOUL, Model: KIA SOUL 2020Pages: 211, PDF Size: 6.6 MB
Page 10 of 211
8
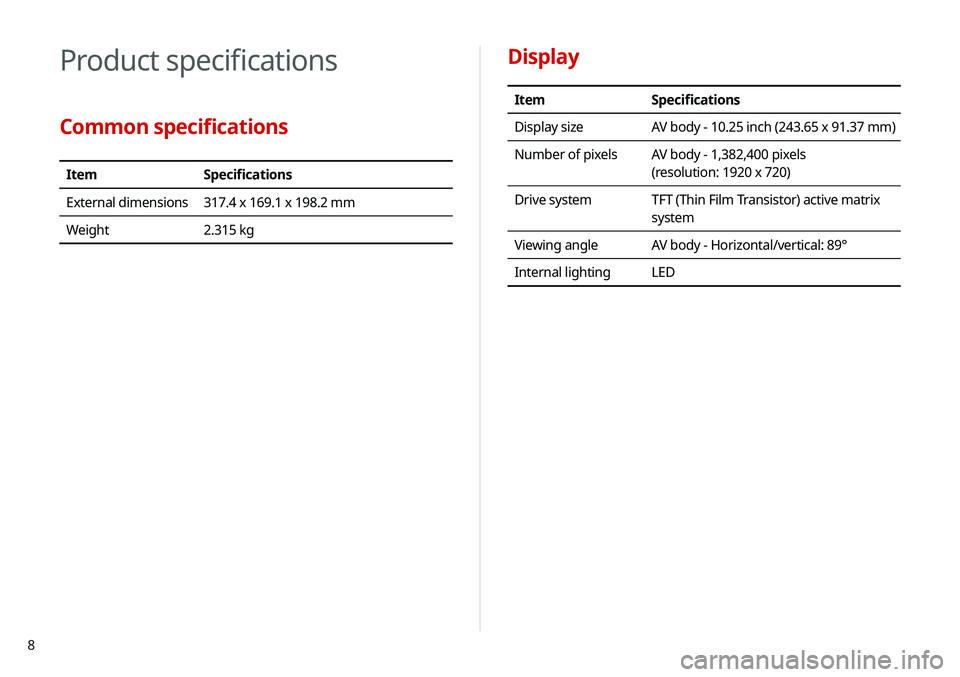
Display
ItemSpecifications
Display size AV body - 10.25 inch (243.65 x 91.37 mm)
Number of pixels AV body - 1,382,400 pixels
(resolution: 1920 x 720)
Drive system TFT (Thin Film Transistor) active matrix
system
Viewing angle AV body - Horizontal/vertical: 89°
Internal lighting LED
Product specifications
Common specifications
ItemSpecifications
External dimensions 317.4 x 169.1 x 198.2 mm
Weight 2.315 kg
Page 20 of 211

10
10 Appendix
Solutions 10-2
System status indicator icons 10-9
FAQ 10-11
Product specifications 10-13
Important information 10-17
Index 10-20
Trademarks 10-24
Open Source Information 10-27
Configuring the navigation settings 9-12
Display 9-12
Guidance 9-14
Traffic 9-14
Volume Control 9-15
Reset 9-15
Configuring the UVO settings 9-16
Activate UVO 9-16
911 Connect 9-16
Modem Information 9-17
Modem Status 9-17
Configuring the general system settings 9-18
Date/Time 9-18
Language 9-19
Keyboard 9-19
Screen Saver 9-20
System Info 9-20
Configuring the display settings 9-21
Mode 9-21
Illumination 9-22
Blue Light Filter 9-22
Reset 9-23
Configuring the media settings 9-23
Media Change Notifications 9-23
Repeat Folder 9-24
Updating the system software and map 9-24
Page 27 of 211

1-7
“Touch and hold” gesture
Touch and hold the desired item.
It is used to fast forward or rewind during playback.
“Touch” gesture
Lightly touch the desired item and release the finger.
The corresponding function is run or the corresponding menu is
selected.
Page 29 of 211
1-9
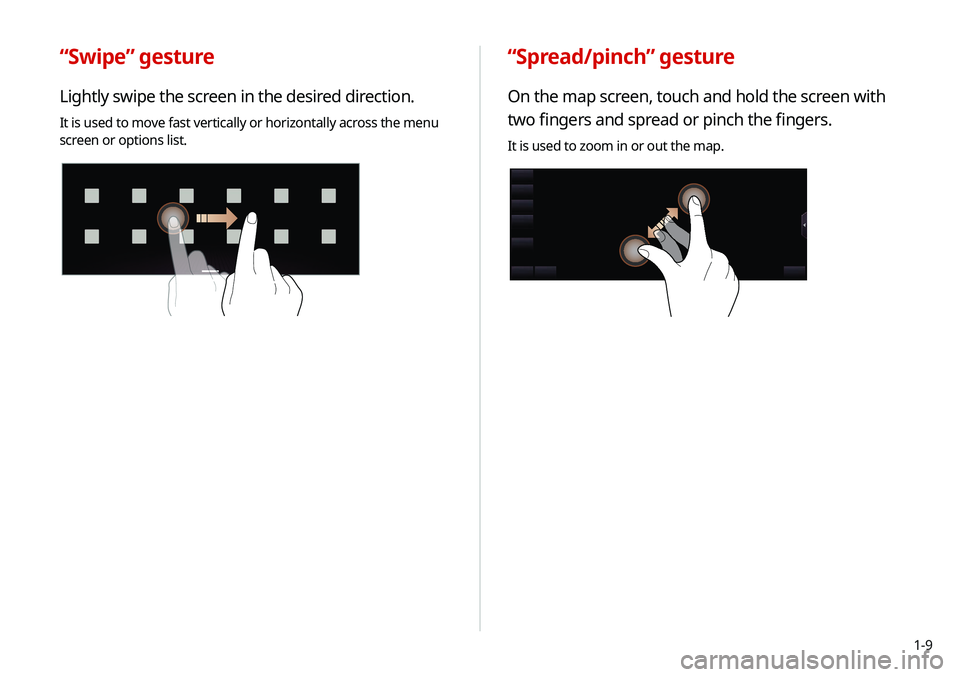
“Spread/pinch” gesture
On the map screen, touch and hold the screen with
two fingers and spread or pinch the fingers.
It is used to zoom in or out the map.
“Swipe” gesture
Lightly swipe the screen in the desired direction.
It is used to move fast vertically or horizontally across the menu
screen or options list.
Page 45 of 211

2-11
d Can synchronize the light with the playing music.0000
A
After checking Music+, music is not played back or the
light does not illuminate when muted.
e Can adjust the brightness of the light.
f The list of menu items appears.
\225 Reset: Can reset all the settings of the sound mood
lamp.
\225User's Manual on Web (QR Code): Displays the QR
code that provides access to the online user manual
for the system.
\225Split Screen: Can turn on or off the split screen mode.
0000
A
You cannot manipulate the sound mood lamp while driving.
0000
A
The light of the inside handle garnish gradually turns off
when you drive above the specified speed.
0000
A
When a door is opened, the light automatically turns off.
Using the sound mood lamp (if
equipped)
You can set to implement various lighting effects by synchronizing
with the playing music.
1 On the All Menus screen, touch Sound Mood
Lamp.
2 Select and then change the settings.
\037
\036
\035
\034
\033
\032
a Can turn on or off the sound mood lamp.
b Can select various color themes. Based on the selected
color theme, the lights on the front door trim (inside
handle garnish/armrest-molding) and at the bottom of
the glove box change their colors in various patterns.
c Can select the color of the light on the front door trim
(inside handle garnish/armrest molding). The selected
lighting color changes into a soft glow effect.
Page 151 of 211

8-7
Using the received location information
You can view points of interest (POIs) received from the UVO
website and the UVO application and set one of them as the
destination.
1 On the All Menus screen, touch UVO >
My POIs.
2 From the list of received locations, select a place
name.
3 See the diagnosis results and perform a required
function, as follows:
\225
To schedule a maintenance service at a preferred Kia
dealership or the nearest one, touch Schedule Service.
\225To call the UVO center for roadside assistance, touch
Roadside Assist.
0000A A diagnosis result provided by this service is only an estimated
result based on the signals from your vehicle. Visit a Kia
Motors dealership for a detailed diagnosis.
0000
A
When a critical diagnostics issue is detected on your
vehicle, an automatic diagnosis starts when a warning light
illuminates on the instrument cluster. You are notified of the
diagnosis result.
0000
A
Your preferred dealership must be registered on MyUVO.com
for you to schedule a maintenance service with it.
Page 172 of 211
9-18
Configuring the general
system settings
You can configure general settings for date, time, language, and
the like. You can also check information of the system.
1 On the All Menus screen, touch Setup >
General.
The general settings screen appears.
2 Configure the settings required:
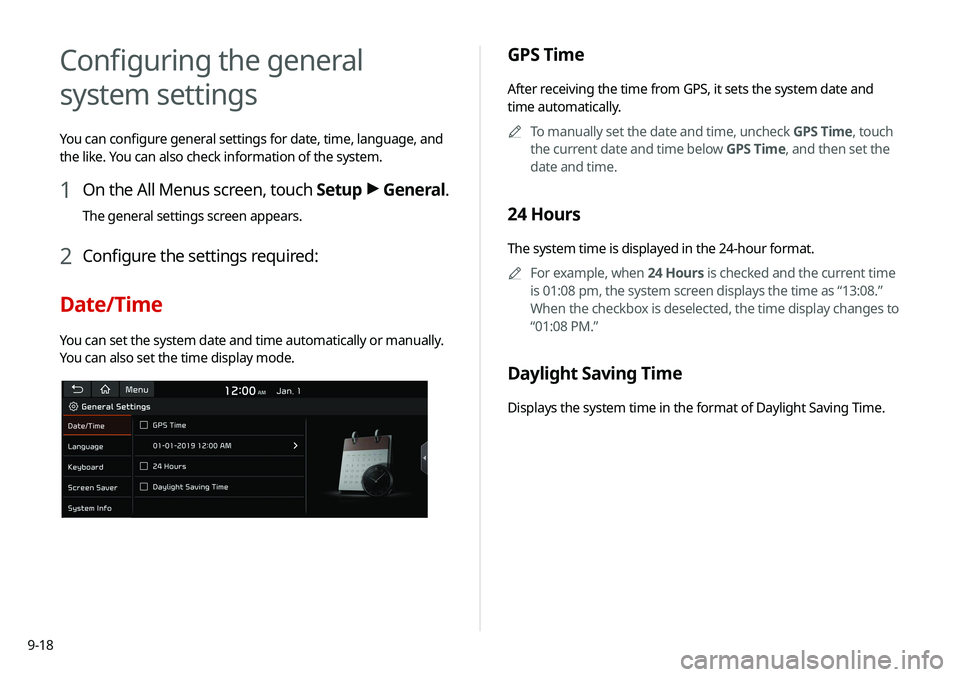
Date/Time
You can set the system date and time automatically or manually.
You can also set the time display mode.
GPS Time
After receiving the time from GPS, it sets the system date and
time automatically.
0000
A
To manually set the date and time, uncheck GPS Time, touch
the current date and time below GPS Time, and then set the
date and time.
24 Hours
The system time is displayed in the 24-hour format.
0000
A
For example, when 24 Hours is checked and the current time
is 01:08 pm, the system screen displays the time as “13:08.”
When the checkbox is deselected, the time display changes to
“01:08 PM.”
Daylight Saving Time
Displays the system time in the format of Daylight Saving Time.
Page 175 of 211

9-21
Storage
You can check the storage space of the system memory where
voice memos can be saved.
User's Manual on Web (QR Code)
You can access the online user’s manual of the system by
scanning the QR code with your smartphone.
Reset
You can initialize all system settings including general settings
and navigation settings.
\334Caution
\225 When initialization is performed, all user data in the system
including the location data is deleted.
\225 When phone projection is active, you cannot reset the system
settings. To reset the settings, remove the USB cable from
your system.
Configuring the display
settings
You can change the system display settings such as display
brightness.
1 On the All Menus screen, touch Setup >
Display.
The display settings screen appears.
2 Configure the settings required:
Mode
You can set the system to automatically adjust the display
brightness depending on the ambient light intensity. You can also
set the system to keep the display bright or dark all the time.
Page 176 of 211
9-22
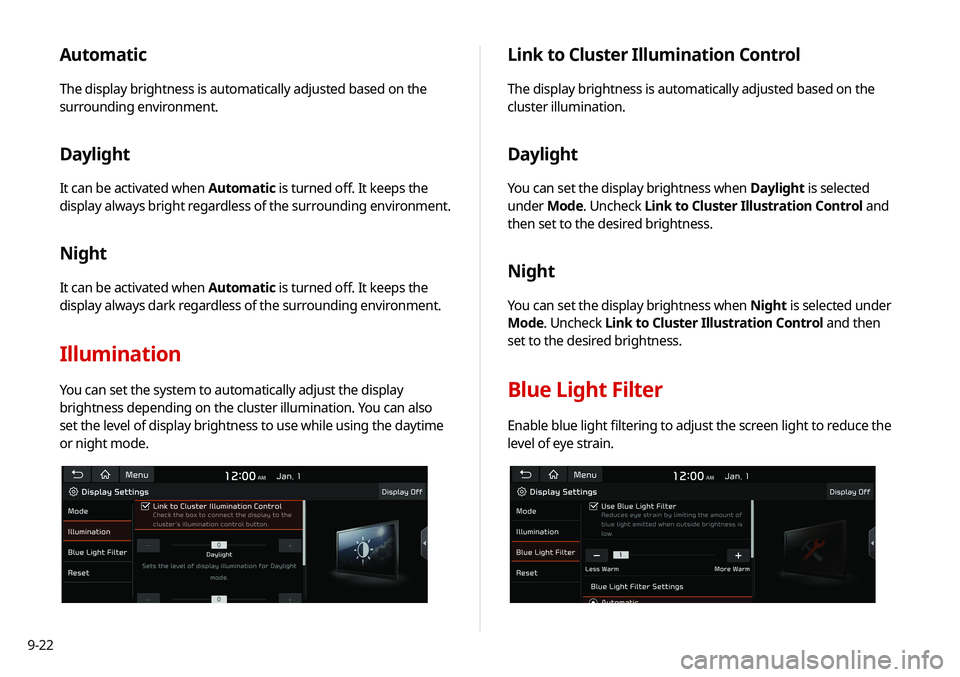
Link to Cluster Illumination Control
The display brightness is automatically adjusted based on the
cluster illumination.
Daylight
You can set the display brightness when Daylight is selected
under Mode. Uncheck Link to Cluster Illustration Control and
then set to the desired brightness.
Night
You can set the display brightness when Night is selected under
Mode. Uncheck Link to Cluster Illustration Control and then
set to the desired brightness.
Blue Light Filter
Enable blue light filtering to adjust the screen light to reduce the
level of eye strain.
Automatic
The display brightness is automatically adjusted based on the
surrounding environment.
Daylight
It can be activated when Automatic is turned off. It keeps the
display always bright regardless of the surrounding environment.
Night
It can be activated when Automatic is turned off. It keeps the
display always dark regardless of the surrounding environment.
Illumination
You can set the system to automatically adjust the display
brightness depending on the cluster illumination. You can also
set the level of display brightness to use while using the daytime
or night mode.
Page 177 of 211
9-23
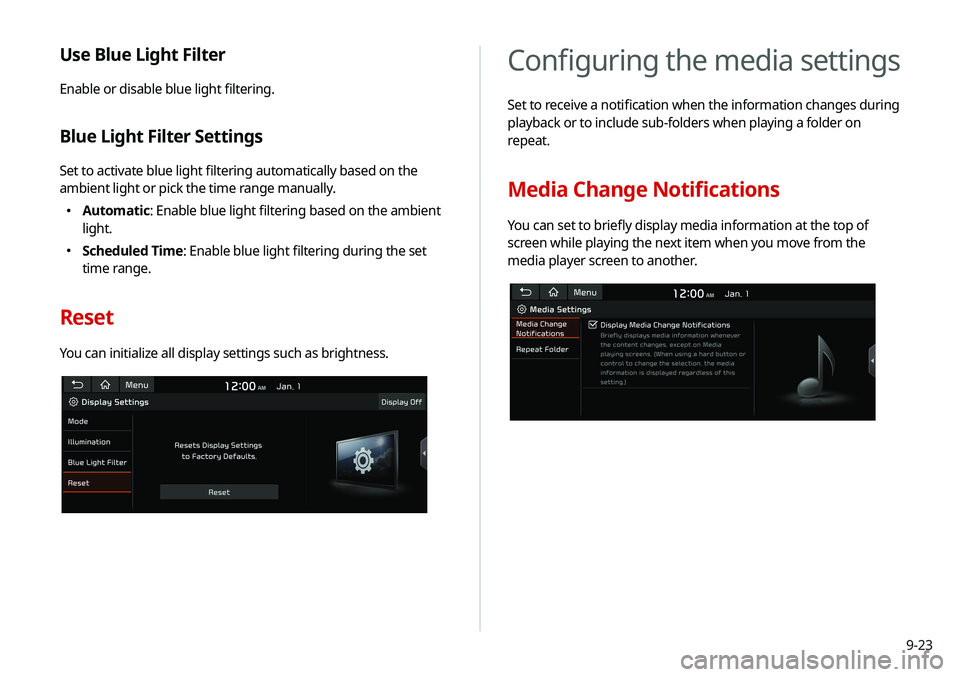
Configuring the media settings
Set to receive a notification when the information changes during
playback or to include sub-folders when playing a folder on
repeat.
Media Change Notifications
You can set to briefly display media information at the top of
screen while playing the next item when you move from the
media player screen to another.
Use Blue Light Filter
Enable or disable blue light filtering.
Blue Light Filter Settings
Set to activate blue light filtering automatically based on the
ambient light or pick the time range manually.
\225Automatic: Enable blue light filtering based on the ambient
light.
\225Scheduled Time: Enable blue light filtering during the set
time range.
Reset
You can initialize all display settings such as brightness.